This piece, entitled “A 3D Printed Moment,” was created to combine the light art principles and methods that other famous artists we learned about earlier in the term have used, while also expanding into new techniques of my own, in this case, 3D printed lithophanes and older techniques known as Zoetrope images.
Lithophane Idea
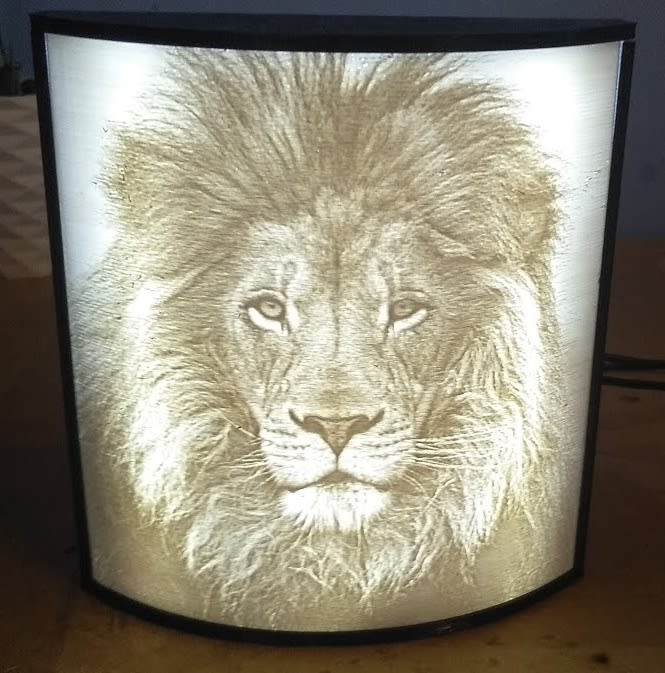

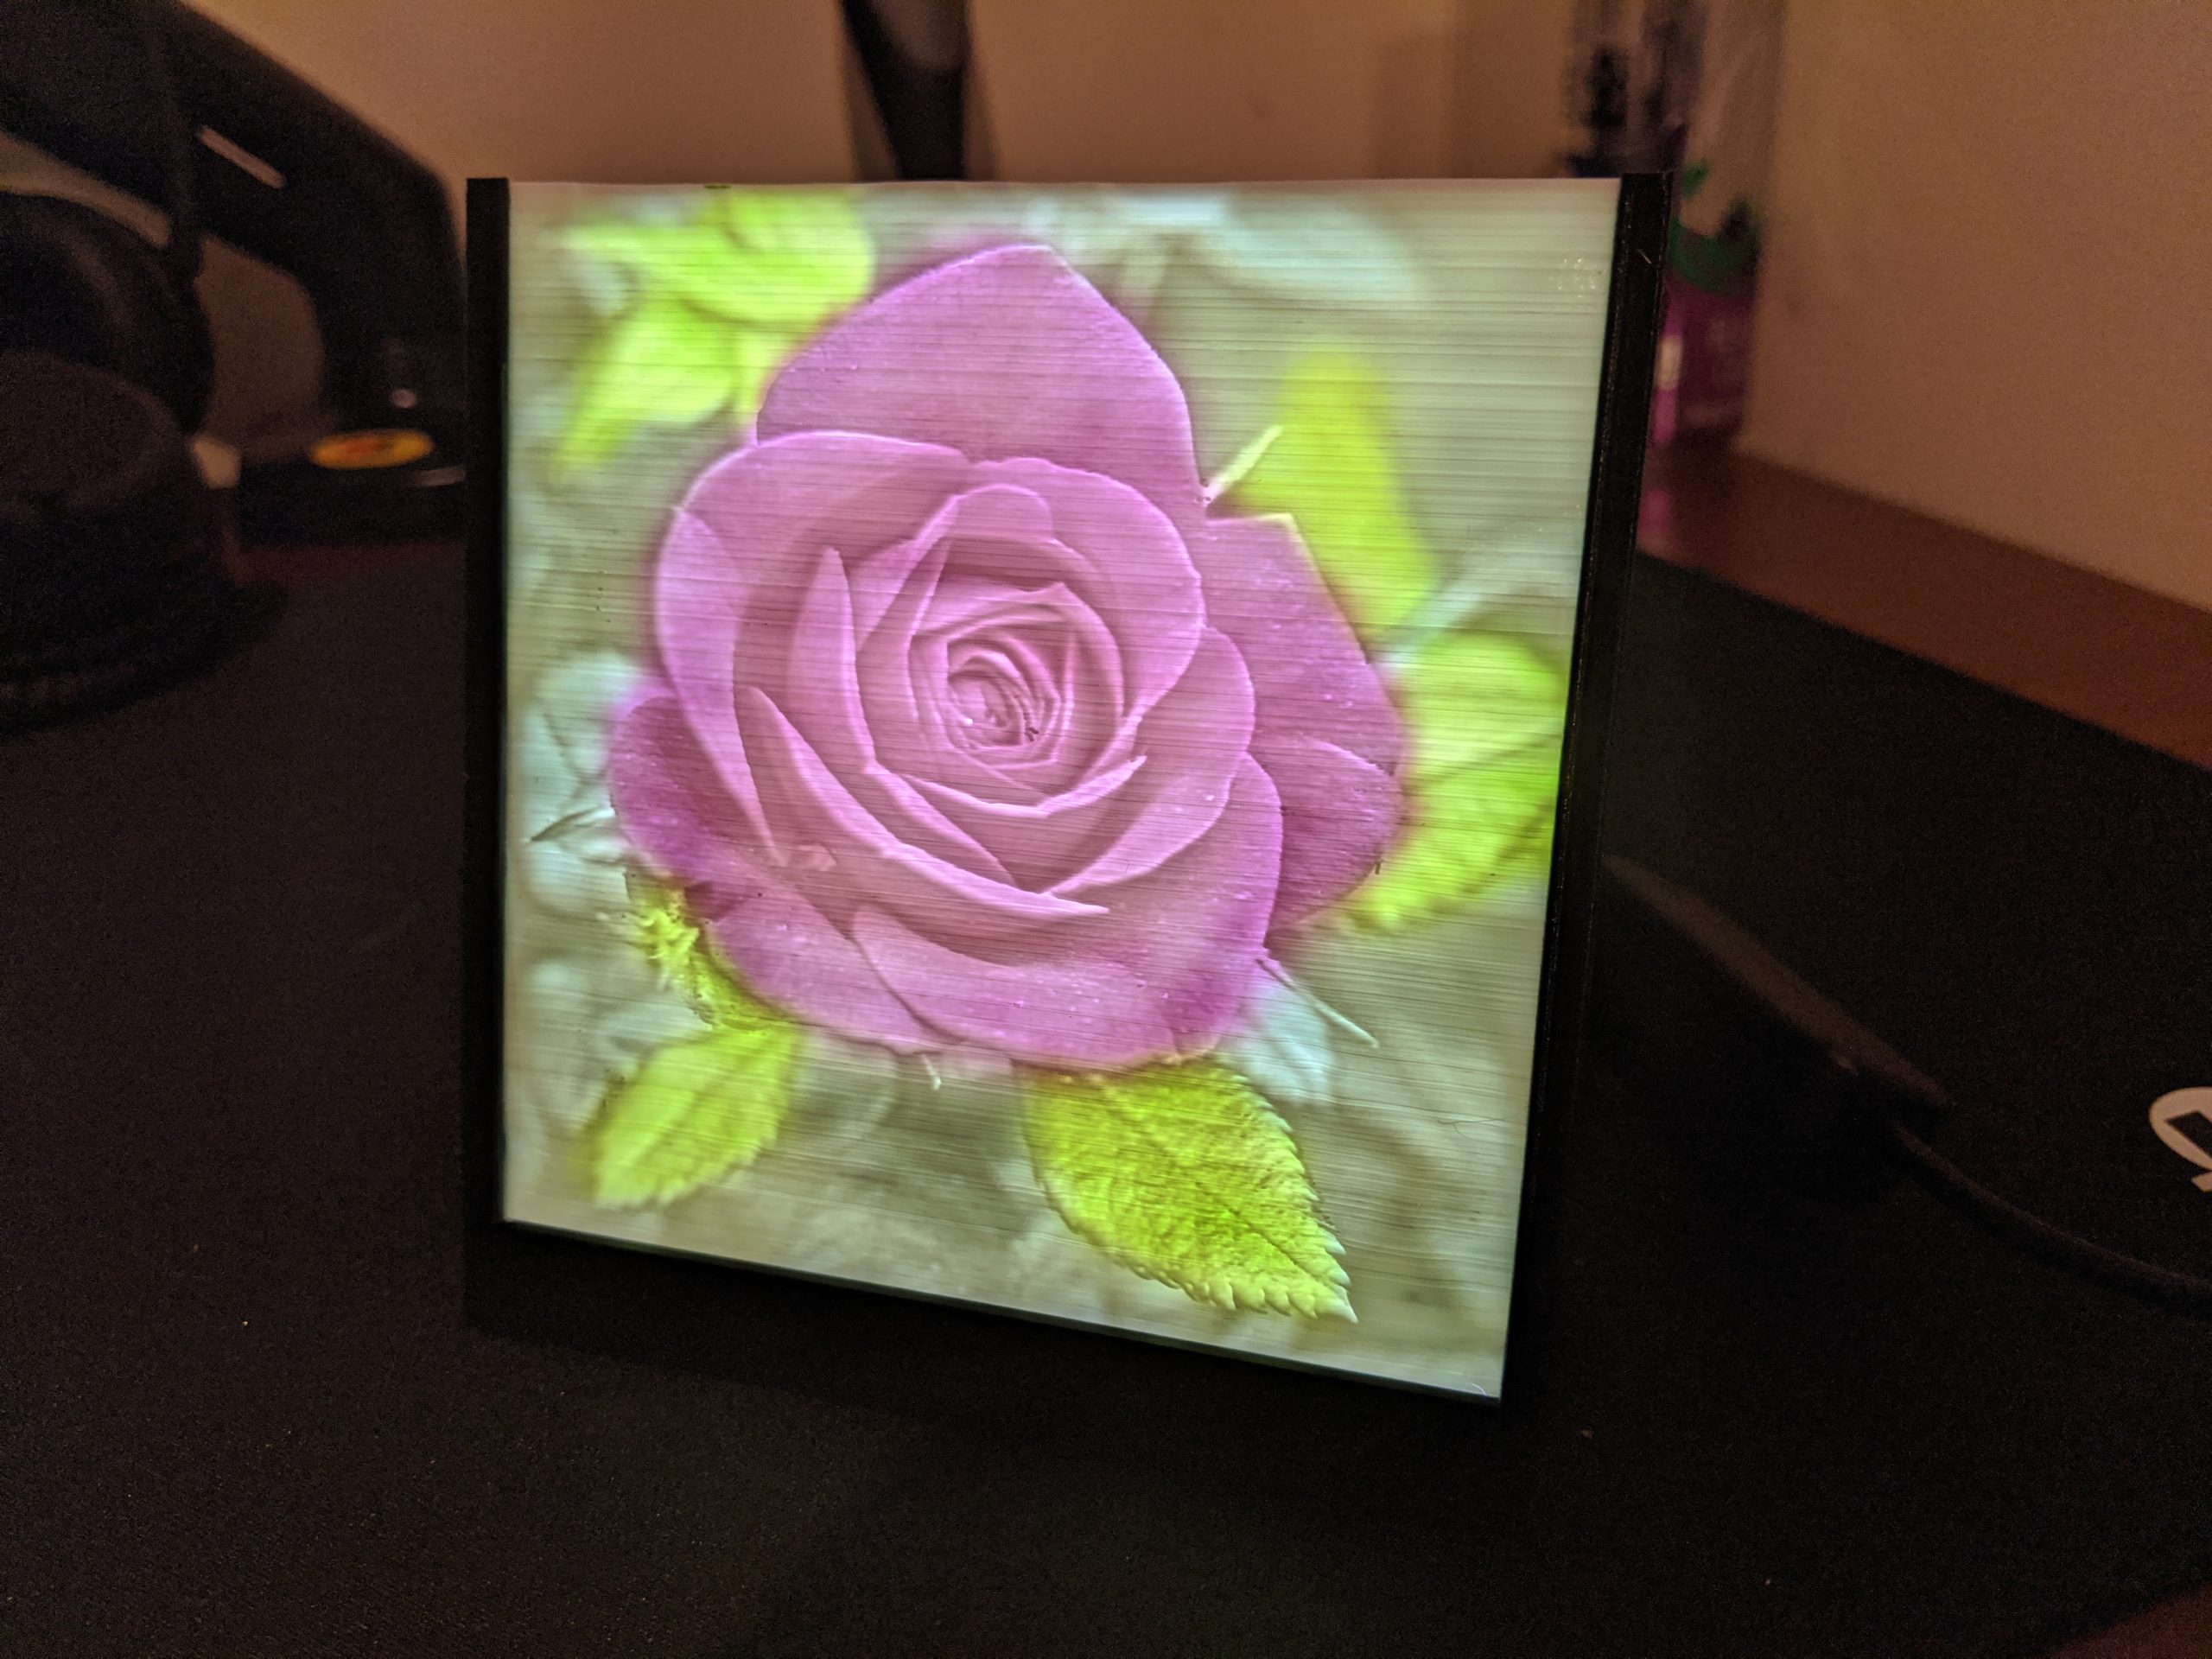
From the very beginning of this class, I wanted to somehow incorporate 3D printing into this project, and as soon as I thought of the lithophane idea, I stuck with this. Above you can see some other Lithophanes people have created, which I used for inspiration for my project. I was also considering doing some sort of colored lithophane through different diffusion and lighting techniques, pulling from concepts and works by Carnovsky with RGB and incorporating 3 different images into one. This way when a particular colored light source were turned on, a particular image would show up.
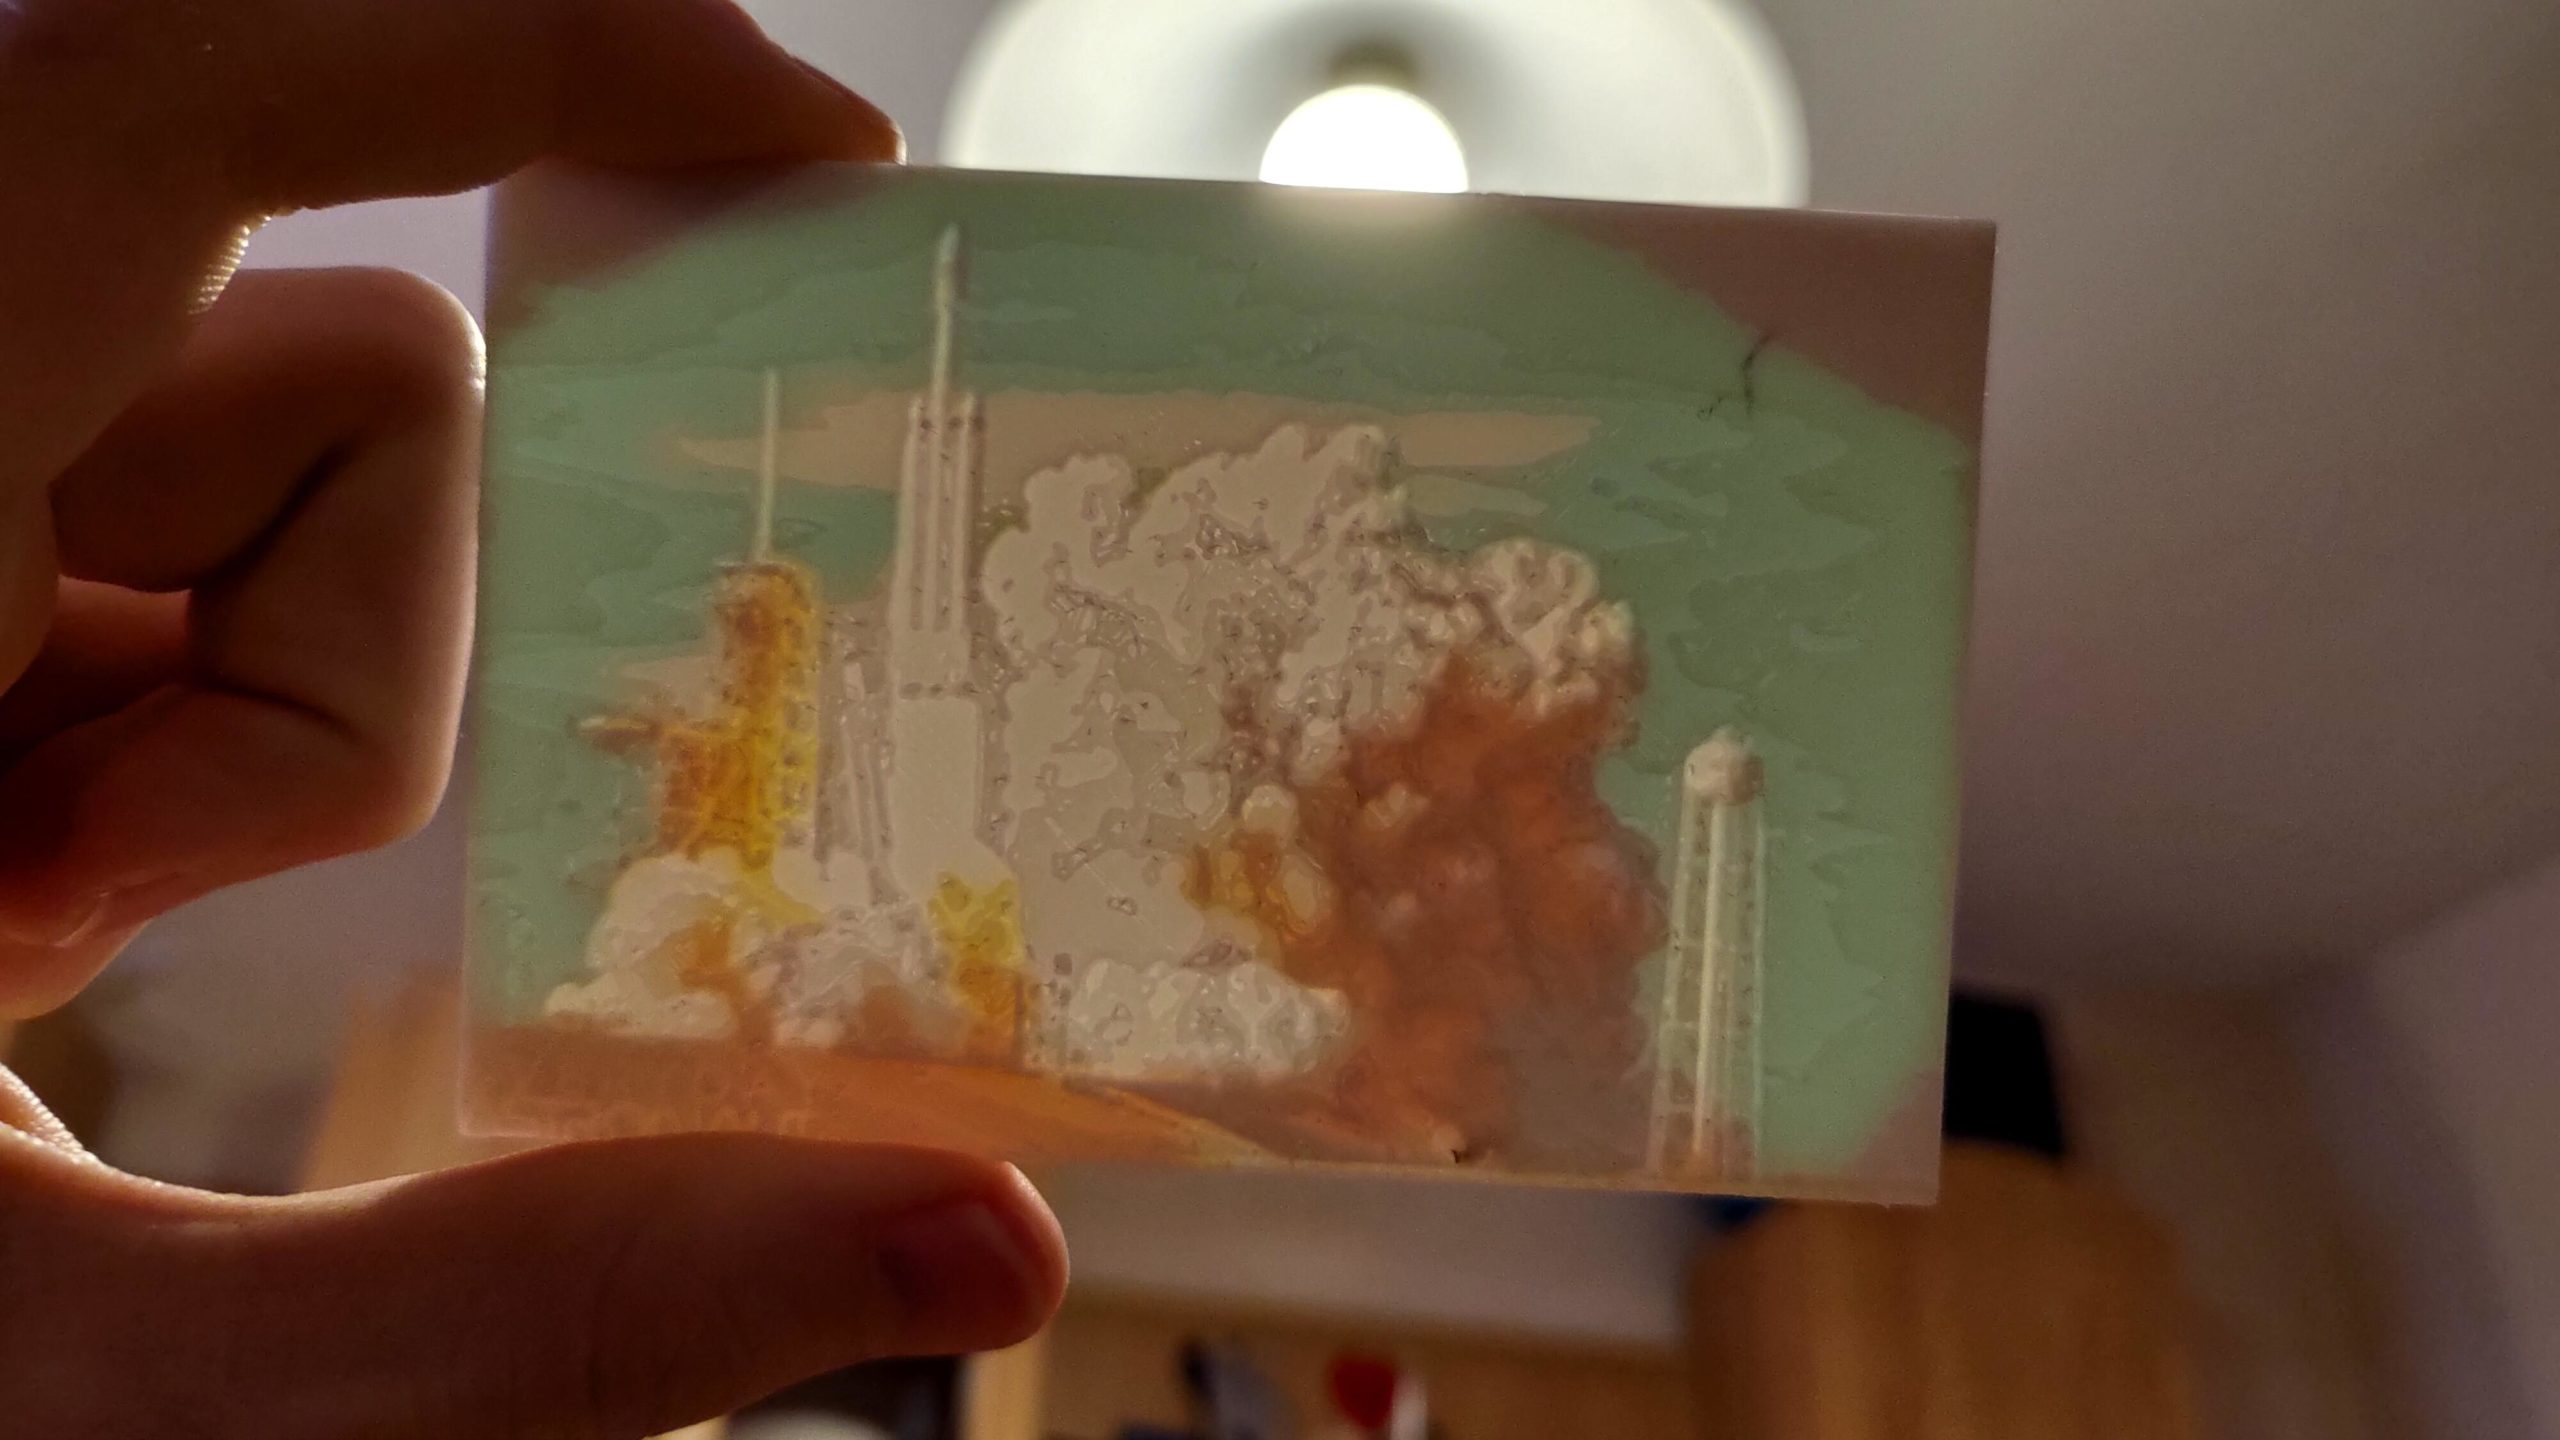
Lithophane Test: Incorporating Color
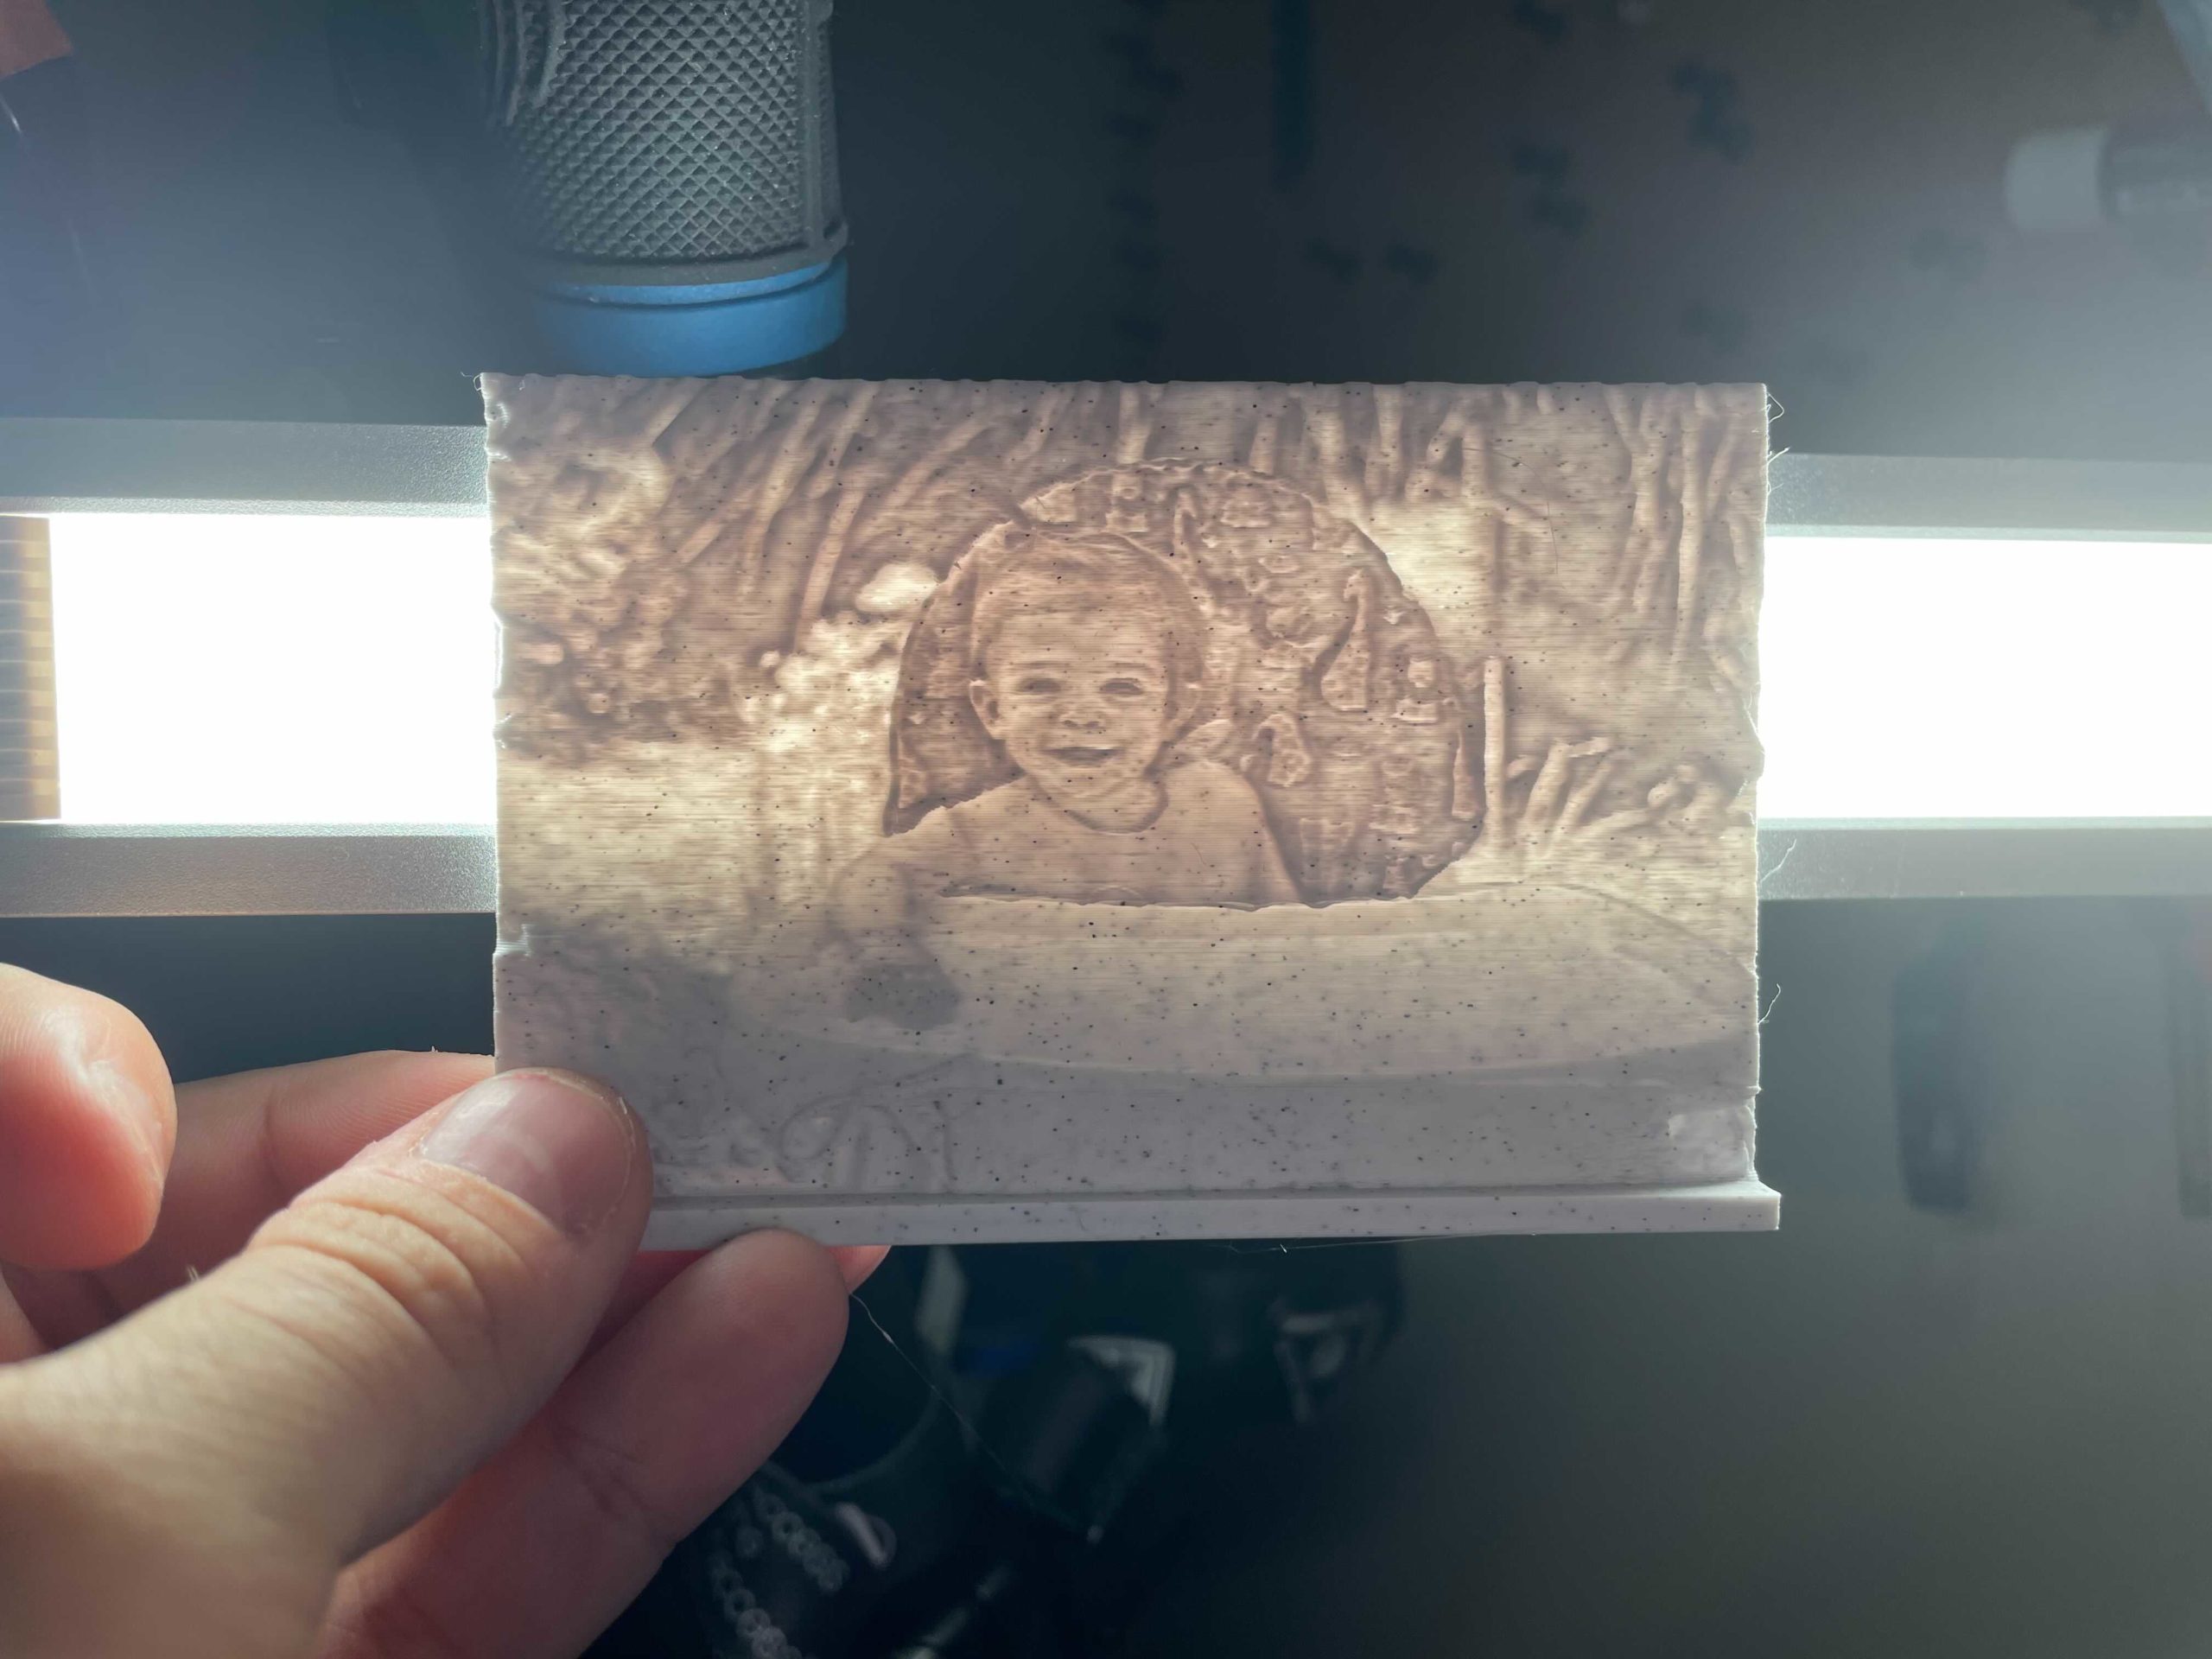
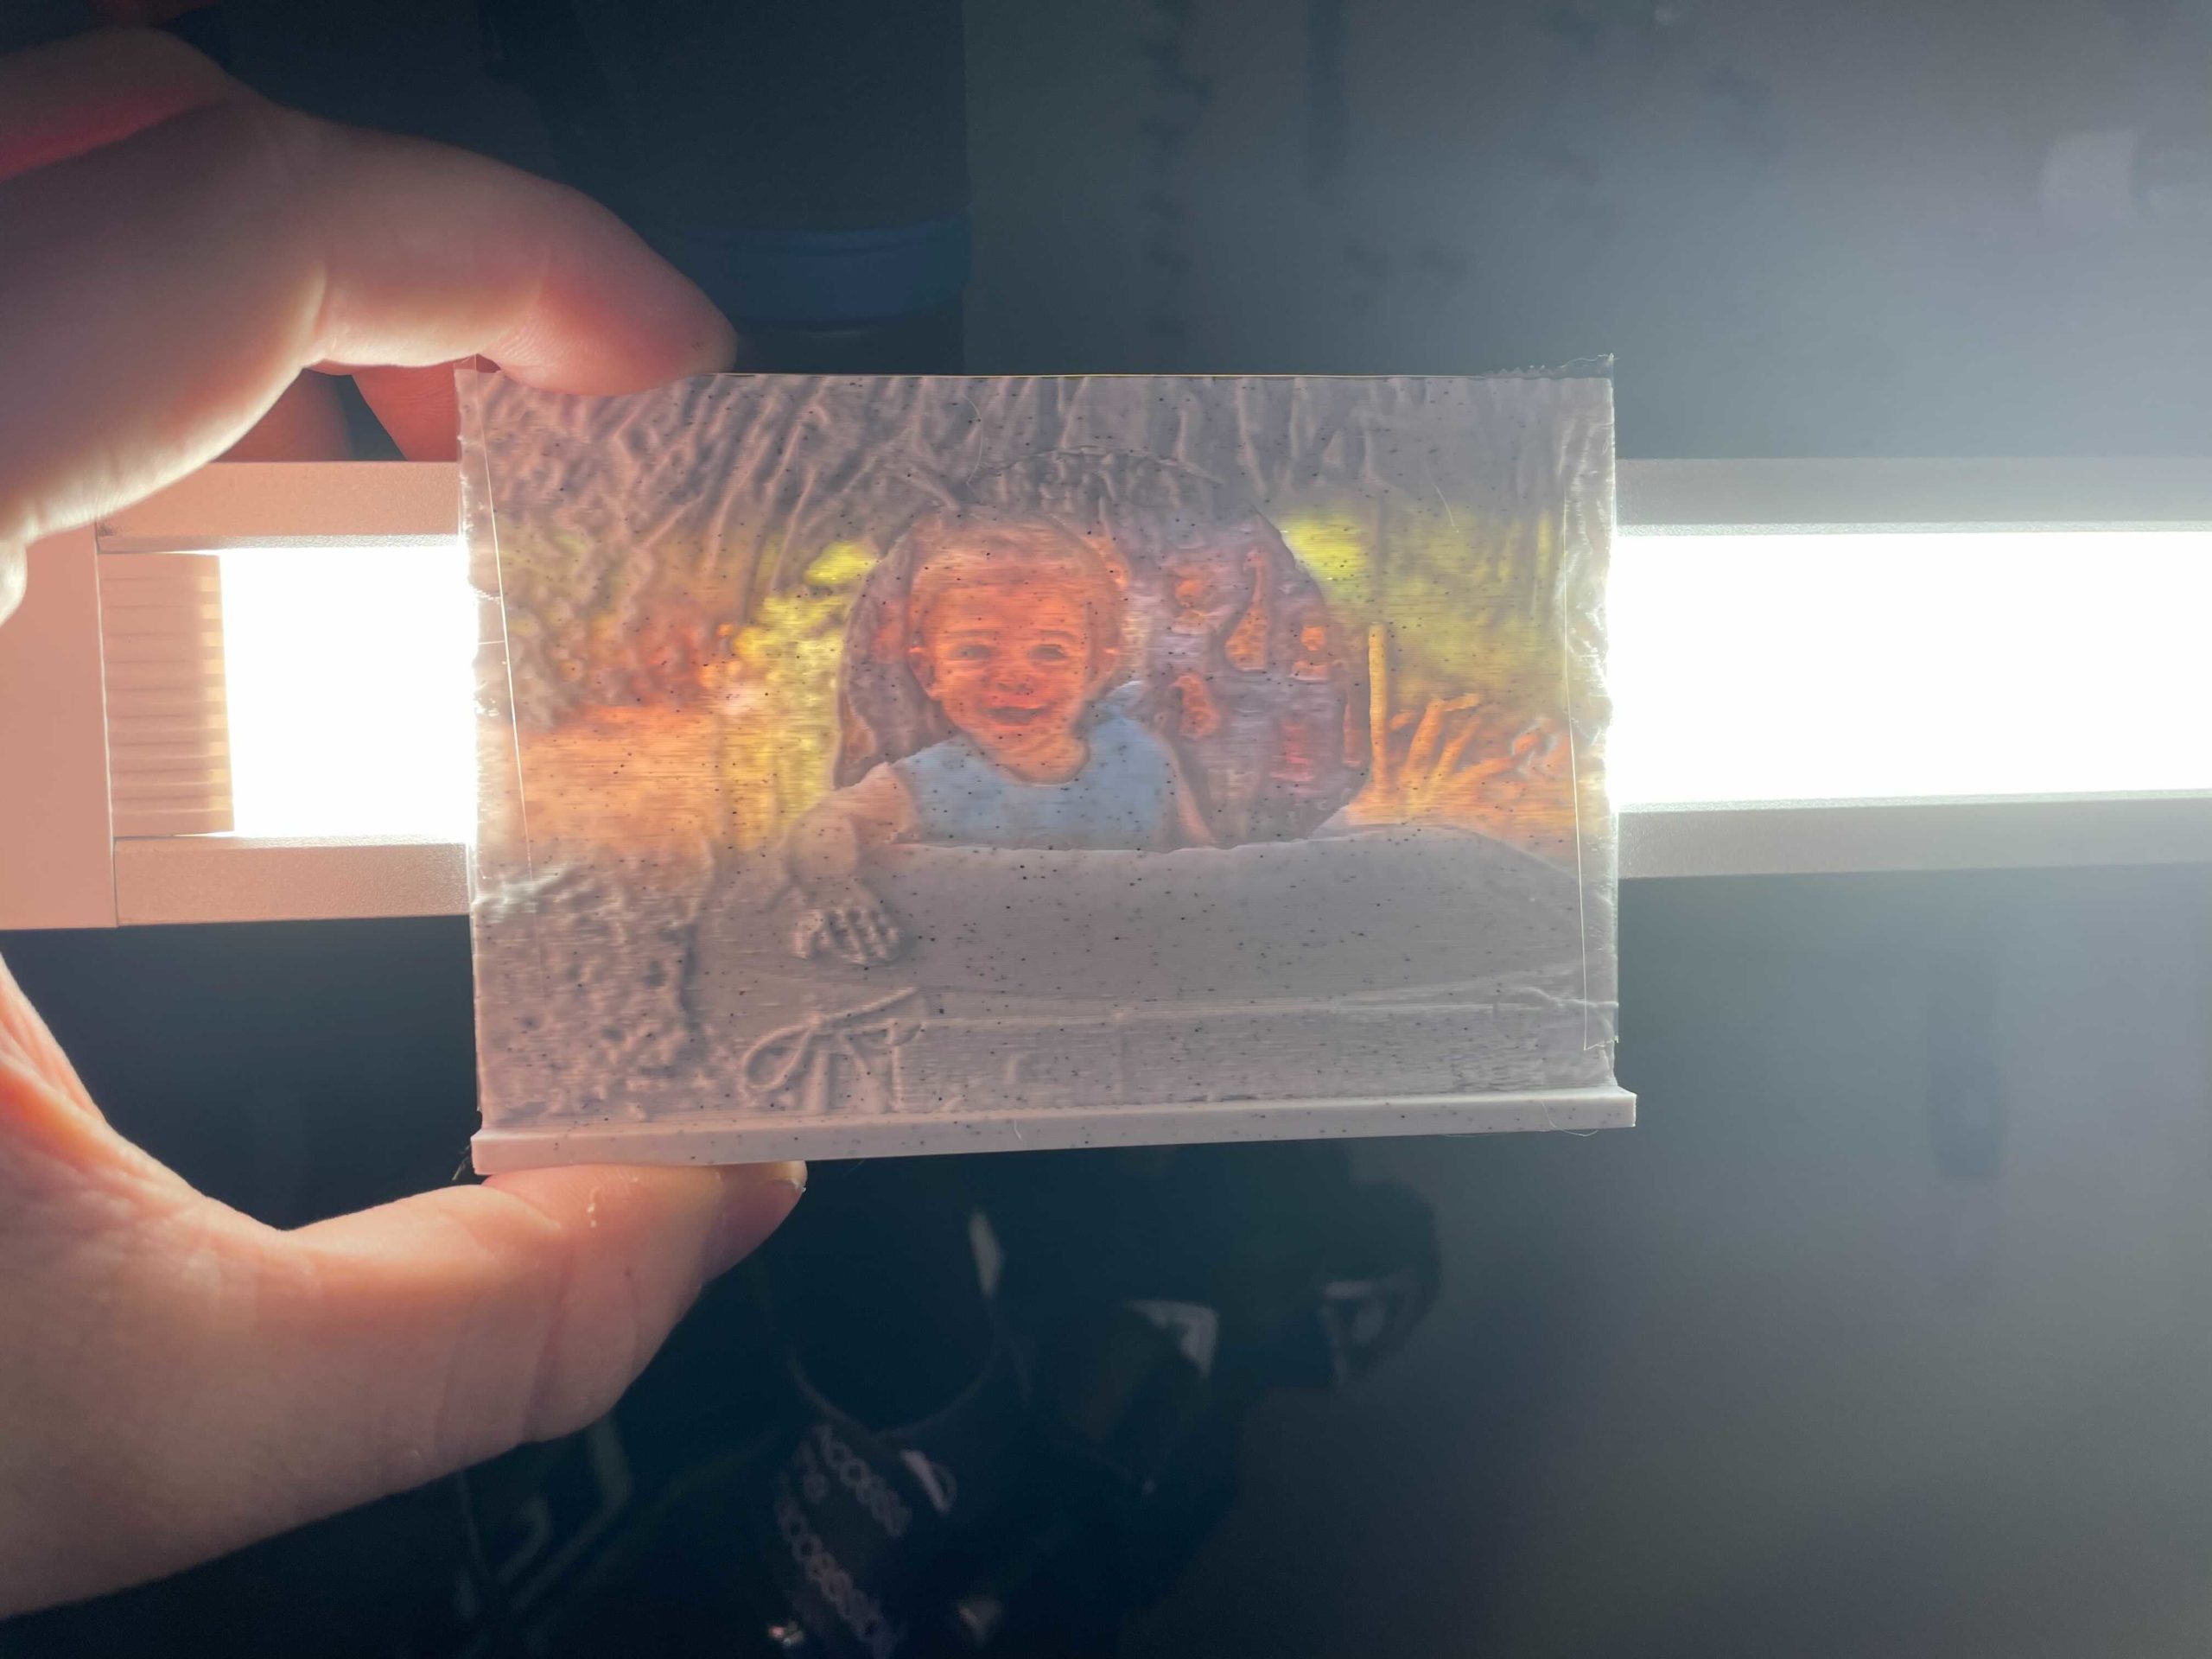
Above is my first test of trying to print my own Lithophane, while also trying a method of putting a colored print behind the lithophane to have the colors shine through. Being that this was a small test, I just wanted to use this as a roofoconcept “thin slice” of my project and potentially use this as a stepping stone for my final concept.
Moving Forward
Following the above test, I learned about the concept of Zoetropes, and know this would be a good partner with the original lithophane idea as I wanted to incorporate some sort of interaction with the final piece. Since from the beginning one of the biggest features I wanted to incorporate into my project was movement and interaction, after giving it some thought, I decided to move towards a curved lithophane with multiple images, that when rotated, would display a moving image.
Photos Selected
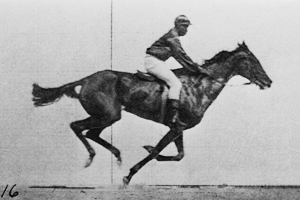
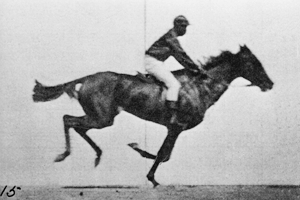
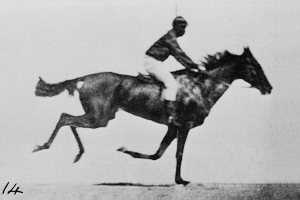
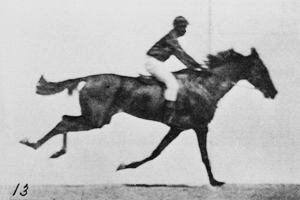
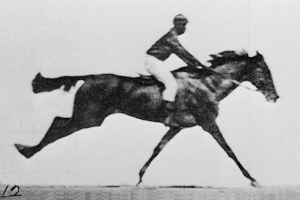
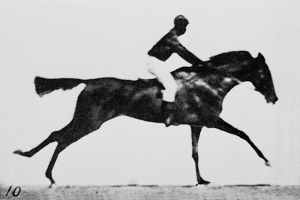
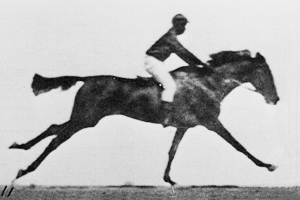
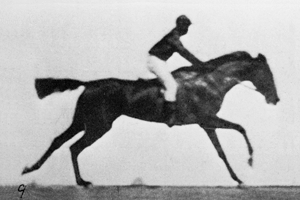
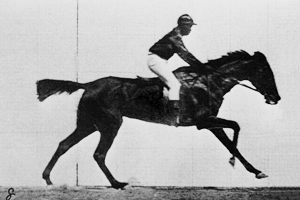
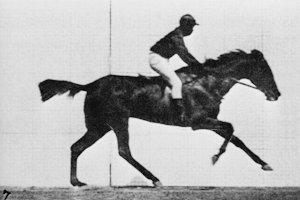
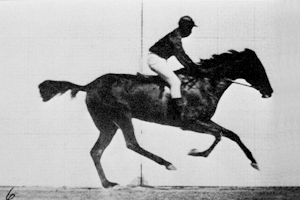
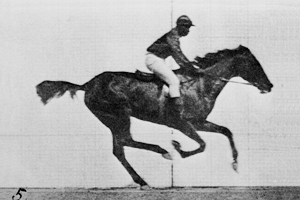
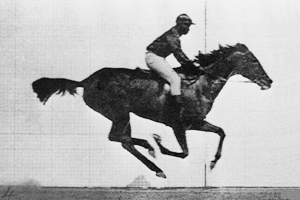
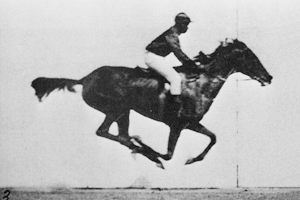
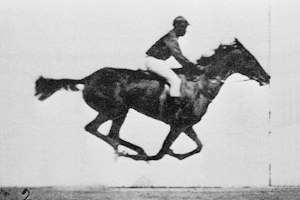
Following this new path into a curved lithophane concept, my next big decision was to decide the images I wanted to display for the Zoetrope. I went with a series of images from 1878 entitled “The Horse in Motion,” created Eadweard Muybridge. This series of famous photographs was an early method of chronophotography, which is the method of photographically recording the passing of time, and was commissioned to answer the question, “Are all four of a horse’s hooves ever off the ground at the same time while a horse is galloping?”
I thought this was a great series to pull inspiration from because it was one of the first of its kind to be used for a movie, as well as to showcase the passing of time in photograph. Being that I was creating a new technique to showcase this passage of time through 3D printing and light, I thought it was important to go back to the roots of these techniques.
Movie Generated

After selecting the images for the piece, I added all the files together to get an idea of what the future piece will showcase. After seeing this movie, I was certain this series of photos (The Horse in Motion) was a great way to incorporate these new technologies and methods of lithophanes to the past innovative techniques and methods of chronophotography and zoetropes, in displaying a moving art form. It allows me to couple my interest in displaying movement, while also pairing my interest in 3D printing.
To create the 3D model, I used this website (https://itslitho.com/), which took each individual picture and arranged it in the correct order in a circular pattern. This way when I go to spin it, each individual image will look like it flows onto the next image creating a similar scene like the movie above.
Iteration #1
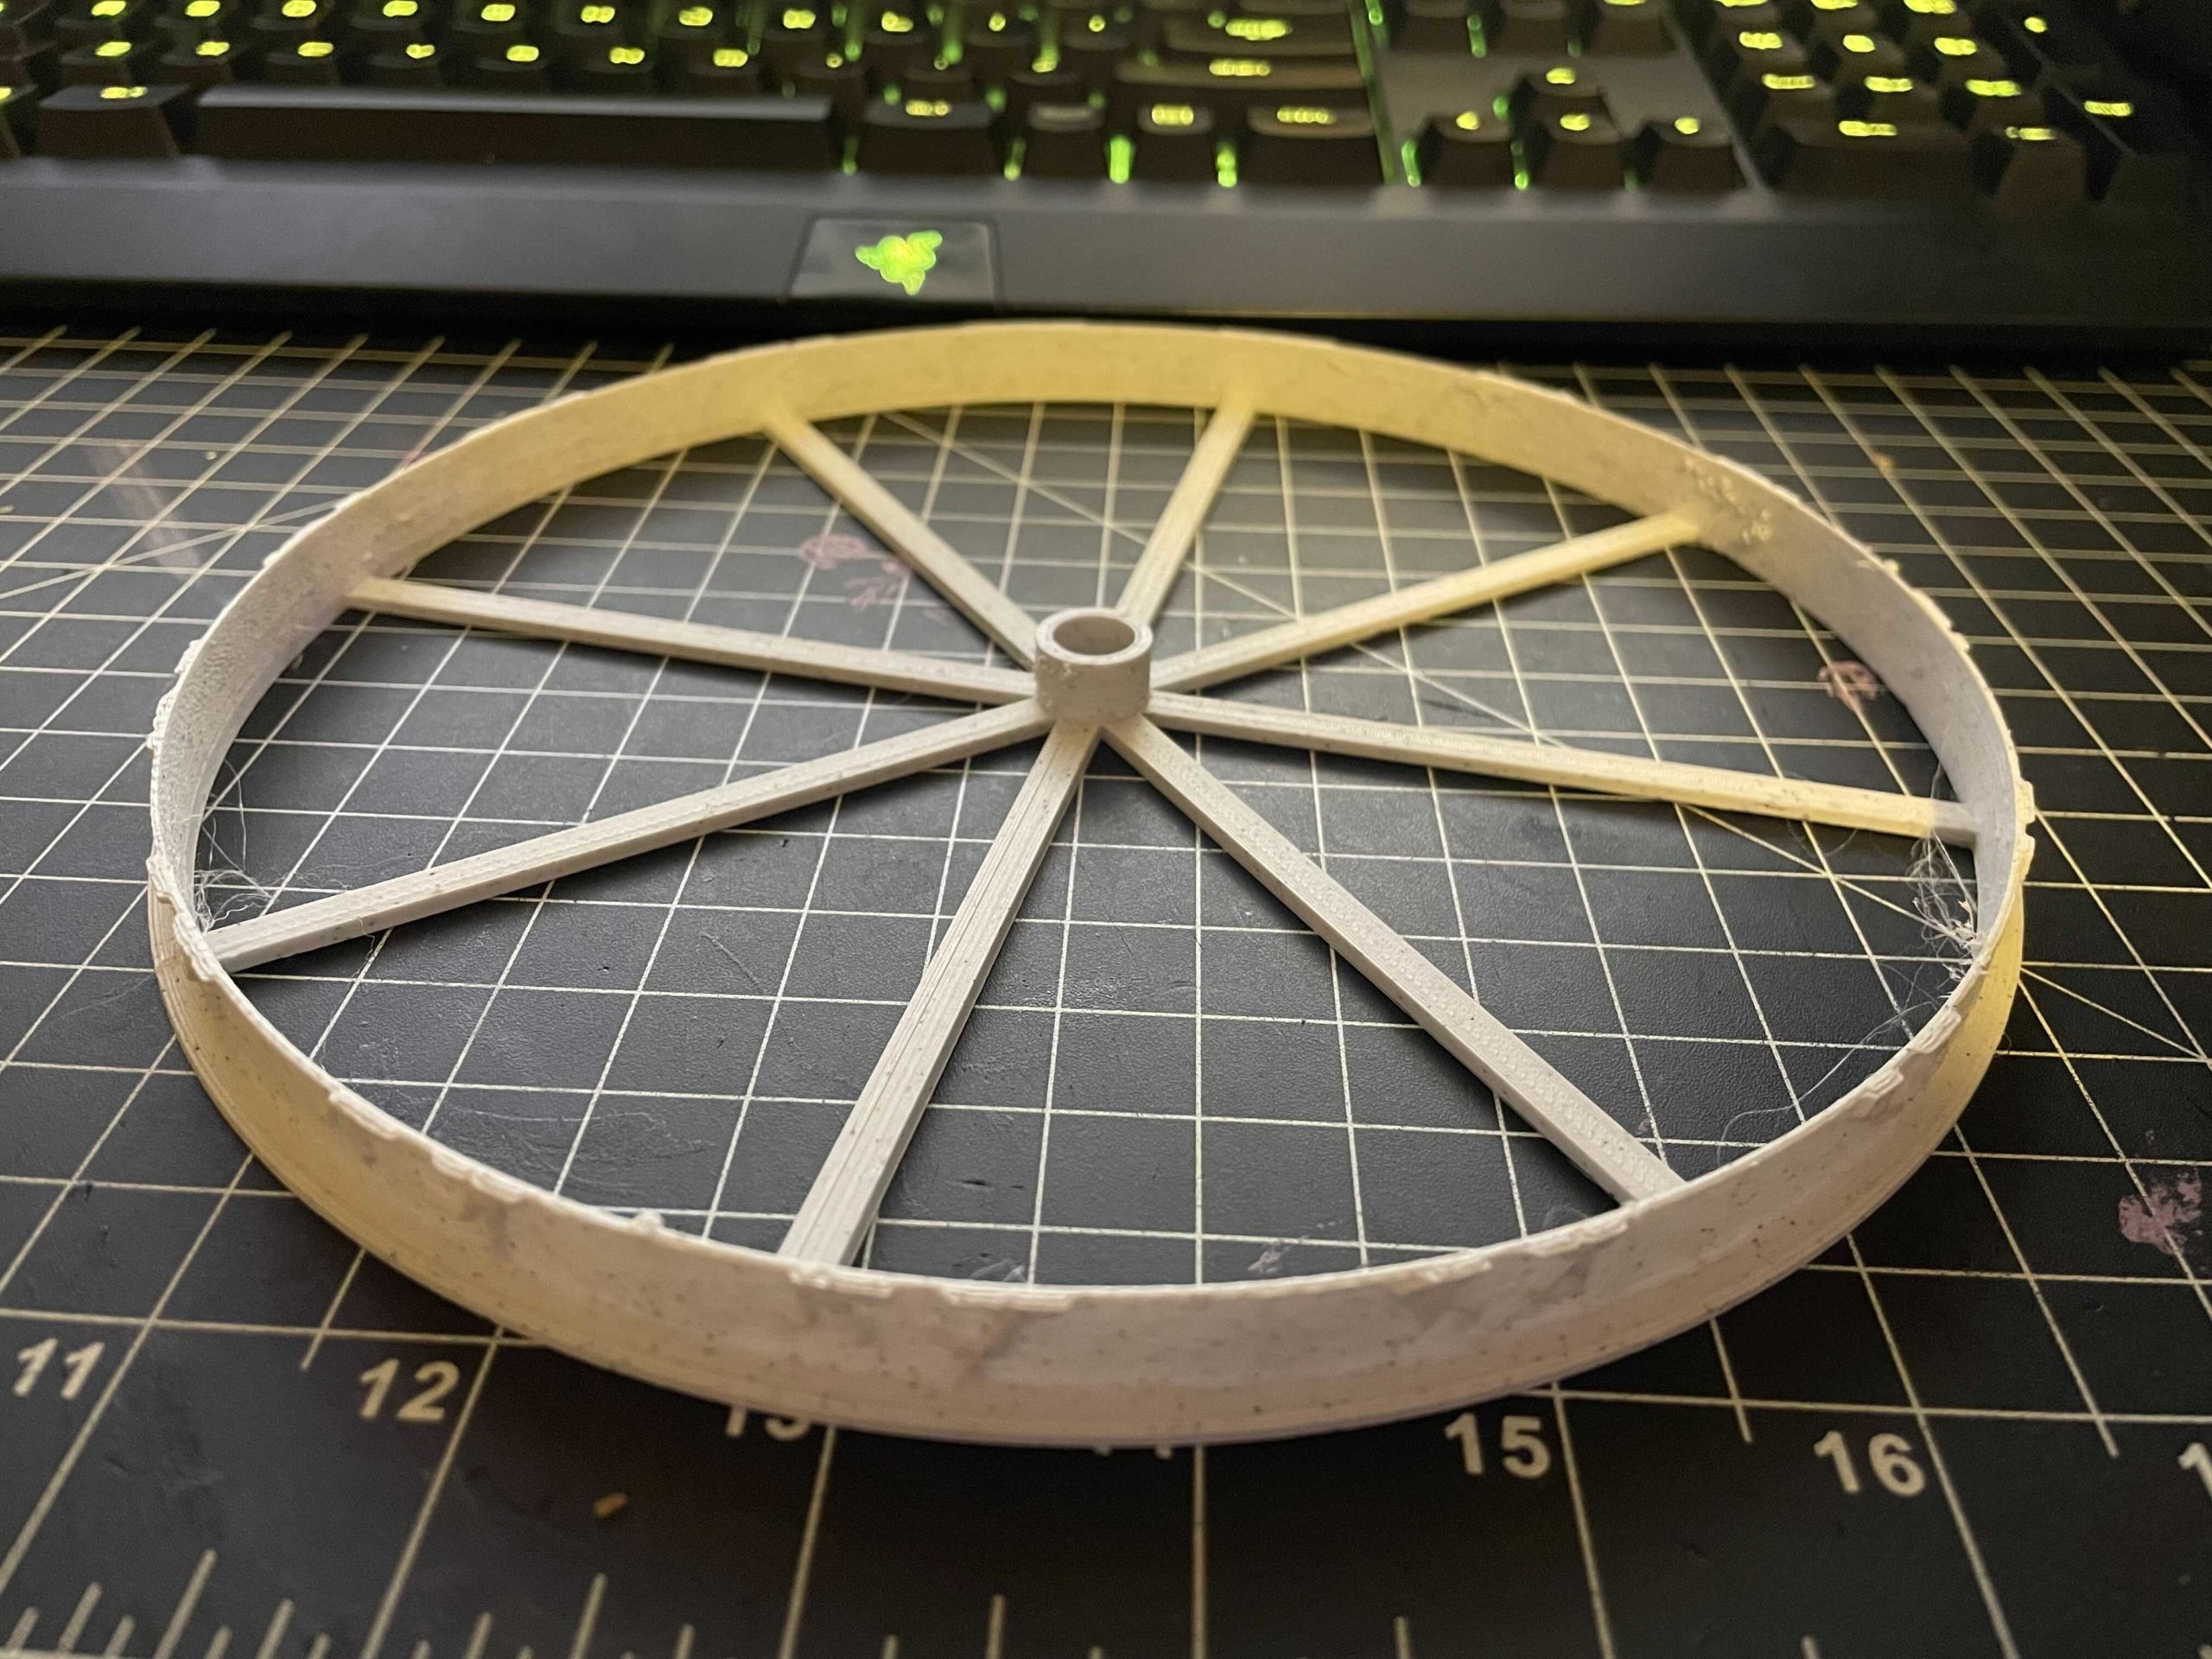
After creating this circular model, I tried printing it as one piece and had issues partially through the print where my printer stopped. I discovered the issue was related to the SD card not being large enough for the memory system in my printer, where it saves data when printing in the case that it fails (to allow me to restart it from where it saved data). To combat this, I set up my OctoPrint network that allows me to print wirelessly to my printer, without needing to use the SD card that is in the printer, thereby bypassing this issue entirely.
The first image above is the failed print, which is smaller than the size I hope to make the final piece. This was just an initial test and experiment with the lithophane software I was using as well as an experiment with the zoetrope idea. It also helped act as a test for the thickness of the actual lithophane, in order to determine the thickness that would be best for the subject here, because the original colored lithophane I tried creating above was too thick. Overall, I was happy with this second test thickness and stuck with it for the rest of the iterations.
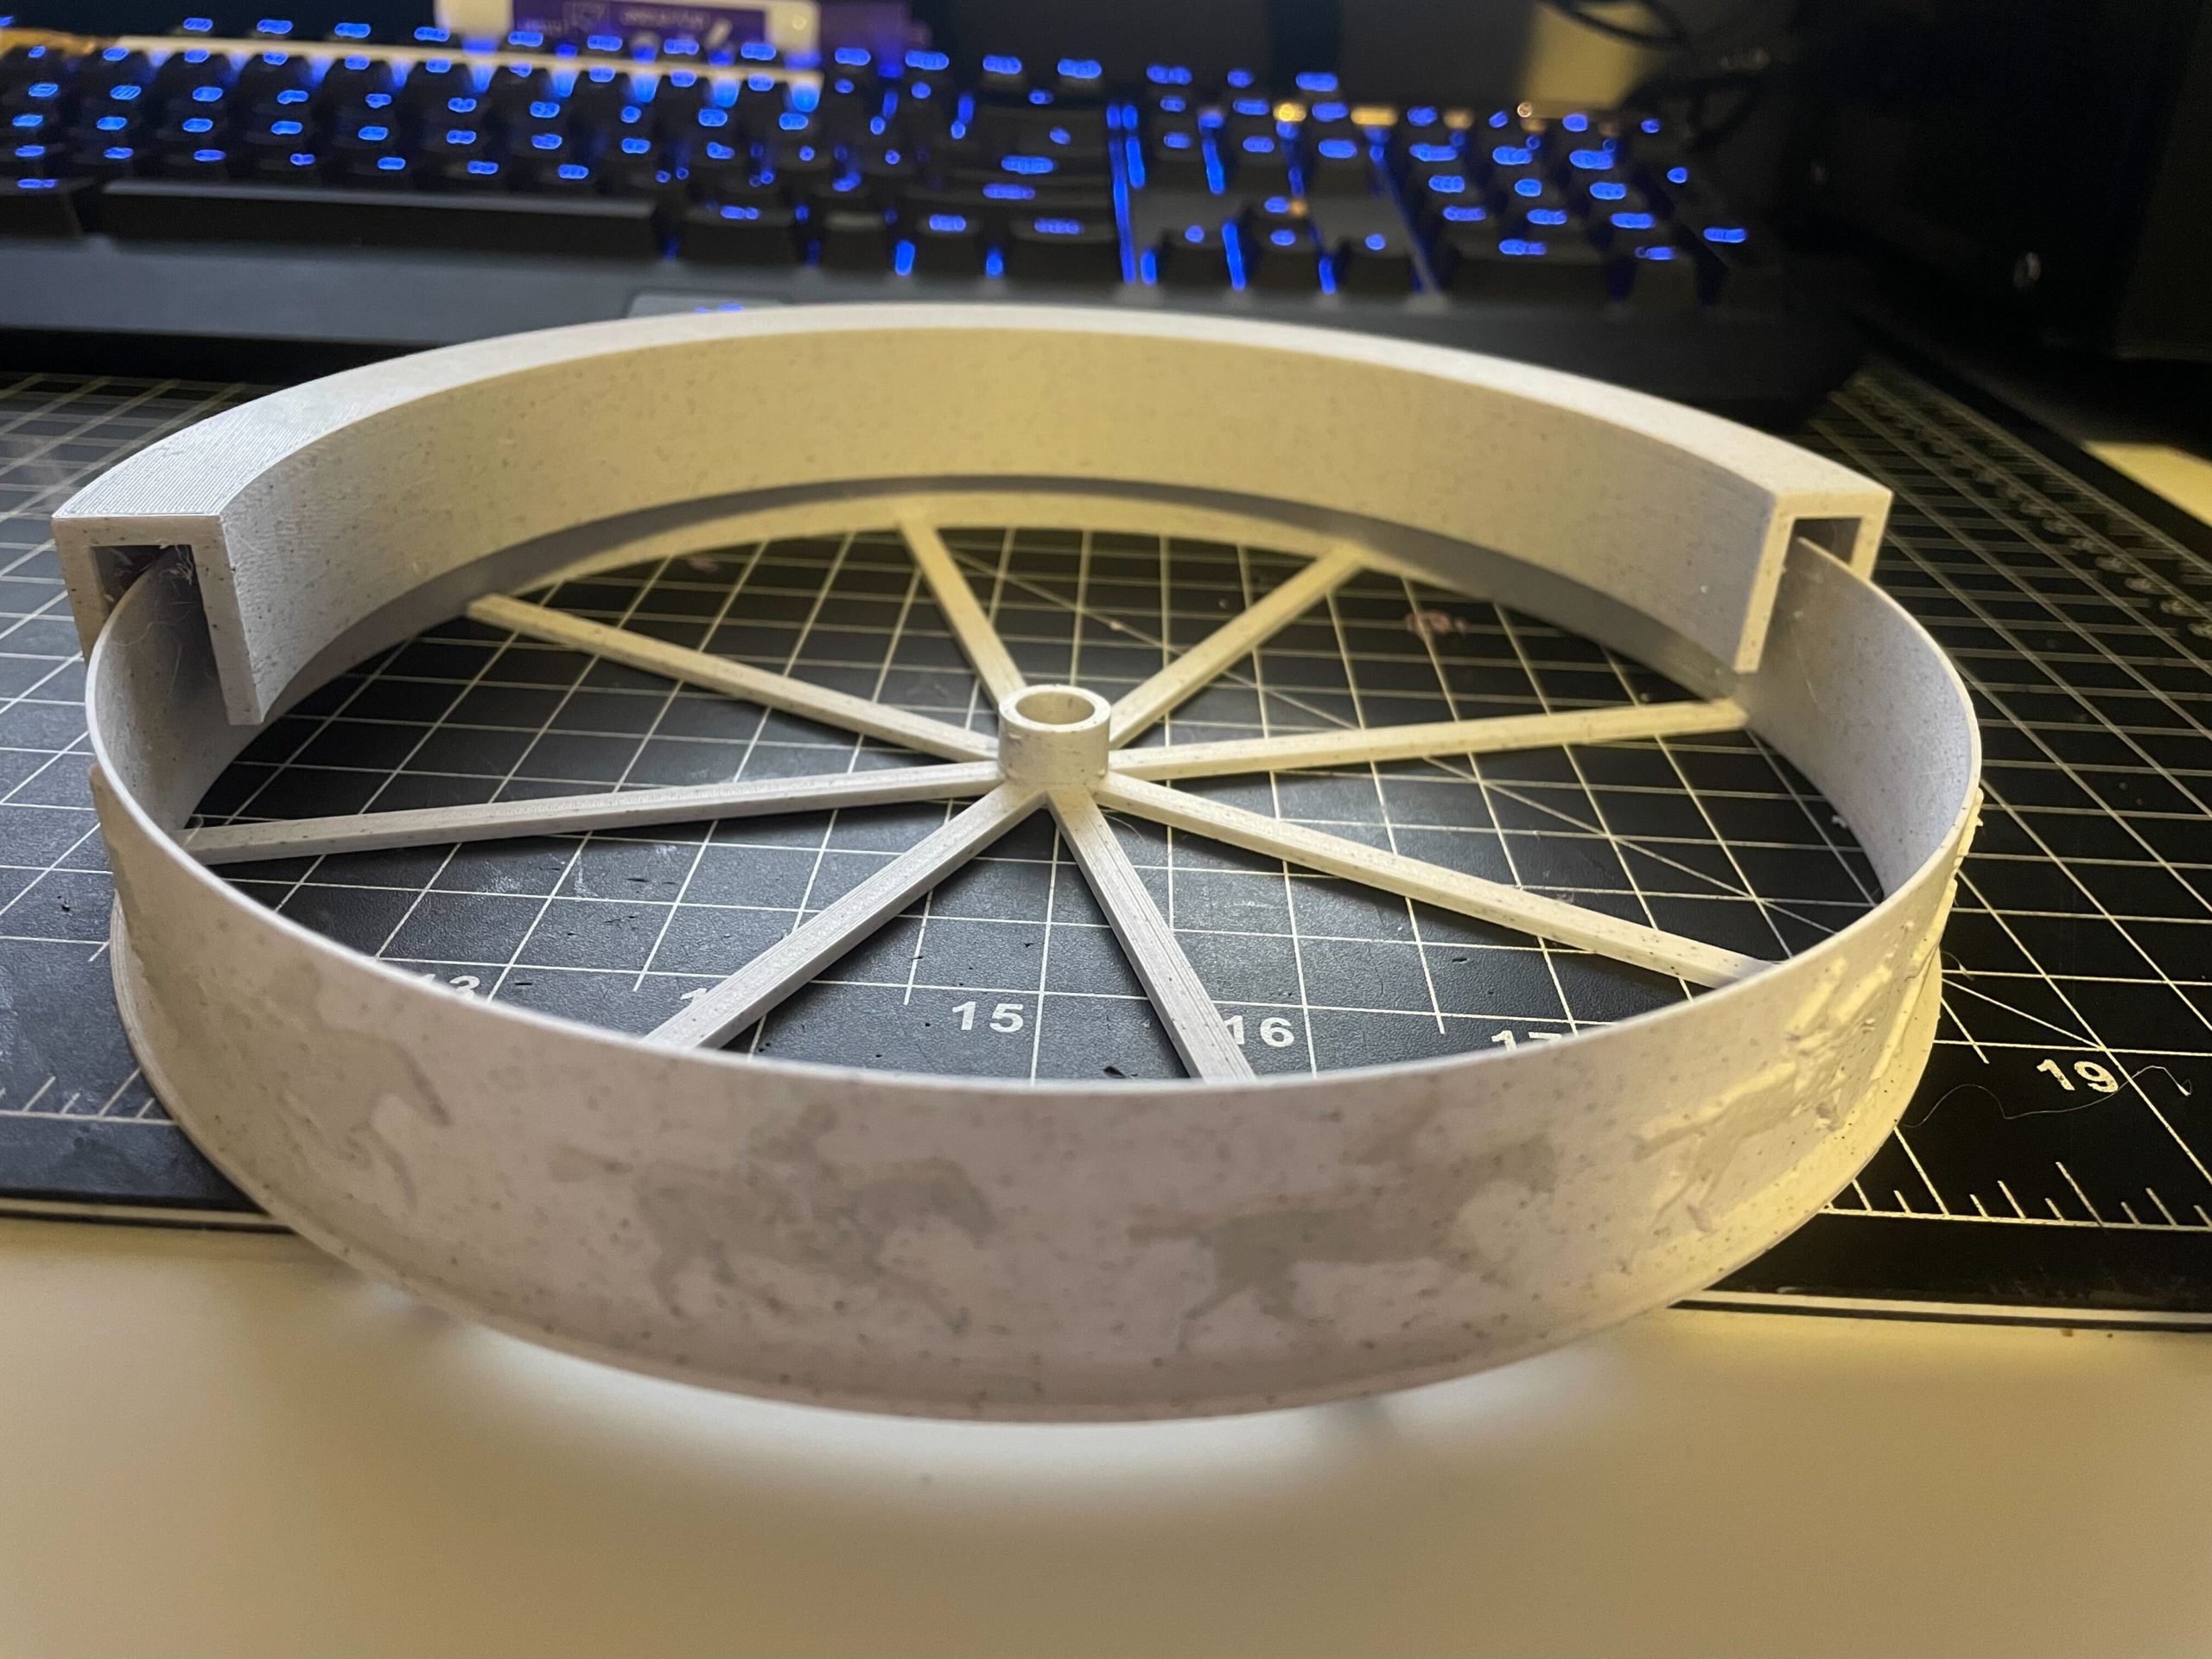
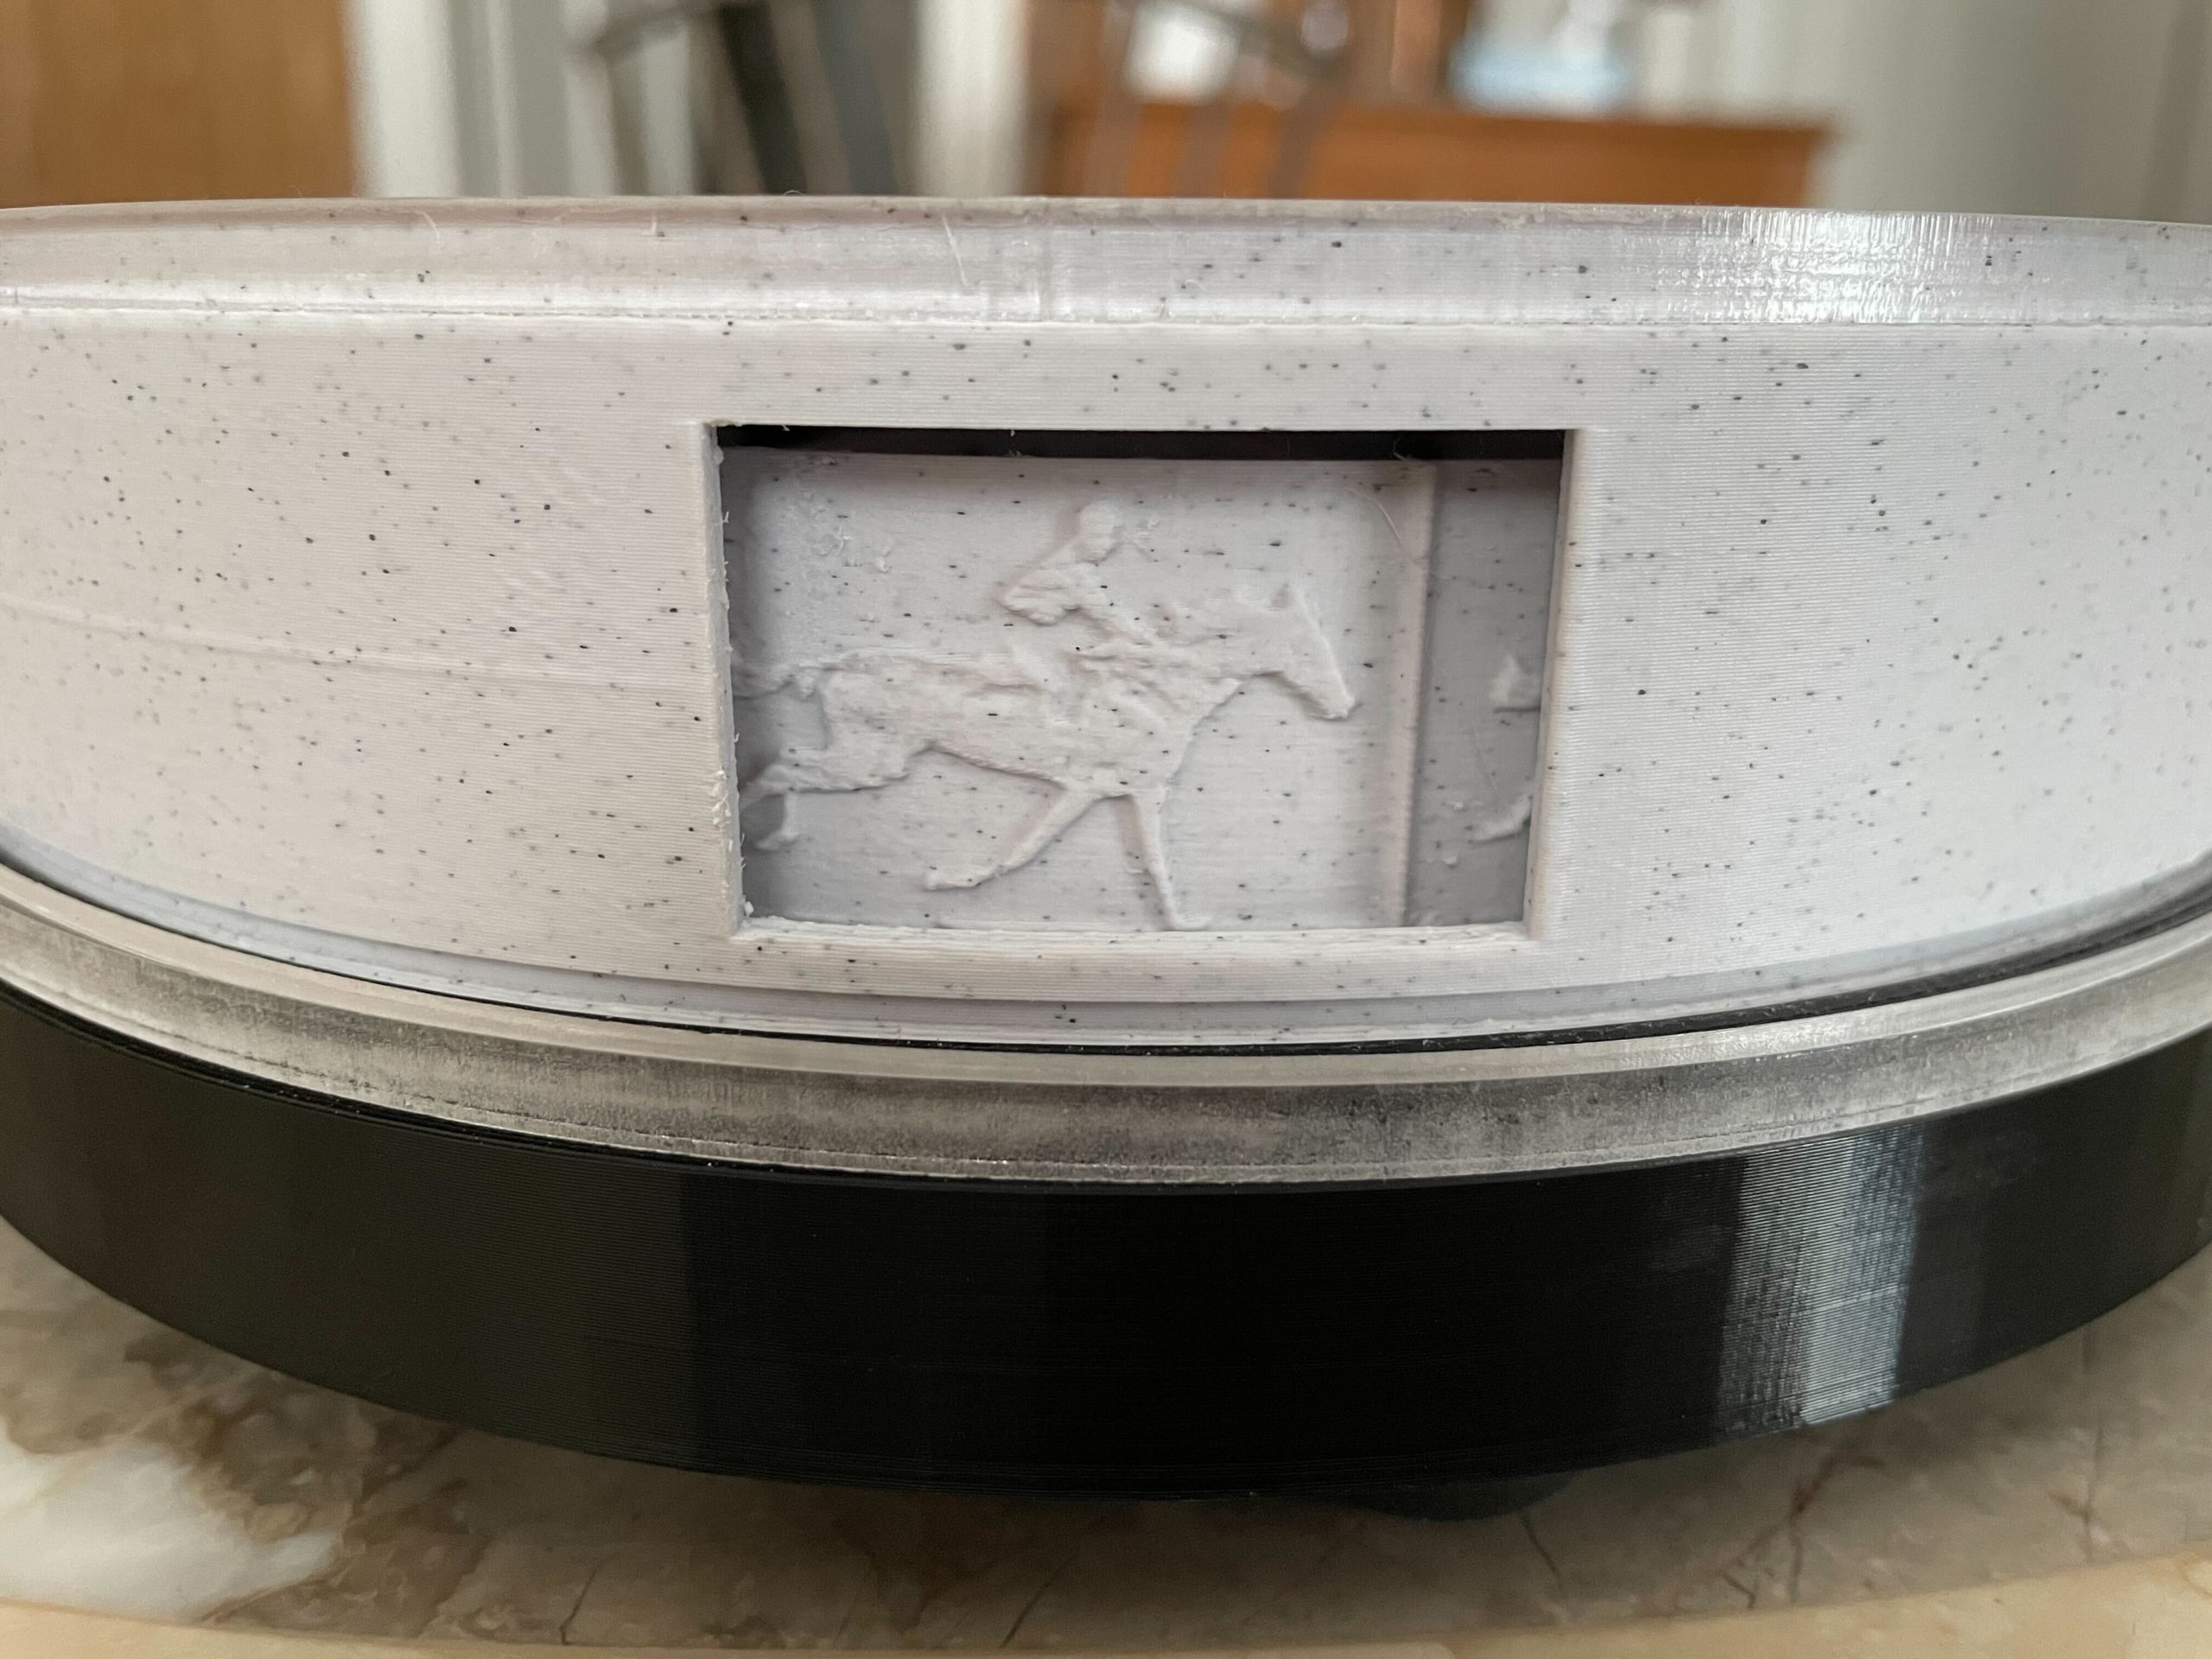
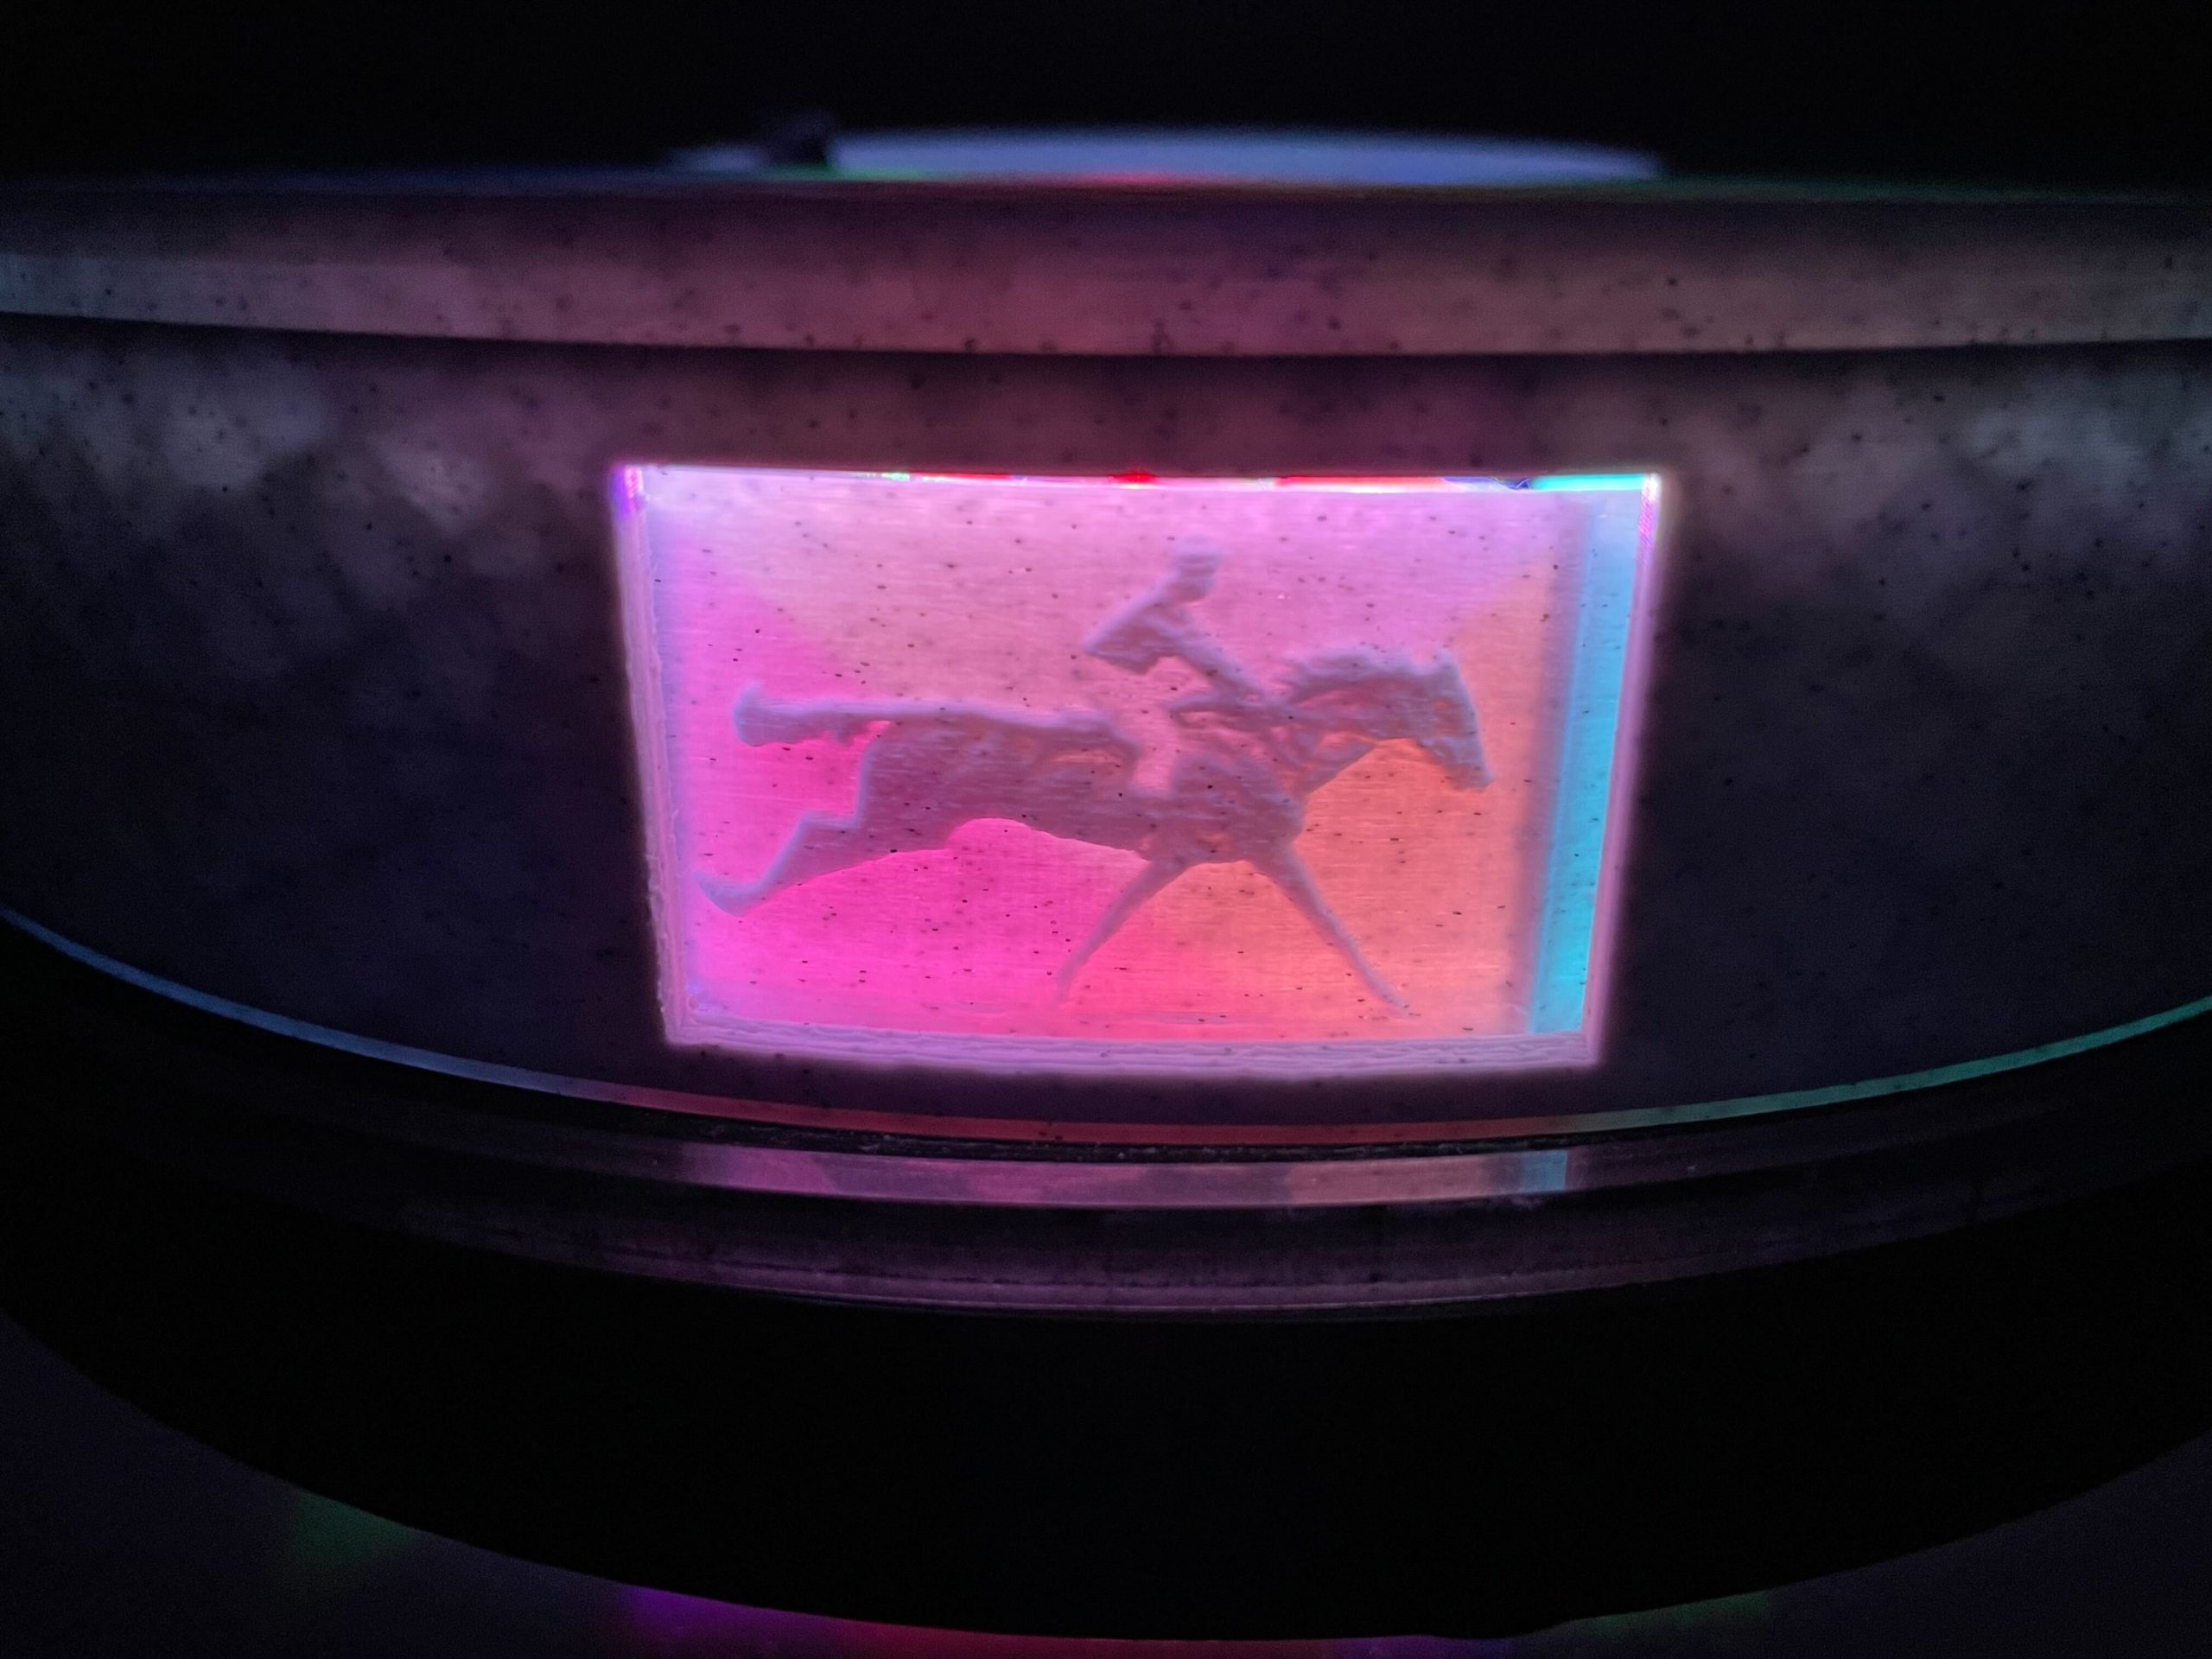
Moving forward from the failure, I printed covers which I hoped would help cover the piece in only certain sections and allow light to shine through in others to give the illusion of the object moving only through a little window (seen in 3rd image). After printing these covers, I lasercut a few pieces of acrylic to act as a base for the piece and began incorporating bearings into the printed parts and acrylic to allow for very easy spinning. I also used a thin circular acrylic piece that acted as clip to hold each cover piece together.
Failure
At this point, I had been trying to incorporate an electrical shutter by using a strobe app I found on my phone (called light). For Iteration #1 seen above, to test the lighting, I had been placing my phone above the piece and changing the duration fo the strobe for both the light and dark components of the strobe. I really did not like how this incorporated my phone into the piece, but it seemed too complex to get LED lights to strobe at the correct frequency to get the illusion of the object moving.
Moving forward onto Iteration #2, the final piece, I began looking into incorporating a mechanical shutter, where the light would remain constant, and a wall between each image would create the illusion of motion. That way I do not need to experiment more with electrical curcuits, other than simple soldering of a few LED lights into the final design.
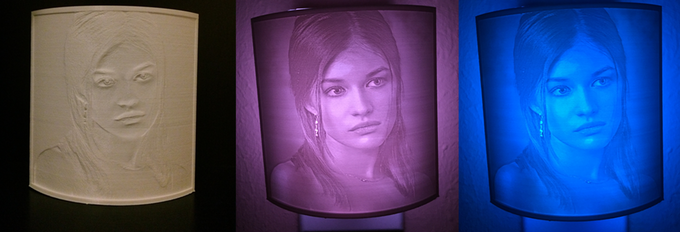
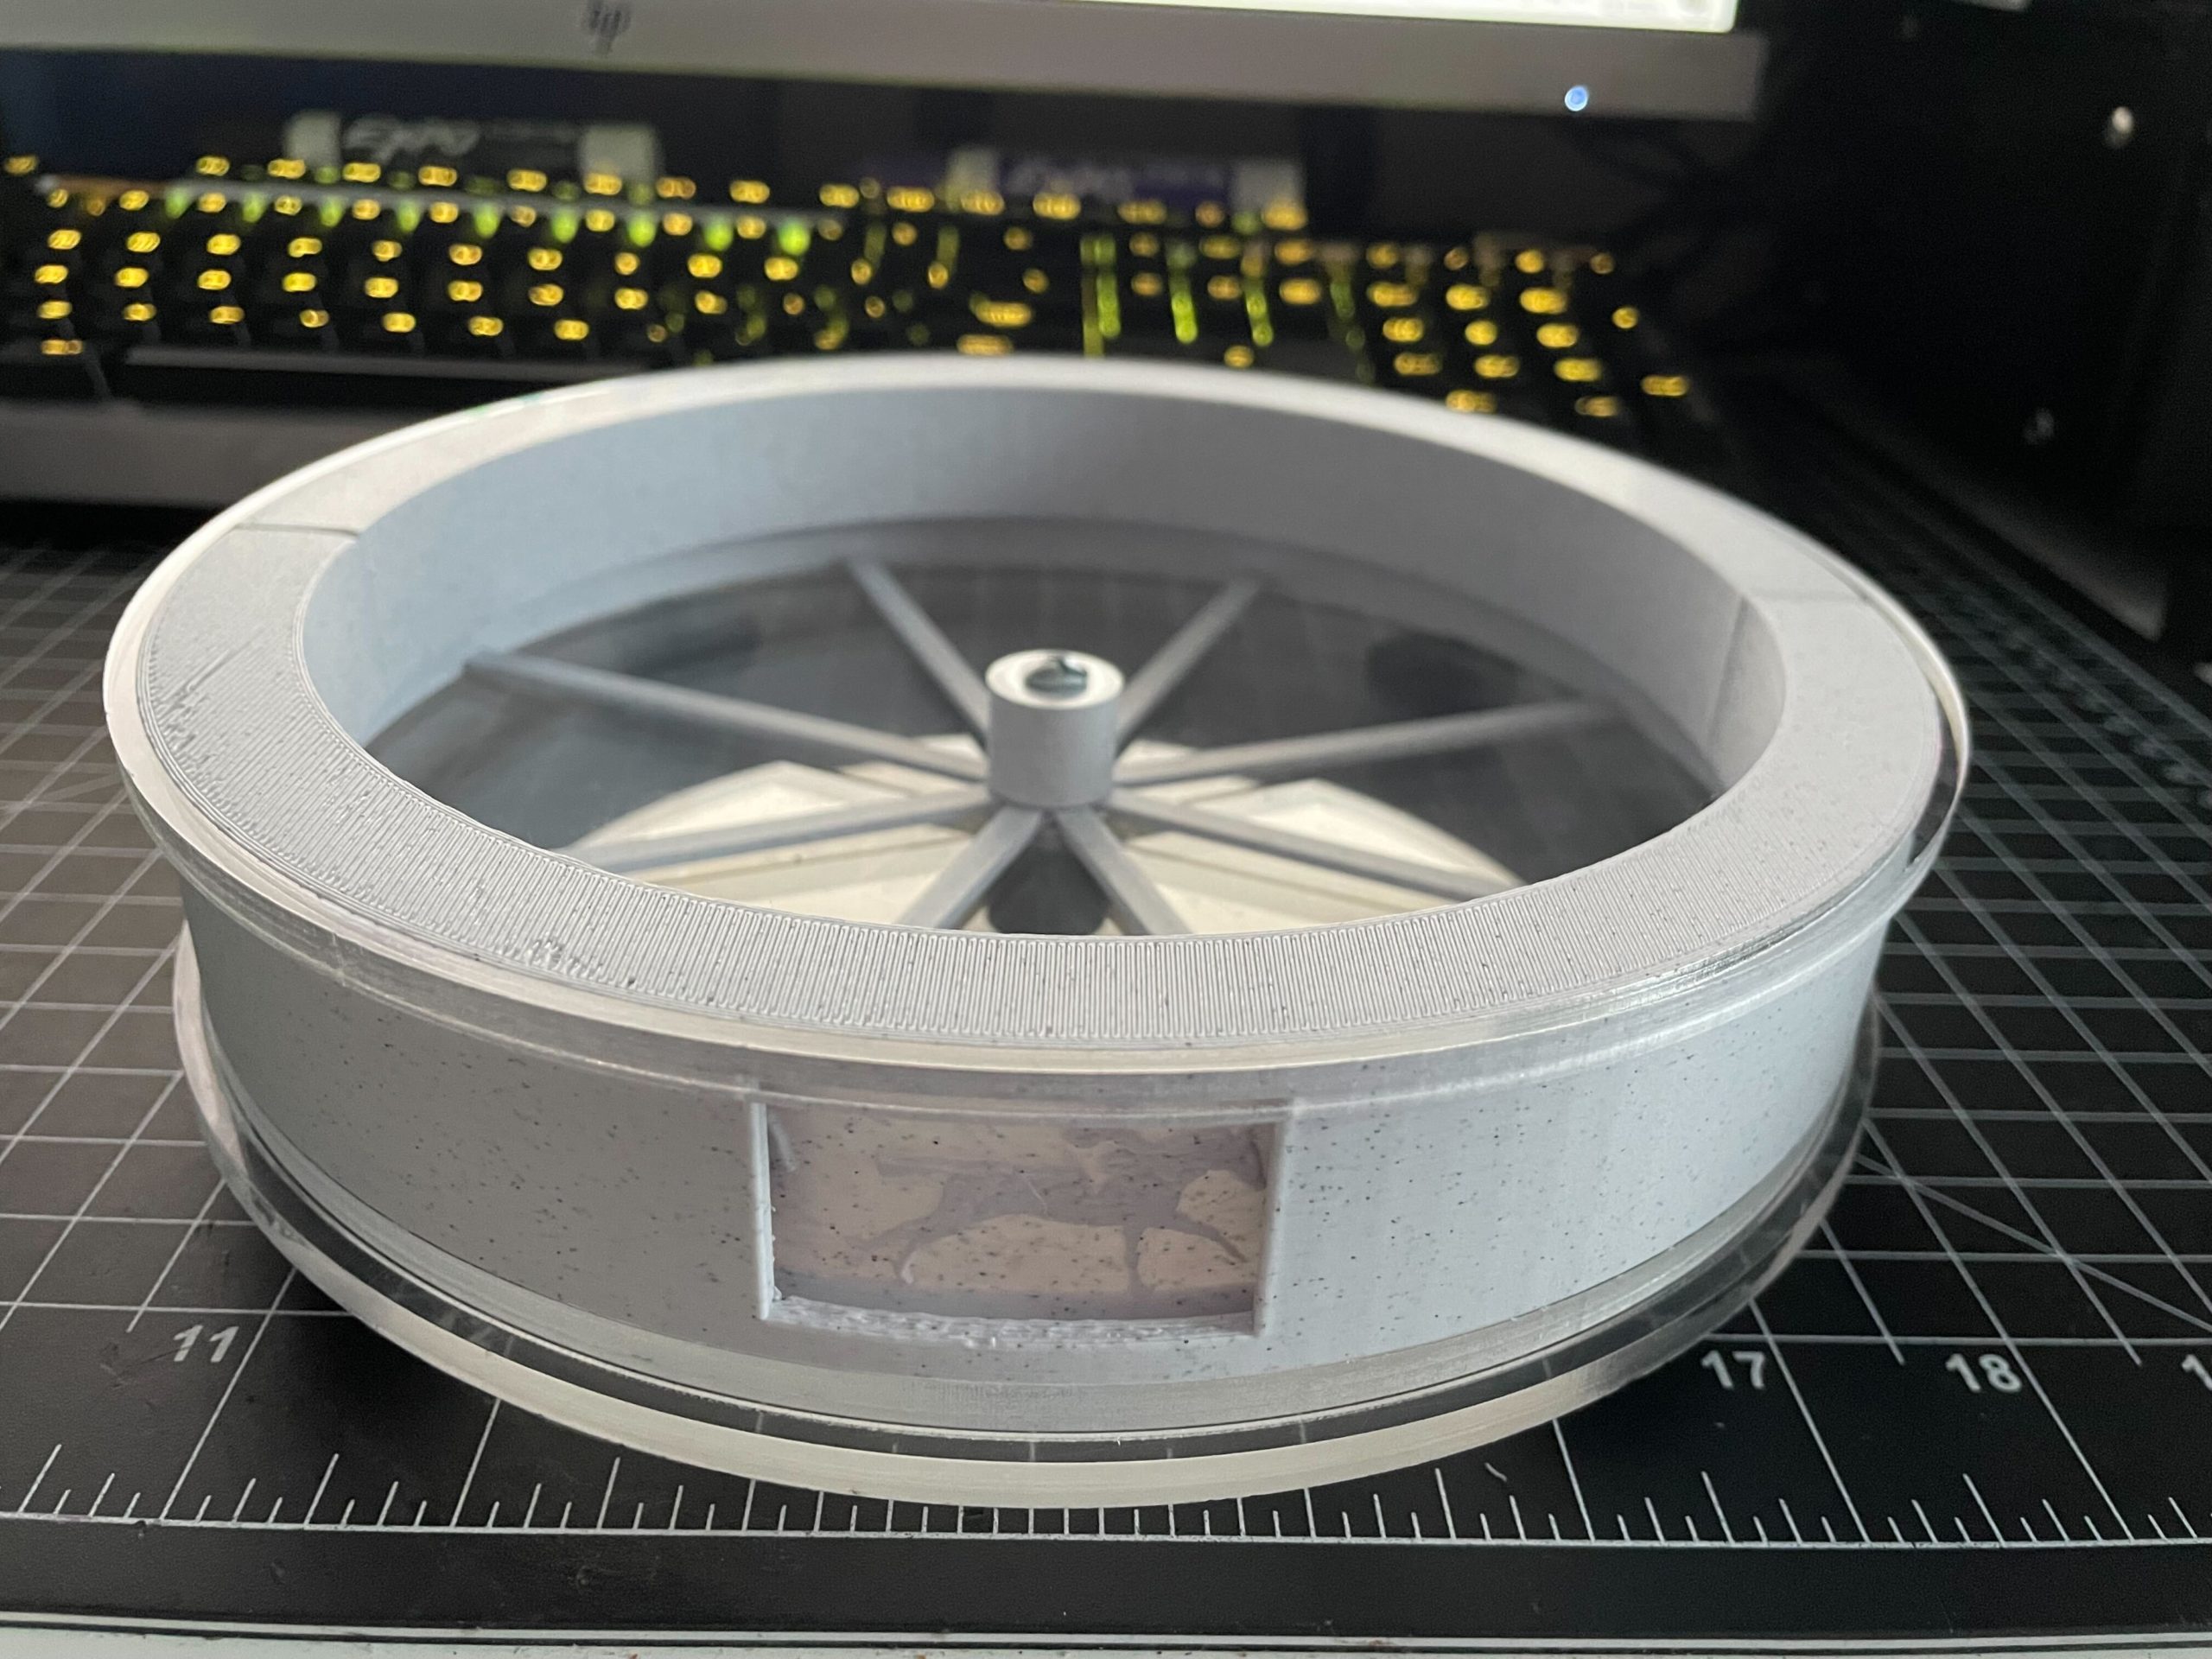
Final Iteration – A 3D Printed Moment
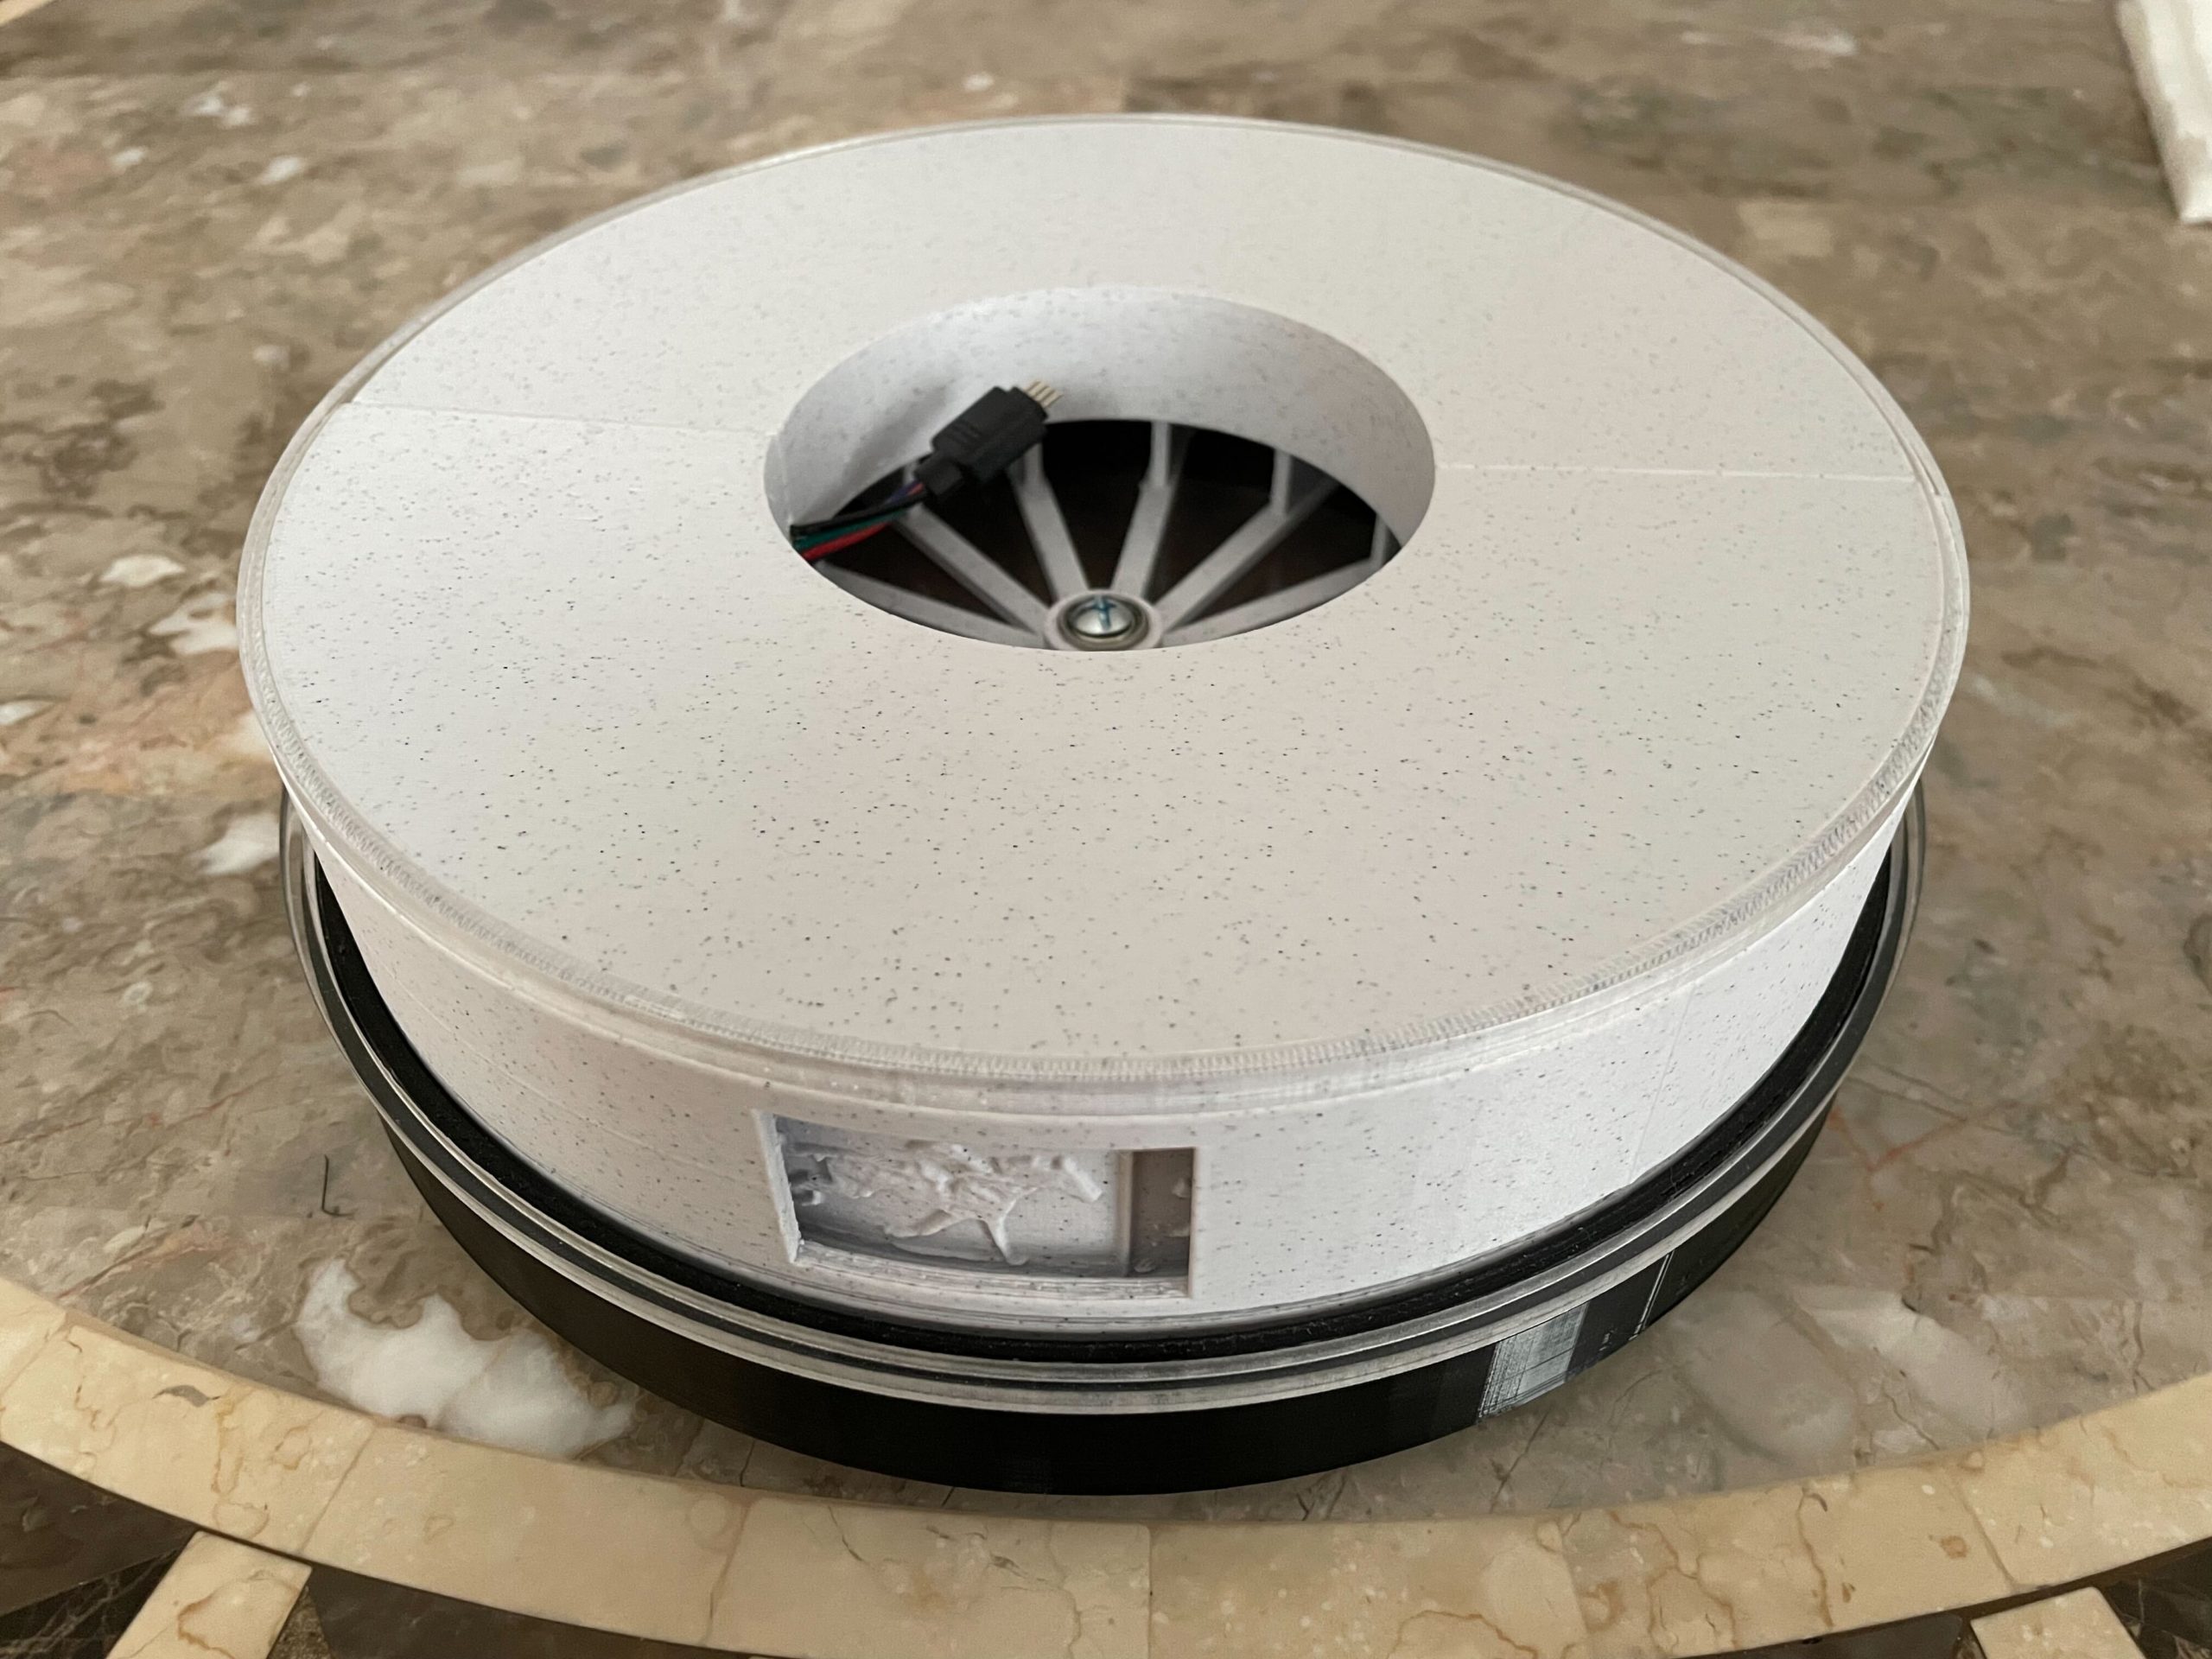
Above are images of the final piece, which incorporates completely redesigned covers, as well as brand new pieces that are meant to hold the entire piece, including the acrylic together. Following Iteration #1, I laser cut a few more pieces of acrylic as well, to both add to the weight of the final piece as well as allow for the easy rotation of the 3D printed lithophane.
Movie
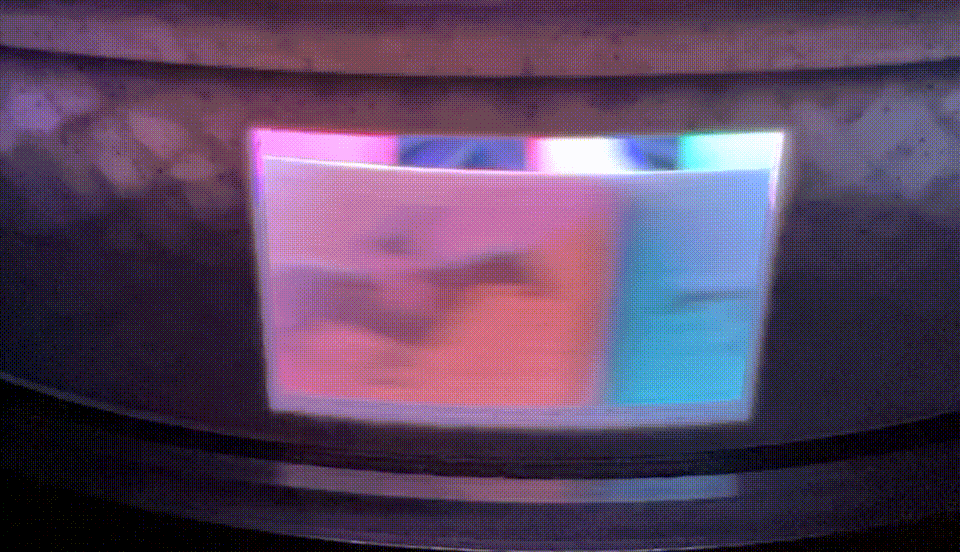
And here you have the “3D Printed Moment”, displaying “The Horse in Motion,” which was one of the first sets of photographs used in chronophotography, to illustrate the passing of time. Hoping to combine this past technique with newer 3D printing techniques known as lithophanes, the “3D Printed Moment” hopes to provide an interactive view at a single moment in time. With a set of 15 lithophanes, all negatives of an original photograph, when backlit by an LED, the original pictures can be seen through the 3D print. When all 15 images rotate at the correct speed with the coupled LED, the horse in the photograph appears to move. This project hopes to showcase how a new technique (lithophanes), when coupled with light and an older technique (zoetropes), can allow for a moment to be seen and displayed through a new medium.