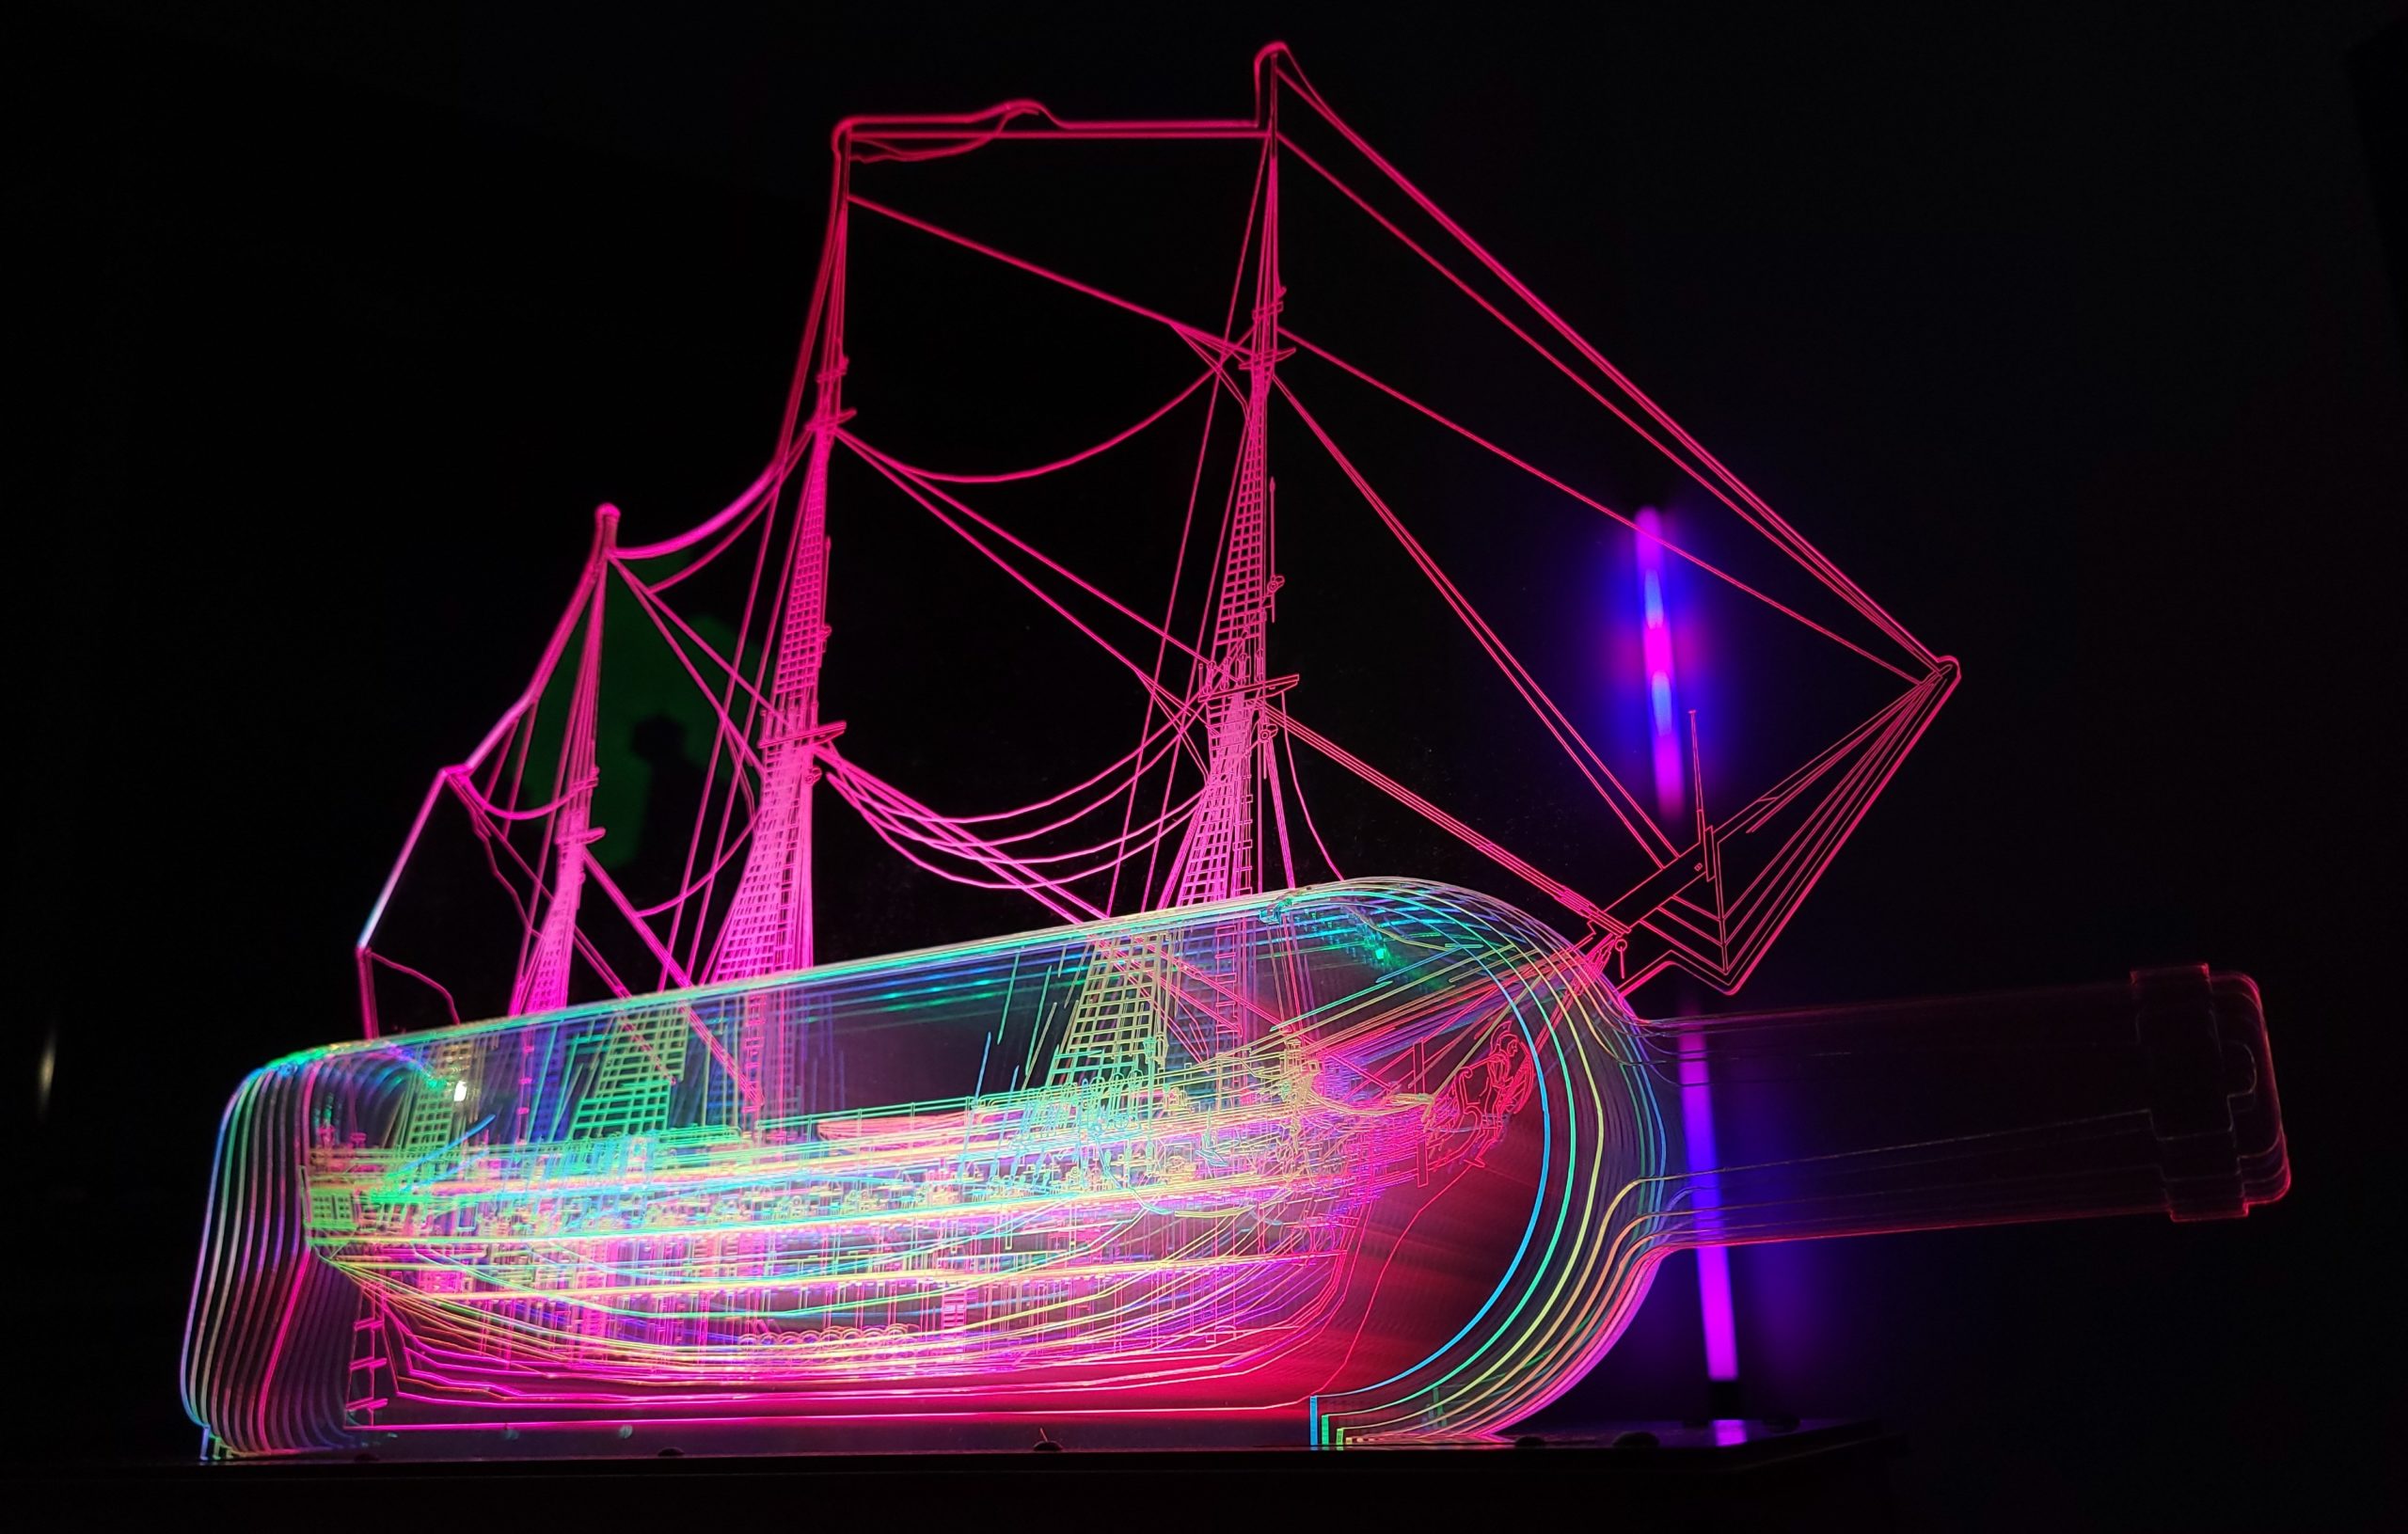
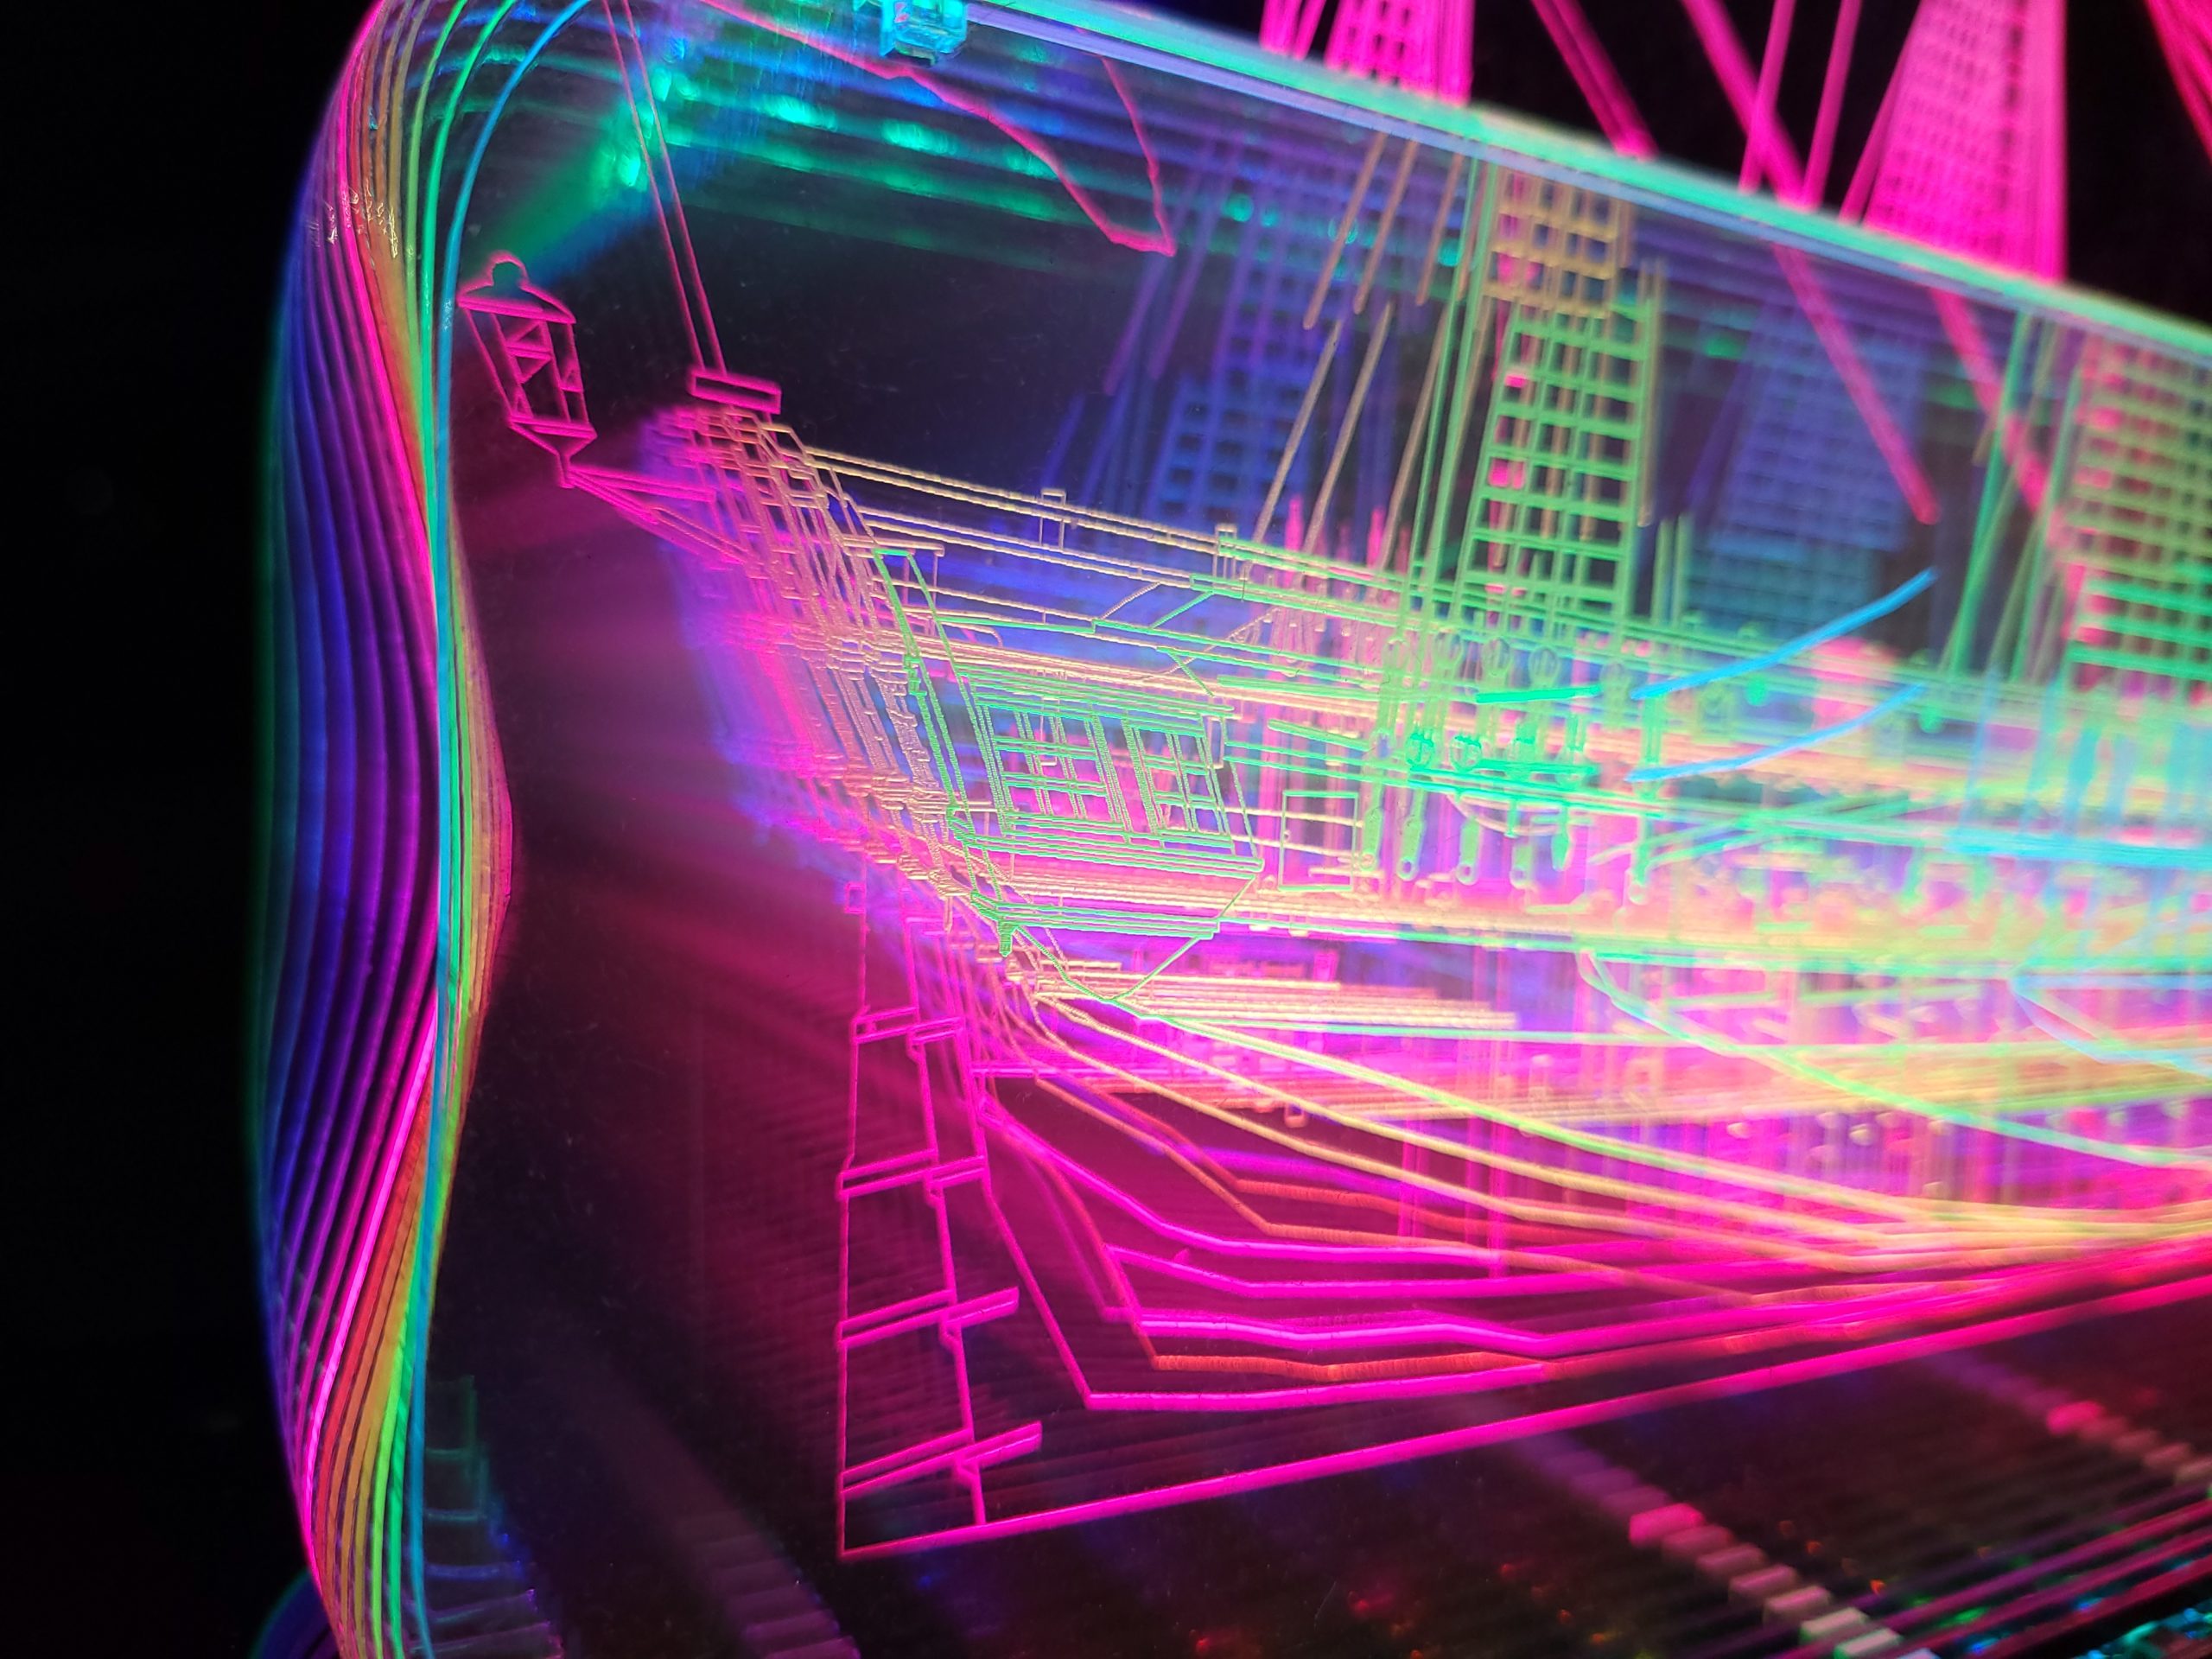
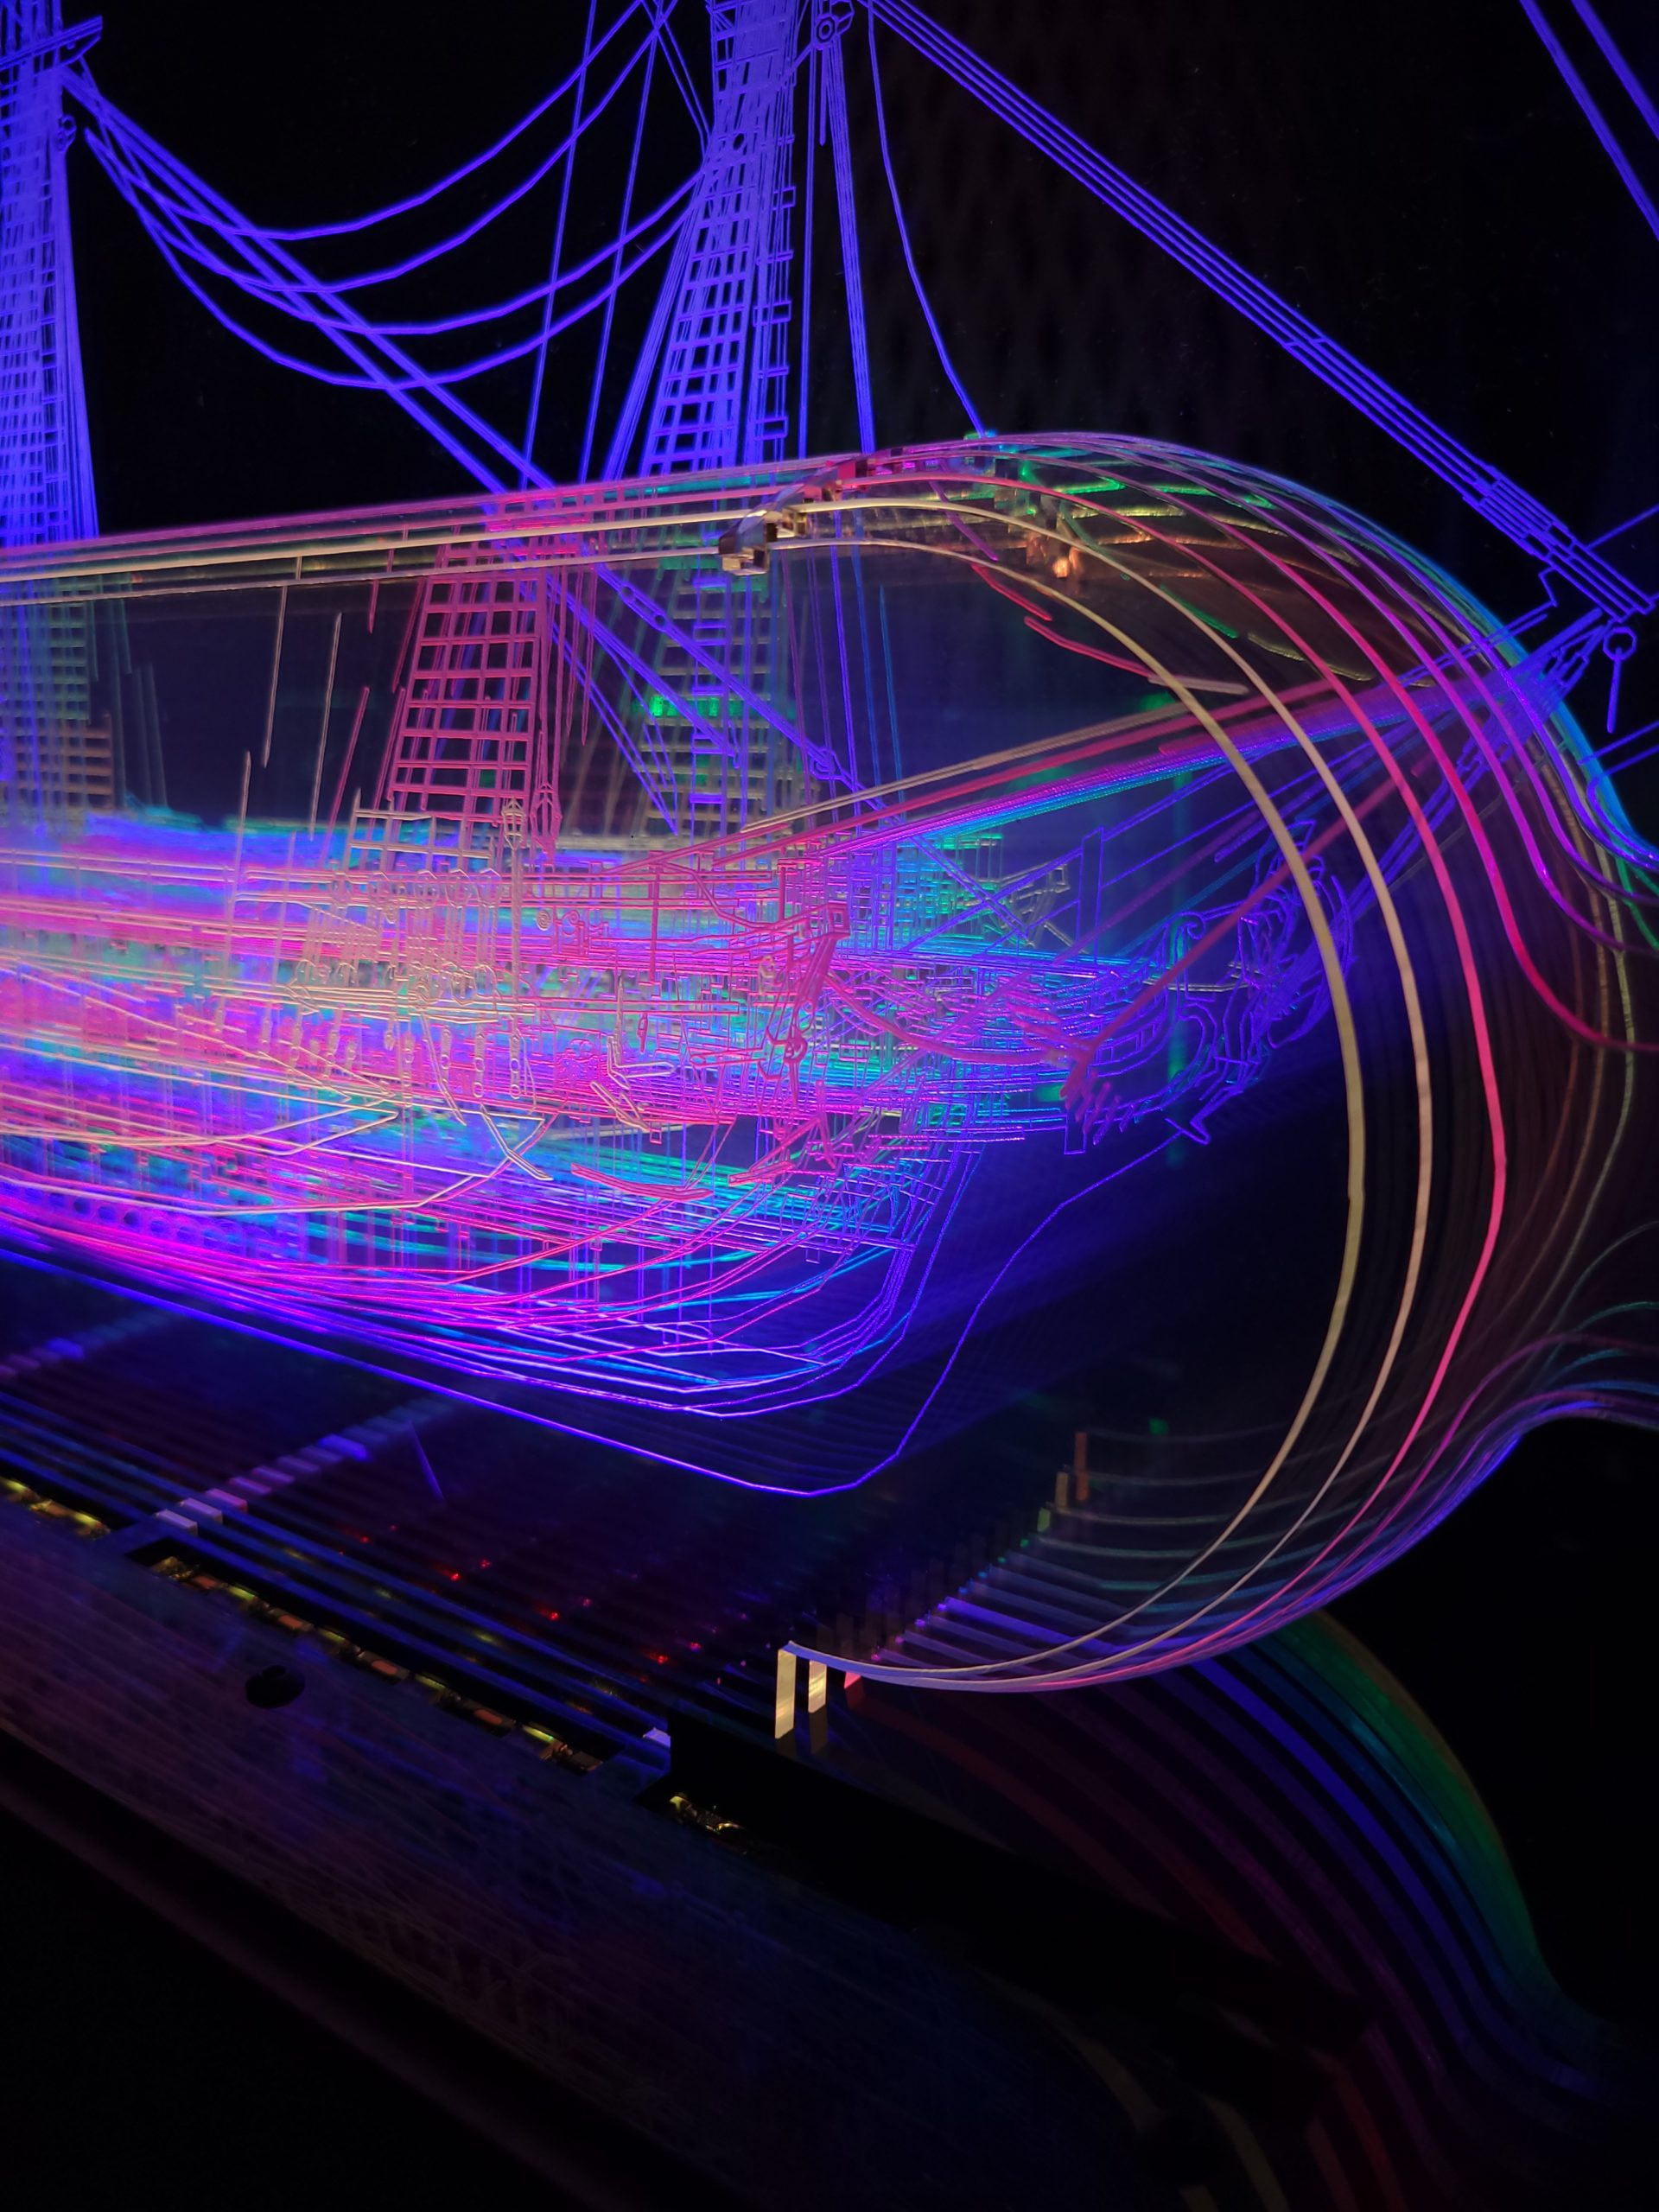
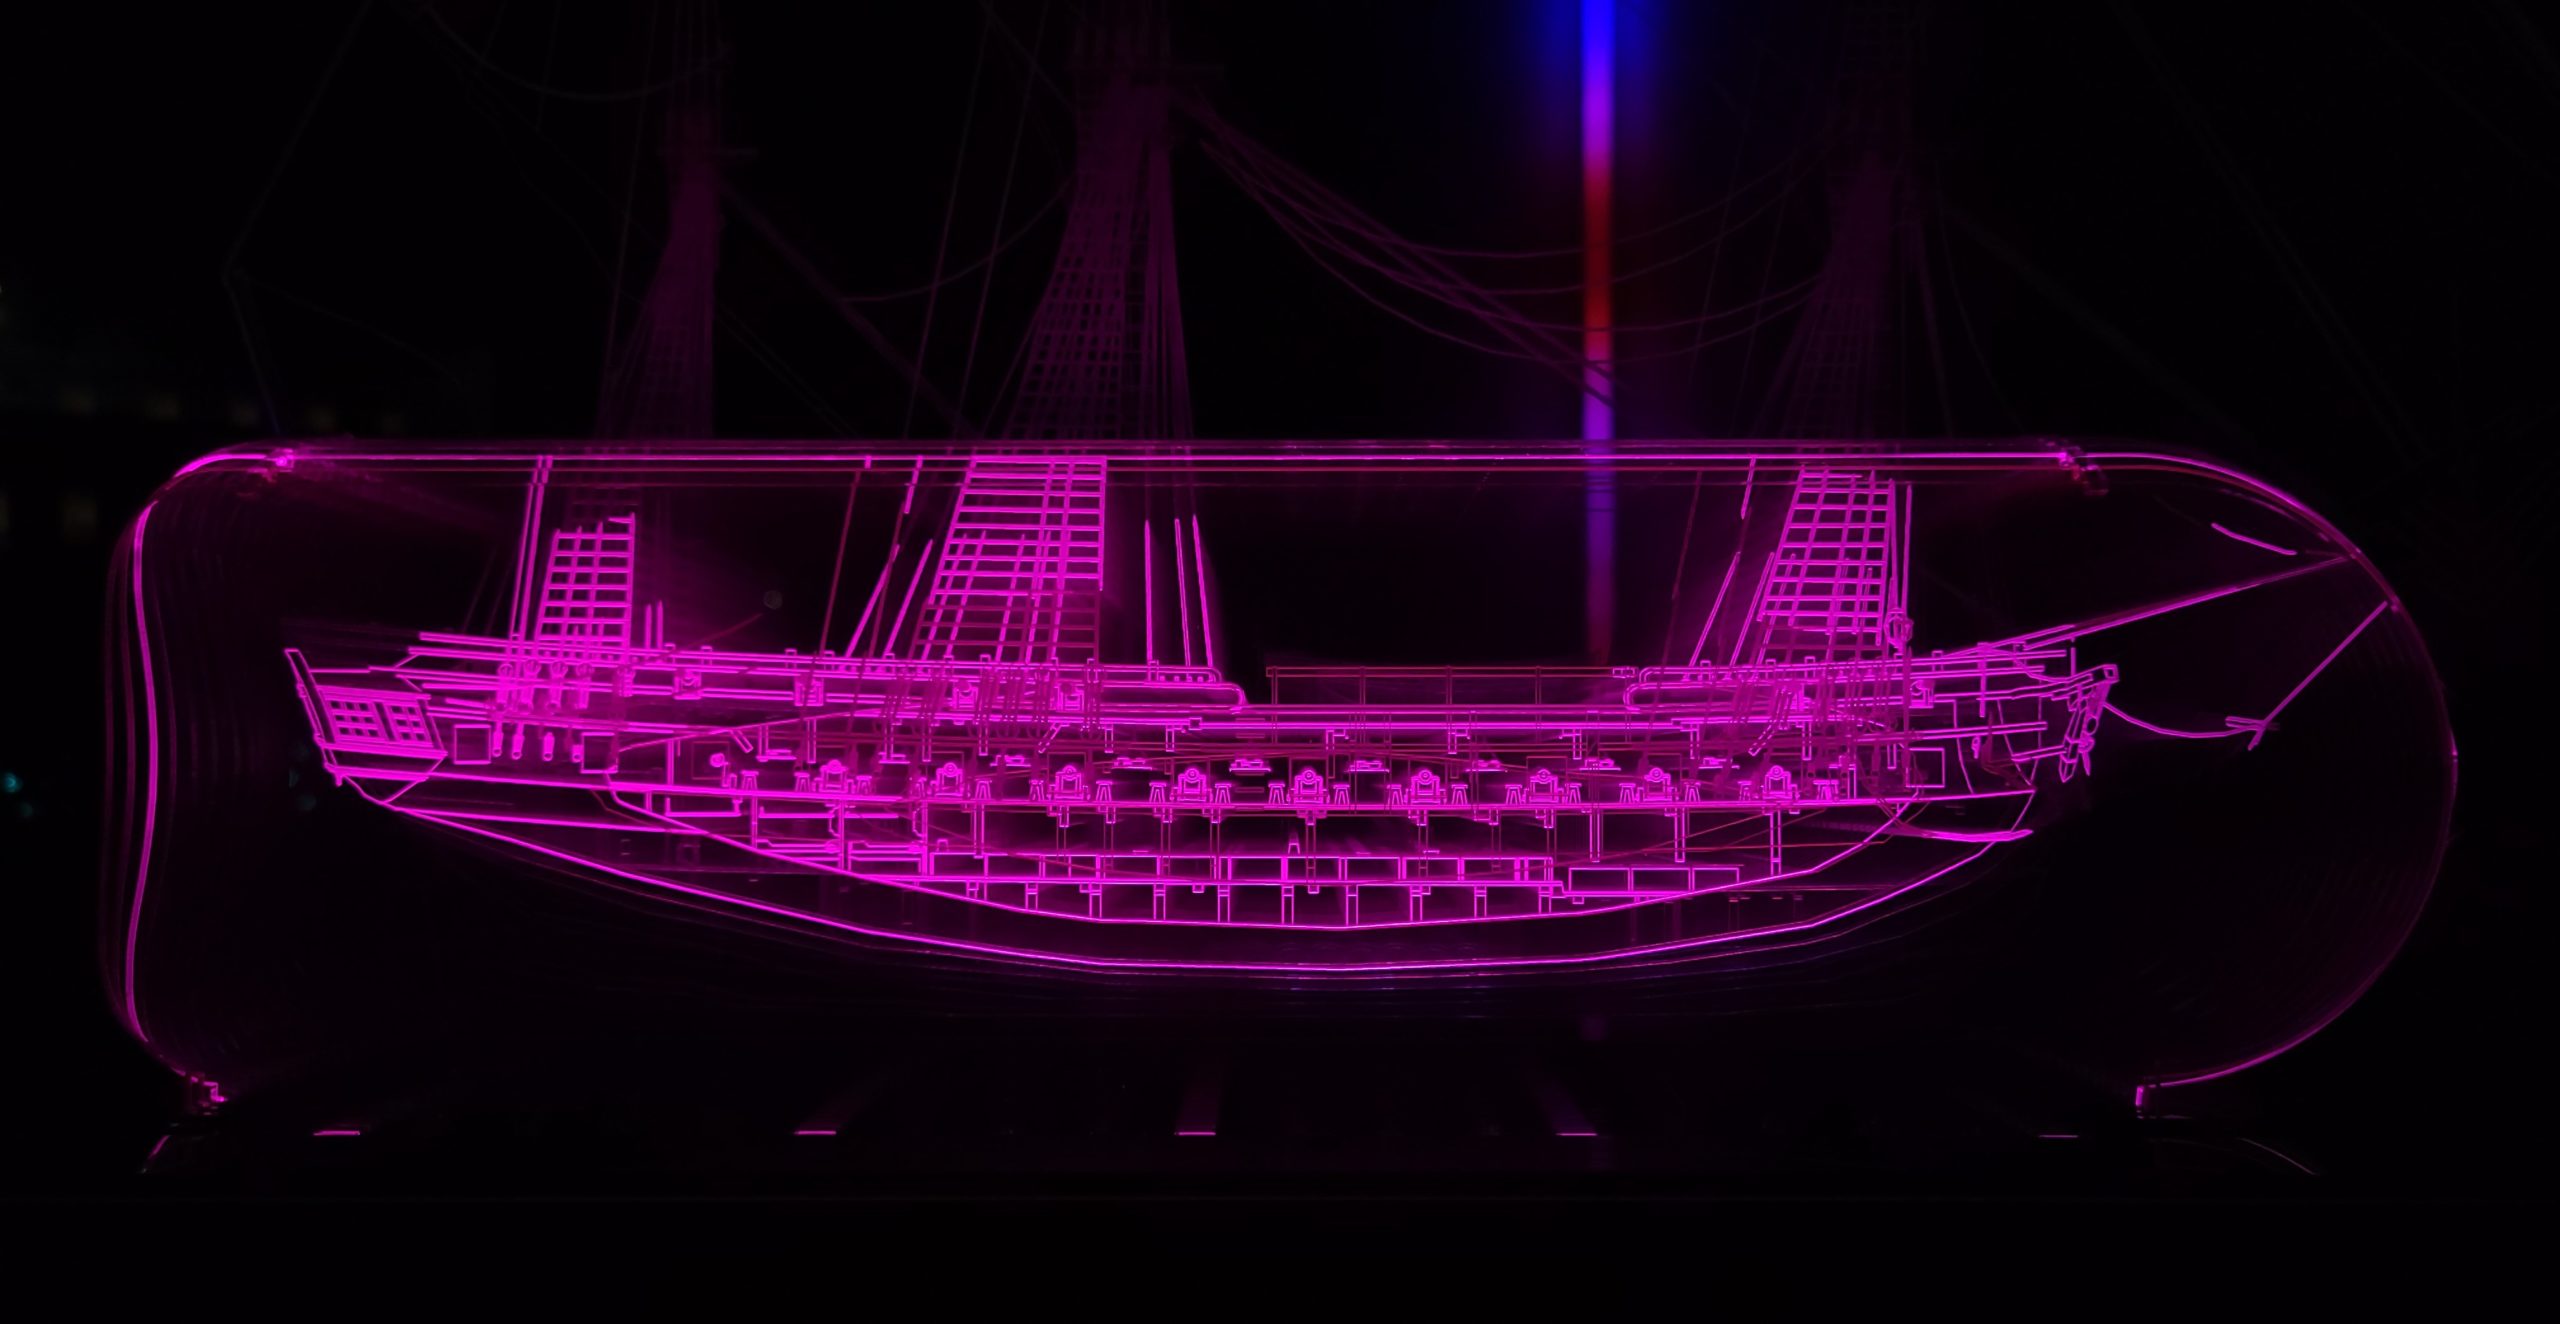
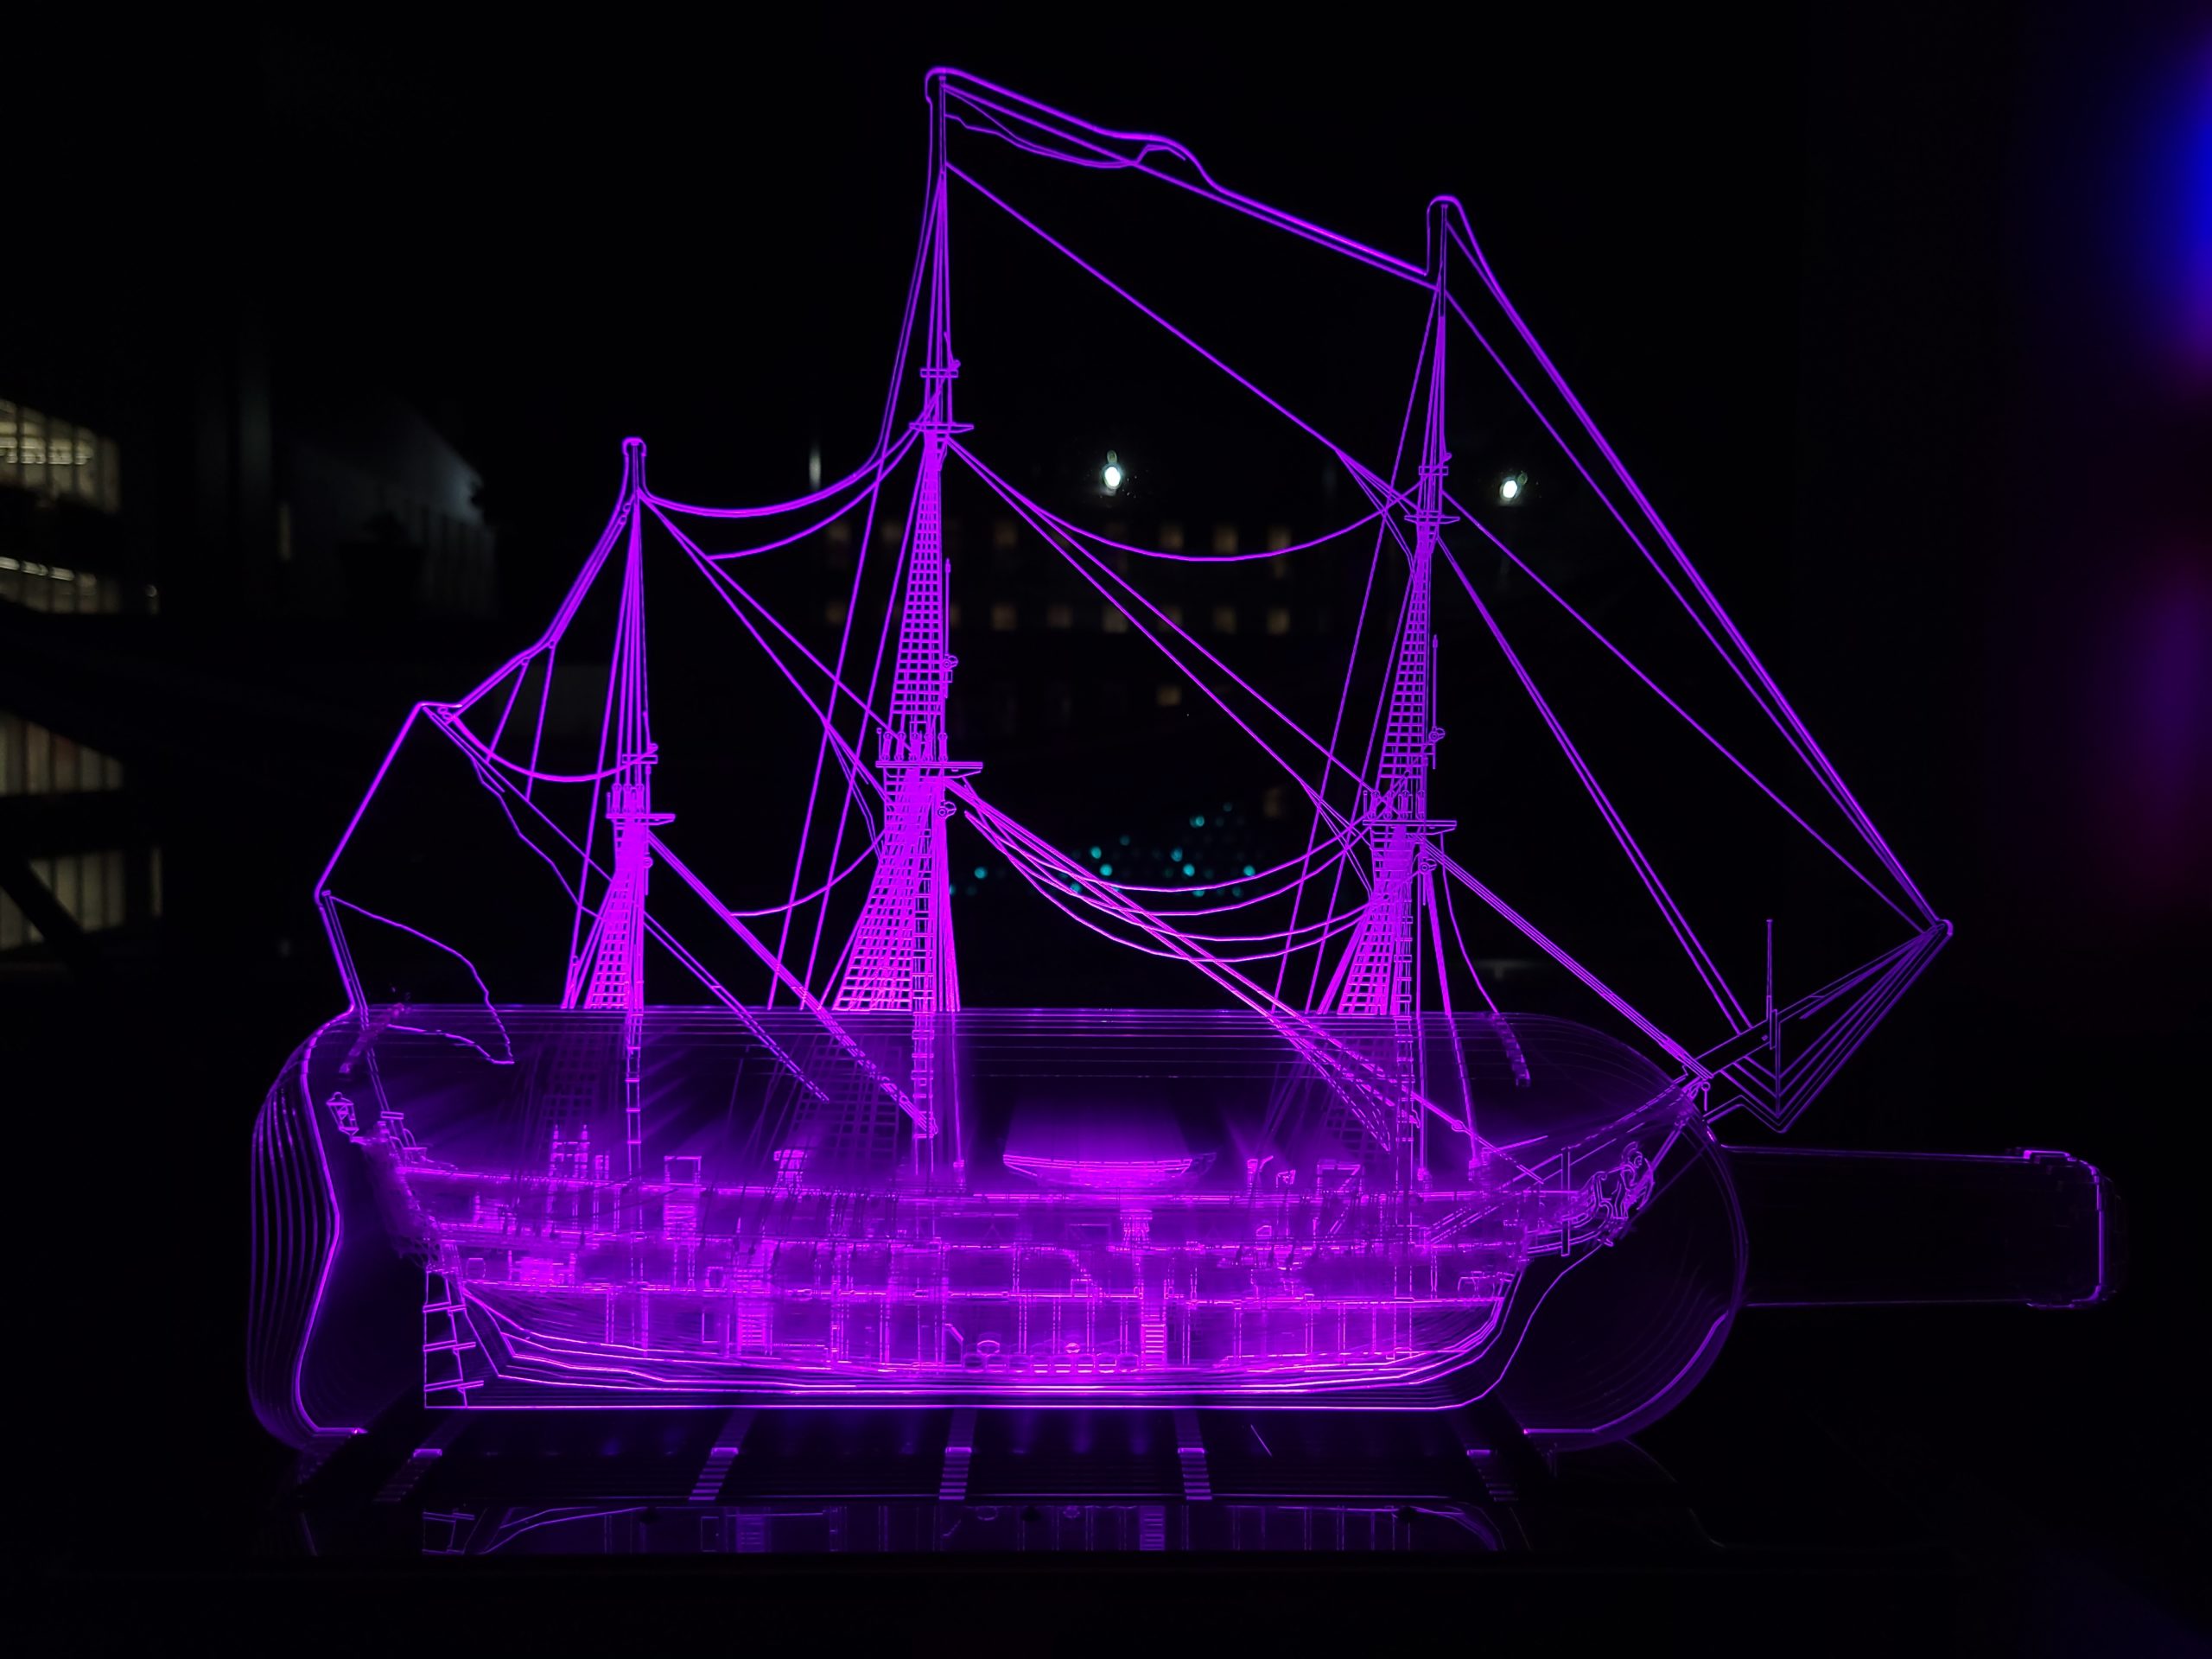
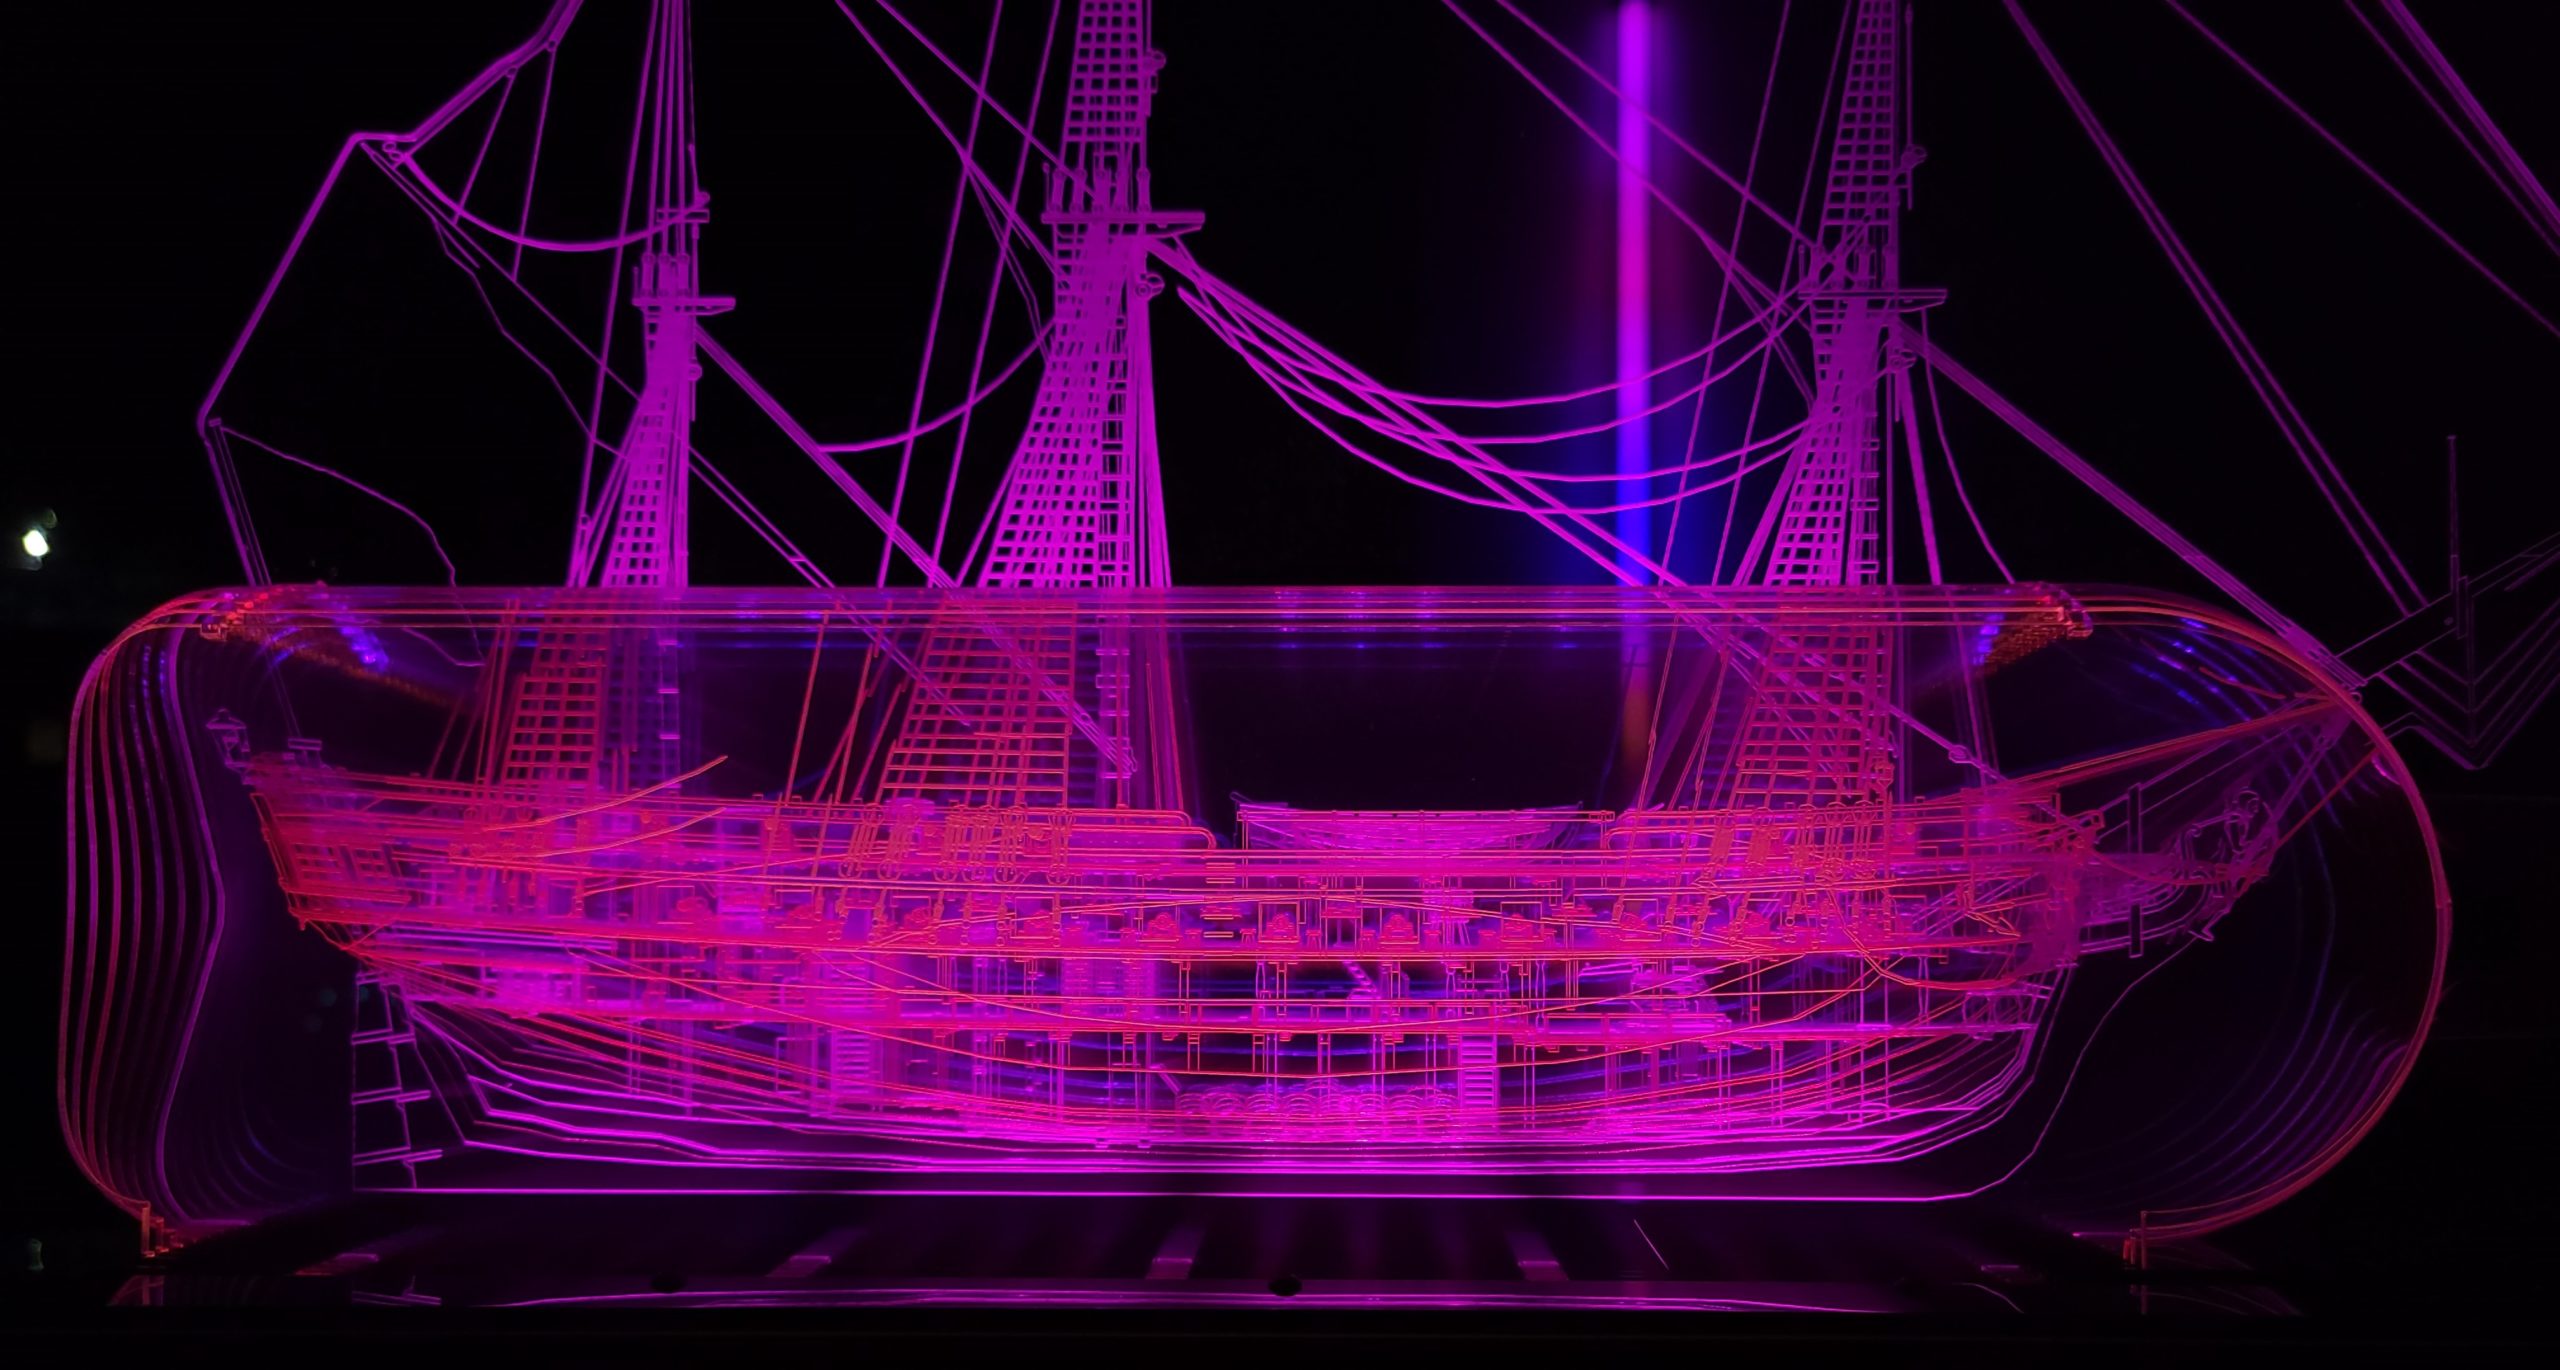
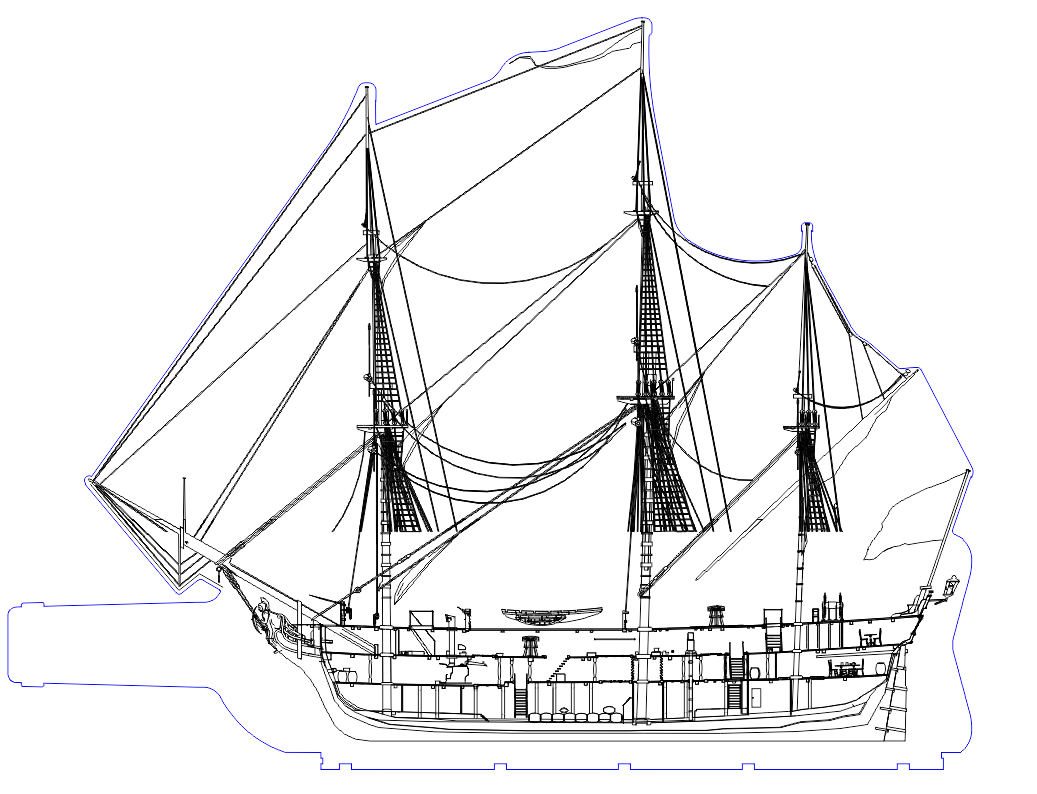
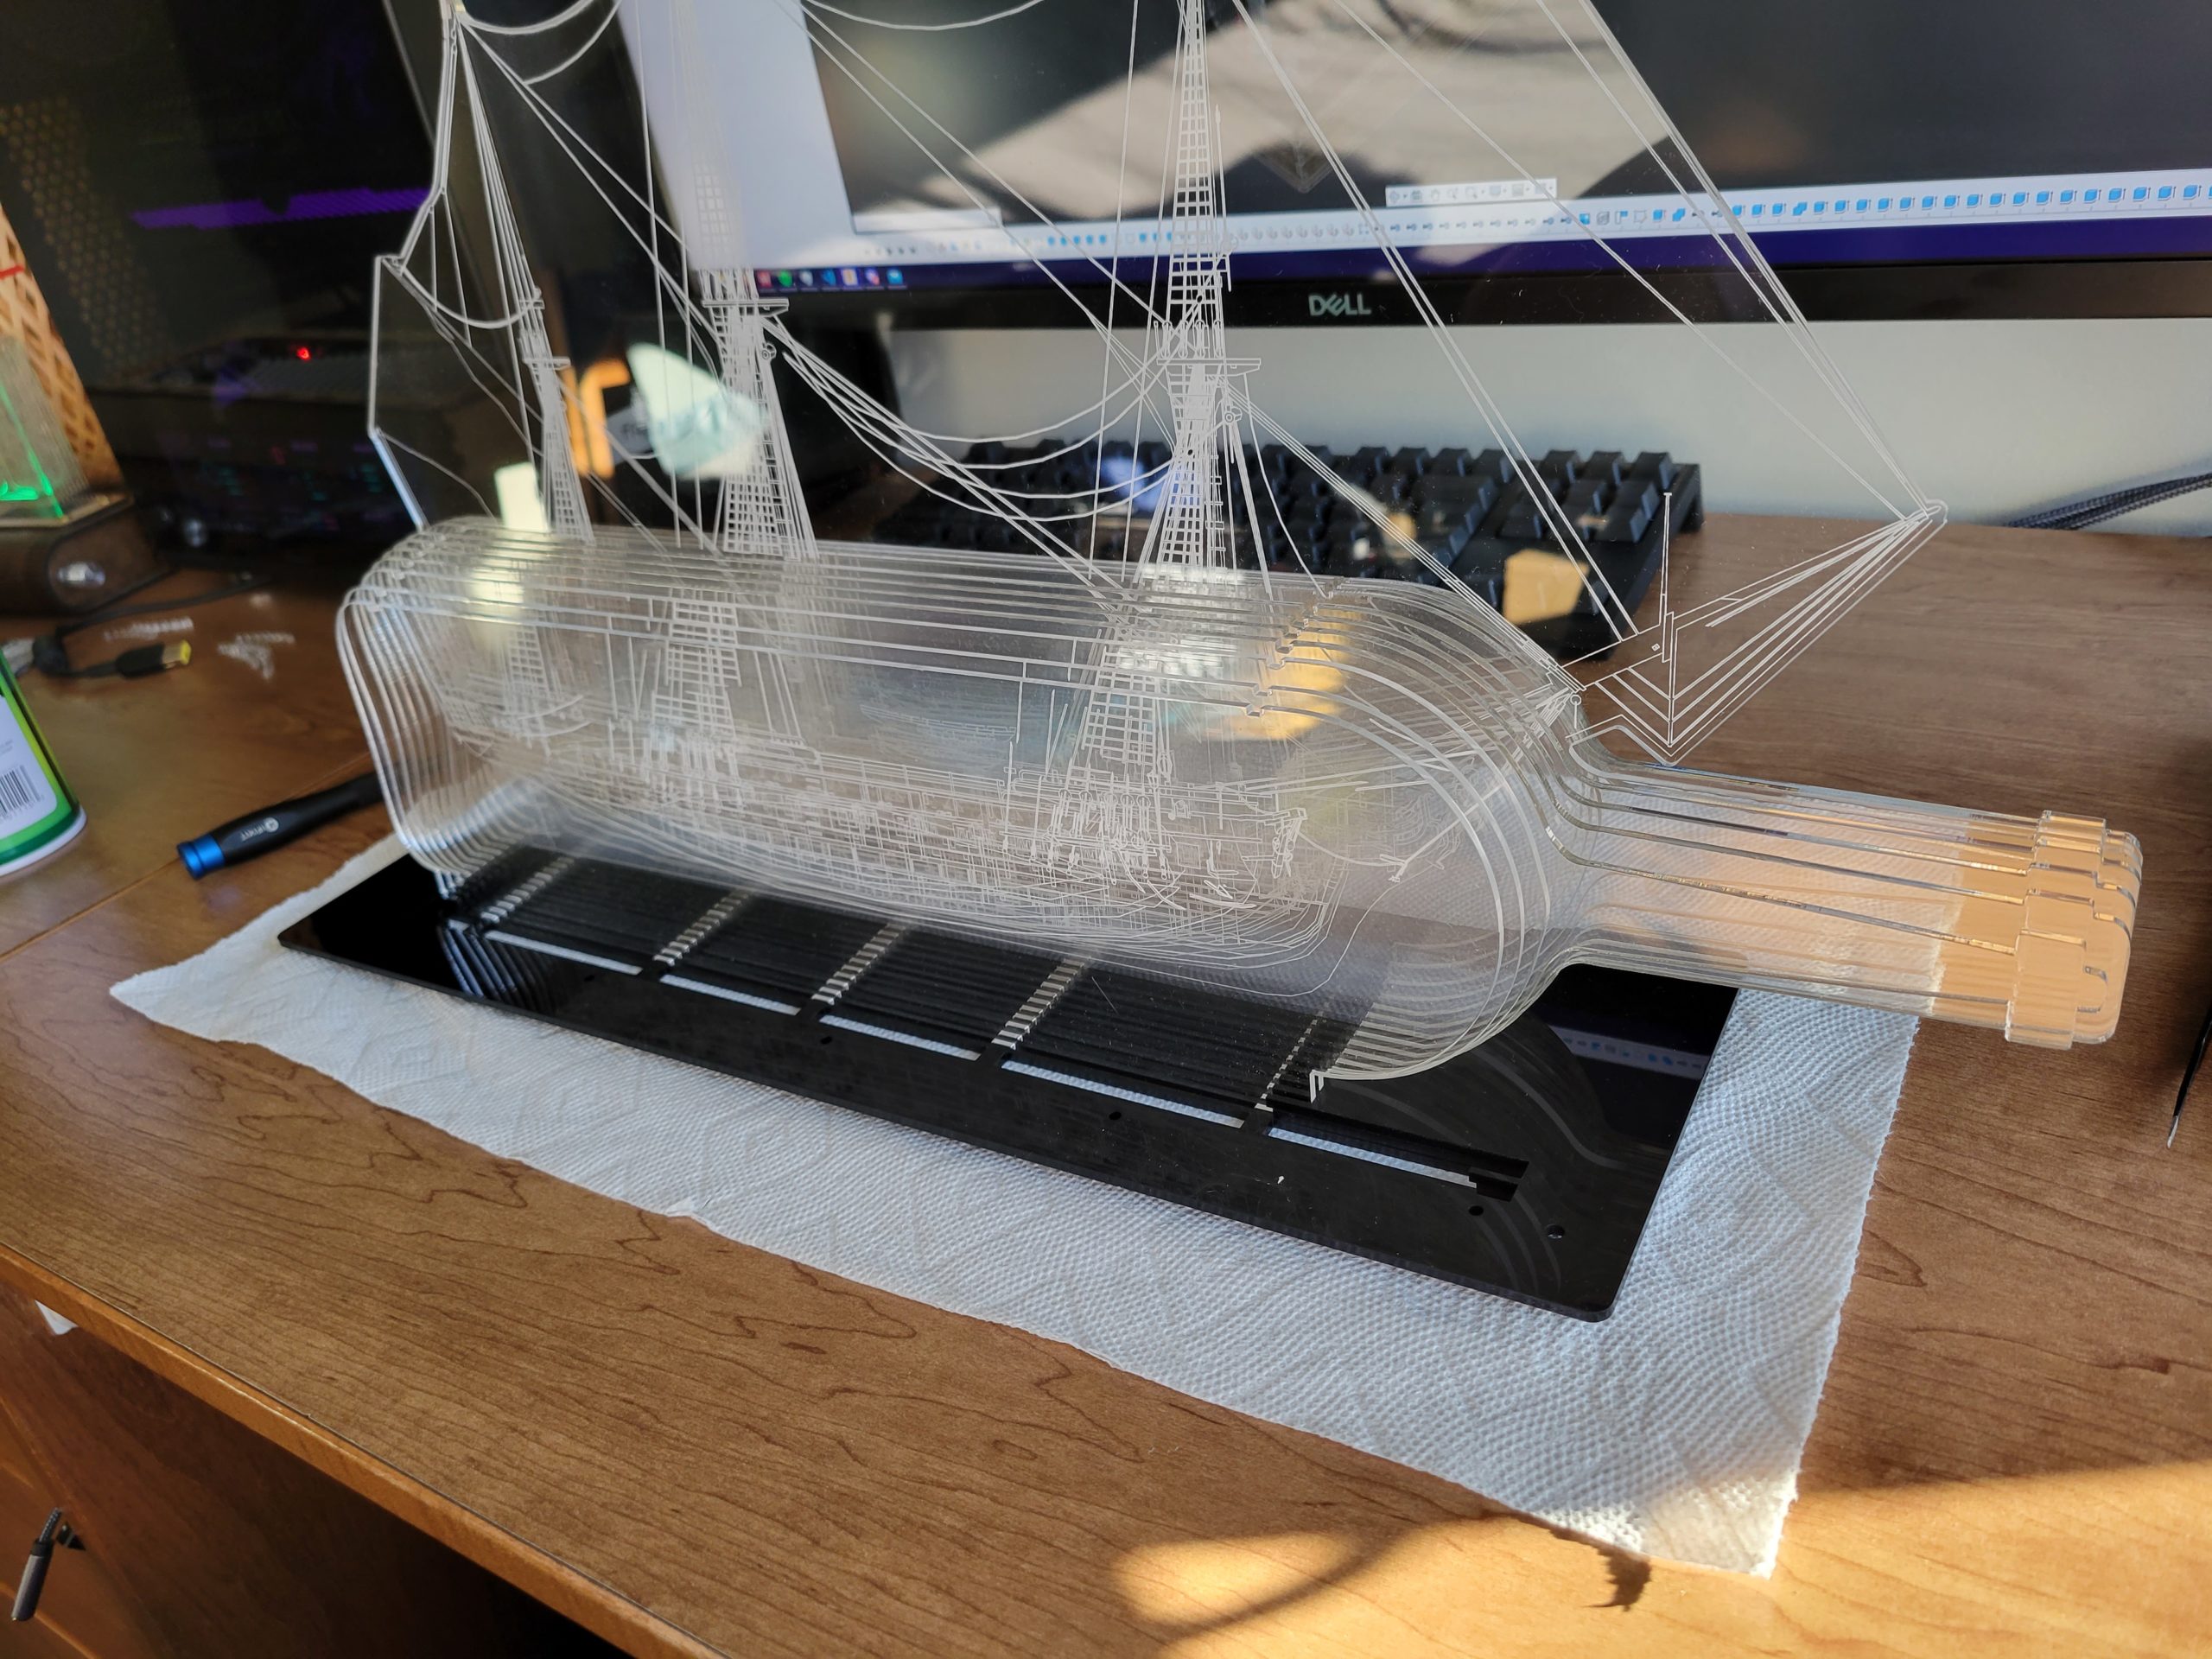
For my Light Art project, I created a “ship in a bottle” made from 15 stacked layers of acrylic. The ship is the HMS Surprise, from Patrick O’Brian’s Aubrey-Maturin series. I started with a 3D model of the ship, divided it into cross sections, then laser engraved the outline of each cross section onto the layers of acrylic, so they would glow when lit by LEDs from underneath.
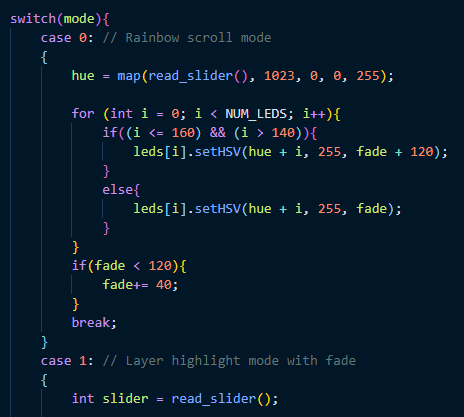
A slider on the front allows a degree of interactivity. In the first mode, the layers are lit in a rainbow front to back, and moving the slider smoothly rolls through the colors. Double tapping the slider against the endstop will switch to the next mode: when the slider is parked at one end, all layers are lit in colors ranging from orange, to pink, to blue. When the slider moves away from that end, you can highlight one layer at a time, and smoothly scroll through which layer is selected.
The next mode is currently a placeholder: a rainbow will scroll front to back through the ship, and the speed can be set with the slider. I plan to add another mode where the lights will fade through each layer, briefly highlighting one and then moving to the next. The double tap detection with the slider isn’t perfect, but with a little tuning I think I can make it more reliable.
How did I make it?
Creating this project took many stages, and I spent close to 200 hours doing CAD work, creating and cleaning up the layers, making renders, and other digital stages. The actual fabrication took a much shorter time: about 10 hours of laser cutting, and a similar amount of time spent between wiring and assembly.
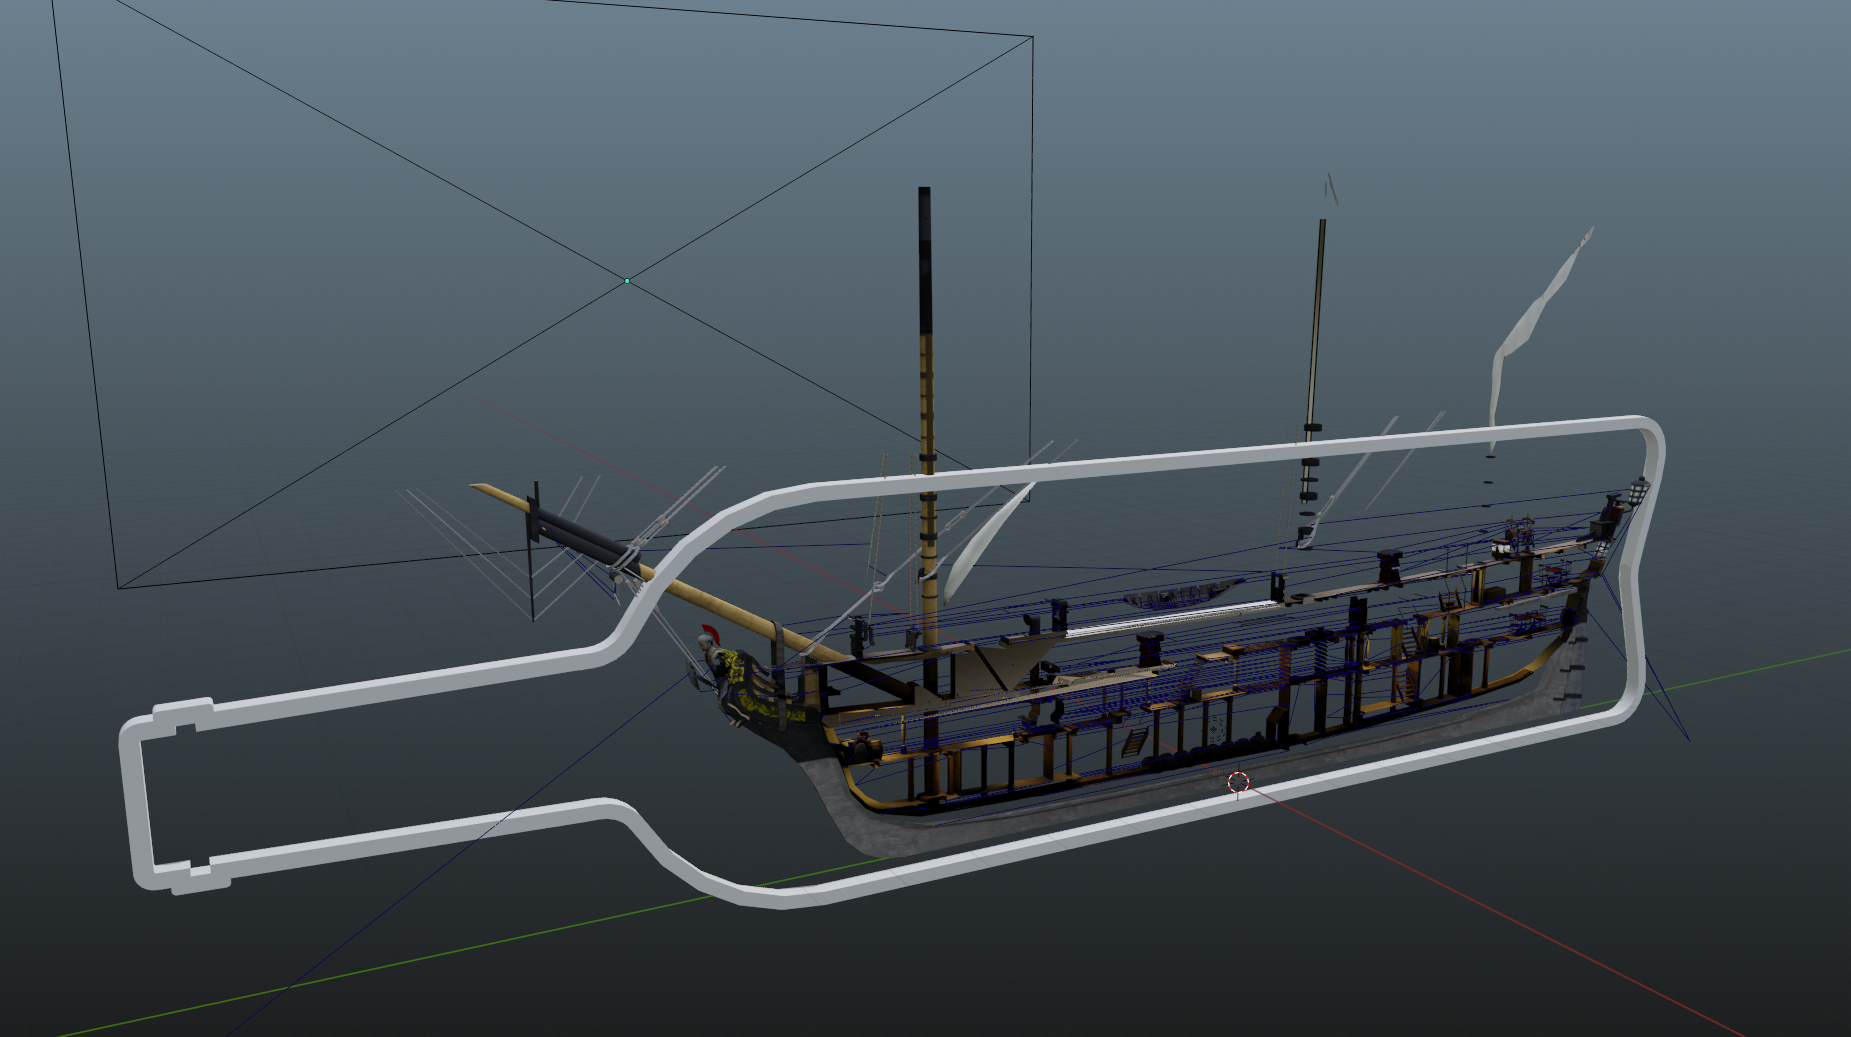
The first challenge was to create the content for each layer. Initially I planned to draw this by hand, but I quickly realized this would be far too difficult. The eventual solution was to purchase a 3D model of the ship from Axeonalias on SketchFab. Considering the ship model took a skilled modeller over 3 months to make, it would not have been practical for me to make in the time I had.
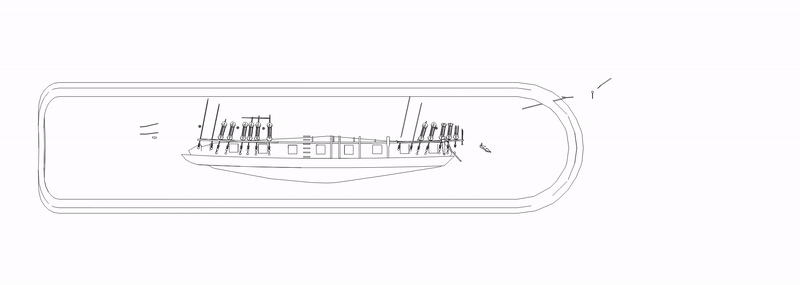
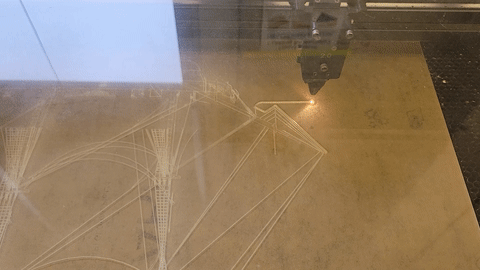
The next step was to turn the model into something I could engrave. For this I used Blender, and set up a system with two orthographic cameras and keyframes, allowing me to render all 15 layers in one operation. I found a renderer for Blender that would turn the wireframe of a model into an SVG.
The resulting SVGs needed some cleanup, and I had to play with the layer width to get the right amount of stuff in each layer. I also added some cylinders that would turn into circles in the SVGs to aid in alignment (not pictured).
Once I cleaned up all the layers and removed extraneous lines (which took a long time), I was able to start designing the base. The scale was dictated by how many layers I wanted and how close together the LEDs could go: if I wanted to have 15 layers, each with their own LED strip, then the beam (width) of the ship is the width of all the LEDs side by side. In order to have the whole ship properly scaled, I ended up making it pretty large. The size definitely posed some challenges: I needed a lot of material and laser time, and making it sturdy enough was difficult. The wood base I made ended up being quite rigid, and with some bolts it held together quite nicely.
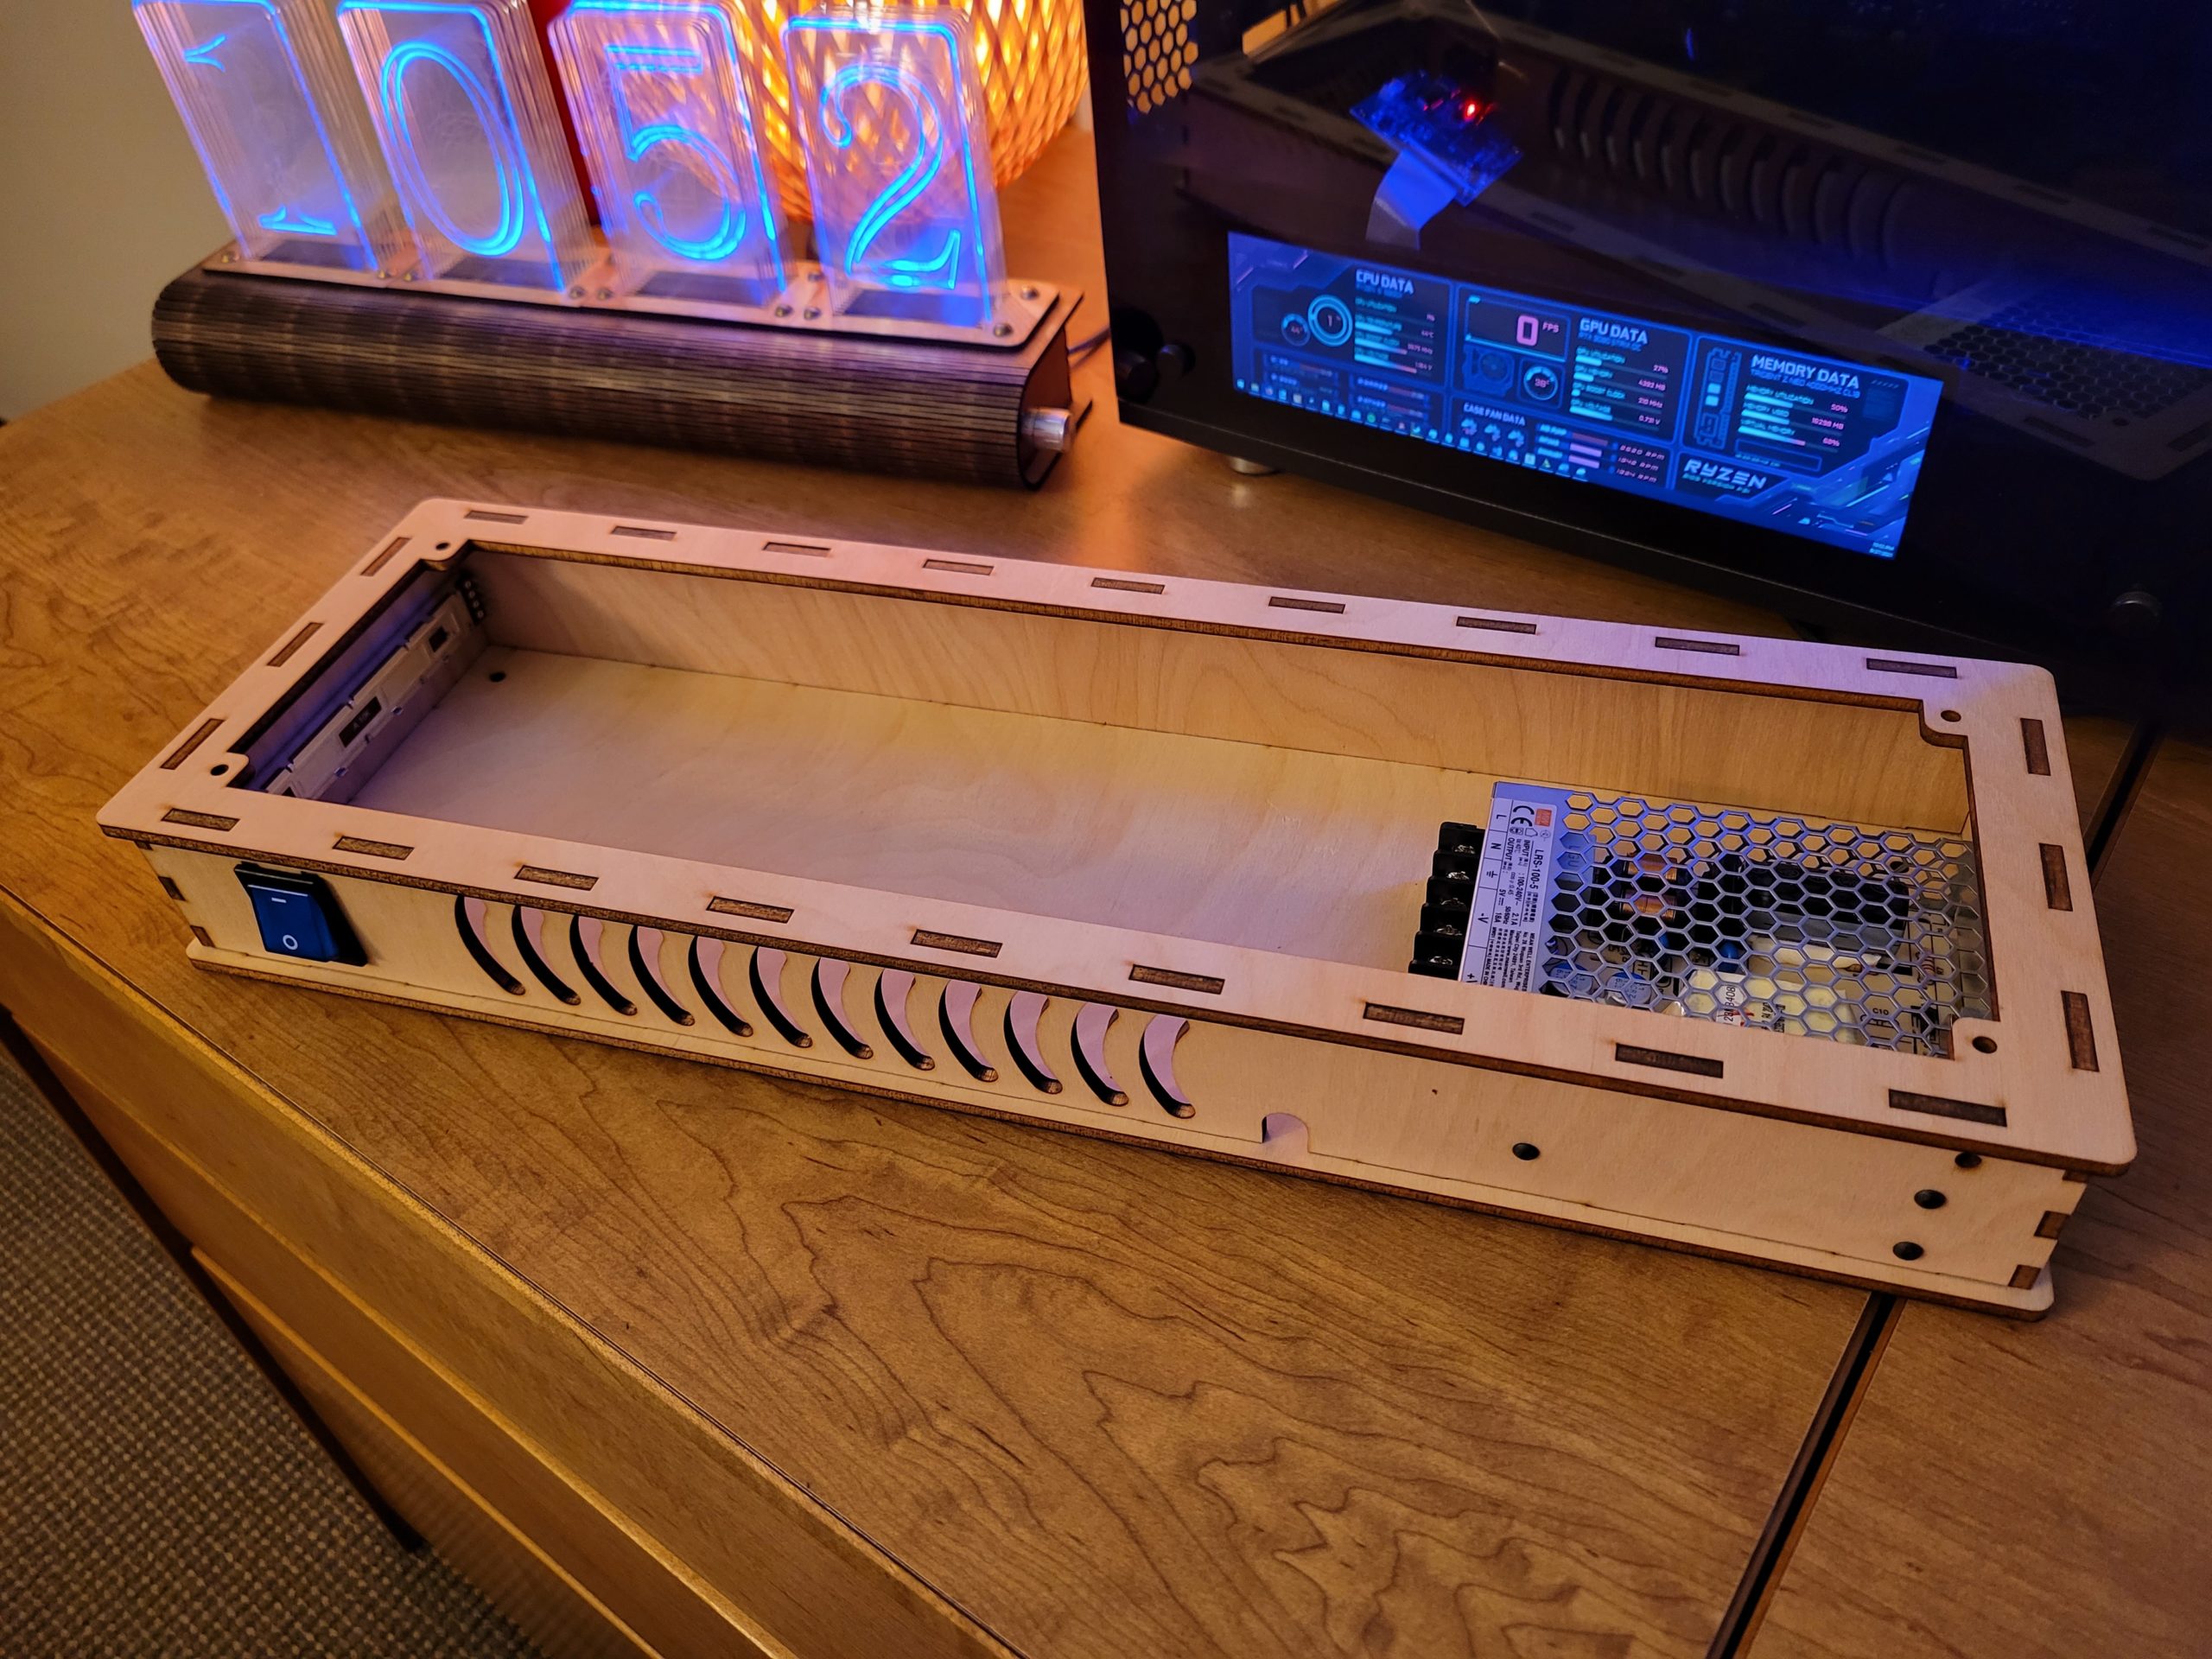
Wiring the LEDs was a very lengthy process. The strips I got are super narrow 5mm strips, as opposed to the standard 10mm for addressable LEDs. The result was very narrow pads, but I got it to work in the end. I needed many wires in the middle going back to the power supply, due to the narrow traces.
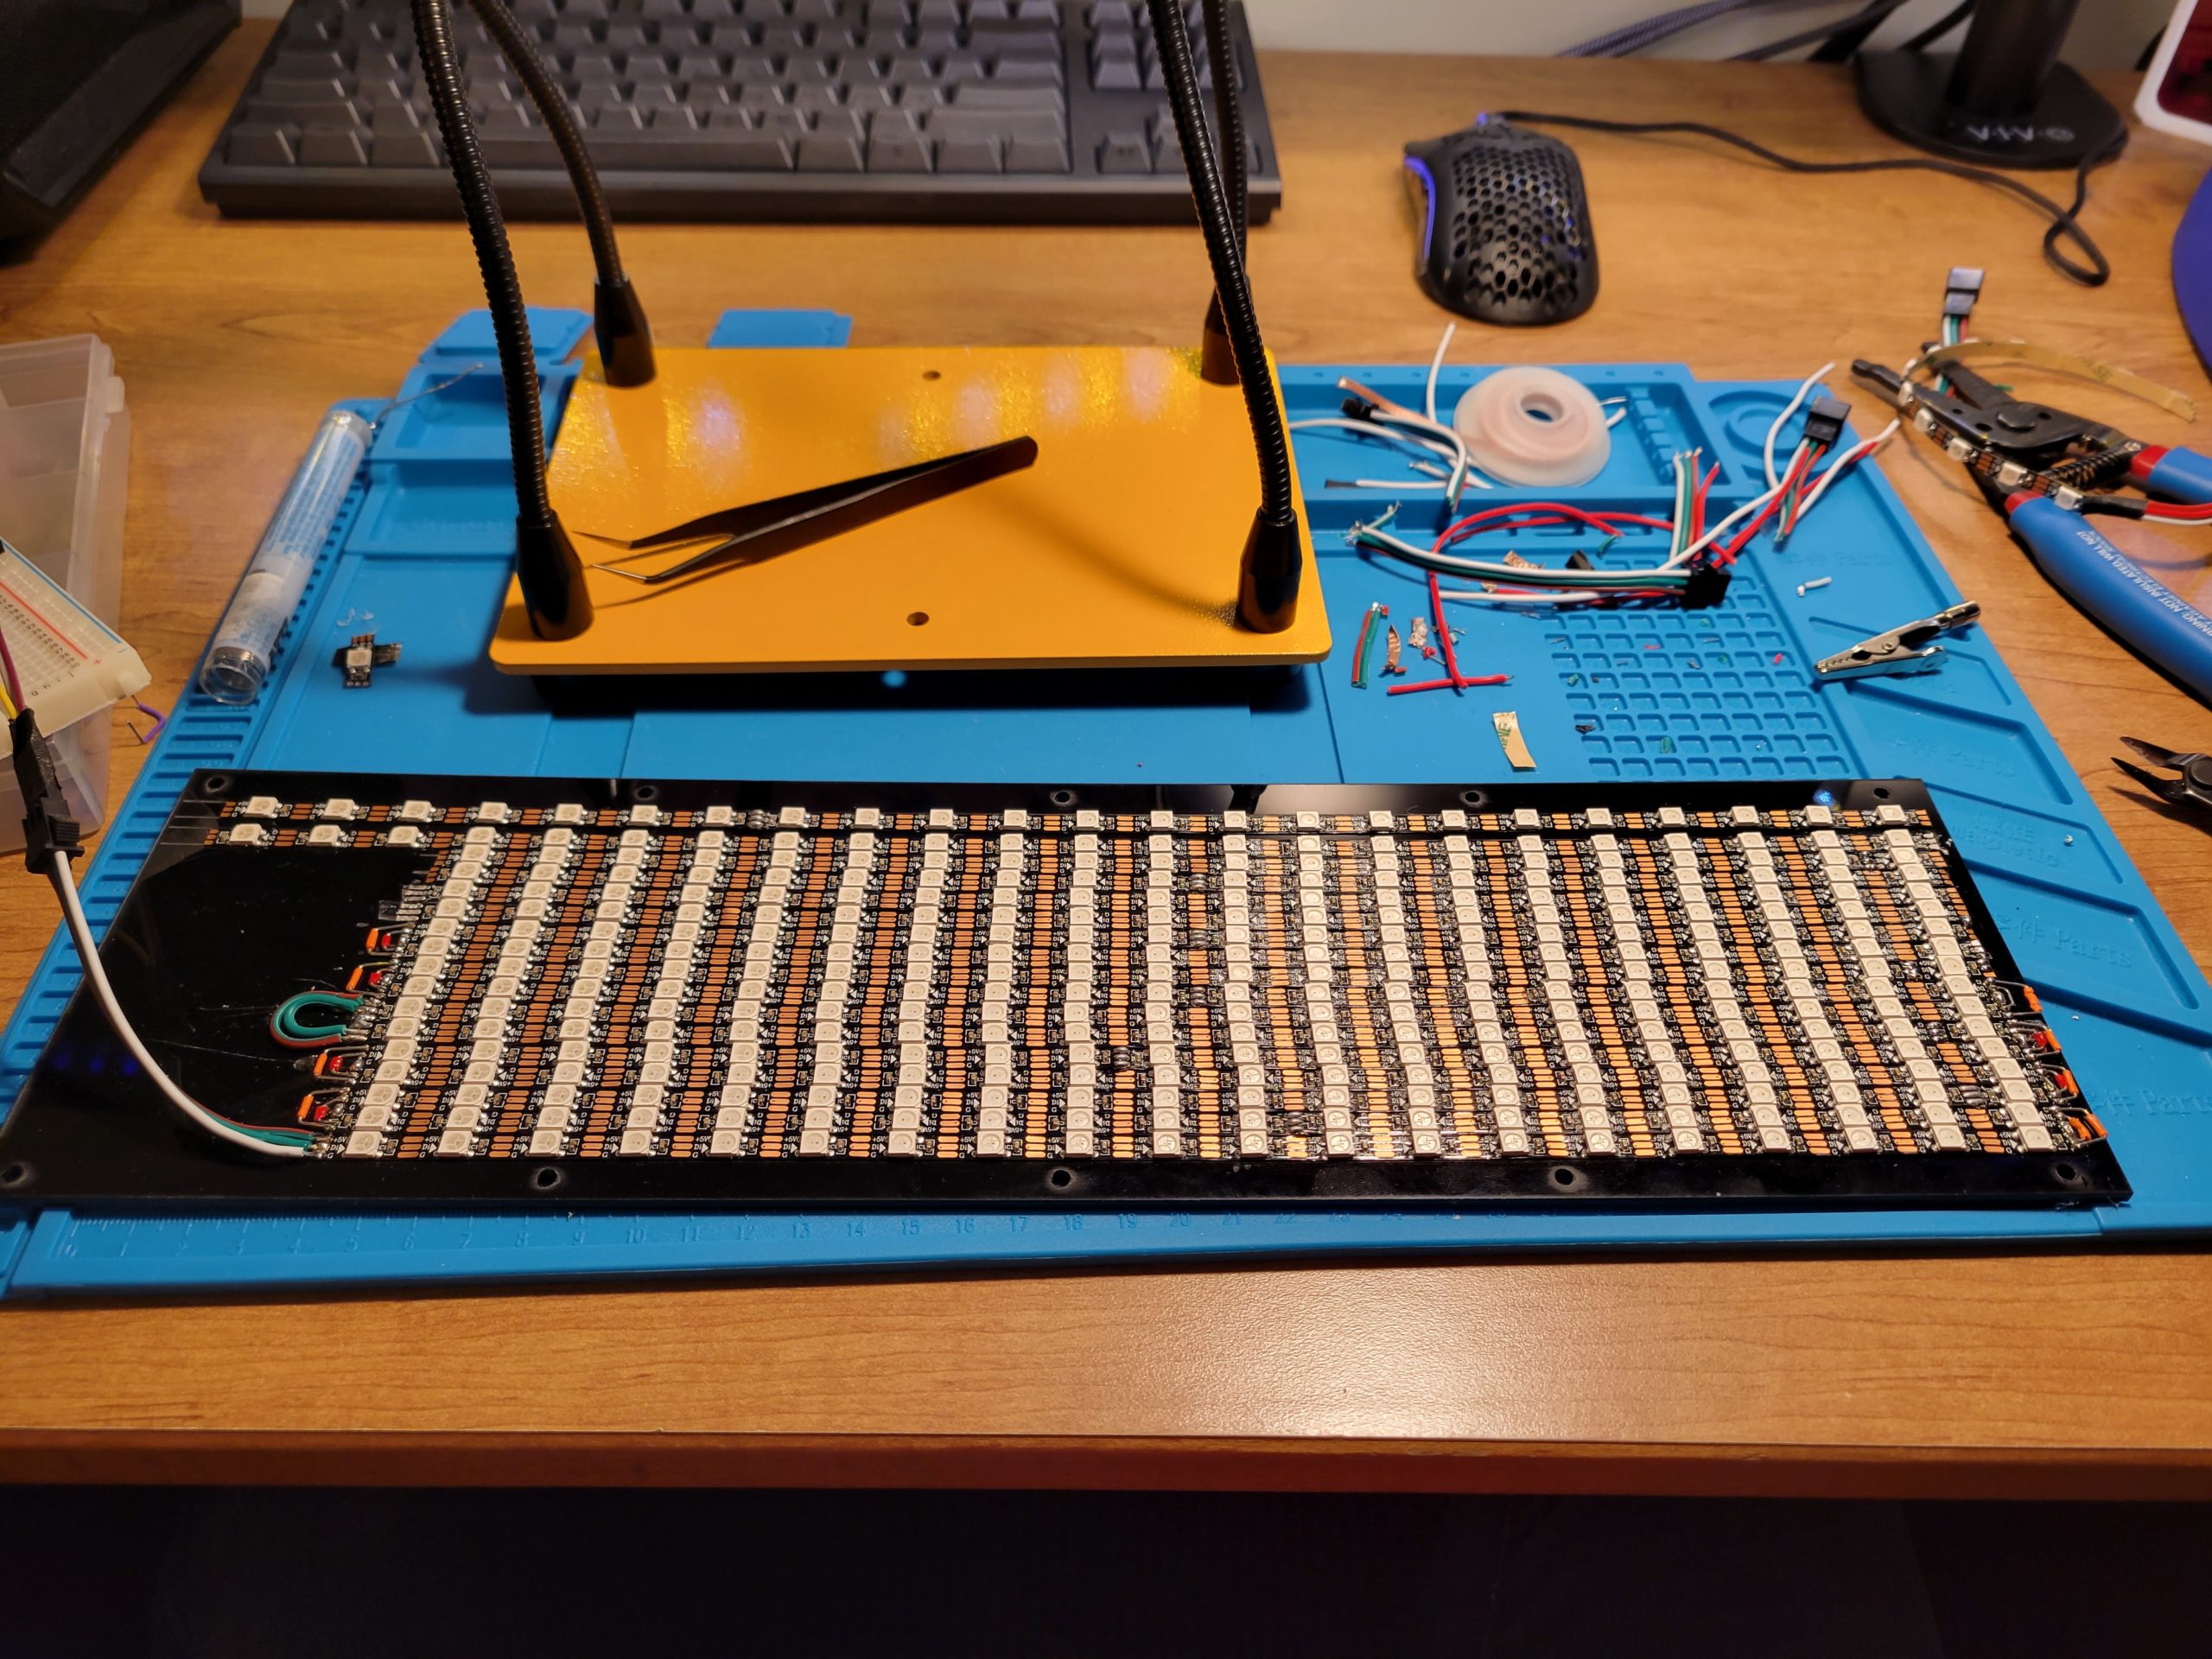
After cleaning up the layers and assembling everything, I started working on the code. The LEDs are controlled using the FastLED library, with all custom effects.

Finishing the code was the last step! Once I had all this finished, I decided I didn’t want to have wave layers, so I didn’t cut them. I need to re-cut the top panel to fill in the gaps for where the waves would go.
I really enjoyed this project, and I loved seeing what everyone else made! Thanks for a great term!