For my light art project, I wanted to combine my passion of photography and interest in portraits with the light art technique of light painting. Light painting is the process of long exposure shots in a dark setting, while moving a bright light around to create trails and beams of colored light. To prepare for this project, I acquired a few materials to help with the light painting effects. I used my own camera, a Canon EOS RP mirrorless with a 24-108mm zoom. I also ordered a light wand to use for the light painting part, and an LED mini-spotlight for backlighting during the portrait shots. My last material was a set of three smoke grenade flares to explore atmospheric light painting in an outdoors photoshoot. You can see all the materials I used for the project in the photo below:

Initial Failure:
I began by experimenting with the smoke grenades I got and tested them in institute park late at night. This was not as effect a technique as I hoped it might be. At first, because the subject was surrounded by smoke, the camera autofocus feature could not detect my subject. Because of this, I had to set up manual focus during the first grenade, which wasted most of the time during that one. The smoke was also not as thick as I had hoped, and the wind was constantly moving making the smoke flow around or beneath the subject I was trying to capture. Most of the photos ended up blurry and not with the effect I was trying to create. The two best photos I took with this effect are shown below:


After that, I went indoors to the multimedia lab in the bottom of fuller, and used the green screen wall as the background while turning off all the lights in the room. I set up the LED spotlight as a backlight for my subject and moved the wand around different parts of my subject while experimenting with color schemes and shutterspeed/exposure settings. For most of the light painting, I wanted the beam of light to accent or highlight certain parts of the subject without taking up too much distracting space from the portrait. I practiced with tracing around different facial features, making crossing lines across the screen, or hiding parts of the face behind light. Most exposures ended up lasting between .5 to 1.5 seconds long depending on the complexity of the light beam I wanted to create. However, the first round of photoshoots often came out blurry and with unwanted light artifacts. Below are some photos from my first photoshoot:
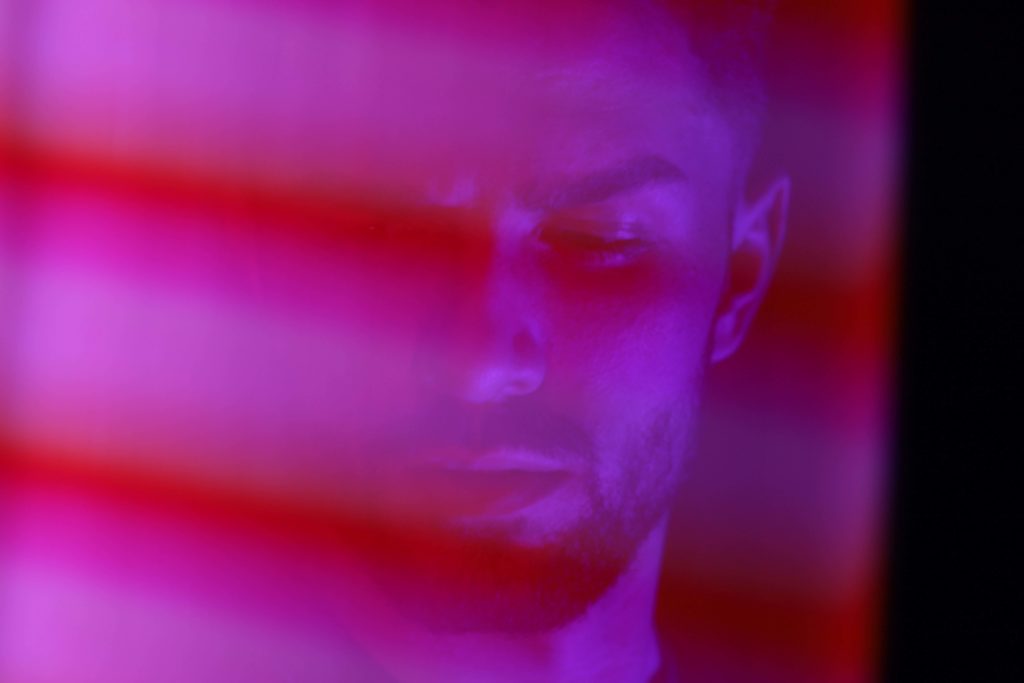
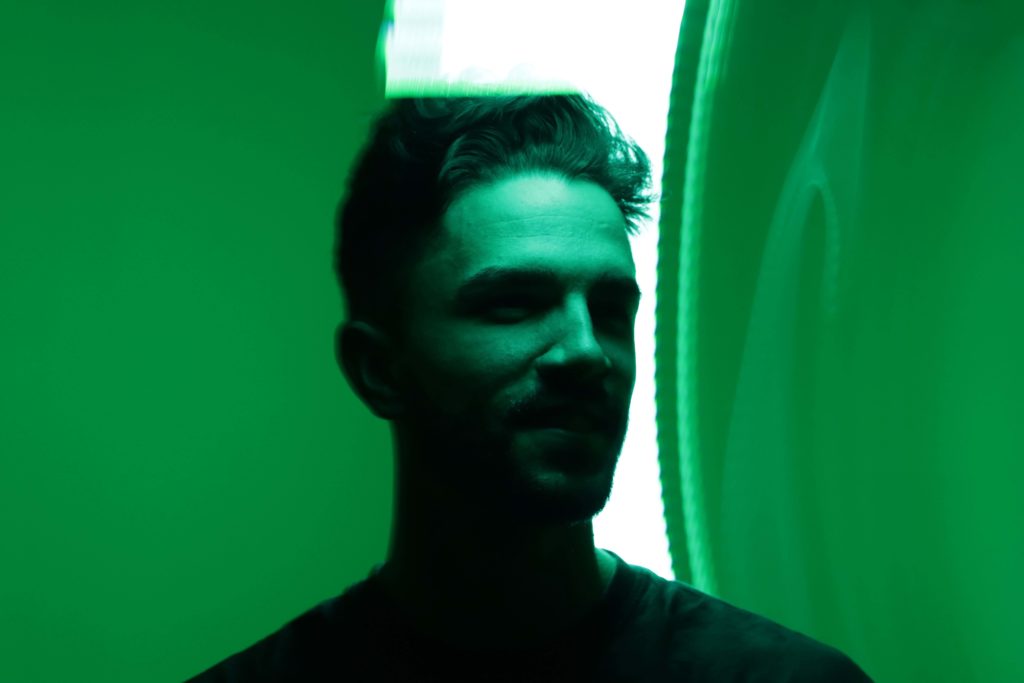


For my second photoshoot, I repeated my technique for the first photoshoot but used slightly shorter exposures to improve blurriness. I also used more manual focus to avoid the light distracting the autofocus of the camera. I tried to find a better balance between light painting and the portrait, rather than the light either being too distracting or not interesting enough. After the final photoshoot, I took the photos I liked and edited them in photoshop. I made all the photos into a 1:1 aspect ratio since I like that size when presenting a series of photos. I also found it a good challenge to focus on what parts of my image I wanted to show, what parts I didn’t, and how I wanted to balance the subject and the negative space. I used some multiple layer corrections of different camera exposures I took to further reduce the blurriness during post-production. Finally, I did basic color correction and tone mapping to increase contrast and darken shadows to ensure the primary light painting and subject lighting were the only colors present in the image. I then took my favorite of the final photos and published them in a google photos album that can be seen here:
I have also attached some other photos from the final photoshoot below:


I would like the thank Professor Rosenstock for the insight and support during this practicum as well as my friend Nick Fleury for willing to continually model for me late at night with his awesome beard.