Final Project/Documentation
Charlie Brooks
My finished work, titled “Suspended Paradise”, was a composition using light, colored acrylic, wood, and monofilament line:

The work consists of a number of laser-cut acrylic shapes suspended inside of a wooden base. There is a flashlight located behind the shapes that casts a “shadow” on the wall, creating an image of a tropical beach, complete with a sunset and palm tree.

My work was intended to be viewed from behind, aiming to capture both the acrylic and the resulting image in one frame. My goal from the beginning was for the hanging acrylic to be visually pleasing on its own, meaning that the work could be appreciated with or without the light. As a part of this objective, I wanted to use a clear acrylic base so that the acrylic could be seen, but the acrylic sheet was too flimsy to be a viable option. The height/relationship/positioning of the acrylic pieces was vital to the quality of the resulting image.
I maintained the position of the wooden base on the table by taping it down. There is a groove in the table top that perfectly cradles the flashlight, and I centered this groove on the base so that the image would be centered. The wooden base also “framed” the resulting image, creating a perfect rectangle of light for the painting to sit in.

If I could make changes to my project with access to more resources (larger budget, designated site to install a work, more time), I would suspend the acrylic from either the ceiling or a clear acrylic base so that they could be appreciated without the light. Also, I would make the entire piece larger so that the fishing line isn’t as significant in the final image. Finally, I would like to have used more individual acrylic shapes. I limited myself somewhat when I only made a 5×6 grid of holes to suspend the shapes. If hanging from a ceiling, I could position the pieces in an unlimited number of positions, and could use a larger number of pieces. Also, I could control better the distance from the light to the acrylic to the wall, meaning I could scale the final painting to my liking.
Overall, I am happy with how my final work came out. The final image had a nice balance of abstract qualities and defined shapes that properly conveyed what I intended for the final image to be. The process of problem solving over time helped ease the stress when it came to final assembly, as I knew that my concept worked and I just needed to assemble it.
Polish and Present
Charlie Brooks
To finish my project and get it ready for presentation, I first had to decide how to suspend my acrylic pieces. I originally wanted to use a clear acrylic, but I found that thin acrylic sheets have too much give and would bounce or sag under any weight, especially when suspended. This led me to use wood for the base of my light painting:

Once I had cut my MDF board into the appropriate sections, I used a drill to make a grid of holes in the center board that I would use to suspend my acrylic and ensure that the pieces were all square to the light. After drilling the holes, I screwed the boards together to get my final base:

I used the laser cutter to cut out an assortment of acrylic shapes in a variety of colors. I had made a preliminary map of the final image, trying to divide it into distinct shapes that I would then cut out. I wanted to cut an excess of shapes so that I would have as much flexibility as possible when assembling my final image. Once cut, I tied strands of fishing line to each piece:

I decided to use small binder clips to quickly hang the acrylic and easily adjust the position/height of each piece. These clips would hold the ends of the fishing line on top of the base:

To make sure that my base didn’t move, I taped it to this small table that I found in the lab. This table also had a groove in the wooden boards that perfectly aligned my flashlight (light source) and made sure it was in the same position each time.
With all of this setup, I just had to spend ~6 hours assembling the acrylic into the proper positions, constantly checking the resulting image and making adjustments. I toyed a lot with which pieces would be closest to the light (which makes their “shadow” larger) and further away, trying to get the scale as perfect as I could.
I think the final image came out nicely. To see that, you’ll have to check out my Final Documentation post….
Polish and Present- Lauren Getz
Today I’m going to take you on a journey from chaos to serenity.

This is how our scene begins, with various lights and diffusions spread out in a battle field of light art. I had work lamps, emergency lamps, desk lamps, various light bulbs from halogen to LED. There was cardboard, paper, tinfoil, and at one point a sweater.

I began cutting out shapes to try and create something interesting to look at, and to me, what’s more interesting than an optical illusion. My next thought was which one would be best illusion ed as a shadow. I decided on the classic two faces or one vase illusion.

So I got my cut out, built my white box, and picked a light source. After all the experimentation I ended up using a simple flashlight, but it gave the best result surprisingly.

This is what the image looks like up close, the flashlight uses 3 LED’s which produced some dimensional shadows. I think this really illustrates the idea behind how you don’t always know what you’re looking at, when you can only see the effect of the shadow.

This was my final set up, I cleaned up where the light was coming from, choosing to secure it from the top with magnets. I also hung the cut out from above so I could control where my shadow was coming from in order to easily transport it in my car 45 minutes.

I made a periscope to make it more interactive with the viewer. It serves to show a peek of what is actually causing the shadow when the viewer only seeing the shadow from above wouldn’t know. There is an additional surprise to behold with the periscope. I did not attach it because I wanted people of various height to be able to interact and explore the space from which ever angle they chose.

This is a view down the periscope which didn’t turn out very well. I am ultimately happy with my project, I think it was a rough road getting here, but all turned out well. I’m really glad I went with a minimalist approach and stripped away all the unnecessary steps I was trying to take and completed a unique concept idea I think works well.
Final Week: Finishing and Presenting
I spent this week putting everything together, breaking it down, then setting it back up on campus in the lab.


I ended up saving most of my lighting-work for this week, which was likely a mistake. I had tested how much work I could get out of each strand of lights I was using, but hadn’t set them down and worked them around the piece until a couple days ago. As it turns out, 50 feet of lights isn’t as big as it sounds when you work with 18 cubic feet of space and have to double back when you drape it down without touching the base. I was also looking online for an umbrella that could realistically fit on a 2-foot square, but that was fruitless, so I ended up working the lights in and around a large boot.


I ended up doing a lot of work with what I had on hand: the lights are all taped onto the frame and base (mostly because I need to be able to take the lights off after we’re done), and I used tissue to diffuse light to a pretty good effect. If there’s one thing I would have liked to do better, it would be the size of the frame. I probably would have been better off cutting off another foot or two, freeing an upwards of 6 or 8 feet of lights to drape down. As it is now, I worry I may look sparse.
Polish & Present
Last week I made a rotating light-painting video by keeping the RGBW LED on the arm constantly on, only having the W component active.
This week I altered the behavior of the LED and tested different lighting patterns from the same perspective. First I tested blinking the LED on and off at a constant rate to see how only a partial image compared to the full image. Initially the LED was set to blink every 1 sec.
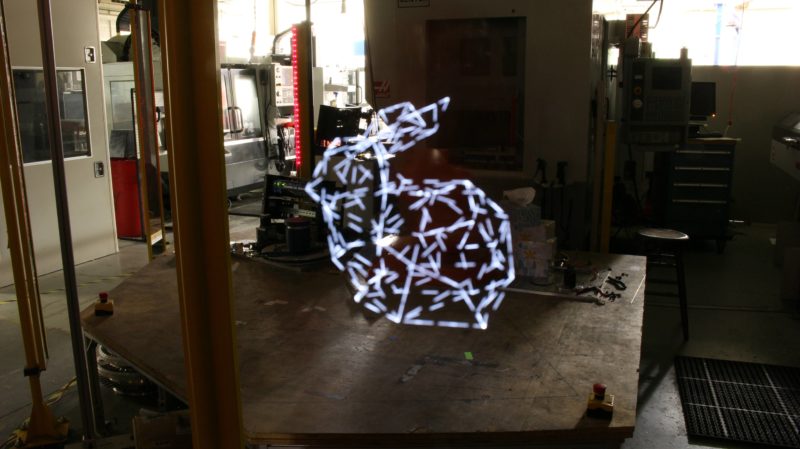
While the original image is still visible the large number of separate lines makes the image look very busy and messy. To change that effect I increased the blink time to 2 sec.

Then I increased the blink time to 4 sec.

Then I increased the blink time to 10 sec.

The original image is still discernible but the the new image is less complicated with simple lines that don’t completely connect. This style with less lines and connections is more abstract and less ridged while still remaining geometric due to the the straight lines and harsh angles.
Next I tried slowly increasing the brightness of LED repeatedly in various cycle times to see if a slow fade in could soften the harsh beginning of the lines. Initially I tried a cycle time of 2.55 seconds.

Compared to the blinking image with a cycle time of 2 sec, this image seems to have softer transitions into the lines. I then tried a cycle time of 6.5025 sec.
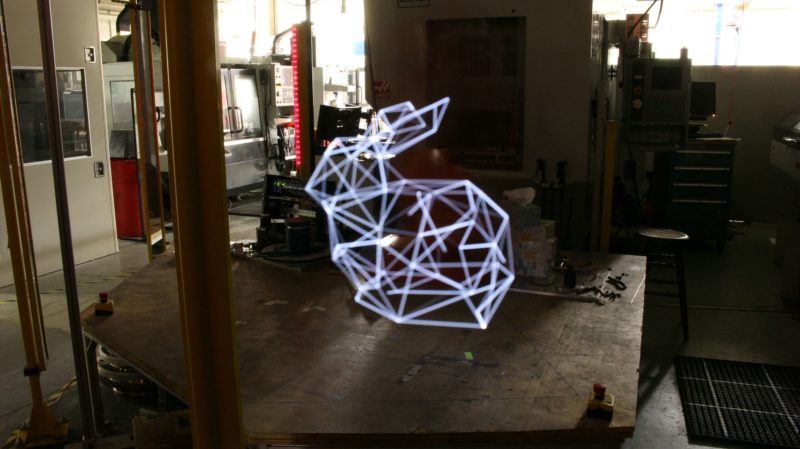
Then I tried a cycle time of 25.5 sec.
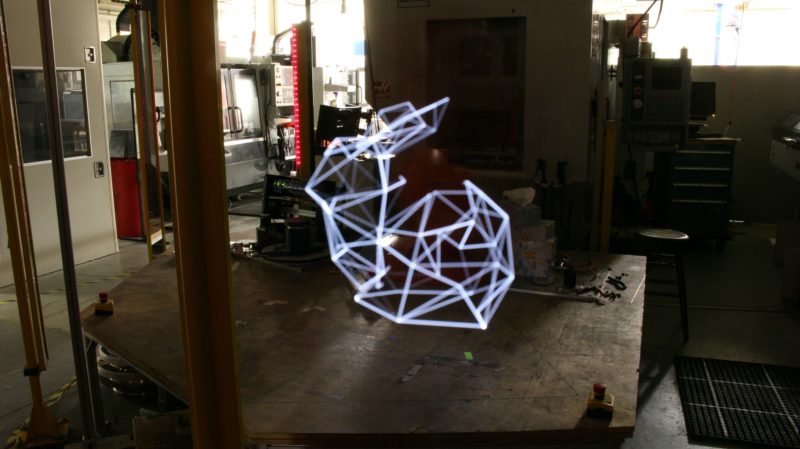
As the cycle time increase some parts of the image become brighter than others highlighting different parts of the image rather than having a single brightness.
Lastly, I tried changing the color of the LED using the RGB components of the LED by randomly setting each component every 1 sec.
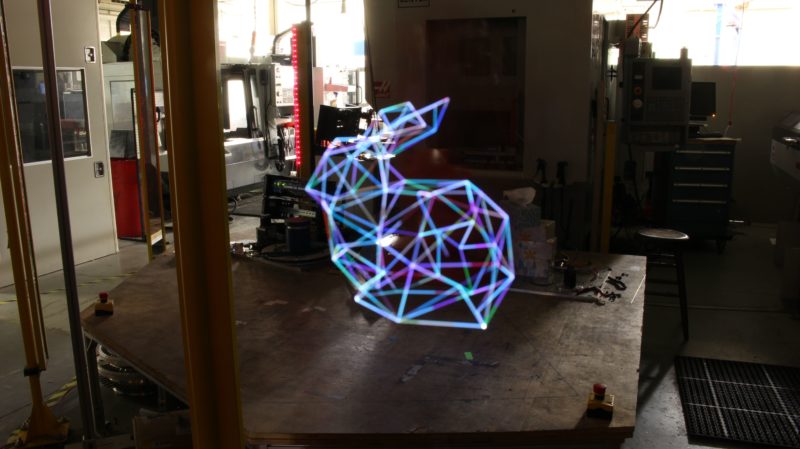
The color was able to add more dimension to the image, but a less random approach could improve it further and add focus to different parts of image.
Bioluminescent Art (Final Results)
Hello Guys!
It has been quite a journey, with many obstacles and unforseen challenges, but I have produced glowing green & red bacteria art in petri dishes.
Follow this link to watch my art grow, to watch my art glow:
Here is a wordless version:
How I did it:
- Receiving a generous donation of green & red florescent bacteria from Professor Farny at the Goddard Bio Labs, I went to my home lab in Gateway Park. I took a small colony from each bacteria plate & put it in liquid LB media. I then labelled my new paint & set it to grow at 37C overnight.

Liquid Bacterial Cultures - The same day, I also mixed up & poured agar plates to grow the bacteria on. This process took 2-3 hours, as I had to heat up the agar to sterilize & gel it (autoclaved).
- The next day, I took my fully grown paint, my plates, some sterilizing ethanol (70%), wipes, and a paintbrush to a quiet lab benchtop and set to work. I sterilized my paintbrush, dipped into my liquid bacteria cultures, and very carefully ‘painted’ on the agar plate. The bacteria cultures dried on clear, so I had to line up my designs underneath each agar plate carefully.

Plate Painting Setup - I repeated this process, each day adding more bacteria to expand the image with the bacteria’s growth phase.

Painting Plates Continues - I would also package up my bacteria plates each day in a SAFE styrofoam box, and transport that to the Goddard Labs, which have a UV-Darkreader. This wonderful machine allows one to place multiple agar plates next to each other & dose them with the correct wavelength of radiation to make the florescent bacterias really glow! Here is some of my agar art illuminated:

Final Viral- The Infection has fully spread! 
Bacteria Bird *May also be a jellyfish when viewed upside down* - Sometimes, if I was working on only part of an image, I would store the other plates into the fridge to avoid unwanted growth or death of my art project.
- Finally, on the last day of growth, I created a GIF to show the growth of my art at a much faster rate.
In addition to the above art, I also created another GIF of Bacteria Bird Growing:
Thank you all for making the class projects so diverse & interesting!
Polish & Present
Over the past week I have been working on improving three parts of my project.
The first part was improving the light that shines through the gems as the stand alone flashlight was leaving a big white spot in the middle. I bought a new light source to use as shown in the picture below. This light source did not work as hoped as instead of either staying as one color or at least shining one color at a time, this light shine the three colors in multiple patterns. While this light looked cool underneath the clear gems, it did not do well with the colored ones.

I decided to stay with the flash light as the light source but try to improve the light some how. This lead me to try putting various things in front of the light to defuse it. Through this, I found the effect of putting a bigger gem in front of the light gives one similar to a kaleidoscope without needed the gems to move around much.

The second part was creating a somewhat nice stand for the dish to sit and rotate on. I started by trying to design one that sat at an angle to make the gems move around more when rotating the dish. This caused problems as the dish was not as easy to rotate when at angle and would cause gems to either fall into the wrong section or spill out of the dish entirely. (You can find these gems all over the floor of my room now) Another problem with the stand being at an angle is the amount of light it lets through as it was hard to tell how much it was letting through.

I decided to make the stand with the dish only at a slight angle for multiple reasons. The slight angle allows for some gem movement to work like a kaleidoscope and combining it with the effect described previously gives a kaleidoscope effect to the projection without removing the norther lights style feeling. Having it at a slight angle made it easier to control the amount of light that was getting through the cutout in the stand as the angle did not have to be factored in. It also made building the stand easier as I no longer had to cut metal wires as I was very bad at it. The new stand is made from cardboard which rests on top of foam to secure the flashlight in place.

The last part was creating the gem mixes. I had ordered bigger gems from amazon to mix up the mixes. However, the gems that I was sent were not what was advertised as they had metallic backs on them which makes them unusable for this project. There was not enough time to get new gems so I played around more with what I had. I tried to make mixes to fit different feelings. This required testing the mixes as I often put too much of a clear based color (clear, yellow diamond, light pink, light blue) into the mix, which let too much of the original light source color show.

The final mixes that are used in the main dish as shown below with some (bad) names that I gave them based on how they look in the dish and not how they look projected. Playful Pink is a mixture of half salmon pink, and half dark pink that has the goal of making the viewer feel playful based on the pink colors it displays. Fire is a mixture of yellow diamond, salmon pink, and red. This mixture is meant to make the viewer feel warm and passionate. Meadow is a mixture of yellow diamond, light blue, and green playing on the peaceful feeling of a meadow. The last one is Space which is a mixture of light blue, purple, and dark blue to create a cool environment for the viewer.

Polish and Present
I “play tested” the laser and OSC control using phone accelerometers with a few students. There were quite a few iterations and accessibility issues I ran into last minute:
Test One:
Three phones controlling a single pitch. Created a sum of float values from each accelerometer (X, Y, Z) instead of each axis controlling a different pitch. This worked pretty well, although the scaling was a little off. Having three students control a single pitch caused them to interact more with the laser’s shapes, as they honed in on combinations of frequencies that made more interesting shapes. I generally liked this approach, but the issue was OSC applications on iOS that are free and easy to setup are practically impossible to come by.
This is a big problem for class demonstration. I can’t spend a lot of time setting up the OSC routing for multiple applications, particularly the iOS variants which are convoluted.
That leads me to solution #2:
Have only two phones control two pitches via (X, Y) accelerometer data. By ratio, two people in class should have android phones that can install “oscHook”, which is free and very easy to setup. This gives two users four pitches total to manipulate. Four pitches seems to make the most complex shapes while still allowing for the more simple shapes to occur (from unison notes).
I can also guarantee with “oscHook” that the OSC packets being picked up by Max through the [udpreceive] object are the same routing. They all are sent as “/accelerometer/raw/x” and so forth.
Third, but failed idea:
Add another phone and user that could control the volume of the other two user’s frequencies. This sounded cool because amplitude controls the size of the projected shape. In practice, it was underwhelming under even half volume — the third user would essentially make it look less interesting by manipulating the volume. I trashed this idea.
Polish (or lack thereof):
I know there’s a more aesthetically pleasing setup than the balloon/mirror cupped over the bluetooth speaker I am using. I wanted to create a housing that hides the speaker and LED laser, but because I bought an LED that is button operated instead of a switch, I have to be able to physically tape over the button to keep the laser on. Housing would prevent me from doing this, so I have to leave the speaker and laser out. This is a huge bummer, and if I further iterated on the design I would buy another laser with a switch, but they go for about $35 on Amazon and I’d have to wait for shipping.
Surprisingly, the laser has great definition even from across the room in the art lab. It was easy to set it up to project onto the green wall around chest height. I think this will have to do for demonstration/presentation.
Summary:
After play testing I feel confident in how the laser operates through OSC control and accelerometers, and I’ve accounted for difference in operating systems and apps by hopefully only selecting android users to participate. The laser is set-up in the art lab at a reasonable distance and height for viewing.
I plan to record video of it in action for my final documentation.
Everything Working
This week I had to buy new materials to create a larger, final version of the model I created for last week. I bought four 8 by 10 canvases. I also wanted to have a brighter light source, so I bought more lights and a base to attach them to. I wanted to create four different color schemes on each separate canvas, and then have four different themes associated with each side. I want all of them to be nature inspired. This week I completed the tissue papering of the four canvases. For next week, I need to create the cutouts to put on the inside of the canvas and assemble the entire piece. I am still trying to decide what I want to put on the top of the prism.
