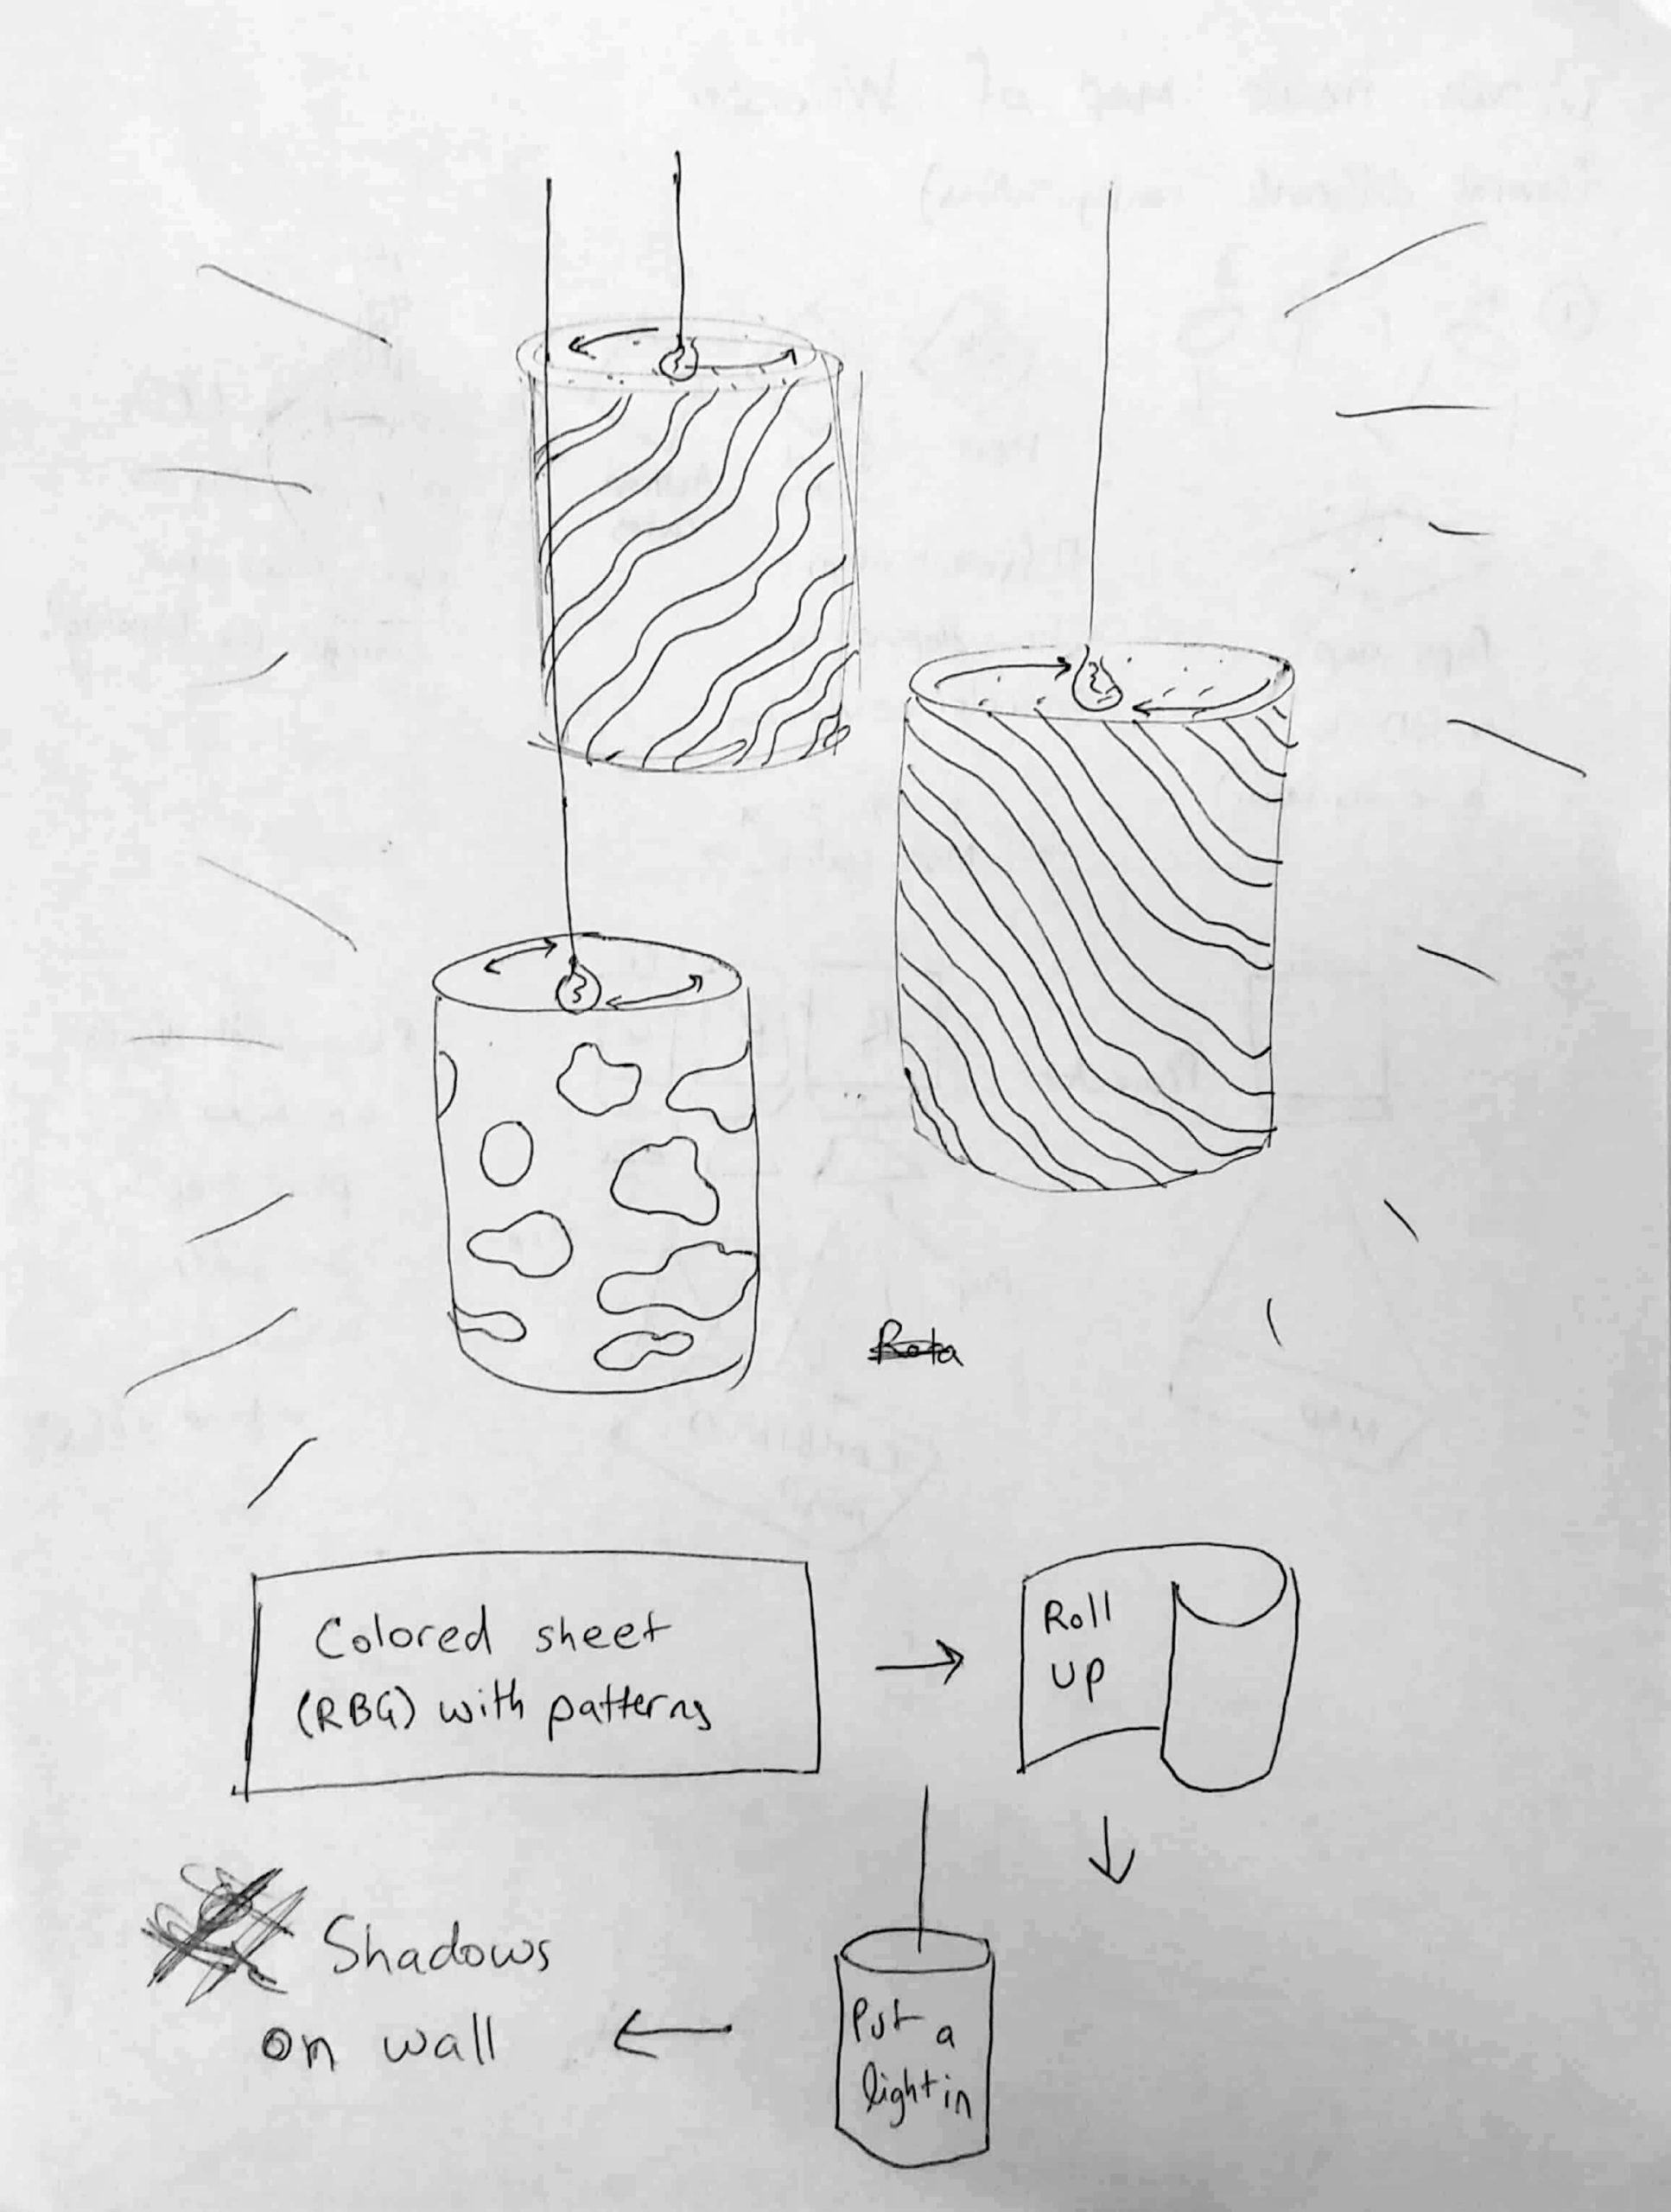
This isn’t a very detailed maquette sadly, in part because I was struggling with the patterns I could have. I will definitely need to do more work on this to get more interesting patterns.
The maquette shows that:
- The resolution should be adequate.
- I can create interlocking patterns with rotating paper.
I still need to figure out the exact drawings I will have. Here’s a list of ideas:
- Abstract patterns, potentially moire patterns
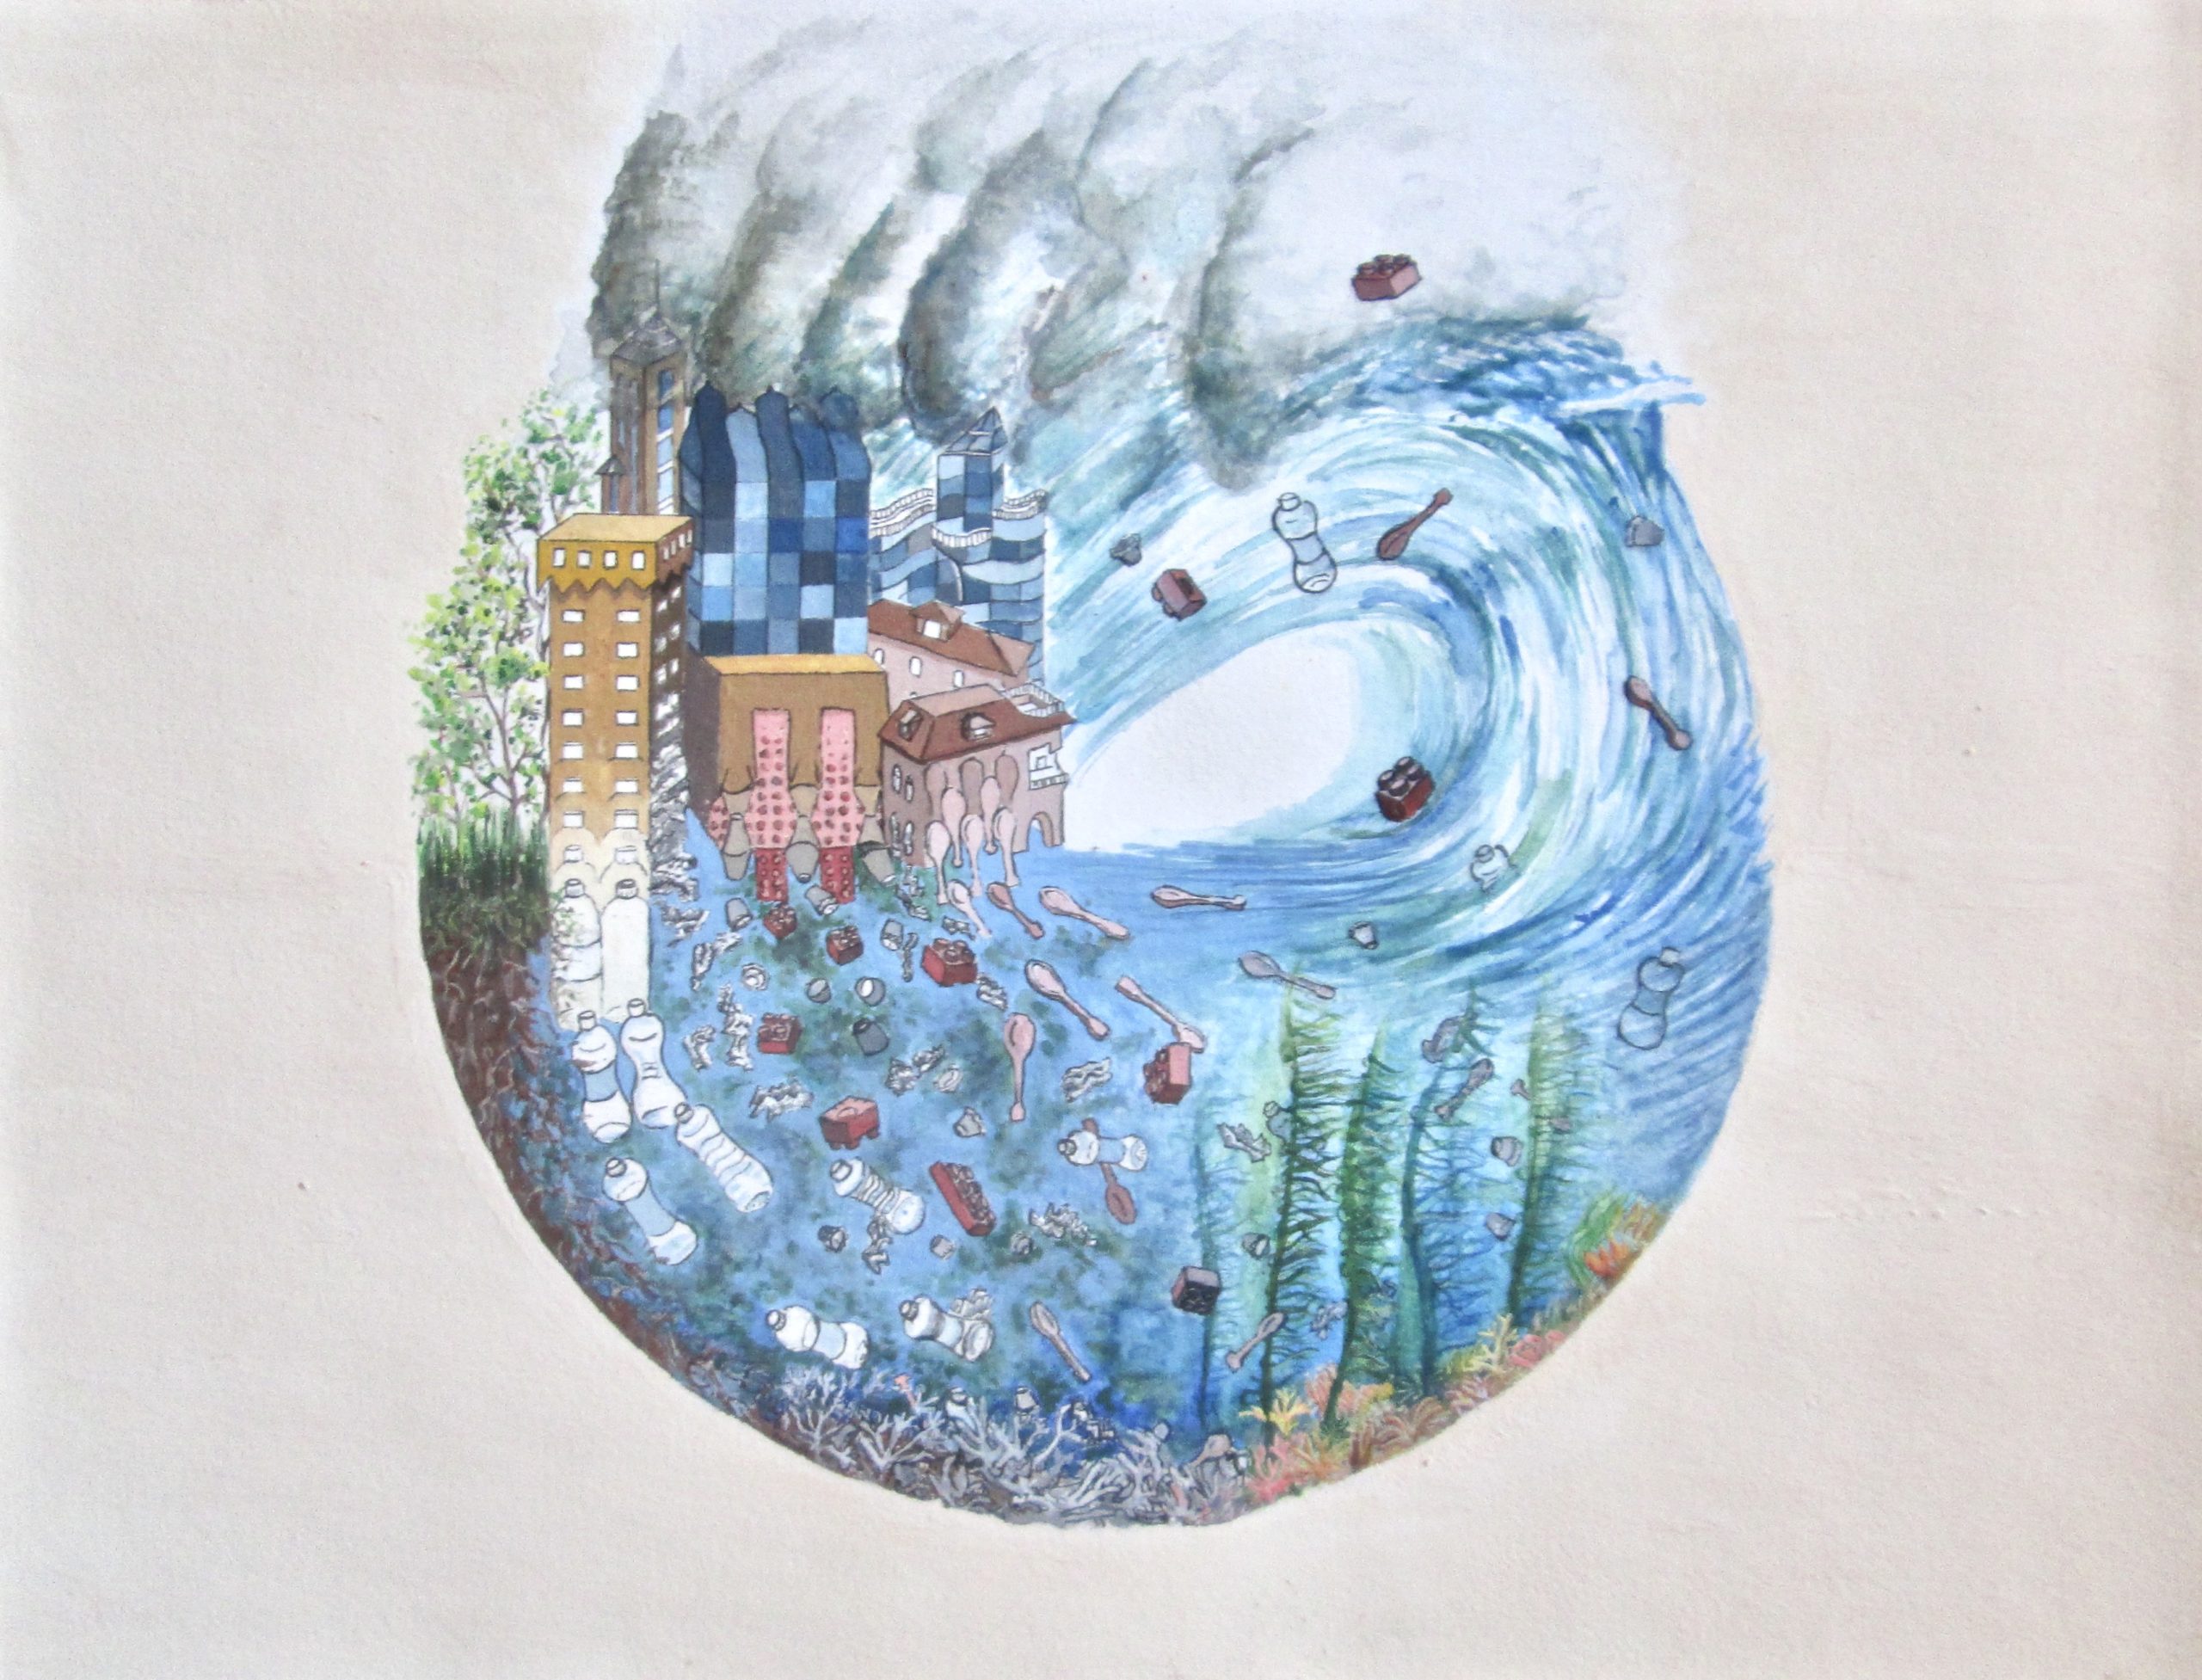
- Repeating loop patterns, maybe like M.C. Escher. I could also use my past work (see the painting on the left)
- An escape-the-room style puzzle where you look at the patterns of light to solve puzzles and unlock things. (kinda time-consuming, obviously, but super fun-sounding!)
I will have to play around with these ideas and the colored paper.
Draft shopping list (all the hyperlinks have been ordered):
- Colored overlays as sheets of paper
- Small halogen bulbs
- Power adapter for the bulbs
- Bulb holders
- Motors (still not ordered, probably need to figure that out. I probably need a design first? I also need to see if I want it to turn by hand or not. I am thinking not, but not sure. Also, I’m not sure how to make sure the lights stay still when the motors are rotating. Either I do some sort of fancy mechanism, or I have the lamp supported from below but the rotating colored sheet from above (or something like that).
Tentative schedule:
- Sep 13-19: Play around and settle on a final concept depending on what you can get with the lights. Figure out rotating mechanism.
- Sep 20-26: Create rotating mechanism, test first drafts (rotating mechanism dependent on parts)
- Sep 27-Oct 3: Create second drafts, try to have a working prototype that could be put up.
- Oct 4-Oct 10: Just finish and make it presentable.
- Oct 11-13: Buffer (which day are we all sharing our light art again? If it’s Monday then scratch the buffer)
Nice to see a video in a post! I mentioned this in class, but I still think it would be really cool to use tissue paper to experiment with overlaying colors and cutting shapes without breaking the bank. I really like your current ideas of the type of drawings to use. You referred to the moire patterns as abstract but, with your concept, you could definitely make them distinct animations! https://ashleyjanelewis.com/2018/10/18/moire-animation-box/
Out of curiosity, why did you decide to go with halogen bulbs over LEDs?
I really think that the little “clues” aspect could be fun, if you had the whole setup turn slowly you could maybe have half of a clue in one pattern and the other half in another so that at some point they line up with each other in the shadows. I know you said it was one of your more “impractical” ideas in class, but I think it could be doable.
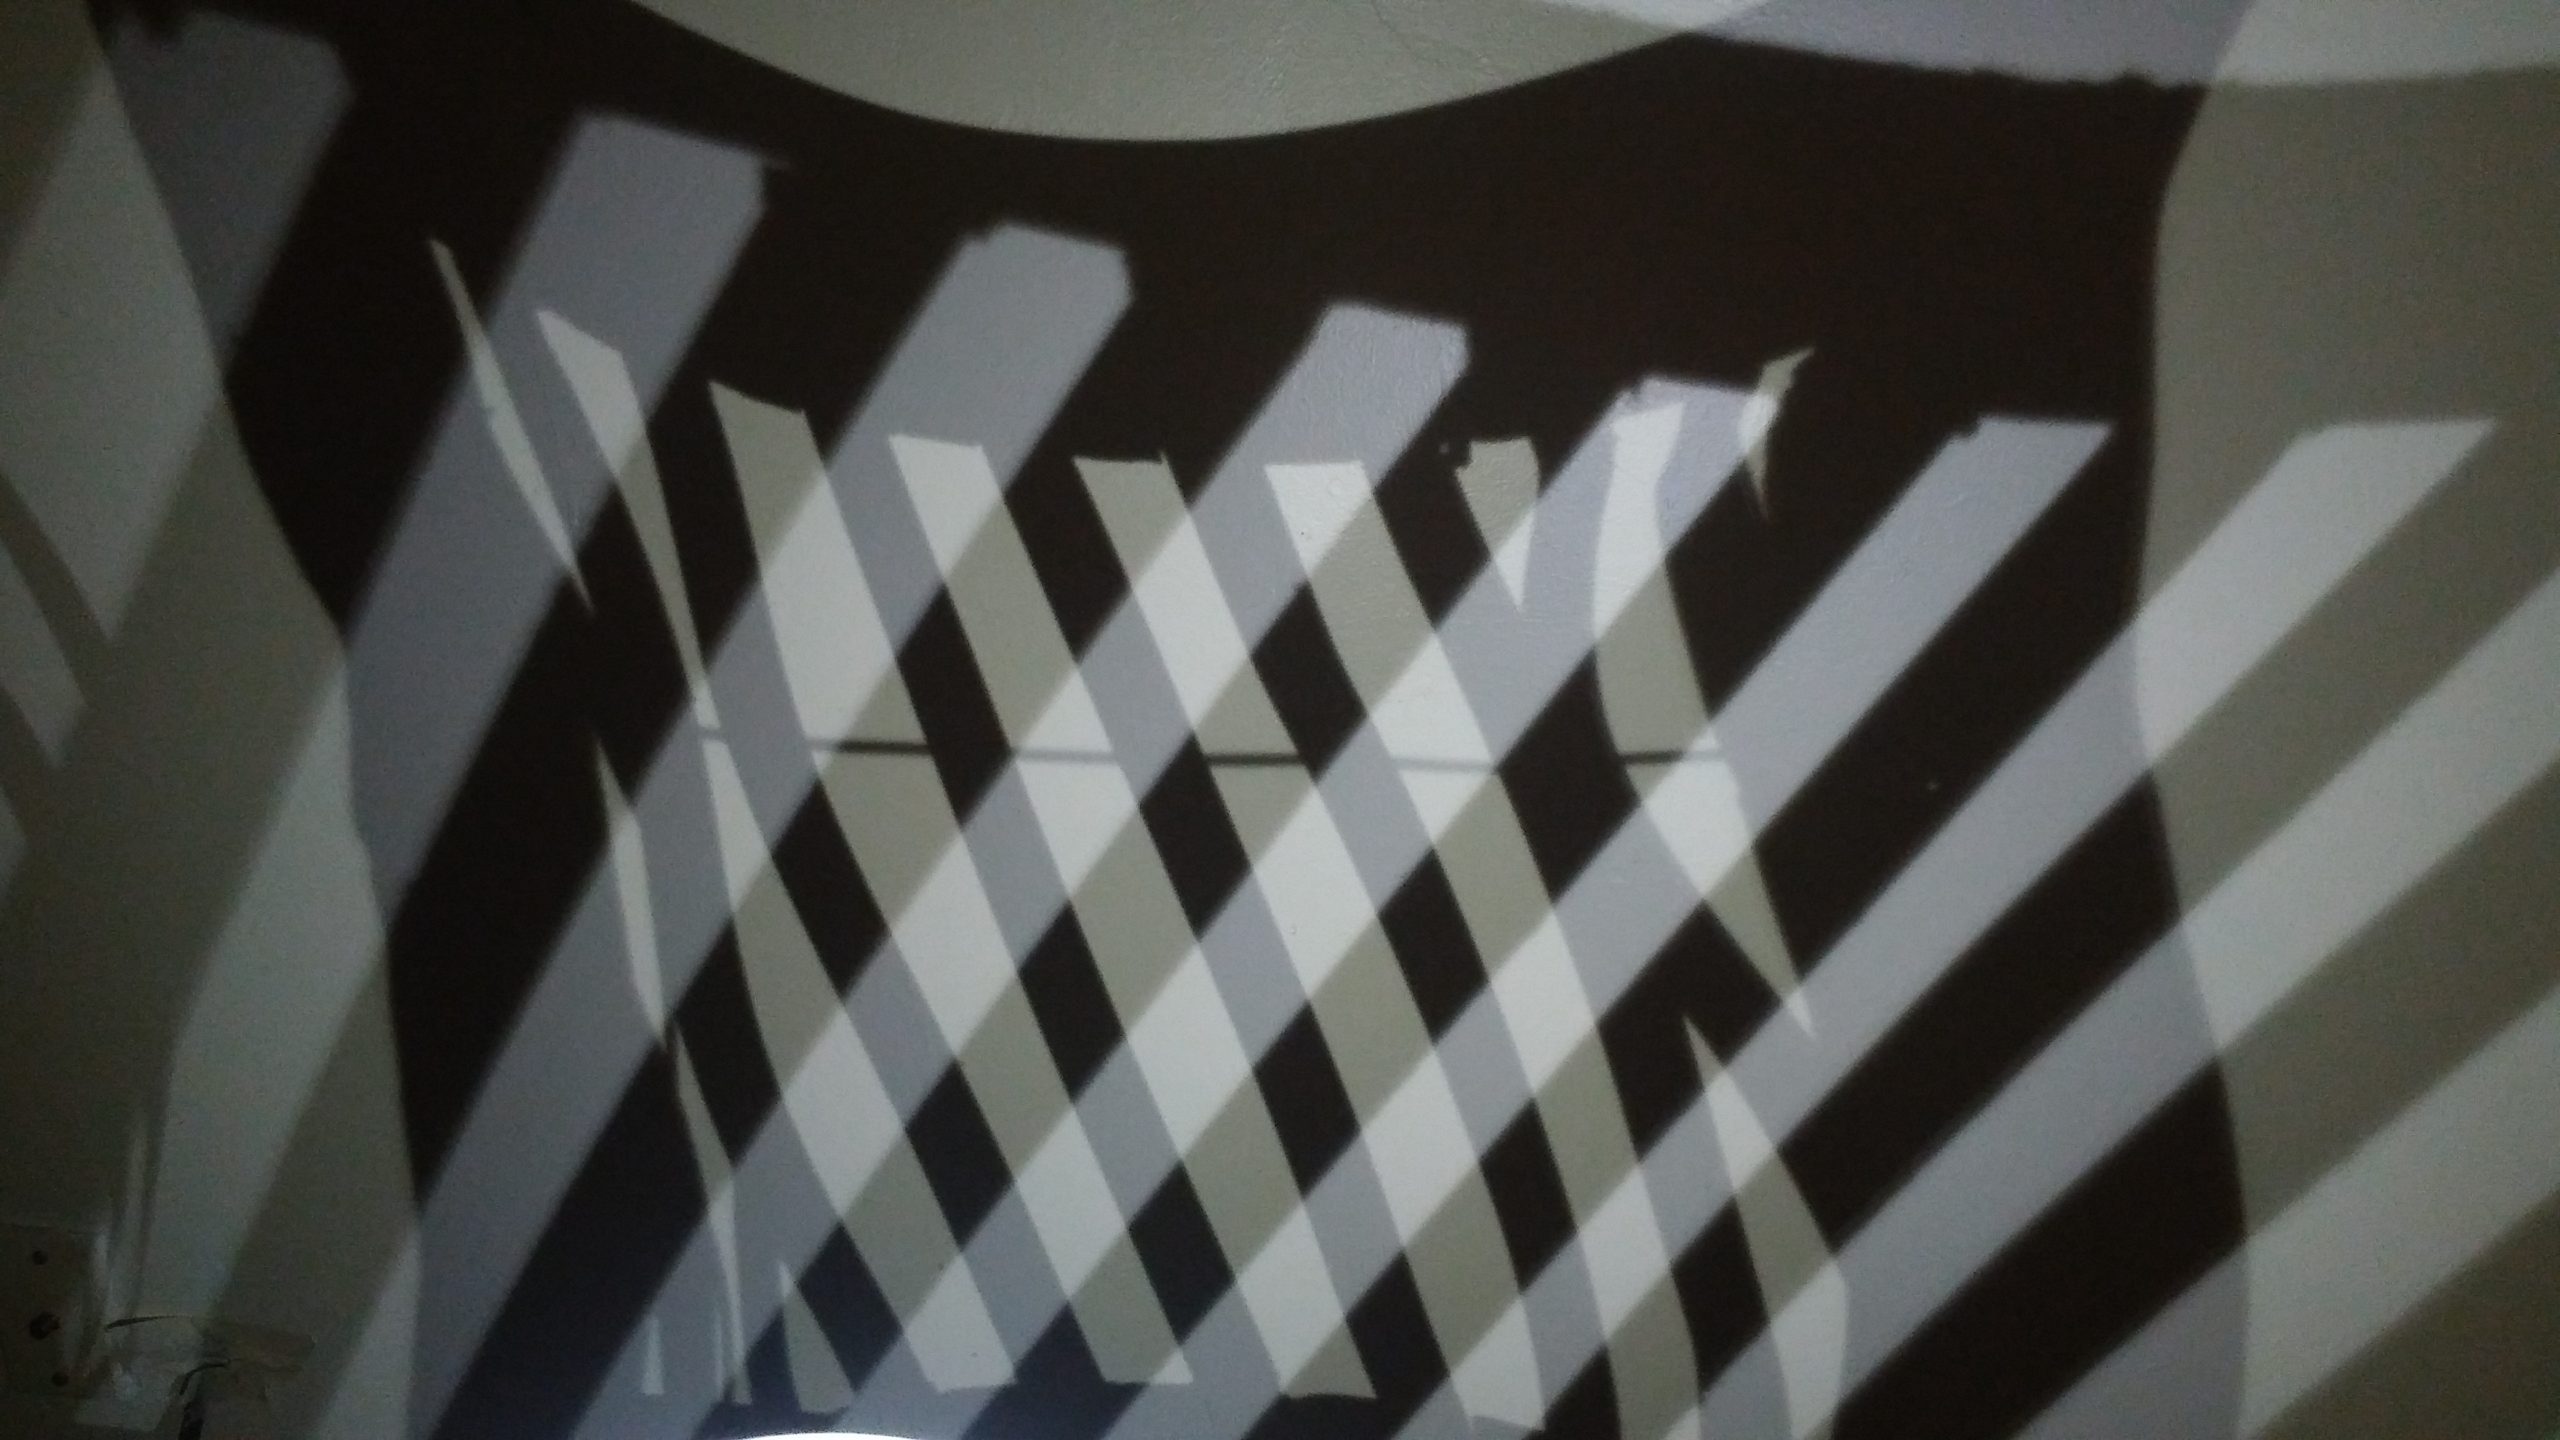
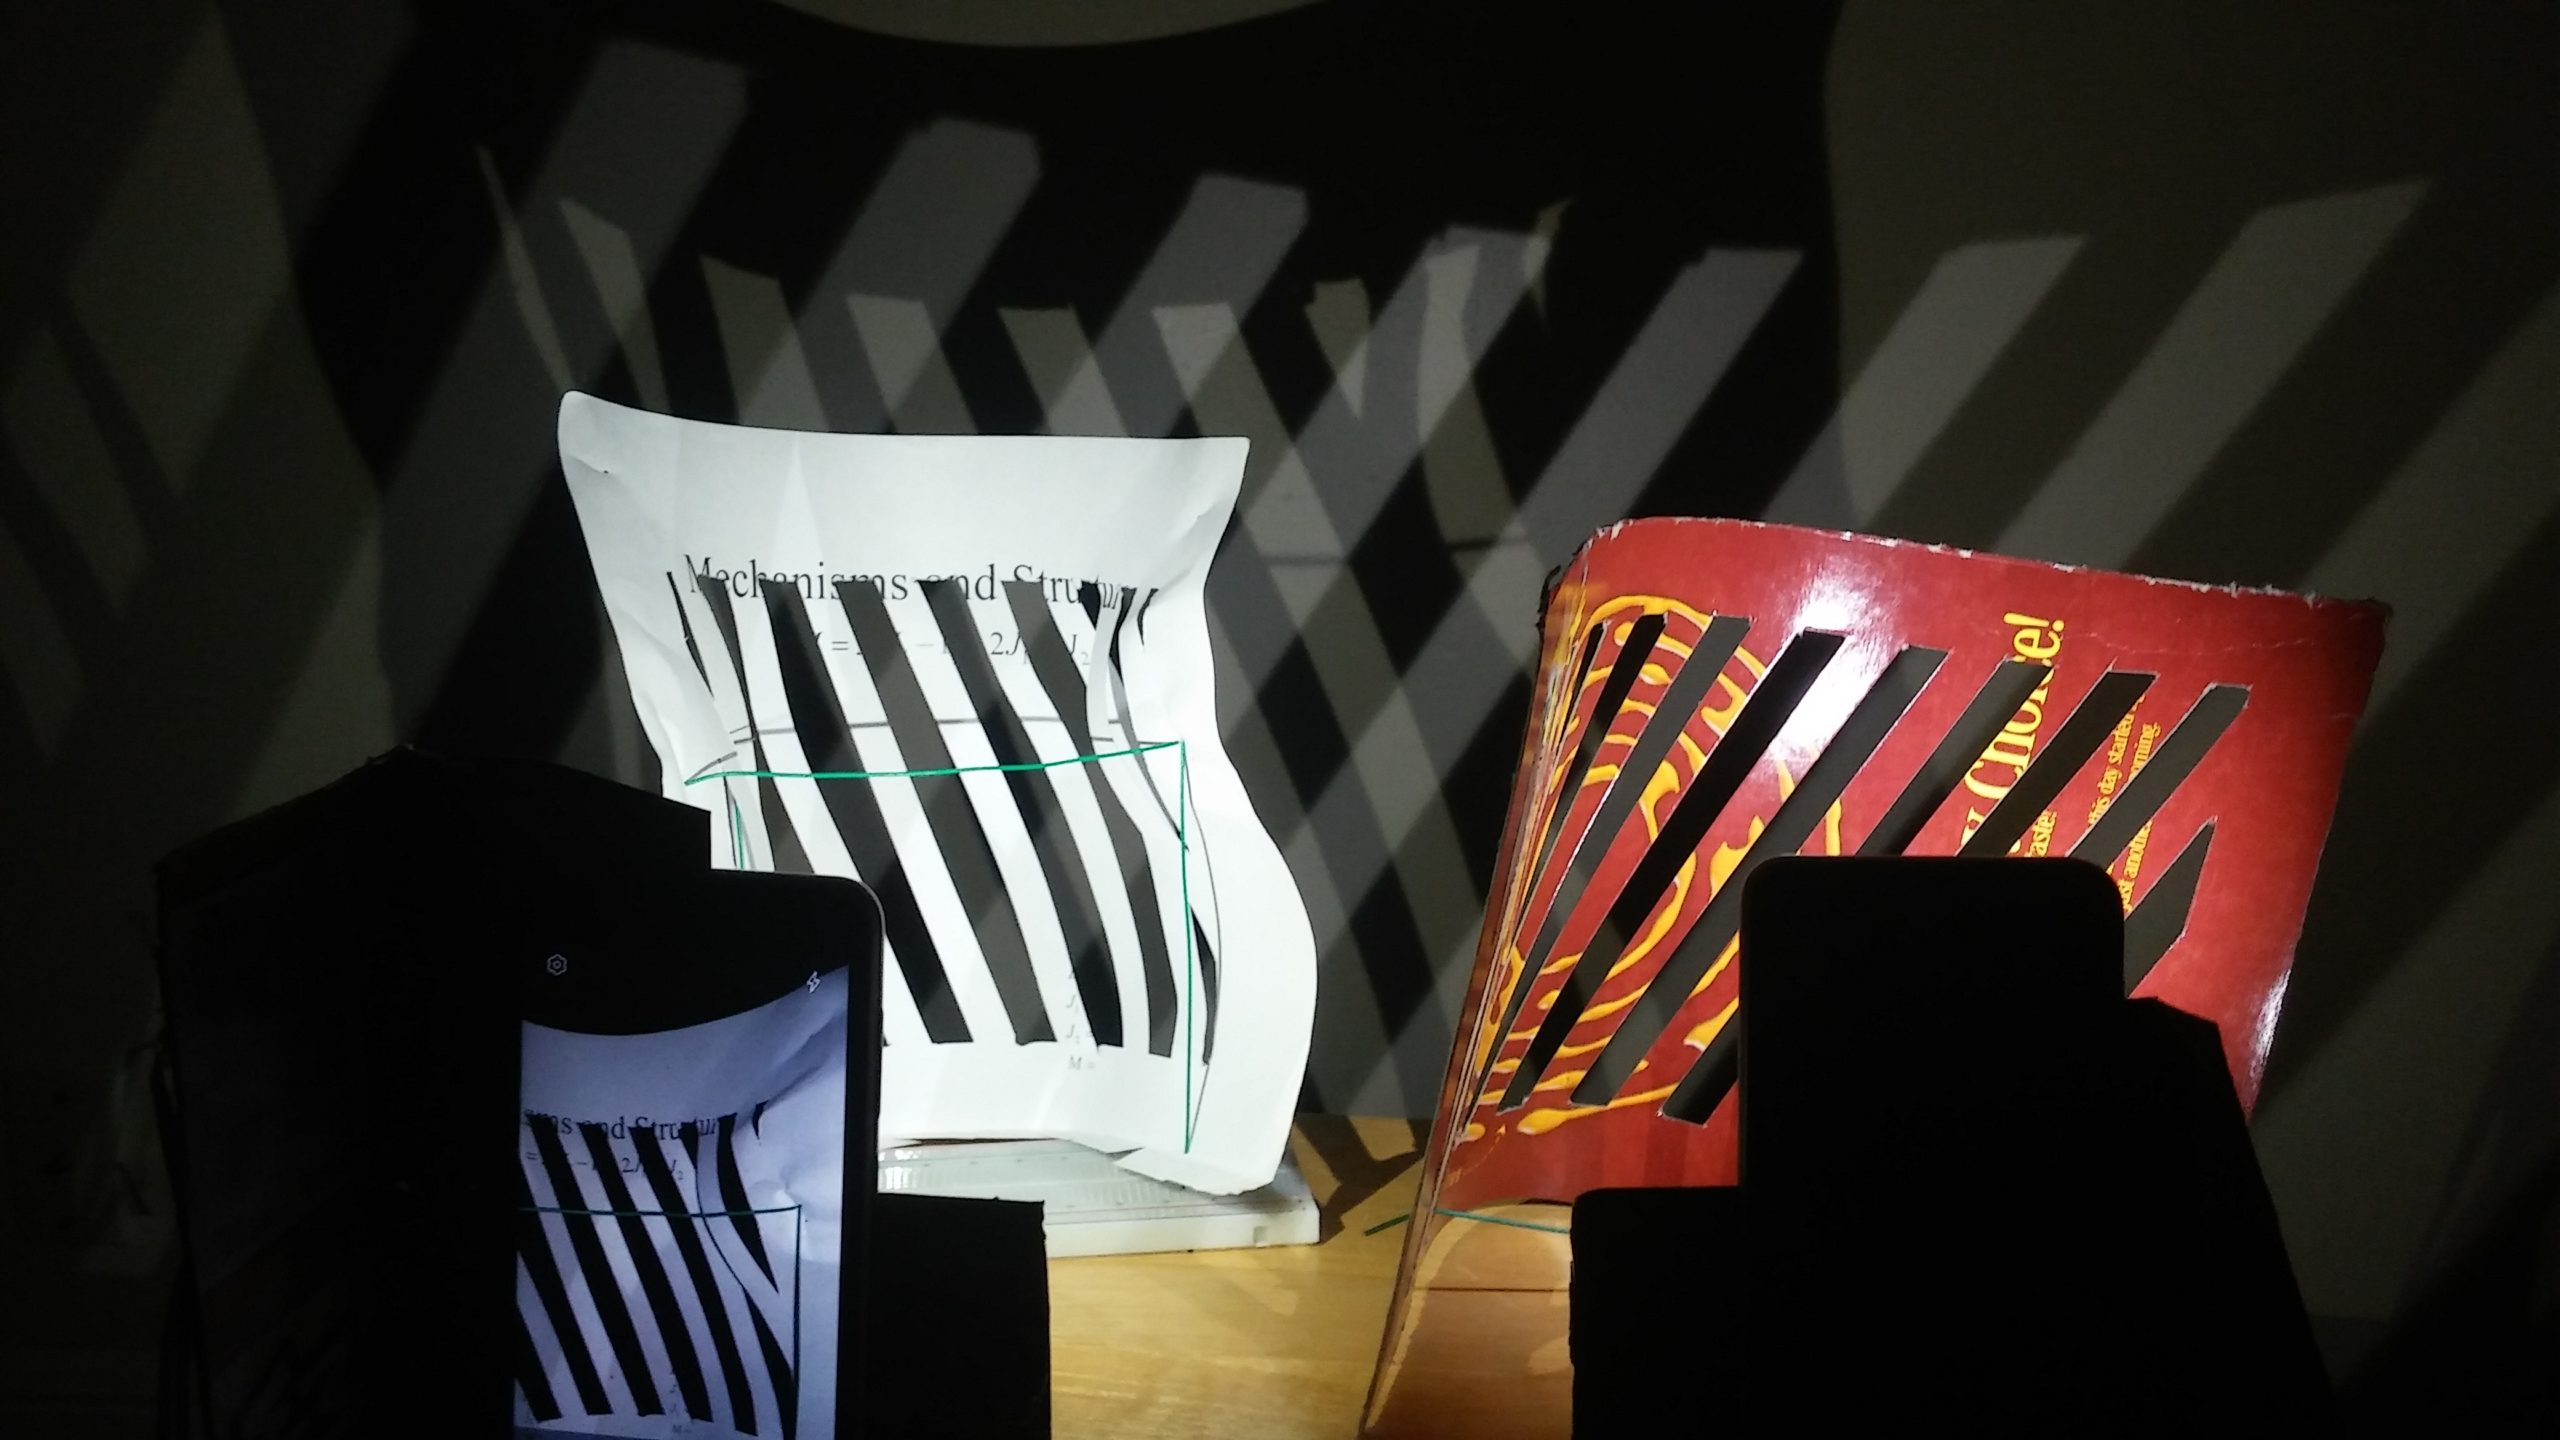
I really liked how crisp the shadows are in the demo pictures you have here. If you were only using a phone flashlight here it will be amazing when you use the halogen bulbs. This may be a little complex, but you could look into 3D printing a planetary gearbox if you want this to be mounted to one object. It would keep the light stationary while rotating the outer layer.
I am curious if you still plan to use transparent colored plastic sheets to make the shadows colorful?
I really like the moire animation example Darius provided in his comment – that could definitely be something cool to explore here! Otherwise I also like the escape room puzzle concept – I’ve seen lots of cool examples of number puzzles that play with light/shadows and require some pieces to be in certain positions before they give any clear information.
If using a motor is going to be too time consuming/difficult to work around, you may also be interested in just using a ball bearing. As long as you add some weight to the lampshades and get them moving a little bit (manually), the bearings should just keep spinning around by themselves for a long while without further input.
I like what you are doing with the shadows, do different materials produce different shades of shadows? Maybe you could do something with a mixture of different shades.