I couldn’t get acrylic or LEDs in time to include them in my maquette, so I worked on the CAD model and did a first pass of clean up on the layers to be engraved. I learned a lot from this, most importantly that my original plan to light all the layers at once will probably look too busy. I think I need to remove extra lines from each layer even further, and maybe only light a few of the panes at once. I think that the model demonstrates the concept pretty well, though!

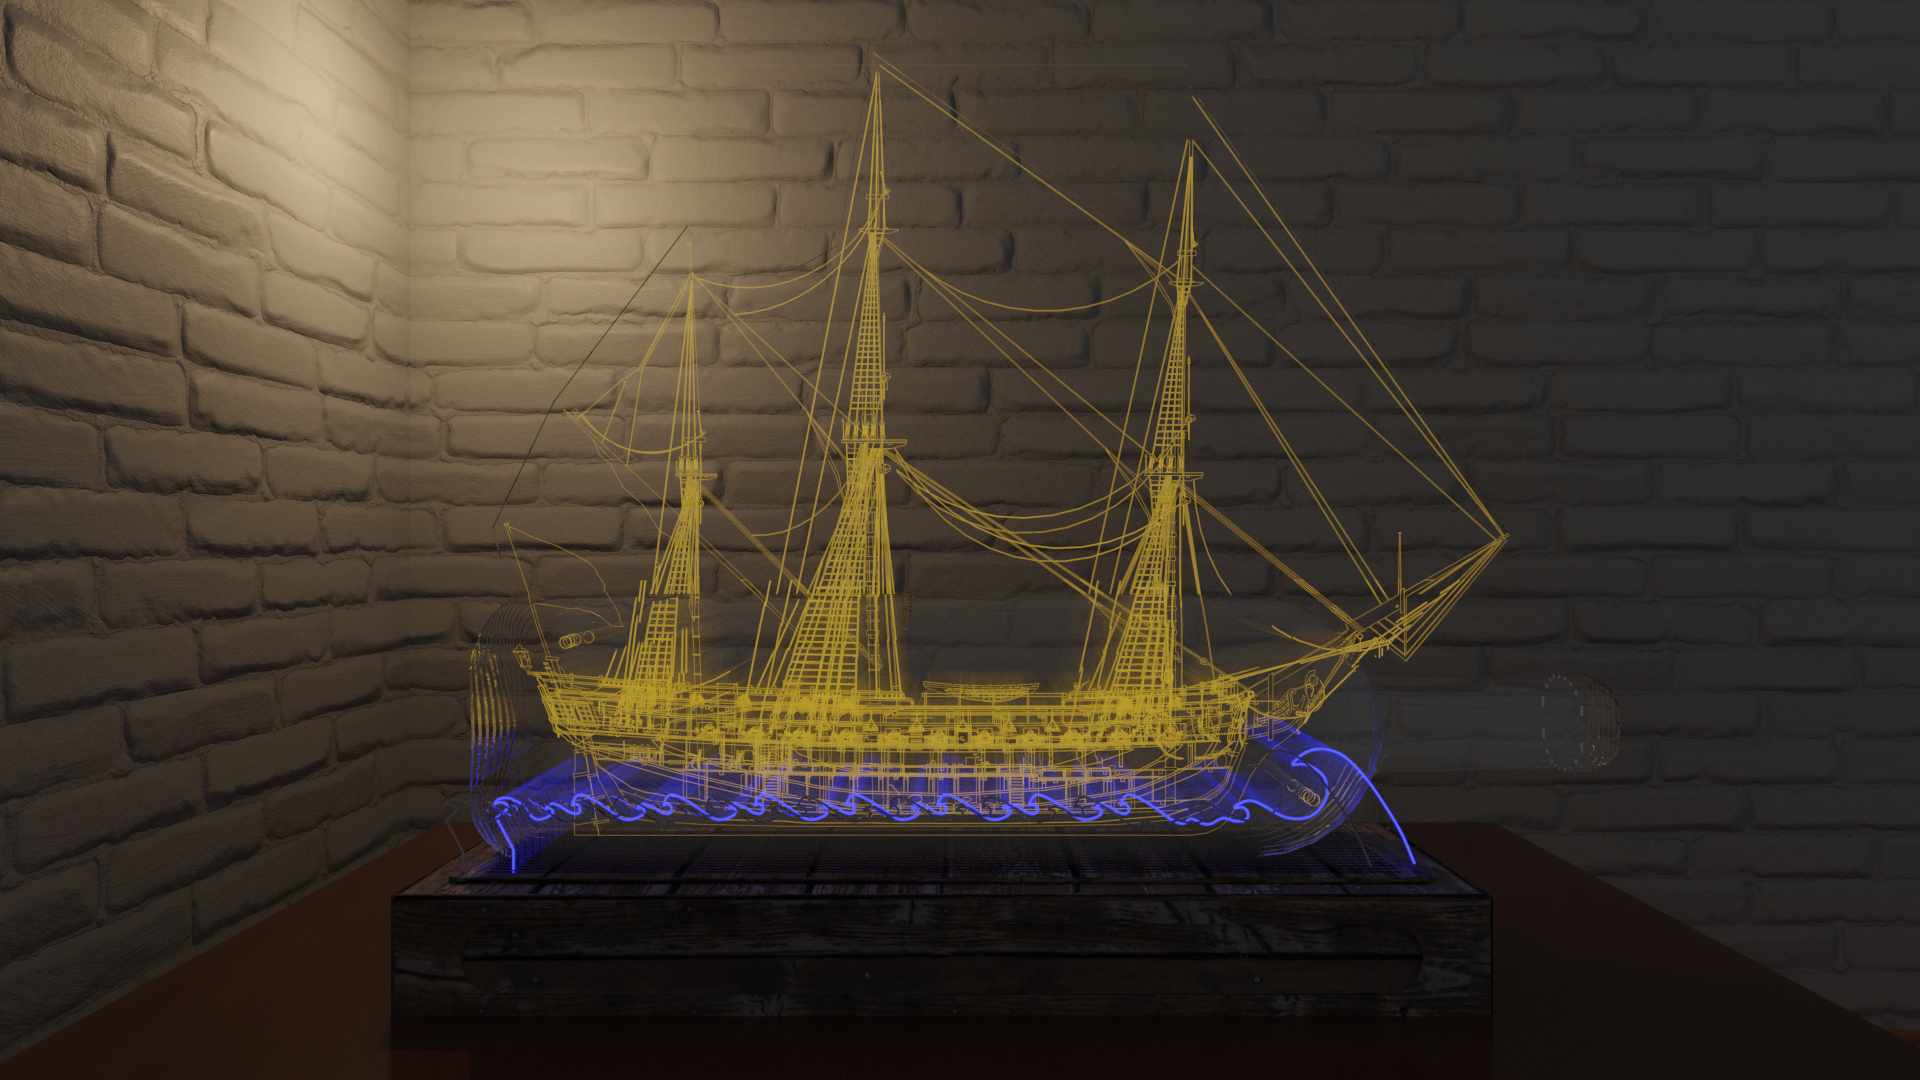
For a base, I’m interested in using some kind of worn looking planter box. I will cut a whole in the top and put a laser cut plate from which the acrylic will come out. The right or left side will have a slider (thanks for the idea Matt!) to scroll through layers. The current wave graphics are a placeholder until I can draw more interesting wave art, but I think they show the concept.
Supply List
- 3x 2m strips of WS2812B LEDs. I specifically found ultra narrow 5mm ones and based the scaling of the whole project around them.
- 90W 5V Meanwell power supply: I will have around 330 LEDs, which at full bright white will draw around 19.8 amps.
- 7x 18×24 inch sheets of 3mm acrylic. I was originally going to buy 2.4mm acrylic from Home Depot, but my 3mm sheet from Robosource came in pristine condition so I will be using those instead.
- 100mm slide potentiometer and knob
- On/off switch
- Button for mode switching?
- Materials for wooden base
- Aluminum sheet to attach LEDs (gonna need something to sink 90W!)
- Small fan for base (I already have a 40mm Noctua)
- ESP32 and large (1000uF+) capacitor
- Anything else I think of!
Rough Schedule
Week of 9/13/2021:
- Order all supplies
- CAD model entire base (find solution for base!)
- Finish cleaning up SVGs and prep them for engraving
Week of 9/20/2021:
- Do first run of engravings, test some layers stacked
- Adjust as needed
Week of 9/27/2021:
- Finish making acrylic. Make base and assemble. Wire LEDs and power supply
Week of 10/4/2021:
- Final assembly, write code and any finishing touches.
After this: Buffer time for unanticipated issues.
These renders look absolutely amazing! I’m really excited to see how this turns out. Until you showed the cannons, I didn’t think it looked too busy but now I see why you would want to remove some lines or even some layers.
For the brackets to hold it together, it doesn’t sound fun at all to cut a hole into the middle acrylic layer. Instead, could you place them along the bottom and sides of the ship?
I honestly like the “busy” overlapping blueprint look it has, although I understand if it meshes with your vision. I also really like the waves as they are, the simple design doesn’t take away from the ship, and with the hard cuts between the two wave panels it goes well with a more cartoonish design in my opinion.
When I saw these render I honestly thought you had a physical model of it already. I also liked the business of the model, it kind of reflects how busy old ships used to be. Maybe you could clean it up a little bit around the cannons though if you want them to be more noticeable?
I am curious if these are the actual colors that you plan on using to light up the ship?
I also like that the water is limited to 2 frames, it reminds me of the classic neon sign look! It might be nice to add another line or two the the water slides – maybe an inset version of the existing wave line, or some small groups of fish. I think that’d add some interesting visual detail without taking away from the rest of the ship.
I love this idea, the renders look really nice, maybe you could set certain lights to be dimmer or off to make frames that are super busy less busy.