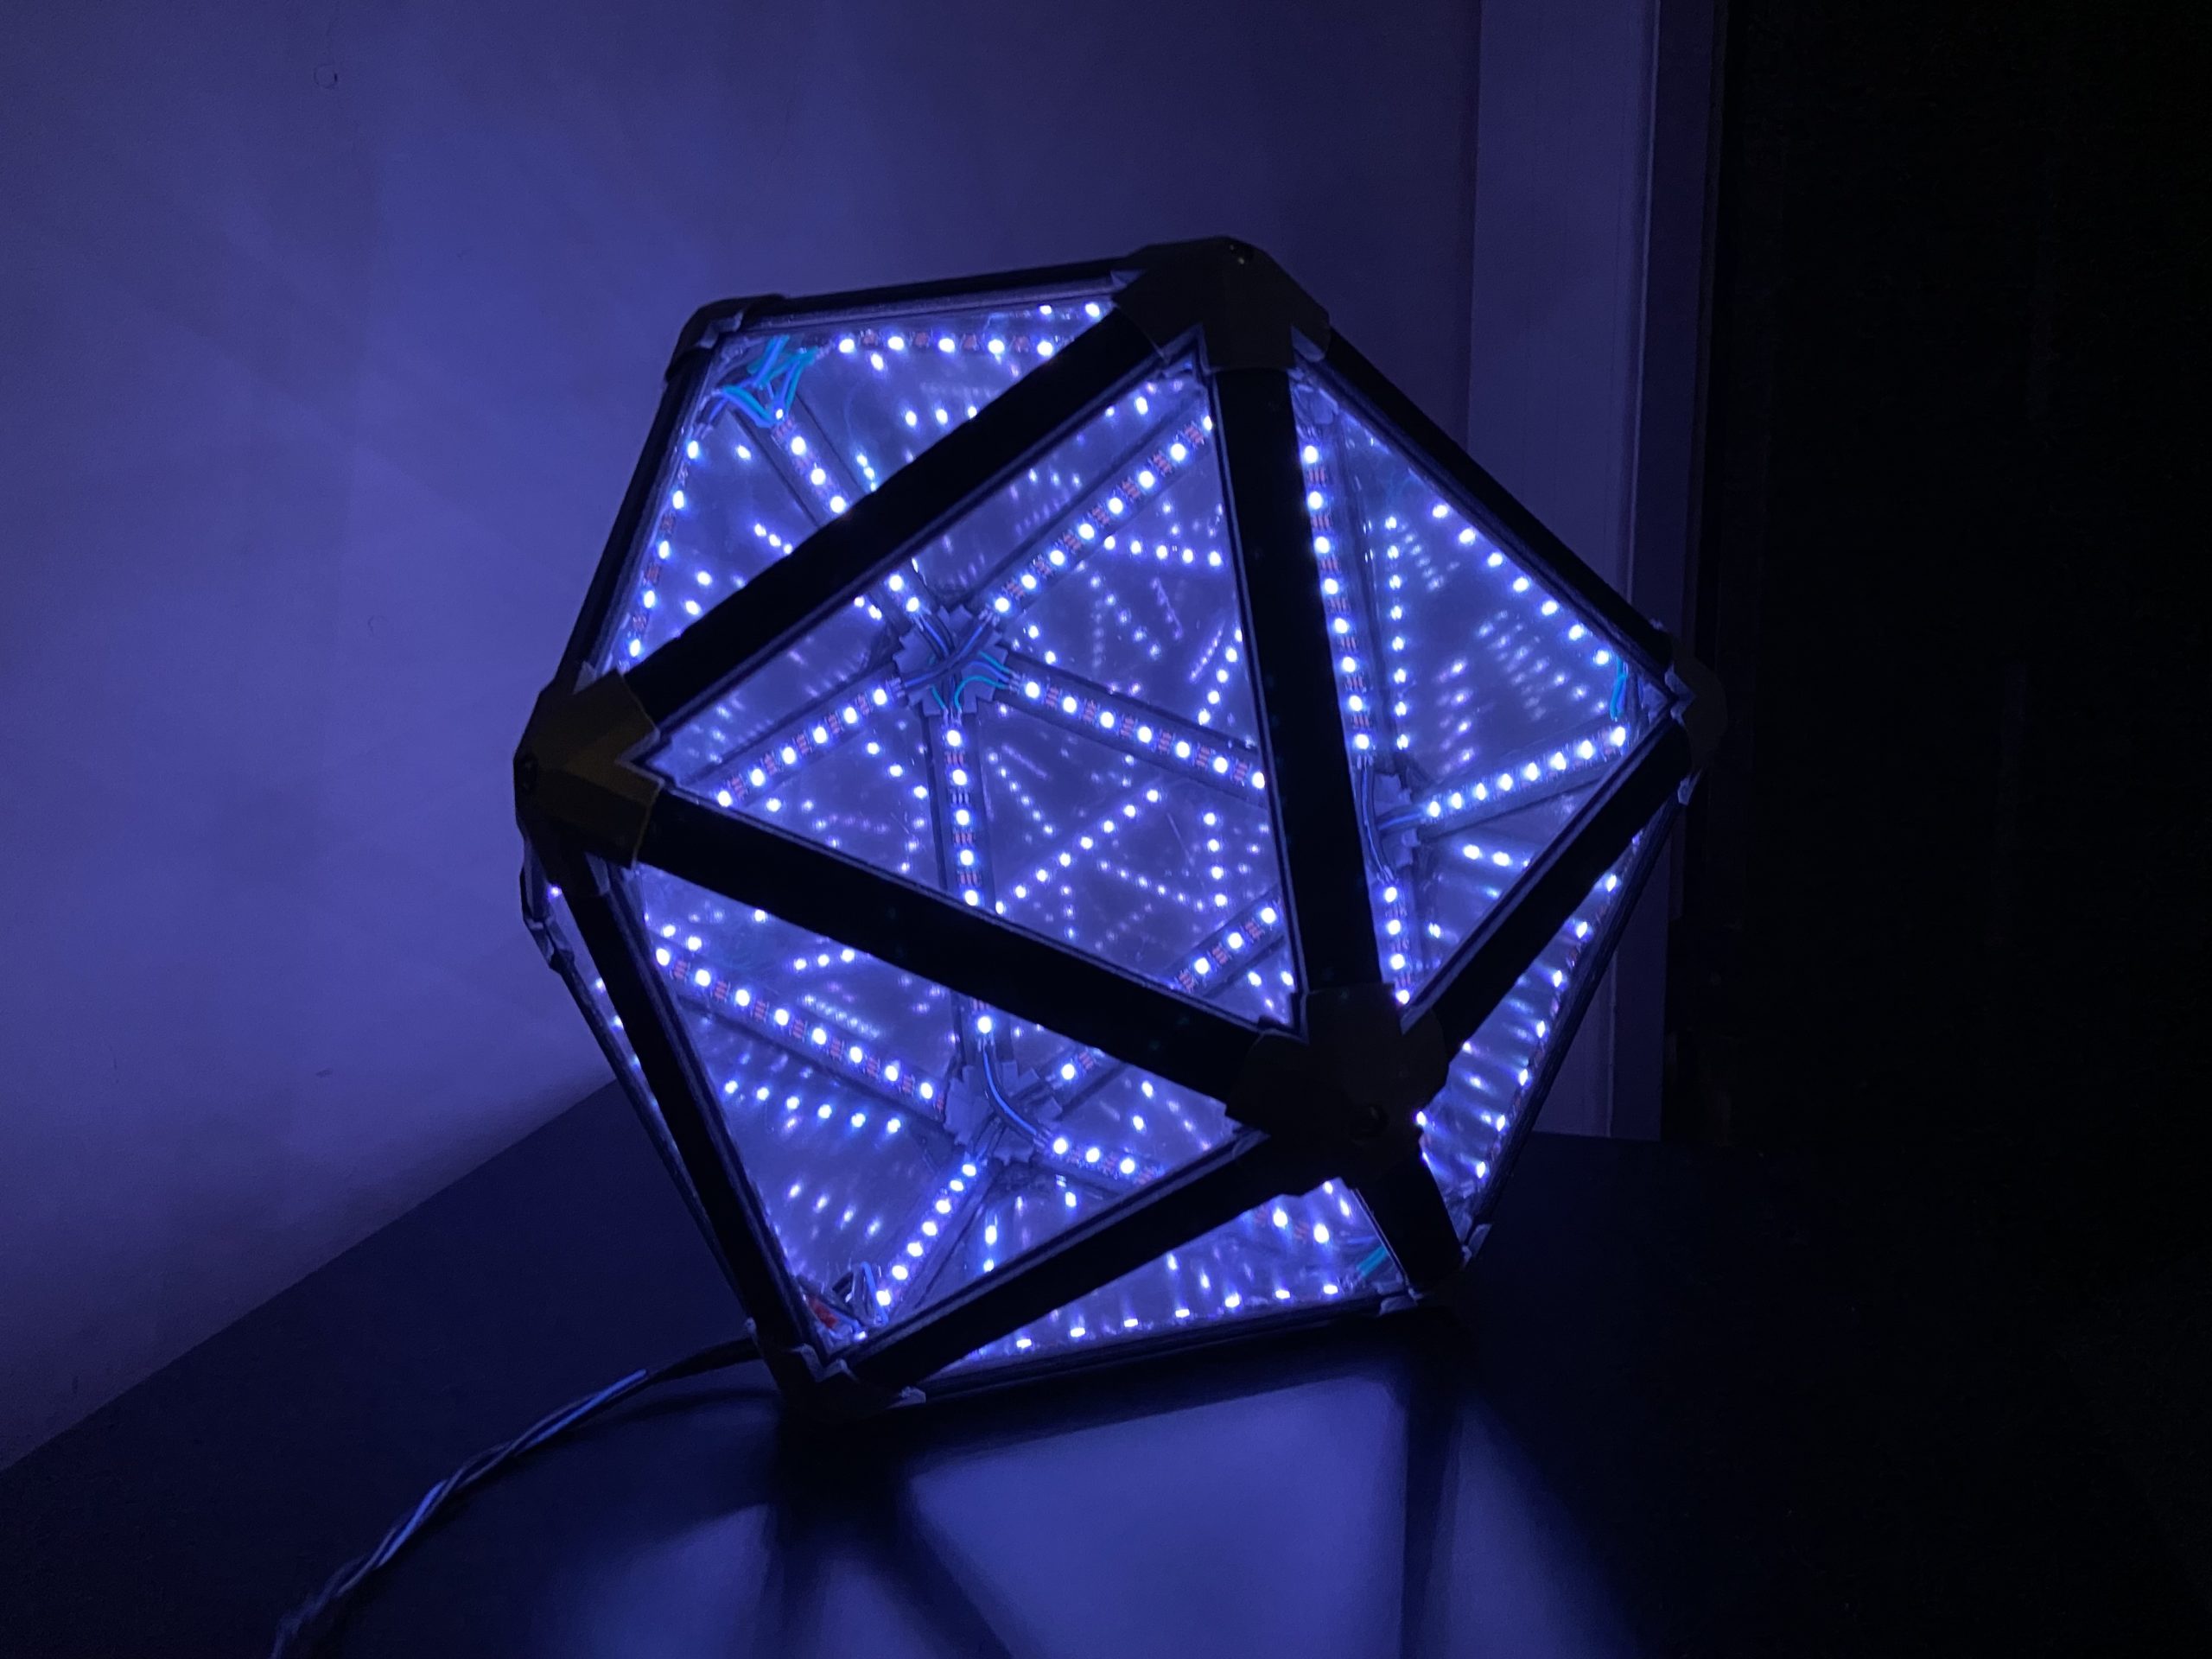
For my final project, I chose to make an icosahedron infinity mirror. Originally, I was inspired by the presentation on Chul Hyun Ahn in class and other light artists, such as Yayoi Kusama. There was a giant mirror in one of my high schools hallways that I always thought was super cool as well. However, I wanted to put a twist on mine by making it a complex shape; something other than a rectangle or a cube. I thought this could be really cool because of the randomness and unpredictability in how the shape would reflect. I ended up choosing an icosahedron due the simplicity of each face being a triangle and uniqueness as a shape. Particularly, I liked how when viewed from the right angle, it appeared as if the structure was skewed.
When I first started to design my project, I wanted to incorporate some skills that I had learned throughout my time at WPI while pushing myself to learn new things. Right off the bat I knew that I wanted to learn how to laser cut materials. Each face or the mirror is a laser cut .125” acrylic triangle with a side length of 7.25 inches. Holding them together are custom 3D printed frames made out of PETG. Originally, I wanted a clean look with friction fit edges. Very quickly I realized this would not be possible due to the tolerances of the 3D printed parts and the thickness of the acrylic. To overcome this, I also designed small end caps that conceal the vertices of the mirror. I had to cut 20 faces out of acrylic, print 30 edge brackets, and print 24 end caps.
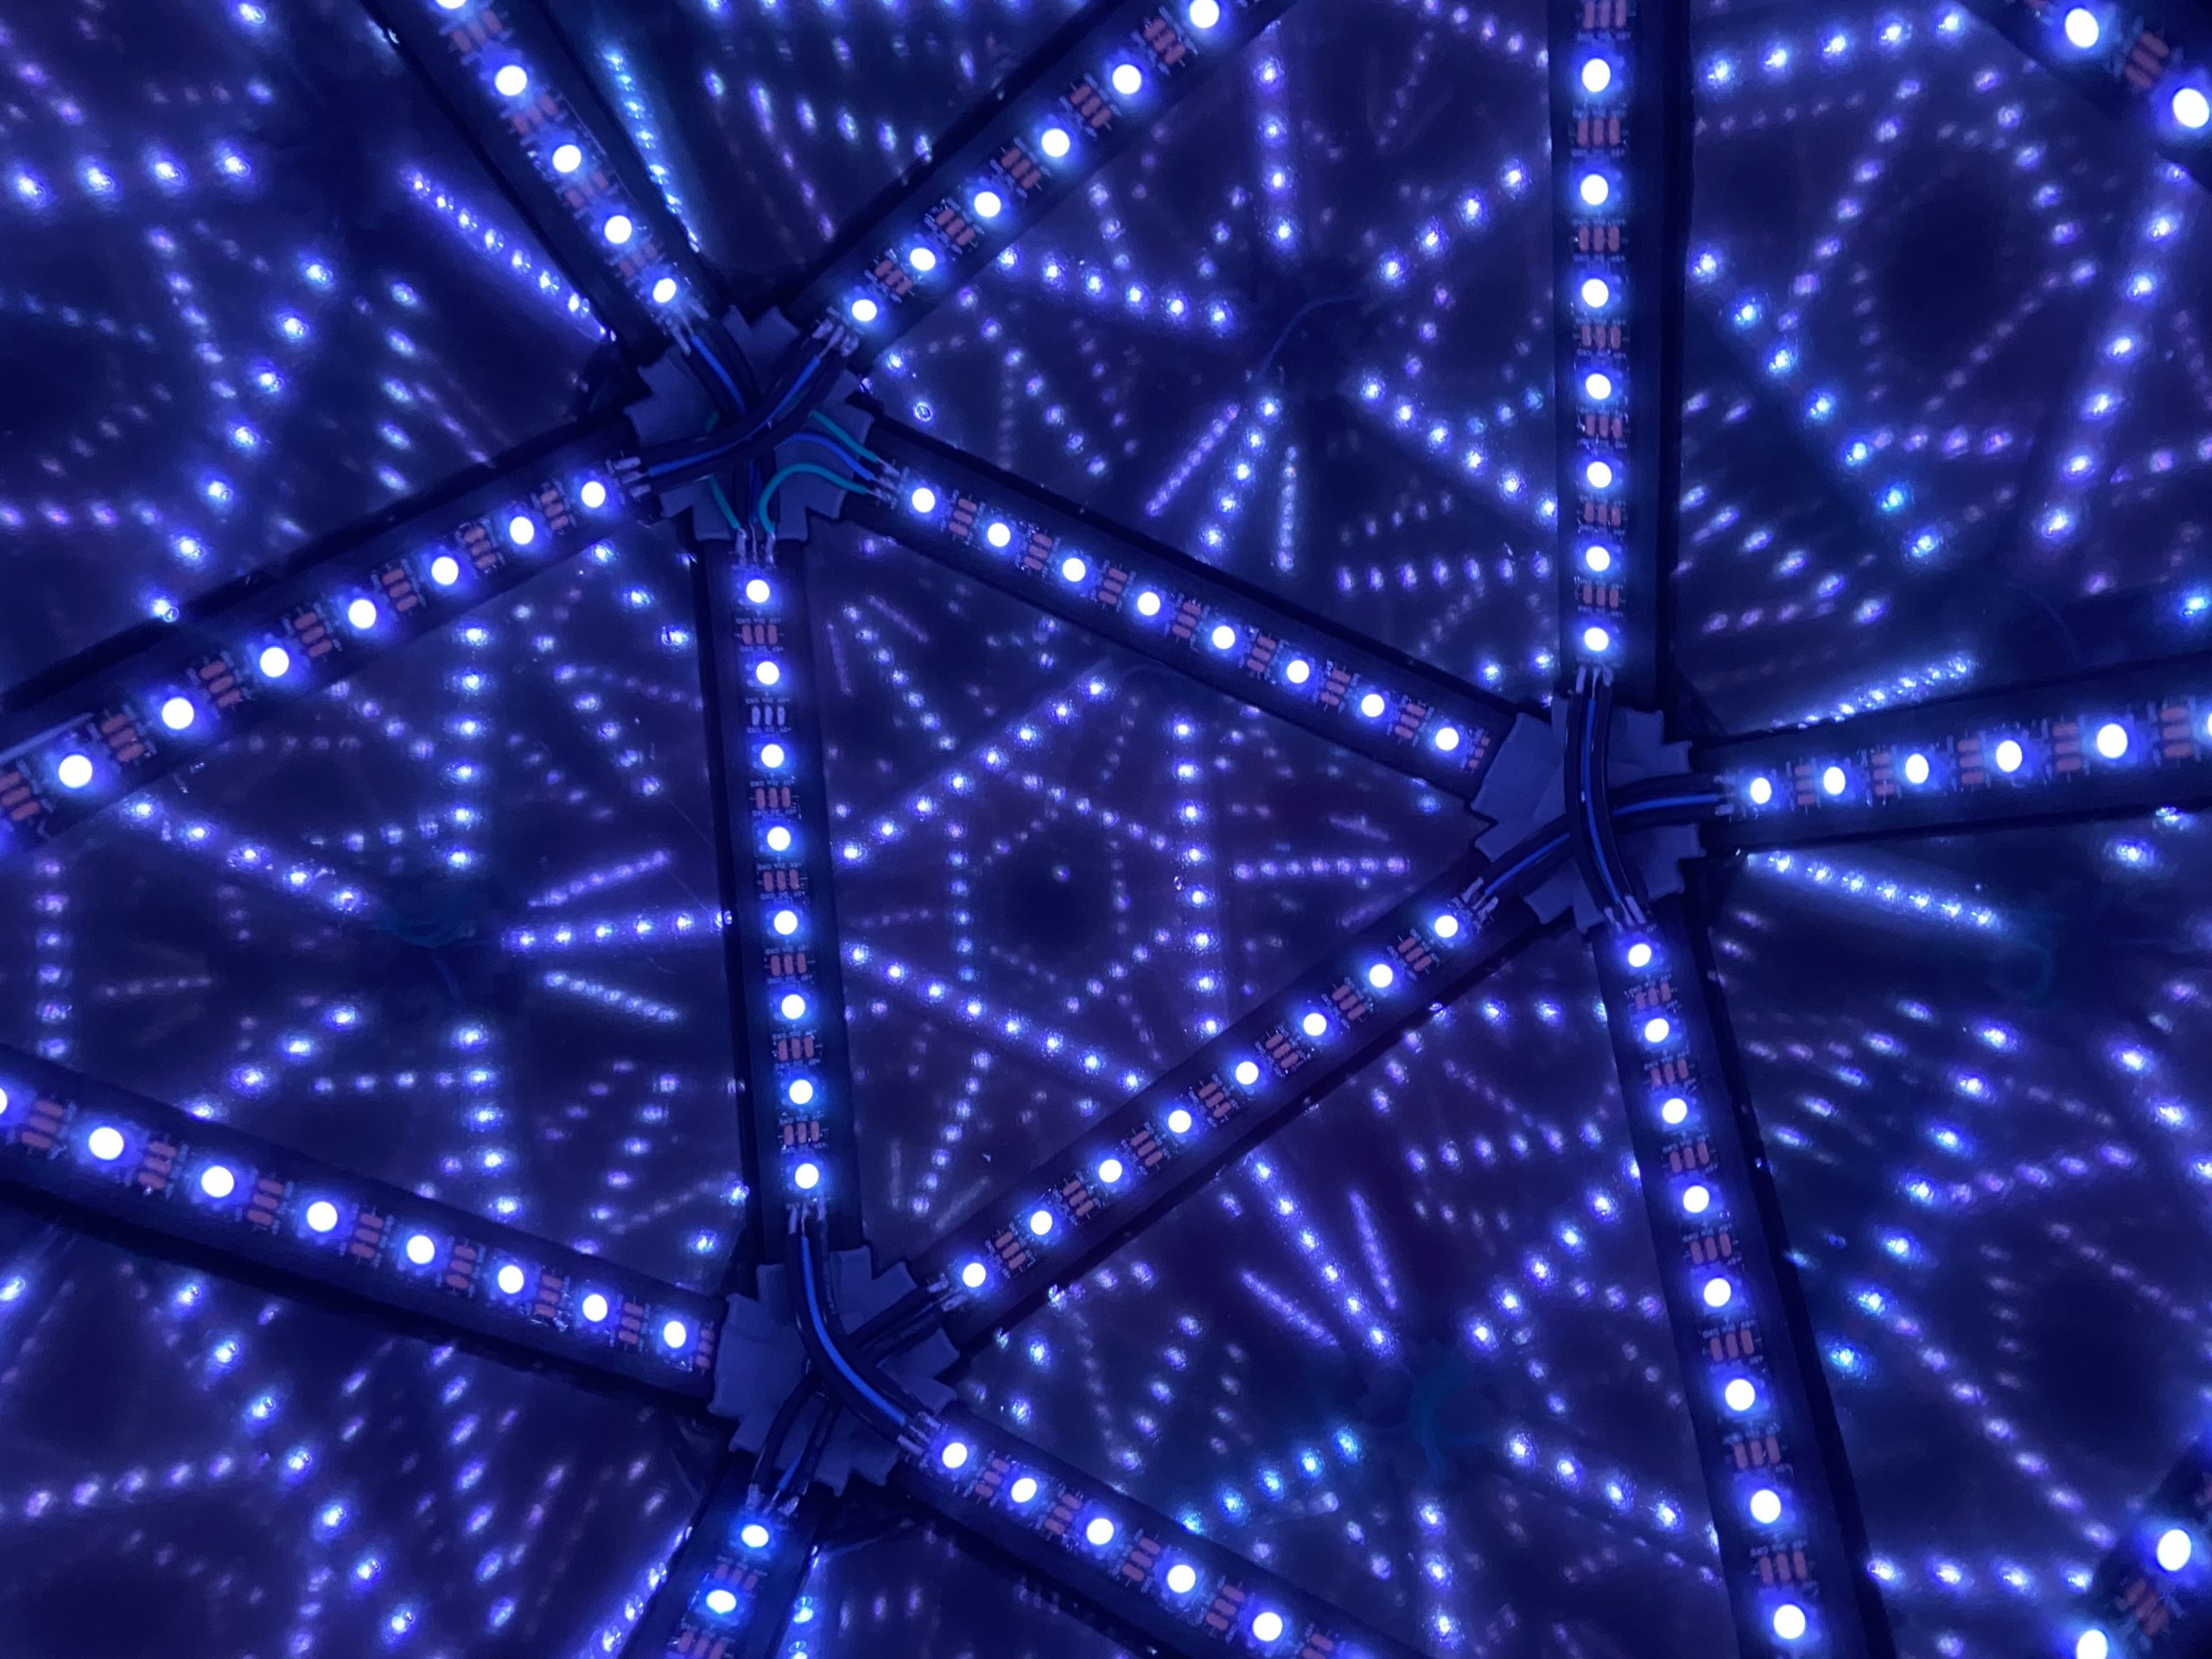
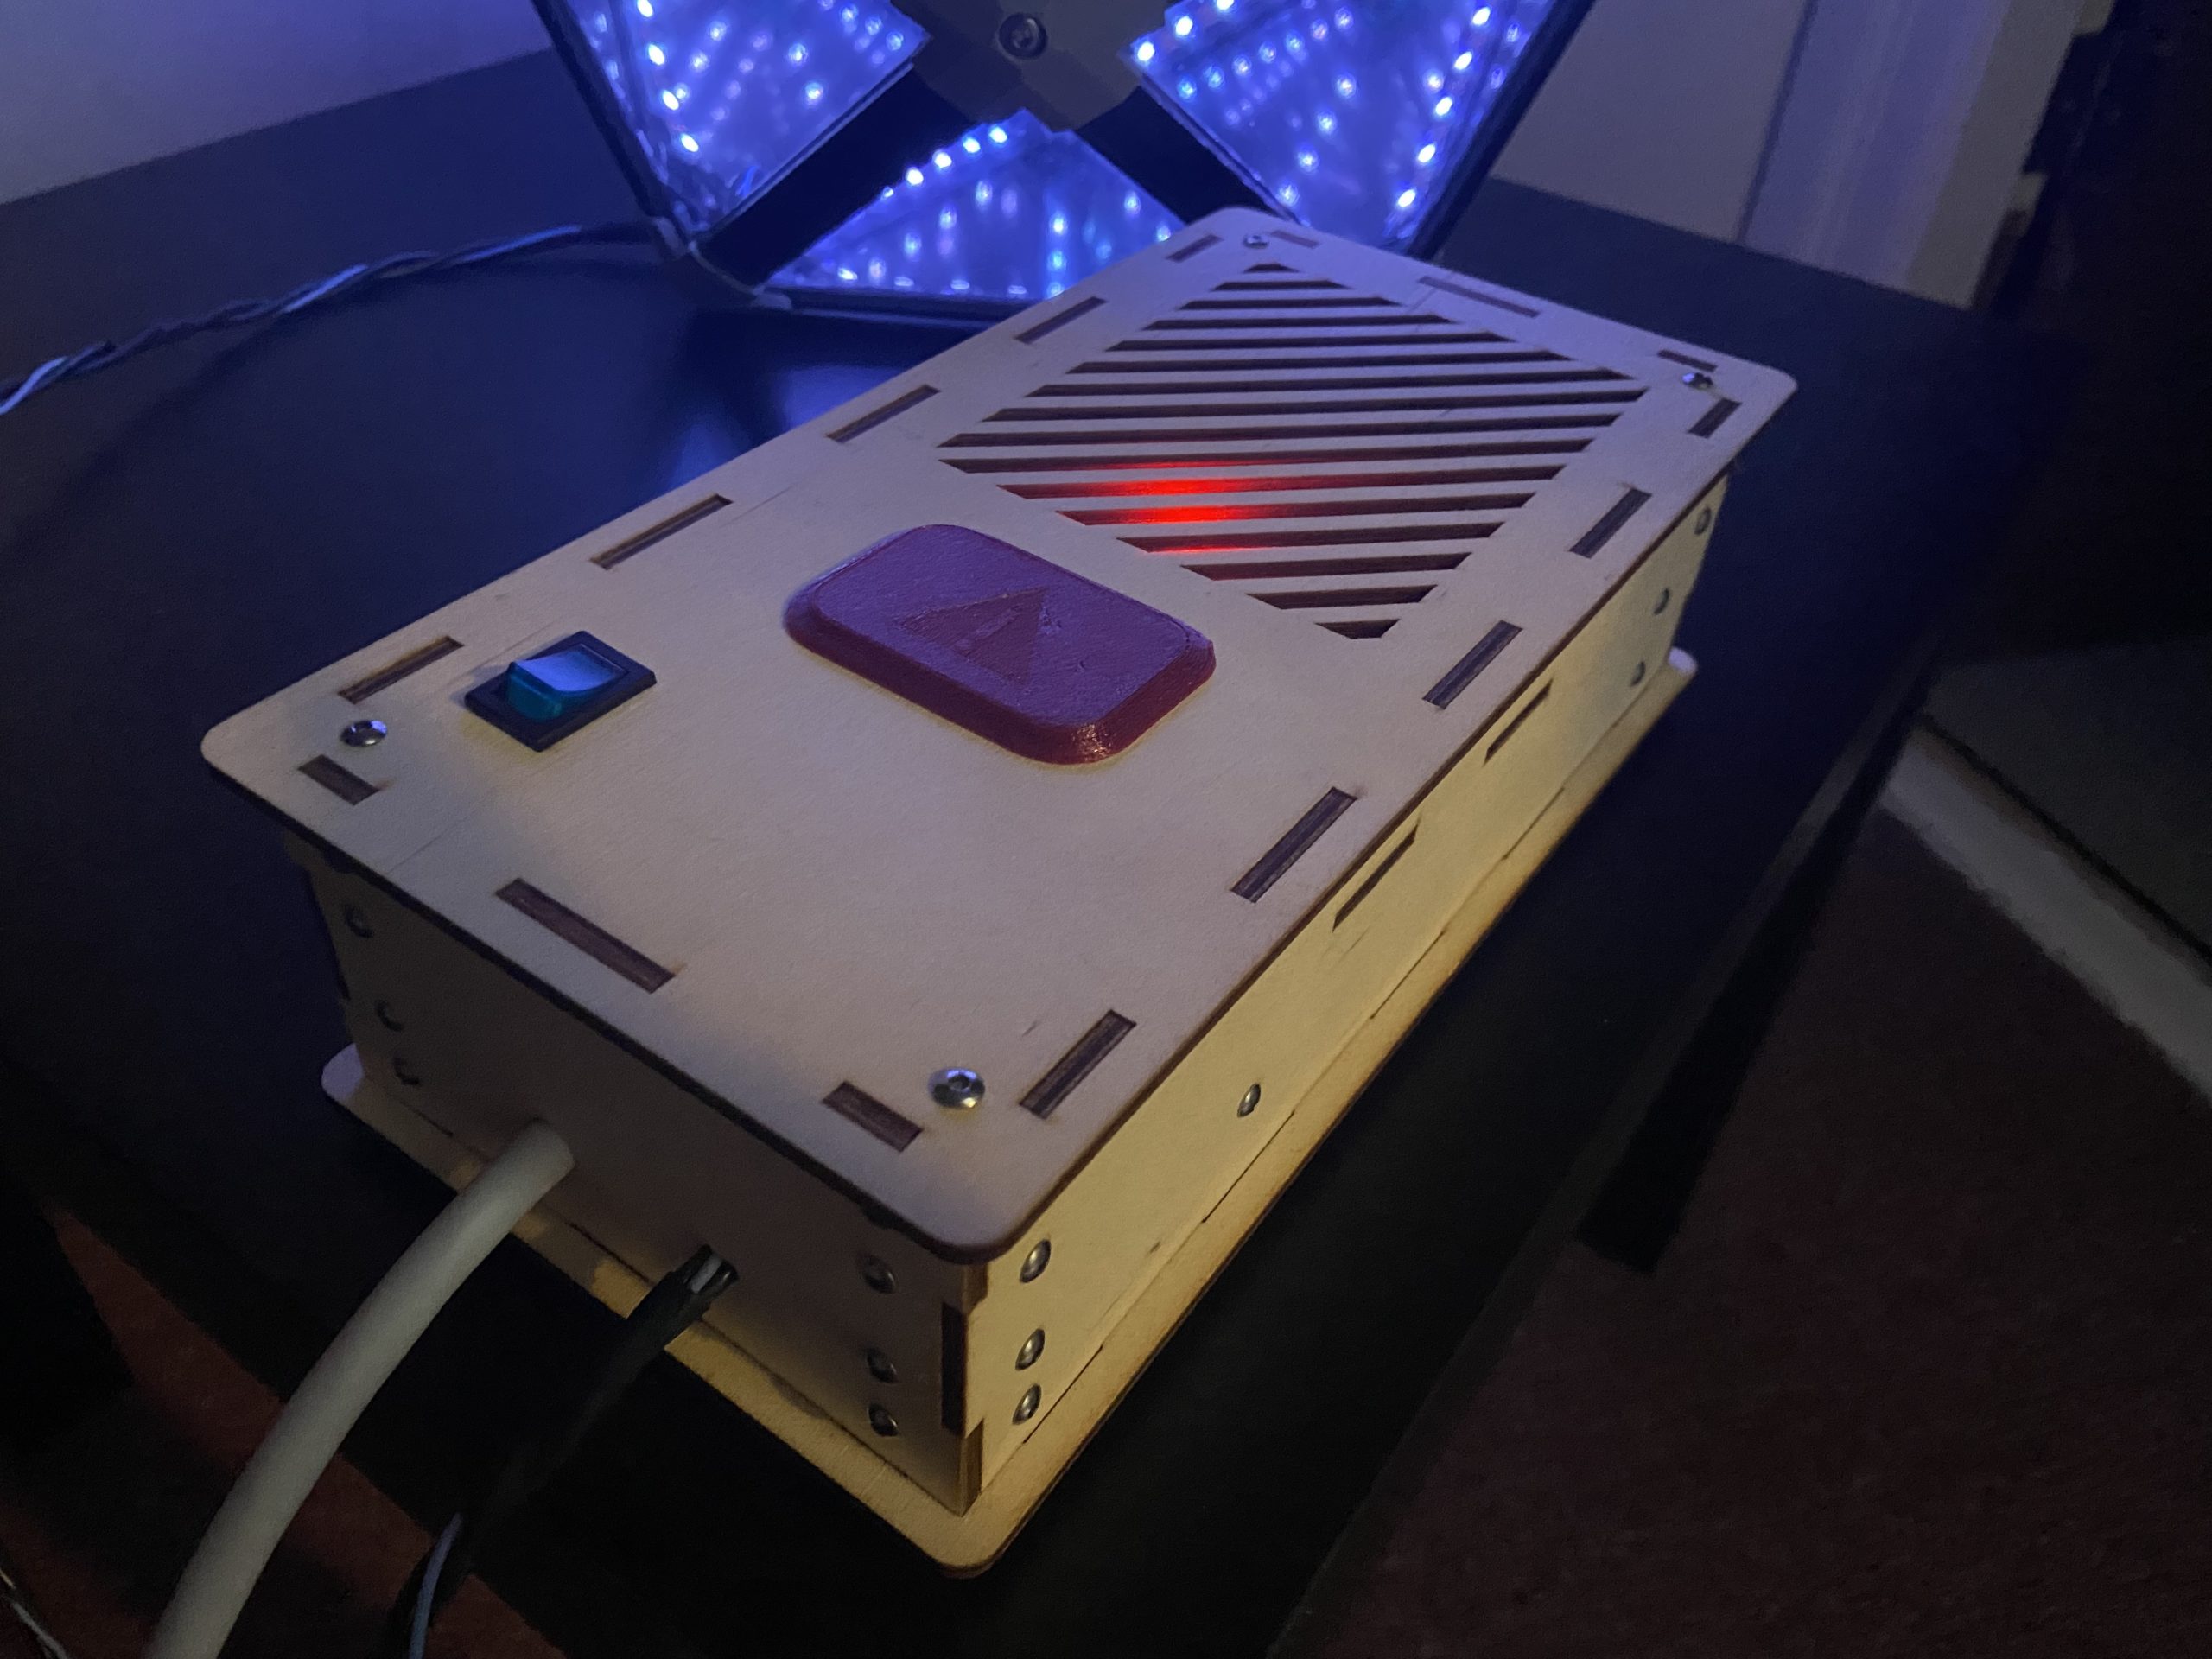
To create the mirror look, each pane has a sheet of one way mirror film on it. The film reflects light on the brighter side of it, while allowing people to see through from the opposite side. In the infinity mirror’s case, the bright LEDs get reflected while the dark exterior allows people to see through the material. The LEDs are a strip of WS2812b addressable LEDs. They are powered by a 150W 5V power supply and controlled by an arduino nano. The power supply is housed inside a custom laser cut box. The red cap provides access to the arduino usb for programming additional lighting patterns.
After assembling everything, I used the Fast LED arduino library to program some functions including an RGB rainbow, CHSV rainbow wave, a multi-color “starry night” function, and a single train of LEDs that travels through the shape. Here is a video I made showcasing the final result.
Overall, I really enjoyed this project and am extremely pleased with how it came out. I learned about laser cutting and how to move forward after failing on tasks such as soldering or designing complex structures. Thanks to everyone for a great term!