For my final project, I created a set of tiles and a small Unity application to view them in a procedurally generated environment. This application is available on itch.io!
https://thepiratepup.itch.io/3d-tile-generator

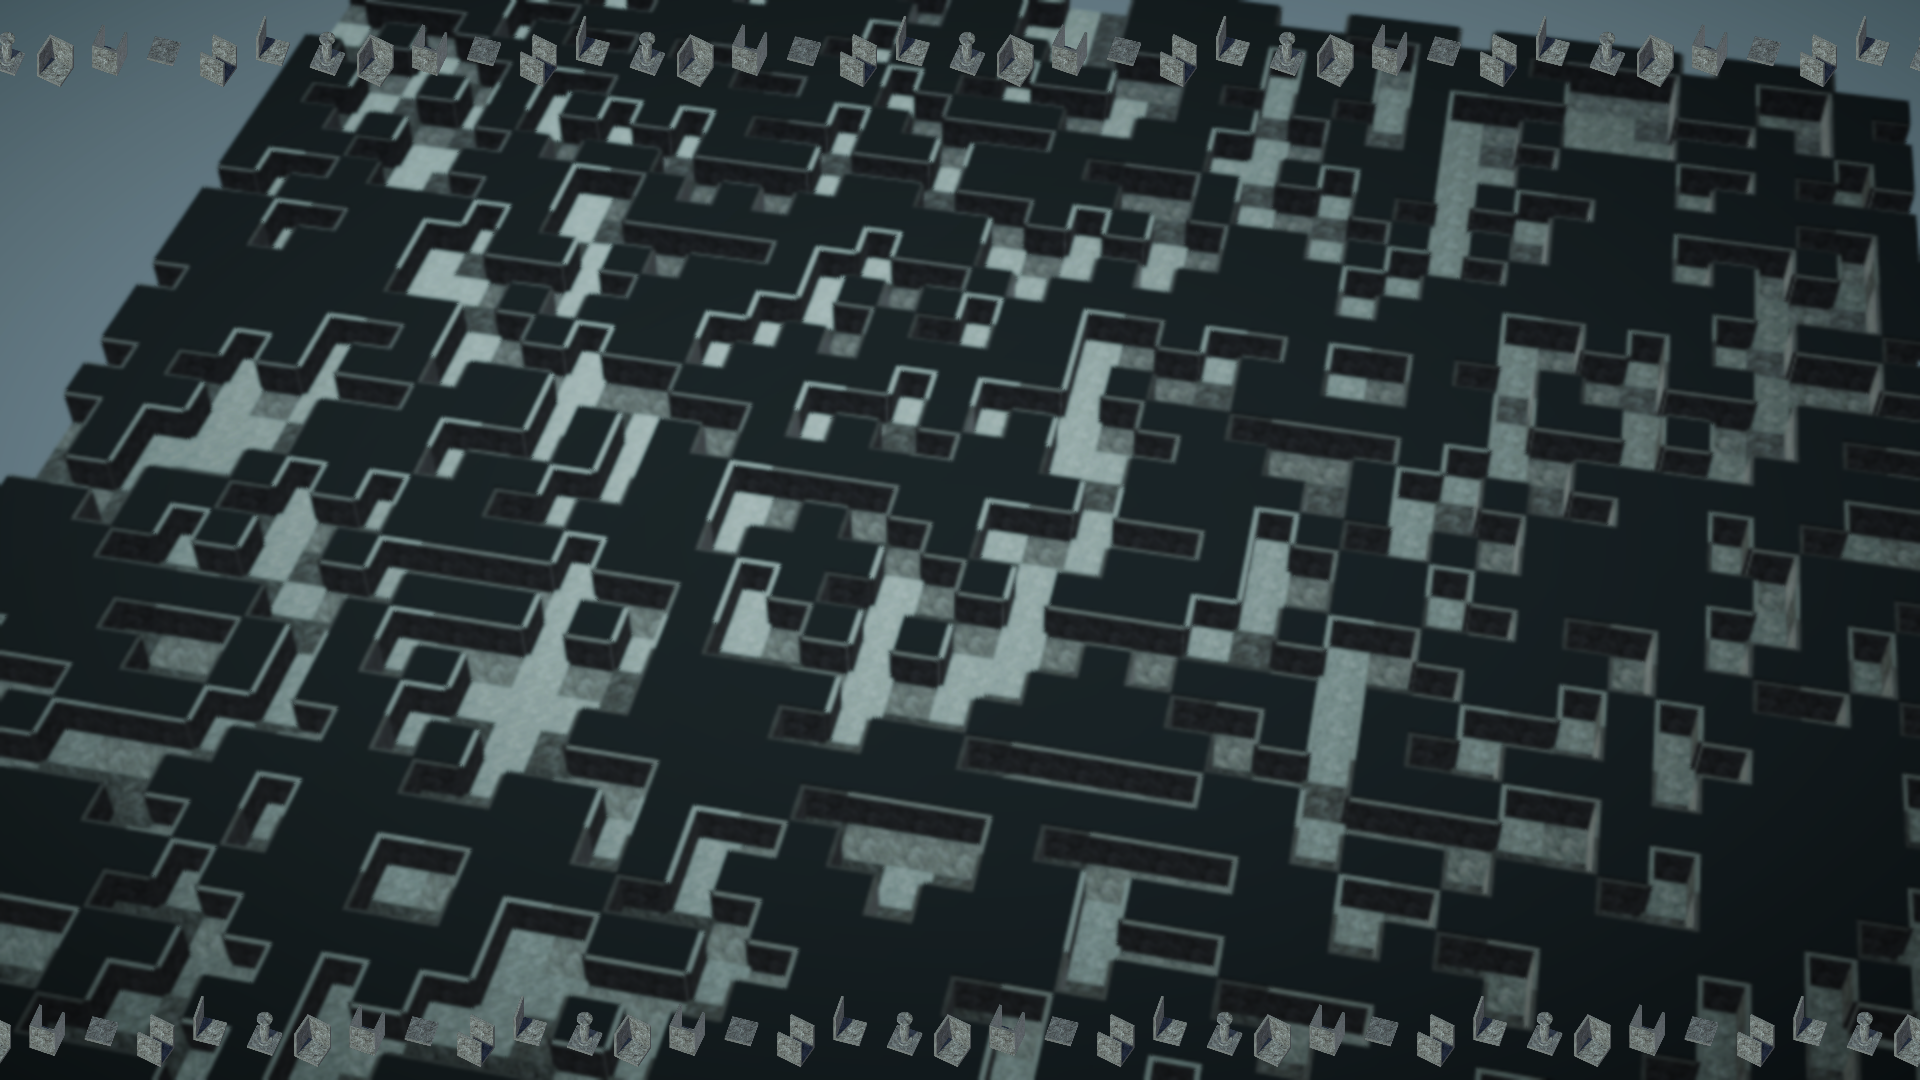
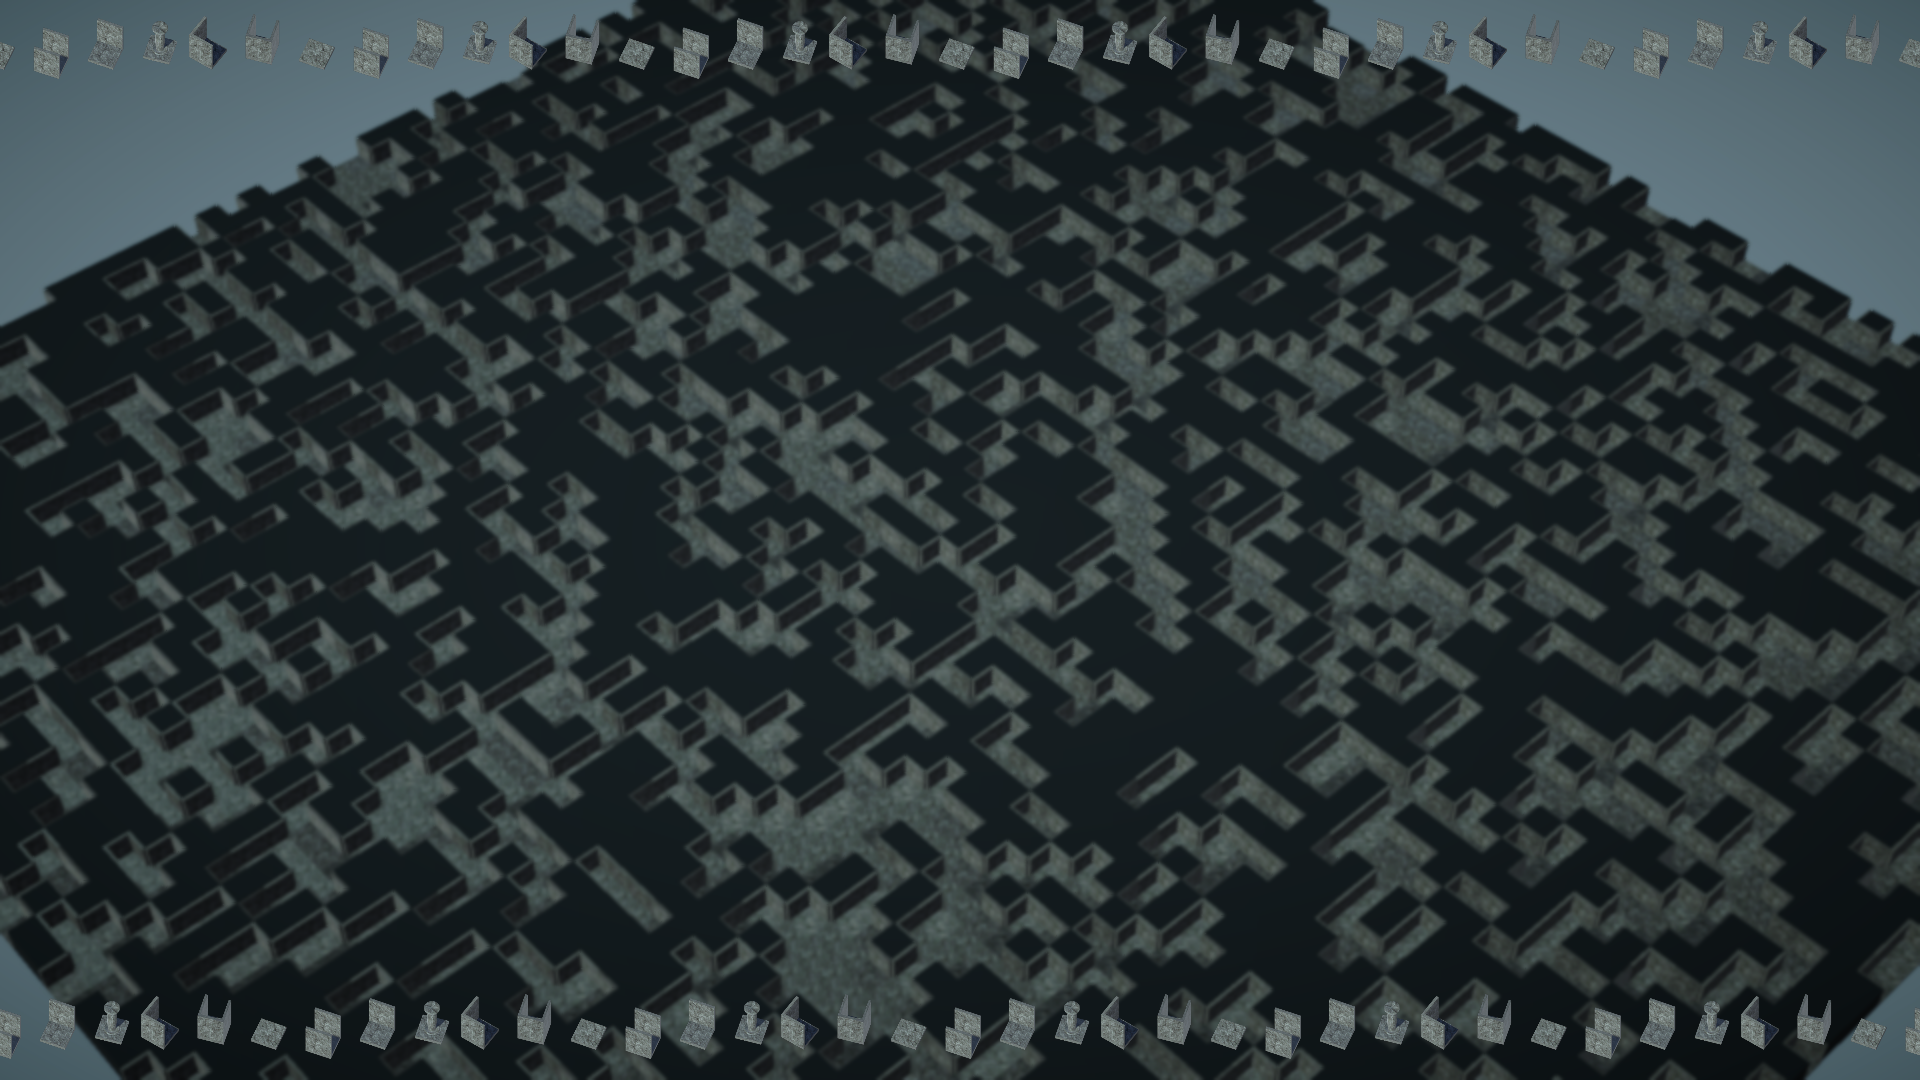
This is what the final product looks like. My goal was to keep a relatively simple workflow creating and texturing the 3D models and to take a deep dive into simple but effective ways to present these. Ultimately I think I was successful, as I learned in-depth information about parts of Unity that I have never explored before, and I feel confident in my ability to make relatively good-looking art in the future while taking a more technical approach to achieve this.


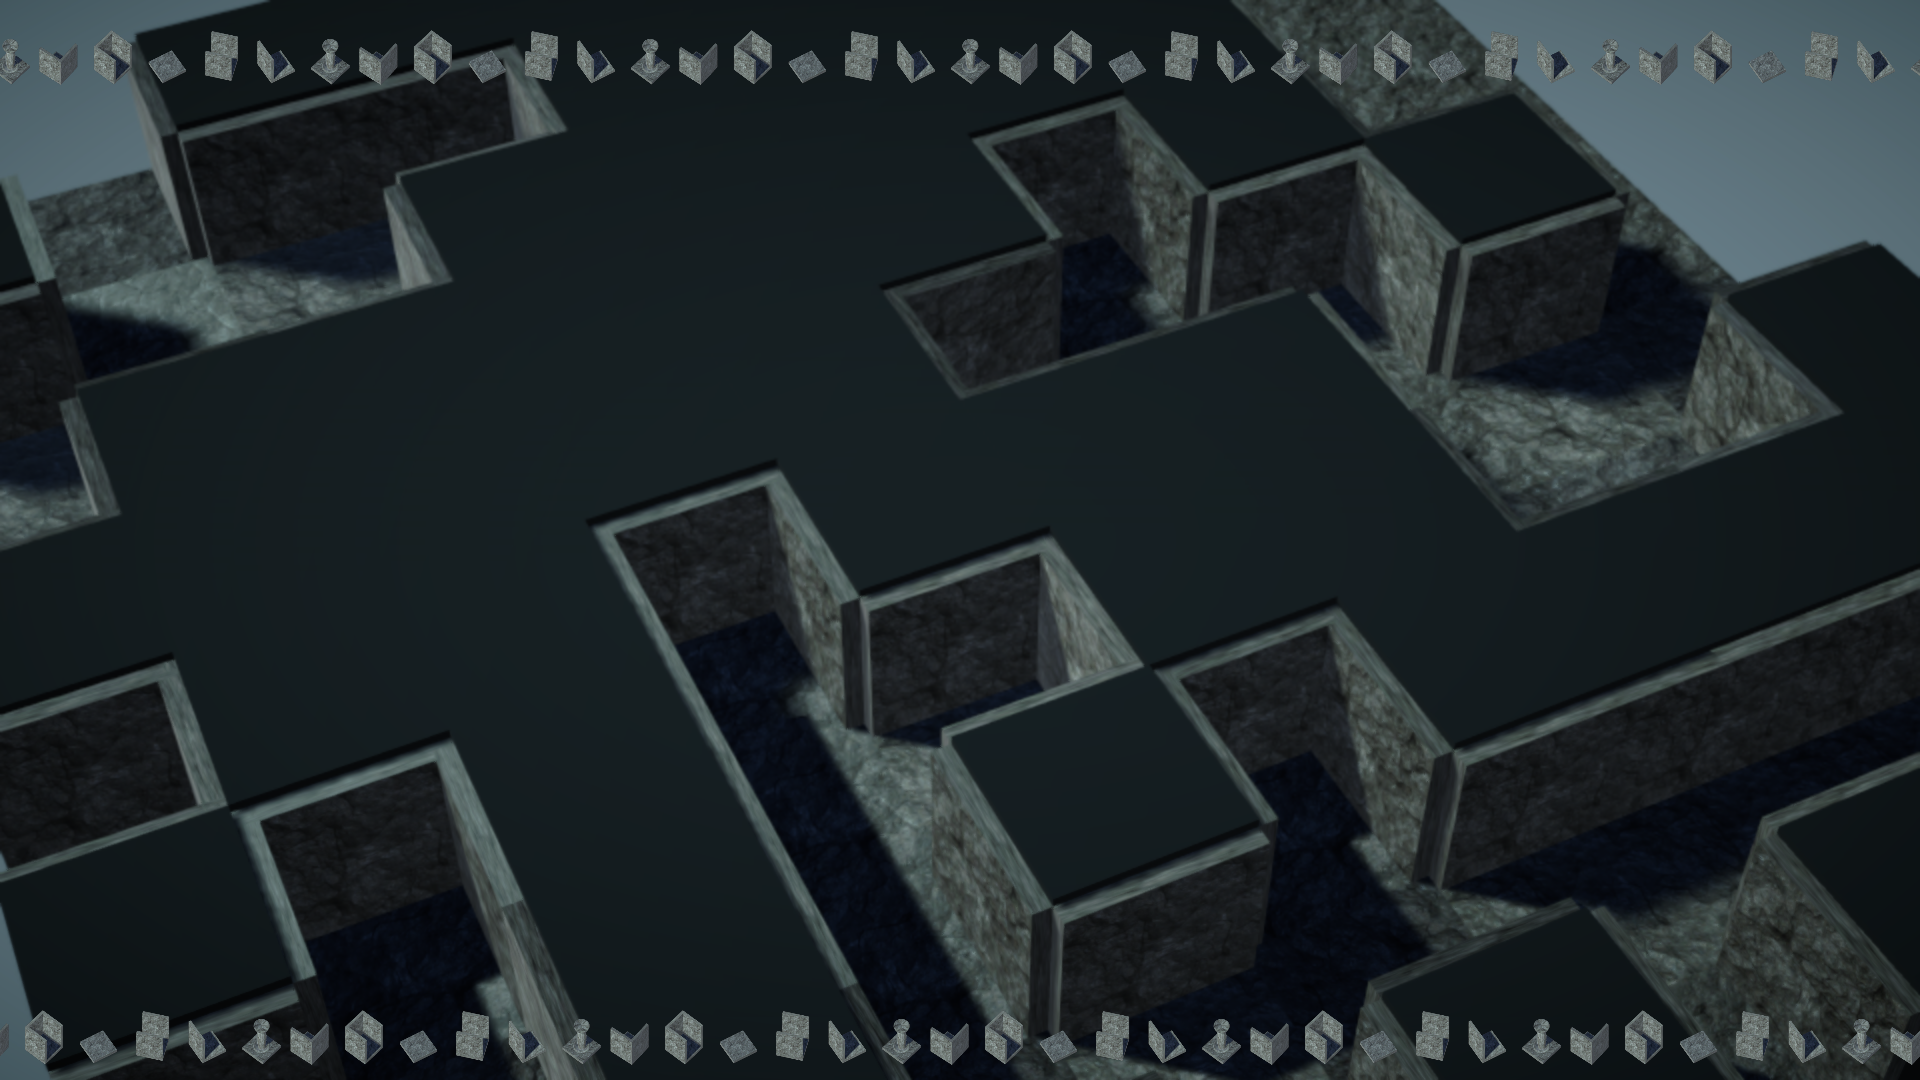
I started by creating the models in Maya. I had planned to use NURBs modeling tools to create tileable stone walls and floor sections but was recommended to limit the complexity strictly to the texturing. The result was very simple models, using primarily re-scaled cube primitives. I wanted to make sure at least one element of the project was more complex than that, so I created a pillar tile as well. Additionally, I attempted to create a lantern, but it wasn’t turning out how I had hoped so I ended up abandoning that aspect of it.


Next, I started the procedural generation. I had planned to use code from past projects to implement generation algorithms like Random Walk, Perlin Noise, and Binary Space Partitioning, but the code I had created in the past was not as reusable as I thought it was. To keep things focused on the artistic workflow, I only implemented a coin flip algorithm, randomly determining whether a tile should be filled or empty. Then I run through the generated tile data, and determine what model should be placed at each tile, and how it should be oriented, by looking at whether the neighboring tiles are filled or empty.

I used Unity’s node-based shader tool to texture the models. While the end result only uses a texture map and a normal map, I ended up learning a lot about this process. Which render pipeline you’re using in Unity can have a dramatic effect on certain things like what tools are available, and I feel confident navigating this space in the future. Additionally, I learned how to do cool shader effects like creating a glowing border that grows and shrinks over time. Unfortunately, such effects did not feel like they had a place in the final version of this project.
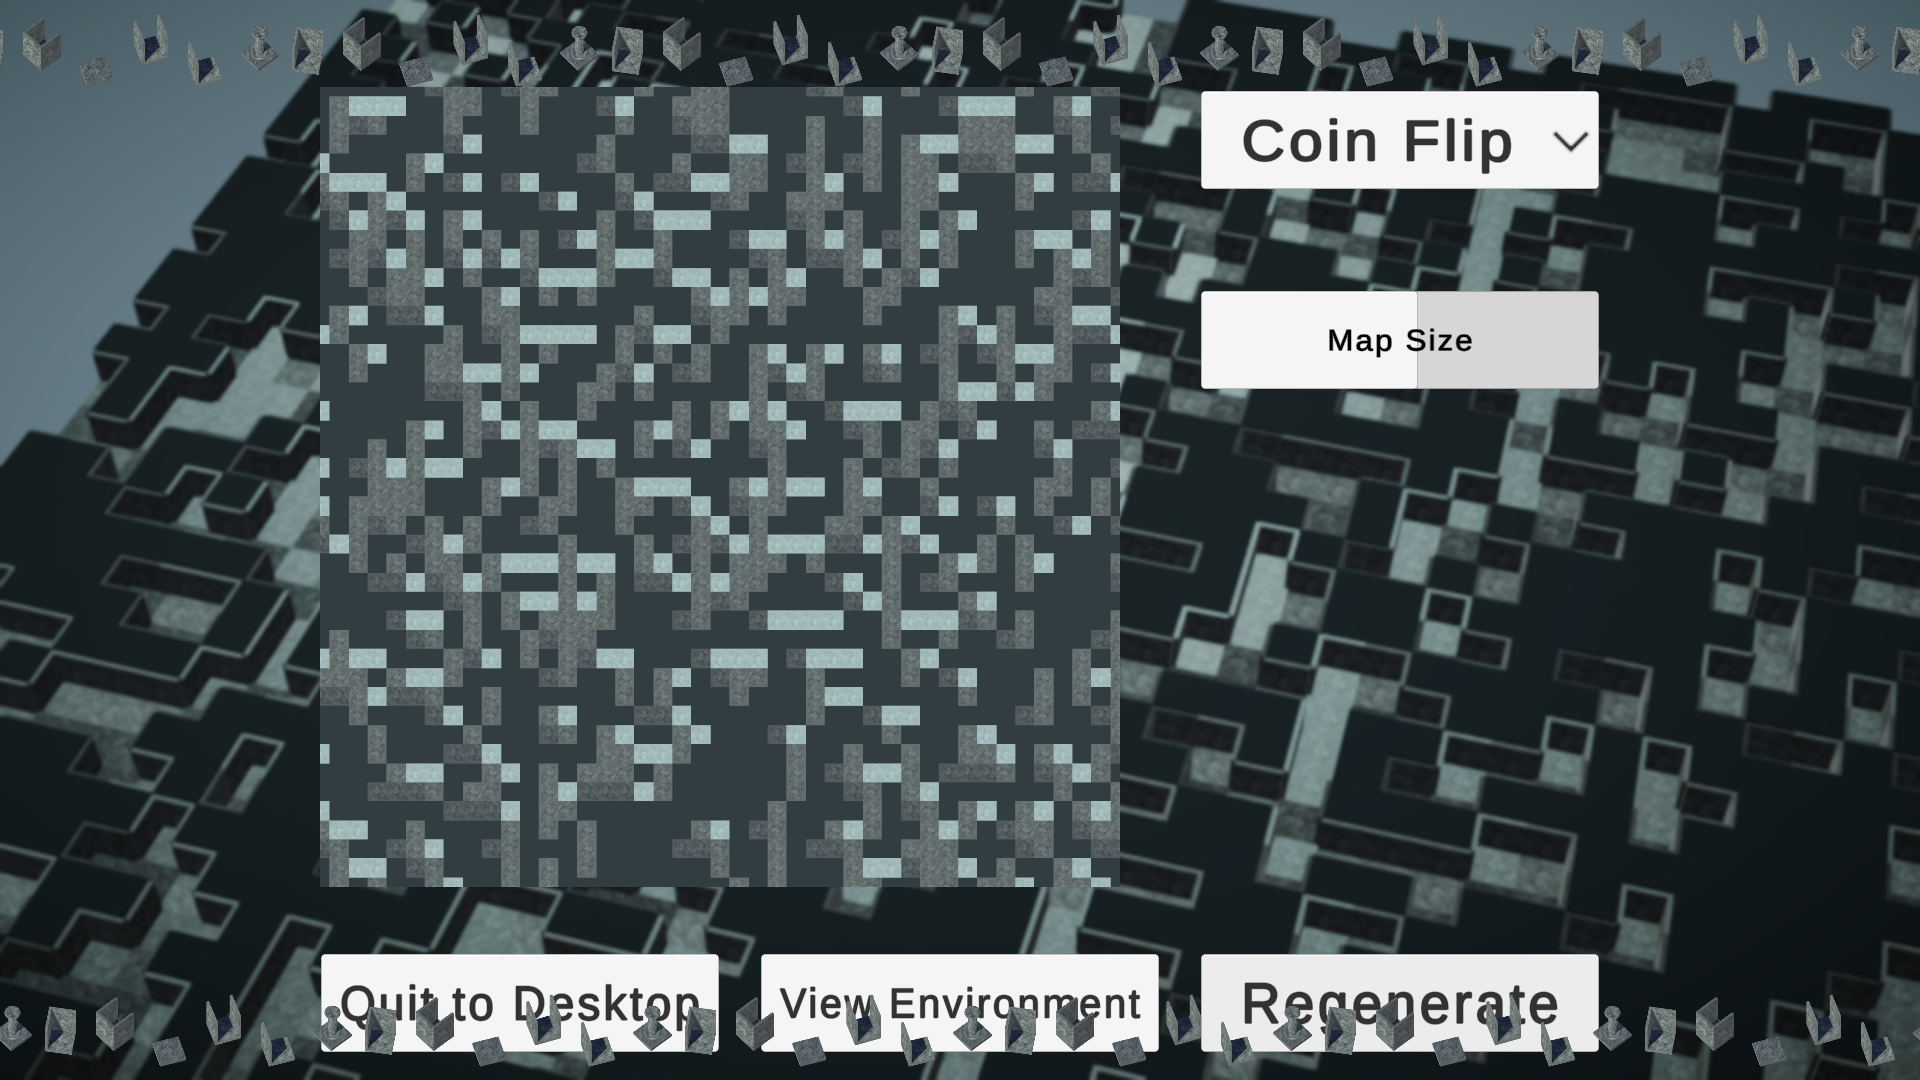
The rest of the work done for this project is difficult to capture in pictures, but you can see much of it in action by downloading the project from the link provided above. The application features a pause menu that tweens in and out of existence, which is an effect that I’ve been meaning to learn how to implement for ages. I used a library called LeanTween, which has a plethora of incredible features for tweening via code in Unity. In this menu, you can view a mini-map of the generated environment, re-size, and re-generate the environment. There is a spot to select a different generation method, but I never implemented additional algorithms.
Additionally, I made use of Post-Processing effects. The render pipeline you’re using in Unity again has a significant impact on this, and I finally understand how to work with post-processing across all of the render pipelines. These are quite subtle, but I think they make the project feel much better. A vignette effect is barely noticeable if you’re not looking for it, and the depth of field effect makes the camera view feel a little more dynamic.
Speaking of cameras, I learned so much about cameras in unity! My favorite effect that I implemented for this project was the small marching tiles along the top and bottom of the image. These are tiny versions of the 3D tiles that I created, and they exist on the UI! To achieve this, I placed each tile in a row in 3D space in the game. I had an additional camera viewing these, and the camera view is sent to a render texture, which can then be placed on an image in the UI canvas. From there, I made a tiled image effect that scrolls along the top and bottom of the screen, and made the actual 3D version of the tiles spin and bob up and down. I also learned about the camera stack in the universal render pipeline, in addition to creating a dynamically-sized mini-map that views the environment, along with a camera-panning effect that also scales its view with the size of the environment.
I’m very happy with the final result, and I feel like I will be able to take my newly gained knowledge and effectively apply it to every Unity project I work on in the future!
The way you have described your thought process makes it possible for me to feel empowered to try this one day myself. I love your final project. I think your decisions about simplicity were the best ones. I am curious about whether you plan on continuing your efforts? I want to navigate through it. Would that be difficult to implement? I also have a question about the shades of grey and the graininess of the image. Are the different shades shadows or textures? And if they are textures, is that what is contributing to the graininess? Thank you for the clarity of your explanation.
Thanks for the feedback Karen!
I don’t have specific plans to continue this project, but I’m sure I will eventually come back to it in some capacity. I do a lot of procedural generation stuff, and this project is set up really nicely to test out different algorithms and stuff.
It wouldn’t be difficult to implement some way to navigate through it, but there’s a bit of an asterisk to that. There’s currently only one generation algorithm, and it’s totally random. So I could place a 3D character in one of the empty spaces, but there’s no garauntee it would be connected to a large space.
The different shades is a bit of an unexpected bug, and the graininess is probably a combination of the texture quality and the blur from the post processing effects.