GoemetricAbstraction
InteractiveAnimation
Huge mistake by posting them in my own blog……..
GoemetricAbstraction
InteractiveAnimation
Huge mistake by posting them in my own blog……..
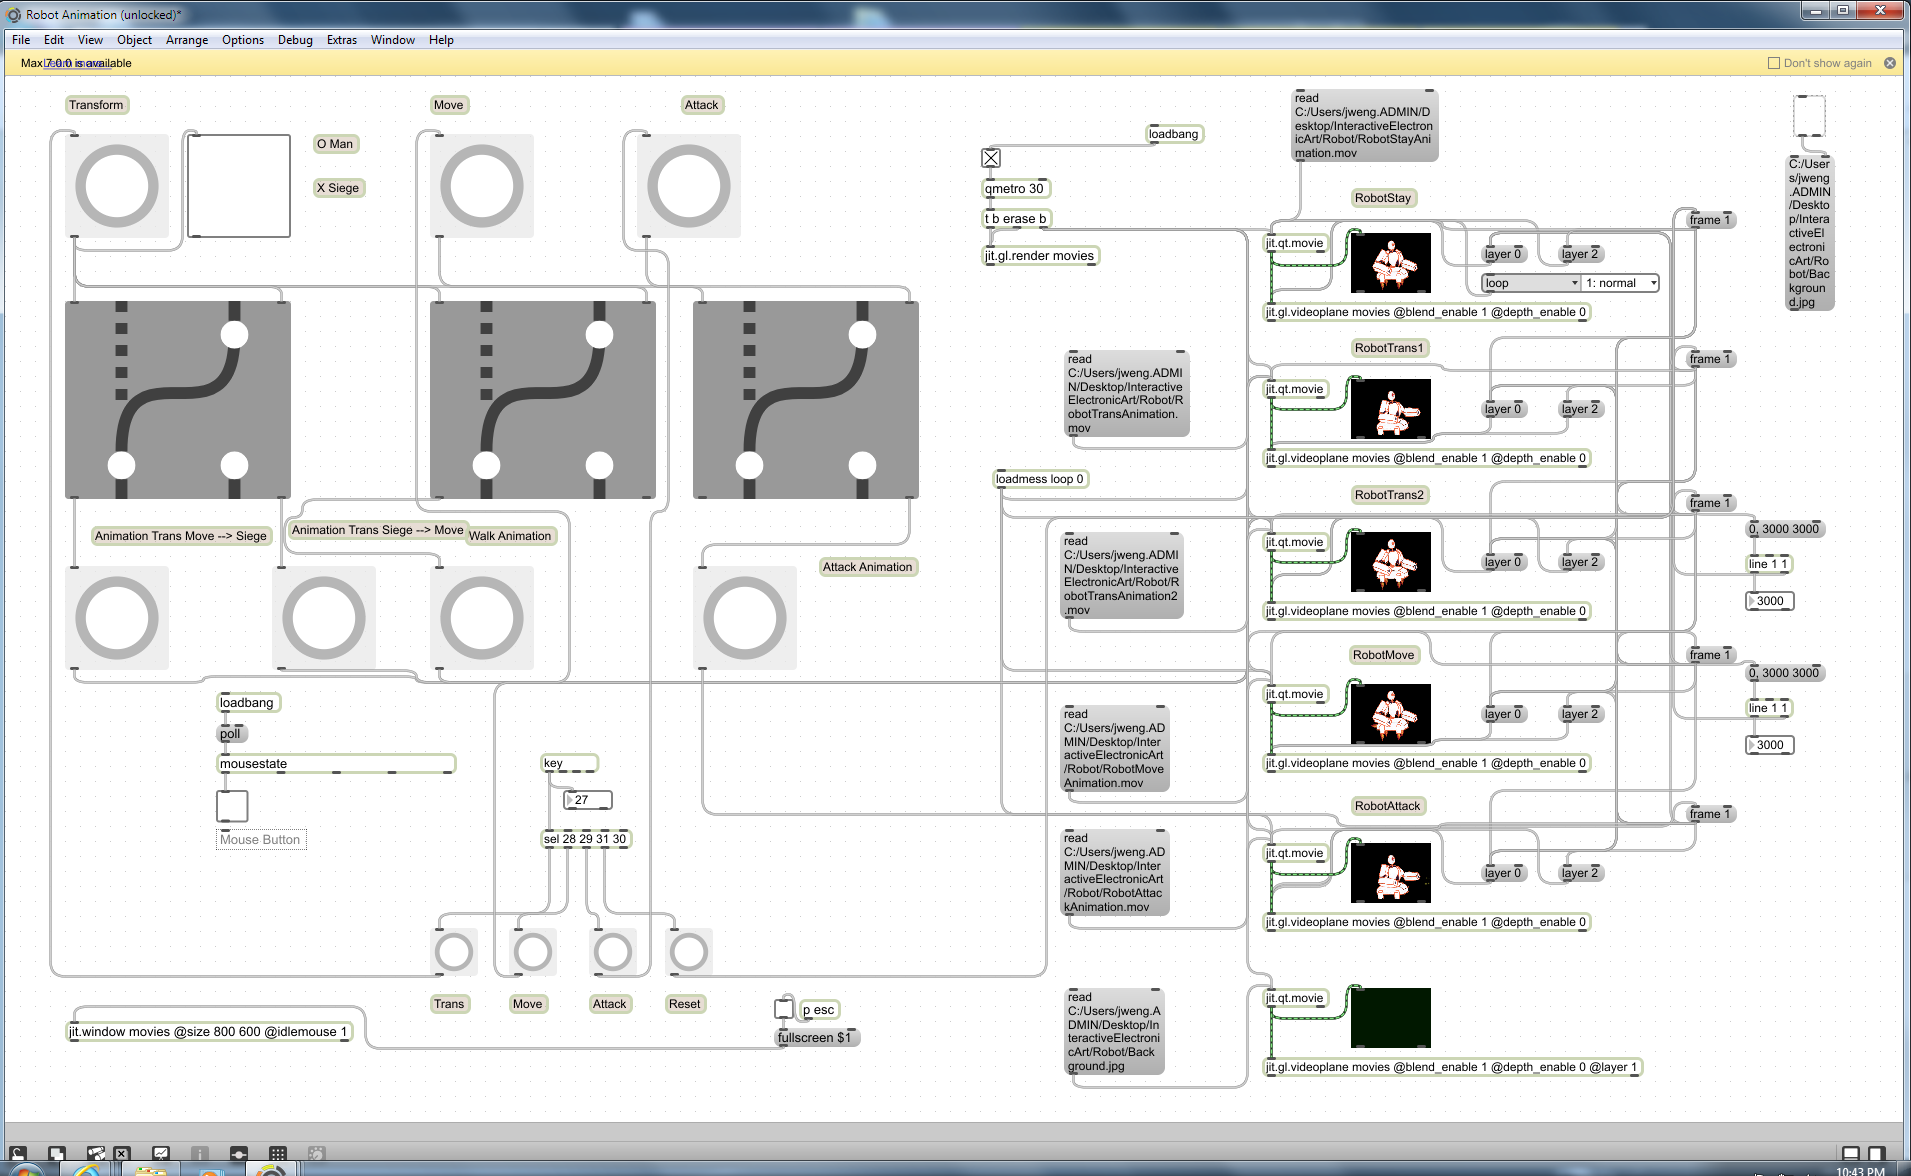
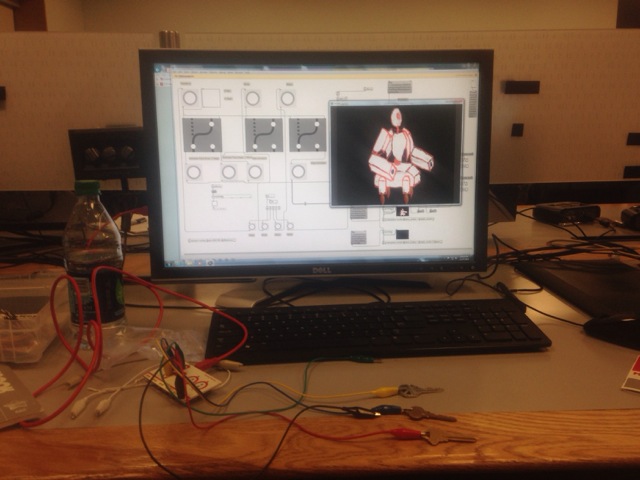
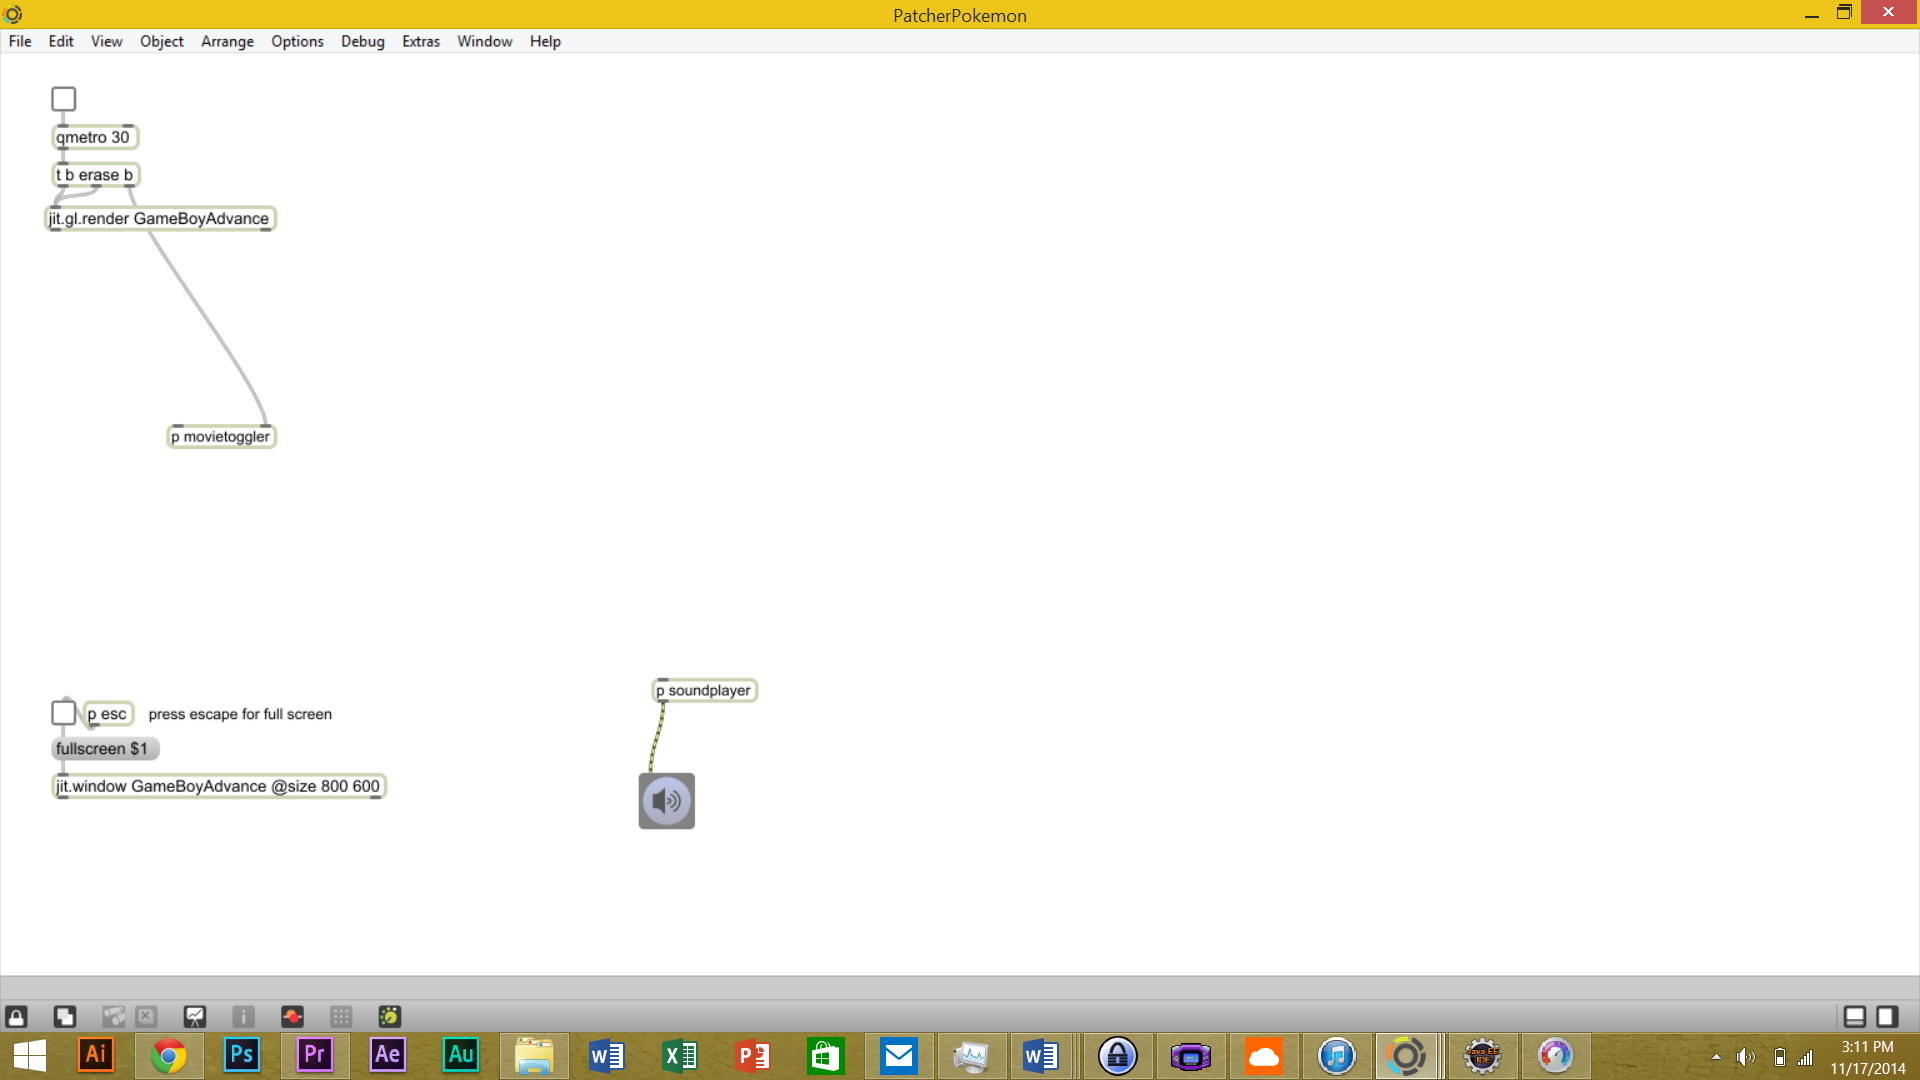
The scene I created for this project is just an interactive robot with transforming, moving, and attacking animation.
I wanted to do a robot because I am a fan of Gundam, and I am trying to get into mechanics for my 2D art.
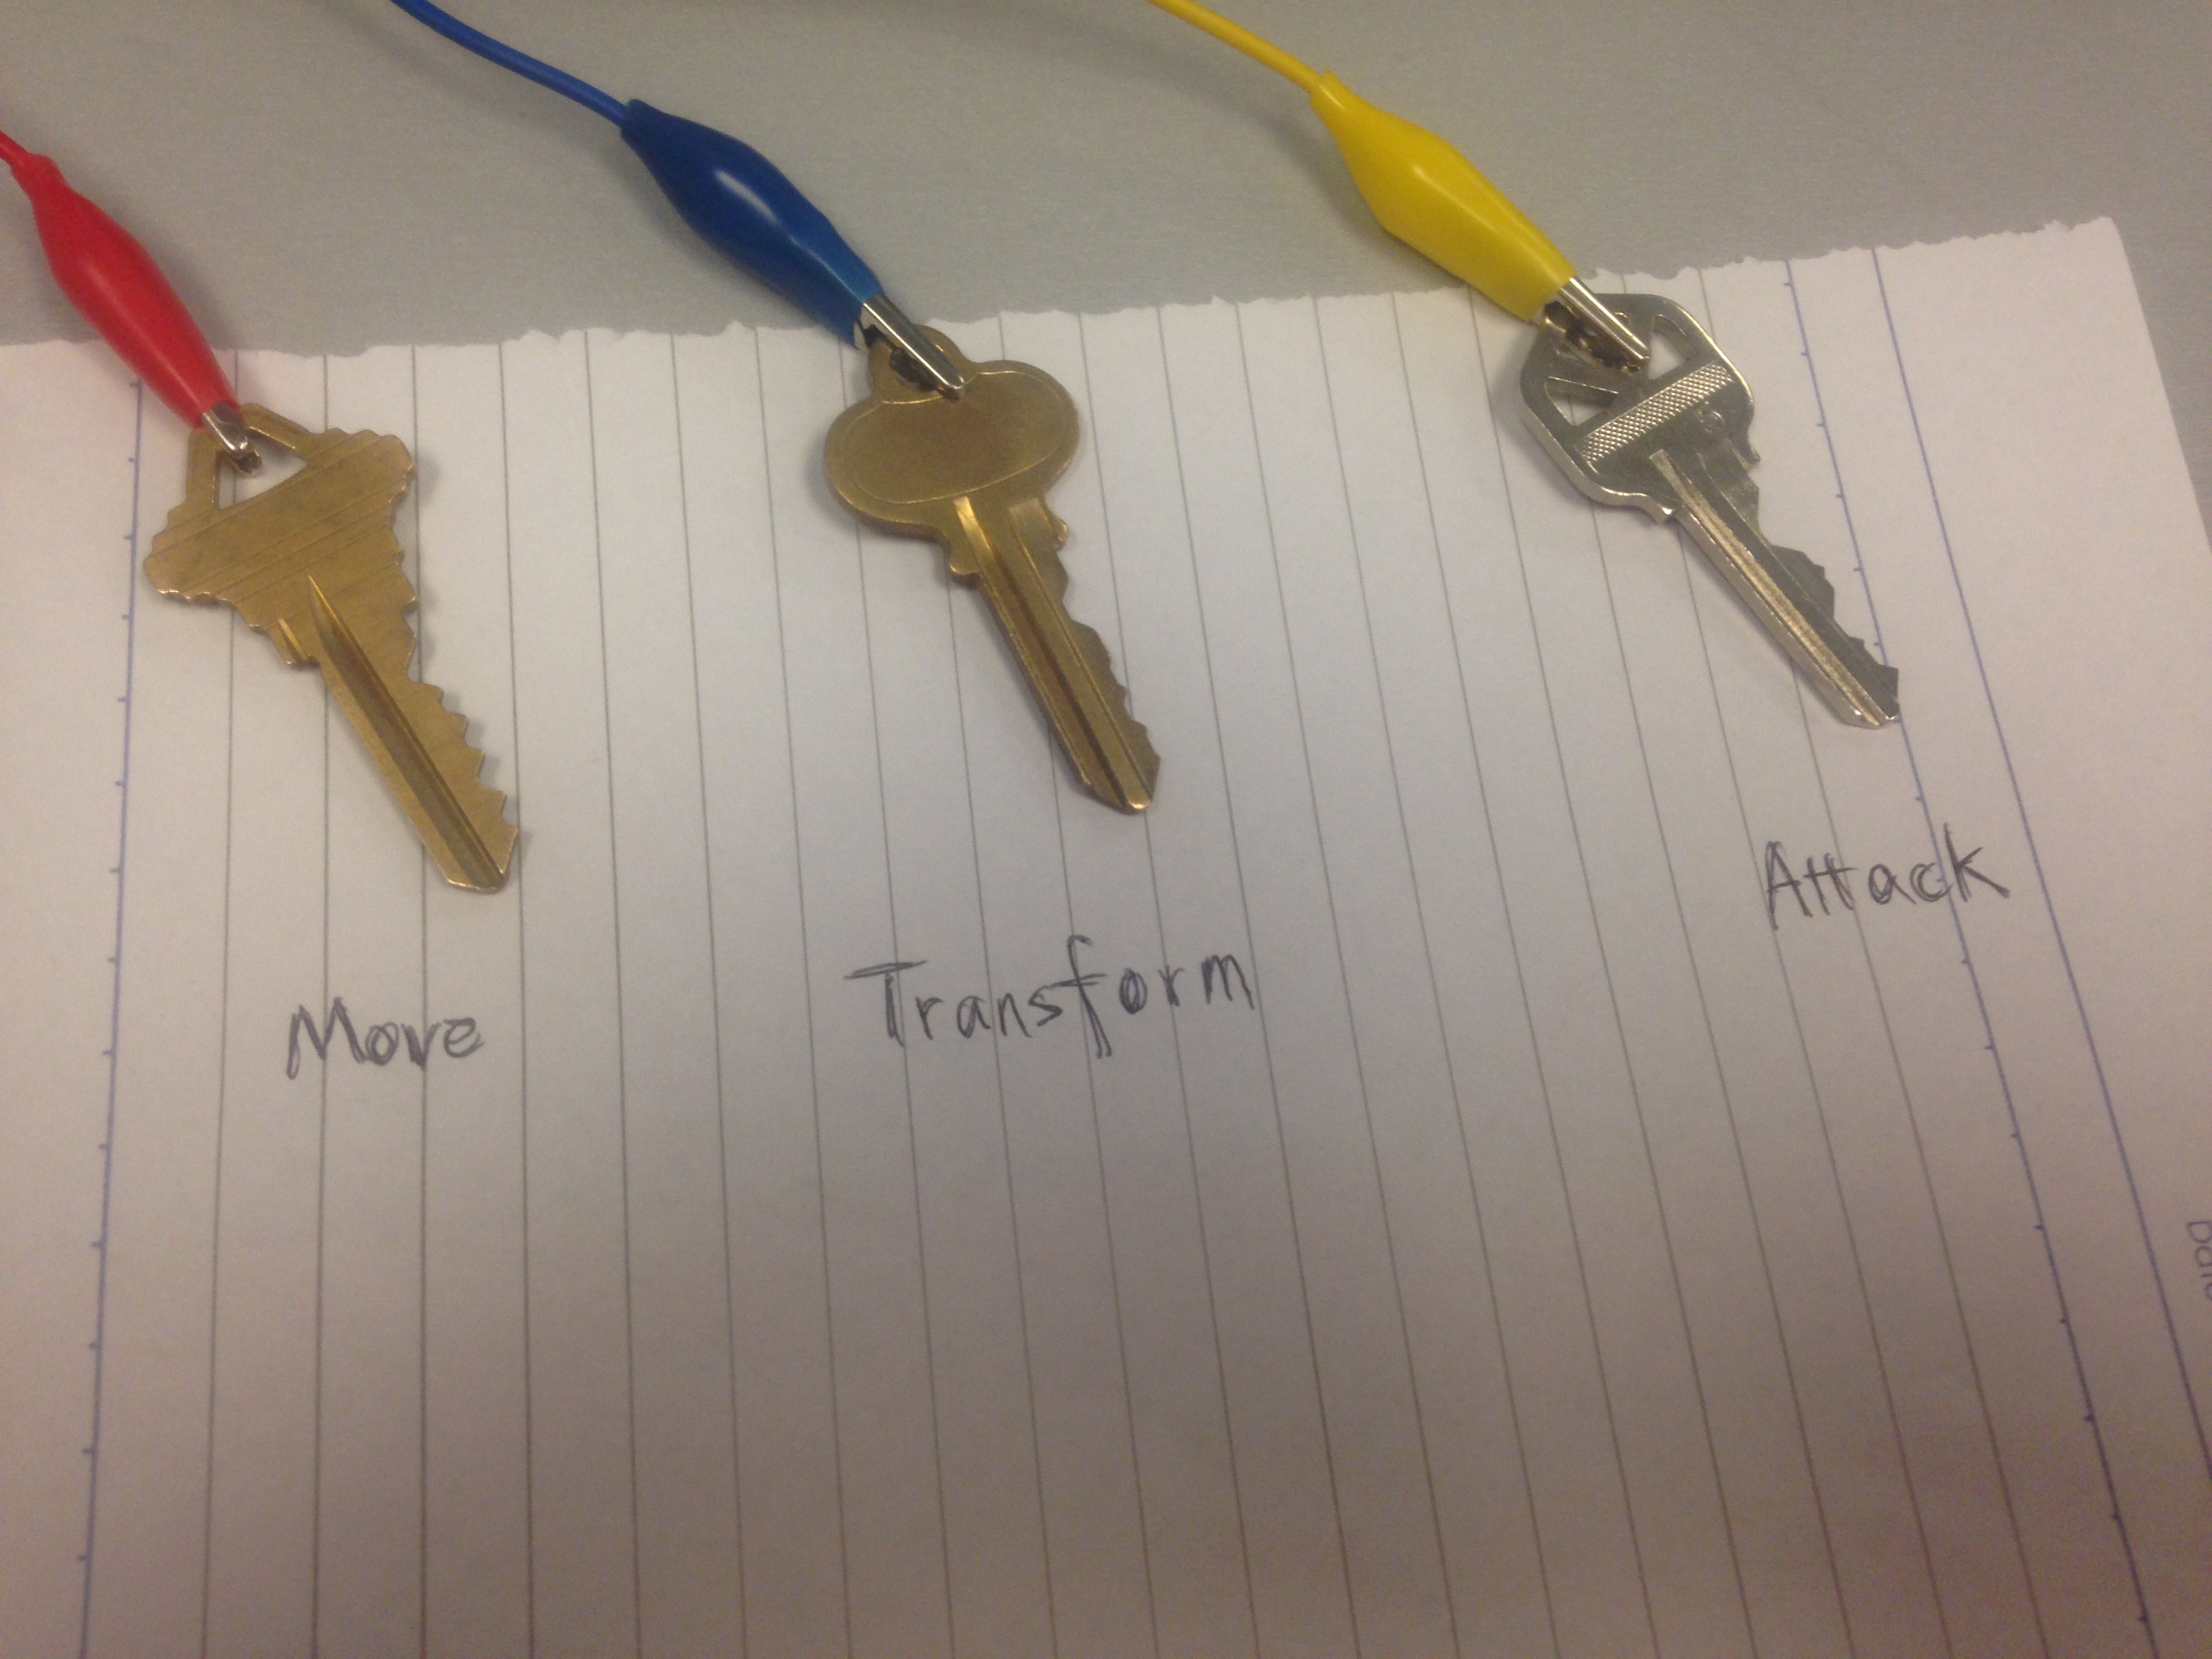
I put most of my time on drawing the animations, so for Makey Makey I just used keys to interact with.
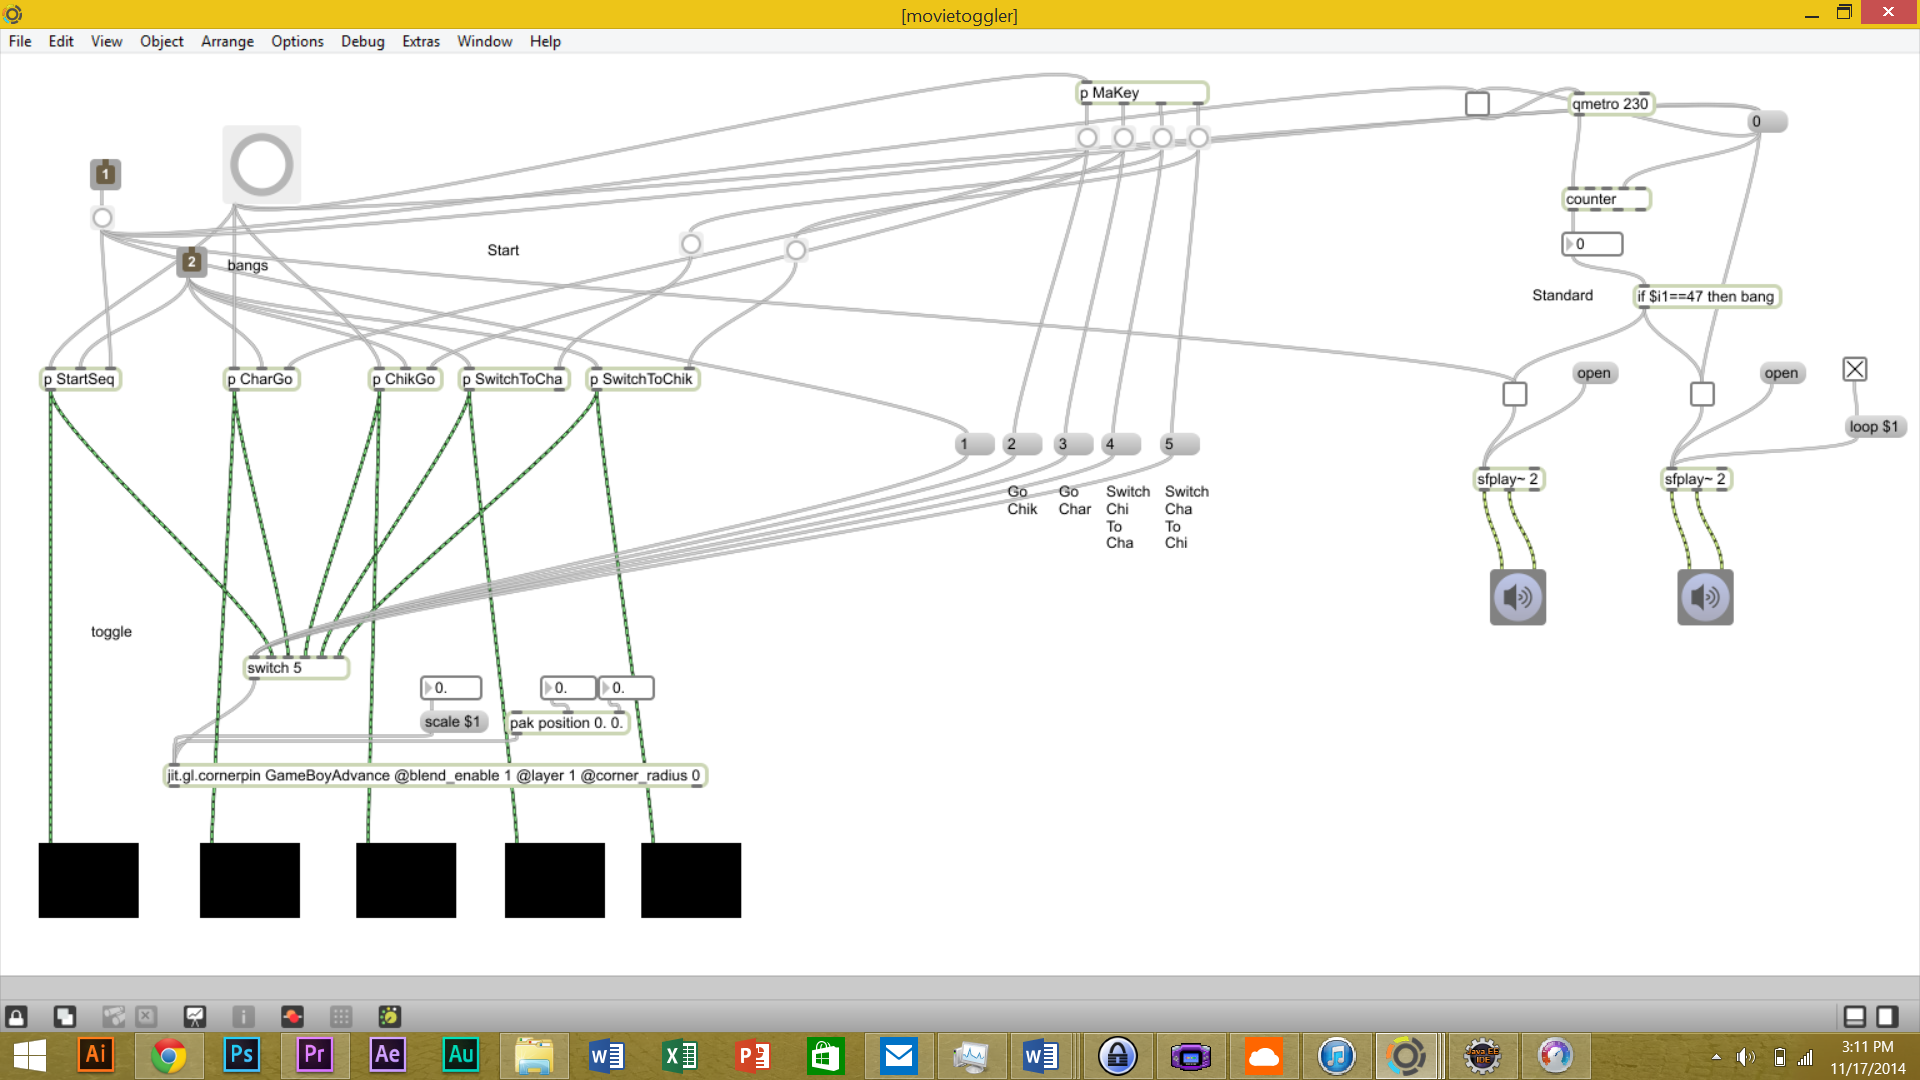
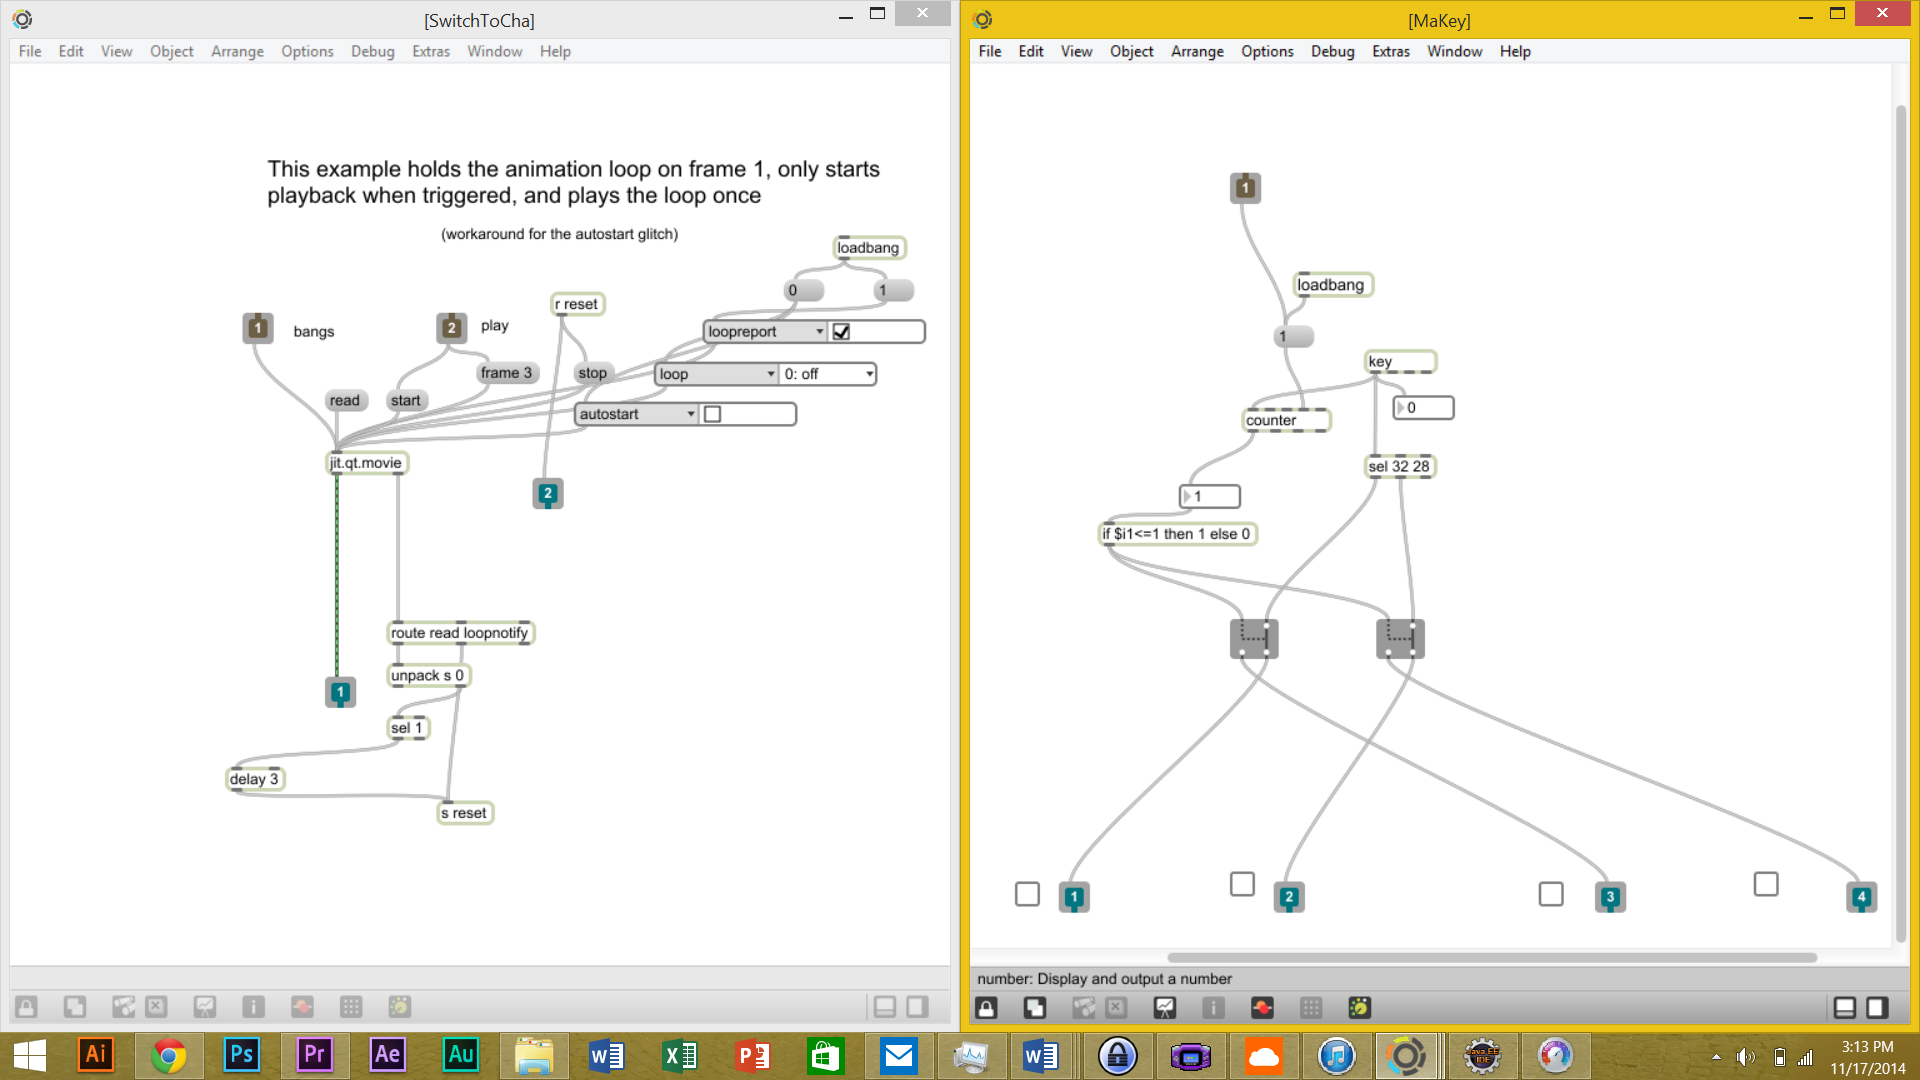
Here is the coding behind the pokedex. The block on the upper left is for squirtle only, but the code is duplicated for bulbasaur and charmander, with the respective images loaded into them. The bottom right is a jitter made to hold the background of the pokedex used to also hide the pokemon not currently selected.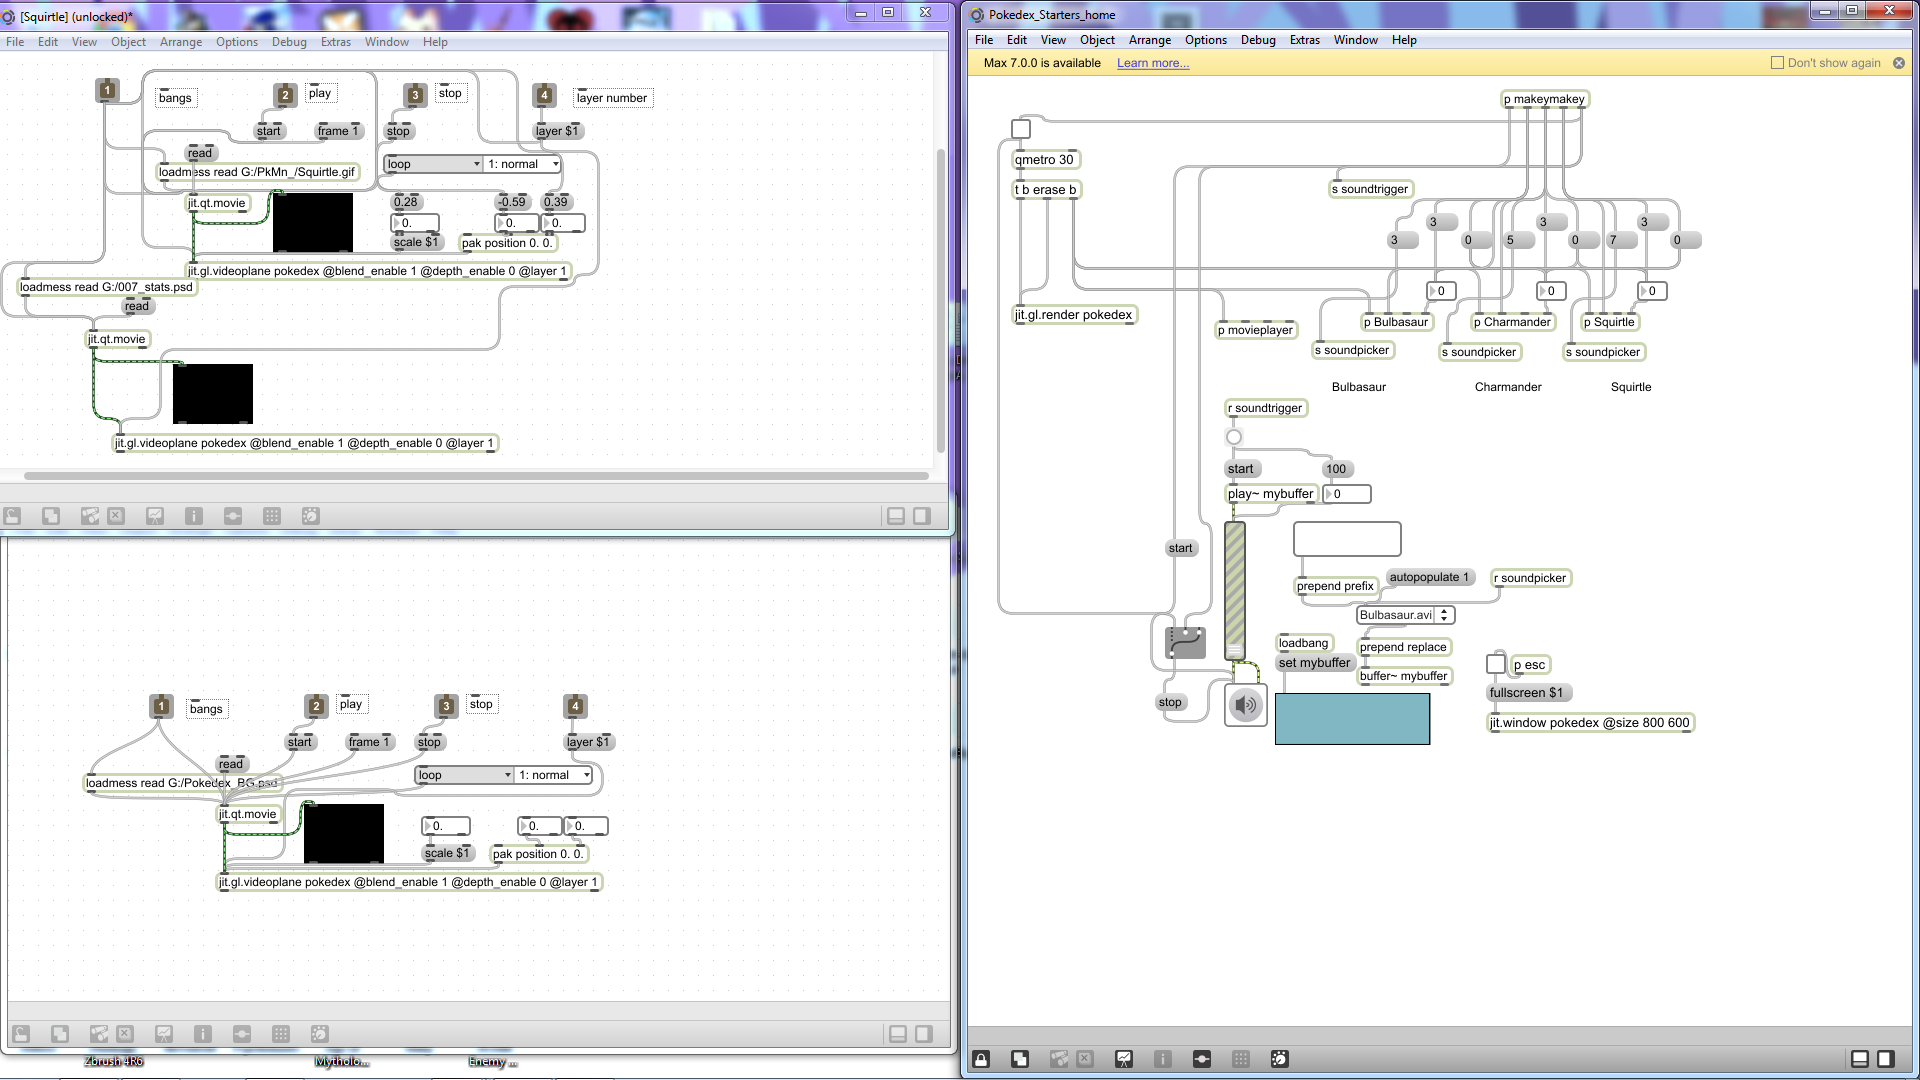 The body of the code is primarily message triggers that come from the bangs from makey makey input, and subsequently switch the layers that each pokemon is displayed on, moving the one displayed to layer 3 and the ones hidden to layer 0. The Background is on layer 2 to hide the default layer one that the others start on so that the text doesn’t start overlapping.
Here is the video link
https://www.youtube.com/watch?v=4ra1NtcElis
Unfortunately i couldnt get sound to work again since the lab speakers don’t work and now when I attempt to run it on my laptop where it originally started, it crashes Max instead and wont load in any of the images, and ignores the background.
The inspiration for ./MALL 3015 came after a trip to the mall (I originally went to see Interstellar – a great film and potential classic). While looking at clothes, I though how wonderful it would be to just download a new look on your computer and have it be reflected on your body, without having to leave the house. The technology isn’t ready for a full implementation, so I explored how a UI would look for such a tool.
A critical element to the program is the folder structure for the images. The images are loaded with absolute paths

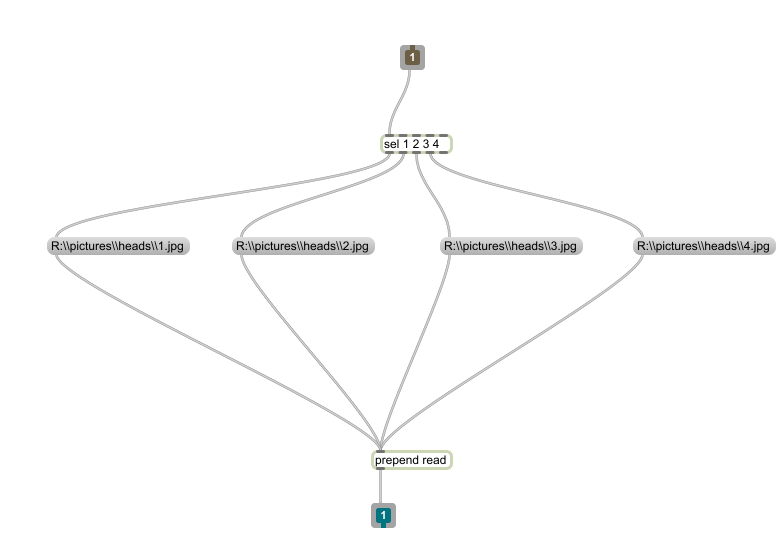
The main Max file is quite a mess. The images and loading video are loaded onto corner pin objects to be mapped onto the projector. The MaKey MaKey interface is connected to sub patchers that choose the image and to a sound object.

The sub patcher generates a random number from 0 to 3, scales it to 1 to 4. The number is then selected and the associated image is loaded.
The entire composition is projected onto a retro themed computer interface.
Idea
The idea behind my project was my passion for Pokemon and the idea of the usage of alternative game controllers.
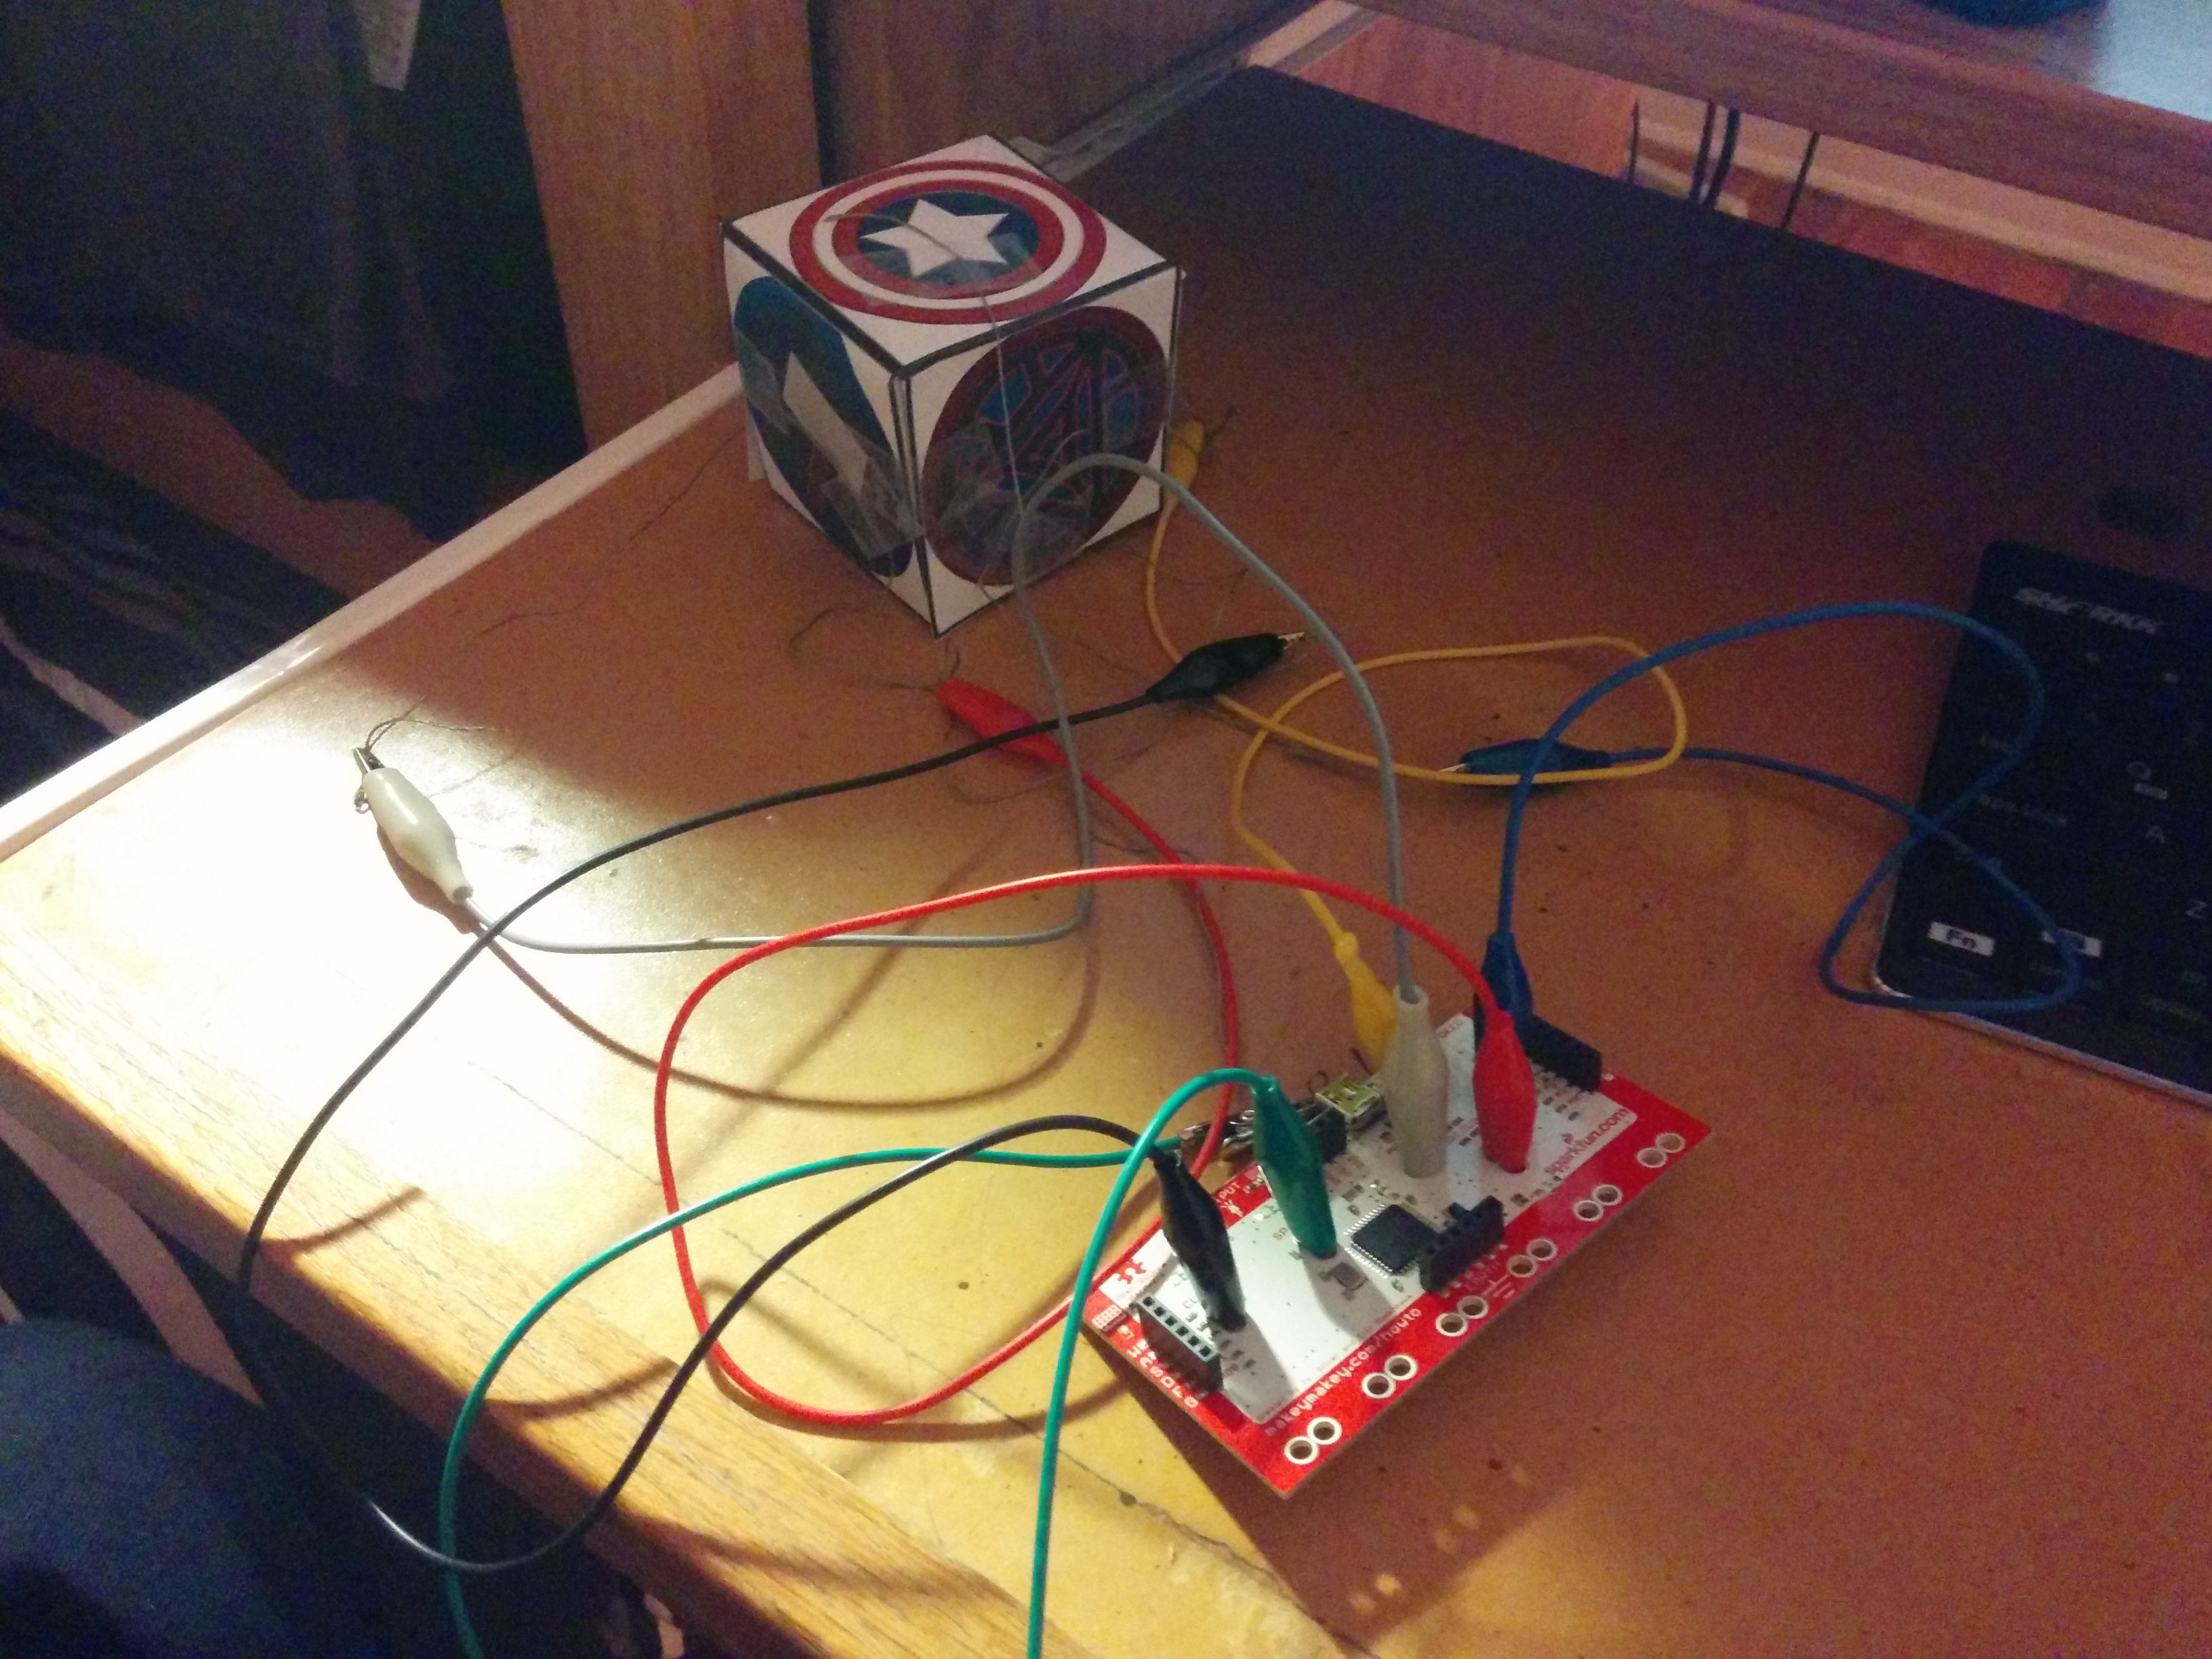
I wanted to rebuild PokeBalls. That was the first idea. However, I quickly found myself struggling with the idea. So instead I 3D Printed three Pokemon I found on Thingiverse. (Low-Poly Pokemon by FLOWALISTIK)
I drew a graphite Pokeball and attached it to the MakeyMakey board as the ground. I attached aluminium foil to make the prints conductive.
The animations were recorded using the VirtualBoy emulator and a program called TinyTake. I had quite a few issues throughout the cutting and rendering and actually decided, due to logic issues, to lower the number to two pokemon (namely Charmander and Chikorita).
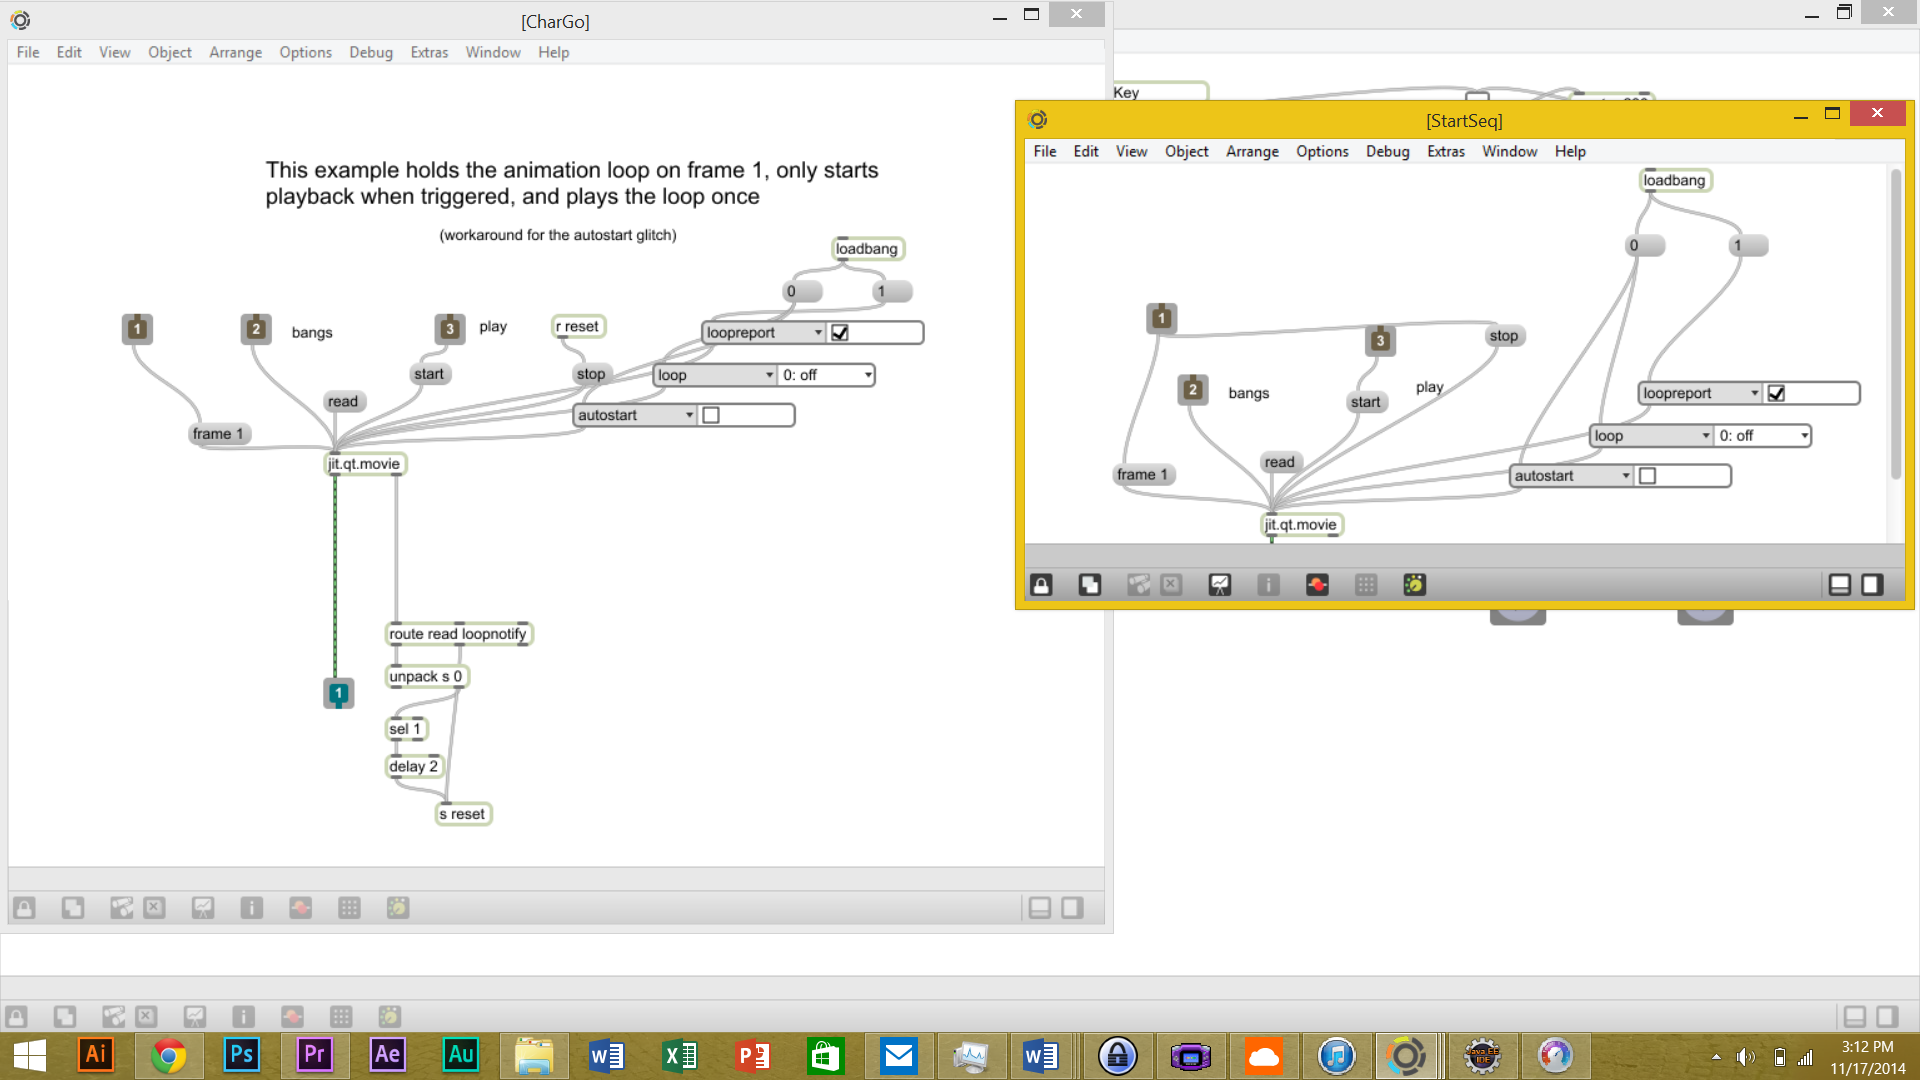
As soon as I finished the animations, I worked on the patcher. After hours and hours I managed to come up wiith the following:
Essentially, I play a start animation, then a “Go animation”, depending on the chosen Pokemon.
Here is the final result:
My interactive drawing consists of a character in a cave painting surrounded by intricate designs. By touching the black designs, most notably the larger black sections, the user triggers animations to play of the designs growing.
Inspiration for the art and animation comes from a short segment of Genndy Tartakovsky’s Star Wars: Clone Wars (2003) animated series, linked below.
I’ve loved this miniseries since it aired, so it was fun to work with this particular style.
The designs and animations were done in Photoshop to mimic the style

Max patch layout
Well, as stated in class, I am a big fan of Marvel’s “The Avengers”. As a result, I thought that incorporating them into my interactive project would be a pretty cool thing to do. Because of this, the project idea was born.
It all started back in class when I began drawing the icons for each of the 6 Avengers (only looking at the main ones for now). Each of these are very basic – using only the built in tools in Photoshop – rarely going outside the shape tool. To finalize them, I gave them depth, some pattern overlays and shadows/lights. Here are all 6 icons that I used for the cube:


At first, I wanted to print these out on photographic paper and all from the printing press, however, due to price and the fact that making a cube out of photographic paper is a little bit difficult, I decided to go with good old A4. The template that I have used:

After this, the cube was built, resulting in the below-shown Brobdingnagian monstrosity:

The conducting strings are attached to more or less the center of each of the squares. Each of them is in turn plugged into the Makey Makey board cables and grounded with one wire, hooked up to my watch. General image of project:
Come to class for the presentation – to see the digital part! 😀
I am just beginning the long journey to bring my artistic ability fully into the interactive realm. I have learned that the creation of the composite as a whole is significantly more difficult than making the individual parts that make up the piece. For the Geometric Abstraction, this difficulty presented itself through getting the correct frame blending between the layers so that the objects felt “alive” rather than just purely responding to the music. Adding a slow pulse in both object size and the background color further added to the desired affect. Composition is extremely important in the video overlays in the interactive picture project. The Puppet Warp and Content Aware Fill tools in Adobe Photoshop CC really helped with creating a realistic interaction between the picture, the animation and the resulting sound.
Over the past two weeks, I have developed a love-hate relationship with max. The love part consists of the visual programming (which is also a hate bit, more about that later). It’s nice to look at the screen and immediately see how everything is connected – in programming, it’s difficult to see everything immediately when one method is about 10 pages down, and you are not sure where it’s called. The not so good bit with visual programming is the lack of code at times. I saw that the jitters are actually JSON syntax files, which was interesting, and, hopefully before the end of the course I will have a go at writing one myself using JavaScript.
In general, Max is fun up until the point that its quirks start showing up. For example, a problem fixed in class today was the && operator – outputs something regardless of result – 0 or 1. That was something new that I did not expect to happen (doesn’t happen in programming, any linked code after a false && will not run).
The first two projects were pretty simple in theory, however, could get complicated if there were many variables to take into account. For example, specifying certain variables to load on start up was an interesting procedure/situation (especially when you don’t write down the 10+ X and Y coordinate pairs for your shapes). Project 1 was a basic animation, you can see it in the link below. The base drums will play when the squares move past certain points (this changes as I experiment, sometimes it hits the edge and will play a sound). The re-sizing tori will cause a crash cymbal to play when the peak point is reached. So, when it stops growing and starts to shrink, the sound will play.
For my second project, I decided to look at something very primitive, my desk mainly (don’t let the image fool you, it is actually way more of a mess). I have my keyboard, memory card, remote, mouse and card reader. The mouse, reader and the ledge are animated, with sounds. Interesting situations happened here as well – mainly with mapping. Window re-sizing tends to mess up the mapping – not sure why this happens, I suppose if the aspect ratio is changed and the padding is on the sides of the image, the program will not calculate the new coordinates based on the image edge, but rather go from the window – so absolute positioning.
Both projects are unlisted on YouTube, but here are the links. Recording quality varied since I used Snagit for one (has some serious glitches on the OS) and Camtasia Recorder for the other one:
Assignment 1:
Assignment 2:
Welcome People to my first blog post.
The GeometricShapes assignment is now TIMED.
I analyzed the beat (I had Serato analyze it for me, to be precise) and calculated the beats per millisecond.
Now a random effect will occur on every other beat. The effects are random, every time one gets a different result.
The song is called “Deja Vu” and can be found on “(R)evia” by Tua (tuamusik.de)
The Interactive animation took a lot out of me. I still have not figured out how to make it just appear when clicking without looping it.
So I figured I’d just put soundeffects on it and let it go. Not my best work, honestly.