For my project I decided to do the first of my two proposals which is show again below for reference.
To complete this project I have decided to run the processing power on a Raspberry Pi computer which allows easy expansion for more memory for images, and plenty of processing power to convert and scale images on the fly which is the primary technical requirement of this project. For the light strip, I am using the Adafruit 144 led/m dotstar led strips. The downside to using these strips is that logic level converting (3.3V Pi voltage to 5V led signal voltage) is required. I tested the setup of a board that performs such voltage conversions as well as integrating a power supply shown in the figure below.

To house the strip, I plan on using a transparent tube or box that is the same length of the strip with a cross sectional area of around 1.5-2 sq-in to give appropriate dispersion from the LEDs. To act as a filter and remove the harshness of the leds directly, I am planning on using several layers of semi-transparent paper as shown below. 
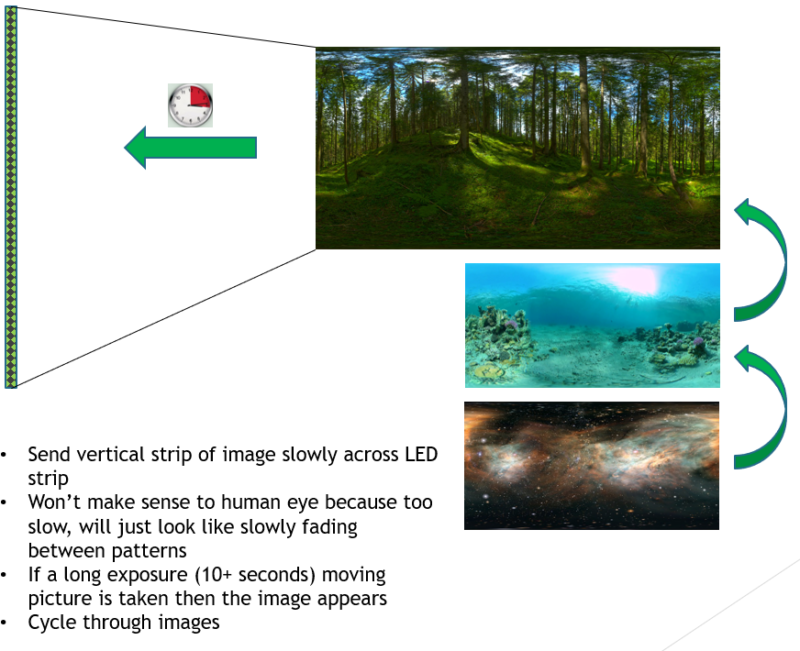
I did a preliminary test with a single image to see if moving the camera actually would produce an image. Results of some testing are shown below. For this test, the strip was laying on the floor with the diffusing paper on top of it like in the previous image. The image was of a galaxy with drastic light vs dark sections. As the images below show, it comes out a little over exposed. The camera used to shoot the images below was a samsung galaxy s9 camera with the default app. A samsung j7 with the Long Exposure 2 app installed was able to produce similar images, but suffered slightly more from the over exposure. Moving forward, installing the light strip in a tube for better diffusion and dampening should be a primary focus to produce better quality images.


The shopping list:
Purchased:
- Raspberry Pi
- Sd Card
- Power Supply
- Led DotStar Strip
- Custom strip driving circuit board
To purchase:
- Electronics enclosure
- Clear tube (or similar)
- Diffuser paper