Final Project II: The Switcheroo

In my first post about my final project I provided photos of a stepper motor, stepper driver, and FPGA development kit.

I will use none of those for my final project. Why? It turns out that getting high resolution rotary encoders for free is very difficult. Instead I shall be using the following parts:

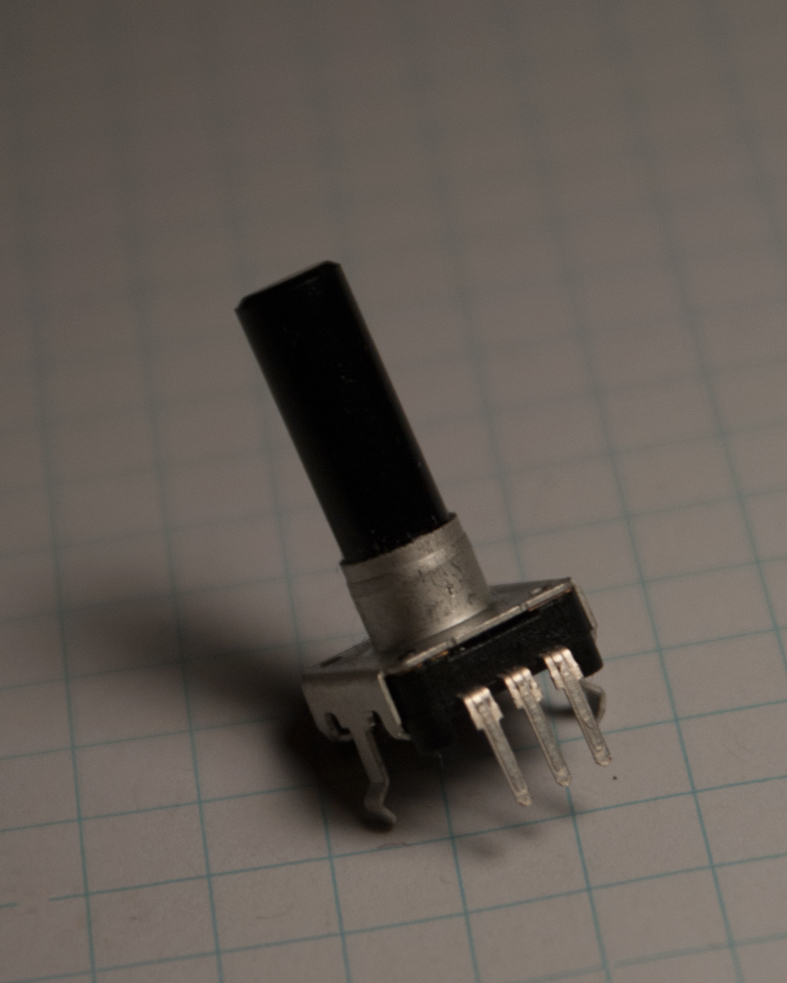
Simple Knob Rotary Encoder
This is a simple rotary encoder which has 24 counts per revolution and reports angular change via quadrature encoding. Quadrature encoding is a very cool method of transmitting the angular change as you can both artificially increase the resolution 4x but also tell the direction of rotation. See this article for details. Specifically read the “Further Description, Including Encoder Waveform” section.

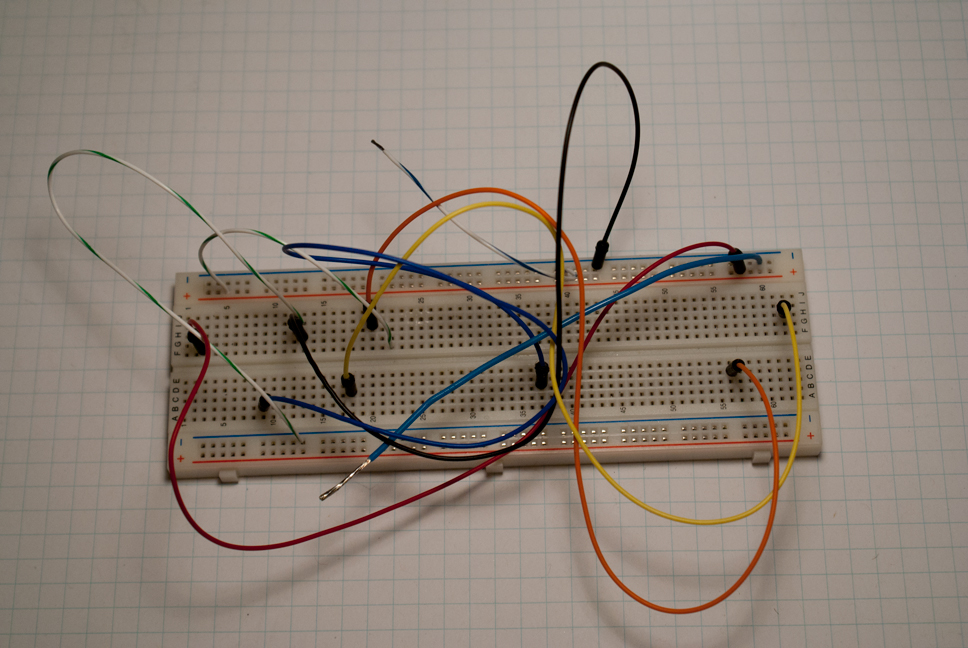
Breadboard and Jumpers
Breadboard and jumpers
Just a standard breadboard with jumpers.

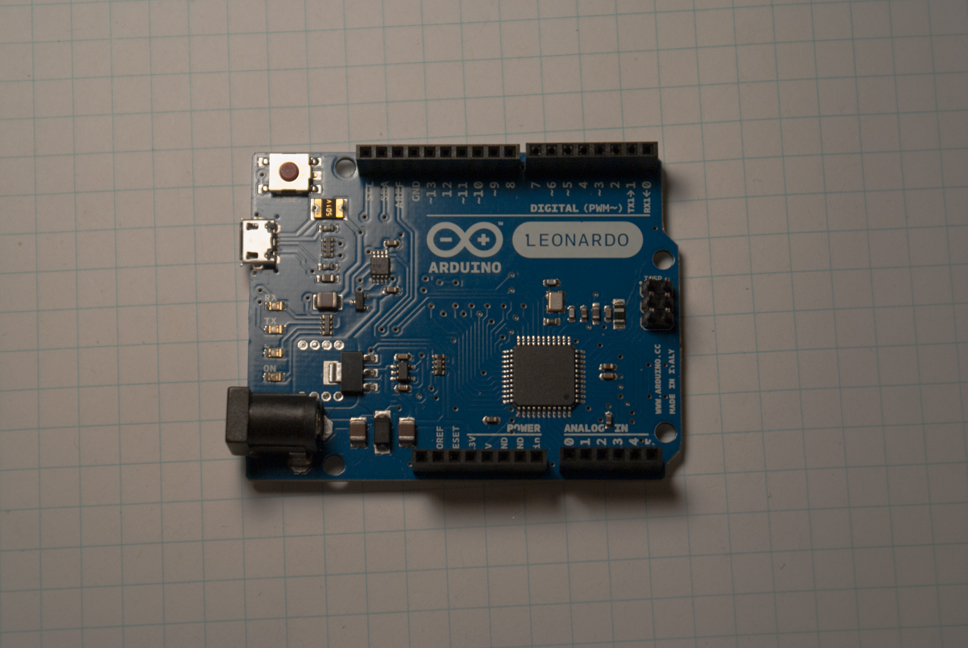
Arduino Leonardo
Arduino Leonardo
The Arduino Leonardo is an updated version of the Arduino Uno. It is less expensive to manufacture and has an updated ATMega microprocessor. I choose this part mainly because it has 4 available external interrupts while the Uno only has 2.

Project Goals
My goal with this project is to produce a virtual etch-a-sketch. I will further extend the etch-a-sketch concept by including velocity data into the drawn lines in some form or another. I could modulate the stroke width, the color, or both.

Final Project Concept

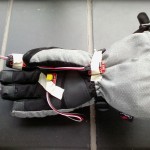
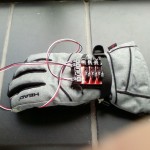
For my final project, I’m taking inspiration from the Synthesizer Glove on the Brainstorming post.

I hope to have four sensors on the glove: A gyroscopic sensor, a light sensor, a touch sensor (button), and a rotation sensor.

The main part of the project will be to create a simple synthesizer patch that will take input from the light and gyroscopic sensors to make a sound.
Pressing the button will play the sound.
My current idea is to have the vertical axis be the frequency (pitch) and the light sensor be amplitude (loudness).

The fun part will come after this. I want to use the rotation sensor to switch modes between using the synthesizer and special effects.
When the rotation sensor is turned past a point, fulfilling certain conditions with the light and gyroscopic sensors and pressing the button will play sound effects. E.g., making a gun with your fingers will produce a gunshot sound.

Here are some pictures of my rig so far:

Final project concept

Ok, so for my final project, I really liked the idea of doing a play mat for a game that got mentioned in class today. I think I’m going to try something similar to his idea but using my friend’s Magic deck instead of using Yugioh. I don’t really want to do a mat, but I do want to do some kind of interactive video or audio to the game and the methods that my friend uses to play. Luckily, he uses multiple copies of the same cards a lot so it would be easy to make images or animation that are like cut outs of the cards that he uses. He uses goblin card so I figure that it shouldn’t be too hard to find or make animations for it. I would want to have it be very specific to him and not really a generalization because it seems a bit easier. I would hope to use actual cards as the sensors, but I feel like that would actually mess up the cards a lot because of the alligator clips, so I will probably end up using some spare card covers that we have. I will definitely need to look up some animations or images of goblin quickly so that if I don’t find any I have time to make my own. Of course I will also need to test to see if the cards or the card cover are actually conductive, but if not I could always put a little bit of aluminum foil on them. For the program itself, I don’t really think that it should be too hard if I just use images. I could just have each keycode be registered to put up a different image and then to reset after a few seconds. All in all, it seems like the project could be very fun and I am looking forward to getting started on it.

Makey Makey project! Evolving creature dice art/game

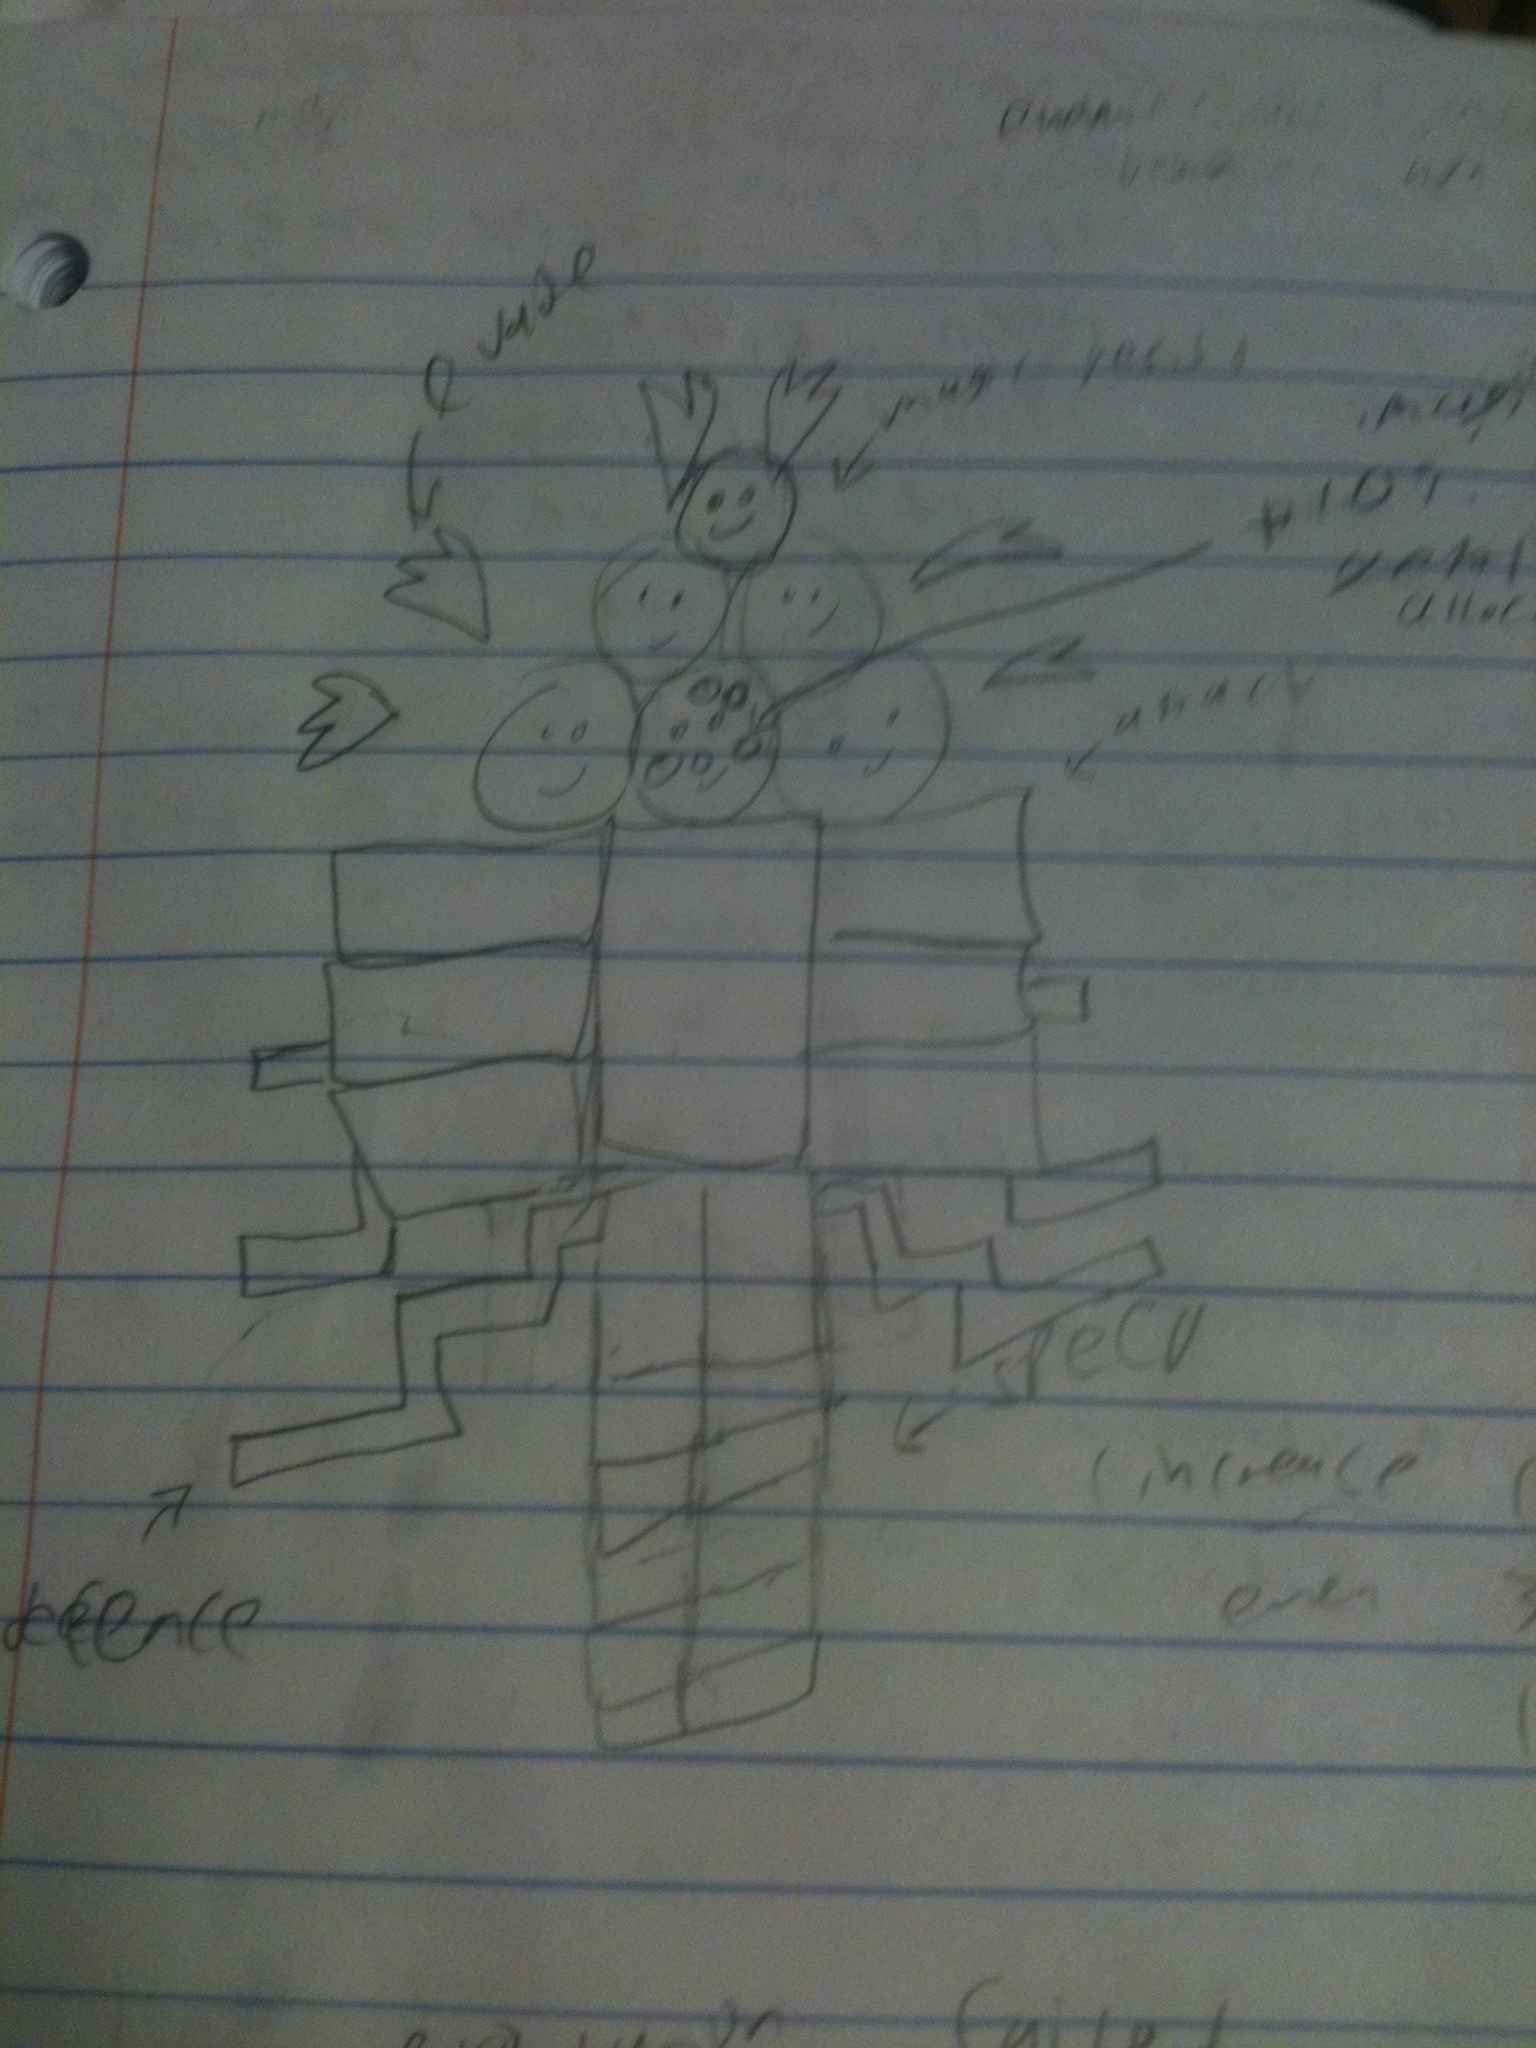
My project will involve the use of a makey makey and a set of D-6 dice. It will be artistic in that it will involve evolution and change based on decisions you make, but will also be fairly game-like due to the fact that your input devices are dice. You start with a simple monster drawn in processing that has a head, a body, two arms, two short legs, a tail and single floating wing above its head. The head has 2 eyes and a mouth. The body parts are all simple shapes. You have 15 possible rounds. At the beginning of the round you grab a die to indicate that you want to roll to add to the stat that the given die represents. On screen you will see what you rolled and 1 + your roll will be added to that stat for your creature. One difficulty will be figuring out what stage of a given round you should be in and having the game stay in that state until the correct input/actions have been done. I like programming though so that should be manageable. Visually your monster will have a body part added to it based on the stat you added. If your creature runs out of health in a battle you will get the message: evolution failed, but see what you created! If you survived you will get the message: your creature survived look at your evolved magical being.
Your monster will have a set amount of health that does not change with its evolutions. Here are the things you can add to:
Arm = attack
Head = magic resist
Wing = evade
Tail = defense
Leg = speed
Eye = increase the chance that your enemy’s low stat will be something desirable. If you have low speed it’s low stat would be more likely to be speed. Similarly low attack makes it more likely to have low defense, low magic resist makes it more likely to have low magic, low defense makes it likely to have low attack. If your lowest stat is evade I will look at your second lowest.

The enemies will have speed, defense, attack, and magic. They will have one stat that that is high, two that are medium and 1 that is low. The high, med, and low will be a different range of possible random values, and the actual stats are randomly generated within that range. The number indicating the round we are will be added to the given stat so the enemies get harder over time. The enemies will be drawn to indicate what their high and medium stats are. The high will be indicated by their shape, one medium will be indicated by their color, and the other medium will be indicated by the stroke color. They also will have a name displayed that will be changed to indicate their high and medium stats.
Speed = green or circle
Defense = yellow or triangle
Attack = red or square
Magic = purple or star
Their name will be an adjective based on a medium, a verb based on the other medium, and noun based on their high stat.
Here is each stat’s low medium and high descriptors
Speed: quick running speed-demon
Defense: hardy blocking defender
Attack: aggressive striking warrior
Magic: magical casting wizard
So if the enemy has stats such that: magic > defense > speed > attack
Then it will be called a quick blocking wizard and would be a yellow star with a red stroke.
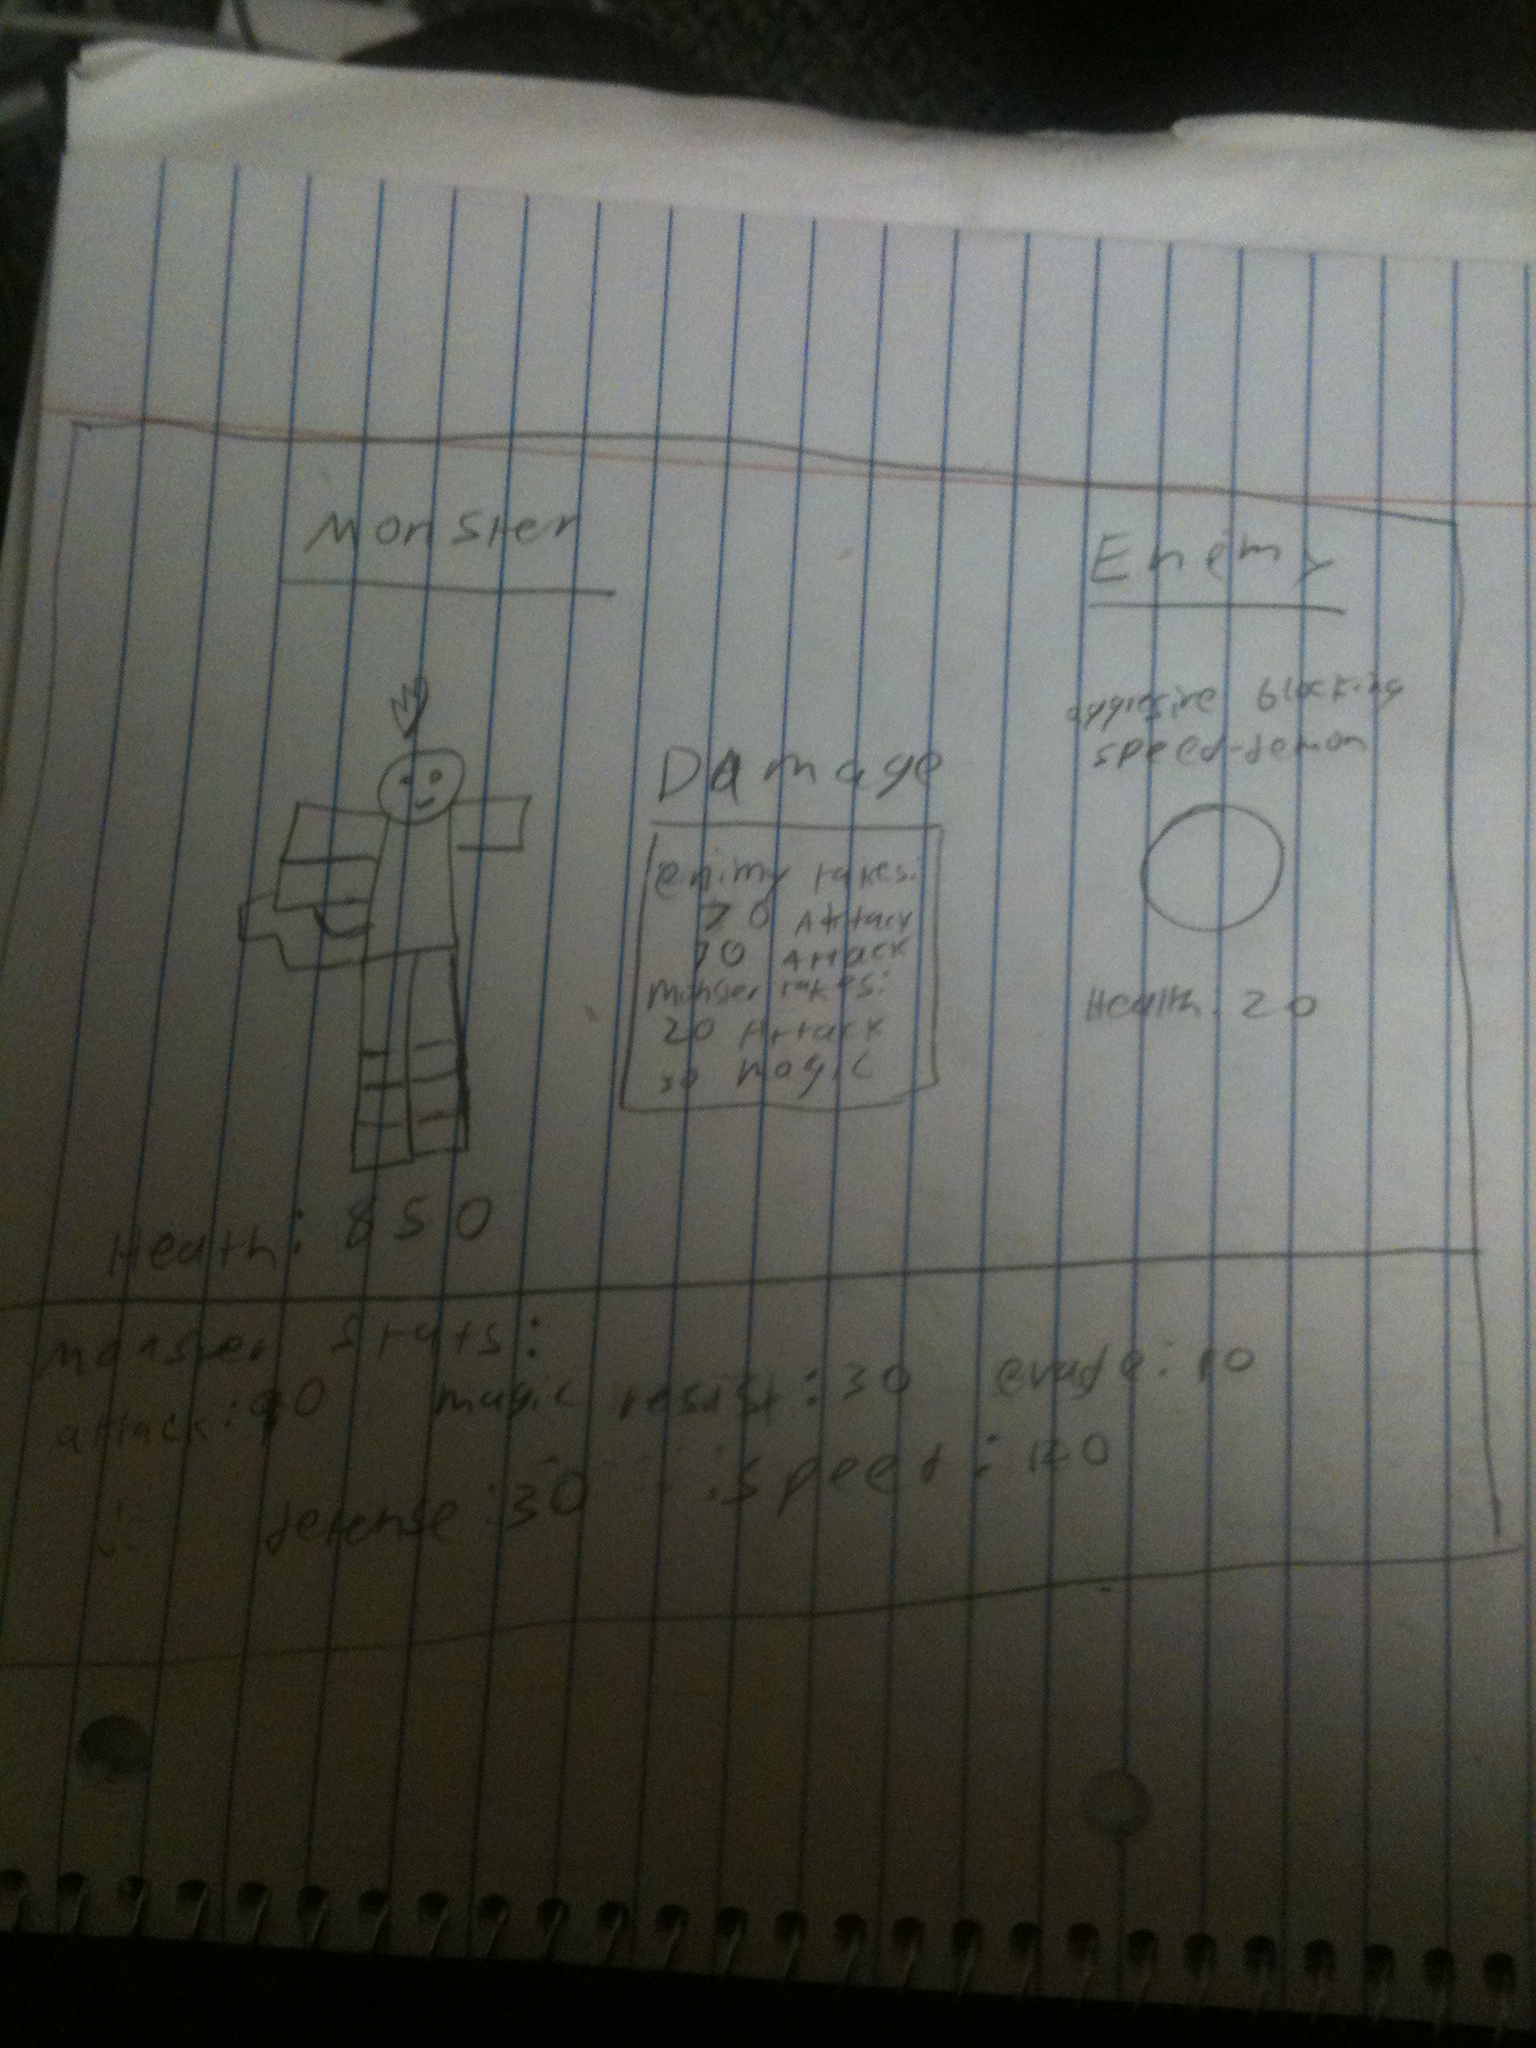
The enemy will have HP based on the round number and its defense. Attacks are not animated or anything but I will display the results of an attack. A round continues until either the monster or an enemy is out of HP. The monster and the enemy attack at the same time and the one with the higher speed has some chance at attacking a second time before the other gets to attack again. The chance is based on the difference between the two speeds. A single attack from an enemy gives two types of damage: attack and magic. The only difference is what your monster uses against it. Your monster will use defense and magic resist respectively. Some percent of damage will be subtracted from the respective area when calculated how many hit points your creature looses. Your creature only does attack damage, hence why the enemy has defense but not magic resistance. Evade is some percent chance of an attack missing your creature completely.

The reason for using dice: Even though this only involves a simulated roll, I still wanted to use dice. I find dice to be very fun and appealing objects and liked how they wil a factor in the random but still guided evolution of your creature. Some evolutionary attempts will work and some will not but you will get to see what your creature becomes, and due to random chance sometimes the same evolutionary path may not work even if it worked before or vice versa. That said I am fairly certain that some paths will be more useful than others. As for battling I wanted a reference to RPG type elements and some sort of nod to classic role-playing in a fun artistic way. That is another way the dice are represented in the artistic product.
Picture of your creature (if it had all parts, which would not be possible):
The monster
(^note the legs just get longer. Everything else adds more.)

possible on screen display:
The UI

A few notes: Where it says damage during the battle it will say “Add stat” during the stat adding part, and will display the results of the roll. Also I do not know the exact numbers I will be using yet and will probably need some tweaking, but will worry about the mechanics first.

MakeyMakey Guitar

So for my final project, I’m thinking of making a virtual guitar of sorts using the MakeyMakey and Pure Data. The idea would be to make something similar to the paper drum controller that we made earlier in class, however instead of using a small piece of paper with buttons, I would make something resembling a small guitar. I’m not 100% sure what I would make it out of (have to look around the apartment for some nice piece of cardboard of something). The idea would be to have a number of preset chords, with the “buttons” being in the place on the neck of the fake guitar where they would be on an actual guitar. I’ll find mp3s of different chords being strummed, or I’ll generate them myself in ableton. Pressing the “chord buttons” will ideally select the given mp3 in pure data, and then strumming, or hitting the “button” placed on the main part of the guitar would play the selected mp3.

Sound Sketcher aka THE GREAT AUDIOGRAPH

For our project we plan on making a machine that will draw a line based on audio input. Here are our sketches of what we though this might look like:

Jon’s original idea of what our machine could look like.

Our machine would move forward at a constant speed. A piece of chalk or a pen attached to a movable arm would draw a line on the ground. An attached microphone would receive notes or tones from the user. The audio would then be converted into data, through Pure Data or Processing. That data would be used to set the speed the drawing arm moves back and forth. When turned on and given an audio input, the machine would draw a long curved line along the ground, based on the input. This idea had a problem though, since it would be difficult to attach a computer to something that could move more than a couple feet. Since we only have a week to make this project we had to simplify things and remove the mobile aspect altogether.

Here is a rough sketch of what we are doing now:

A quick sketch of what our project will be like.

Rather than having a moving vehicle, we will instead have a stationary rotating device which will draw out the audio input in lines in circles as it goes around the drawing surface. This eliminates the mobility problem, and even adds to the visual interest. Rather than drawing a single long line in one direction, the line would continuously overlap itself, perhaps creating an image reminiscent of a Spirograph.

We will have to research how motors work, and how their speed can be changed so that they can suit the purposes of our project. We will work with an arduino to build this, so some research on how to use the arduino will be useful. We also need to see how arduino can interface with pure data or processing. We also need to convert audio input into numbers so that the motor can turn the pen/chalk at the correct speed.

For supplies we have an arduino, various electrical components like resistors and LEDs, and we may use legos to build the frame. We may have to purchase two motors as well, one for spinning the drawing utensil, and the other to make the chalk/pen draw.

Final Project Concept By: ahclemens

The Creative Process


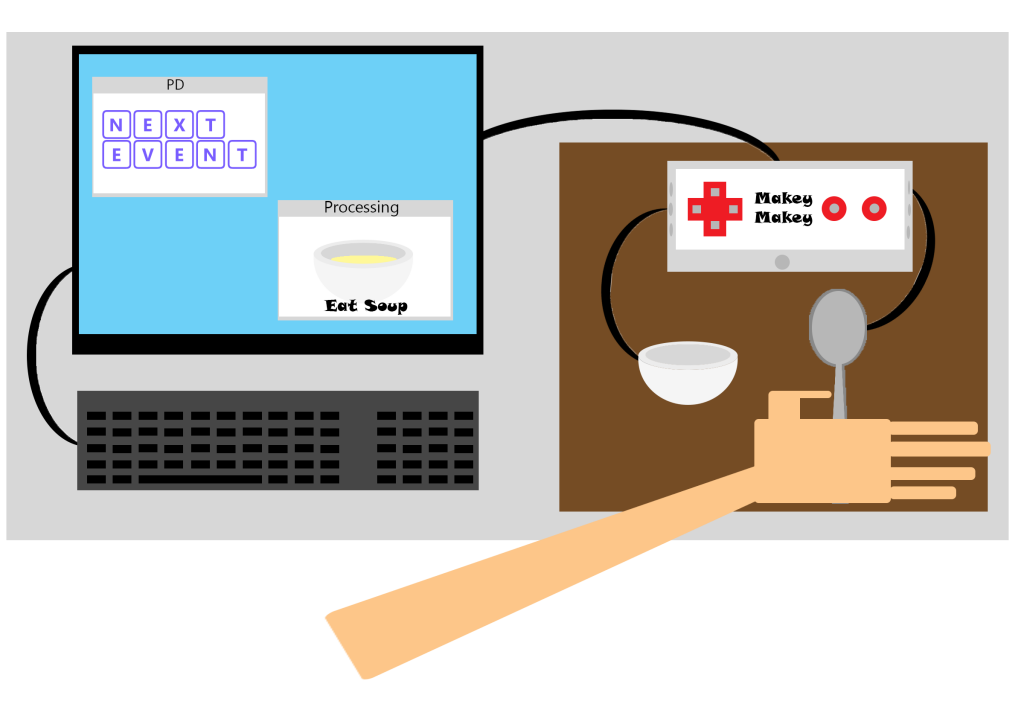
I have derived my idea from a previous project in which I combined PD and Processing. This had allowed two windows to be in use at the same time. I could also send info back and forth with the programs. So my idea is expand that technique and make the program work with itself and the user. From there I had the basic interaction that the artwork would use, but I needed a something to base the interaction off.
In my thought processes of using multiple windows and having lots of activities going on I thought of something people do every day, surf the web. But I can’t make the web so I went with “something people do every day”. The activities we do everyday stress us out, yet we do them and we can’t live without them. If we ever tried to stop doing them we may not survive. In conclusion of my process, I came up with the idea to have the mundane, everyday life become a fun interaction. The person will have to eat, sleep, and survive the world inside the program. If the person gets overstressed by activities then they can try again the next, and the next day, AND the next day…


How the Project will Work


The program will require a unique set of tools that correspond to the images produced on screen. As you can see in the concept image, the user will be supplied with items like a bowl and spoon to complete the activity suggested on the screen. When the activity completes, then the program either Processing or Pure Data will call switch to the other program and require another task until. The process will repeat until the day ends or the player cannot handle the everyday stress.
The program will have activities in the selected survival categories: eating, sleeping, and surviving. Eating will consist of gaining sustenance. Sleeping will require staying asleep long enough, which may require some rolling. And surviving is simple, don’t get hurt and stay safe; so no staying in any storms and watch out for any animals.

The Technical Side


The project will be made in both Processing and Pure Data so that the use of two windows can increase the stress trying to be portrayed. Each window will have images or videos selected by their coding to go off at when the previous one finishes. Luckily, multitasking is just a myth which means only one window will be going at a time. Every event will take in and send out signals such as the length the time the person has been going, the amount of successful tasks, and what program is running. The events will be randomly chosen each day, but they will progress as if the day was getting more adverse.

Crash Course Concept:


The project is like the WarioWare in that there a bunch of mini-games that combine for the creation of a unique interaction. In this case, the user will have several objects they may use every day that will interact with the progressing images and videos on screen. Since life is continuous, so is the project. If the person can’t keep up, life will go on without them until they can catch their breath to try again.

Title:


Surviving the Everyday

Equipment Needed:


The Everyday Survival Tools (found in: The Everyday Survival Toolkit (owned by: the creator of Surviving the Everyday))

Final Project Concepts & Ideas

For our final project, Mike and I will be working together on an interactive game-like installation using Arduino and Processing. Our idea is to create a game experience where the controller itself is the game, like “Simon” or “Bop-It” toys that we grew up with and are still popular today. Most often in digital games, the “controller” – whether a handheld unit or a mouse and keyboard setup – is really just an interface between the player and the game, and how the player communicates and interacts with the game world. We would like to create an interactive experience where the controller – the interface – IS the game.The line between the interface and game is blurred in dance and rhythm games, of which there are many popular and diverse versions, and we aim to make something along those lines. It would be interesting to play with this idea as part of our metaphor, that we can blur the line between controller and game by engaging different senses between the player and the game machine.

Our core design ideas are that our project will have real-time interactivity, will encompass both the physical components of Arduino and sensors that the players can touch and feel, as well as digital components that work together and receive input from different methods of interaction. We would also like to include audio and visual components, engaging multiple senses of the user in addition to the tactile sense of handling the game/controller itself. The components we have to work with are an Arduino board, a tilt sensor, a buzzer, colored LEDs and push buttons.

Both of us have worked with Arduino with previous projects, but we should research Arduino in relation to exactly what we would like to use it for. We also need to research how Arduino and Processing can work with each other, and if there are any limitations to what we can do when using them together. We should also find out the physical and digital limitations of our components, if there are any, so we are working within the scope of what our parts can accomplish and design with these things in mind.

To bring all of this together, we will create a handheld device that will the the “controller” with the Arduino board, push buttons, LEDs and tilt sensors incorporated. This will be connected via USB to a computer running the Processing part of the game, which will provide the audio and visual interaction. We will have to research how to do sound with Processing, and see if it is possible to do stereo sound in processing, which would be another level of interactivity and feedback we could play with. The Processing programming component will keep track of all of the sensory input from the Arduino hardware handheld controller, and we will have to program the designated outputs for the interactivity of the controller. Once we have the hardware functionally working and have started on getting the Processing part functionally working, we can work getting the two to work together and polishing it until it is the game experience we are aiming for.

Jayson Corey: Final Project Concept

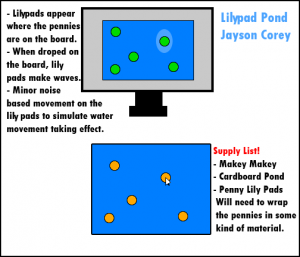
For my Final Project, I’m going to use Makey Makey to see if I can make an interactive pond full of lily pads. The lily pads will be controlled by moving the lily pads (Likely pennies) around the board. If pressure is applied to a pad, it will emit ripples. The senses used are the response of lightweight objects to water and touch. I will likely program this entire project in Processing and will use noise to generate water movement and an alternate to mouse tracking to have the pennies/lily pads move properly.

Final Concept

The concept art for my final project.

Final Project Idea, Michael Frankfort

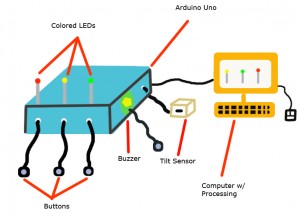
The concept for my final project stems from auditory, visual, and reflexive sensitivity. The general idea is inspired by classic reaction and memory based games such as “Simon says”, “Bop-it”, and “Twister,” and will use an arduino uno board as means of communication with the user. The arduino board will be hooked up with a series of sensors including a tilt sensor, an alarm-like buzzer, and three colored LEDs accompanies by 4 push buttons. Attached to the arduino board will be an A to B USB cable connecting it to a computer running processing. The user will interact with the arduino board in three different ways which will be dictated in real time in processing. The three different ways of interaction will actually be different games which are explained below:

Interaction one, color matching: The computer running processing will show a series of lights that must be pressed using the button attached to the LEDs on the arduino. Players must press the buttons in the correct order in the allotted time to gain completion credit for the activity.

Interaction two, sound differentiation: The processing sketch will play a series of tones, some of which will be important, and some of which will not. The sound that the buzzer makes on the arduino must be matched with the sounds the user hears during the playback. The player must count the correct number of buzzer sounds and press the corresponding button based on the amount of times the buzzer noise was produced.

Interaction 3, tilt feedback: Processing will display an image, which at any point will flip on the screen. Immediately, the user must flip the tilt sensor before a set timer runs out.
The following interaction will be incorporated into a fluent game, where players will gain lives by successfully completing a series of challenges in a row, and lose lives if they do not complete a challenge correctly. Finally, the entire project will be based around the idea that video games in fact do have redeeming qualities. As the player completes certain challenges, a graphical image of the user will be drawn on screen next to the game logic which will animate in a way to show the user gaining memory and reaction time throughout playing with the project.
Plan:
A simple path to follow in order to do the necessary research for this project will include:
1) Research the necessary libraries to incorporate arduino feedback in processing
2) Researching how to play auditory sounds through processing
3) Researching methods to hook up the necessary sensors to the arduino, as well as registering input of the sensors into processing

Technical Flow:
In order to put the entirety of the project together, I will need to split up the work into three main categories: art, software, and hardware. The artistic aspect of the project will include making all of the 2D graphics such as the in game icons, animation of the player, and instructions. The software portion must entail the overall state machine of the game, registering input from the arduino, and programming the arduino to perform its’ own actions such as turning on an LED or alarming a buzzer. The final hardware portion will be setting up the physical circuit of the arduno in order to successfully communicate with the board through processing.

Idea 2:

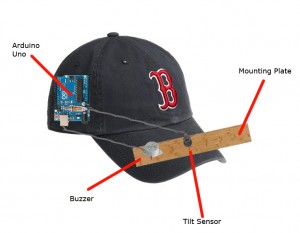
Another idea I have thought up which is a little bit less ambitious is a “stealth robbery simulator” which tracks the player’s sneakiness while navigating a virtual warehouse. Players must walk very slowly and silently in order to successfully complete their thievery. The actual setup of the device is as follows: Users will wear a baseball cap with an arduino board attached to the side. Mounted on the brim of the cap is a flat plate where a tilt sensor will be secured in order to maintain a flat surface. The user must watch a computer screen which will be showing a processing sketch with a barely visible room outline. As the player starts the simulation, they must walk in a straight line without tilting the sensor too much. During the activity, the screen will start to become brighter as the occupants of the warehouse seem to noises. At this point the music that was playing lightly in the background will start to increase in volume and the screen will become brighter simulating flashlights. At this point the sensor will be more prone to fail the player as they must be extra quiet to not alarm the guards. Finally if the player makes it through the “night” before getting caught, they will have successfully completed the mission. If at any point they trigger the sensor too much, a buzzer will go off signaling the guards and the player’s failure of the mission.