Final Video – LED Light Box – Dominic Cupo

It’s all done! However, not what you were expecting. I discovered last week that creating the spinning LED light ball was not feasible in the time left. Instead, I went and created another of my possible projects. The explanation video explains how it works, and the demonstration video shows it running through a couple of examples. Despite the fact that I finished it in about a week versus a term I still had a lot of fun making this. Hope you enjoy!


Final Video

My last blog was about the pretty much completed project. This time, I have better a better container for the ferrofluid and more electromagnets so I can now create the symmetric patterns. I also bought some glass petri-dishes, hoping that they will do the job better in the case of seeing the spikes from the electromagnet; however, I found that plastic containers do better than glass ones. You can witness this in the following final video.


Project Progress (week 4)

For the last week of the project, I built a structure out of craft sticks and a thin plank of wood. The structure extends up above the cylinder to hold the upper end of the axle, which passes up through the center of the cylinder, in place. I then built a circuit to enable an Arduino to control the RGB LED ring and the motor.

Below is a picture of the structure that I built around the cylinder:

cylinder


Here is a picture of the circuit that I put together to power and control the LEDs and the motor using an Arduino and a 5V power supply:

light_cylinder_circuit

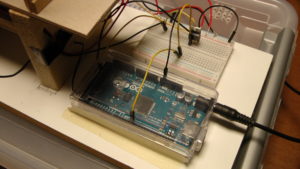
I wrote a program that executes on the Arduino to control the LEDs and the motor. The LEDs are initialized to random colors. Over time, the color pattern rotates around the ring and the colors tend to change over time. The motor changes speed randomly. At the end of every random time interval, a random target speed is selected, and the motor’s current speed drifts towards the new target speed.