
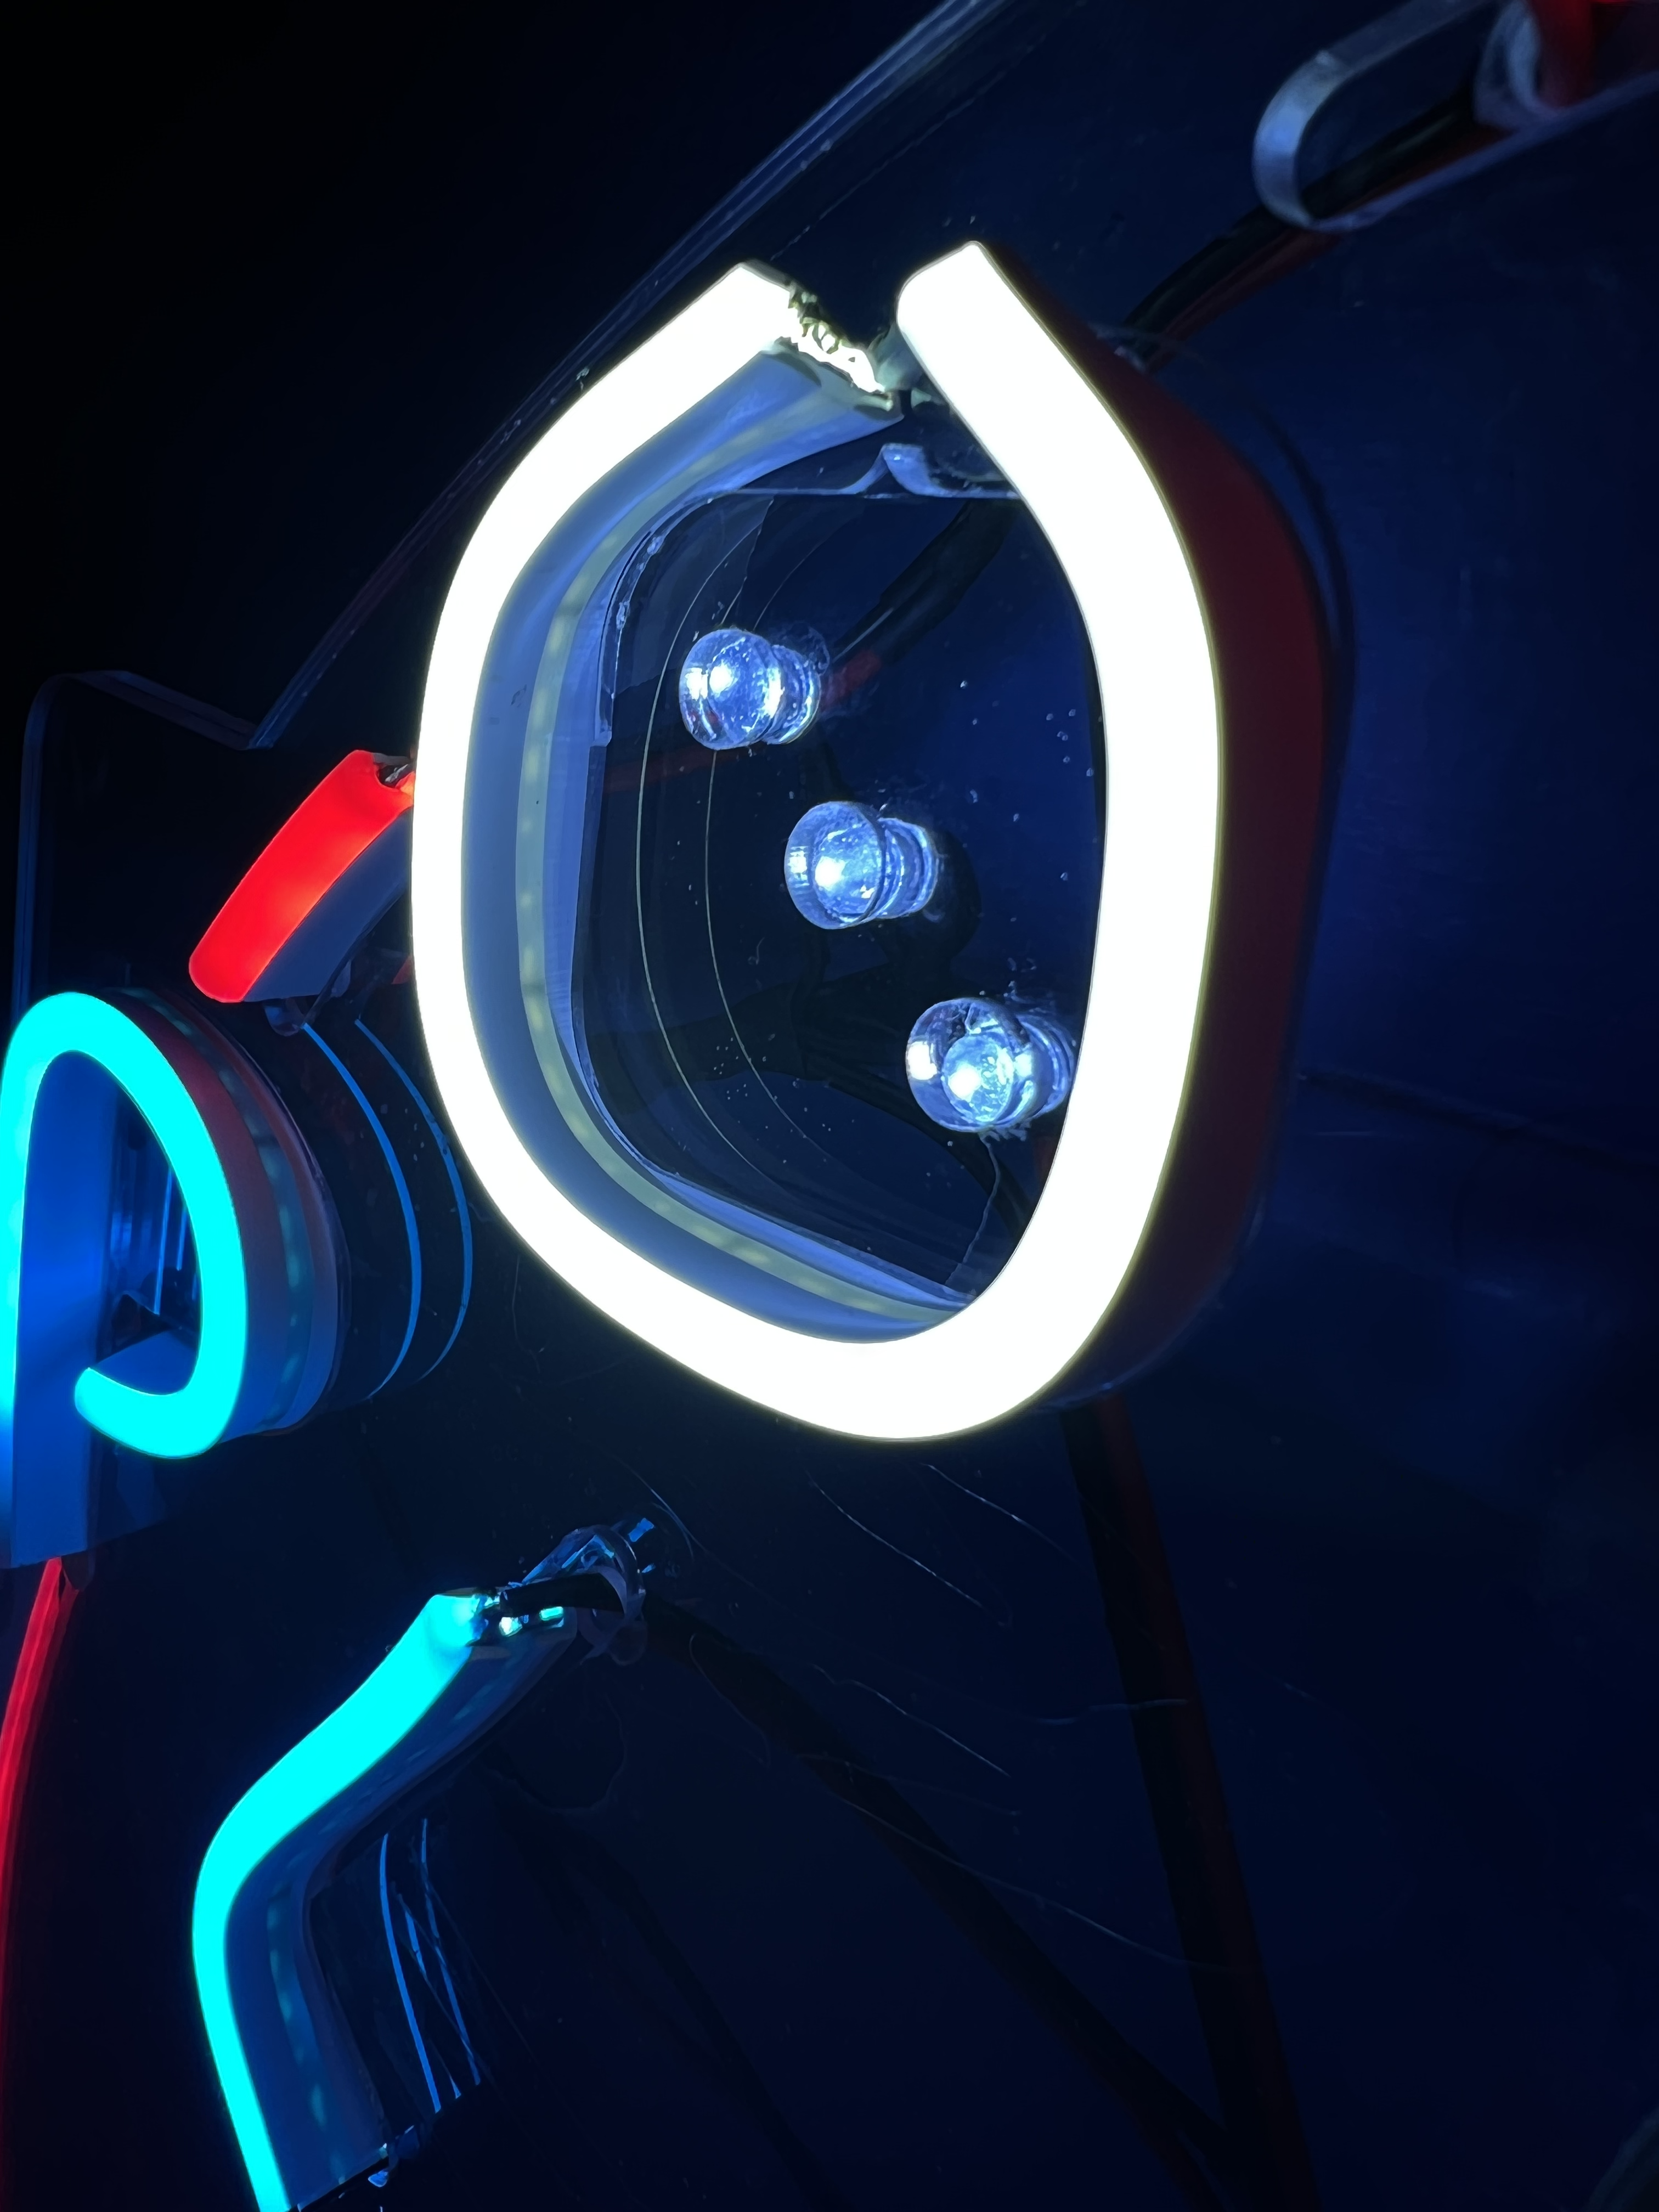
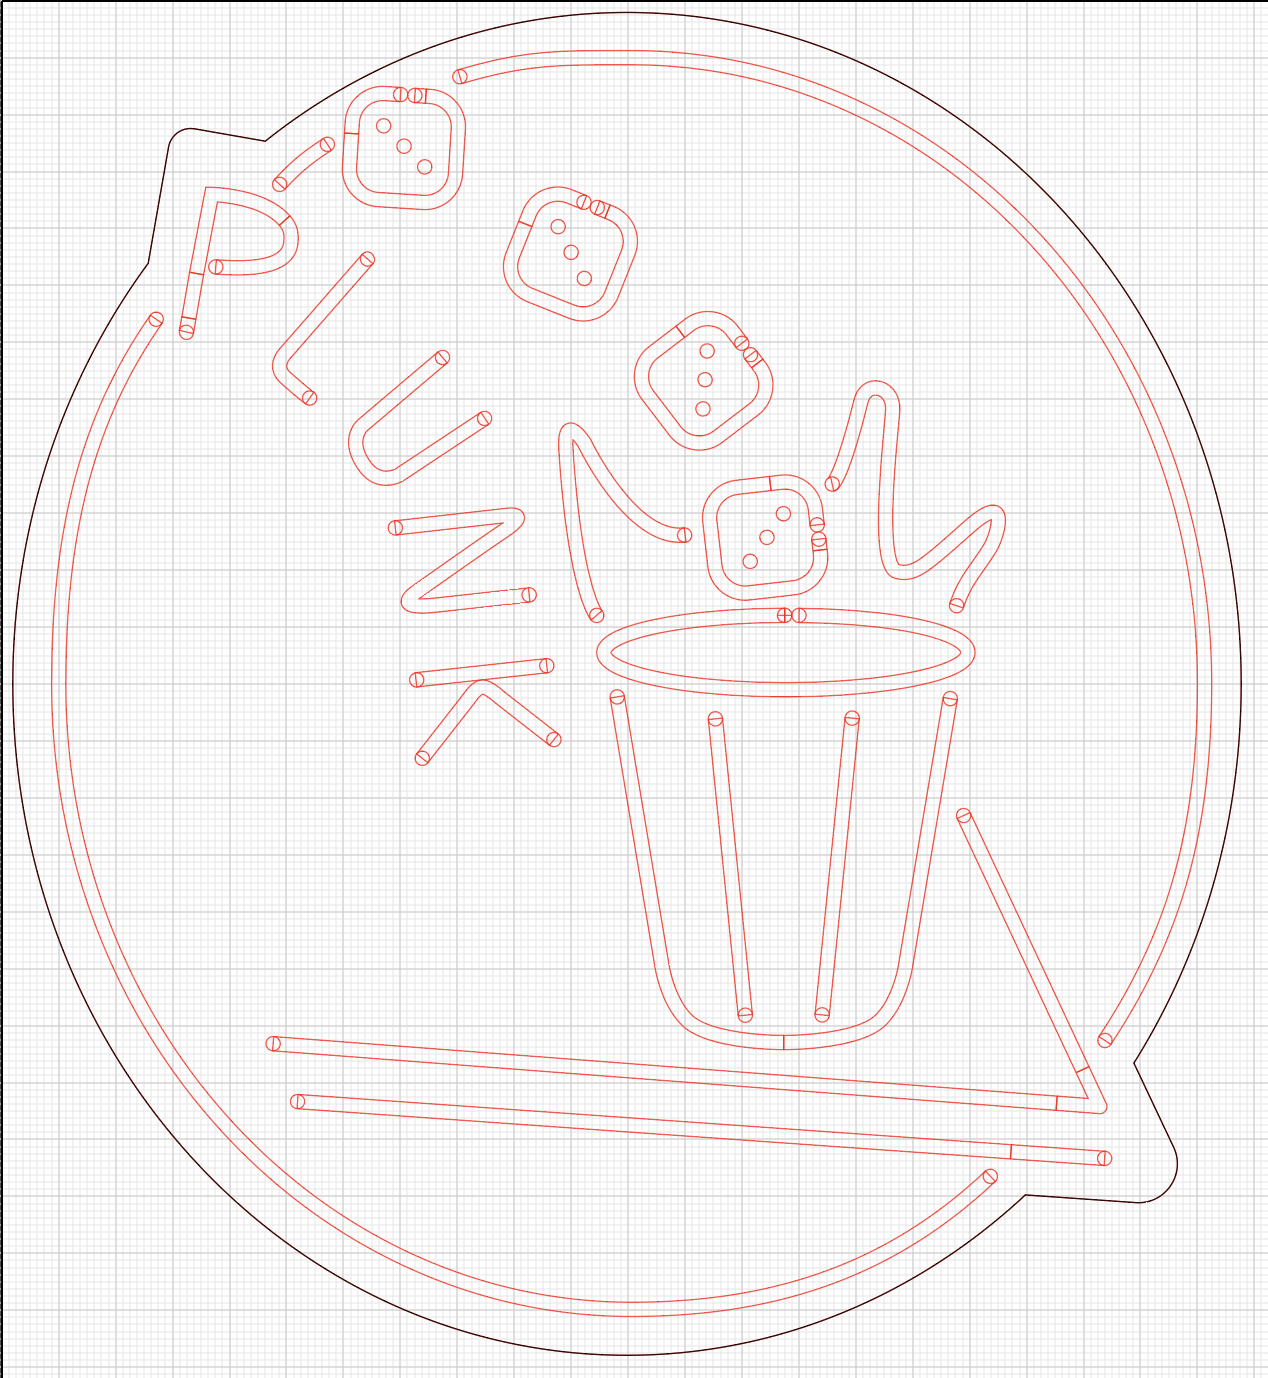
For my Light Art Practicum requirement at WPI, I designed and built an animated Neon Sign using silicon covered LED Strips. The LEDs are shaped to form a cup sitting on a table, with a die dropping into the cup, and letters spelling out the word “PLUNK.” This represents a game that I enjoy playing with my fraternity brothers, commonly referred to as “Die”.
How it was made
The base is made of two sheets of 1/8″ acrylic, one for the overall shape of the sign, and a second with channels cut out to hold the LEDs in place. In order to emulate the effect given from Neon Gas tubes, all of the LEDs are wrapped in different colored silicon tubes, with exception to the lights that makeup the pips of the die, which are simply just round LEDs. These lights are fastened to the acrylic using super glue.

I spent the majority of my time learning how to use a laser cutting machine and meticulously planning out the cuts to make sure they would fit the LED strips perfectly. I used Adobe Illustrator to design the SVG file for the laser cut, utilizing the Document Info window and the Measure Tool to refine its dimensions.
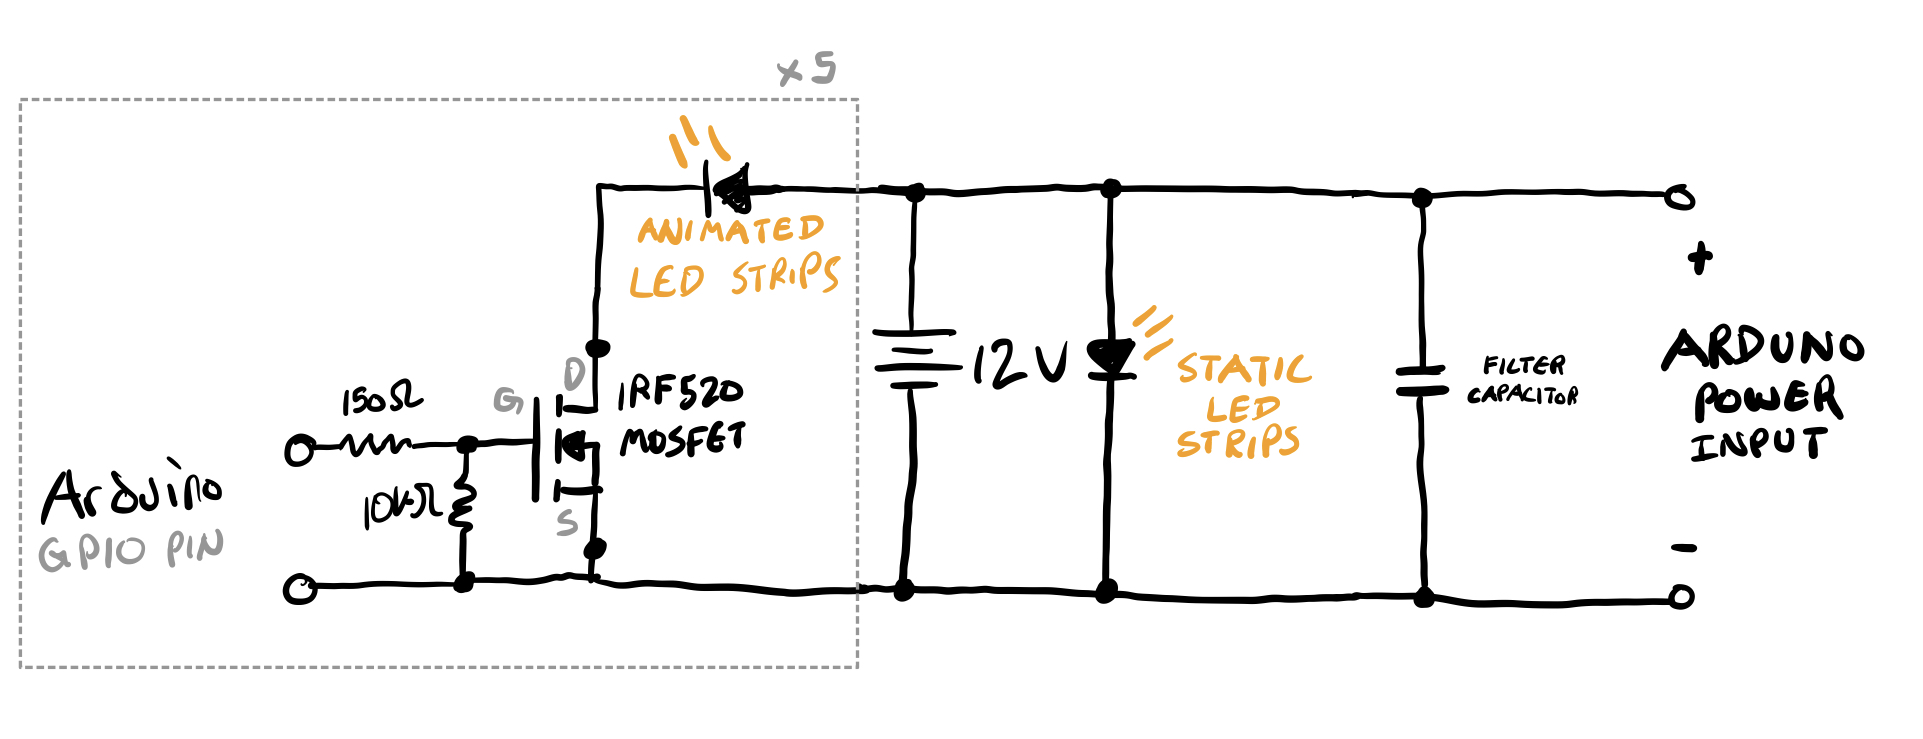
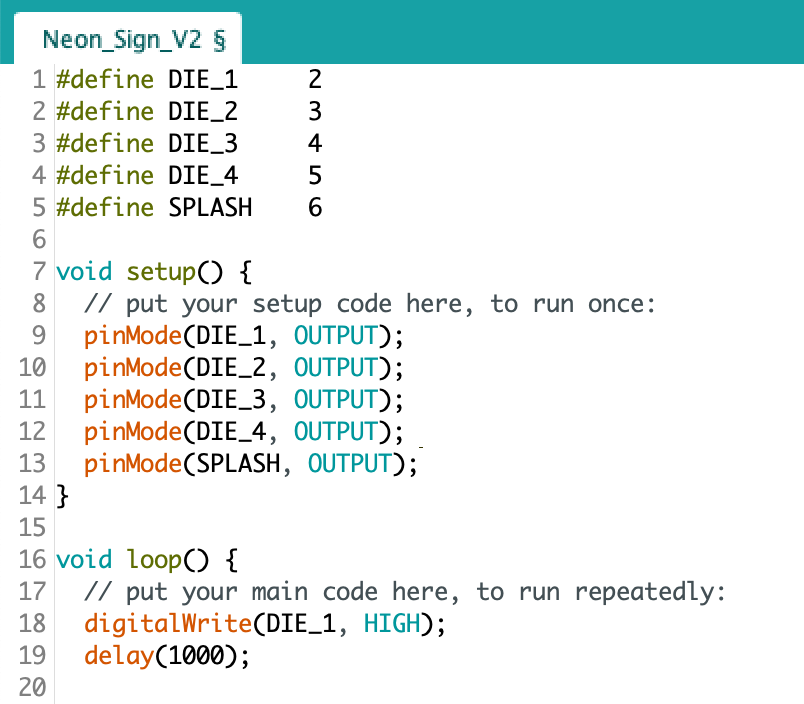
The five animated strips of LEDs are programmed with an Arduino Uno microcontroller. A circuit using IRF520 MOSFETs takes in 5V input from the Arduino GPIO pins to supply the LEDs with 12V DC.

Overall, the project was a success and I came out with a piece of art that I am proud to hang on my wall. Along the way, I gained many new skills and had a lot of fun. I also have quite a few extra LEDs that I hope to continue making Neon LED signs with.
I really liked your final product, it really creates that neon aesthetic. It also looks really well built, i could even see it getting put up in a business or bar.
The final product looks so pretty and convincing! These not working strips also gave the sign a convincing look since real neons often have some bad strips. It’s a very good decision for you to use high power MOSFET since BJTs like 2N3055 can get very very hot and relays tend to be noisy. To make things even better you can add a little piezo buzzer and use Arduino’s tone function to simulate the HV transformer. Awesome project both technological and design-wise! (This comment was on the polish post but I misread it as the final post, so it really belongs here)
This project turned out really good. You should be really proud of the work you’ve done. The craftsmanship is superb. Looks very clean! Also, your photos are nicely exposed and your documentation is great!