
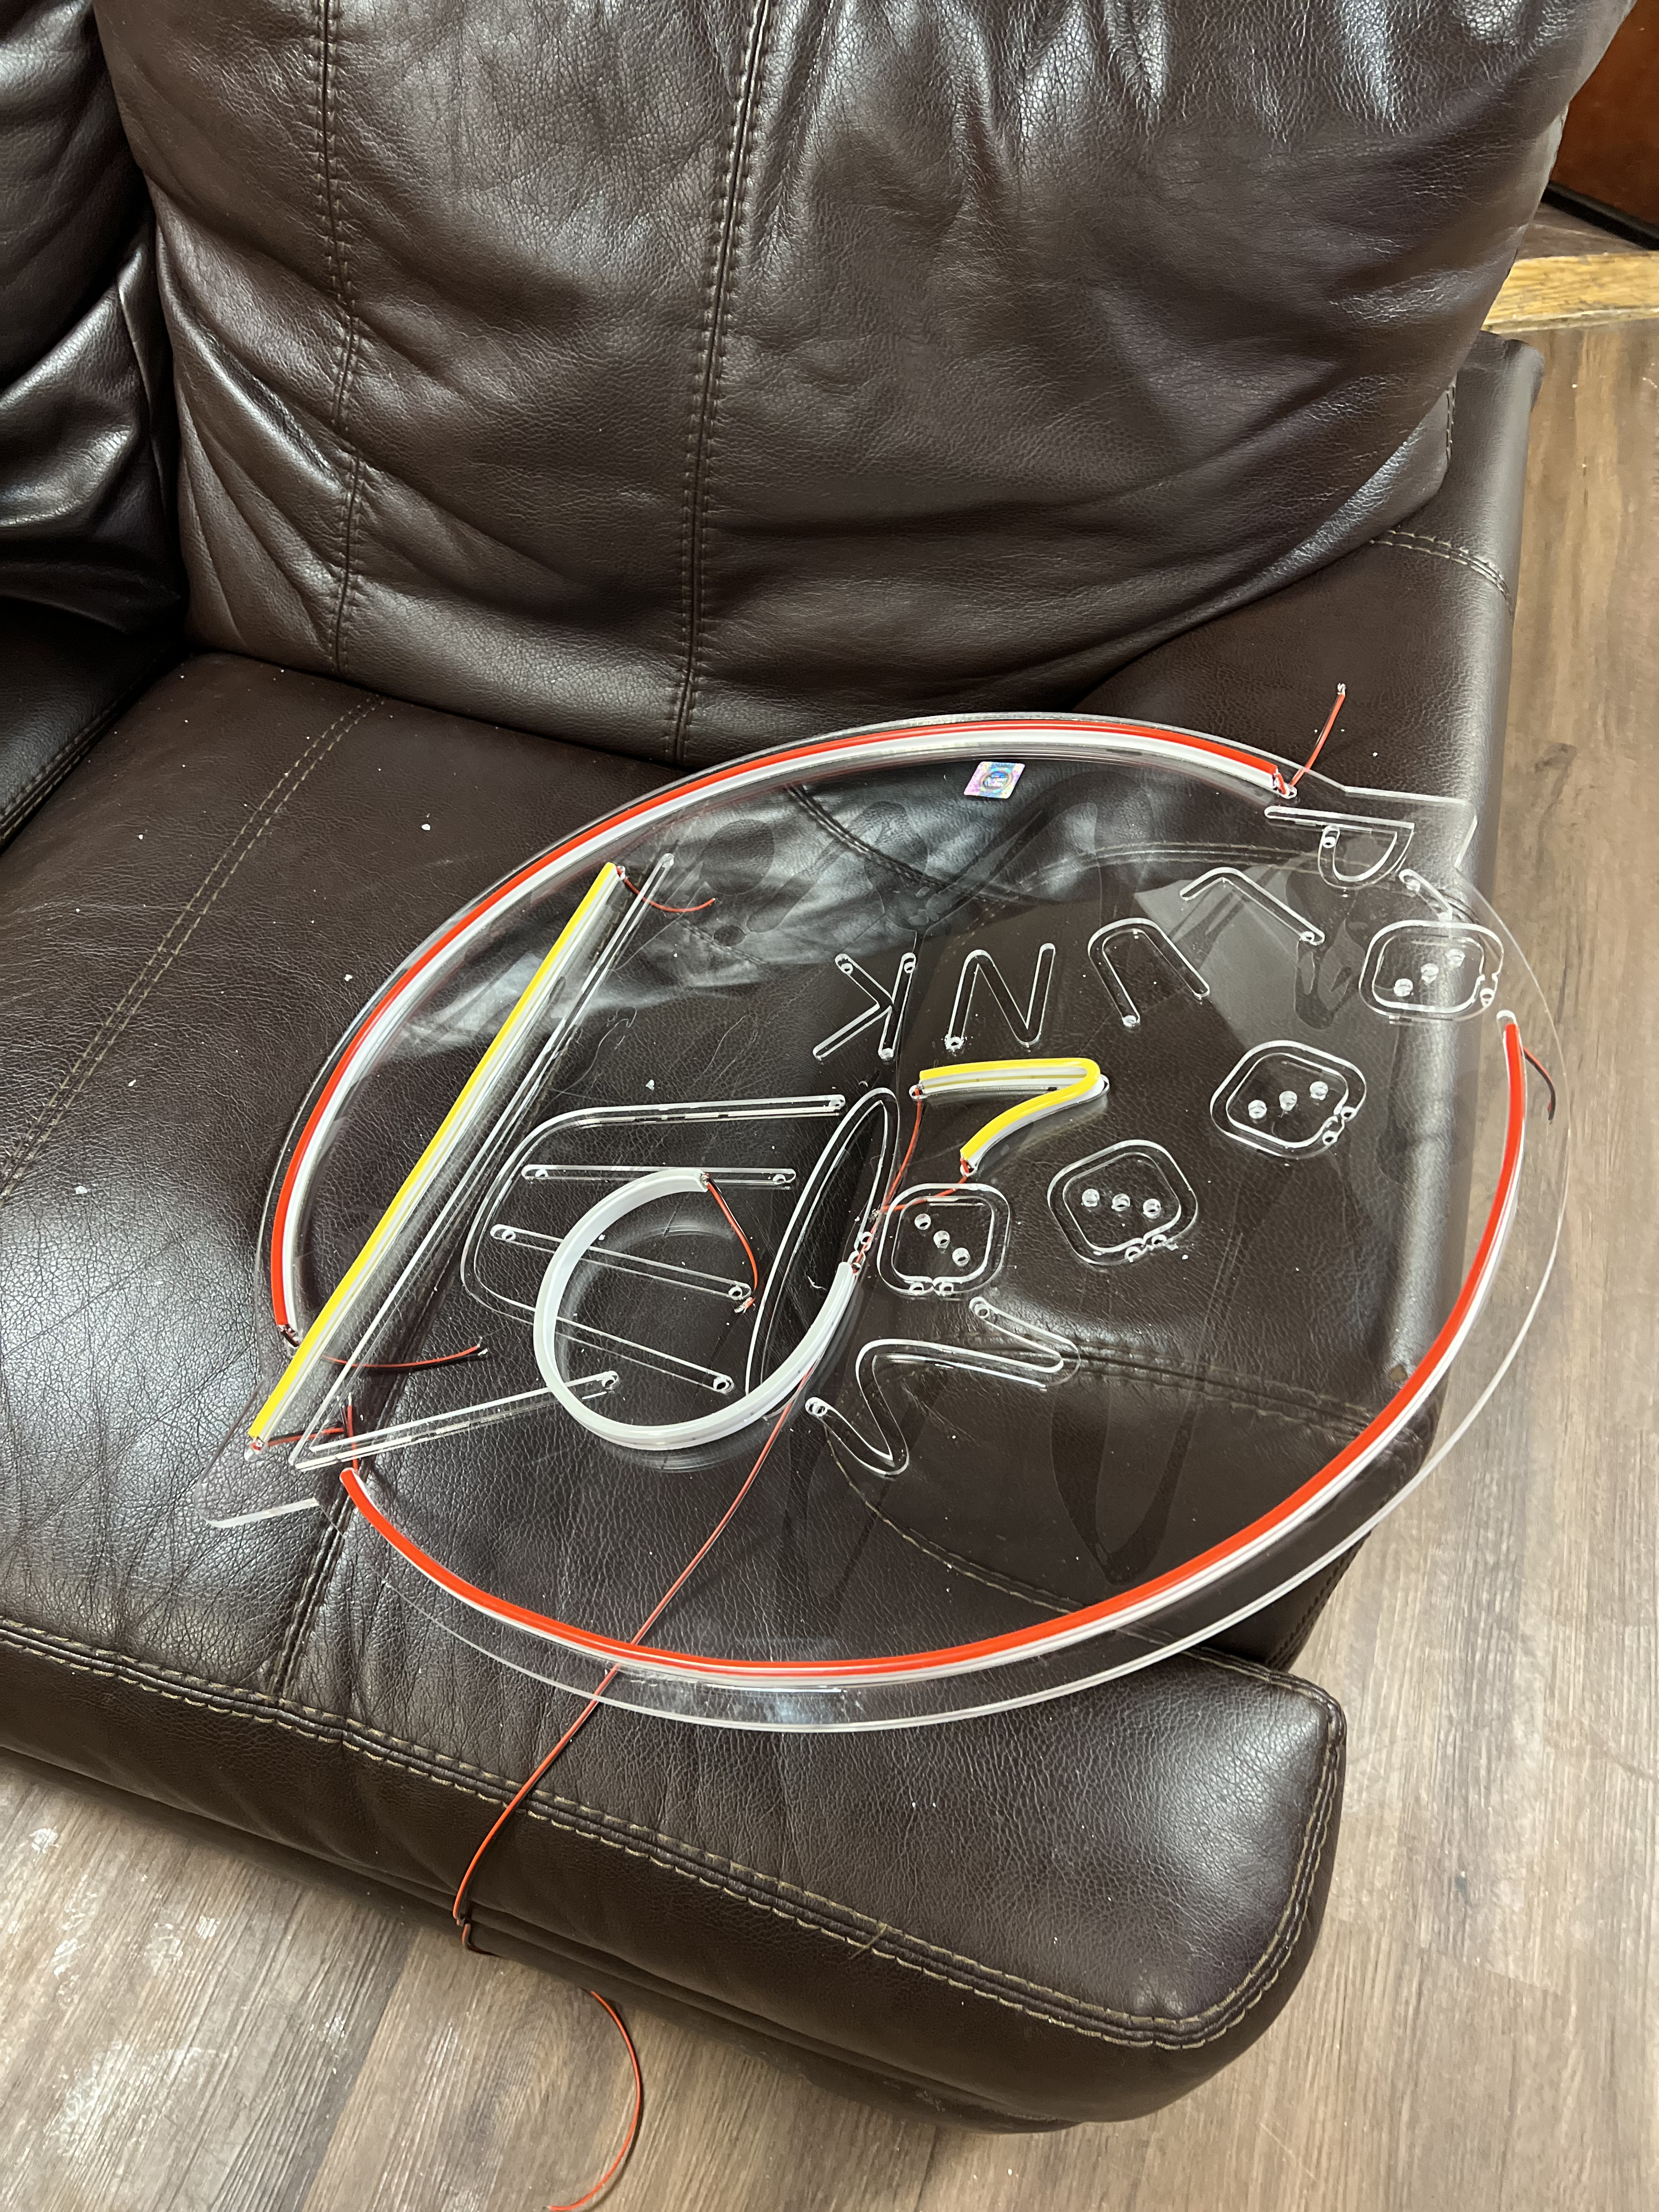
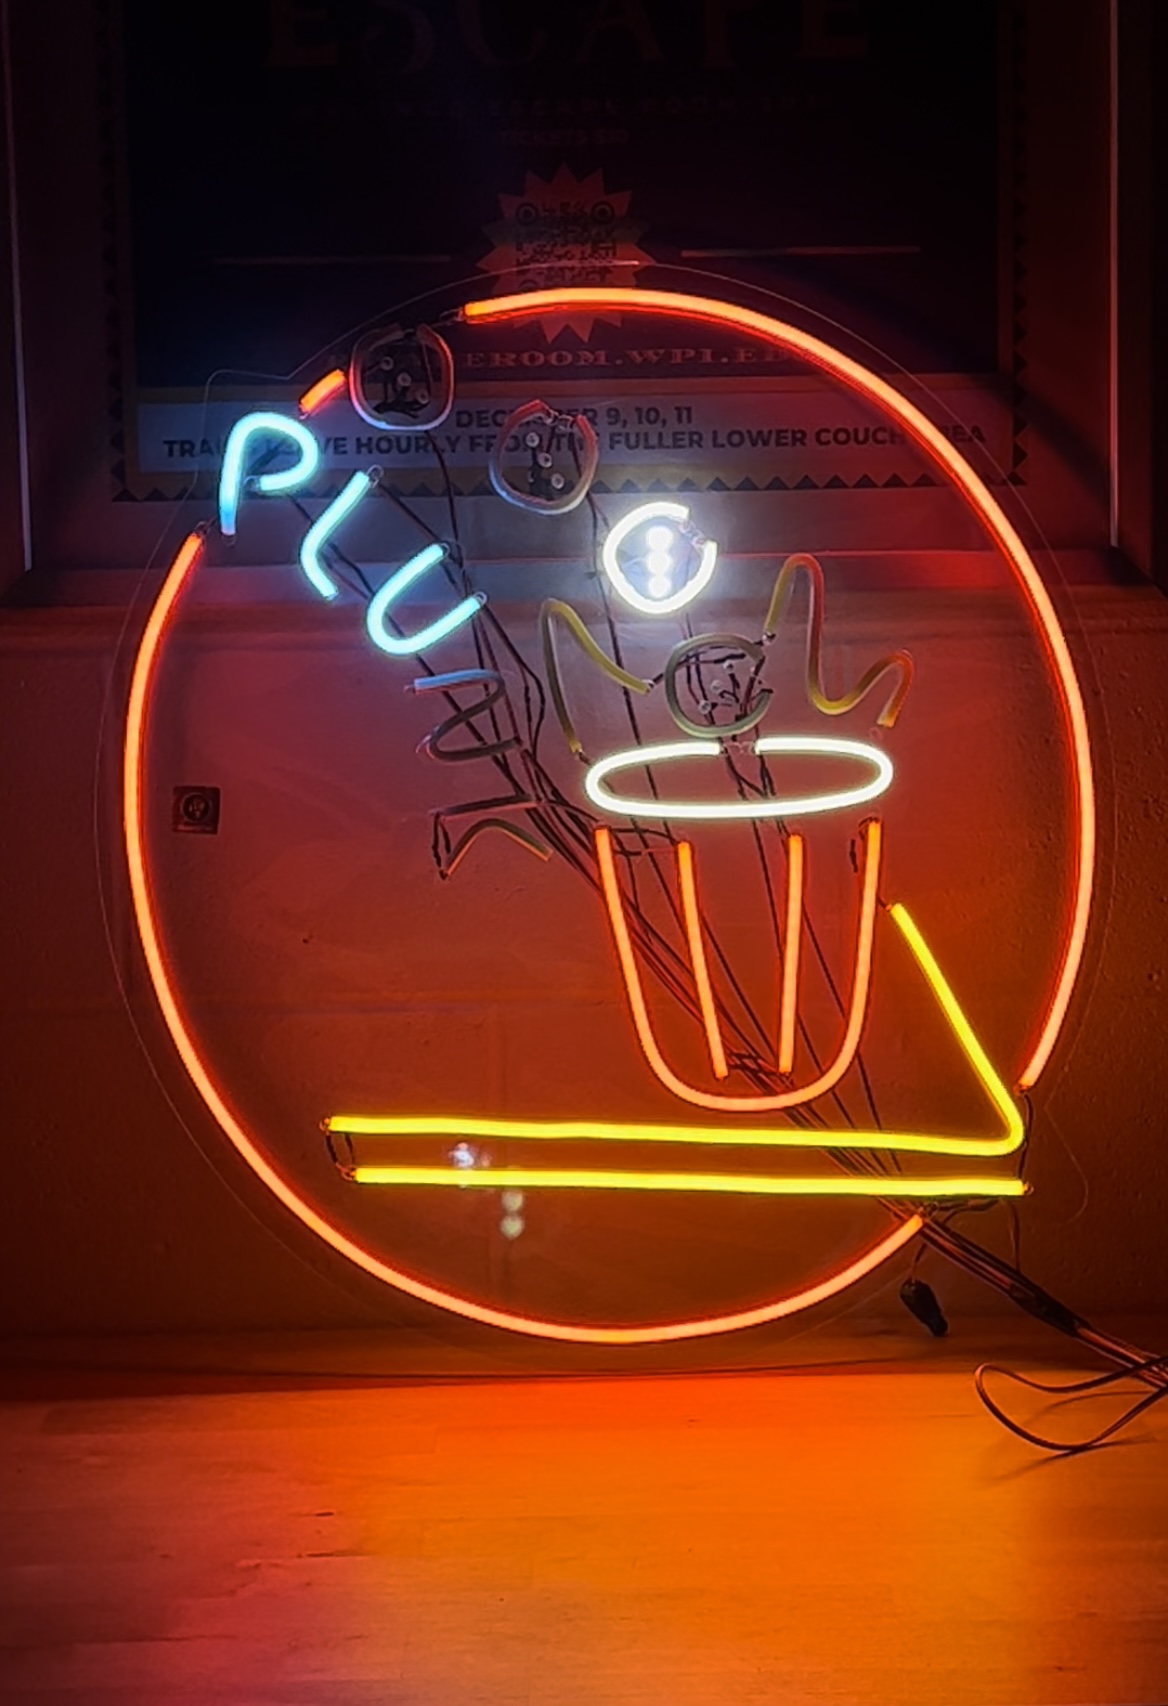
This week I needed to focus on putting all of my parts together and wrapping up the project. This started with making the final laser cuts for the acrylic base, and gluing the two sheets together, as shown on the right. I used transparent Gorilla Glue to adhere these two pieces together. I drizzled the glue over the base sheet and carefully placed the second sheet on top. I expected the glue to be completely transparent, and did not put much effort into the placement of glue, which resulted in some streakiness, as can be seen with a close look.
Next, I started laying LEDs strips along the channels in order to see what lengths I will need to cut. Even with my meticulous planning, the strips do not fit as perfectly as I would like them to. But this was expected with all of the different shapes and curves that are used.
Following this, I brought the LED strips to the Atwater Kent ECE lab and started soldering bits of wires to the ends of each of the strips. This in itself was a very tedious operation due to the placement of the soldering ports on the LED strips. It was difficult to solder around the silicon coating without burning and melting it too much. And often times the solder would easily fall out. Even as I started to place the LED strips onto the acrylic base, many of the solder connections became loose or fell off.
Once I was finished soldering the LED strips, I started laying them down and taping them onto the base to make sure they were held in place well. I started at the bottom corner where the power supply will connect to the sign, and snaked my way around in a way that will keep the wired connections between strips the shortest. I did this for the static LEDs first, the ones that will stay on all the time and do not affect the animations. Some wires came loose and needed more soldering. Using the power supply, I was able to test which ones needed work.
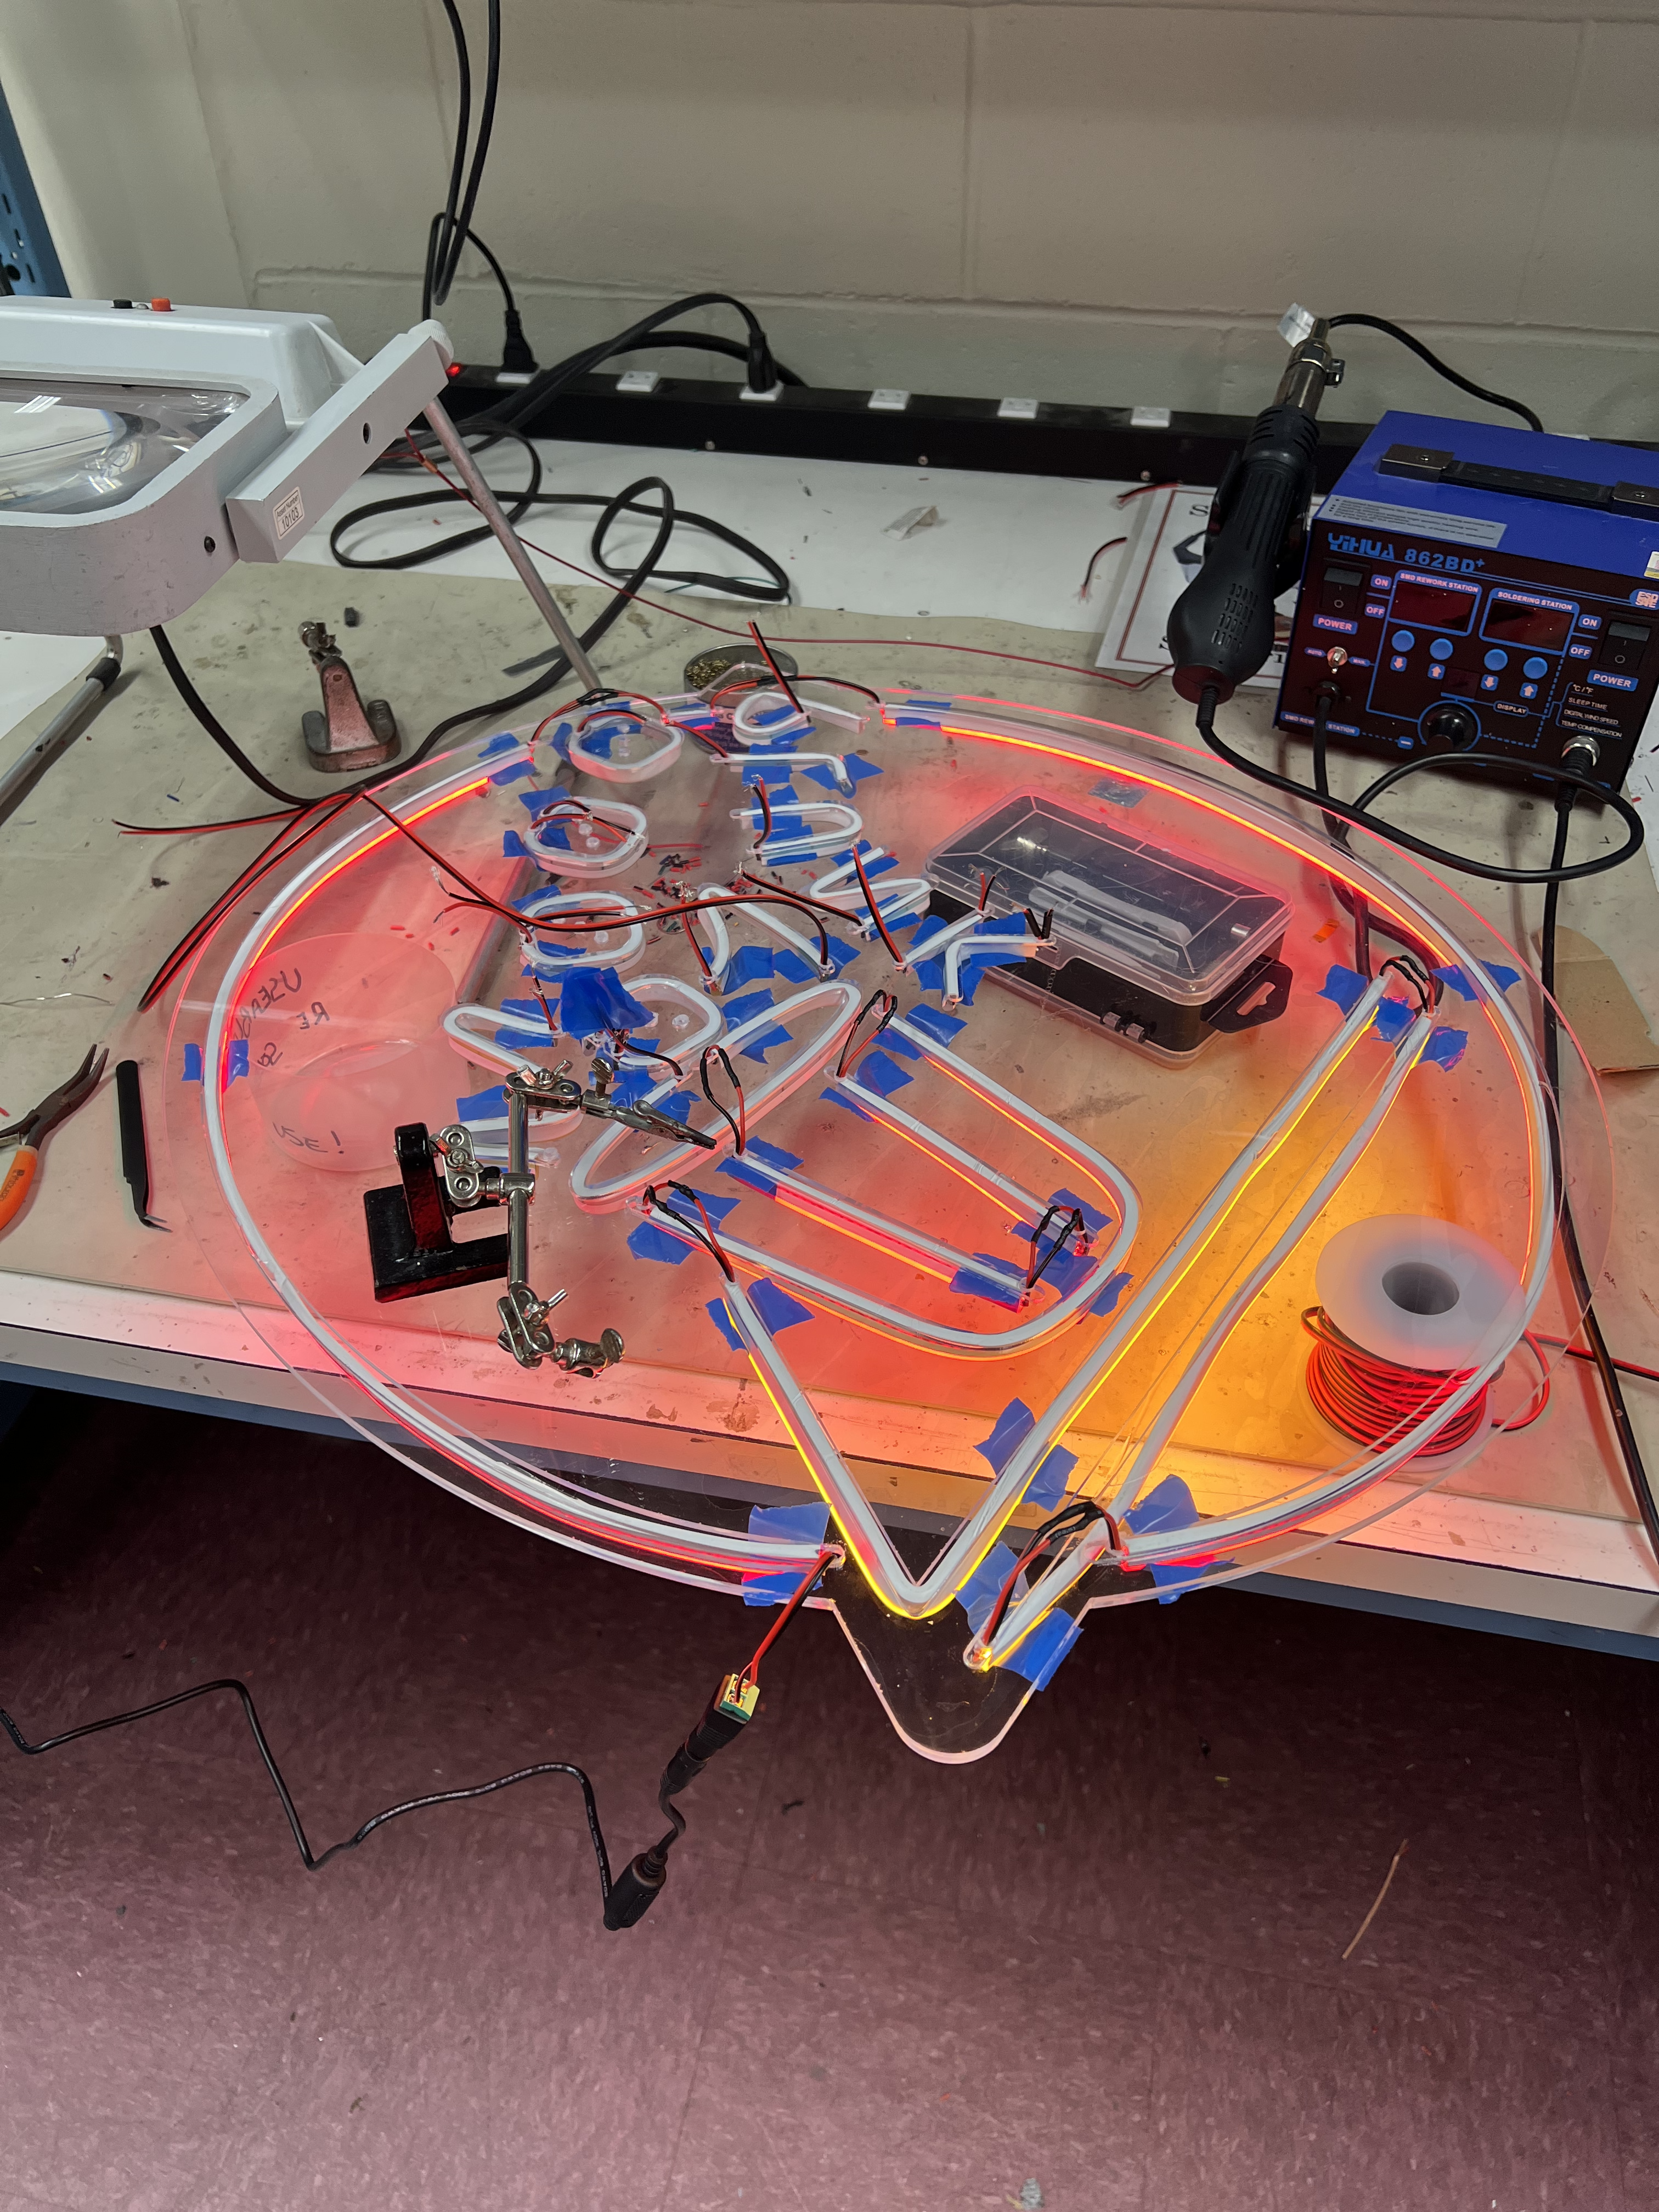
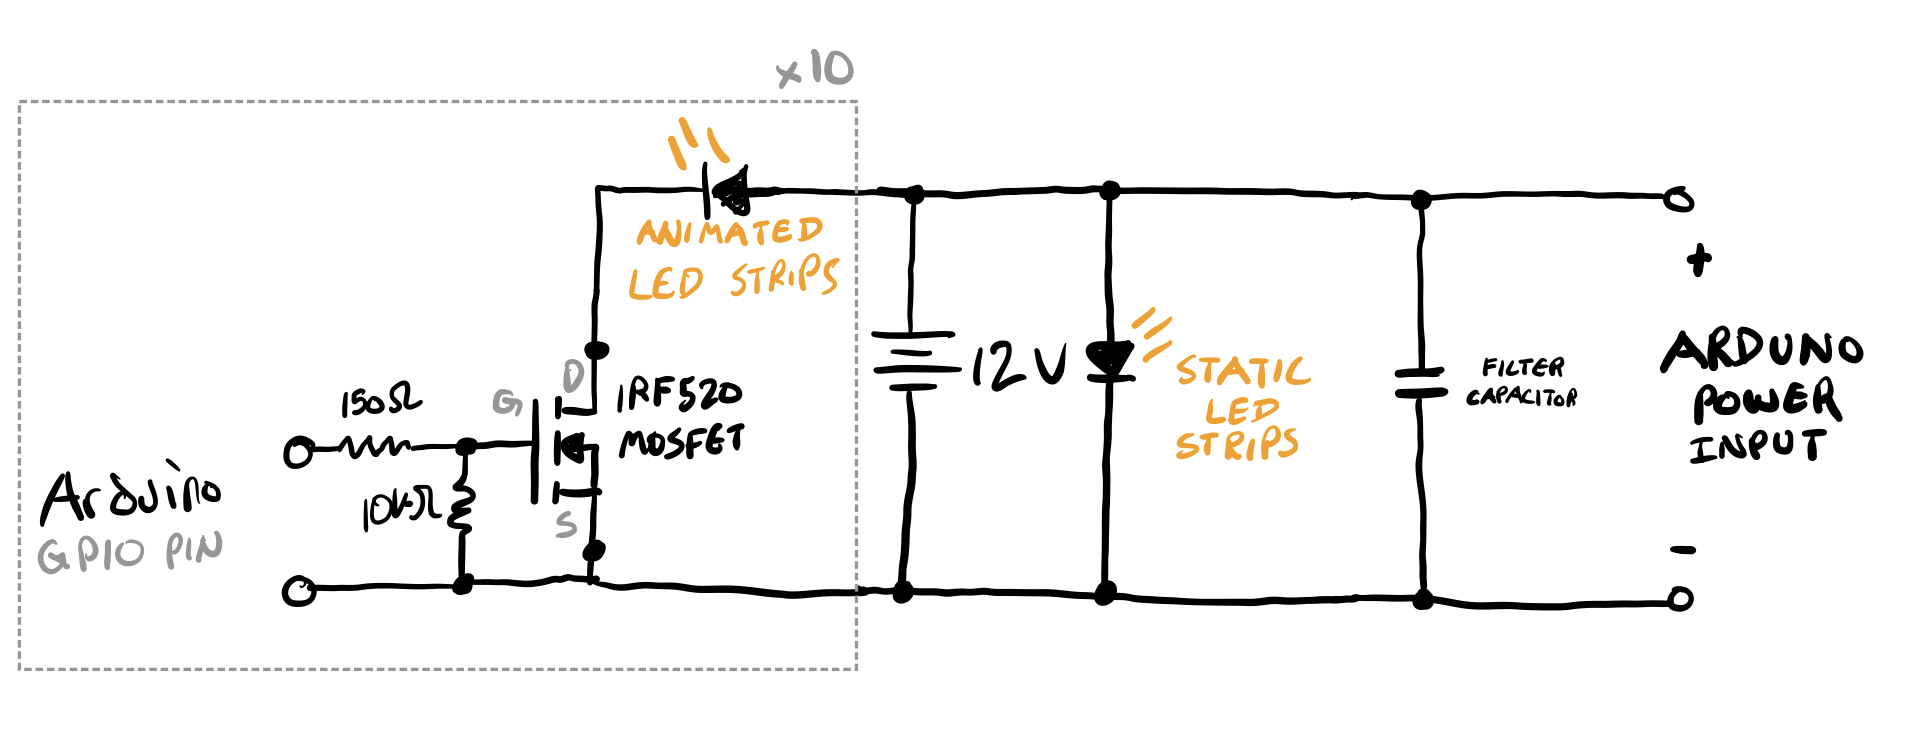
Next, it was time to install the animated LEDs and wire them to the circuit. For this circuit, I decided to use an Arduino to program the animations, for the sake of efficient use of my time. The circuit, as shown below, uses IRF520 N-Channel MOSFETs to allow the 5V Arduino GPIO pins to power on the 12V LEDs. There are ten different LED components to the animation, which requires there to be ten MOSFET circuits throughout the entire schematic. For each MOSFET circuit, a 150 ohm resistor is used in series, and a 10k ohm resistor is used in parallel to protect the current draw to the Arduino GPIO ports. Additionally, a 220uF capacitor is used to filter the 12V power signal.
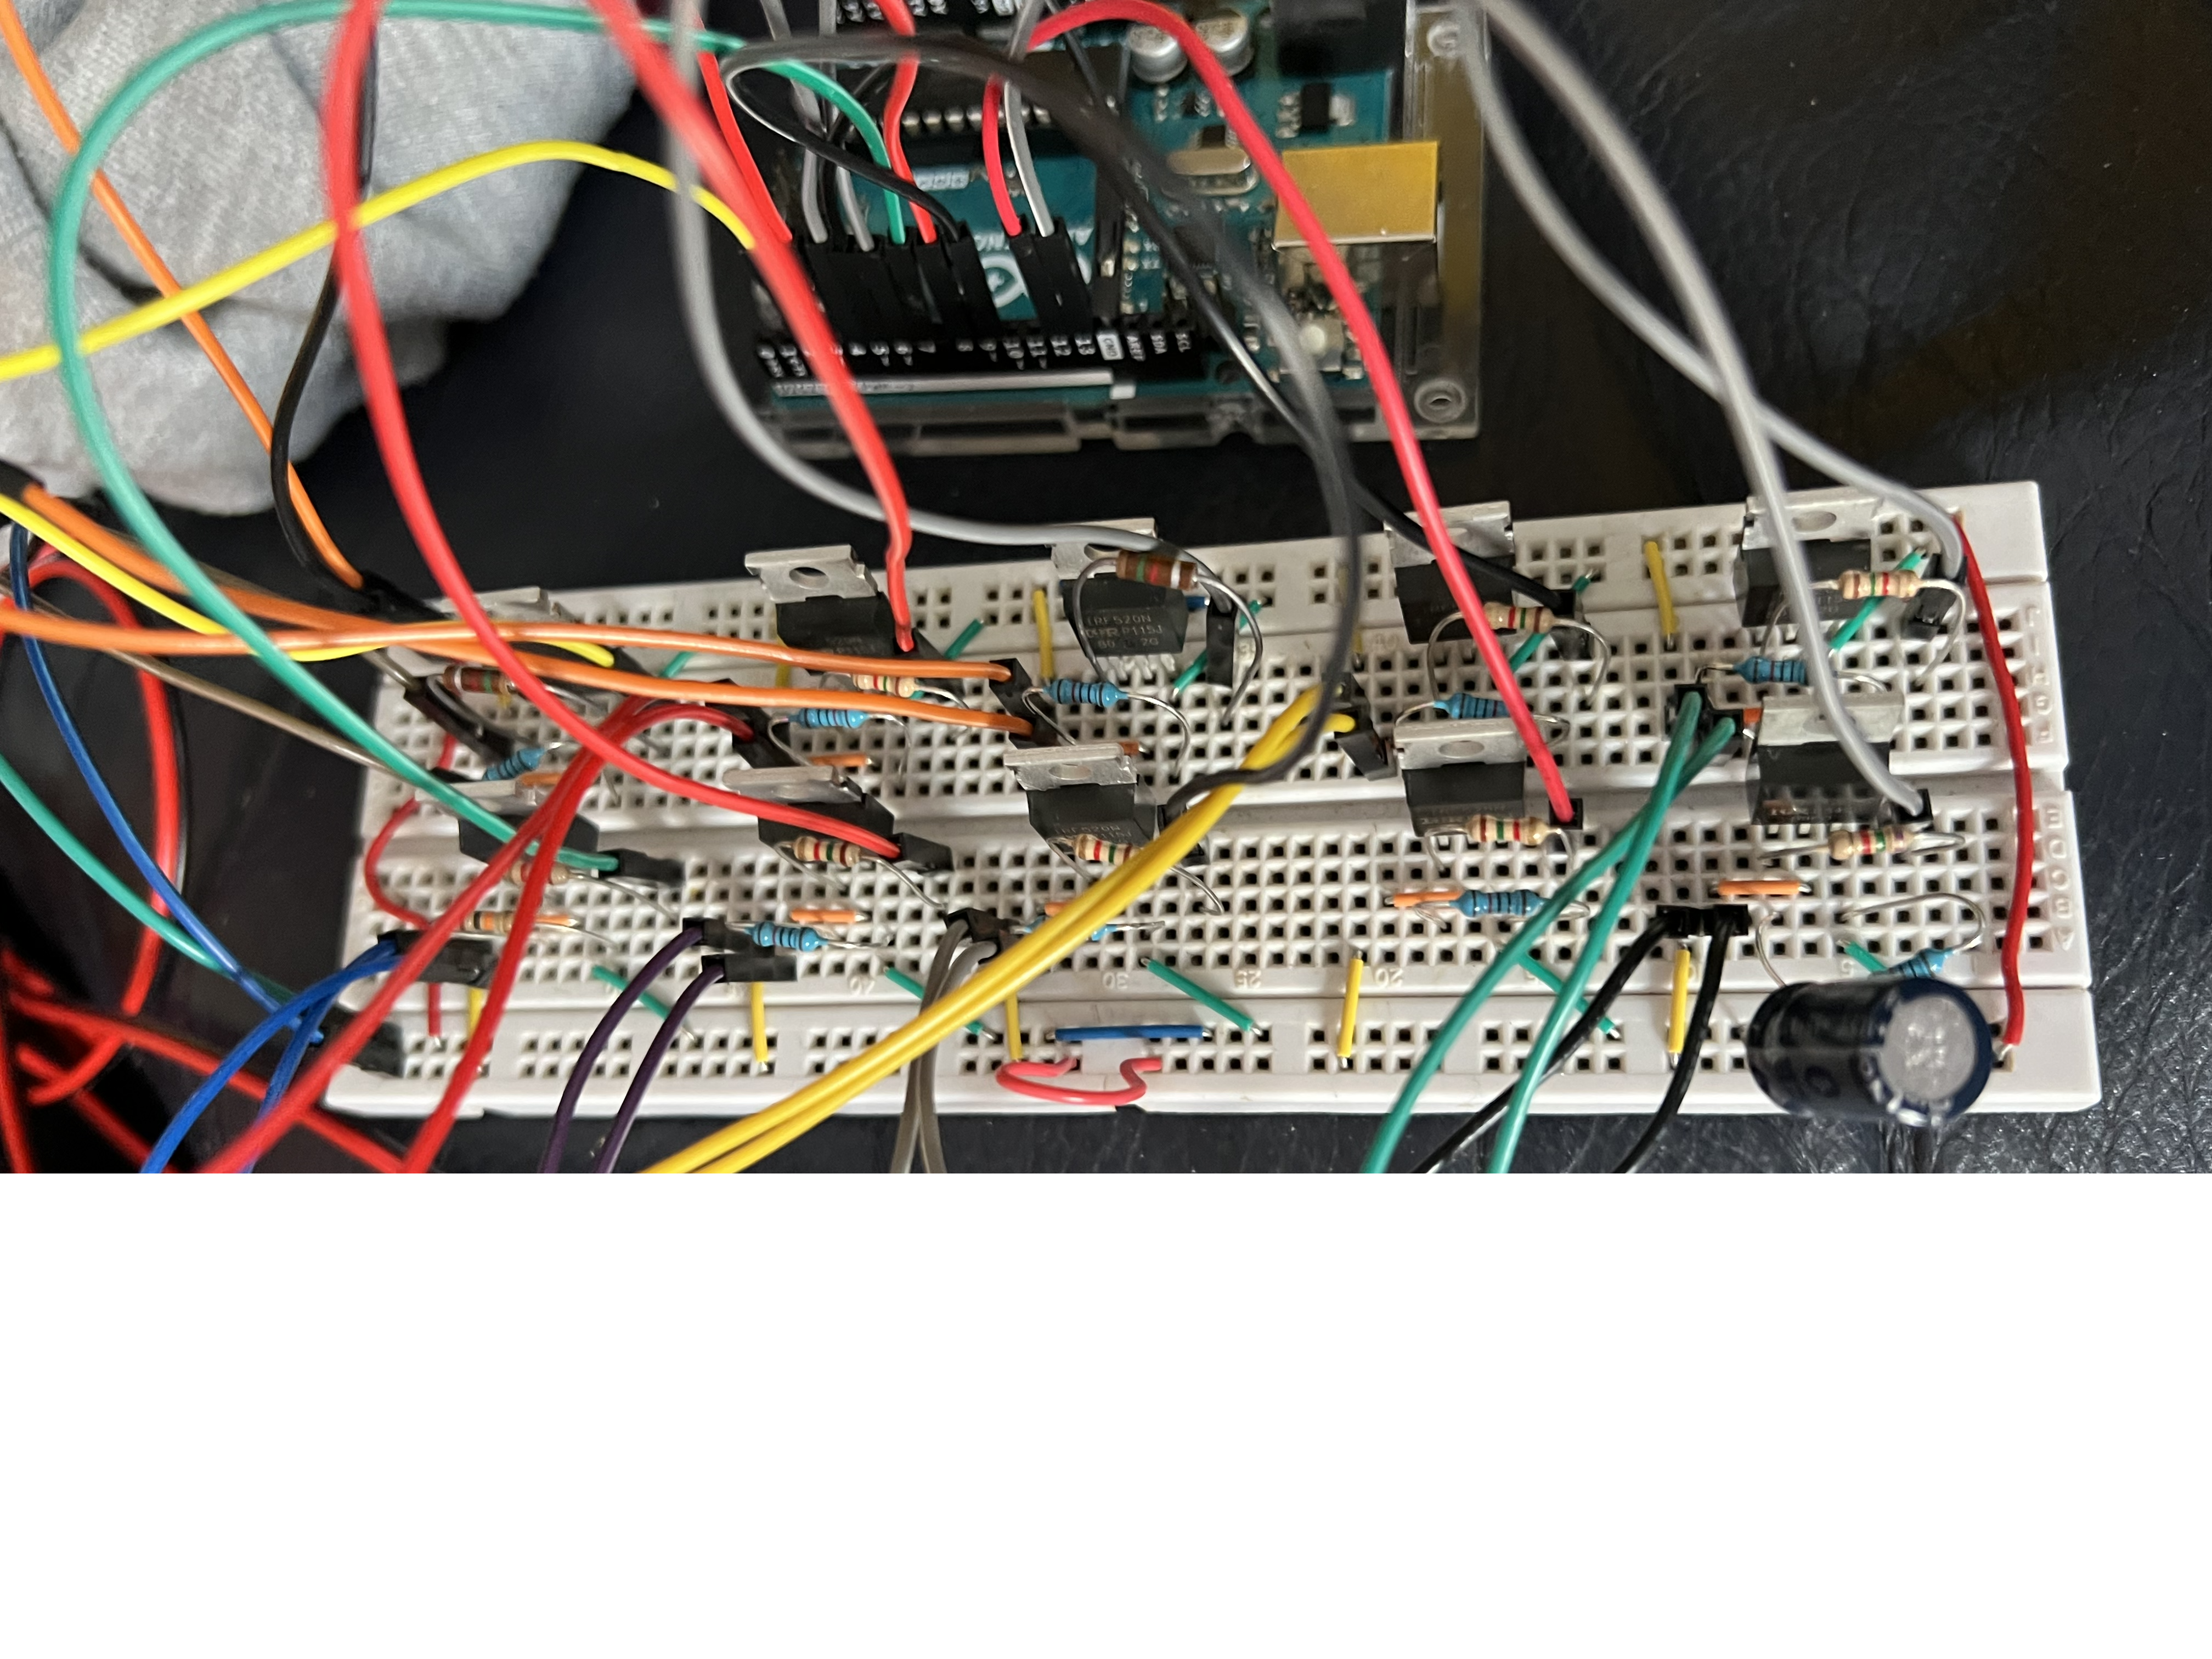
The resulting circuit is quite large and will need some sort of casing before I hang the final project up on the wall. I would also like to solder the components onto a prototyping board so that they do not fall loose later in time.
The final iteration that was presented in class can be shown in the Youtube link below:
https://youtube.com/shorts/9pNAYgb8gVM?feature=share
There are still some last steps that need to be taken before the project is finished in my eyes. The N and K are having circuitry issues that need to be addressed. There also needs to be some sort of way to hang the sign up on the wall, for which I will probably go to Home Depot and pick up some metal spacers. And of course I want to design a circuitry encasing as mentioned before.
Overall, this project was a lot of fun and I learned many new skills. I still have a lot of LEDs leftover and plan on using them for another similar project.
The final product looks so pretty and convincing! These not working strips also gave the sign a convincing look since real neons often have some bad strips. It’s a very good decision for you to use high power MOSFET since BJTs like 2N3055 can get very very hot and relays tend to be noisy. To make things even better you can add a little piezo buzzer and use Arduino’s tone function to simulate the HV transformer. Awesome project both technological and design wise!
The vibes of this piece are immaculate. It really captures the aesthetic I think you were going for and I really admire how far you went out of your comfort zone.