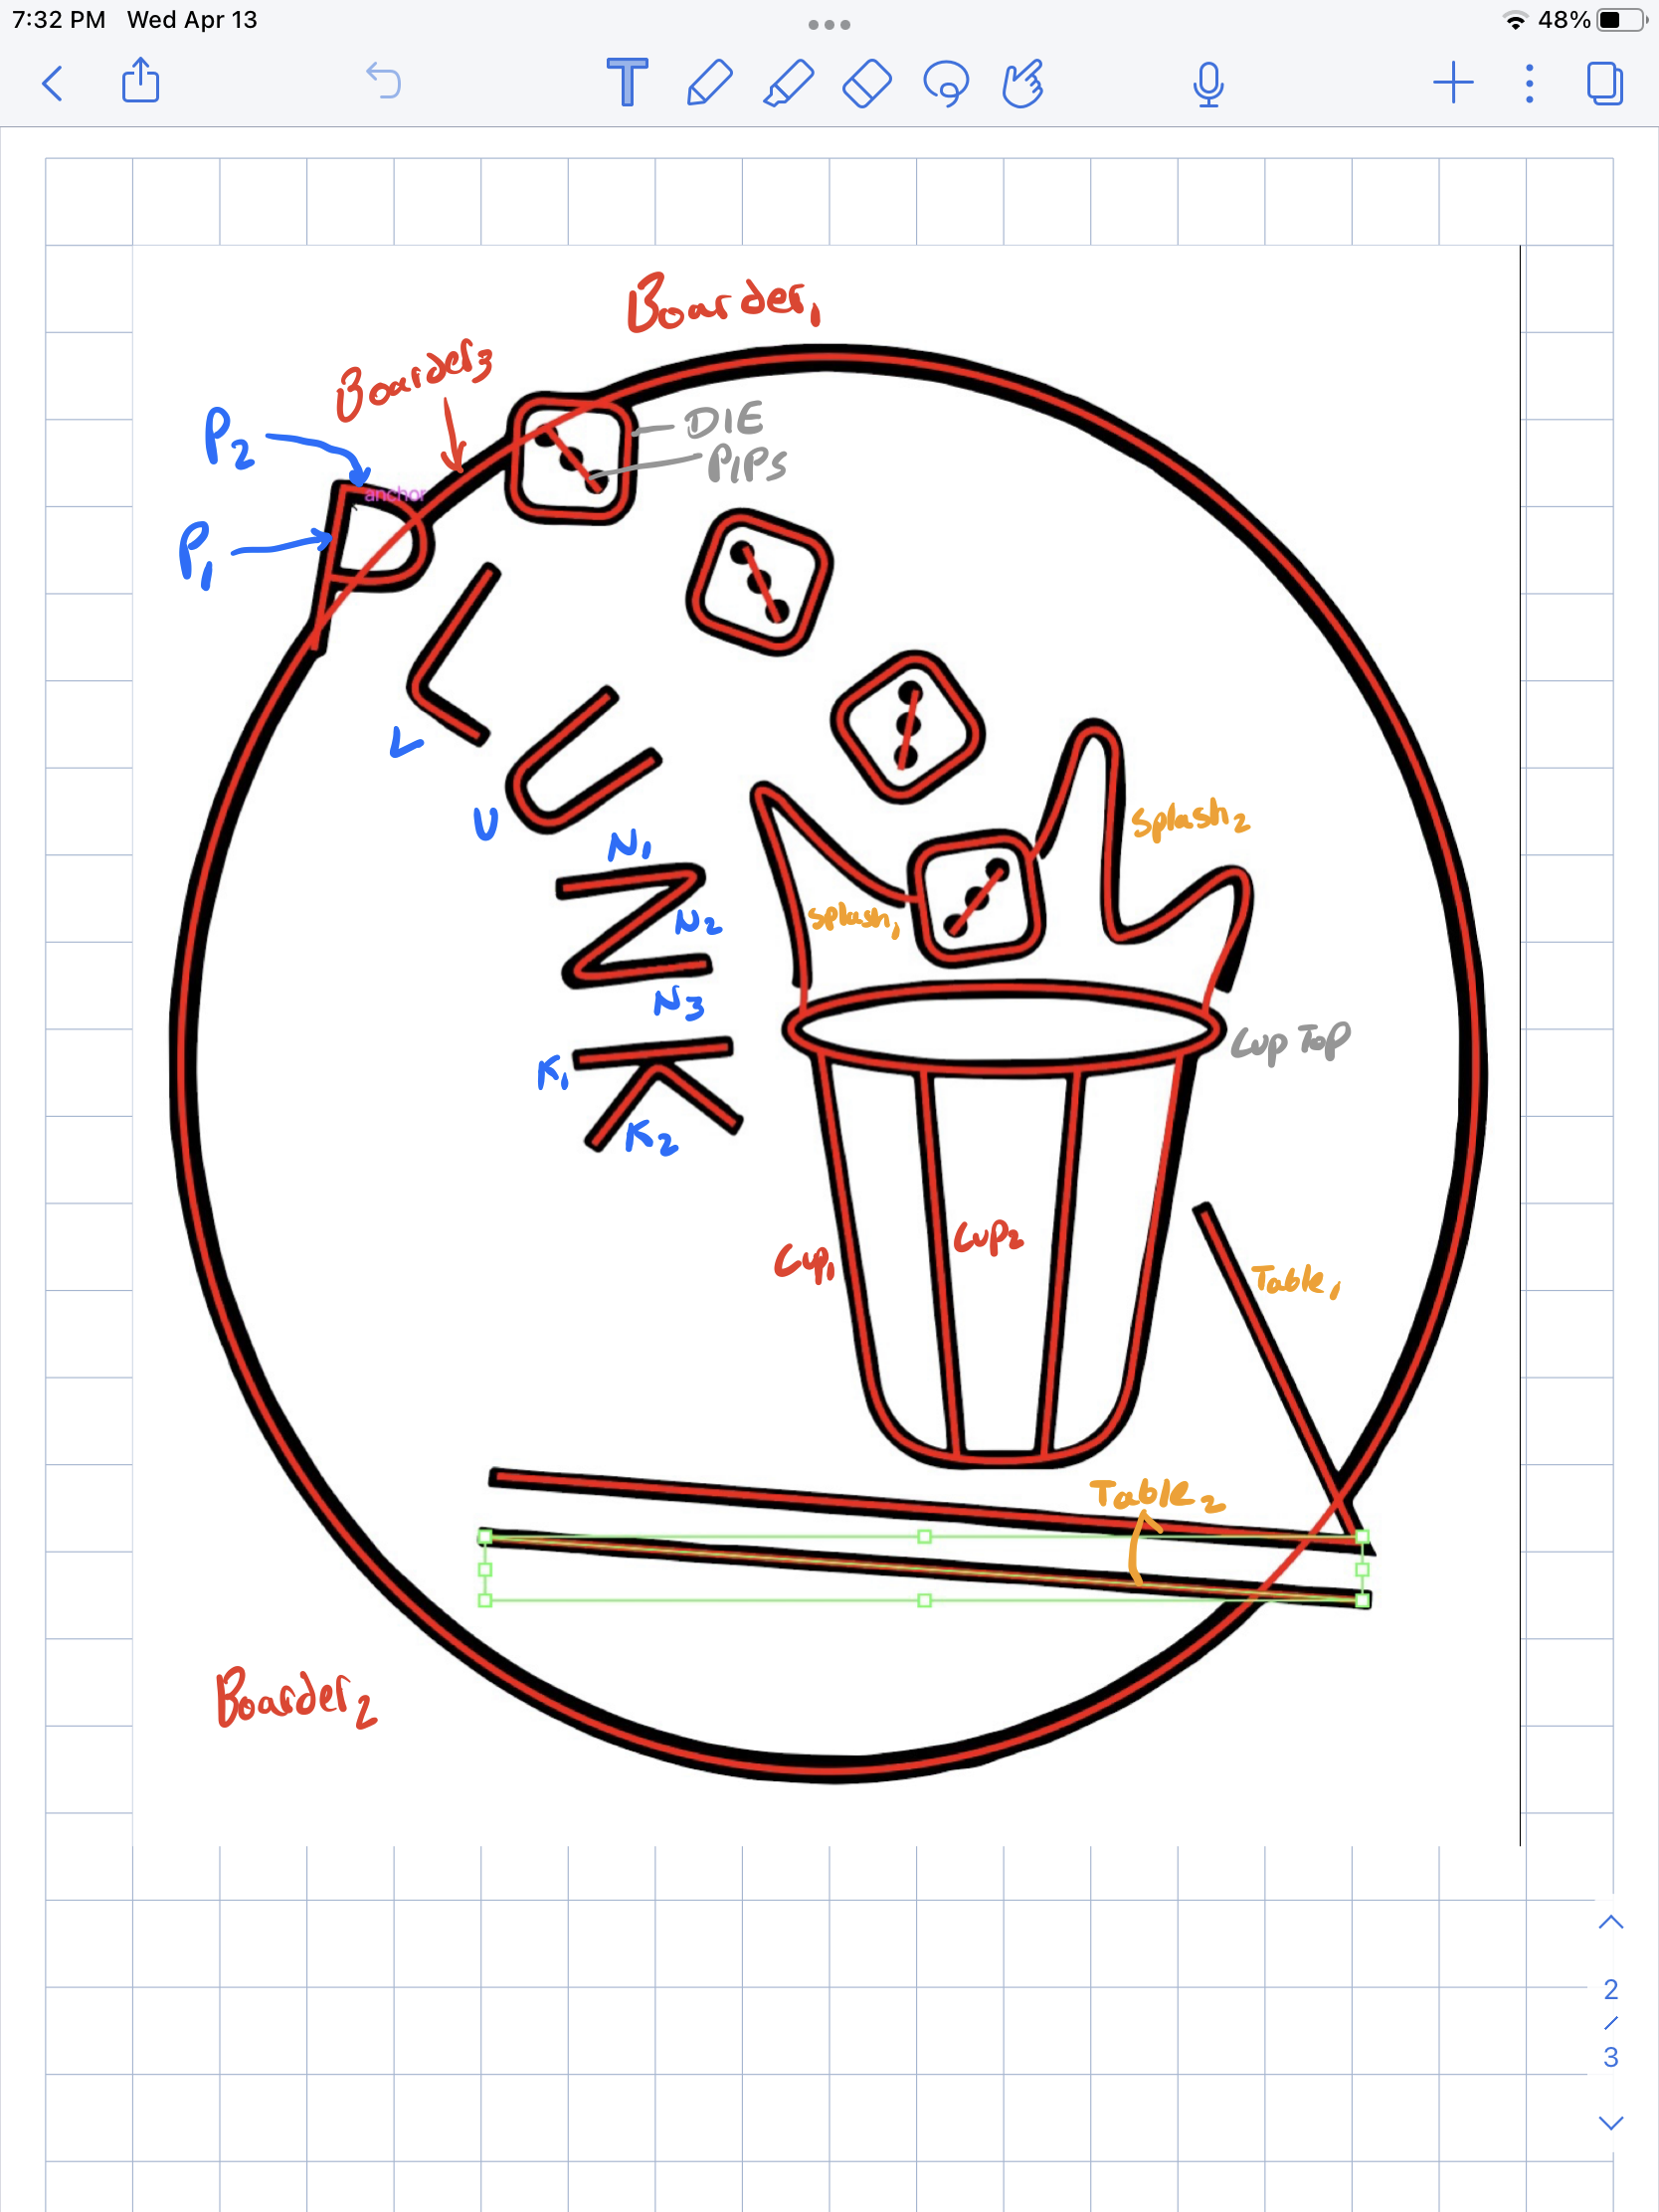
This week I spent some time planning out the base of my design. I started by creating an SVG file in Illustrator which will be used to make laser cuts. This included drawing a path for all the LED strips to follow, and then turning this path into a 0.2 inch channel, as shown below. This first drawing is 20 inches wide and 30 inches tall. I found that it is very difficult and tedious to scale down this drawing, in order to maintain the 0.2 inch channel width. So if I do plan on scaling the size of this down, I will basically have to redraw the entire thing.

While drawing this, I started thinking about all of the light strips that I will need to buy. In doing so, I realized that that I had made some flaws in the way that I was drawing my cuts in Illustrator. I was not accounting for the strips as individual pieces. So, next I started mapping out all of the different sections of lights and what lengths will be needed, and thus how much I will be spending on LEDs. My calculations are shown below:
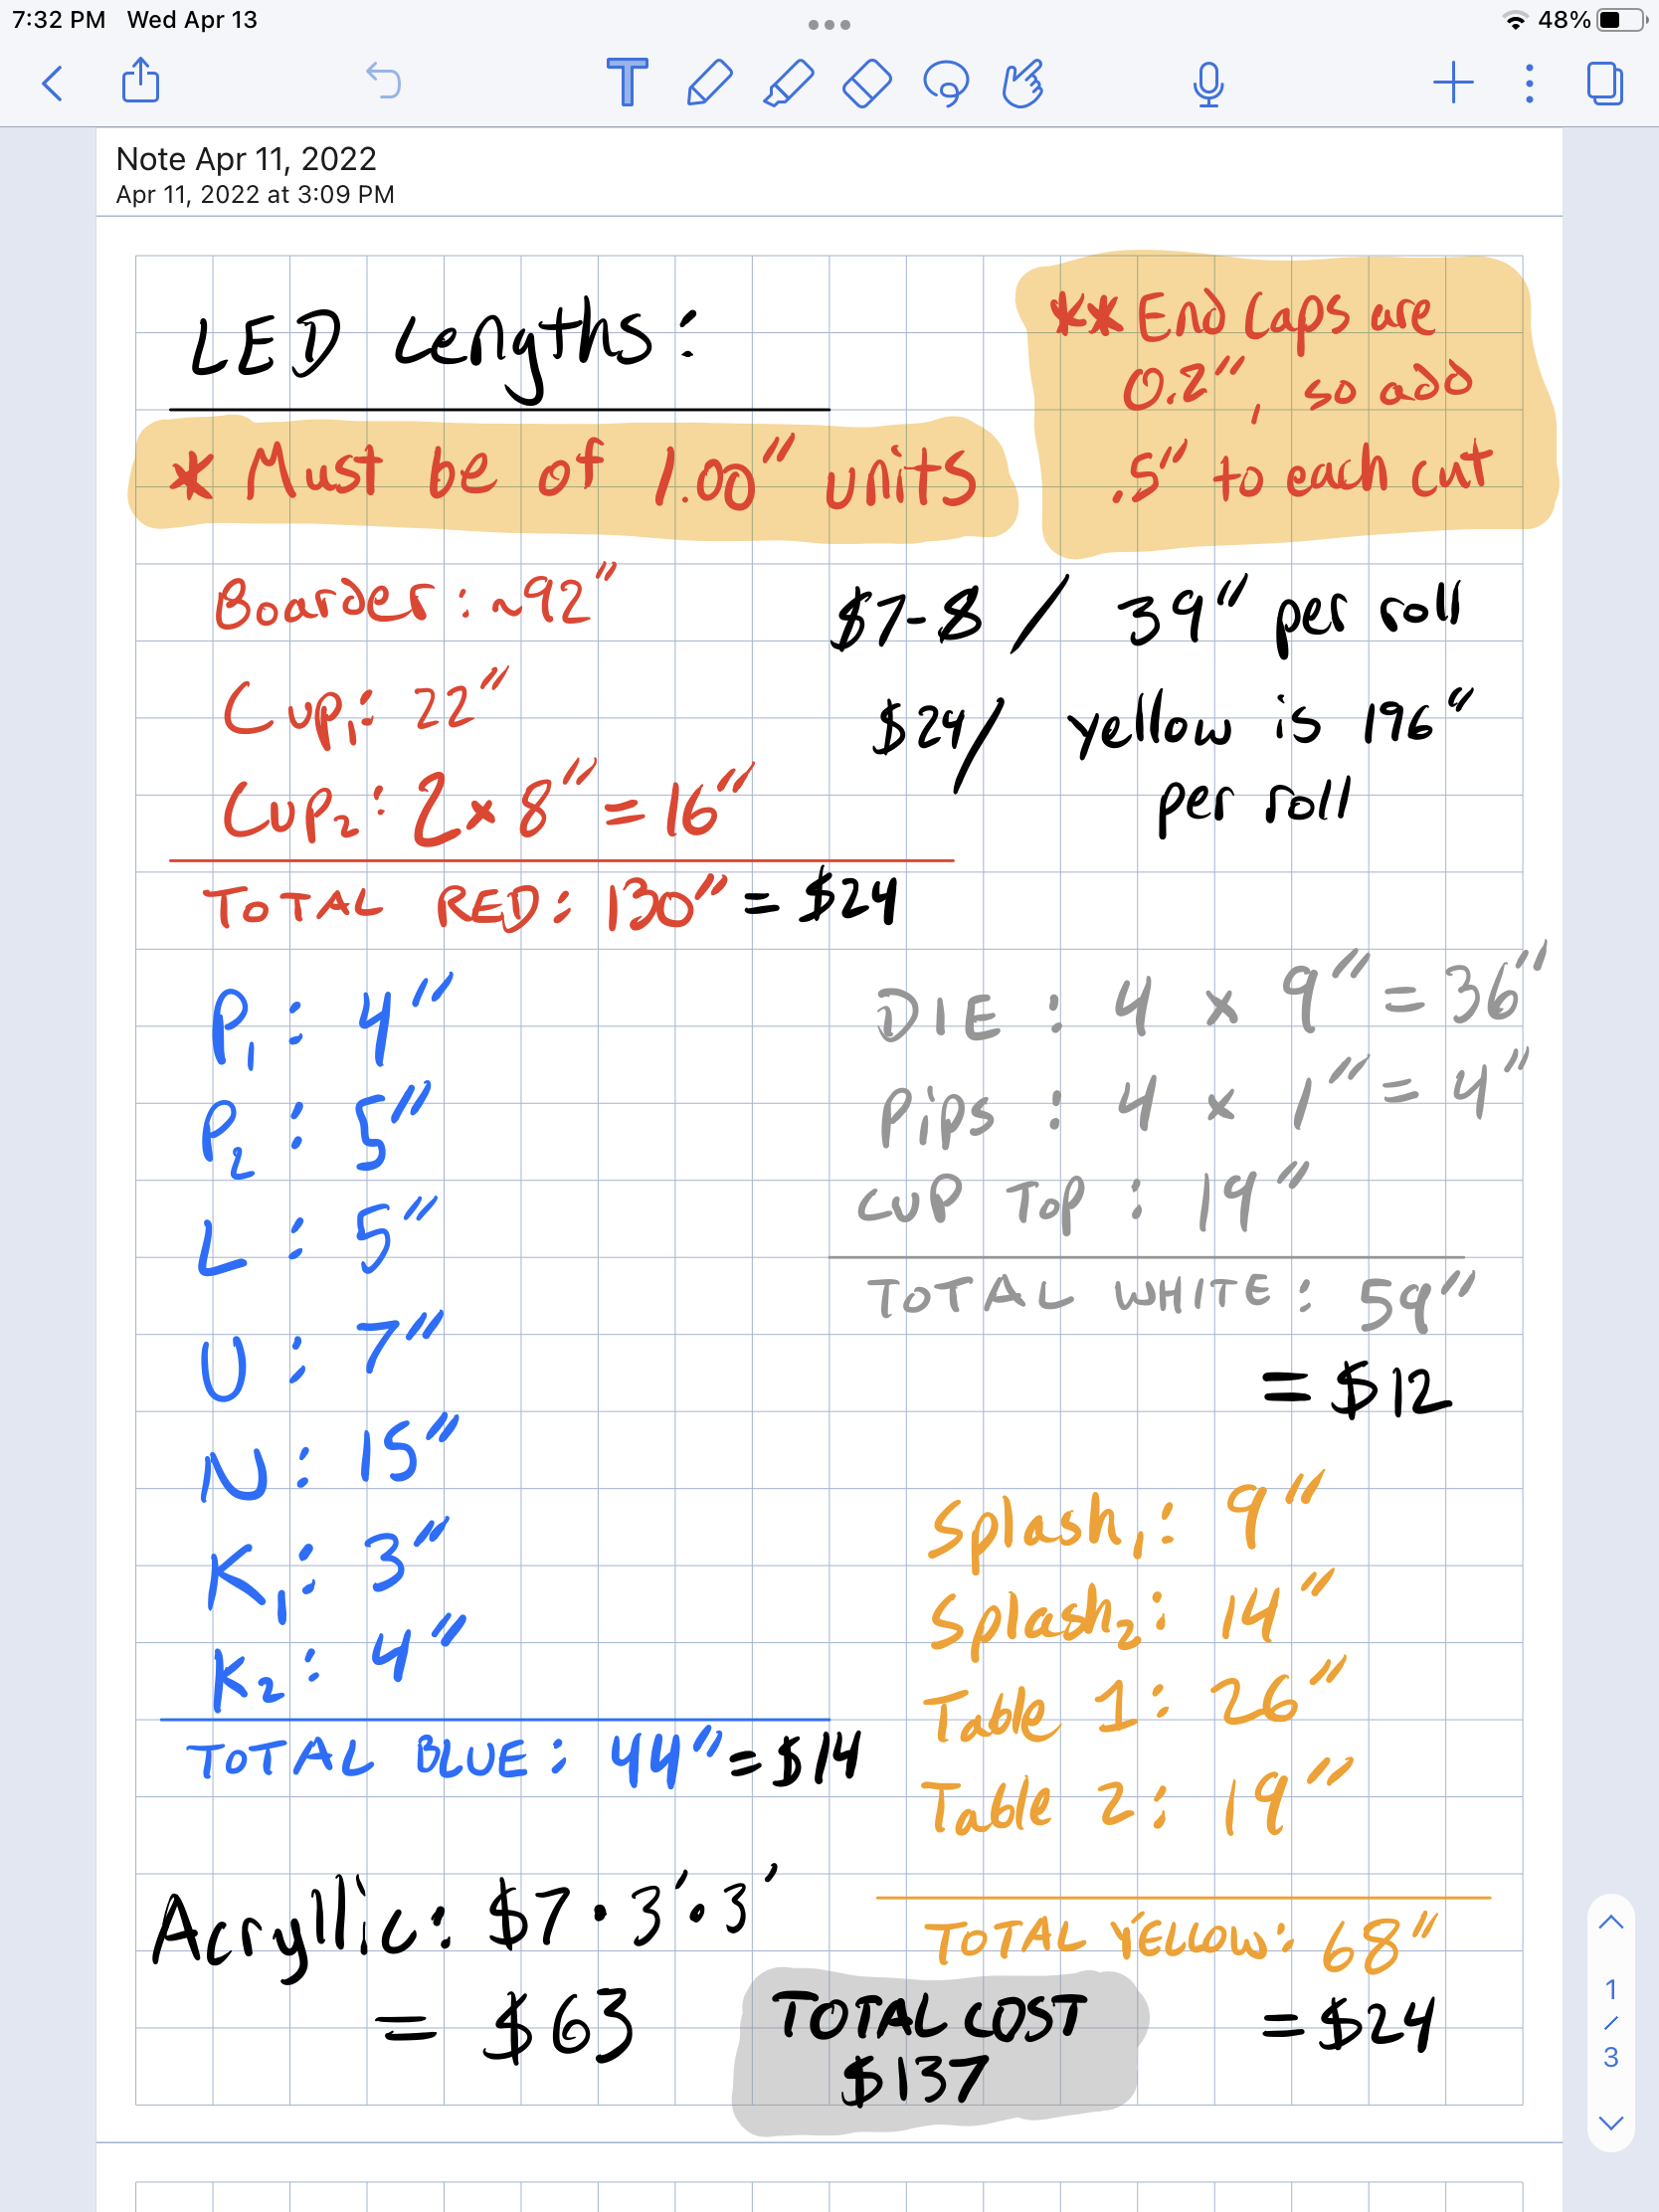
The WPI Makerspace office sells 1/4 inch Acrylic sheets for $7/ square foot. Therefore if I make this sign as large as the laser cutter allows, I would be purchasing a 3′ x 3′ sheet of Acrylic for $63. I also determined all of the lengths for each LED section using the Document Info tool on Illustrator to analyze the path lengths. By using the prices of neon LED strips on Amazon, I determined that the total cost of Acrylic and lights will be around $137. While doing these calculations, I also realized that each LED strip must be within exact one inch increments. This makes it a lot more difficult to plan out the size of my cuts, as I need to measure each individual path and ensure that they meet this requirement.
Test Cuts
With these things in mind, I realized that I am going to need to be very tactical in planning out the final cut in order to avoid spending lots of money on mistakes. So I started making some practice cuts of a die to see how different cut sizes will turn out.
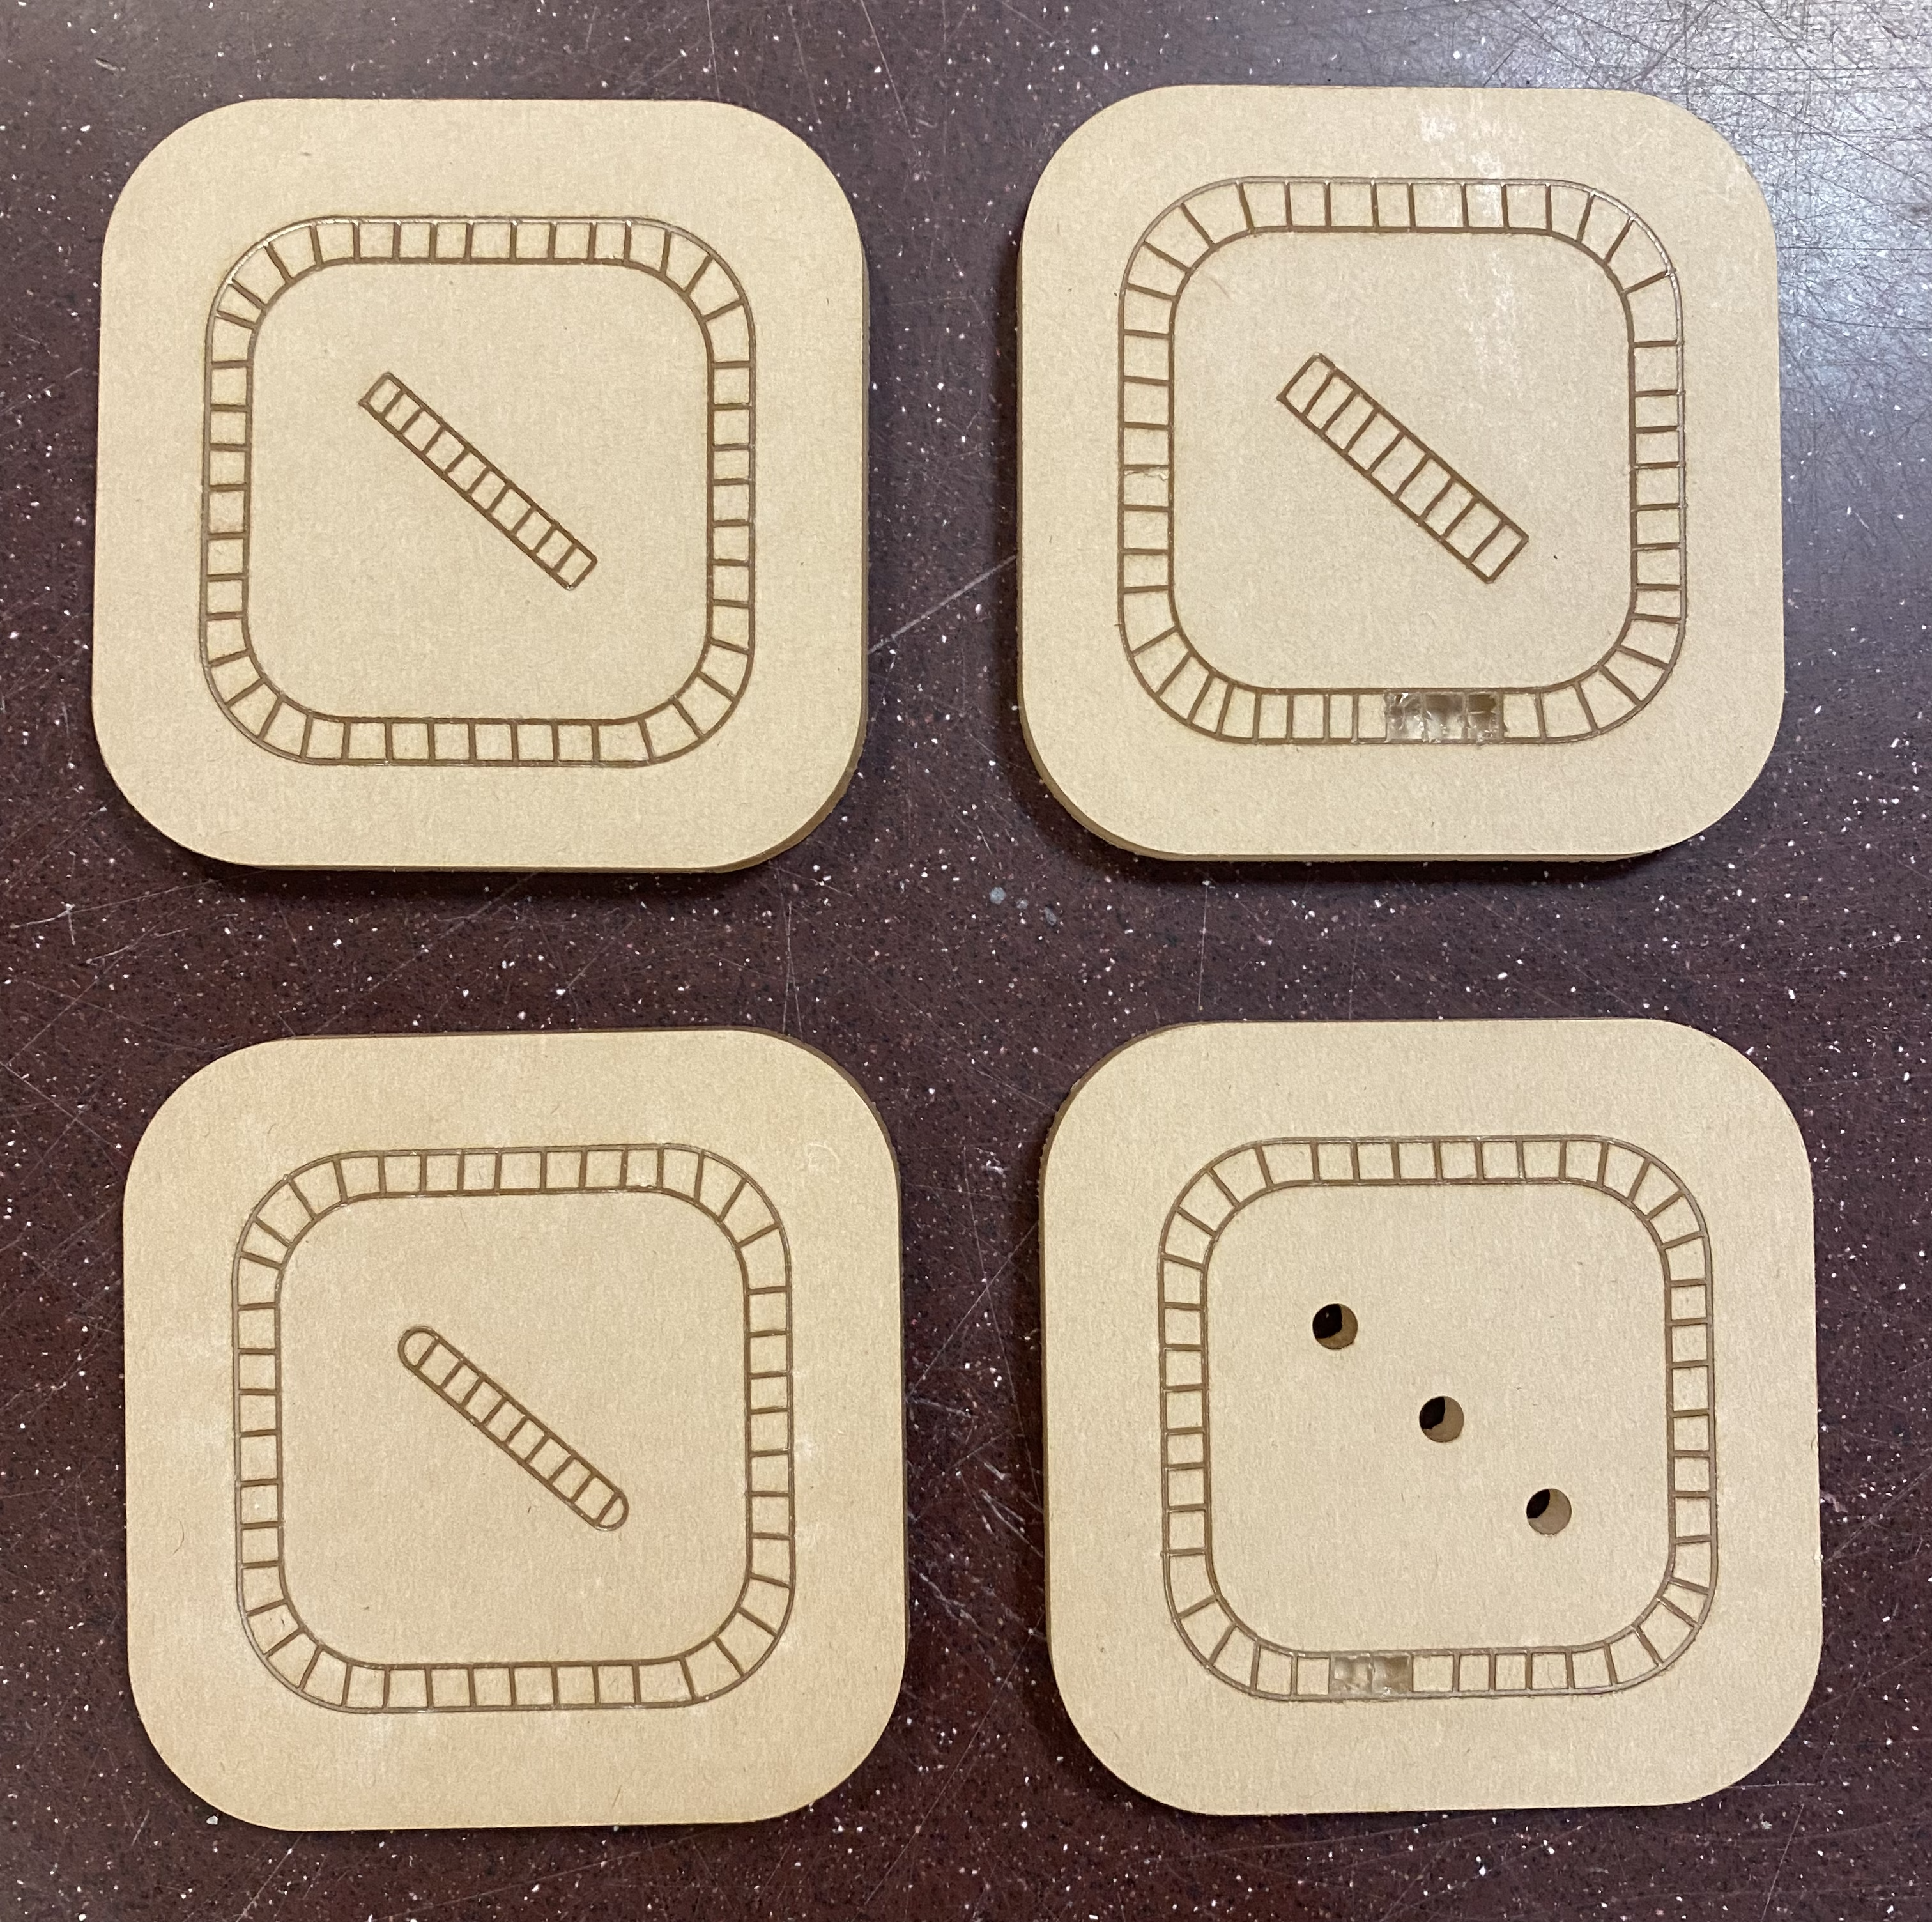
In respect from left to right, the first one uses exact measurements of 0.2 inch channels. The second one has a little added tolerance at 0.25 inch channels. The third just simply has rounded edges to see how those will fit with the LED caps. And the last die has three round holes for LED diodes to represent the pips of the die rather than an LED strip.
When designing these, I had the intent of cutting through the acrylic halfway for the LED channels. However, the laser cutter does not really have this type of ability. It can cut halfway through, but not for the entire area of the channel. The prototyping lab assistant suggested that I make some extra lines within this channel area so I can just chisel the channel out after wards. However, this did not work whatsoever. I was told that I could try using a CNC machine. But I am tentative on this sine I would need to put more time into learning how to use another machine, and I would have to start finding people who have experience with it.
Conclusion
So in this way, I failed this week at cutting the acrylic the way I intended, but it was definitely a great learning opportunity. I determined that I had a misunderstanding of the way a laser cutter works, and how I will be able to use it. I also determined that even with the precision of the laser cutter, both the LED channels and LED diode holes will need extra tolerance in order to fit the intended lights inside.