Practicum Take 3 Post Mortem

So, after some issues with how lasers work and my inability to get them to co-operate, I changed my project yet again!

I essentially decided to shift my attention towards making this a light-refracting aesthetics project. I couldn’t come up with a clever name for this one, so I’m just going to refer to it as “Twine,” because I used an inordinate amount of twine in the process of making this.

Materials:
– Twine
– A Dowel
– A bunch of 1 inch mirror squares
– Hot Glue
– 8 LED votive/candle things
– A dark sheet
– Masking Tape
– A flashlight.

The Project:

And with the lights off:

Aesthetically, I was going for a sort of ethereal, dream-like setup, with maybe a little bit of black magic ;-).
The candles help to set the mood, through their flickering and general aesthetic lighting:

The mirrors throughout the background almost resemble stars in terms of how they’re hung and the appearance they give off when they reflect light.

But the real magic is what happens to the rest of the room when you shine a light on the display:

The room becomes filled with these astounding quadrilateral lights that just add to the dream-like atmosphere.

Experimentations:
I tried to add to the scene in various ways, such as by adding fog or adding additional light sources.

I don’t have a picture of it, but when I added the fog, it did improve the general feel of the scene to be much more dream-like, but it wound up blocking the light too much and removing a lot of the reflections.

The other thing that I tried was adding in some Christmas lights, in hopes of getting some additional bounces off the mirrors.

Sadly, these just obstructed the flash light and, much like the fog, made it impossible to see any of the light reflections from the mirrors.

Conclusion:
All in all, I truly wish I could have done something much more intricate for this project, but after two failed attempts I figured I needed to really dial it back if I wanted to complete something functional.

Post any questions, comments, or concerns below.
Practicum Take 2: Ritual Beauty

So, for my second attempt to churn out a functional project, I’ve decided that I’d like to do something with lasers and, in doing so, salvage the 1 inch mirrors from my failed project.

Without further ado, I present: Ritual Beauty.

The premise of this project is to show that the standards that society and media set for beauty are so ridiculously impossible for people to reach. It’s almost like making a deal with the devil, or using witchcraft.

The lasers will take the form of the summoning circle, which while in typical witchcraft is a pentagram, will be a shape relatively similar to the human eye. In the center of that eye, will be a mirror. This will represent the pupil and show the viewer how the media is expecting them to look. Ideally, this would be a concave trick mirror, showing the viewer a thinned out version of themself. Since I probably will not have the time to obtain one of these, however, I may just have to settle for a flat mirror. Around the ritual circle will be some added illumination for the viewer’s face by way of electric candles (Or real candles depending on which is easier to obtain). These will represent the candles that you would typically find around the pentagram in a traditional summoning ritual and hopefully will not mess with the ability to view the lasers in the darkness.

Materials:
– 2 Laser Pointers
– About 50 1-inch mirror squares
– The Center Mirror
– 4 Candles (be they electric or real).

If you have any thoughts, comments, or concerns, please let me know!

The Sphinx’s Sundial (TM) Post Mortem Post

So, The Sphinx’s Sundial is a bust.

I got some acrylic and laser cut it into the shapes that I needed, and once I put everything together, nothing worked the way I wanted it to ‘-.-

Breakdown of why I think it failed:
Let’s start with how I went about doing this.

Materials:
– Opaque Red Acrylic .125″ thick
– Mirror Acrylic .125″ thick
– Hot Glue

So, I was initially going to 3D print the inside… BUT THEN I LEARNED ABOUT MIRROR ACRYLIC AND IT SOUNDED LIKE A MUCH FASTER SOLUTION THAT COULD HAVE BEEN SO MUCH BETTER (and I guess if I had worked with it enough it may have?)
I laser cut out the silhouettes as well as the holes for the sunlight to enter out of the red acrylic. That looked: Amazing. Like really clean. Laser cutting is really cool.
Like look at how clean those are. I’m really happy about them.

NOW. FOR THE THINGS THAT ARE IMPORTANT TO NOTE ABOUT LASER CUTTING. HEED MY WARNINGS:
– Laser cutting is very precise, yes. But make sure the shapes you cut are the proper dimensions! Acrylic is REALLY HARD TO BREAK. I messed up the measurements on some of my inner mirrors, and so I had to re-break them, since Washburn was closed at that point.
– Make sure that you label the pieces if you’re making a bunch of things that need to fit together like a puzzle. I did not do this. This was a grave error. I accidentally confused some of my pieces with other pieces.

So, that being said. I believe the reason I failed was the inner network of mirrors. It’s kind of a mess.

Now, what I did for this was laser cut a bunch of small 1″ x 1″ squares so that I could arrange them in a more versatile manner. This would have been fine if life was the same as Maya or some other 3D modeling software. Fun fact: It’s not. What wound up happening is that just enough gaps wound up happening in each tunnel for all of the light to escape before it reached the other side.

If I were to do this project again with infinite time and whatever resources I wanted, I would keep the laser cut exterior because that looks super clean. Not much to improve there. The inside however, I’d like to change it from laser cut acrylic to some sort of hollow, bendable, reflective tubing. I think that would be a nice, sealed, easily shaped material to use. I think that would have fixed a lot of my issues.

THAT BEING SAID: THE PROJECT ITSELF WAS NOT ENTIRELY FRUITLESS.

I’m really proud of this project simply because I went really far out of my comfort zone and I stuck with it. If I’d done something digital with some stuff I’d worked with before and just did whatever, I feel like I wouldn’t have done nearly as much experimentation and wouldn’t have learned nearly as much.

I knew that the project was going to be difficult as soon as I started working with it, and if I had the time and resources to go for one more iteration, I think I may have cracked it? But alas, this last iteration was pretty costly :/. Fun fact: Acrylic is expensive. I got really lucky that I got the price I got.

Anyway, if it weren’t for this project, I would never have tried 3D Printing. I would never have tried Laser Cutting. Both of these are things that I’ve always thought were cool, but super inaccessible to a non-hardware guy like myself. But it turns out they’re actually really easy and very effective if you do them properly.

Thank you for giving me the space to explore this design problem. Alas I couldn’t solve it in the time frame, but I appreciate the assistance I received along the way.

Sundial… Almost there!

Sorry I missed a week. Honestly, I had a really busy week last week and didn’t get the chance to throw something up here about my progress.

That being said, we’re reaching the end of this project, so it’s time to kick it into high gear.

Current Goal:
So I’m making a set of “Flattened” 3D Models that I can use to make cutouts on the faces of a box (which I’ll 3D print). Light will enter the box and fill the negative space of the cutout and create the shape.

Potential Problems:
I’ve never 3D printed before so I’m still not sure how it works. I’ll have to play with it a bunch this weekend to make everything work (I’d like to talk to you about this if possible Professor Rosenstock).

Also! There’s the fun fact that certain surfaces don’t reflect light as well as others, so in order to account for this, I want to have the inner network of holes to be made of a reflective material, which could be difficult in terms of 3D printing. So yeah, this’ll be an eventful weekend.

Actual progress shots:
I have a couple of screencaps of the 3D models I’ve made and what shadows they make (which are the same as the images they’ll craft in the negative space).

Feedback is welcome! I now know that I don’t get e-mails when people comment on things this time, so if I don’t respond to your comment, chances are I didn’t read it and you should let me know it exists (y)


Thank you friends!


Sundial Update

SO! After playing around with how the sun moves (and how sundials work), I have once again been confronted with the fact that what I’m currently doing will not work! 😀

So, basically, after trying a couple of models and reading several online documents about sundials, I realized that there is no physical way that I can take the shape that I currently have and use the shadows to create different shapes depending on the sun’s position.

So yeah. Since the sun moves in a VERTICAL circle instead of a HORIZONTAL circle (which is a revelation I made last week), the number of shapes I have to work with to achieve my result have been drastically lessened.

So I dug a little bit, and I decided to look into that 3D printed digital sundial to see how that works.
The simple answer: A lot of math that I probably don’t have time for.

Which gave me another idea. What if instead of trying to create the figures through the idea of using their silhouettes as POSITIVE space, what if I created holes in the figure in order to use the silhouettes as the NEGATIVE space of the image.

Here’s a brief example of my thought process

Basically, I want to have the entry points of the holes be towards the top to catch some of the rays there, but have those holes go through the whole figure.  This will cause the light to create  a shape WITHIN the shadow.

So I think this is a cool direction to move in with this project, I’m just not sure how I should go about making models that I could iterate upon. I could use Maya. I’m not sure if that’s the best way to go about this, but it’s definitely an option. Modeling a shape like this out of clay would be very difficult, so I probably won’t use modelling clay from here out. If you have any route suggestions please let me know.

Maquette: Life Progression Sundial

I decided to settle on my Sundial idea. With a couple of people already doing cool projects with Tech and LEDs, I thought it would be fun to try my hand at something slightly more interesting to me, which is the use of Shadows.

So, just as a sort of brief test of how the shadows would work with the shapes I wanted to make, I made some cutouts and used the flashlight from my phone to make shadows. In future tests, I’d need to use like a nice desk lamp, but I don’t have one, so I’m planning on grabbing one next time I’m out.

The cutouts:

So I tried to layer them all together in a triangle style like this:

Which didn’t really produce the effect that I wanted. So I’m gonna have to go back to the drawing board a bit. I’ll probably use more of a Y formation for the final version, but I need to find a nice way of combining the three silhouettes to make that work.

Also, the final version will likely be 3D printed, so I need to look into how I can go about using WPI’s 3D printing services (I tried asking some friends, but they’ve never used it, ha.) Worse comes to worst I’ll hit up Shapeways with some 3D models I make. The only issue is it would be harder to play with the actual shape between trials.

Shopping list/Useful Components:
– An actual light source.
– Potentially an Arduino setup that will allow me to rotate that lightsource around the piece.
– An Exacto-knife (for more cardboard trials)
– A pedestal for the piece to go on.

I’ll probably need more things, but that’s all I can think of at the moment.

Cerini Project Inspirations

So like, I was trying to think of some of the properties of light that I think are the coolest, and from there I developed a couple of ideas, each of which is very different and shows off a different aspect of light.

Idea 1: Animated Portrait.


My first idea is based on the artist that Kelly showed off last class (Liu Dao). I thought that the concept of taking a static image and using LEDs to bring it to life. With this image I wanted to do something kind of surreal, so I was thinking of maybe doing something with Mother Nature and the elements. Another way I could take this, which could potentially be more interesting, is if I made the image of maybe Tesla or Edison trying to harness lightning into a small orb. Kind of going a little meta and making Light Art of the father of light.

Idea 2: Shadow Sculpture Sundial

So I was walking through Higgins Gardens and I was looking around and I saw a bunch of these nice like… kind of Doric columns. And my mind traveled down a rabbit hole there and after a while the thought that erupted was “Sundial”

This next idea is to take a sundial and turn it into a shadow sculpture. I want to make a weatherproof sculpture and put it on a pedestal so that over the course of the day the shadow evolves and changes over time.

I found a really cool example of something like this here:

Idea 3:  Something with FadeCandy?

I don’t know. I always wanted to work with some cool Arduino stuff. So I was kind of thinking of maybe doing some sort of cool interactive piece with the FadeCandy. I don’t have much for this idea, but I don’t want to rule out this opportunity.


Luzinterruptus

In 2008, Calle del Pez Street in Madrid was taken storm by the anonymous Light Artists, Luzinterruptus, as they covered each and every street lamp on the block with red lampshades. They have since done over 170 different light art pieces in locations across the globe, including, but not limited to, New York City, Toronto, and Melbourne.

Their name, “Luzinterruptus,” essentially breaks down into “Luz,” or “light,” “interrupt us.” Which is a pretty good summation of their goal as an artistic group: take lights and combine them with everyday objects in order to “shed some light” on some pressing social issues. Their typical tools are fluorescent lights, however they also use LEDs and Glowsticks from time to time.

Some of their pieces:

This is a shot of the aforementioned “The Intimate Lights of La Calle Del Pez.” The goal of this piece was to take an urban area, filled with bustling people, and use the lighting in an effort to make the area feel more “lived in” and “intimate.”

This is a piece named “Under Nuclear Threat.” It was displayed in Besançon, France and used a kind of sinisiter-looking scarecrow dressed in a hazmat suit to represent the looming threat that Nuclear war puts us under.

This is a personal favorite of mine called “Literature vs. Traffic.” The one pictured above is from their most recent display of it in Toronto, but they’ve also done it in NYC, Melbourne, and Madrid. Basically, they took over a street for a full day and just covered it with books that had lit up pages. The goal was to take a busy and bustling environment and completely transform it into a quiet space. Visitors were allowed to take home any of the books that they wanted from the display.

Here, we have the Plastic Island. This particular instance of it was in Trafalgar Square, but the original was in the waters of Portugal. The piece is a play on the statement that the Eighth Continent of the world is made of plastic. The goal was to alert people of the effects that their pollution has on the environment.

This last piece is called “Street Heartbeats.” It was a commissioned piece located in Tartu, Estonia. Luz had a photographer take pictures of thousands of locals, and used those images to create illuminated bags of red water, representing the heart of the city.

Hello, My Name is: Erik Cerini

Howdy friendos!

My name is Erik and I like to make/play/eat/sleep/breath/etc. games. I’ve been pretending that I know how art works since I took an introductory studio art course senior year of high school. Sometime after that I decided “Hey. You know what would be cool? Making games,” and then I packed my bags and magically teleported to WPI.

As an IMGDTech major, I like to think that I understand how code works from time to time. While I’m not as good at programming as some of my peers, I feel confident in my abilities to figure out the answer to a problem using the mystical, magical powers of Google. But the minute we step from Software to Hardware, I have no idea what I’m doing. I want to change that. Maybe not like… a bunch… But I want to like make a circuit or something this term. Maybe.

When I’m not consuming games, I like to sing, act, and make funny sounds with my mouth. I’m a member of the WPI Audiophiles and I’ve been in like… one VOX show here. So yeah.

“Creative Inspirations…” I honestly don’t know what inspires me creatively. My friends are probably a really big one. They’re really good walls to bounce ideas off of, even if most of the time we’re joking. Outside of that… I kind of draw some of my ideas from the Final Fantasy series for things like plot and game mechanics, I guess.

I think my artistic goals are just to “Be Better.” I’d love to evolve on my current art style and make it a lot cleaner and more… adaptive, I guess? I want to be able to apply it to things beyond just like… being adorable.

Some of my work:

This was a cow I drew for a game jam game called “Beef Cake,” where you bake cakes for cow customers. It’s super rushed because we started running low on time, but all-in-all I think he looks cute.

14914998_10155312135924338_1516243901_n

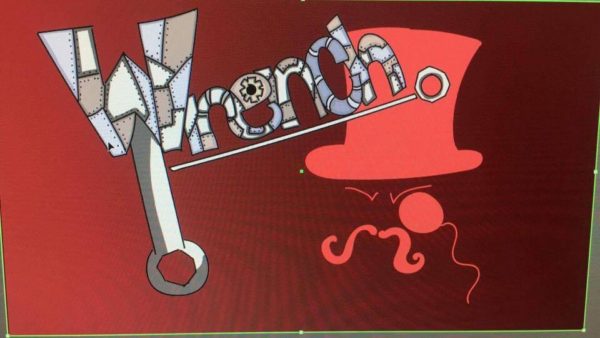
The title card for a WIP game that may or may not ever get finished. It was supposed to be a steampunk platformer.

A scene I made for Interactive Electronic Arts for the Everyday Mysteries assignment. I mainly put this here because the lamp is so good. The rest is cool too, but mainly the lamp.

You can see some of the games I’ve made at my website here.