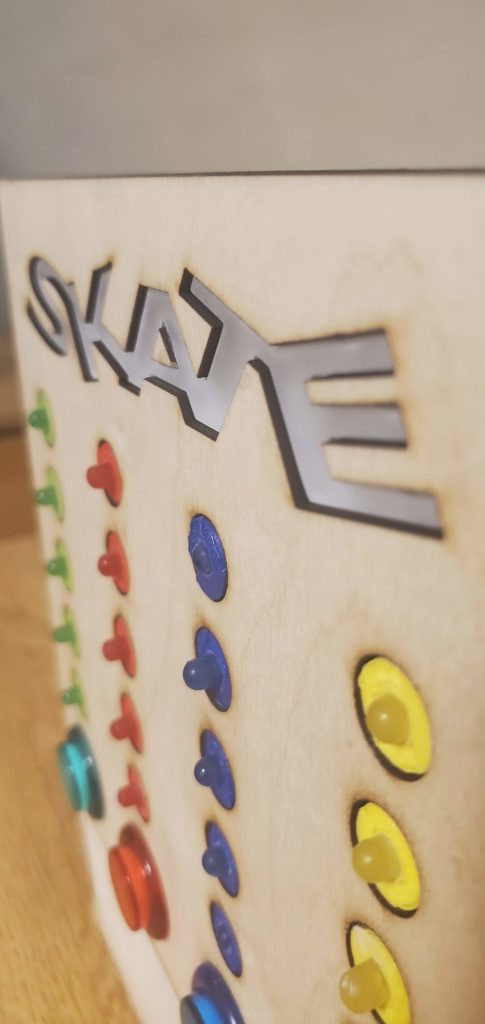
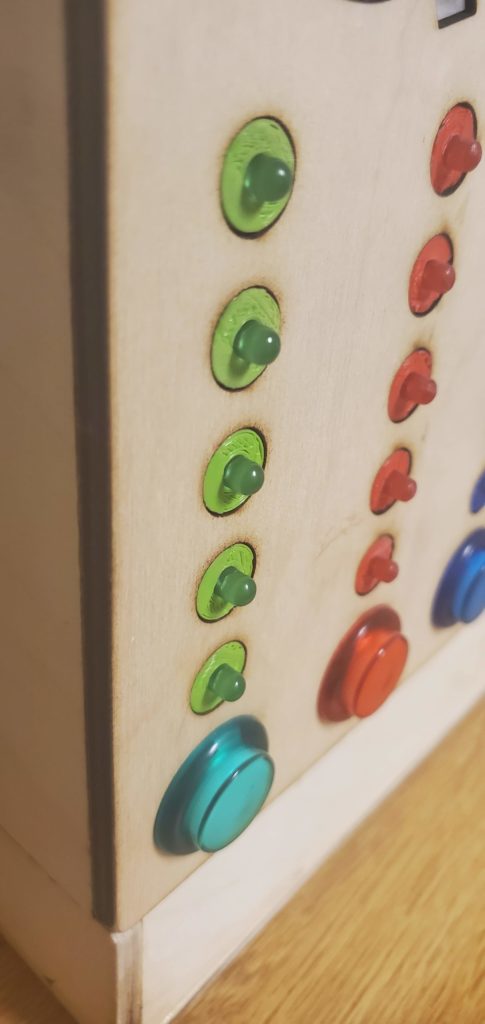
When I began this course, I was juggling various ideas that all could have been very interesting. I decided to build the Skateboard Light because I like the idea of using a project for longer than its intended purpose, which in this case was this class. But the project did not come without challenge.
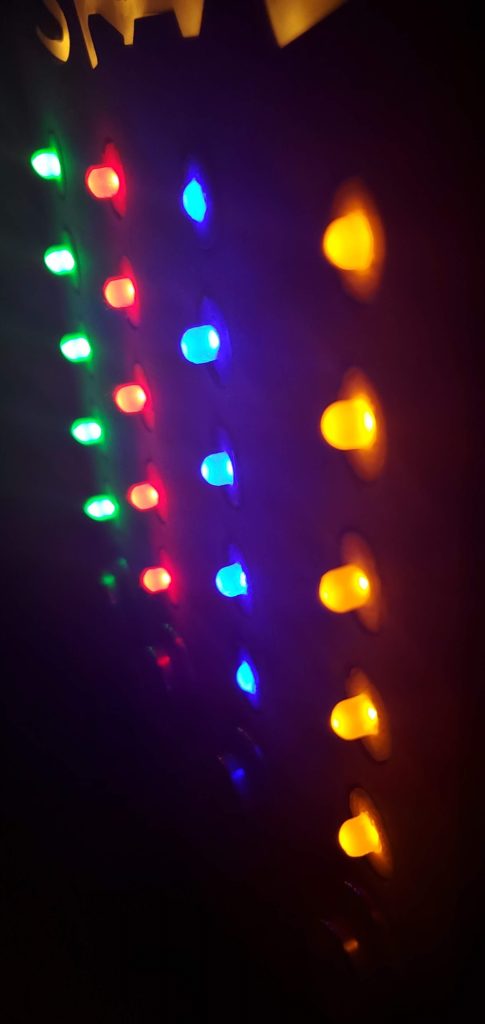
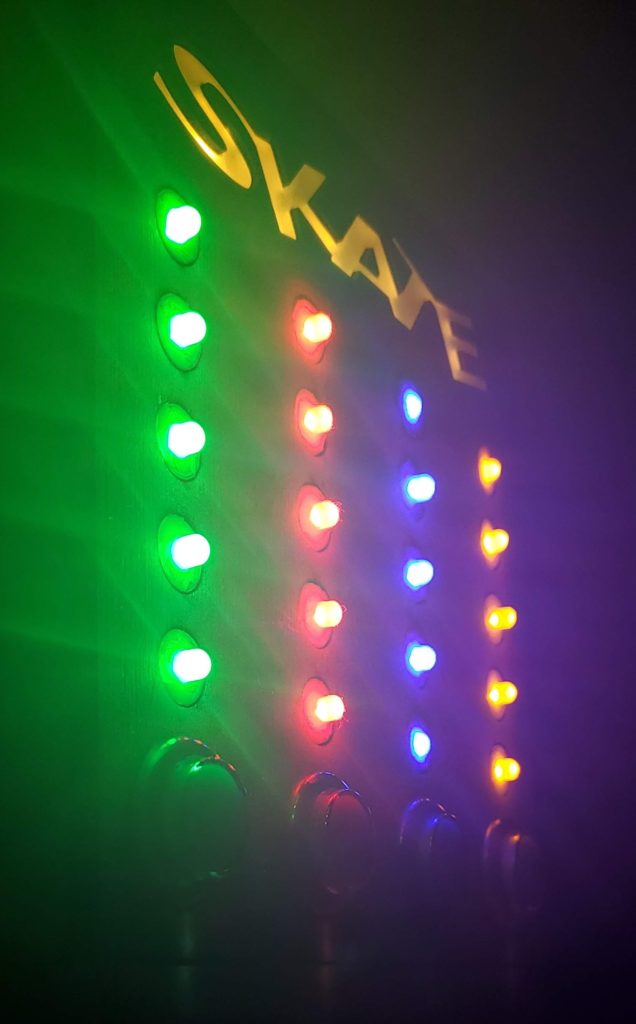
This was the first project in which I used the laser cutter to make parts and while the machine would occasionally give me trouble, I was able to get all the parts. Also, wiring the 24 leds used in this project was not a fun task, to say the least. However, I am very happy with the result and plan to use this in the future.
One note about the software, I utilized the arduino library ShiftOut for sending data to the shift registers controlling the leds.
Below is a video of the Skateboard Light: (I figured out the exposure so it should look better than the video in my polish and present post)
The background music was taken from Andrew Luce’s remix of Day N’ Nite by Kid Cudi.
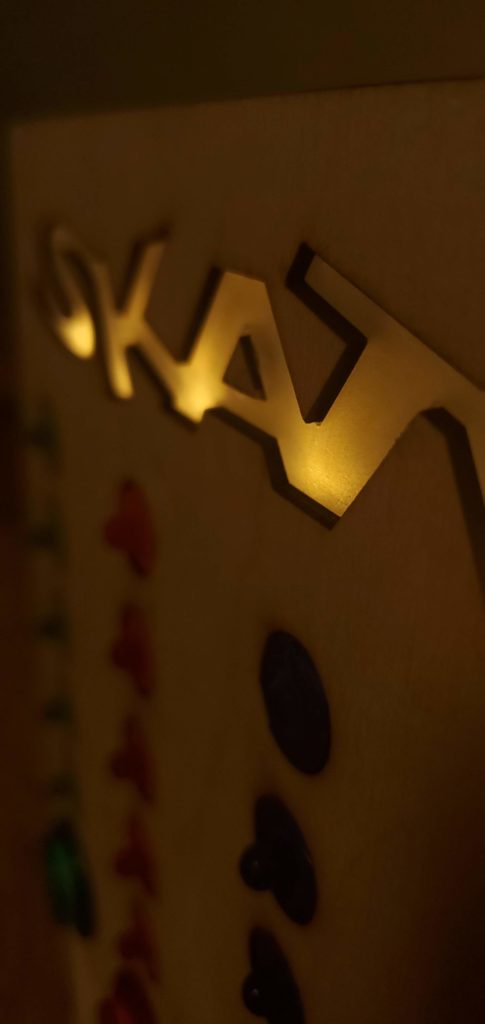
Also here are some photos of the Skateboard Light:
Also here is the main file for my code:
#include <debounce.h>
#include "player.h"

// change flag
bool needToUpdateLEDs = false;

uint32_t firstNumberToShiftOut = 0;
uint32_t secondNumberToShiftOut = 0;

//button pin constants
const int player1ButtonPin = 2;
const int player2ButtonPin = 3;
const int player3ButtonPin = 4;
const int player4ButtonPin = 5;
const int resetButtonPin = 6;

//Debounce timing
const unsigned long debounceDelay = 50;// time to wait after first button press in ms
unsigned long lasDebounceTime = 0;// stores the last time the button bounced

//shift register pins
const int latchPin = 8; //connect to pin 12 on shift register
const int clockPin = 12; //connect to pin 11 on shift register
const int dataPin = 11; //connect to serial in pin on shift register

// button objects
debounce P1B(player1ButtonPin, debounceDelay);
debounce P2B(player2ButtonPin, debounceDelay);
debounce P3B(player3ButtonPin, debounceDelay);
debounce P4B(player4ButtonPin, debounceDelay);
debounce ResetButton(resetButtonPin, debounceDelay);

// players
player P1;
player P2;
player P3;
player P4;

void setup() {
  pinMode(13, OUTPUT); // disable the built in led
  digitalWrite(13, LOW);

  //initialize the buttons
  P1B.Init();
  P2B.Init();
  P3B.Init();
  P4B.Init();
  ResetButton.Init();

  //initialize the players
  P1.Init();
  P2.Init();
  P3.Init();
  P4.Init();


  //initialize the shift registers
  pinMode(latchPin, OUTPUT);
  pinMode(clockPin, OUTPUT);
  pinMode(dataPin, OUTPUT);

  //turn off the leds when system is powered on
  turnOffLED();

}

void loop() {
  //Check all the buttons

  // first button
  if(P1B.CheckButtonPress()){
    P1.addLetter();
    needToUpdateLEDs = true;
  }

  // second button
  if(P2B.CheckButtonPress()){
    P2.addLetter();
    needToUpdateLEDs = true;
  }

  // third button
  if(P3B.CheckButtonPress()){
    P3.addLetter();
    needToUpdateLEDs = true;
  }

  // fourth button
  if(P4B.CheckButtonPress()){
    P4.addLetter();
    needToUpdateLEDs = true;
  }

  if(ResetButton.CheckButtonPress()){
    resetGame();
  }

  // Make updates if button was pressed
  if(needToUpdateLEDs){
    // Combine all player numbers
    turnOnLED(processPlayerLetters());
    needToUpdateLEDs = false;
  }
}

uint32_t processPlayerLetters(){
      // combine p1 and p2 and p3 and p4 separately
    firstNumberToShiftOut = (P2.getLetterCount() << 5) | (P1.getLetterCount());
    secondNumberToShiftOut = (P4.getLetterCount() << 5) | (P3.getLetterCount());

    // then combine the resulting numbers afterwards
    uint32_t finalNumberToShiftOut = (secondNumberToShiftOut << 10) | firstNumberToShiftOut;

    return finalNumberToShiftOut;
}


void resetGame(){
  //Reset all the players
  P1.Reset();
  P2.Reset();
  P3.Reset();
  P4.Reset();

  // raise the flag
  needToUpdateLEDs = true;
}

void turnOnLED(uint32_t ledNum){
  // split up ledNum
  byte SR1 = ledNum; // SR1 gets the LS 8 bits
  byte SR2 = ledNum >> 8; //SR 2 gets the middle 8 bits
  byte SR3 = ledNum >> 16; //SR 3 gets MS 8 bits

  //open the latch to allow data flow
  digitalWrite(latchPin, LOW);

  //SR 3
  shiftOut(dataPin, clockPin, MSBFIRST, SR3);

  //SR 2
  shiftOut(dataPin, clockPin, MSBFIRST, SR2);

  //SR 1
  shiftOut(dataPin, clockPin, MSBFIRST, SR1);

  //close the latch to send data
  digitalWrite(latchPin, HIGH);
}

void turnOffLED(){
  digitalWrite(latchPin, LOW);
  shiftOut(dataPin, clockPin, MSBFIRST, 0);
  shiftOut(dataPin, clockPin, MSBFIRST, 0);
  shiftOut(dataPin, clockPin, MSBFIRST, 0);
  digitalWrite(latchPin, HIGH);
}
James, the lettering on the light looks awesome, especially for your first time laser cutting. I’m glad you found a project that you can use in the future!
I think it is so cool that your project is so interactive, and it is impressive that you wired everything and figured out how to get that to work. I think that the lettering on the top adds a really nice artistic element to the whole project. Good job!
It is great to see that people took the idea of light art and incorporated it into something like a game. I hope that you can show and use this with more people once you are able to see more people.
I was able to see your artwork in person when you were in the prototyping lab, but the video you made did an amazing job of presenting it and making it look very exciting
I think your project looks really satisfying to just press the arcade buttons and watch the lights tic up, also the ‘SKATE’ sign at the top was a really nice touch to complete the project.
This turned out really cool! I love how it is functional and you can now use it when you play! I think the laser cut of the word SKATE really encapsulates the arcade game along with the music you used in the video! Really impressive work!
I really like how contained your project is. It seems very functional and complete. I would love to see it in action for a game. I think the burn marks from the laser cutter add somewhat of a rustic feel to the design. I especially enjoy the font you used for the word “Skate”.