There was a lot to be done this week to be ready to present!
I started by dying my flower motifs black so that they would give more of the illusion of a shadow, then had to block them again so they were the size I was expecting. Luckily they didn’t shrink in the dying process which was a concern because they are 100% cotton and you need hot water to dye. I tried to dye the fabric I planned on using for the outside of the top and bottom, however it turned out to be 100% synthetic and held no dye whatsoever after 40 minutes.
After I dyed the motif’s black I decided to create the bottom and top for the lantern. For this I cut out 16 8×8 pieces of cardboard then hot glued them all together to create a block that was 1″ thick. Then I used rubber cement to attach the cardboard to fabric to give it a clean edge.
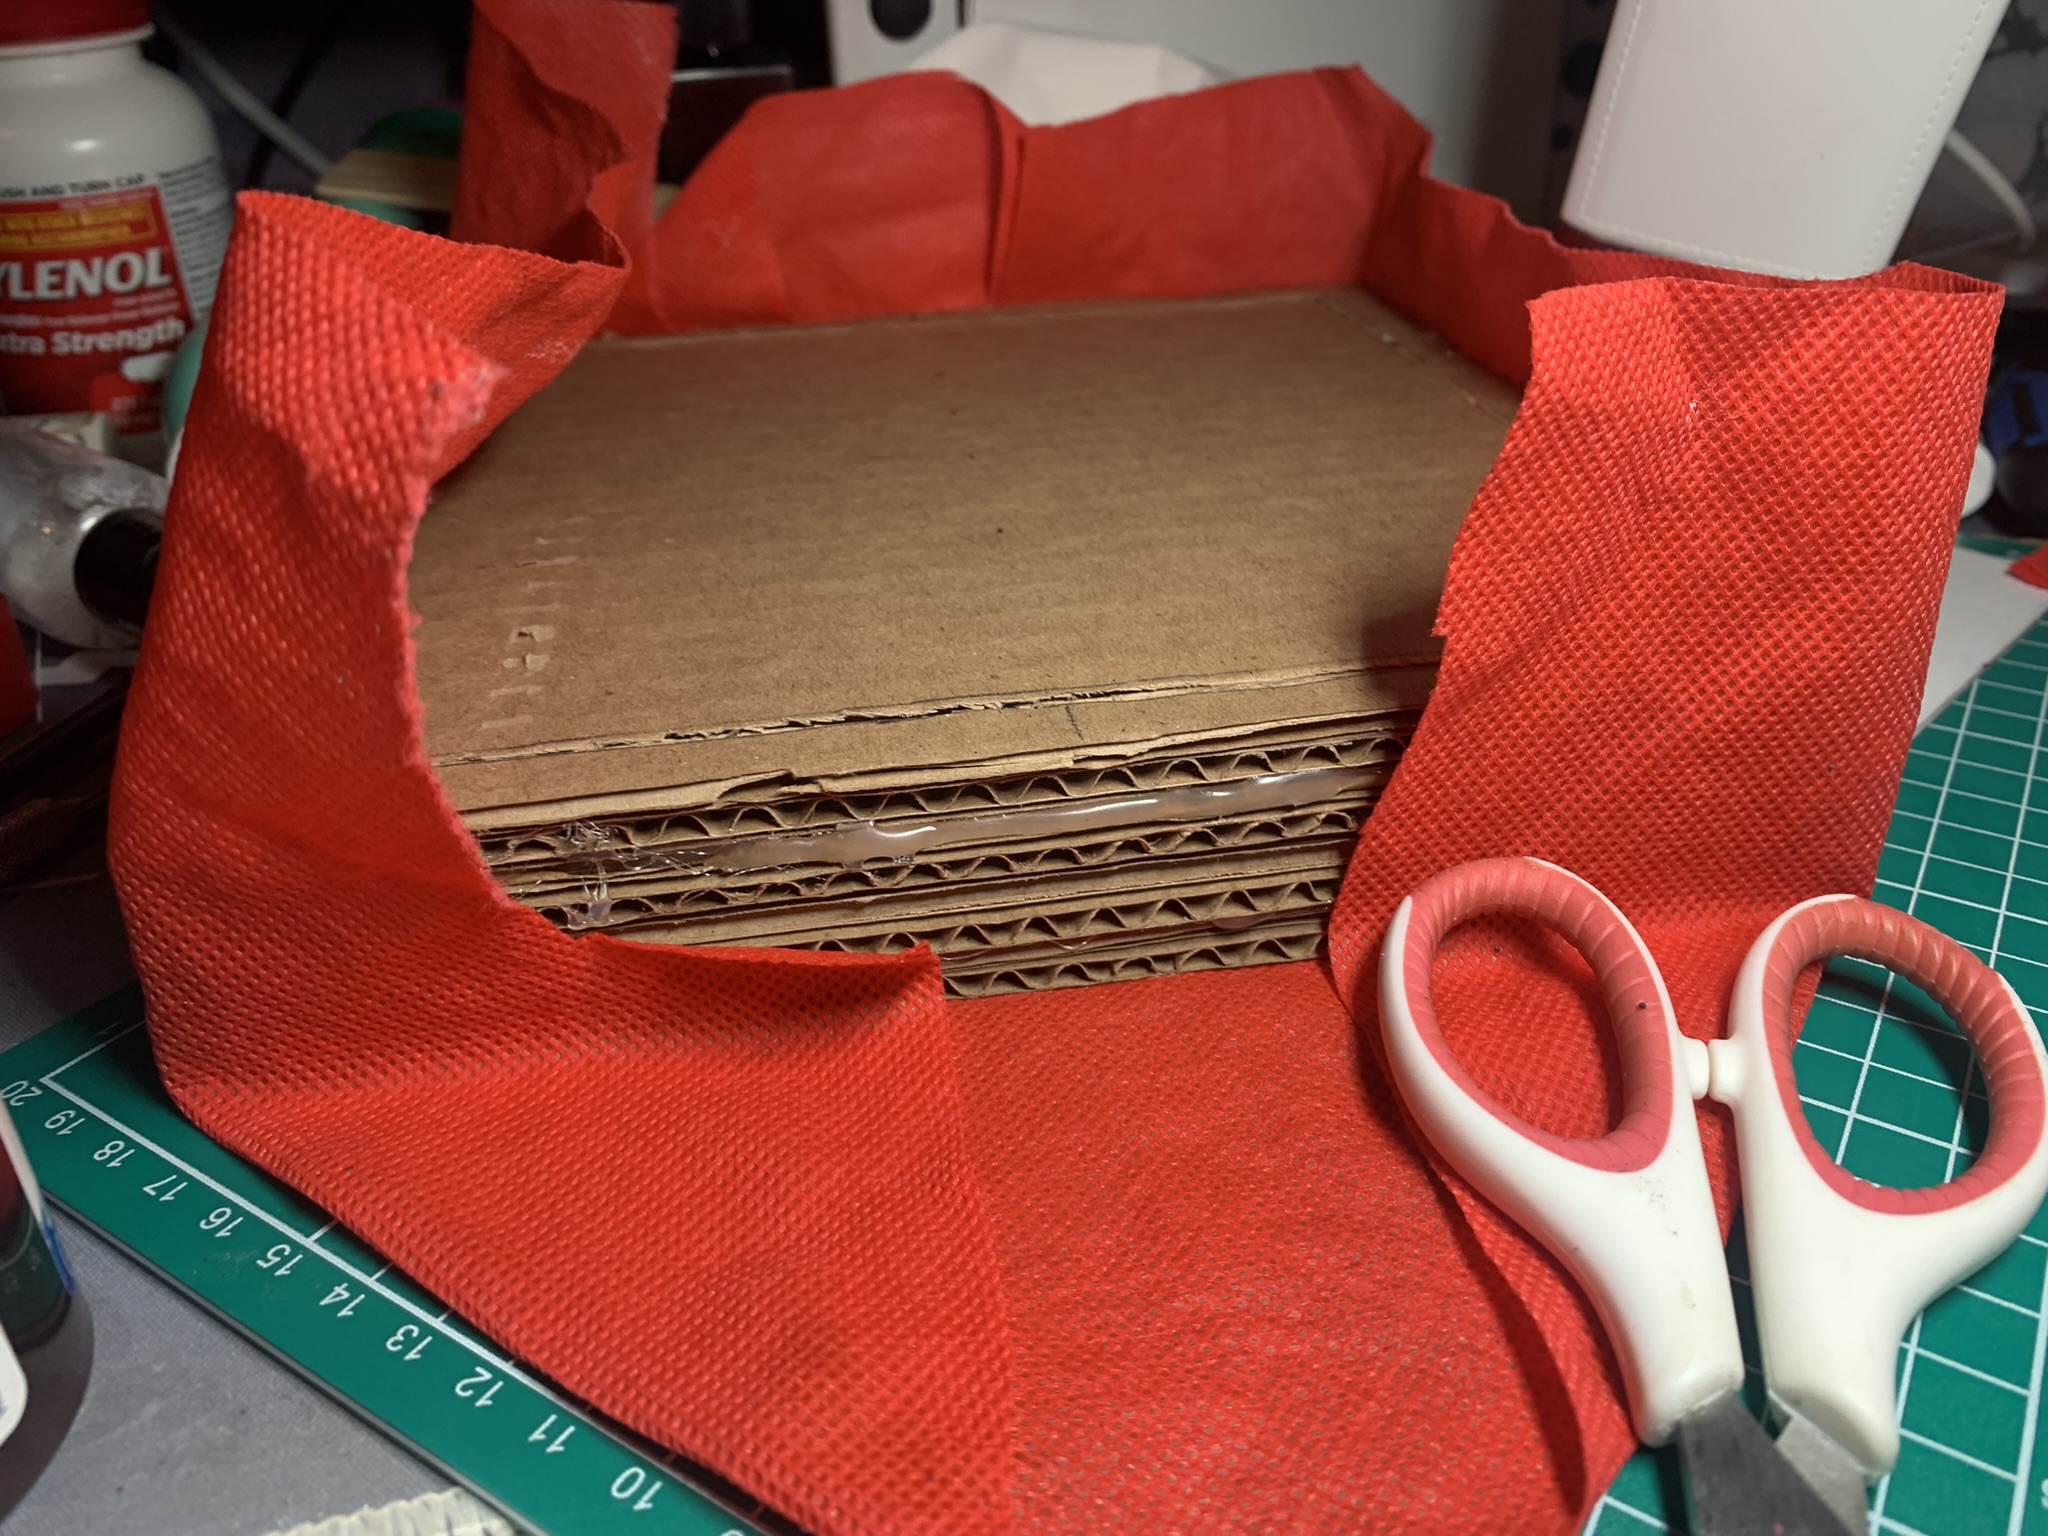
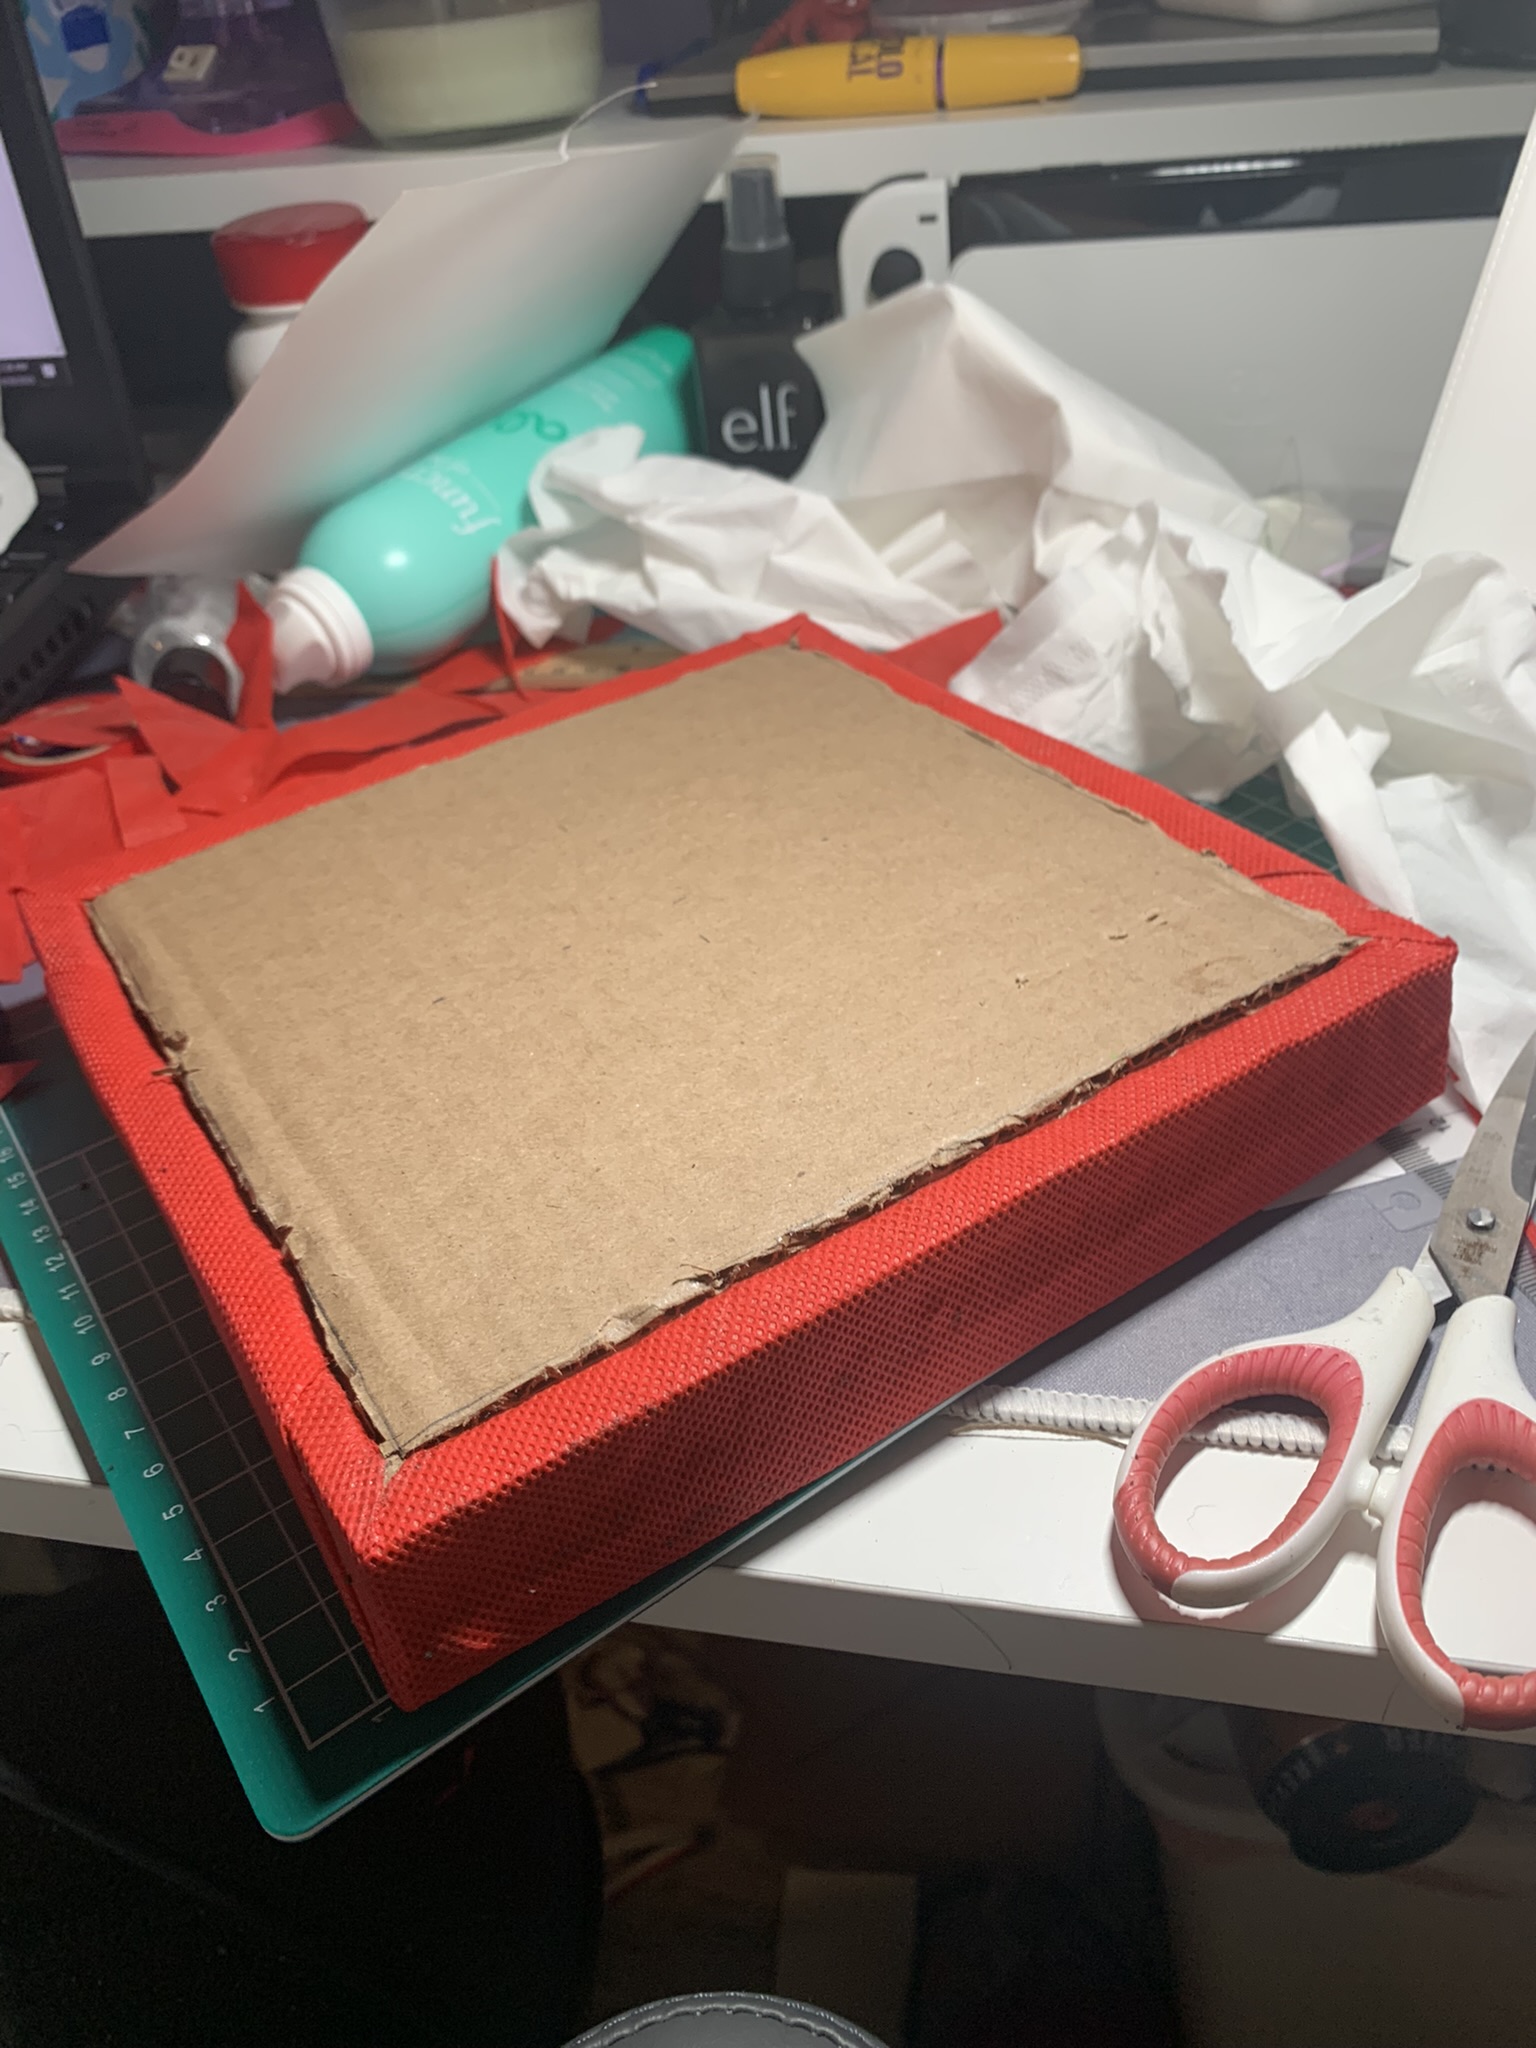
I completed this process twice with both the top and bottom panels for the lantern.
As you can see the fabric is bright red. I didn’t want that for my final project, so I decided to paint with acrylic it since dying didn’t work. Originally I wanted to paint it black, however I didn’t have enough to do both pieces. So I decided to paint them brown since I already had that color.
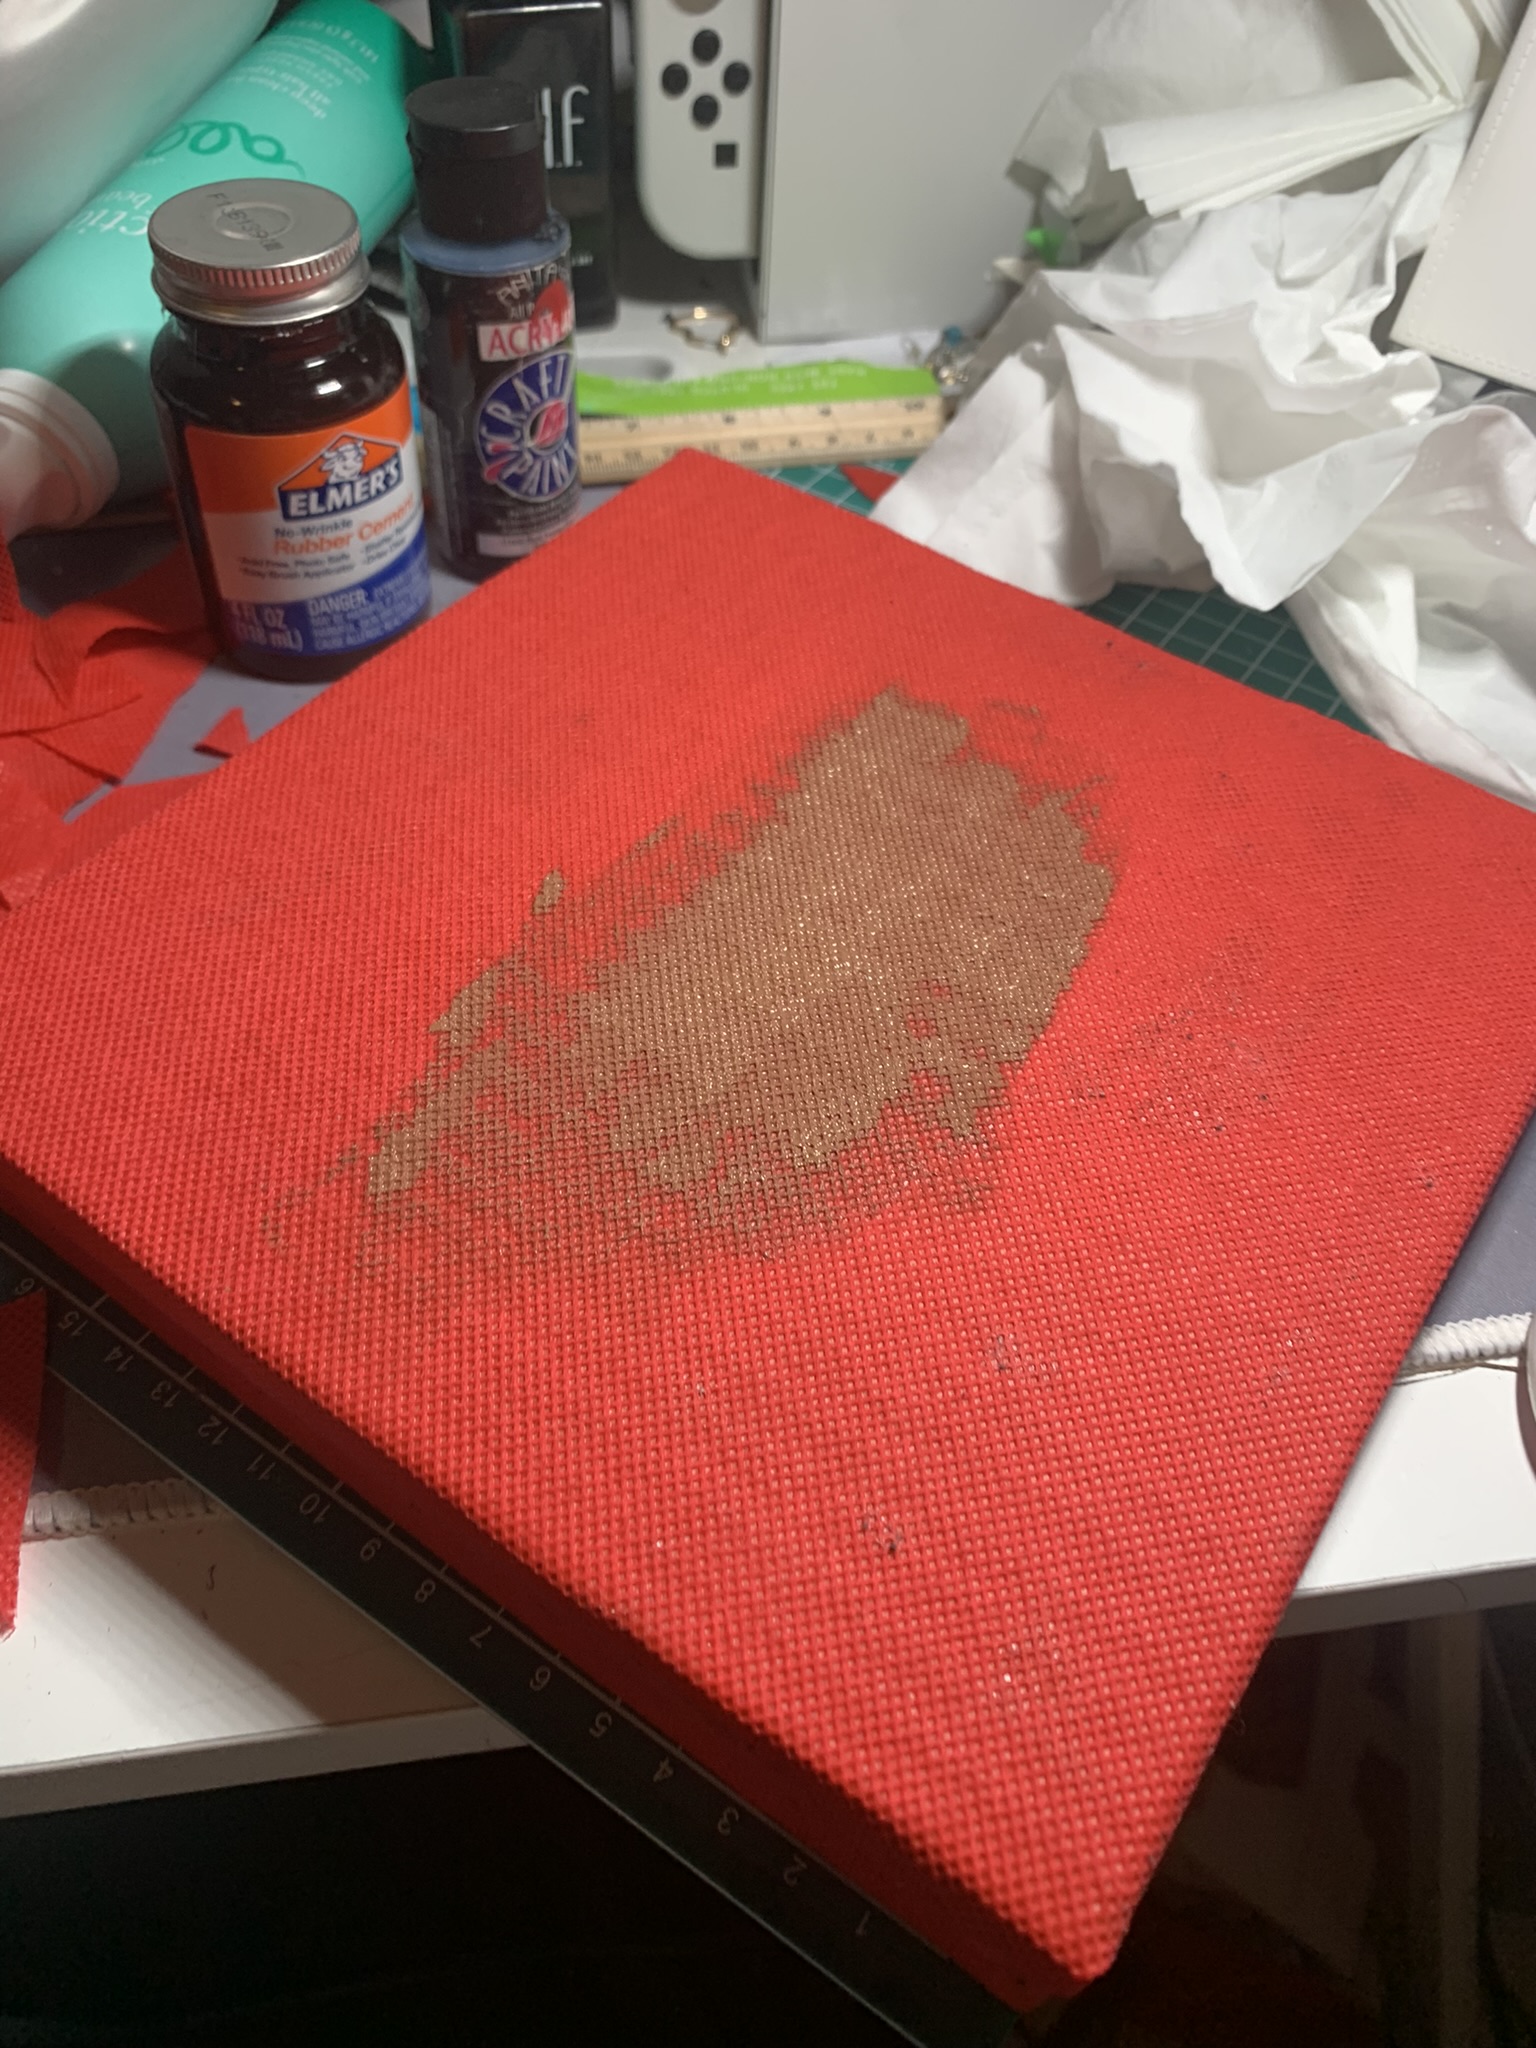
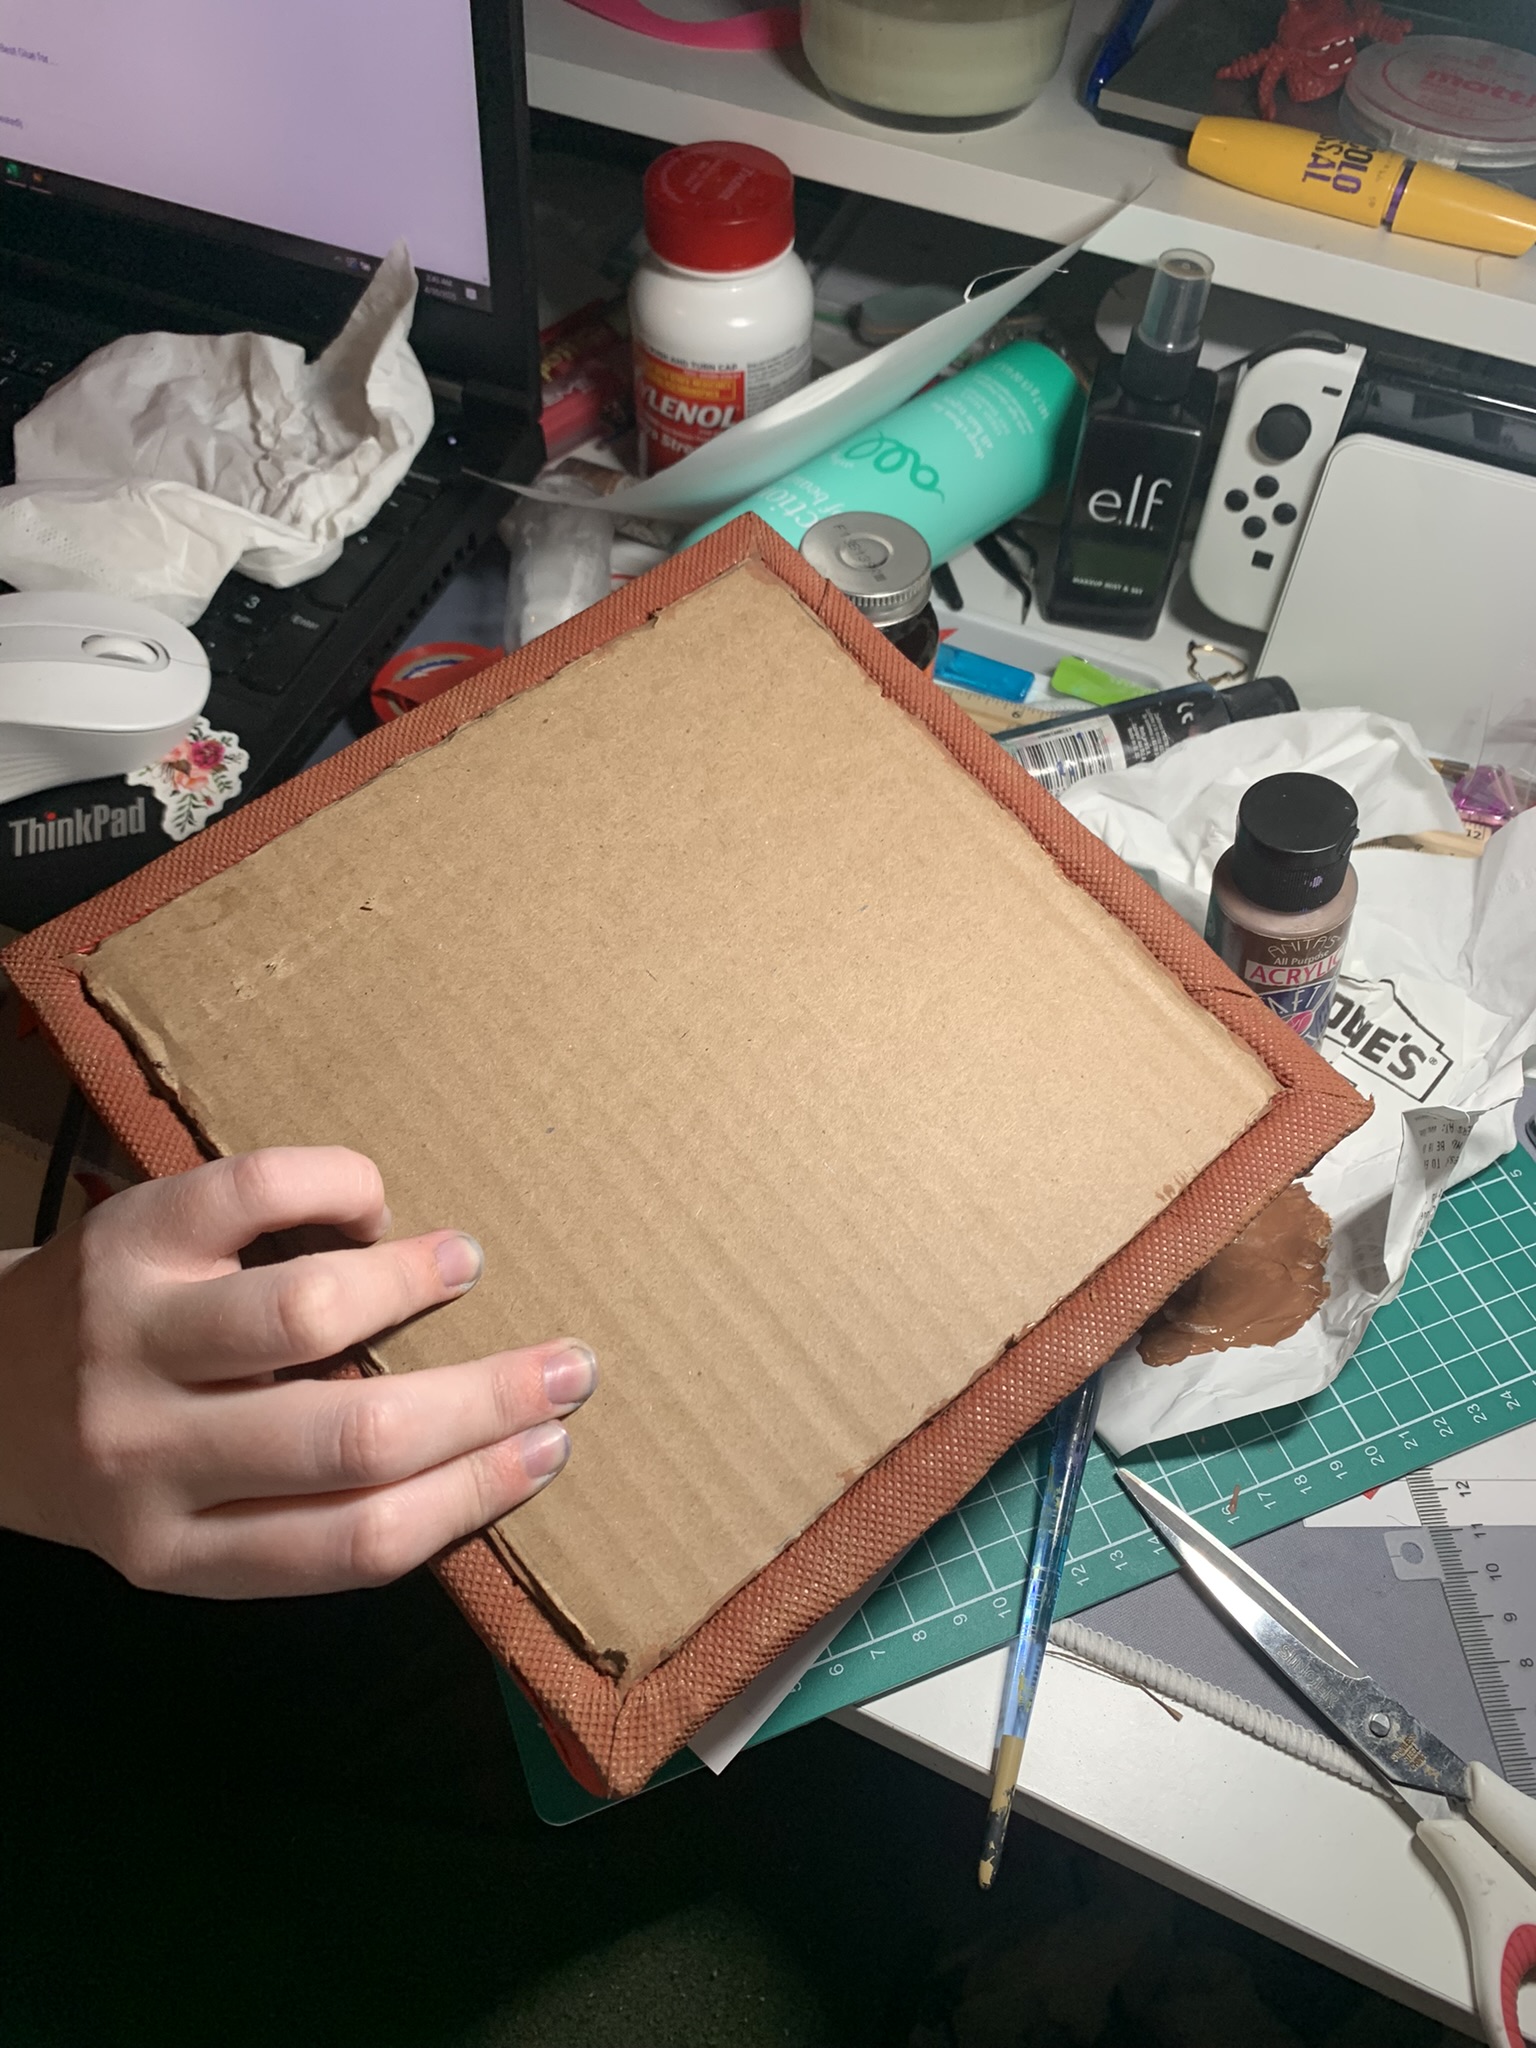
This gave it a more woody look, which I appreciated. Even though it had a bit of a red tint to it in the light, when the lights were off it was the perfect color that blended into the background.
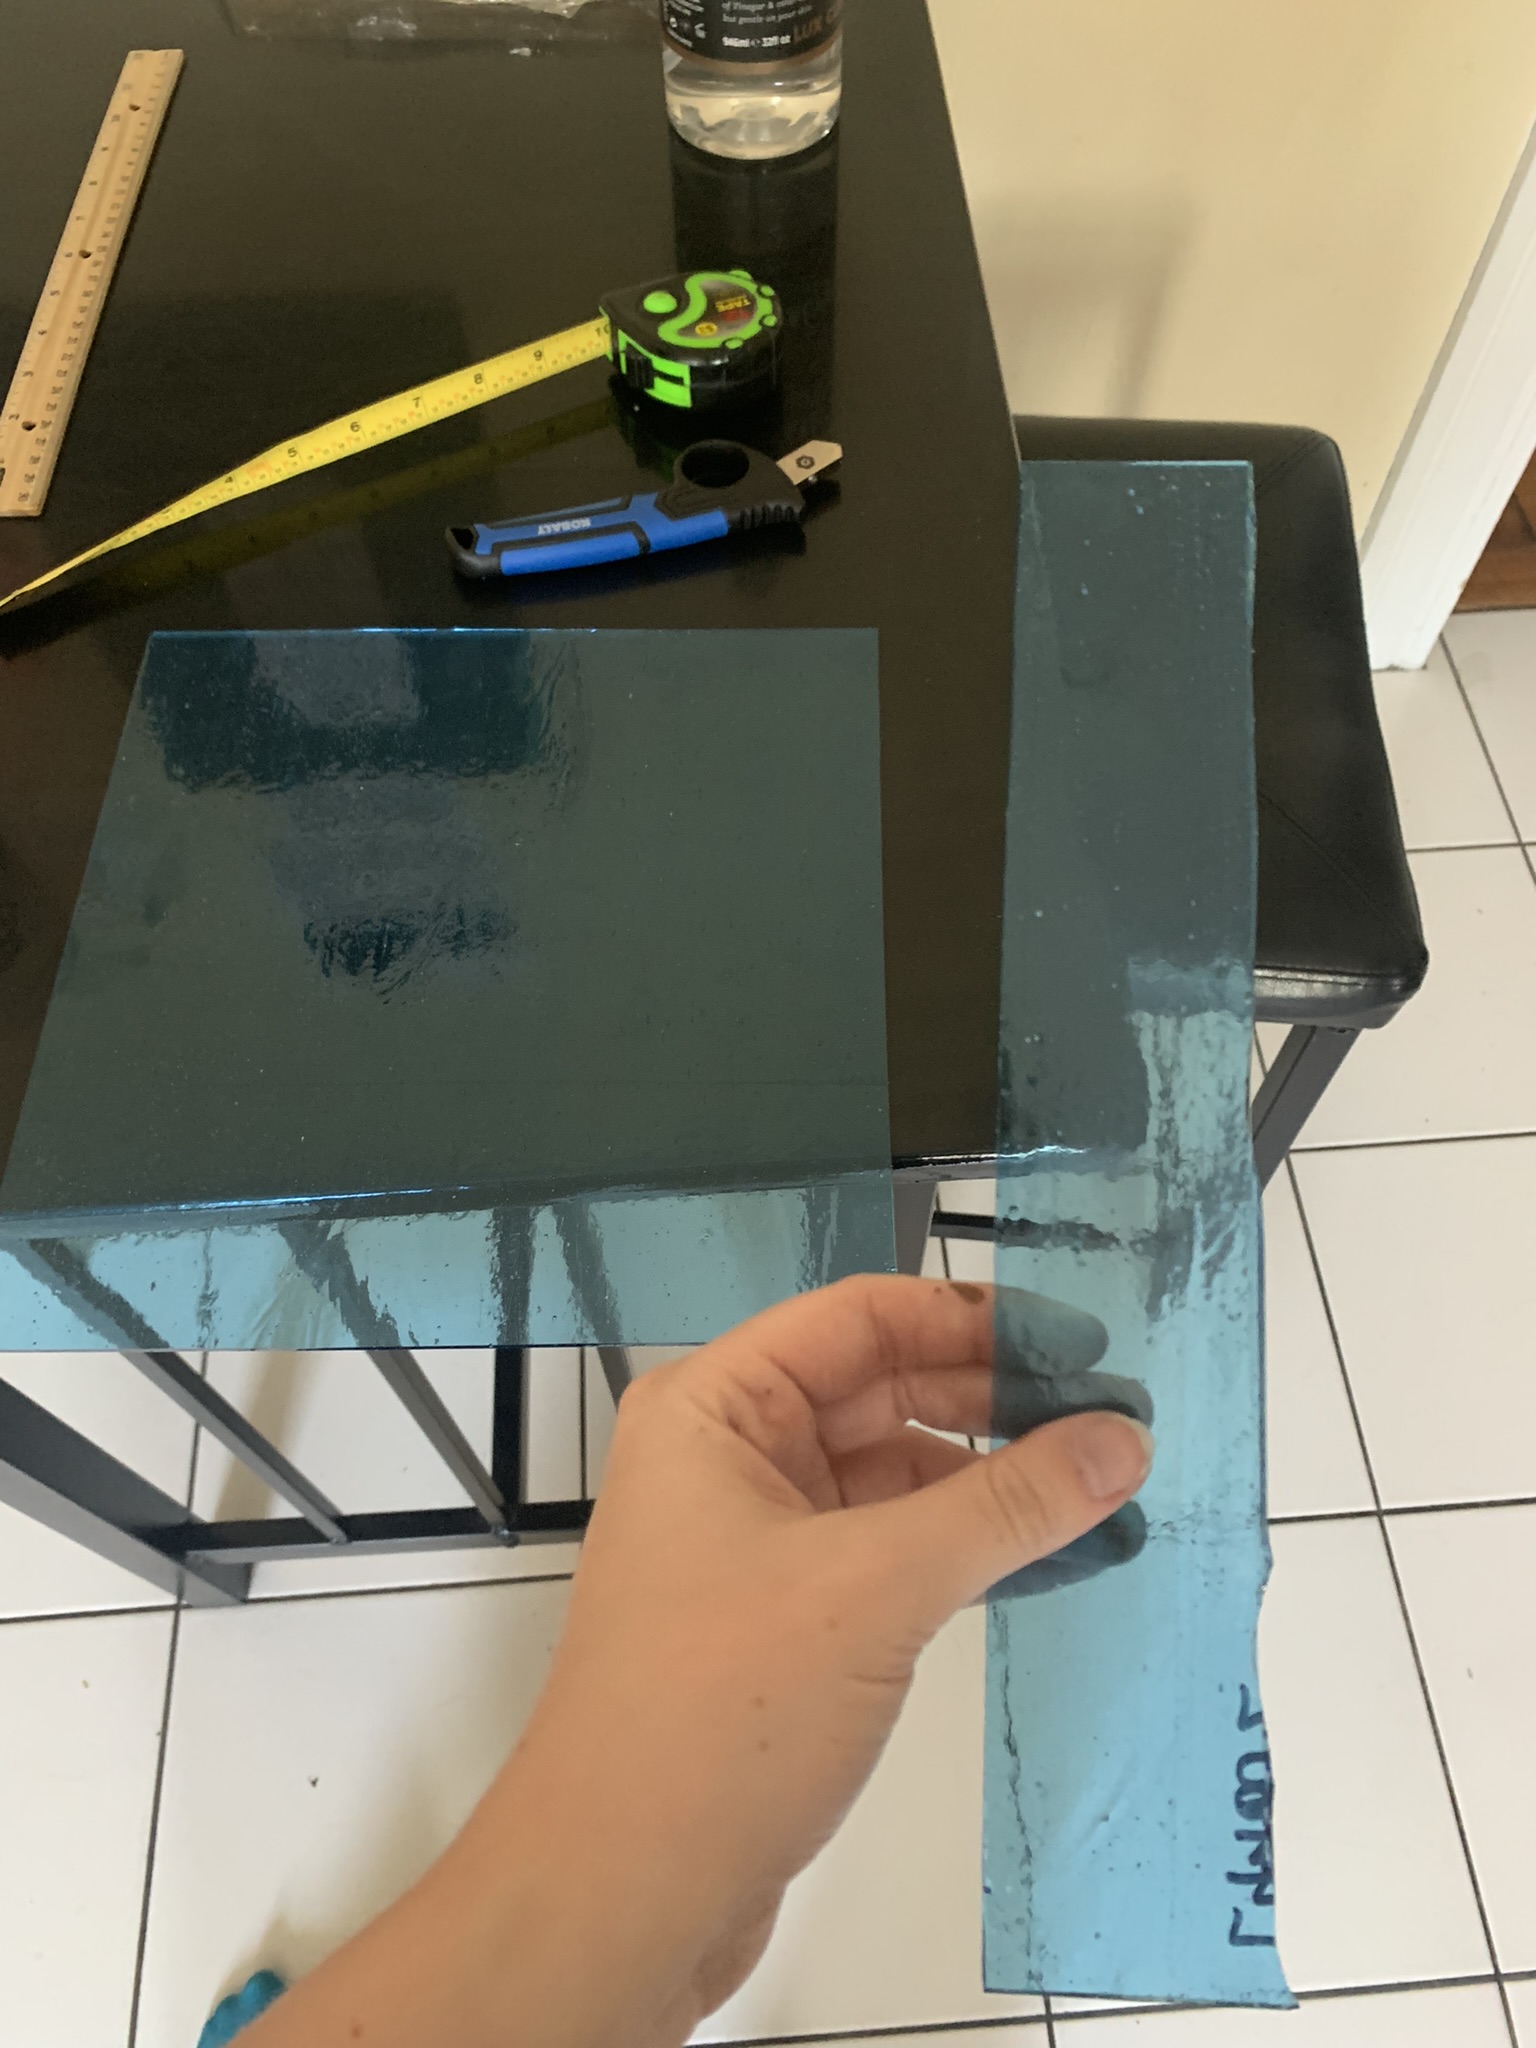
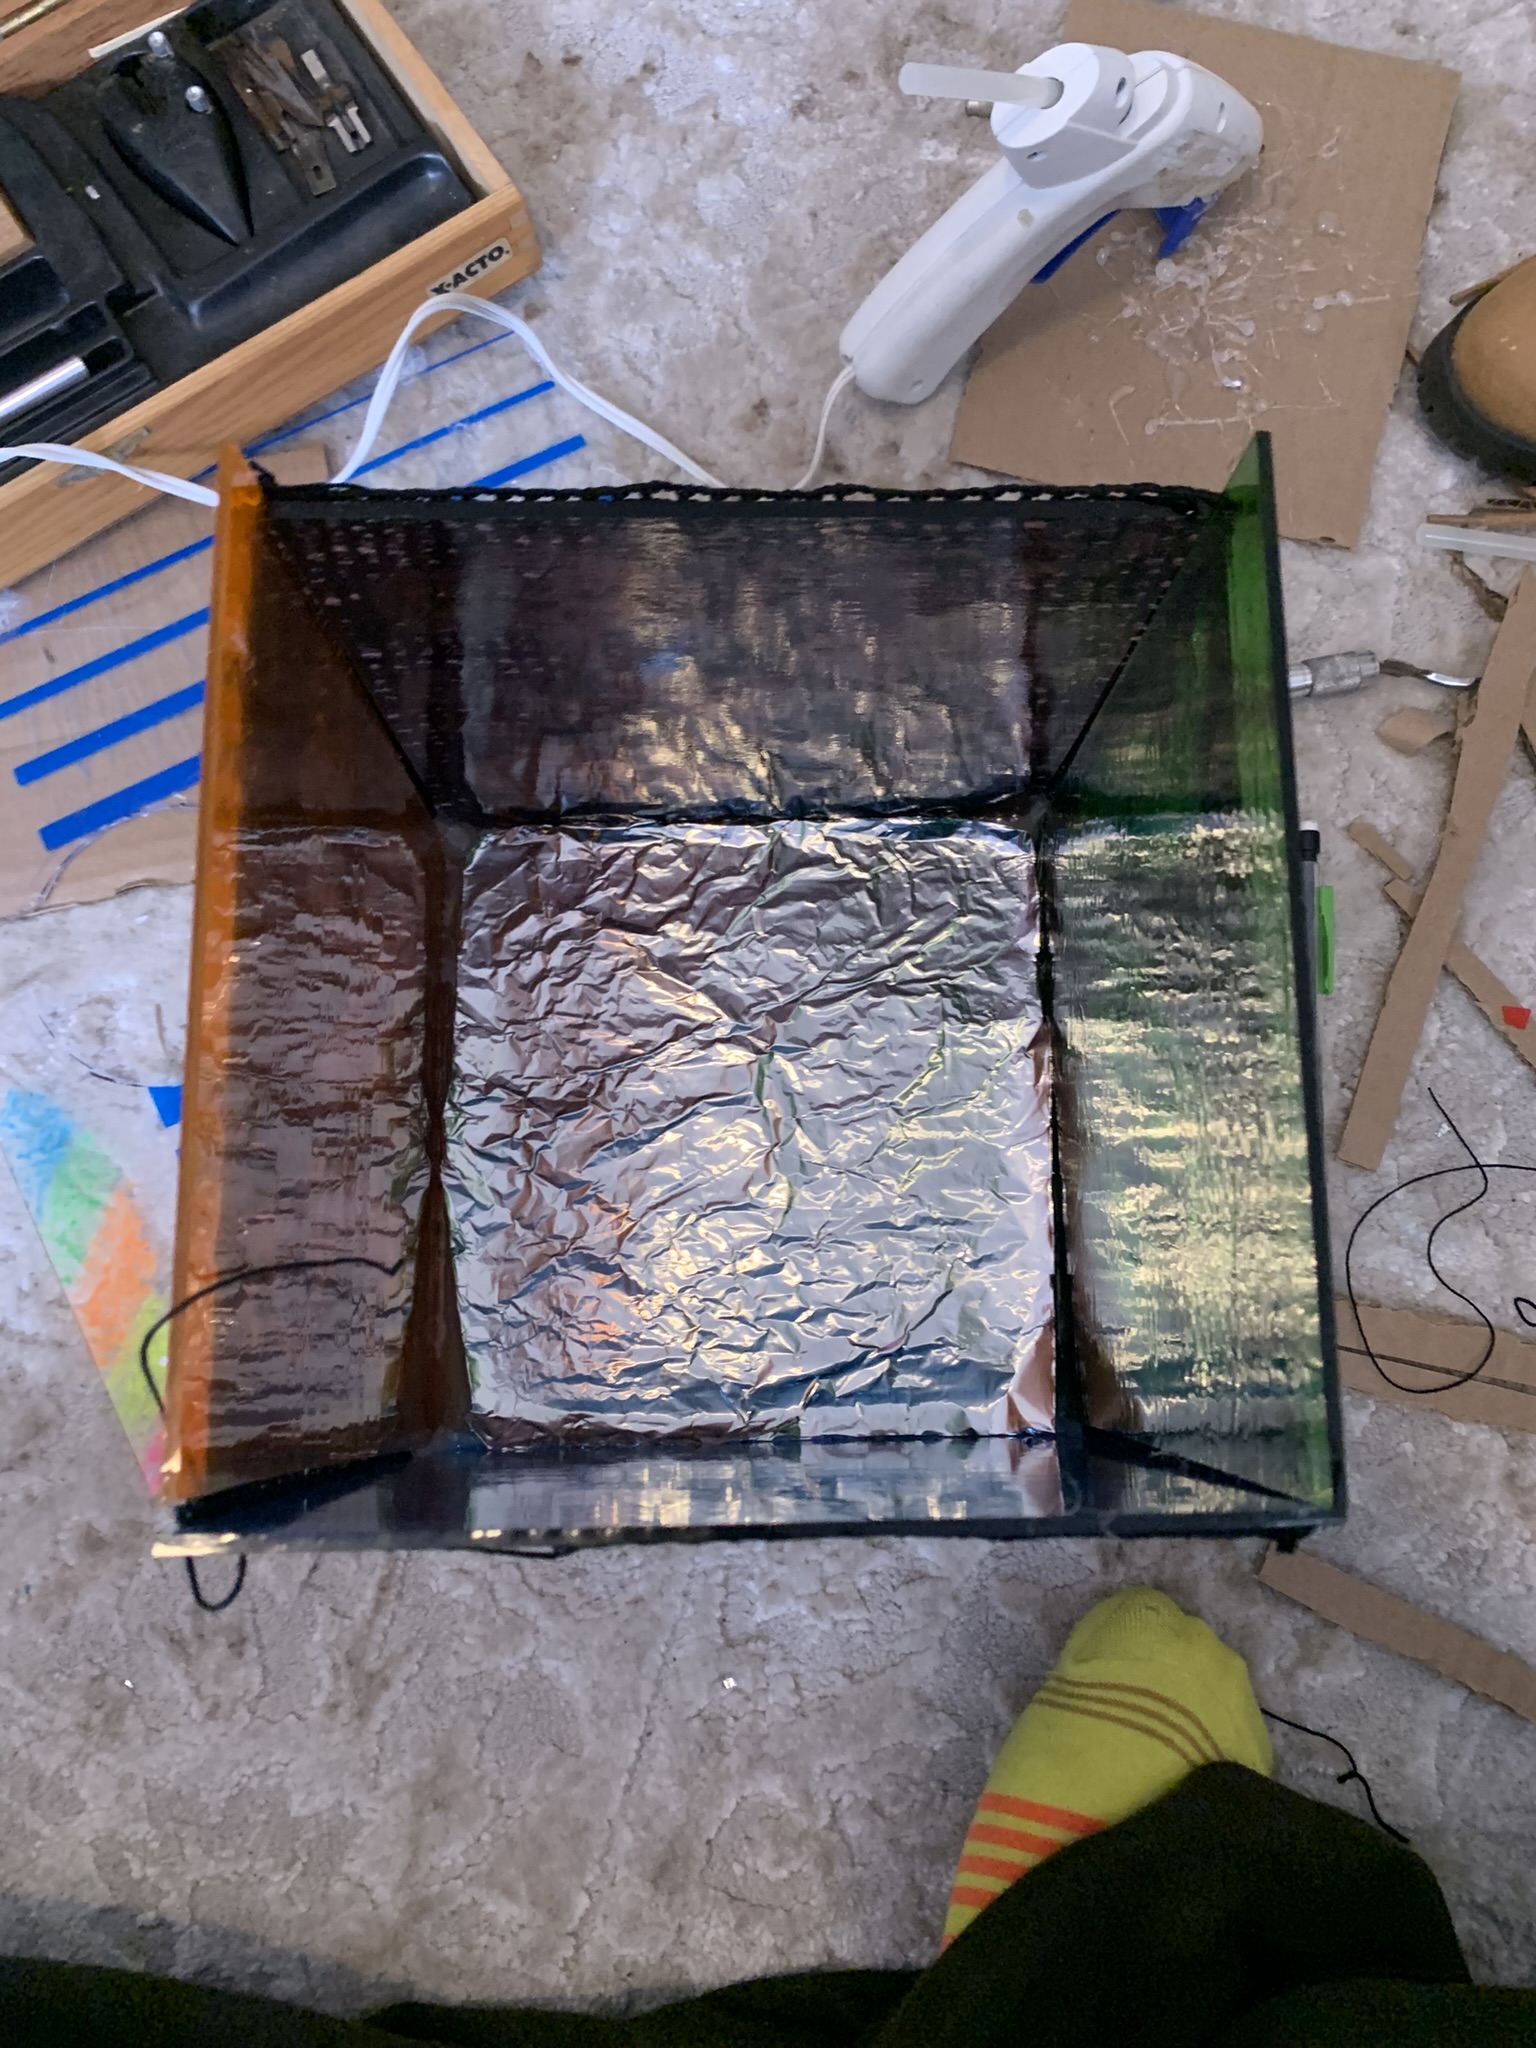
Now that I had the base and knew the size of the glass panels, I decided to cut them to a size a little larger than the motifs themselves. This part was very fun and worked a lot better than I was expecting due to my inexperience.
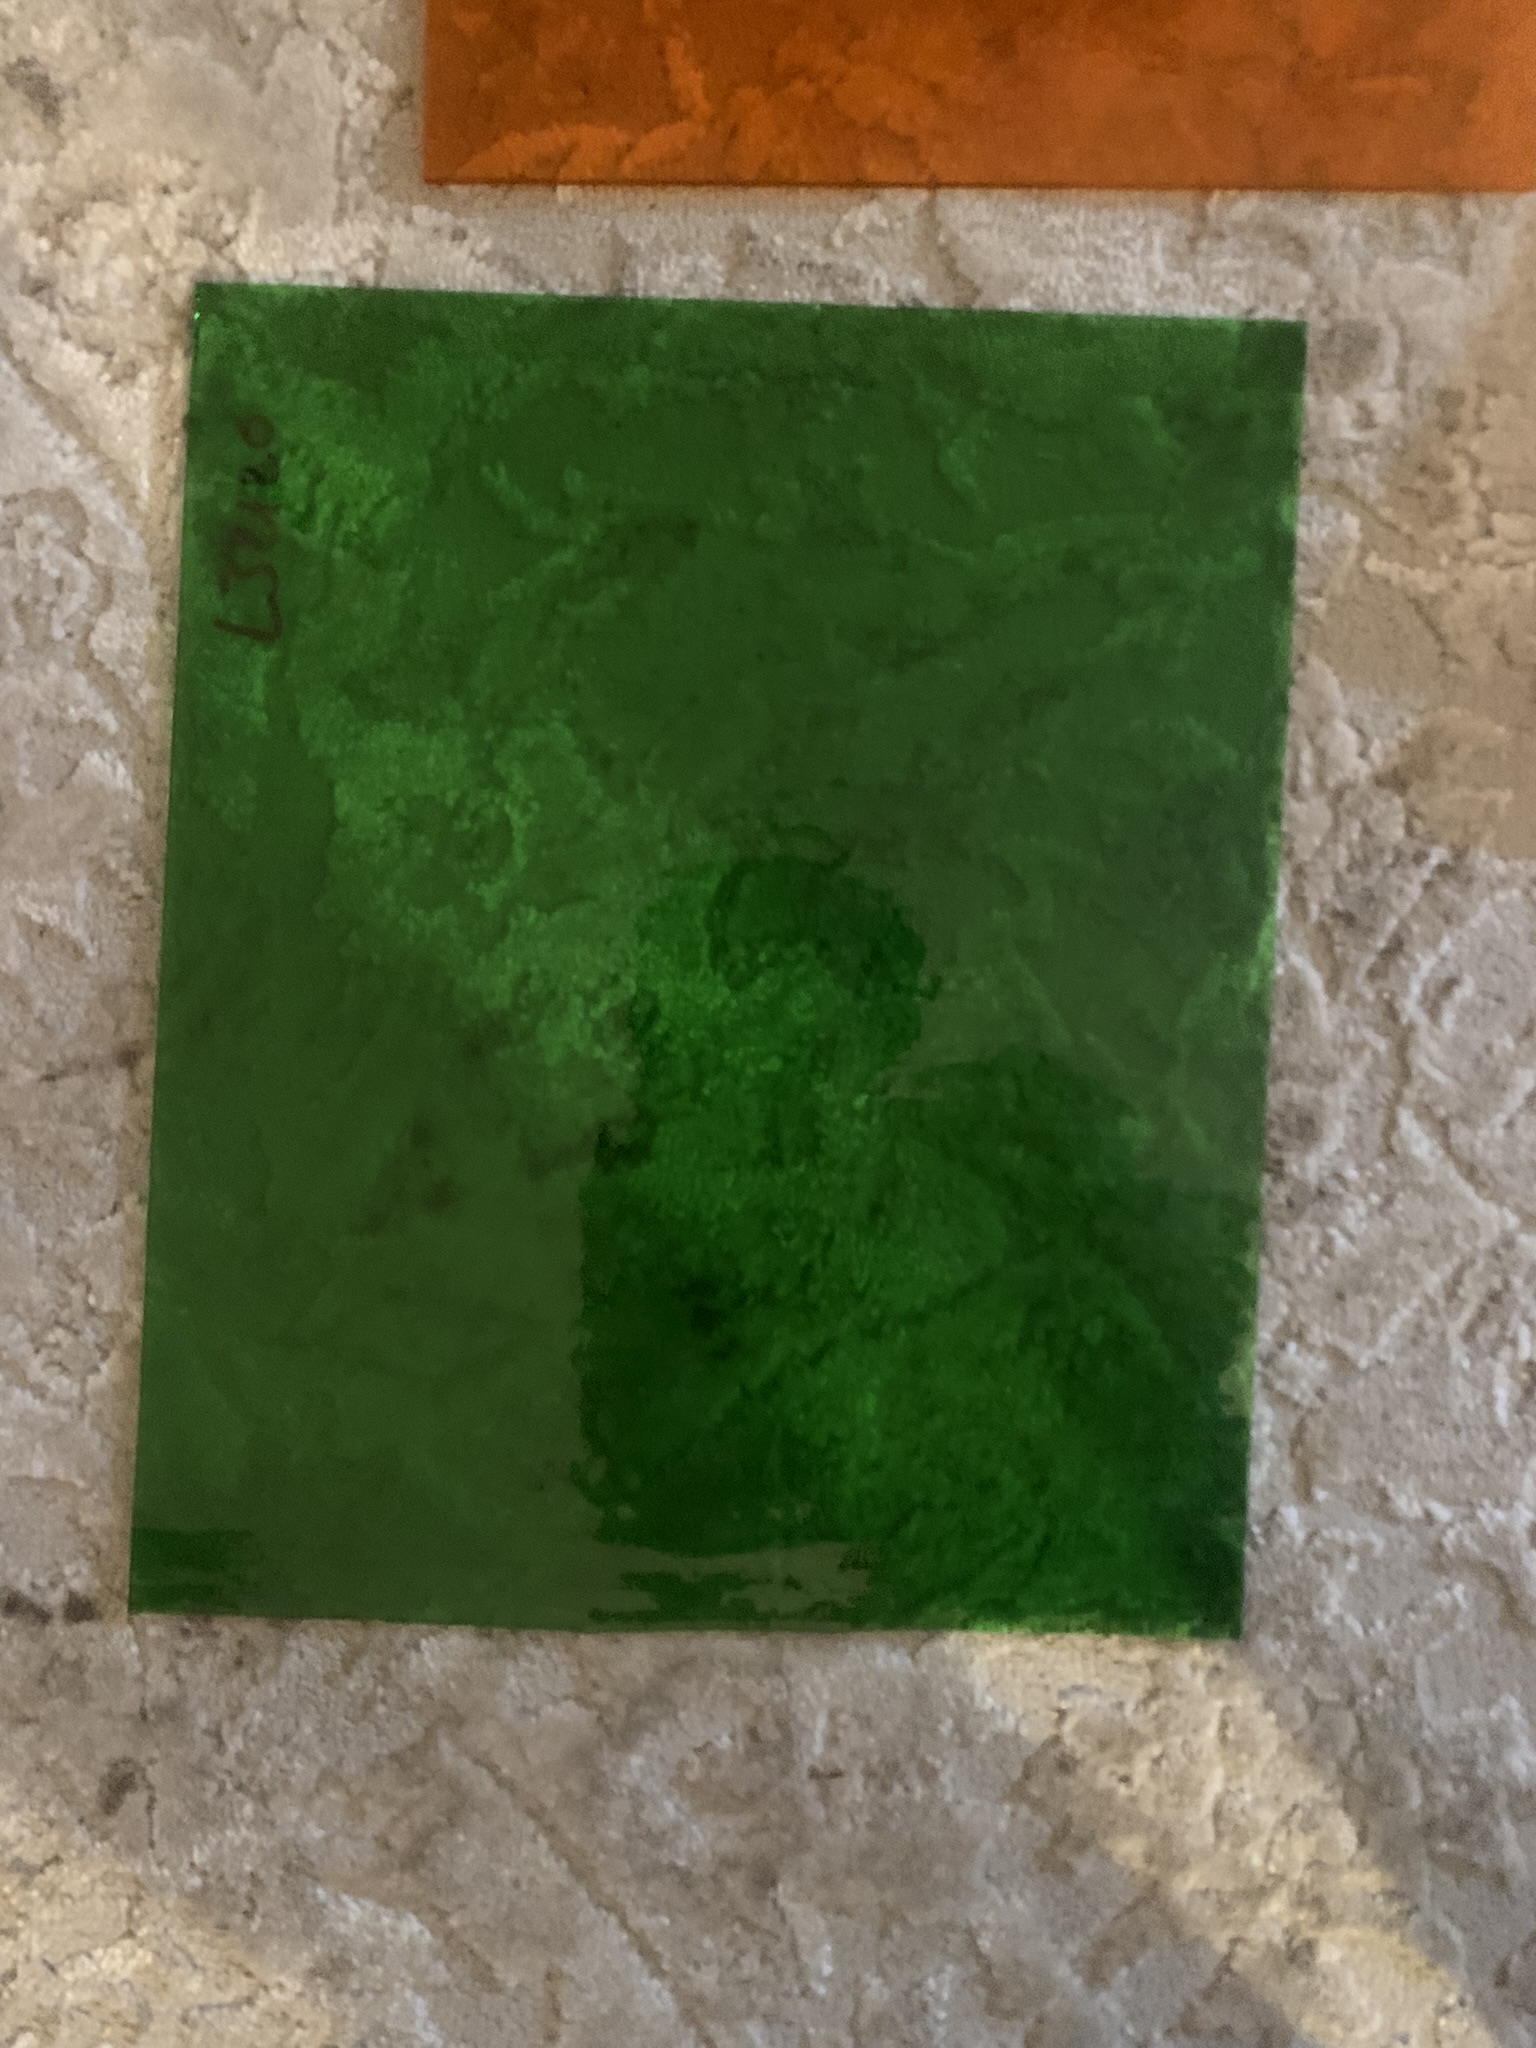
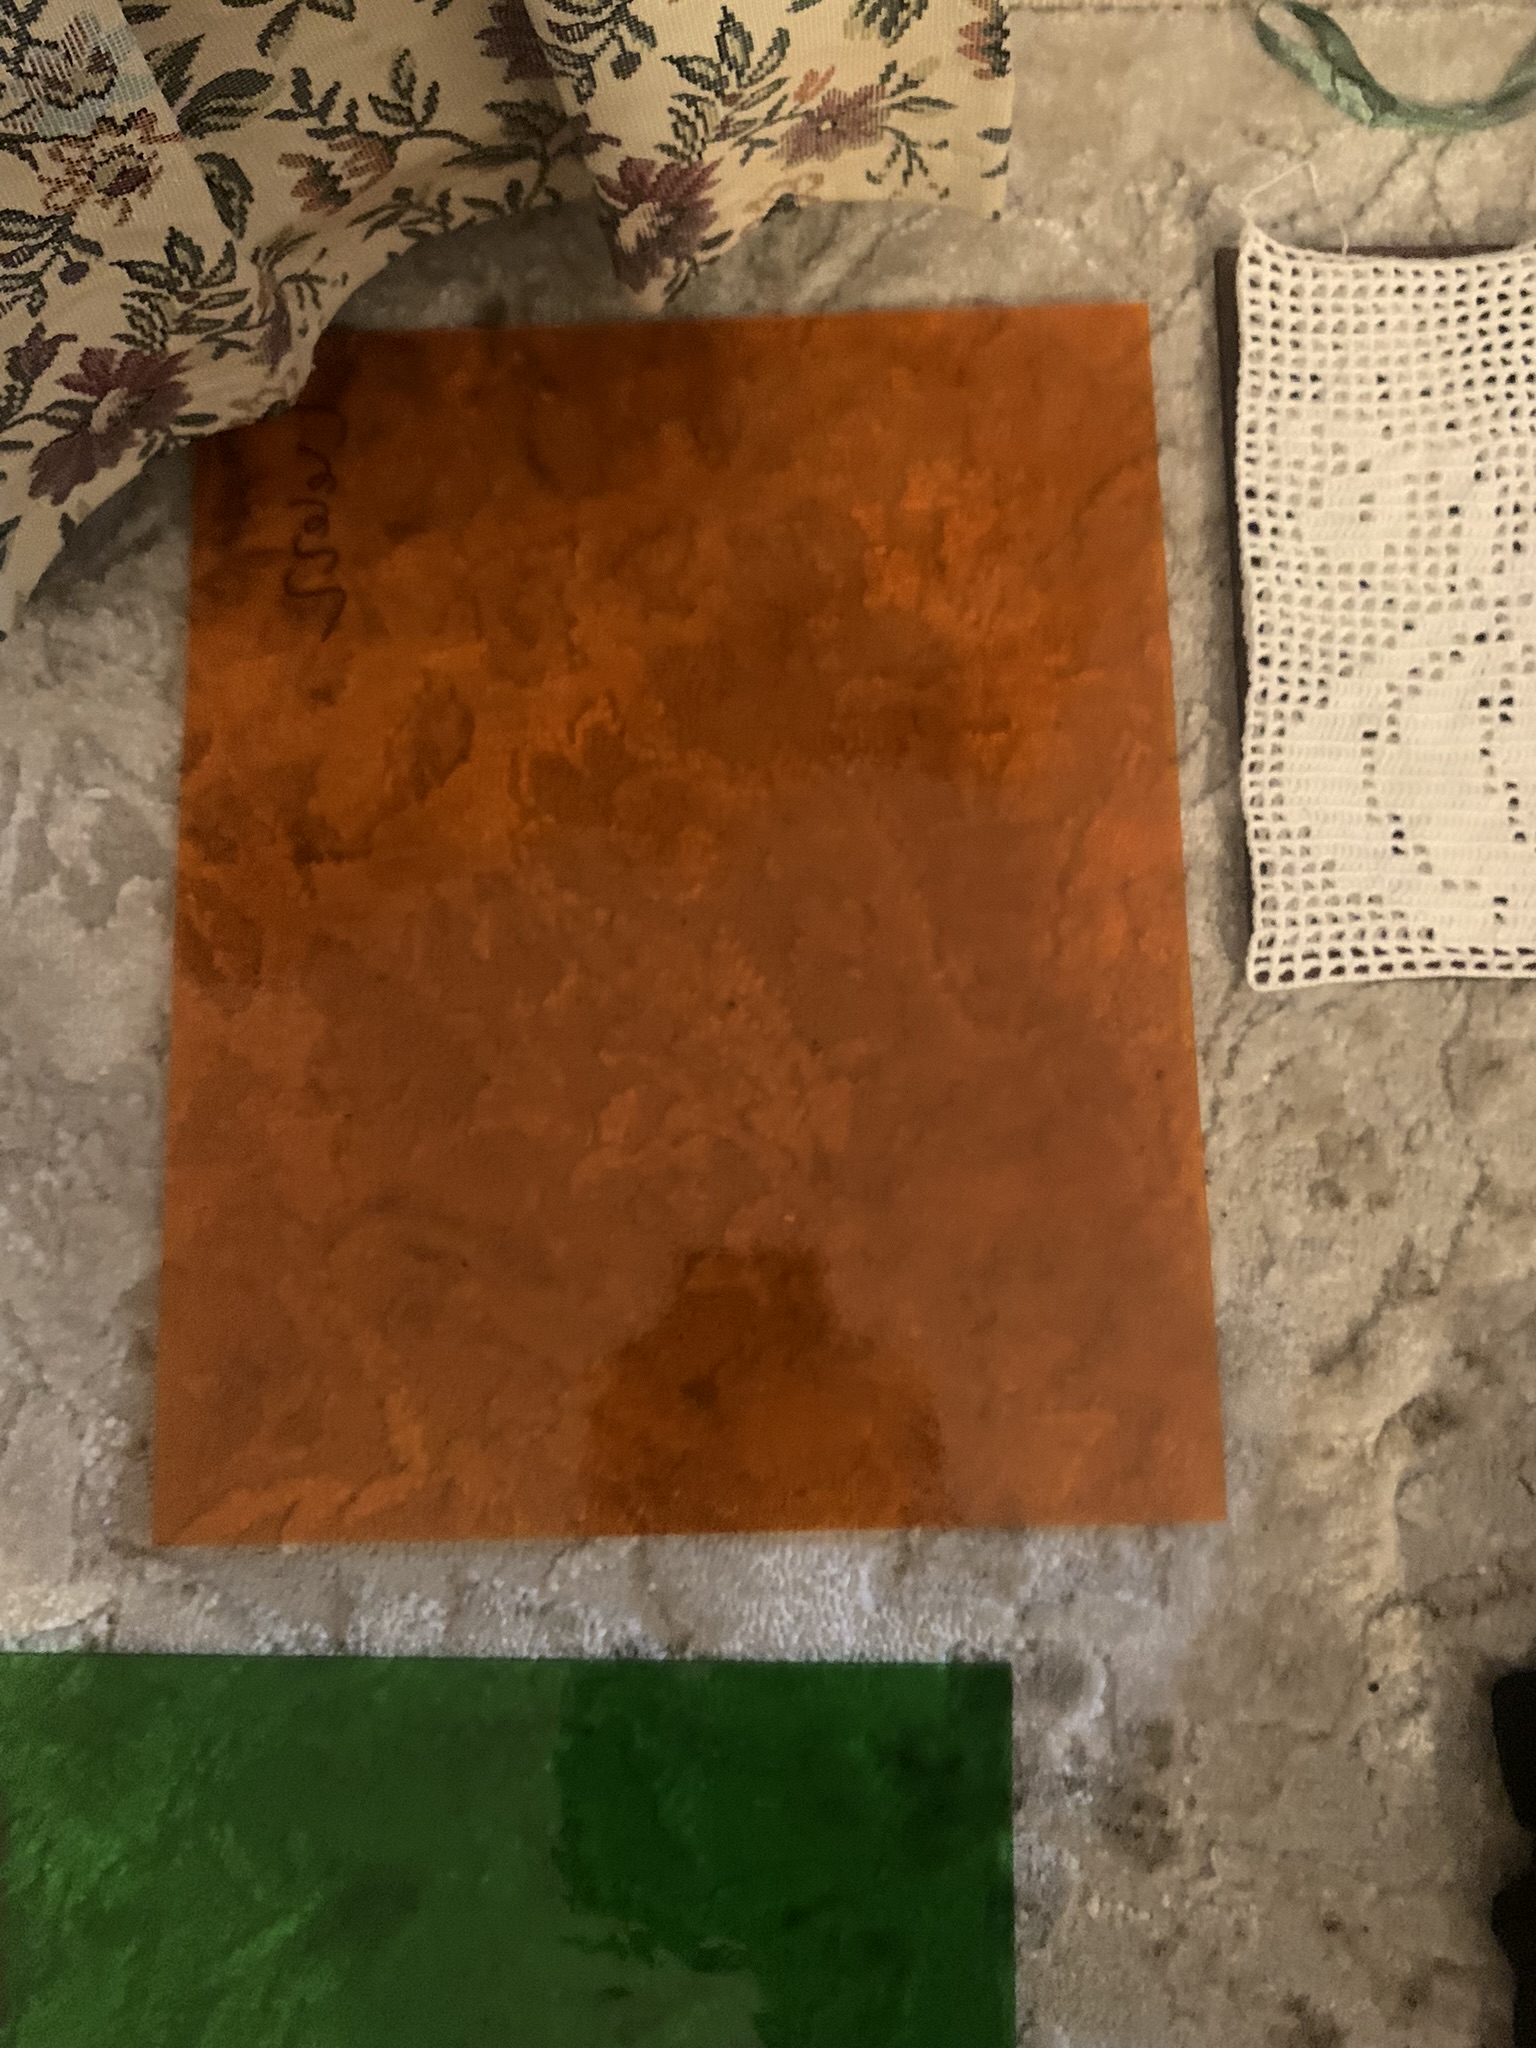
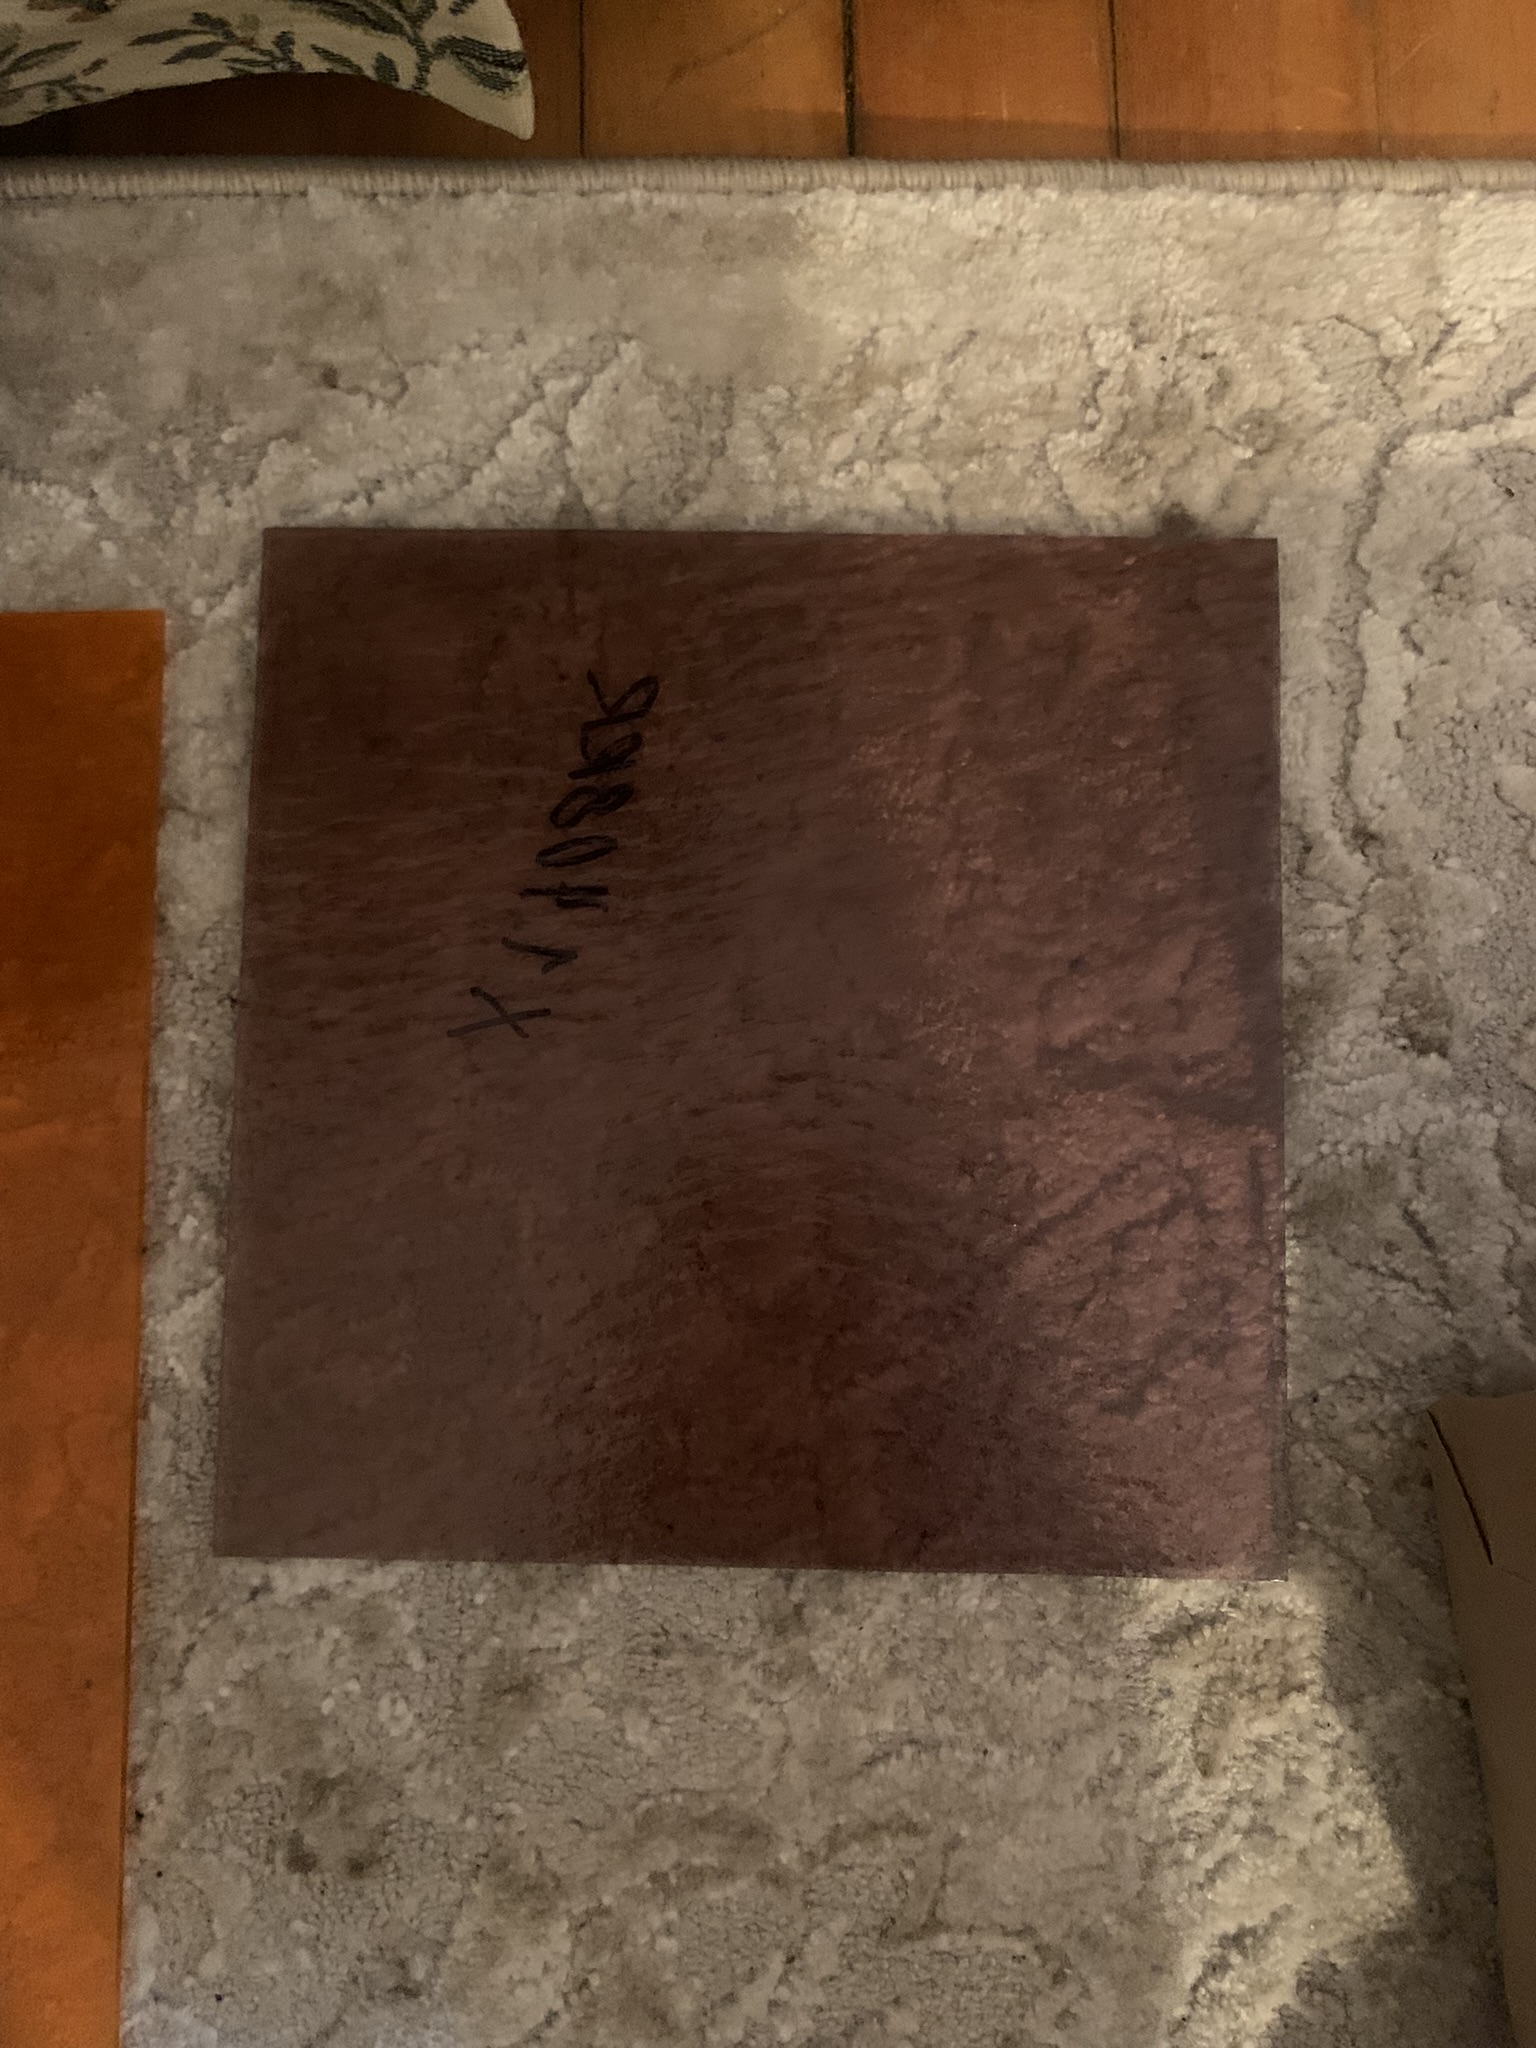
Here are the glass colors I was working with:
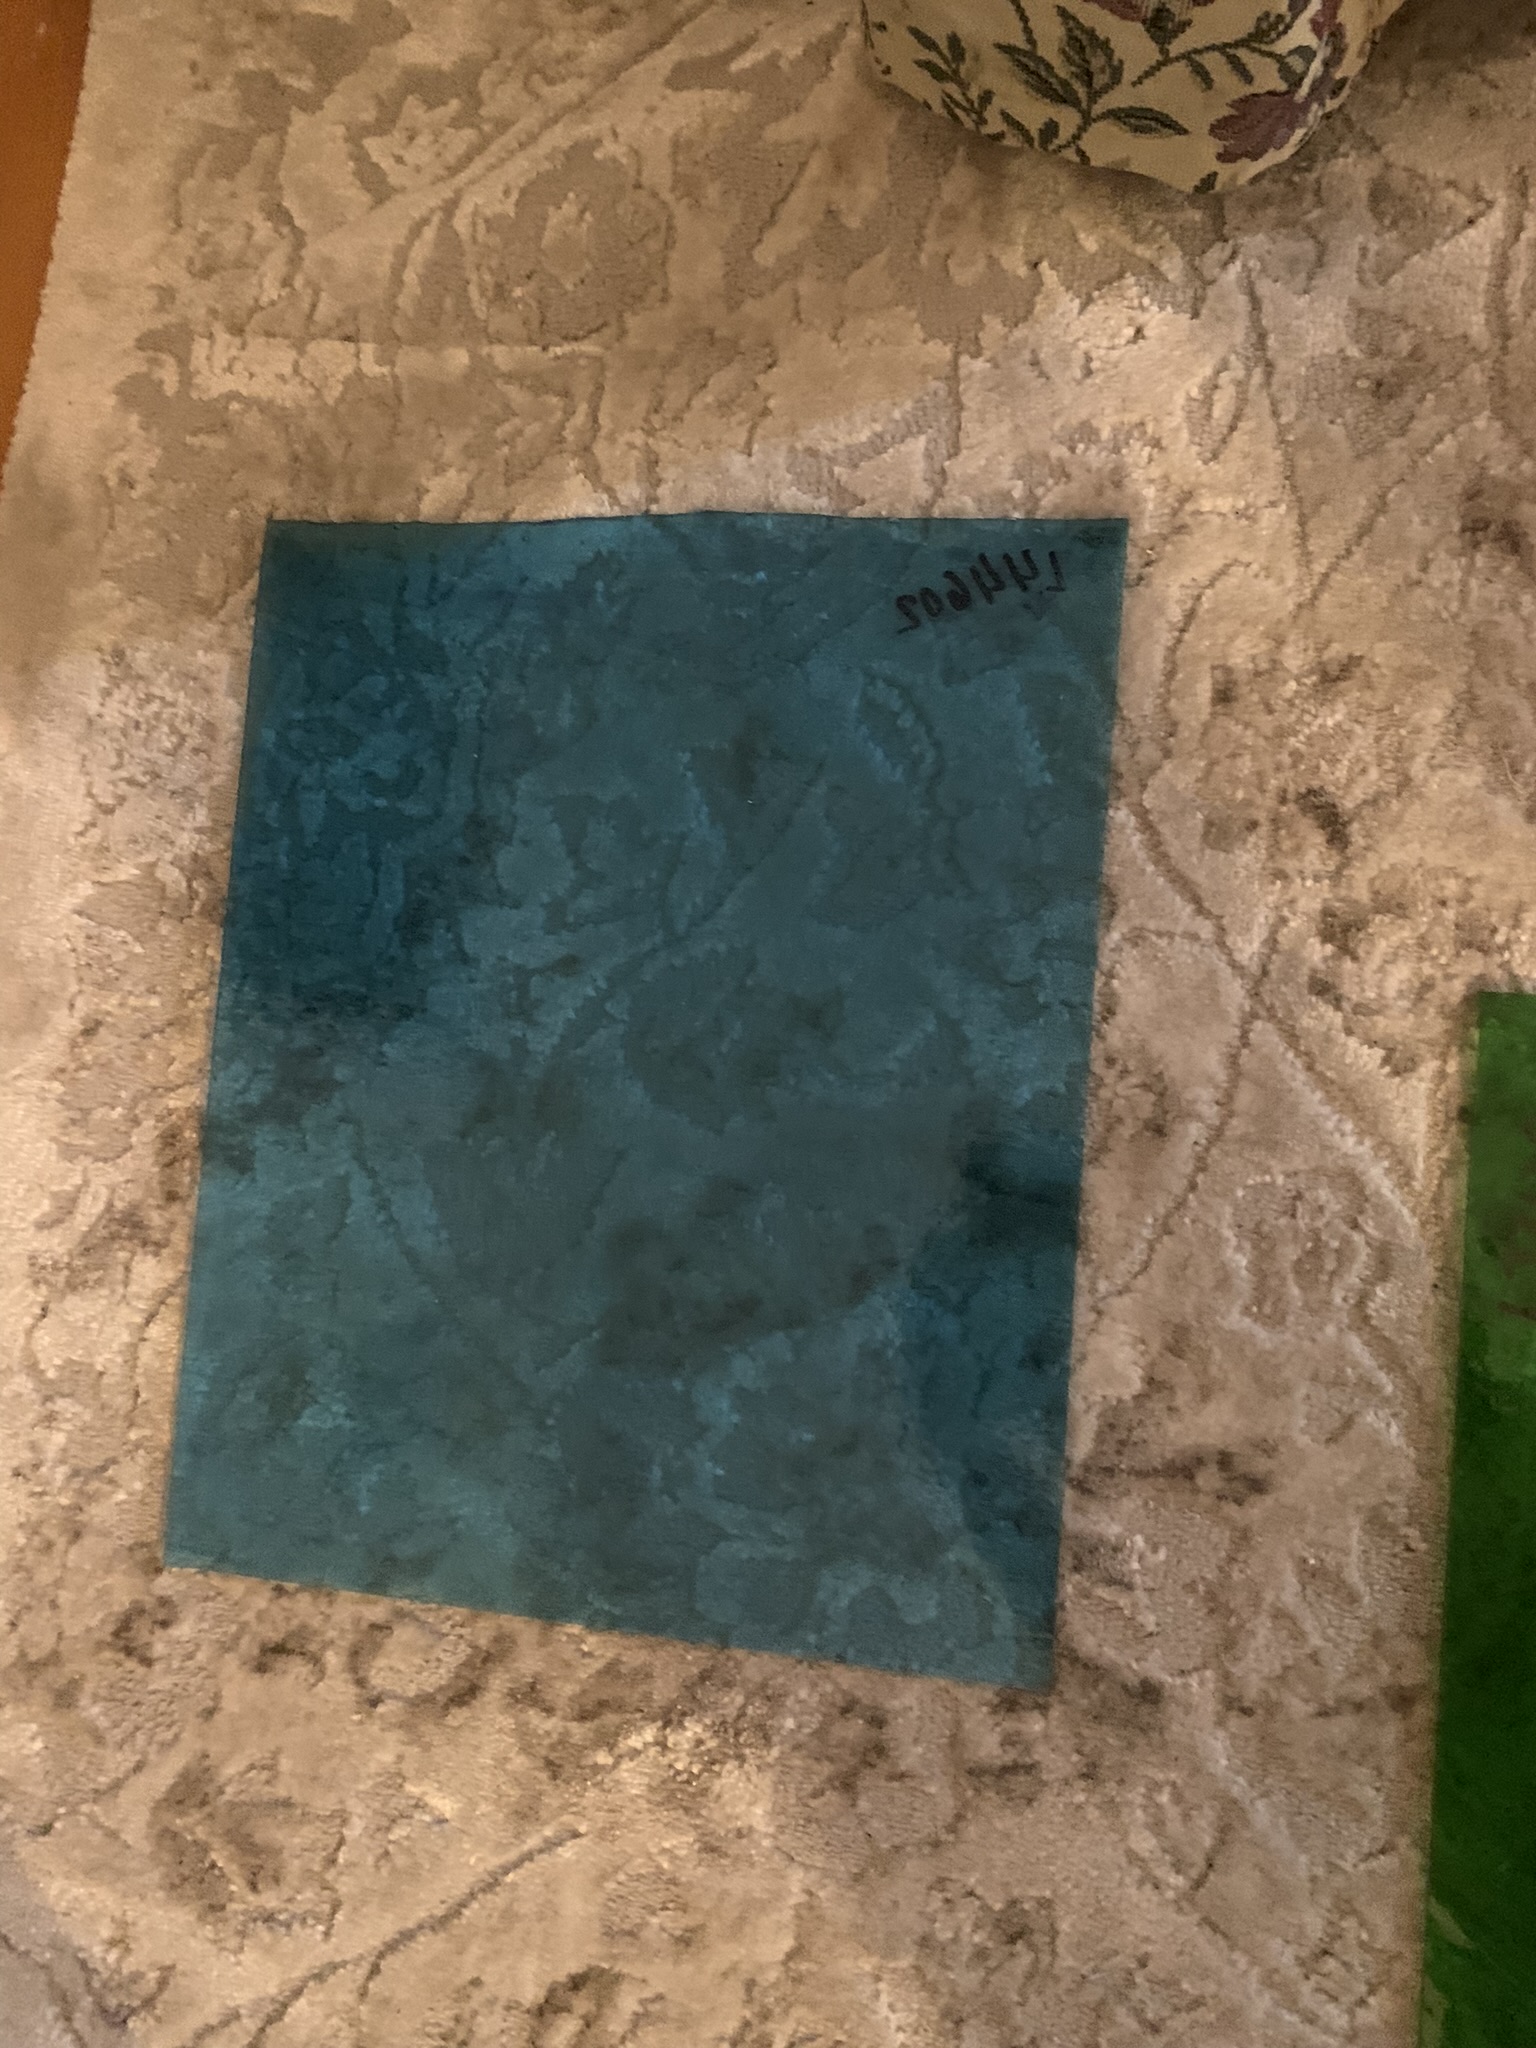
Then I started to cut. I had an extra blue piece to practice with, but I ended up not needing it and turning that into my final rectangle for blue. I found this part very enjoyable and satisfying.
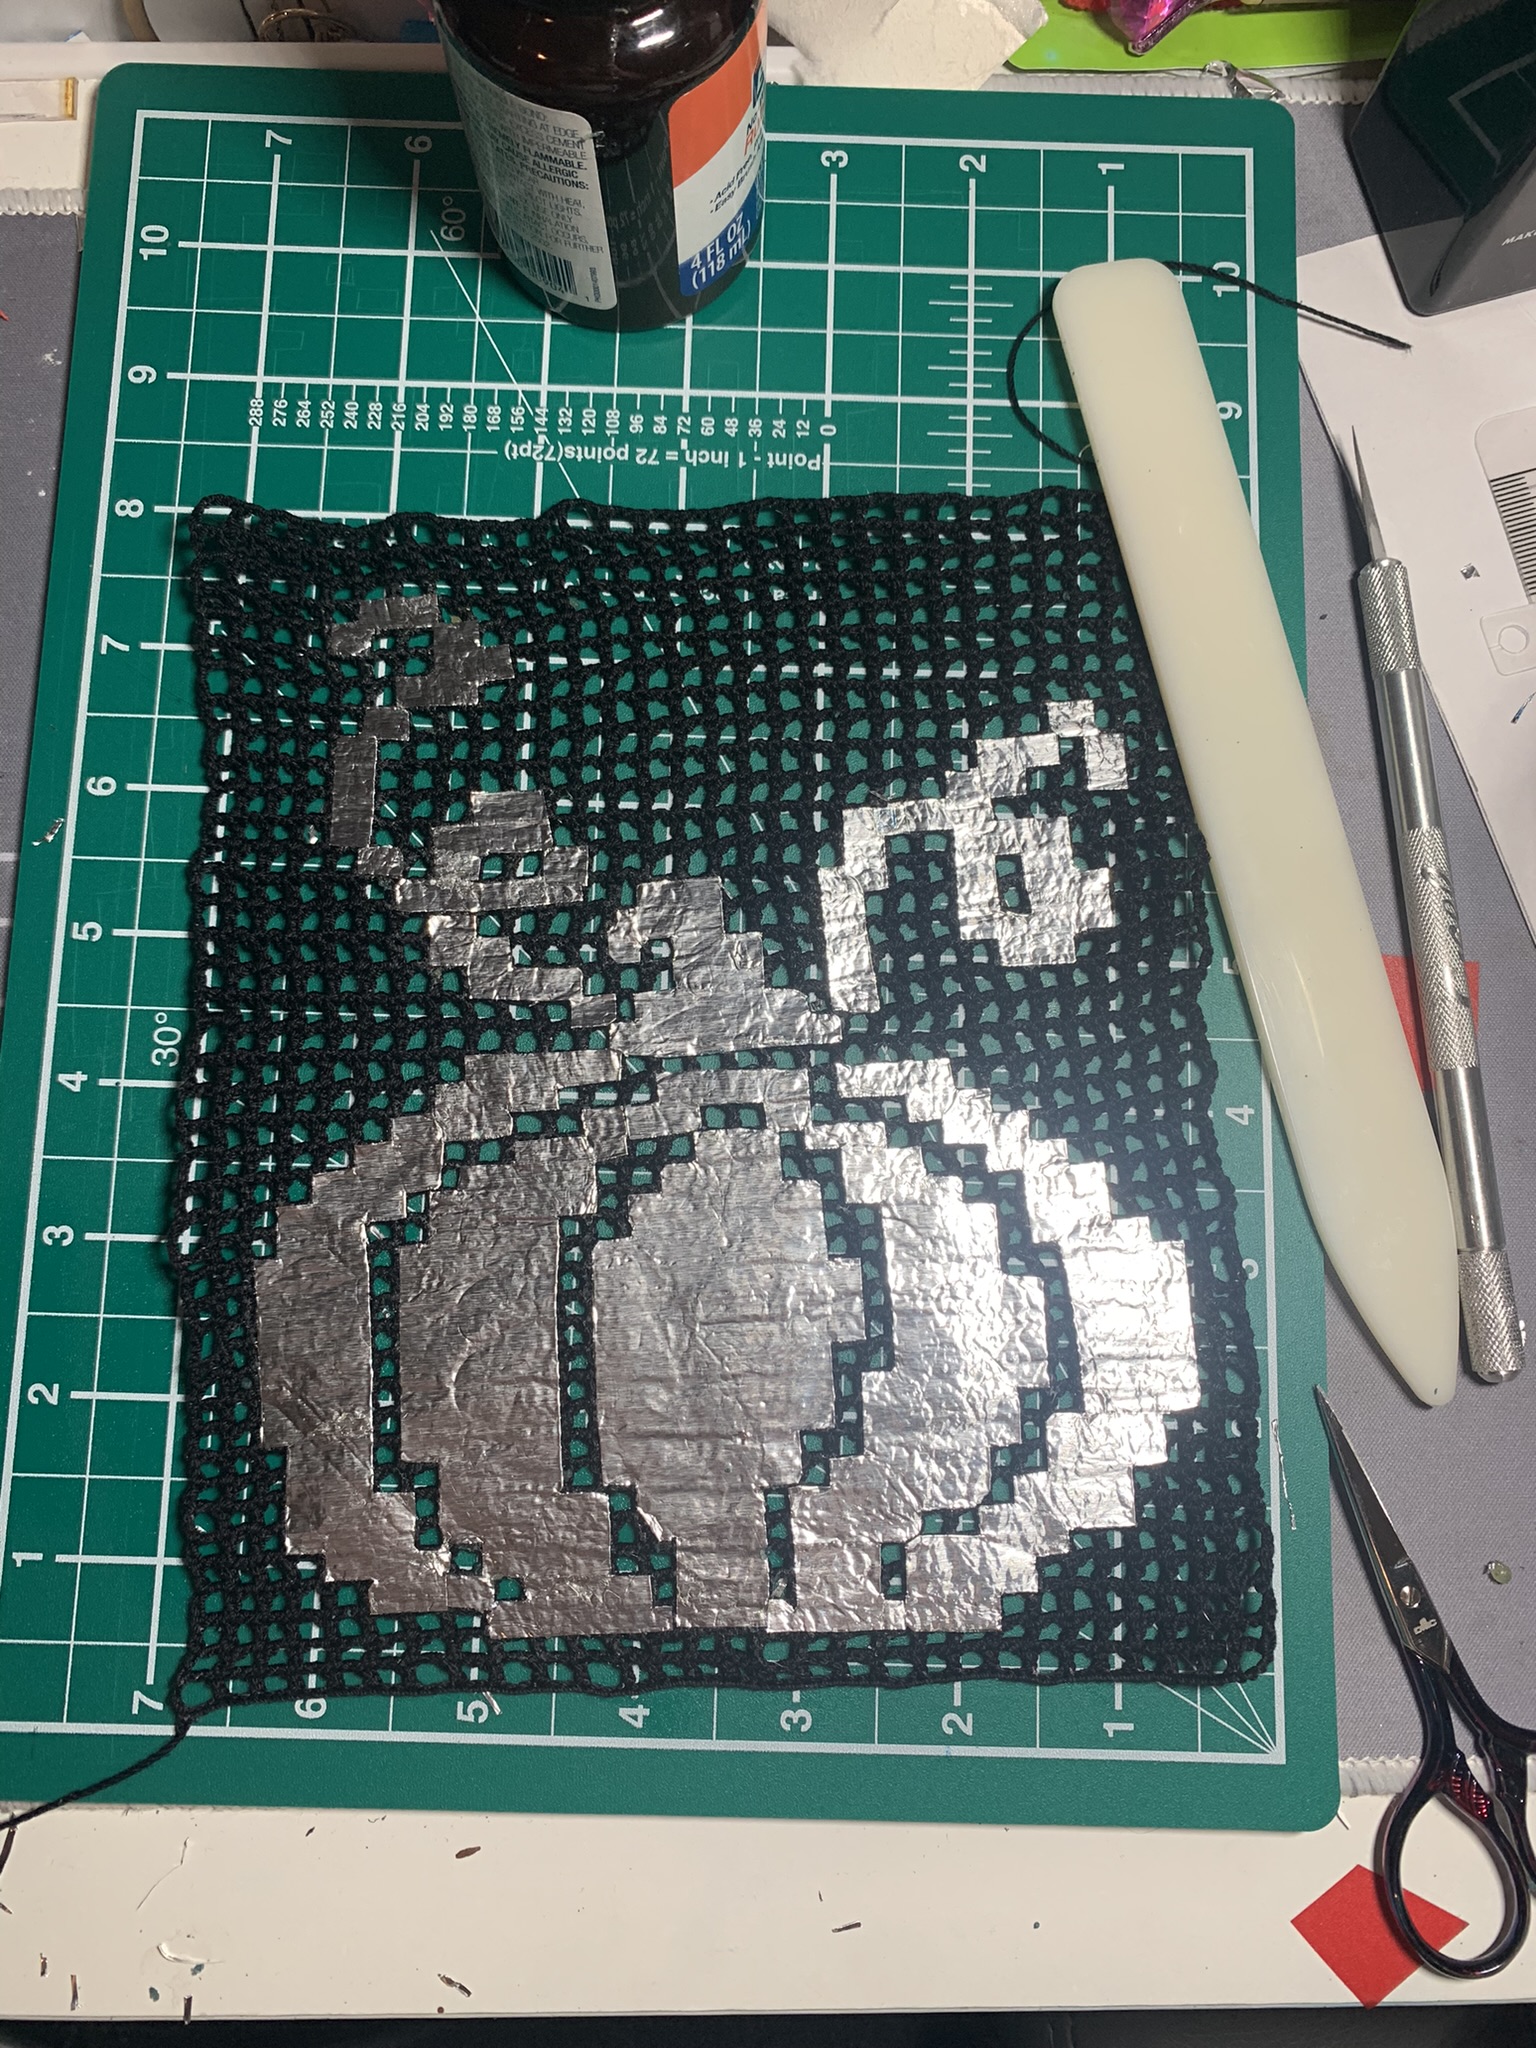
Once I cut up all the glass, I noticed that even the dyed motifs weren’t as solid of a silhouette as I had originally intended them to be. This was simply due to the nature of crochet and how there are many holes throughout the entirety of the work. Also something I had expected to be a problem, so I was prepared.
I decided to line the designs with tin foil so that no light could get through and really emphasize the silhouette. This proved to be a lot more work than I intended and took me the majority of the week to complete.
First I outlined the actual motif with a pen, since I couldn’t get the design to print at the right size I had to use the actual motifs. After cutting out the paper version with an exacto knife, I traced it onto the tin foil.
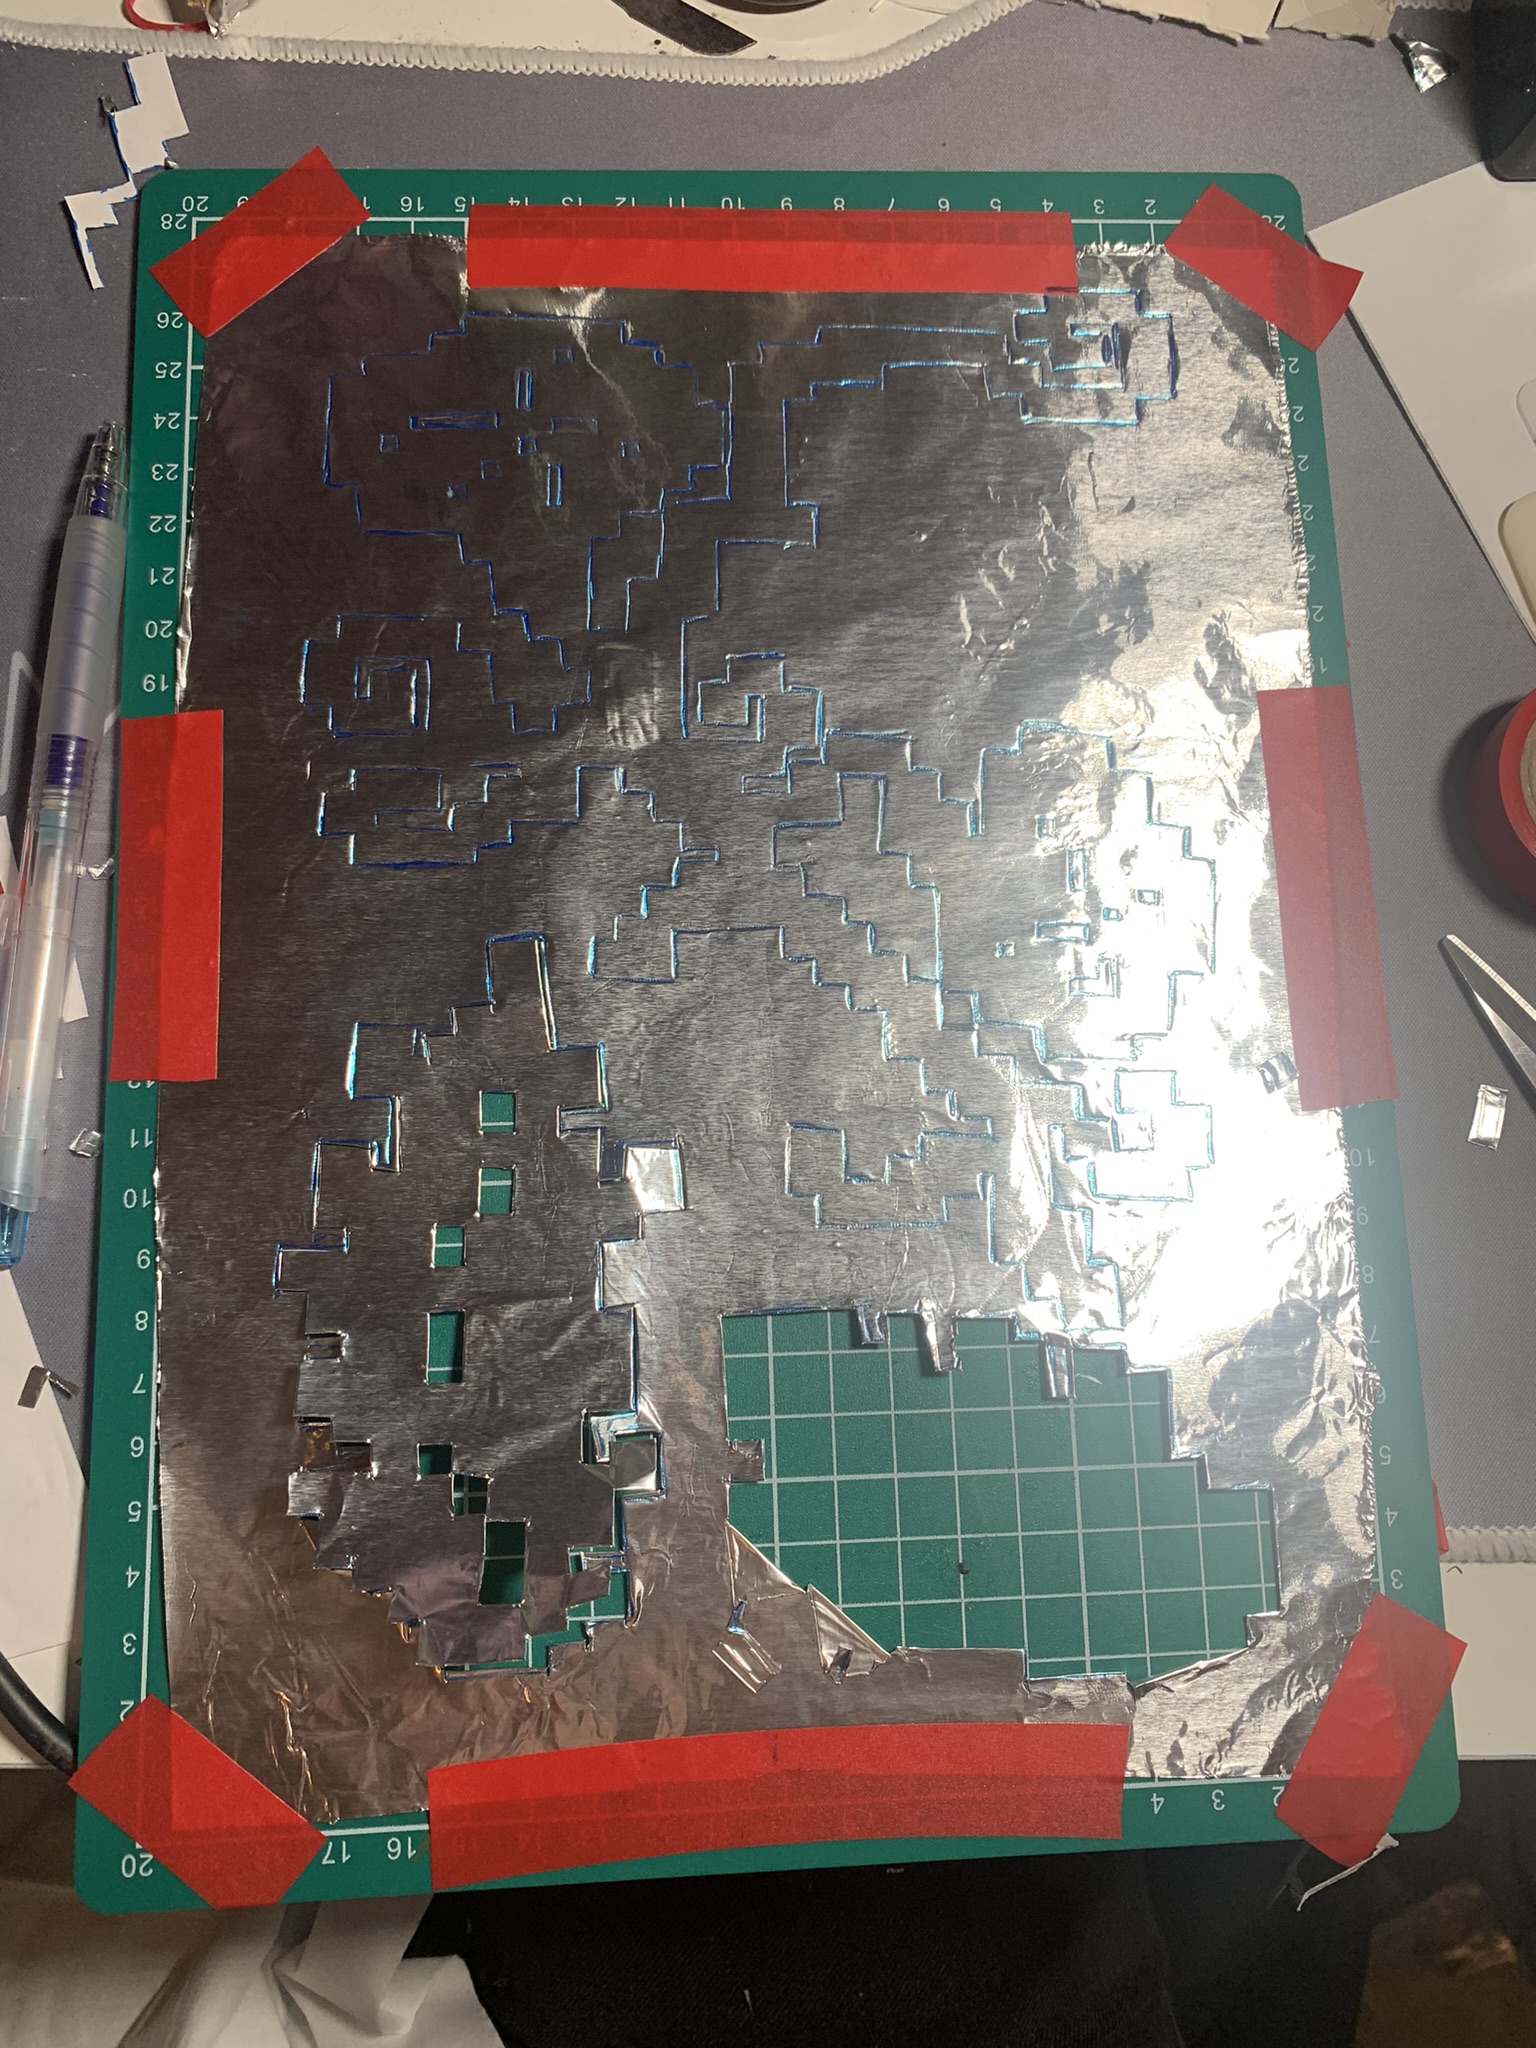
After tracing it, I had to cut it out also with an exacto knife. The tin foil was a lot more fragile than paper so that posed a problem as I was cutting. I fit in all the pieces like a jigsaw puzzle to minimize the amount of tin foil and time each piece would take.
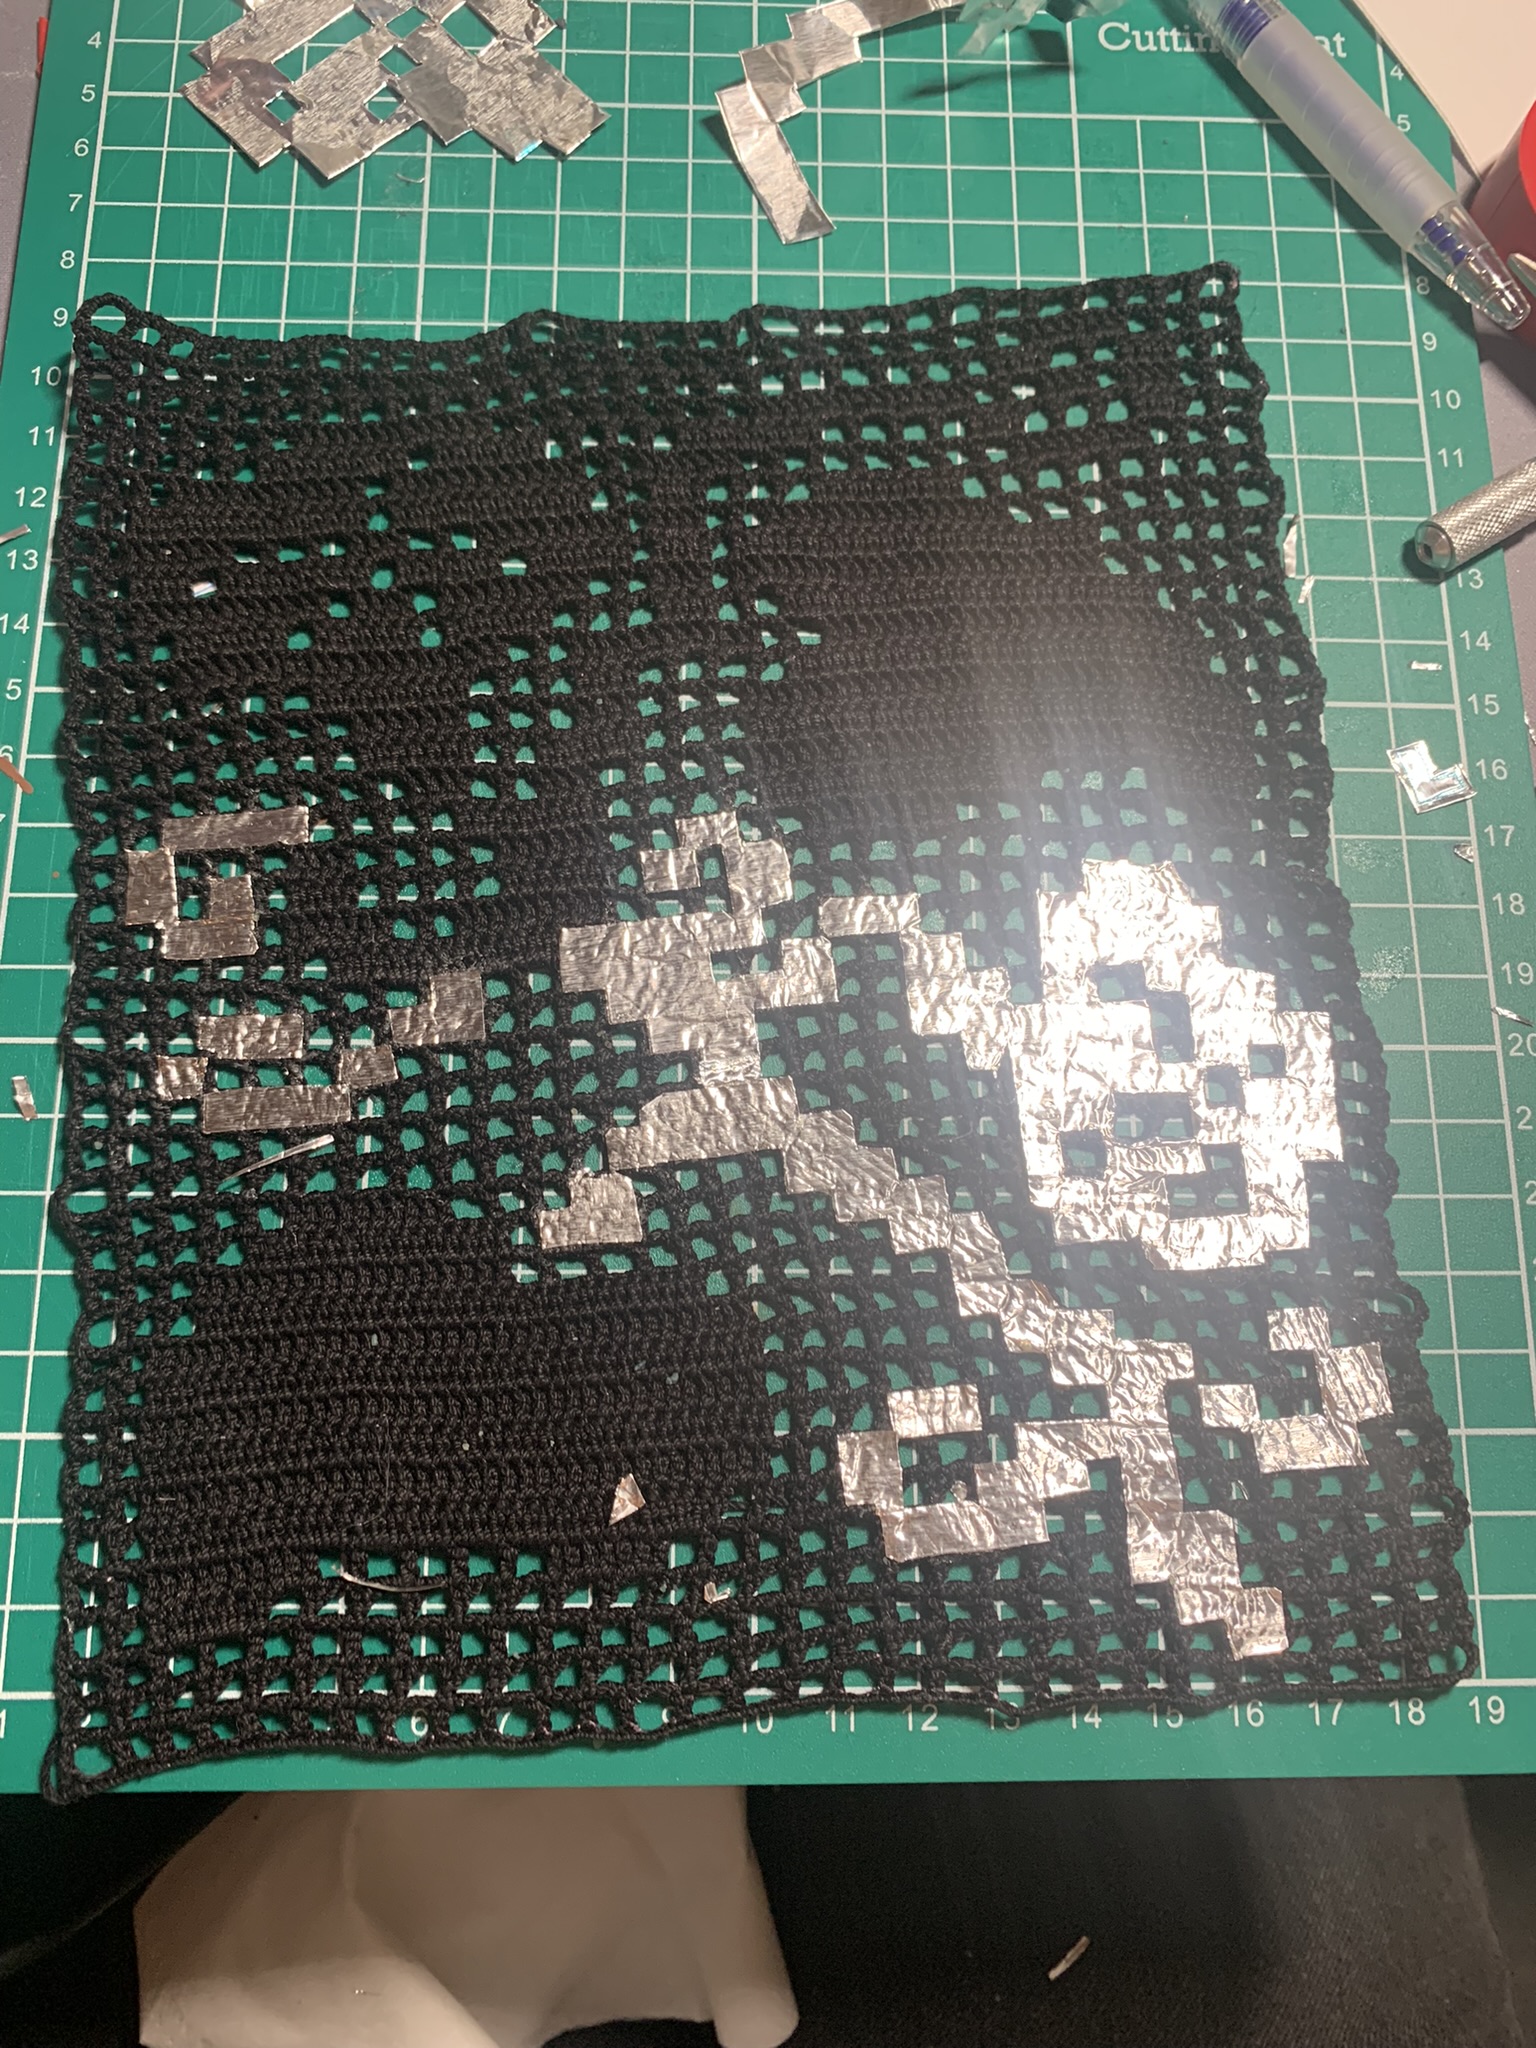
Once I had cut out all of the tin foil backing, I had to attach it to the actual motifs. I decided to do this with rubber cement as well, since it dries fairly quickly and sticks to both fabric and tin foil nicely. Unfortunately when I tried to line them up exactly, there were sizing issues due to the way I had to cut them out. This wasn’t an insane issue, however it did cause a lot more work than I thought I was going to need. I started cutting the tinfoil sheets into smaller sections and gluing them to the fabric a little at a time so they lined up as perfectly as I could personally manage. This took upwards of 6 hours per piece, depending on how complicated it was.
Here are a couple in the process photos. Just note that it’s rather hard to photograph tin foil since it’s so reflective to light.
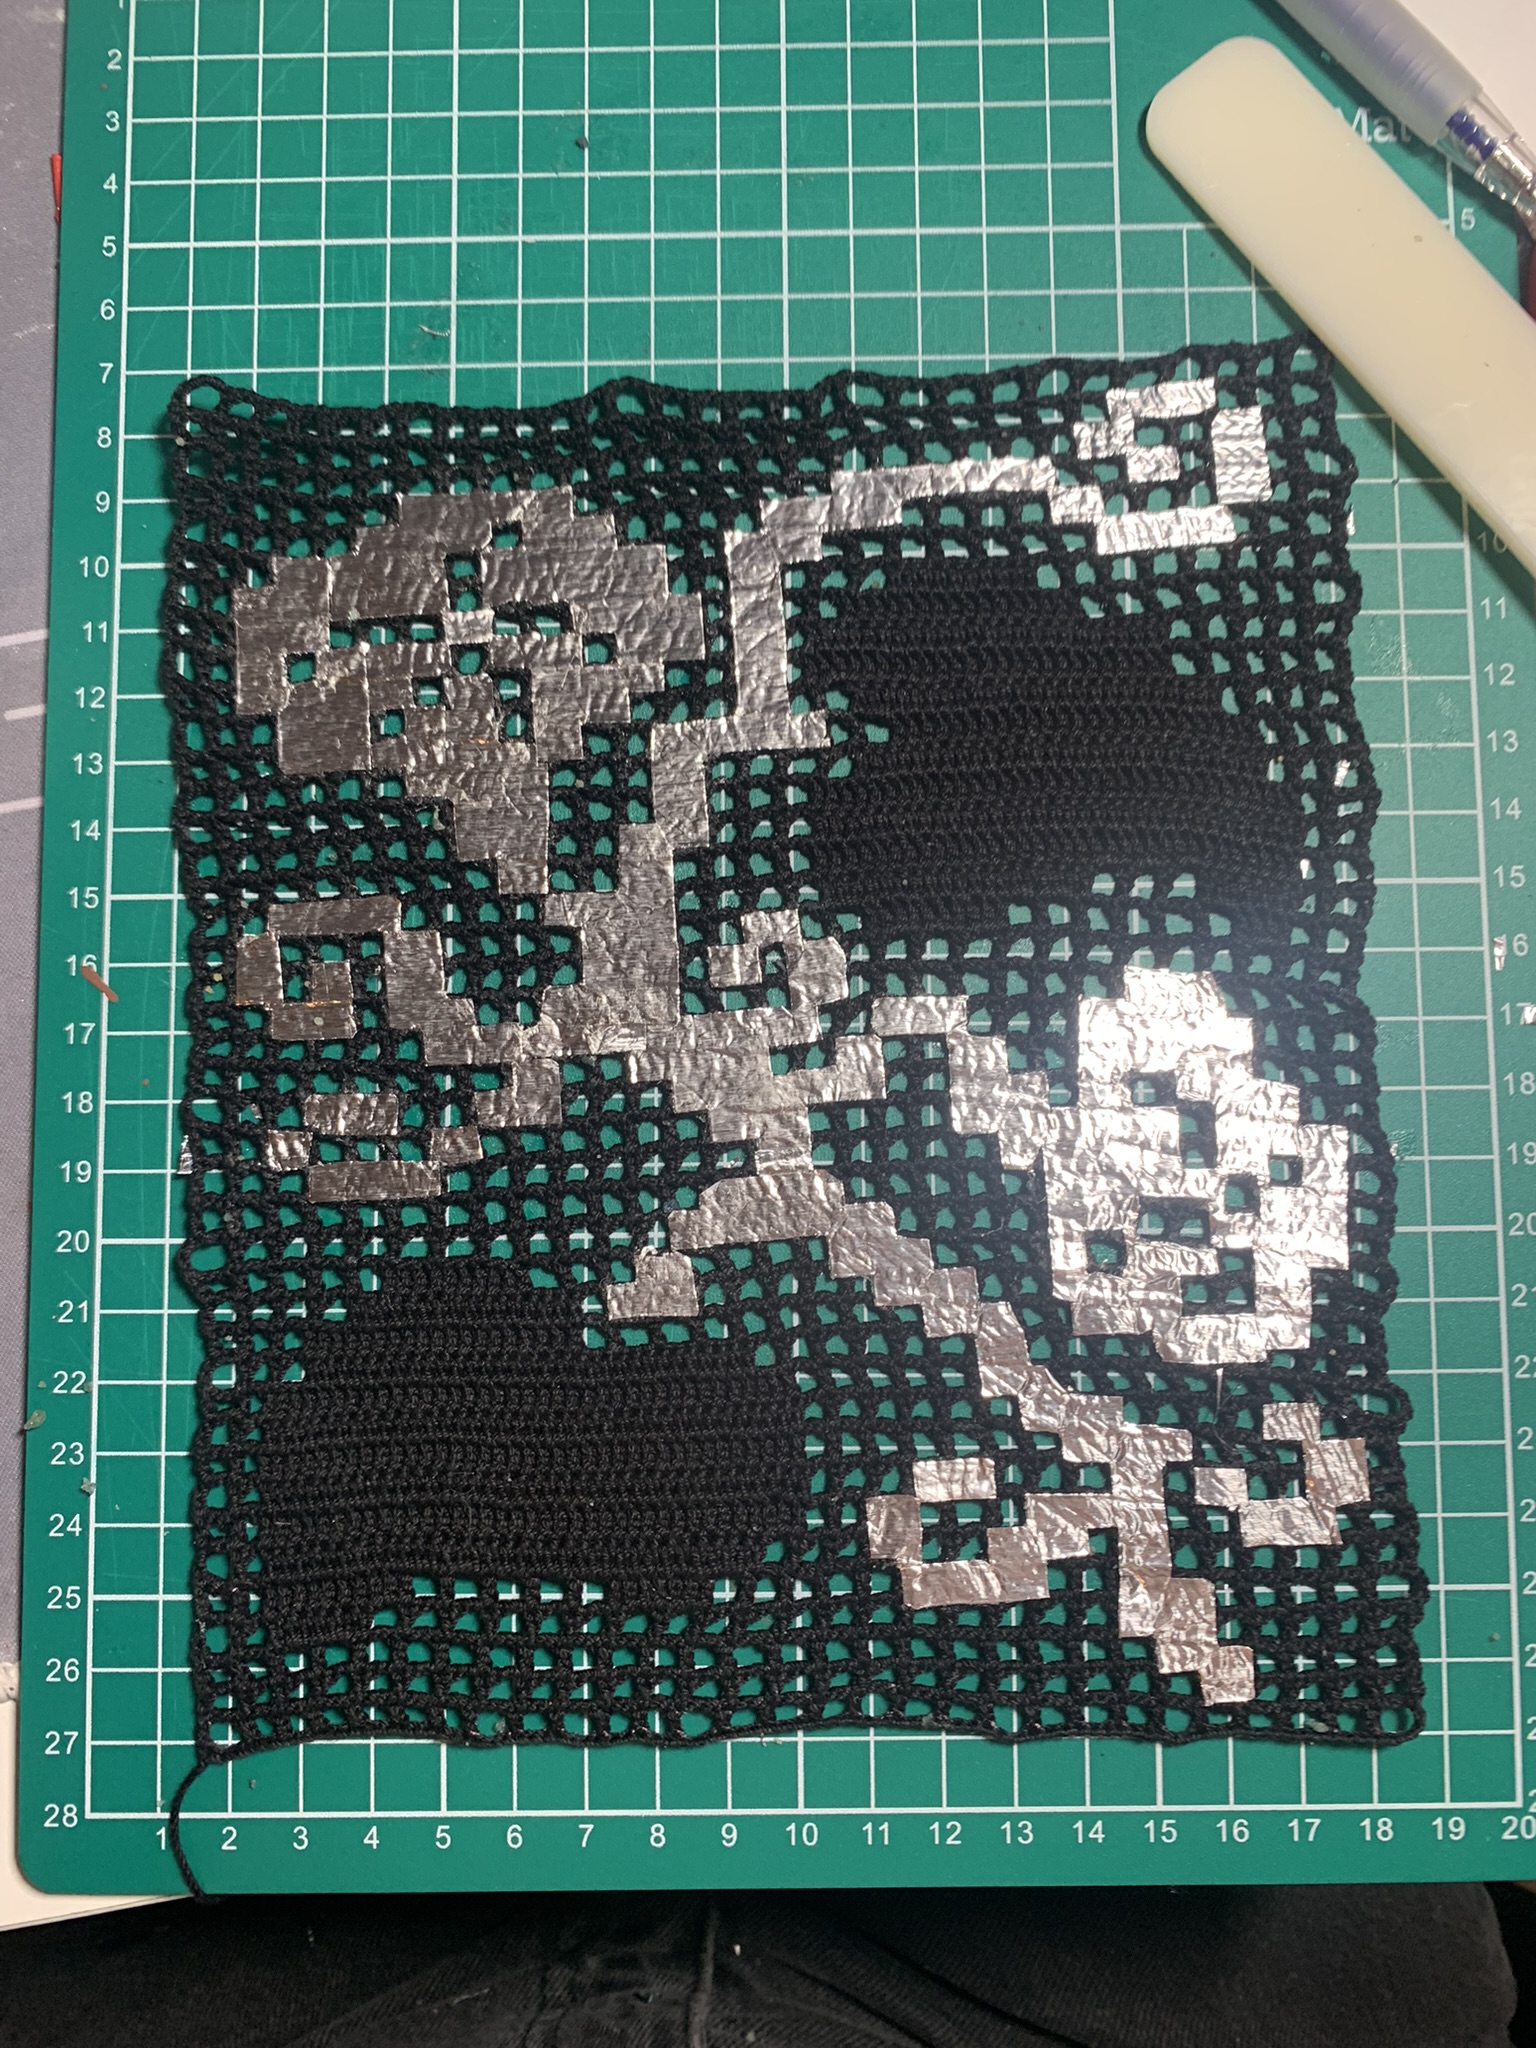
However, all that hard work did pay off and created the illusion I was hoping for. Now the silhouettes of each flower was crisp and looked beautiful.
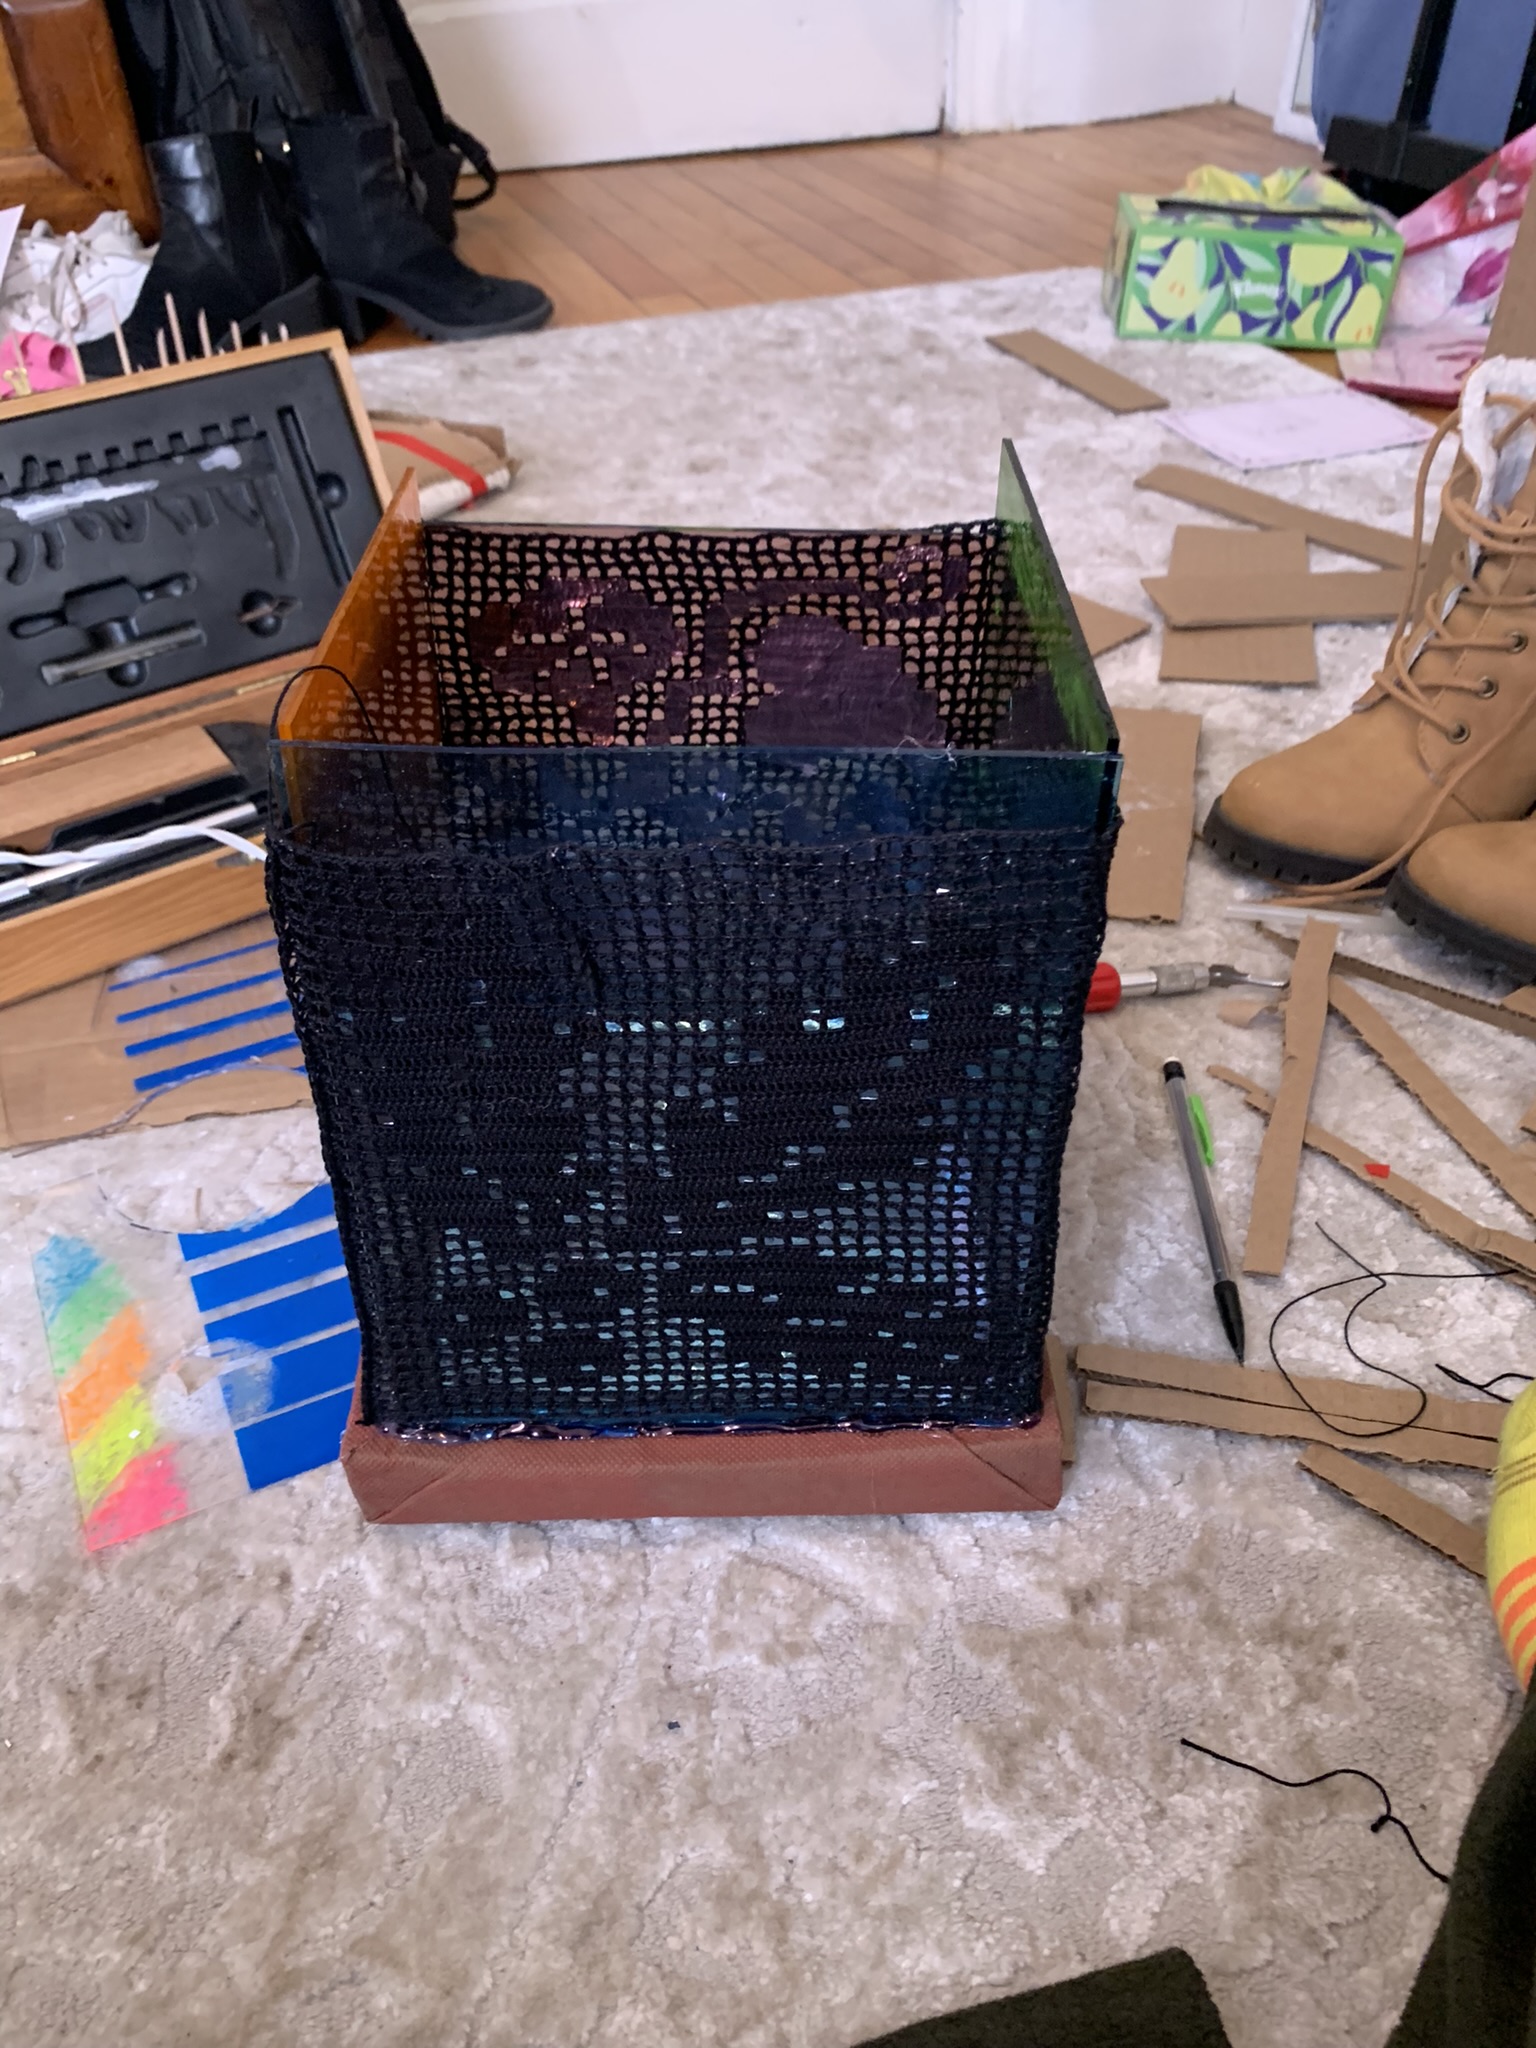
To complete the look, I crocheted all four motifs together in the right order to make what was effectively a tube which I slid over the glass panes I wedged into the cardboard. This also helped to keep the panes of glass from angling outwards.
Then I decided to line the bottom and top of the inside of the lantern with tin foil so that the light wouldn’t just get soaked into the cardboard. This would make it so the light would only be able to escape through the colored glass, casting the shadow of the motifs.
Then I got some fairy lights from my roommate and placed them inside as the light source, turning them back on and placing the top on the lantern. Here are some final photos of the shadows on the lantern. However, they are taken in the daylight so the lighting effect isn’t as big as it is when dark.
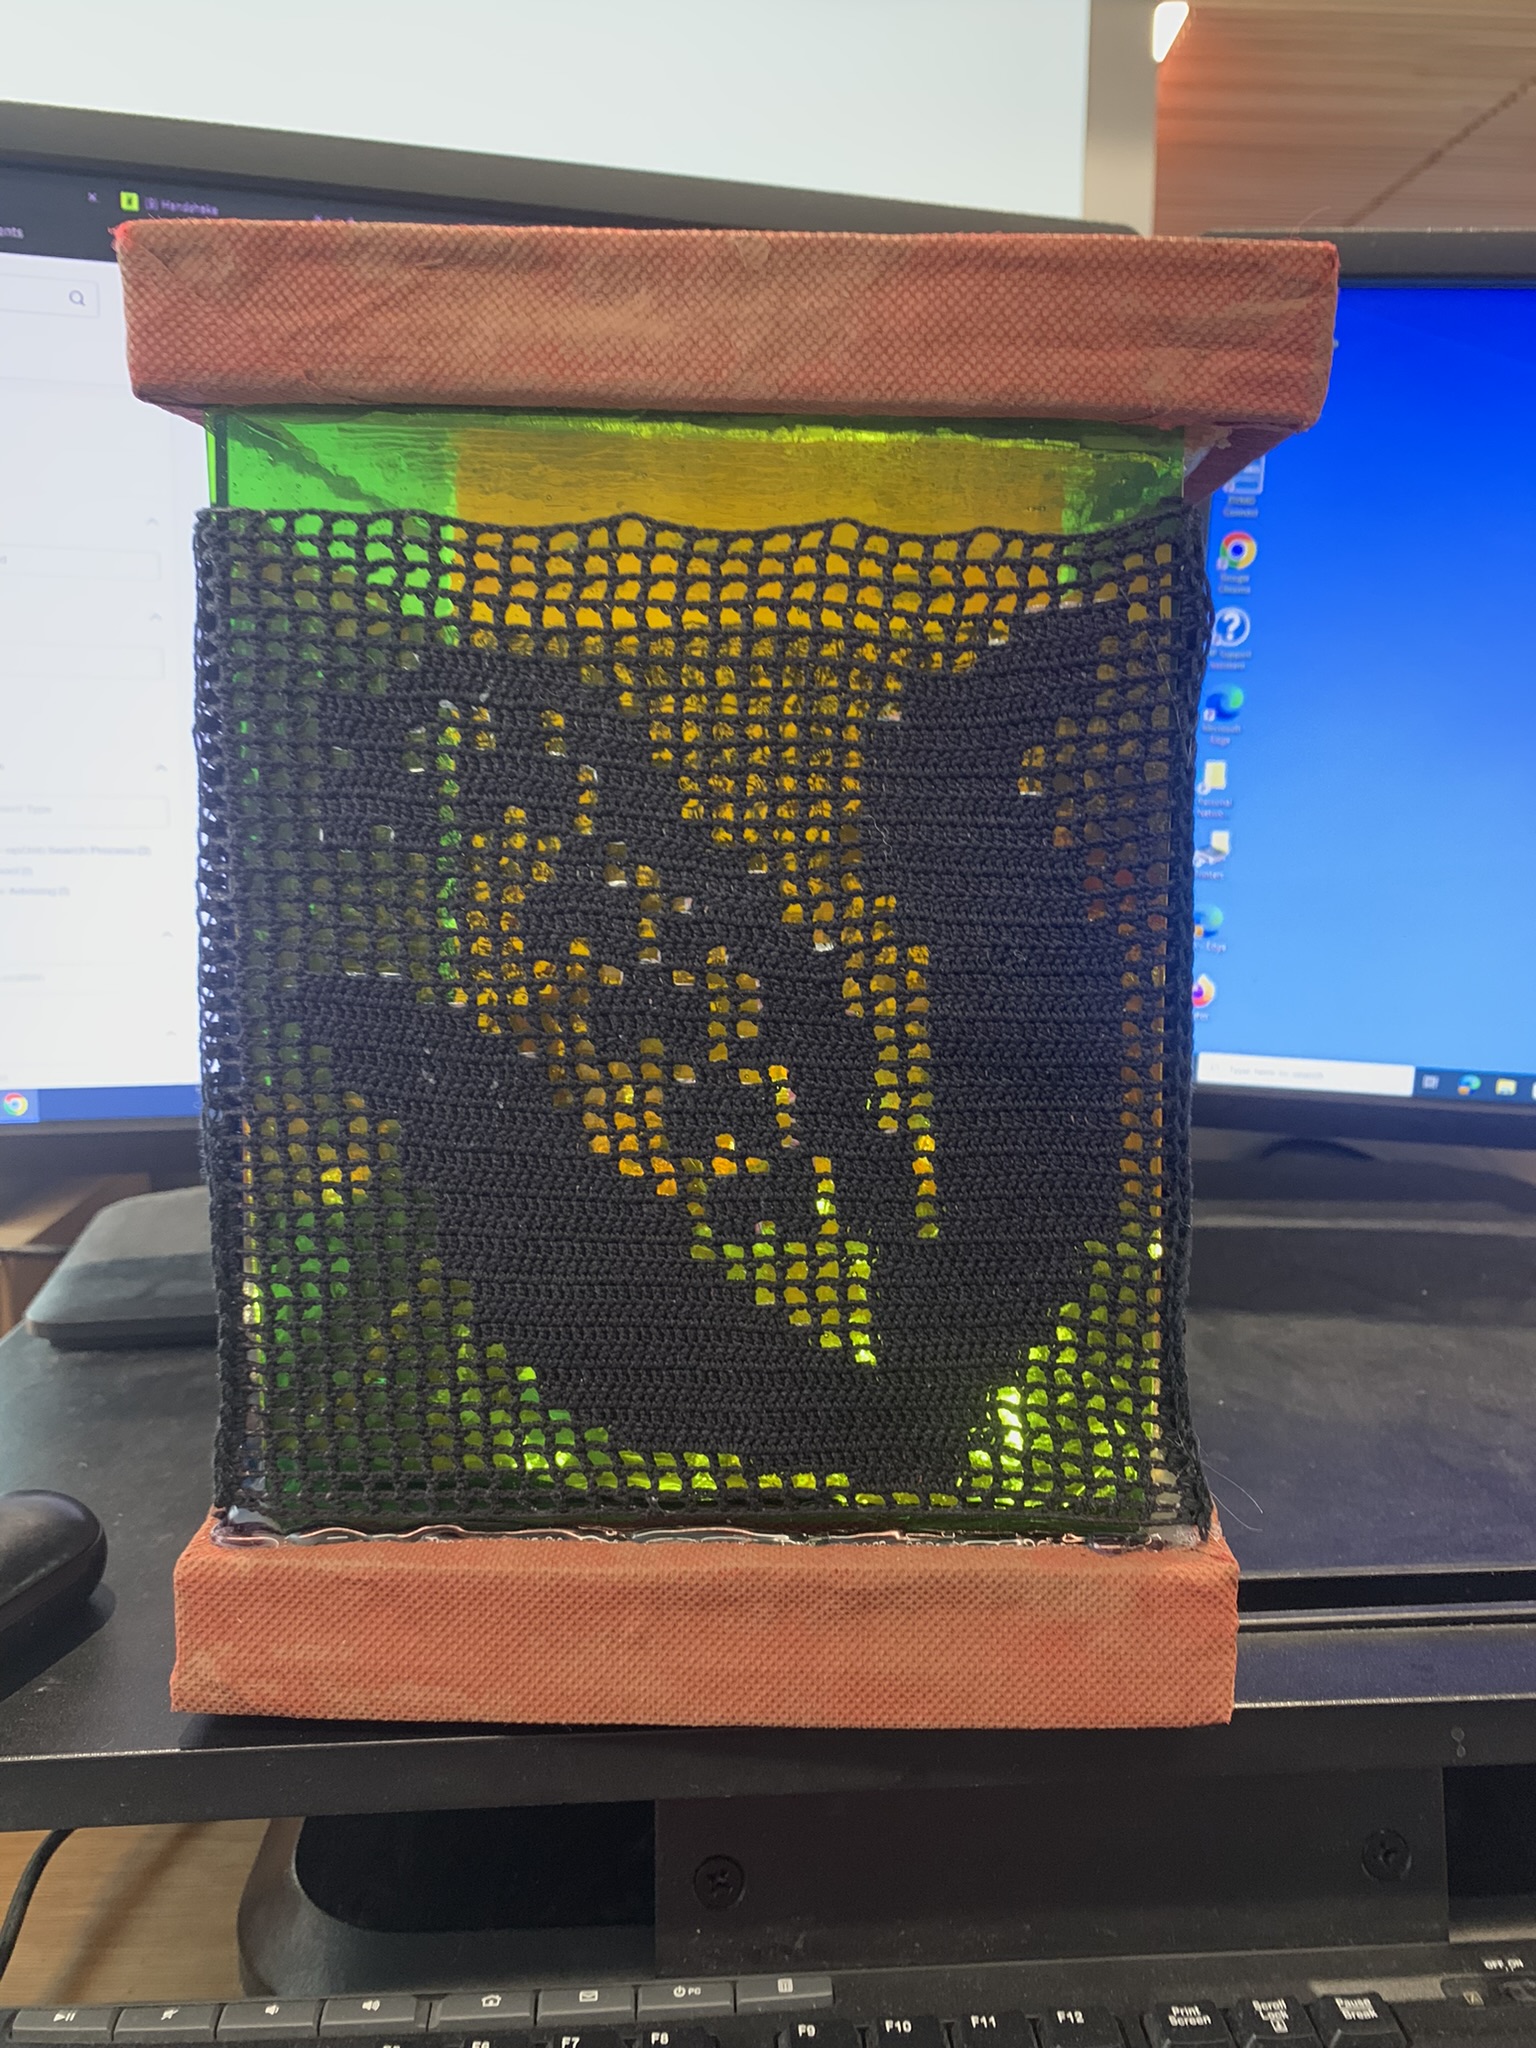
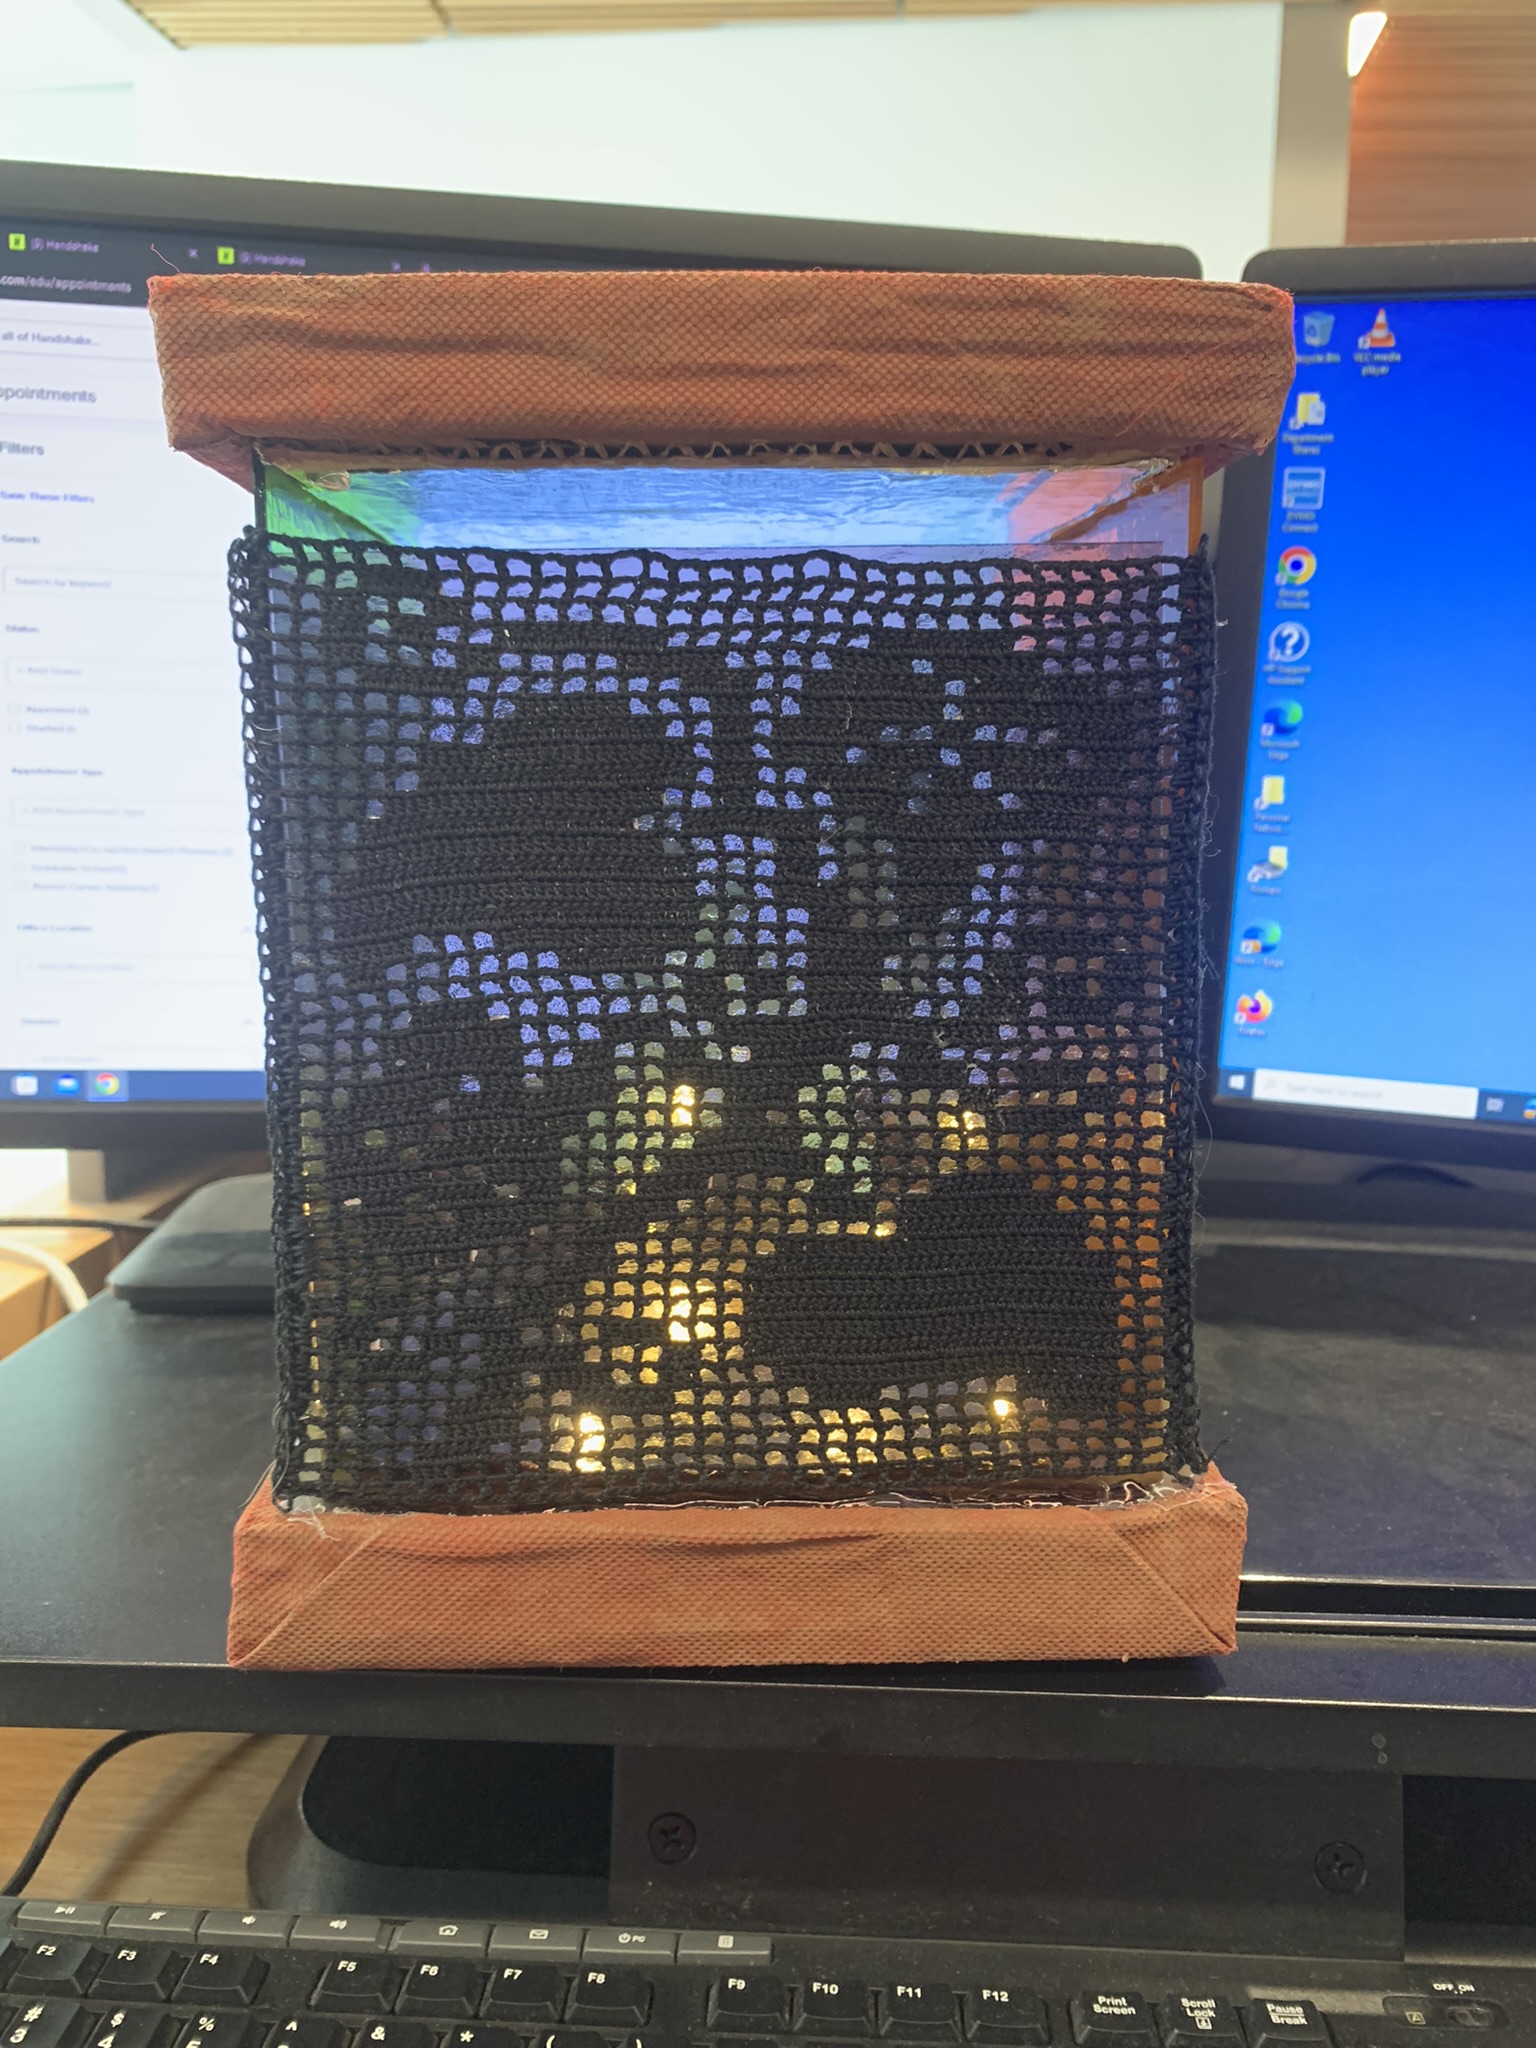
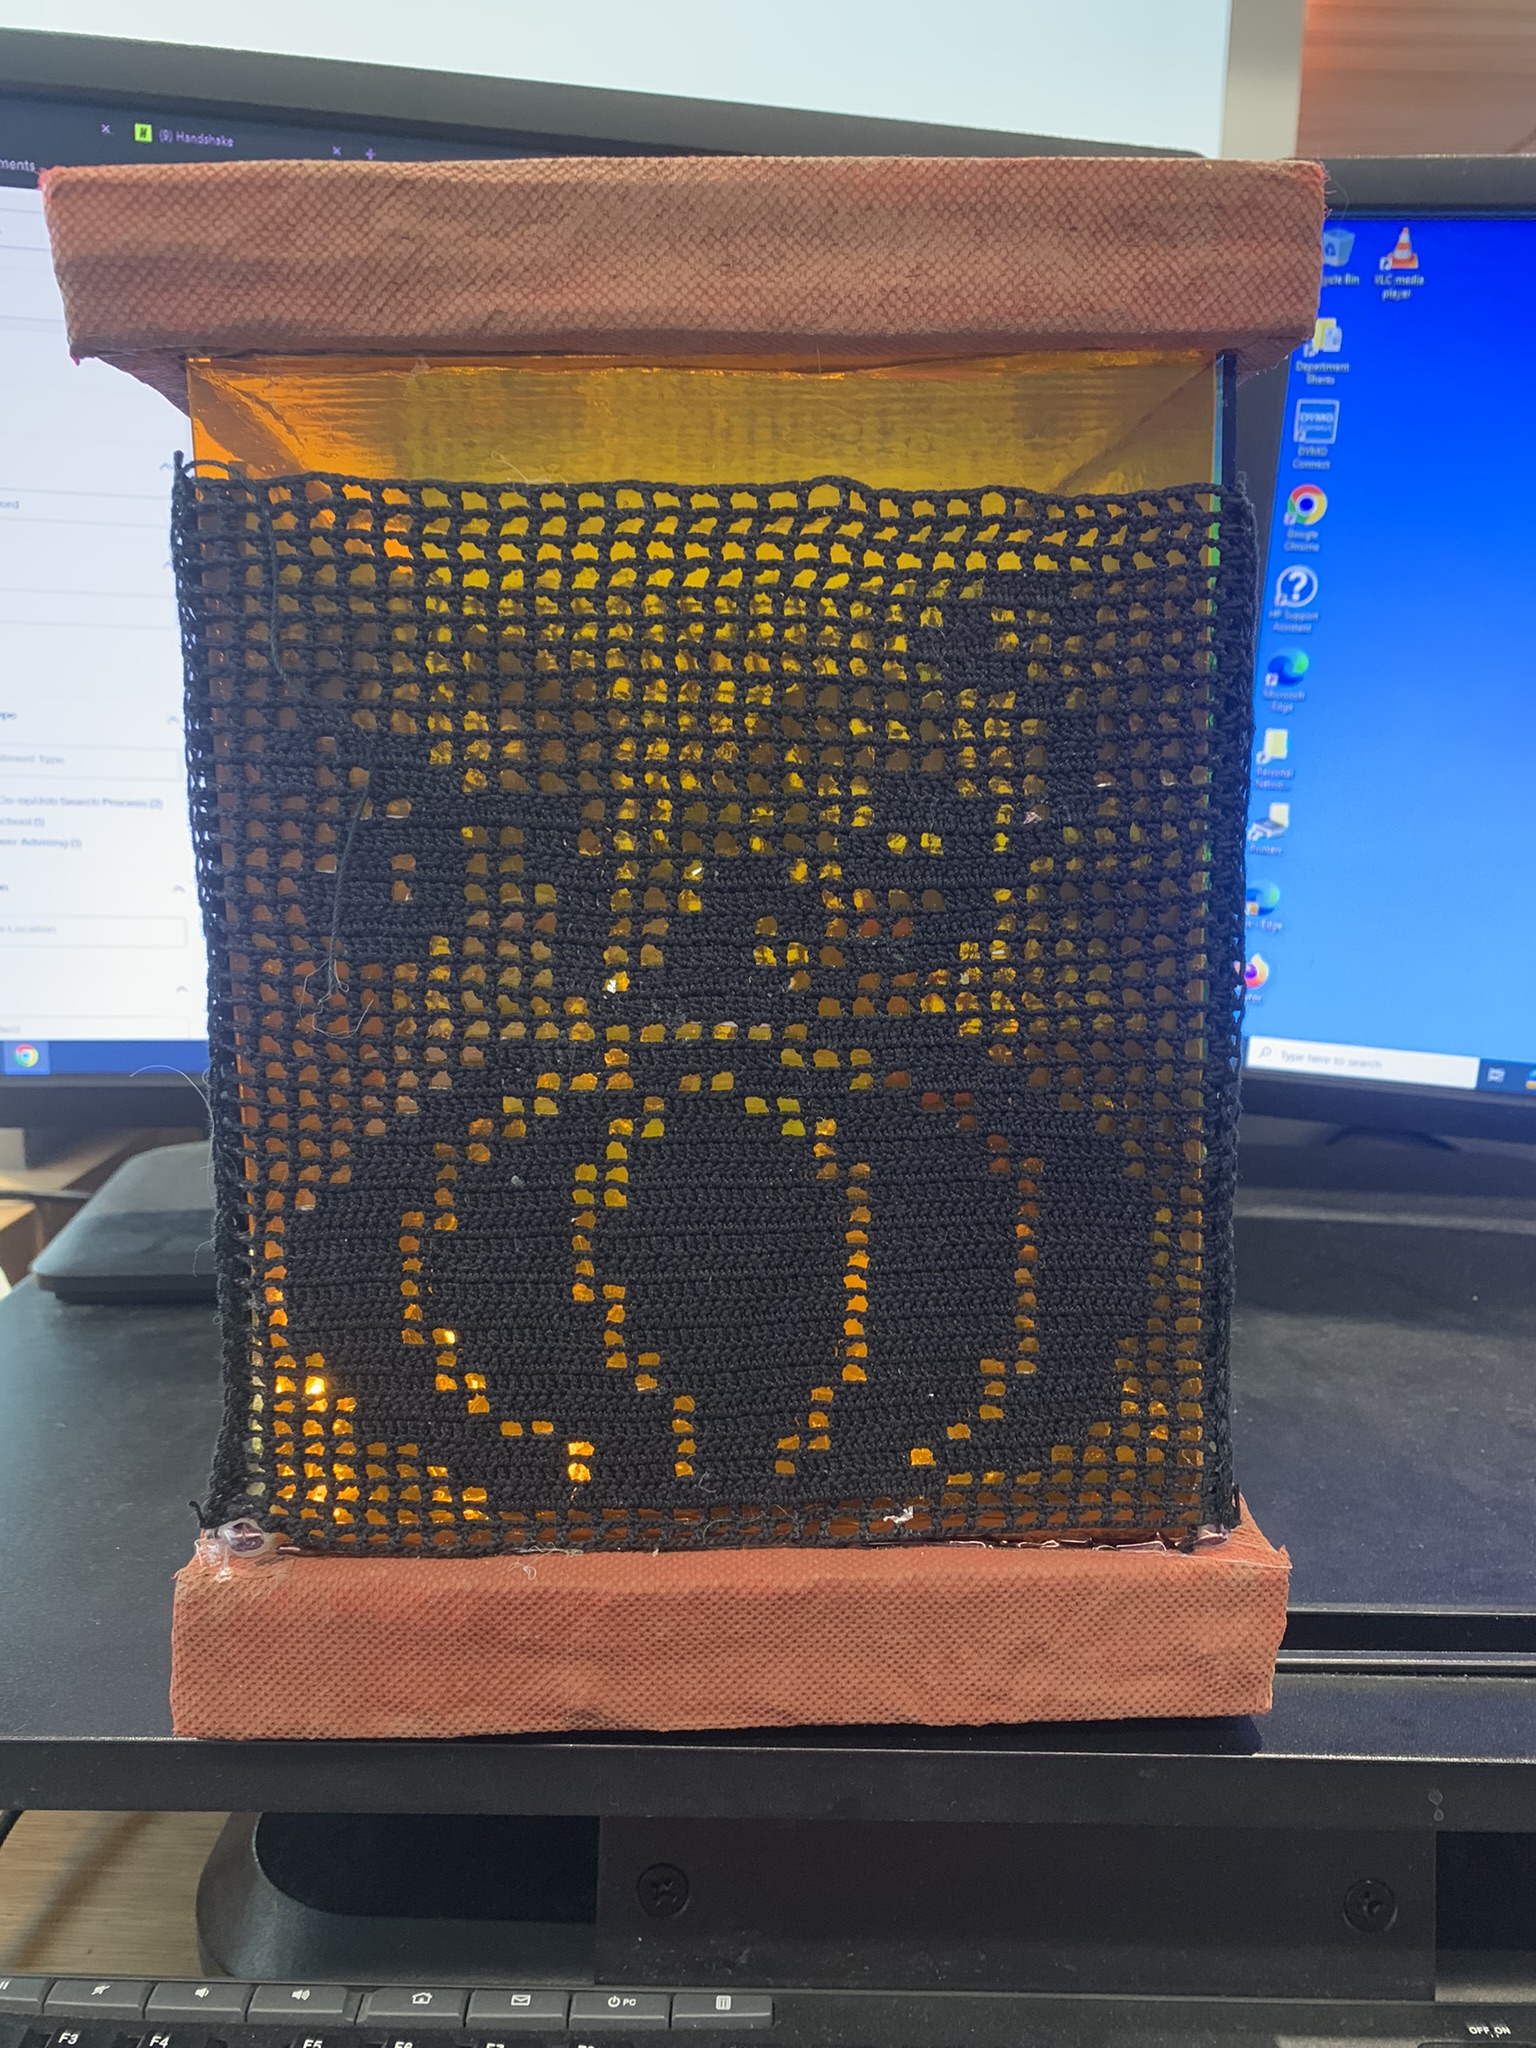
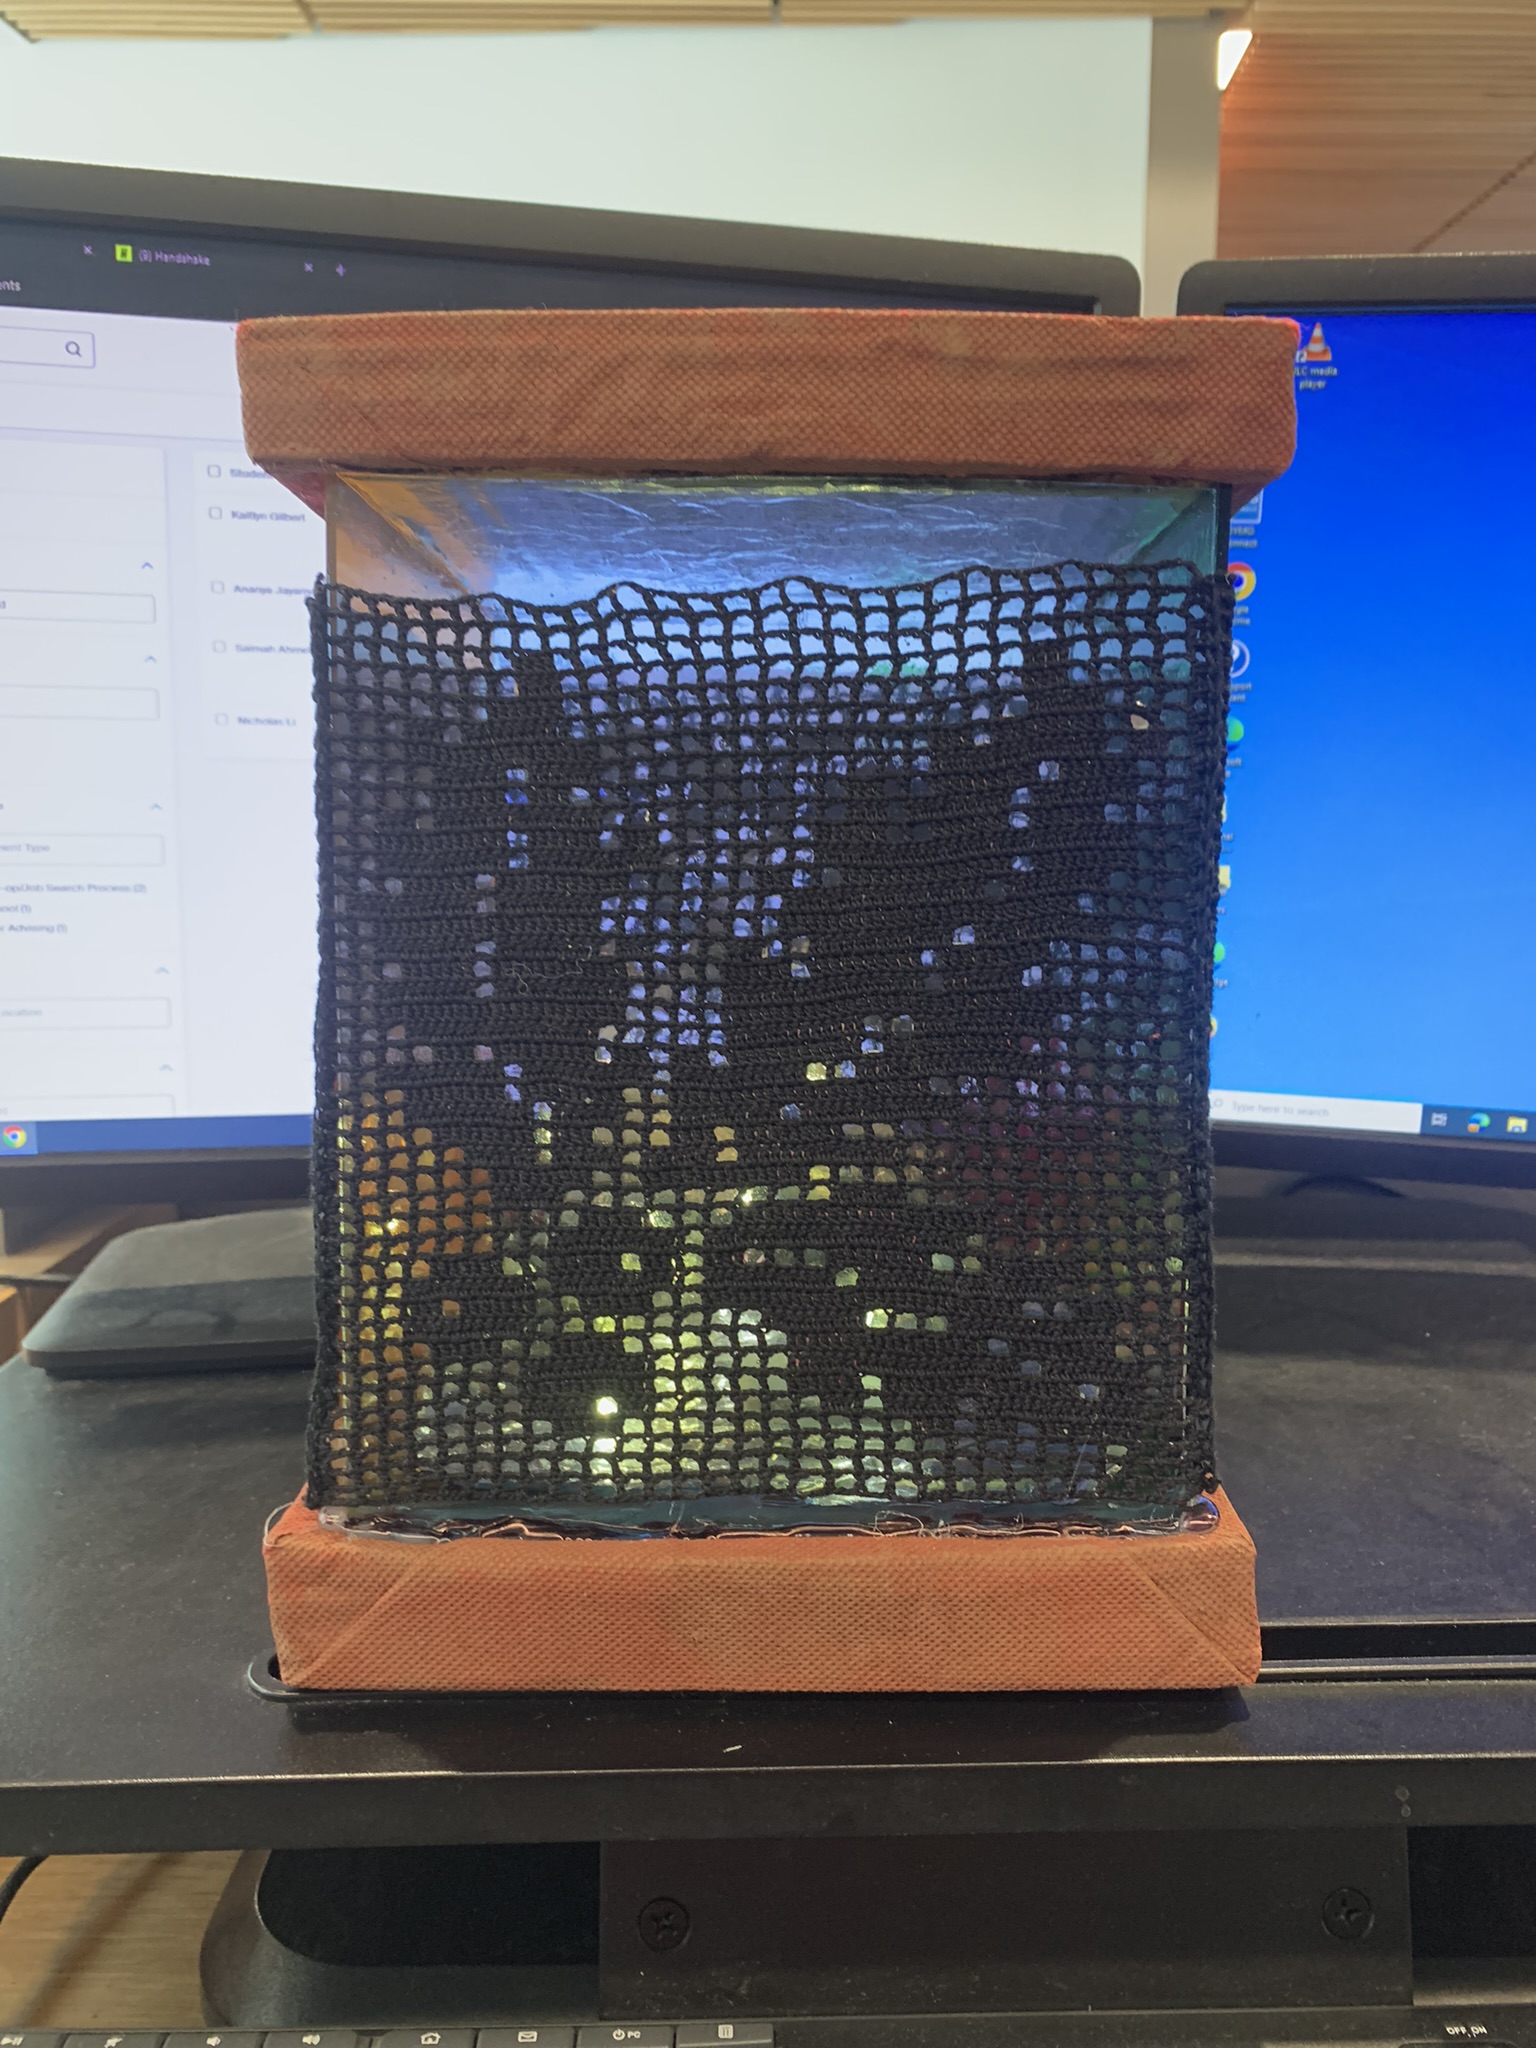
So this is the polished version of my shadow lantern to present in class!