Through the Pines – Building a Layered-Acrylic Lightbox
Abstract
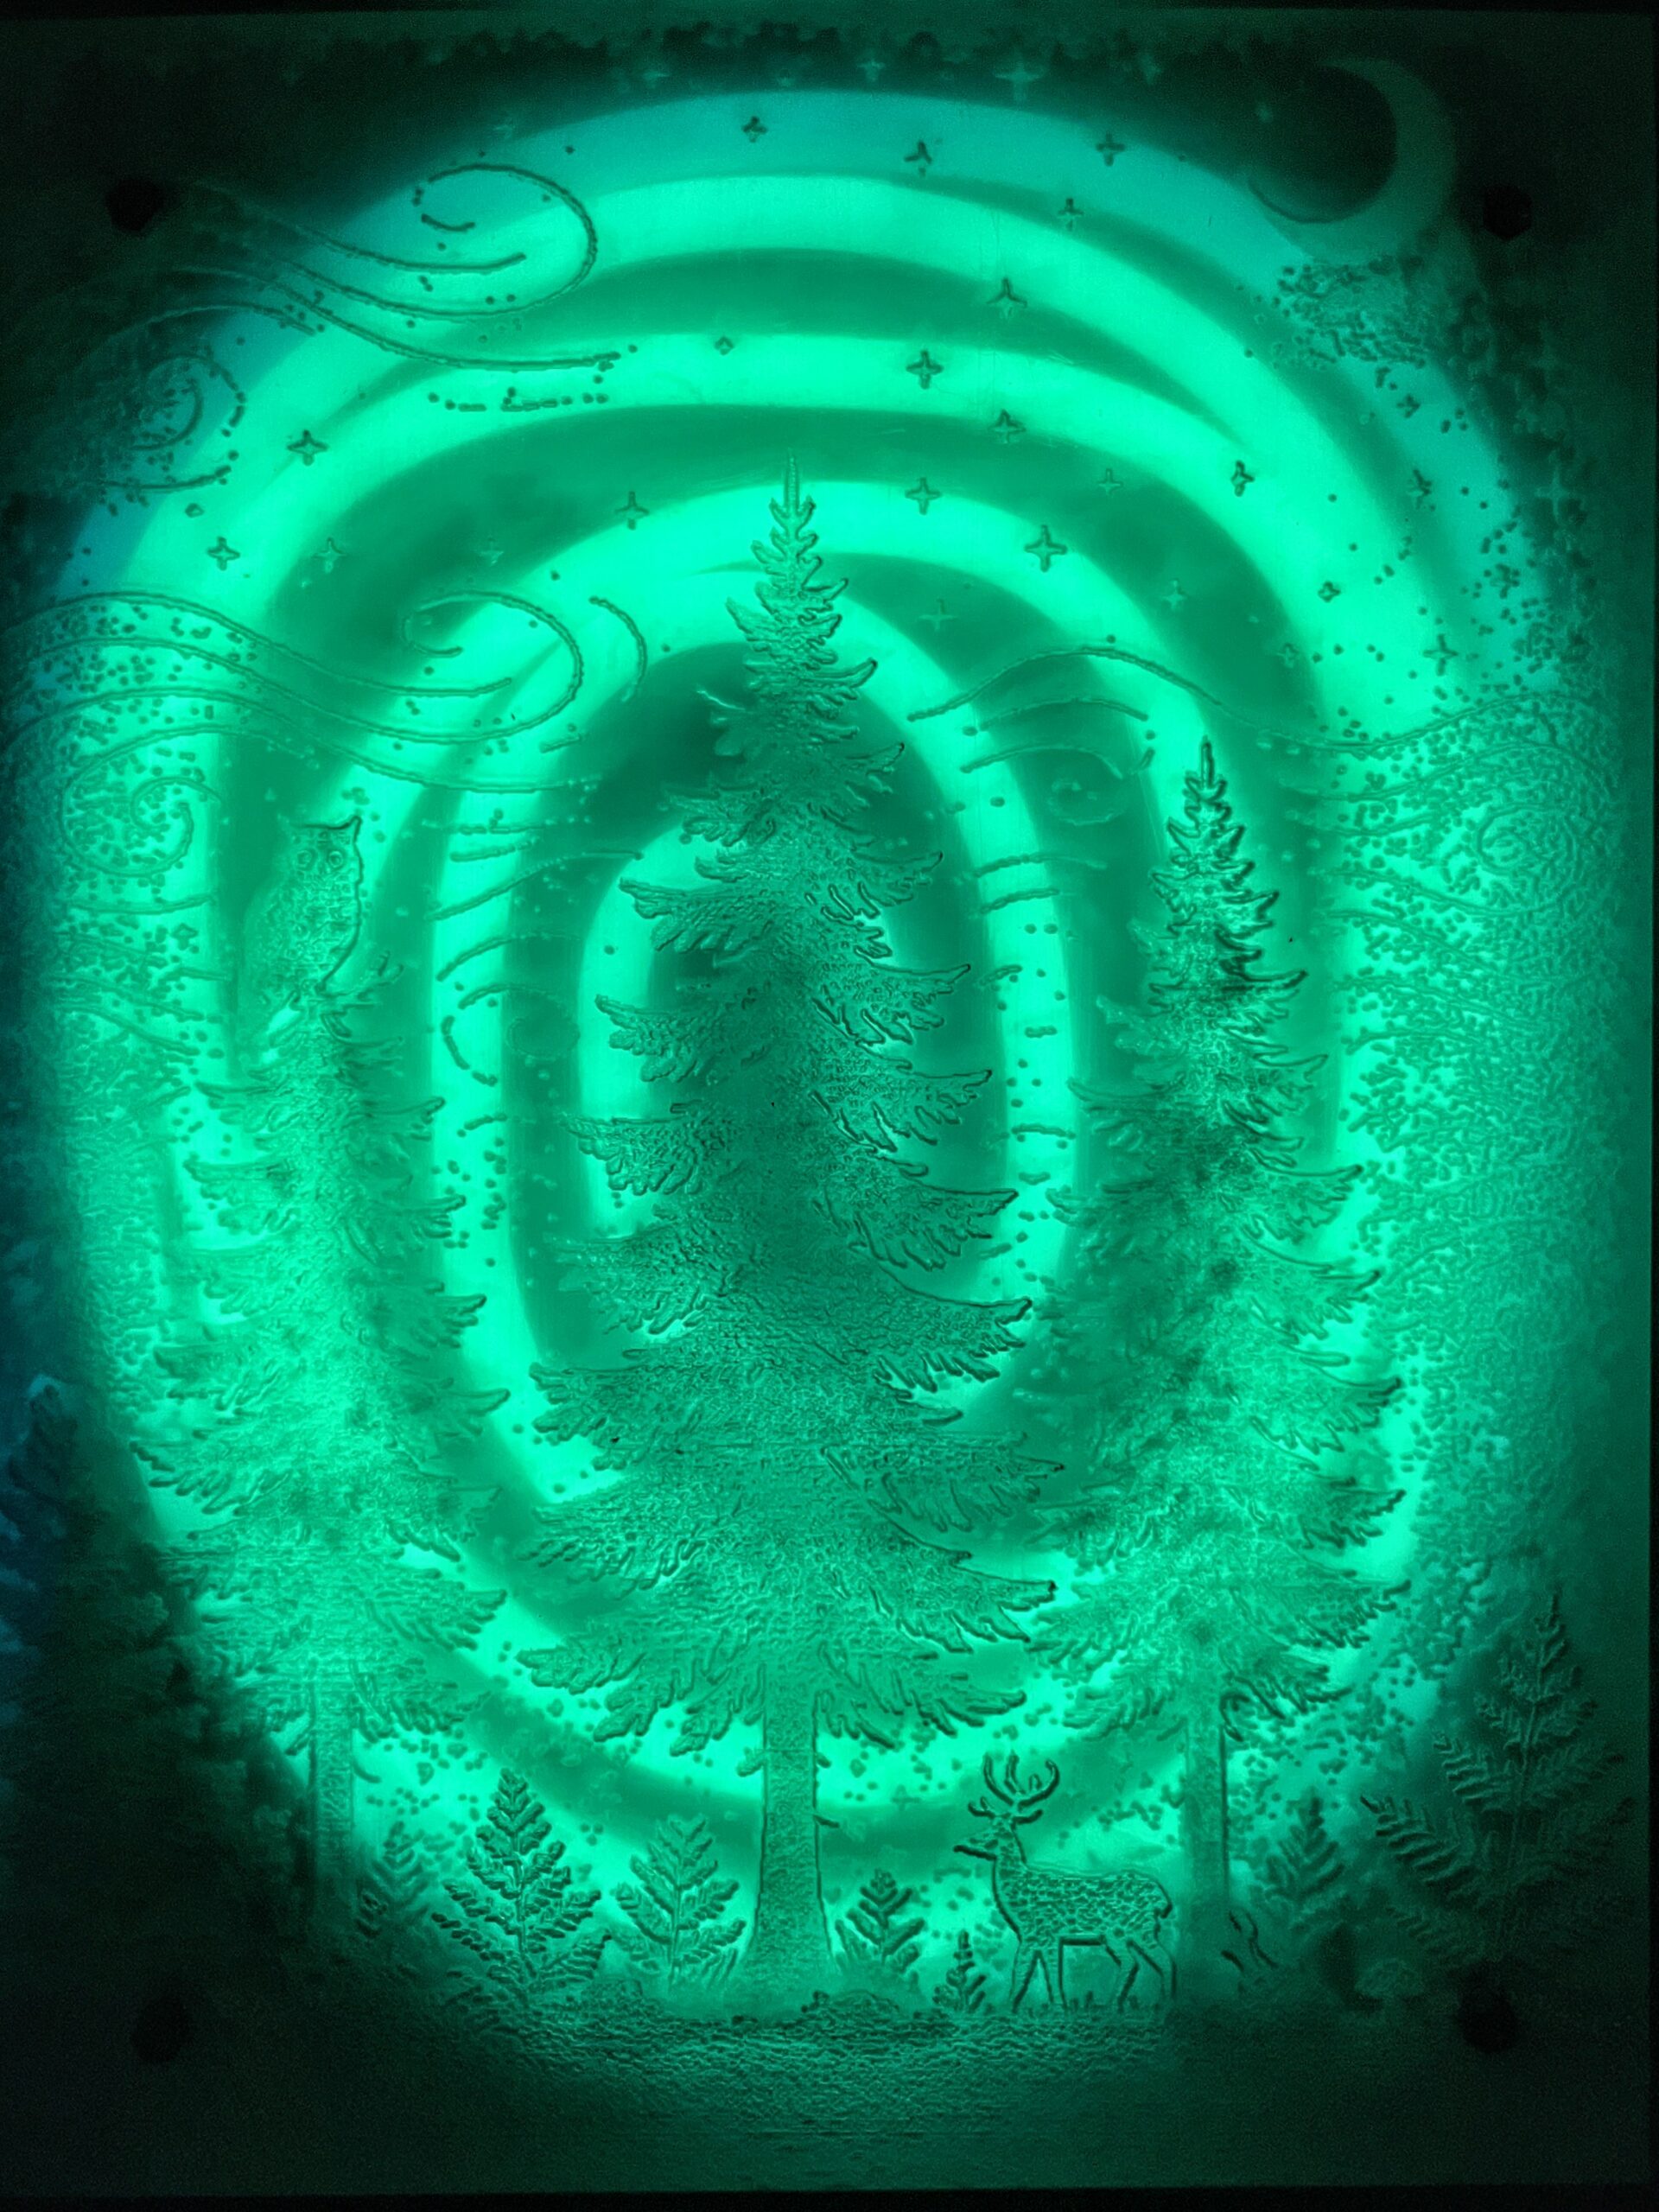
This project is a sculptural exploration of depth, atmosphere, and light using laser-engraved transparent green acrylic panels stacked inside a foil-lined shadow box and illuminated with a spiral-folded RGB LED strip. The piece comprises five precisely designed layers, each etched with forest imagery—including pine trees, swirling wind motifs, celestial elements, and wildlife—that merge visually into a cohesive depth scene when backlit. Eschewing traditional spacers, the acrylic sheets are pressed flush together and positioned at maximum distance from the LED source, allowing light to scatter across the engraved surfaces and produce a soft, immersive glow. The interior of the box is fully lined in burnished aluminum foil to reflect and diffuse the light evenly, avoiding pixel hotspots and enhancing visual uniformity. A side-mounted slot provides a clean ingress for the LED ribbon without visible hardware interference. The result is a seamless, glowing tableau that shifts in character with color changes, invoking a surreal, dreamlike view “through” the forest. This project investigates how spatial compression, material transparency, and controlled indirect lighting can be leveraged to evoke complex, atmospheric effects in compact, self-contained light art.
TL;DR I laser-engraved five transparent-green acrylic sheets with forest artwork, stacked them edge-to-edge in an 8″ × 10″ shadow box, lined the housing with foil, and spiraled an addressable RGB strip behind everything. The result: a glowing emerald portal that feels deeper than the box that holds it.
1. Why a Forest?
Forests read well in silhouette, and I’ve always loved the layered background tricks in Studio Ghibli films. By carving each “plane” of the forest into its own sheet of acrylic and lighting from the rear, I could fake atmospheric depth without needing physical distance between the sheets.
2. The Layers
Using the Gnu Image Manipulation Program (GIMP) as well as some handy add-ons, I designed a simple forest scene layer by layer (raster).

Since GIMP is a raster-based program, I needed to add the vector circles for the laser cutter to cut the wholes after the design was made. This was accomplished via a simple Python script.
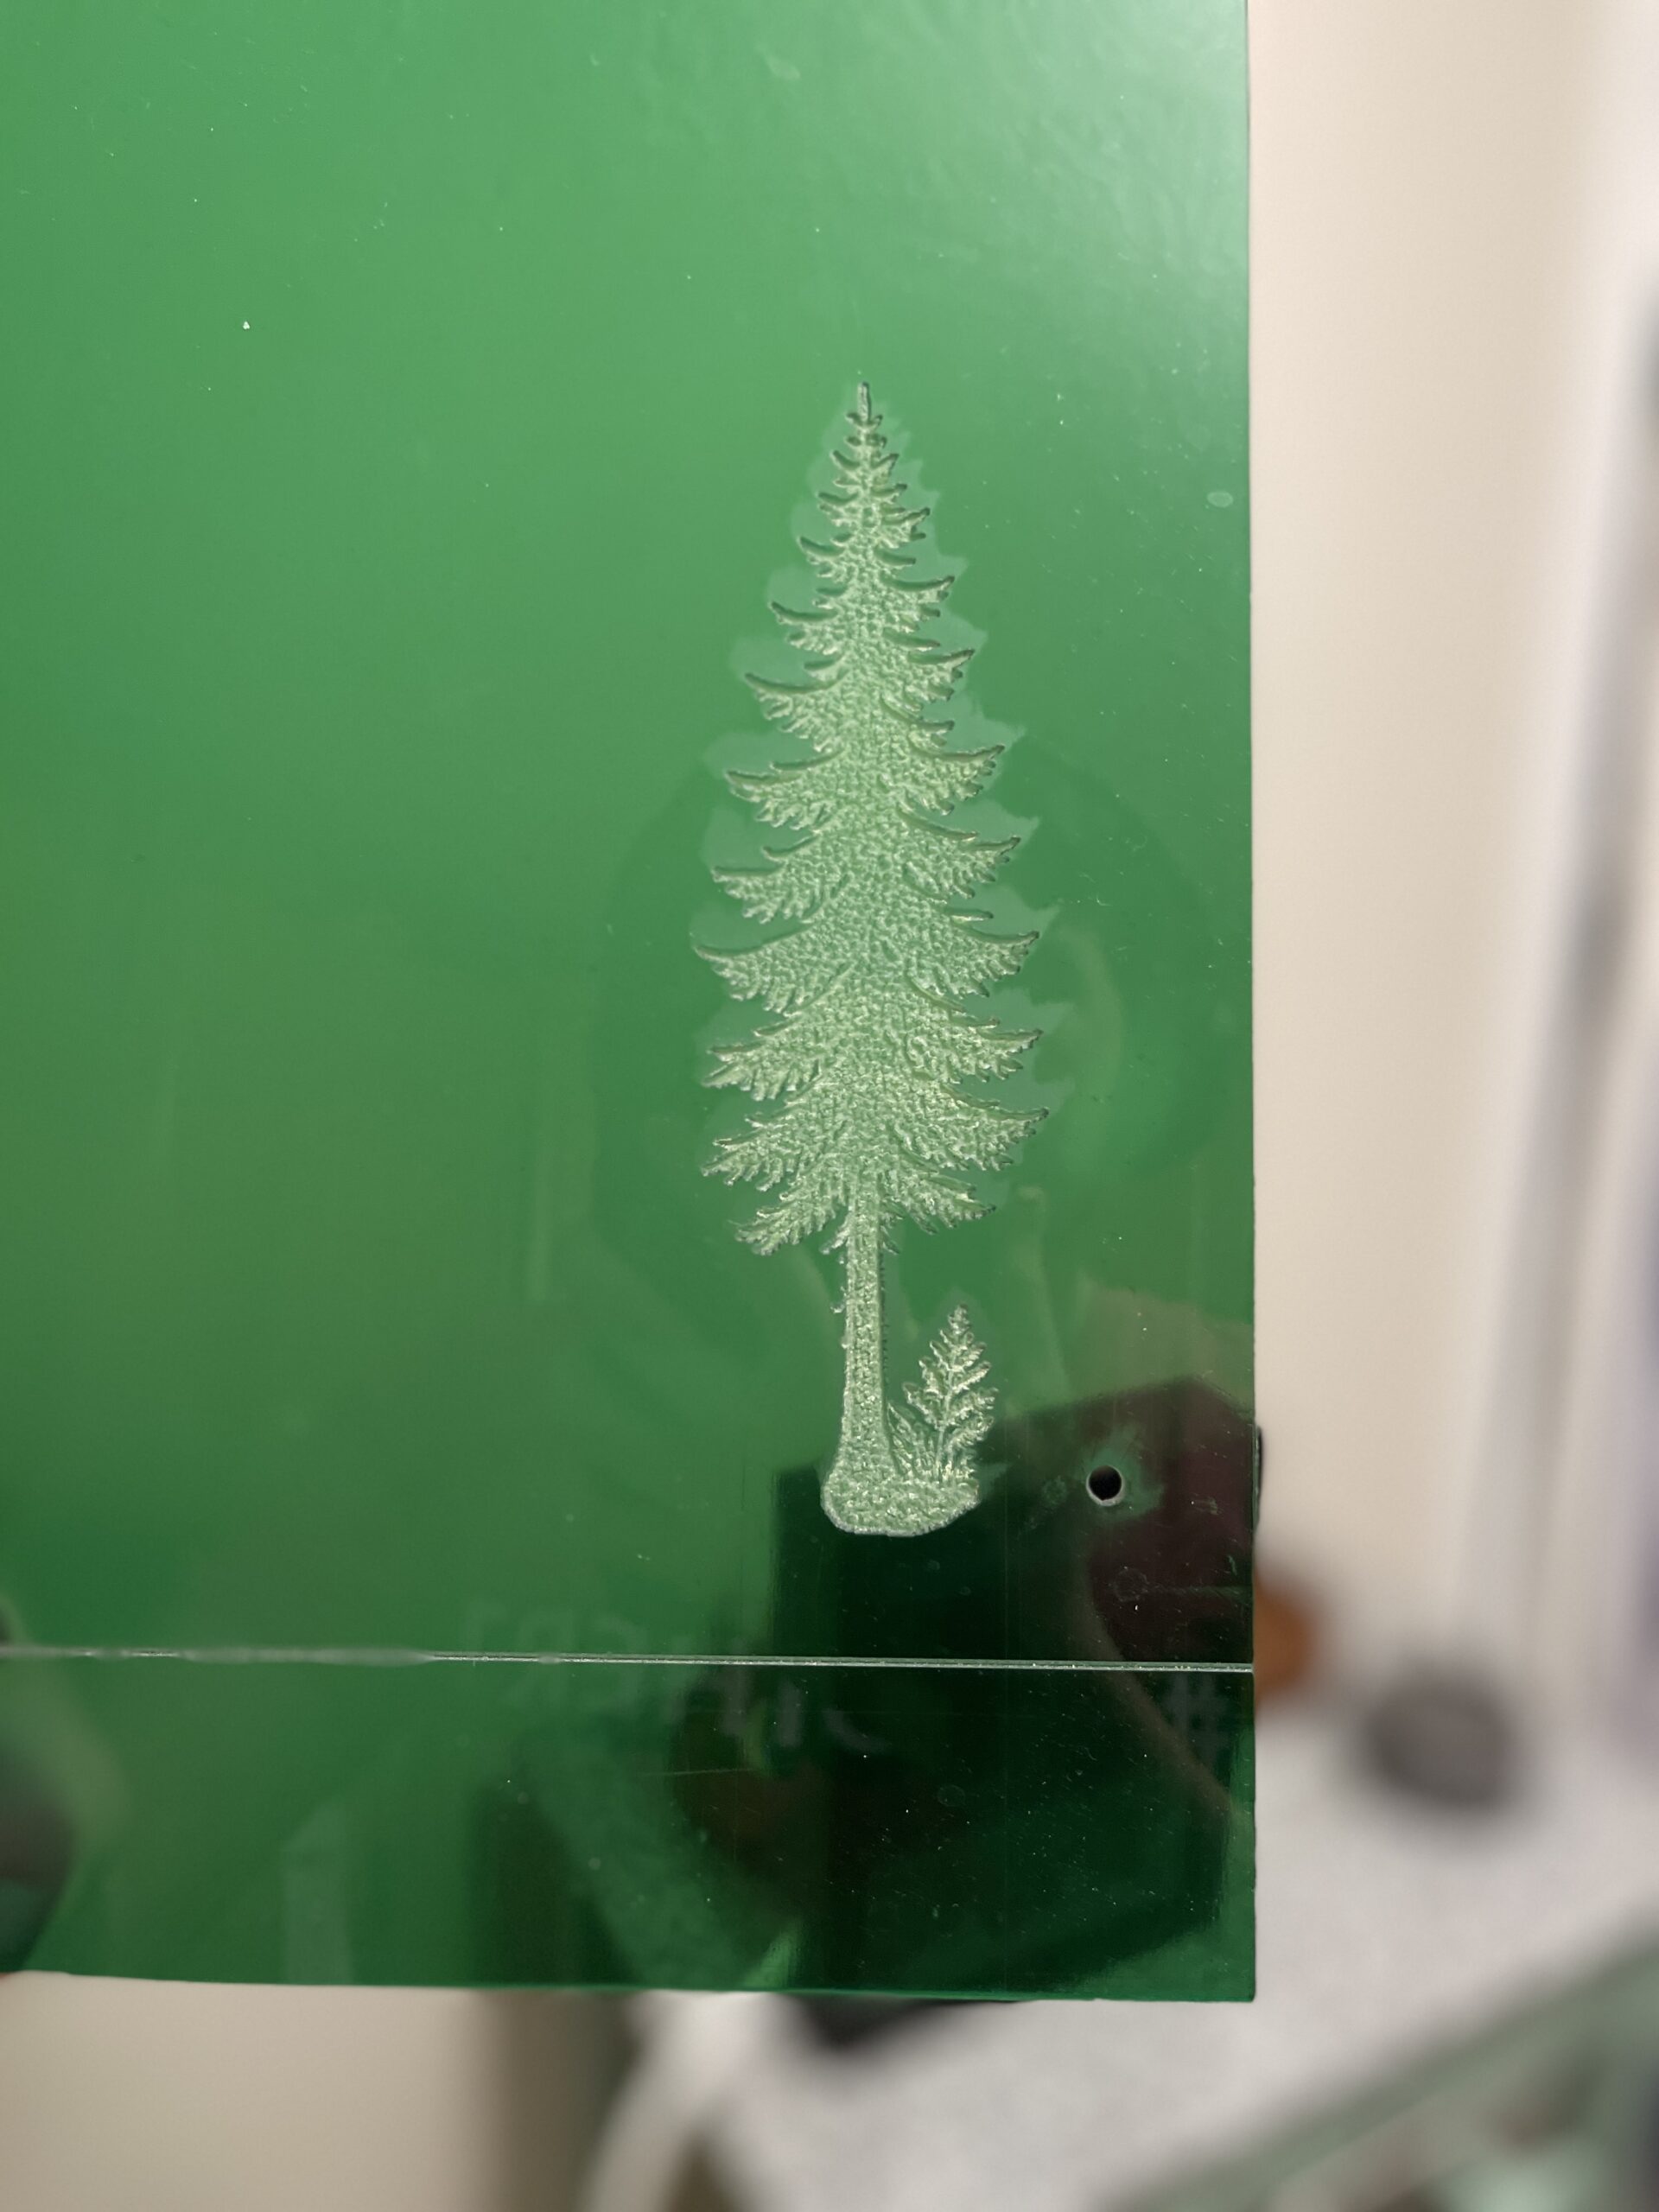
Once the design was finalized (many ugly trees and deer were made in the process), the design was ready to be laser cut. I bought some green translucent acrylic from Amazon for this purpose.

As it turns out, using acrylic was a horrible idea. Not because it doesn’t look good (it does), but because its dust gets ***everywhere***. The picture above shows the acrylic immediately after the right tree was engraved—notice all the white dust. After some trial and error, I got the laser tuned to the acrylic how I wanted it. Then after very thorough scrubbing, cleaning, polishing, and sanding the acrylic, and then finally getting the dust out of the engravings themselves with a camera cleaner, the result was very pretty:
(But, frankly, if I could go back in time, I would have never used acrylic simply because I am still finding its dust in places that it shouldn’t be weeks after the parts were cut.)
I bought some machine screws and standoffs off Amazon, as well as a very nice programmable LED ‘rope’ that I could use to light the back of the acrylic layers. The idea is that I wanted to create an air gap between the light source and the first acrylic layer, such that the light source has a larger angle to diffuse through more of the above layers. This is very similar to the Sun’s light traveling through space before getting diffused by the Earth’s atmosphere; it creates a very cool volumetric effect.
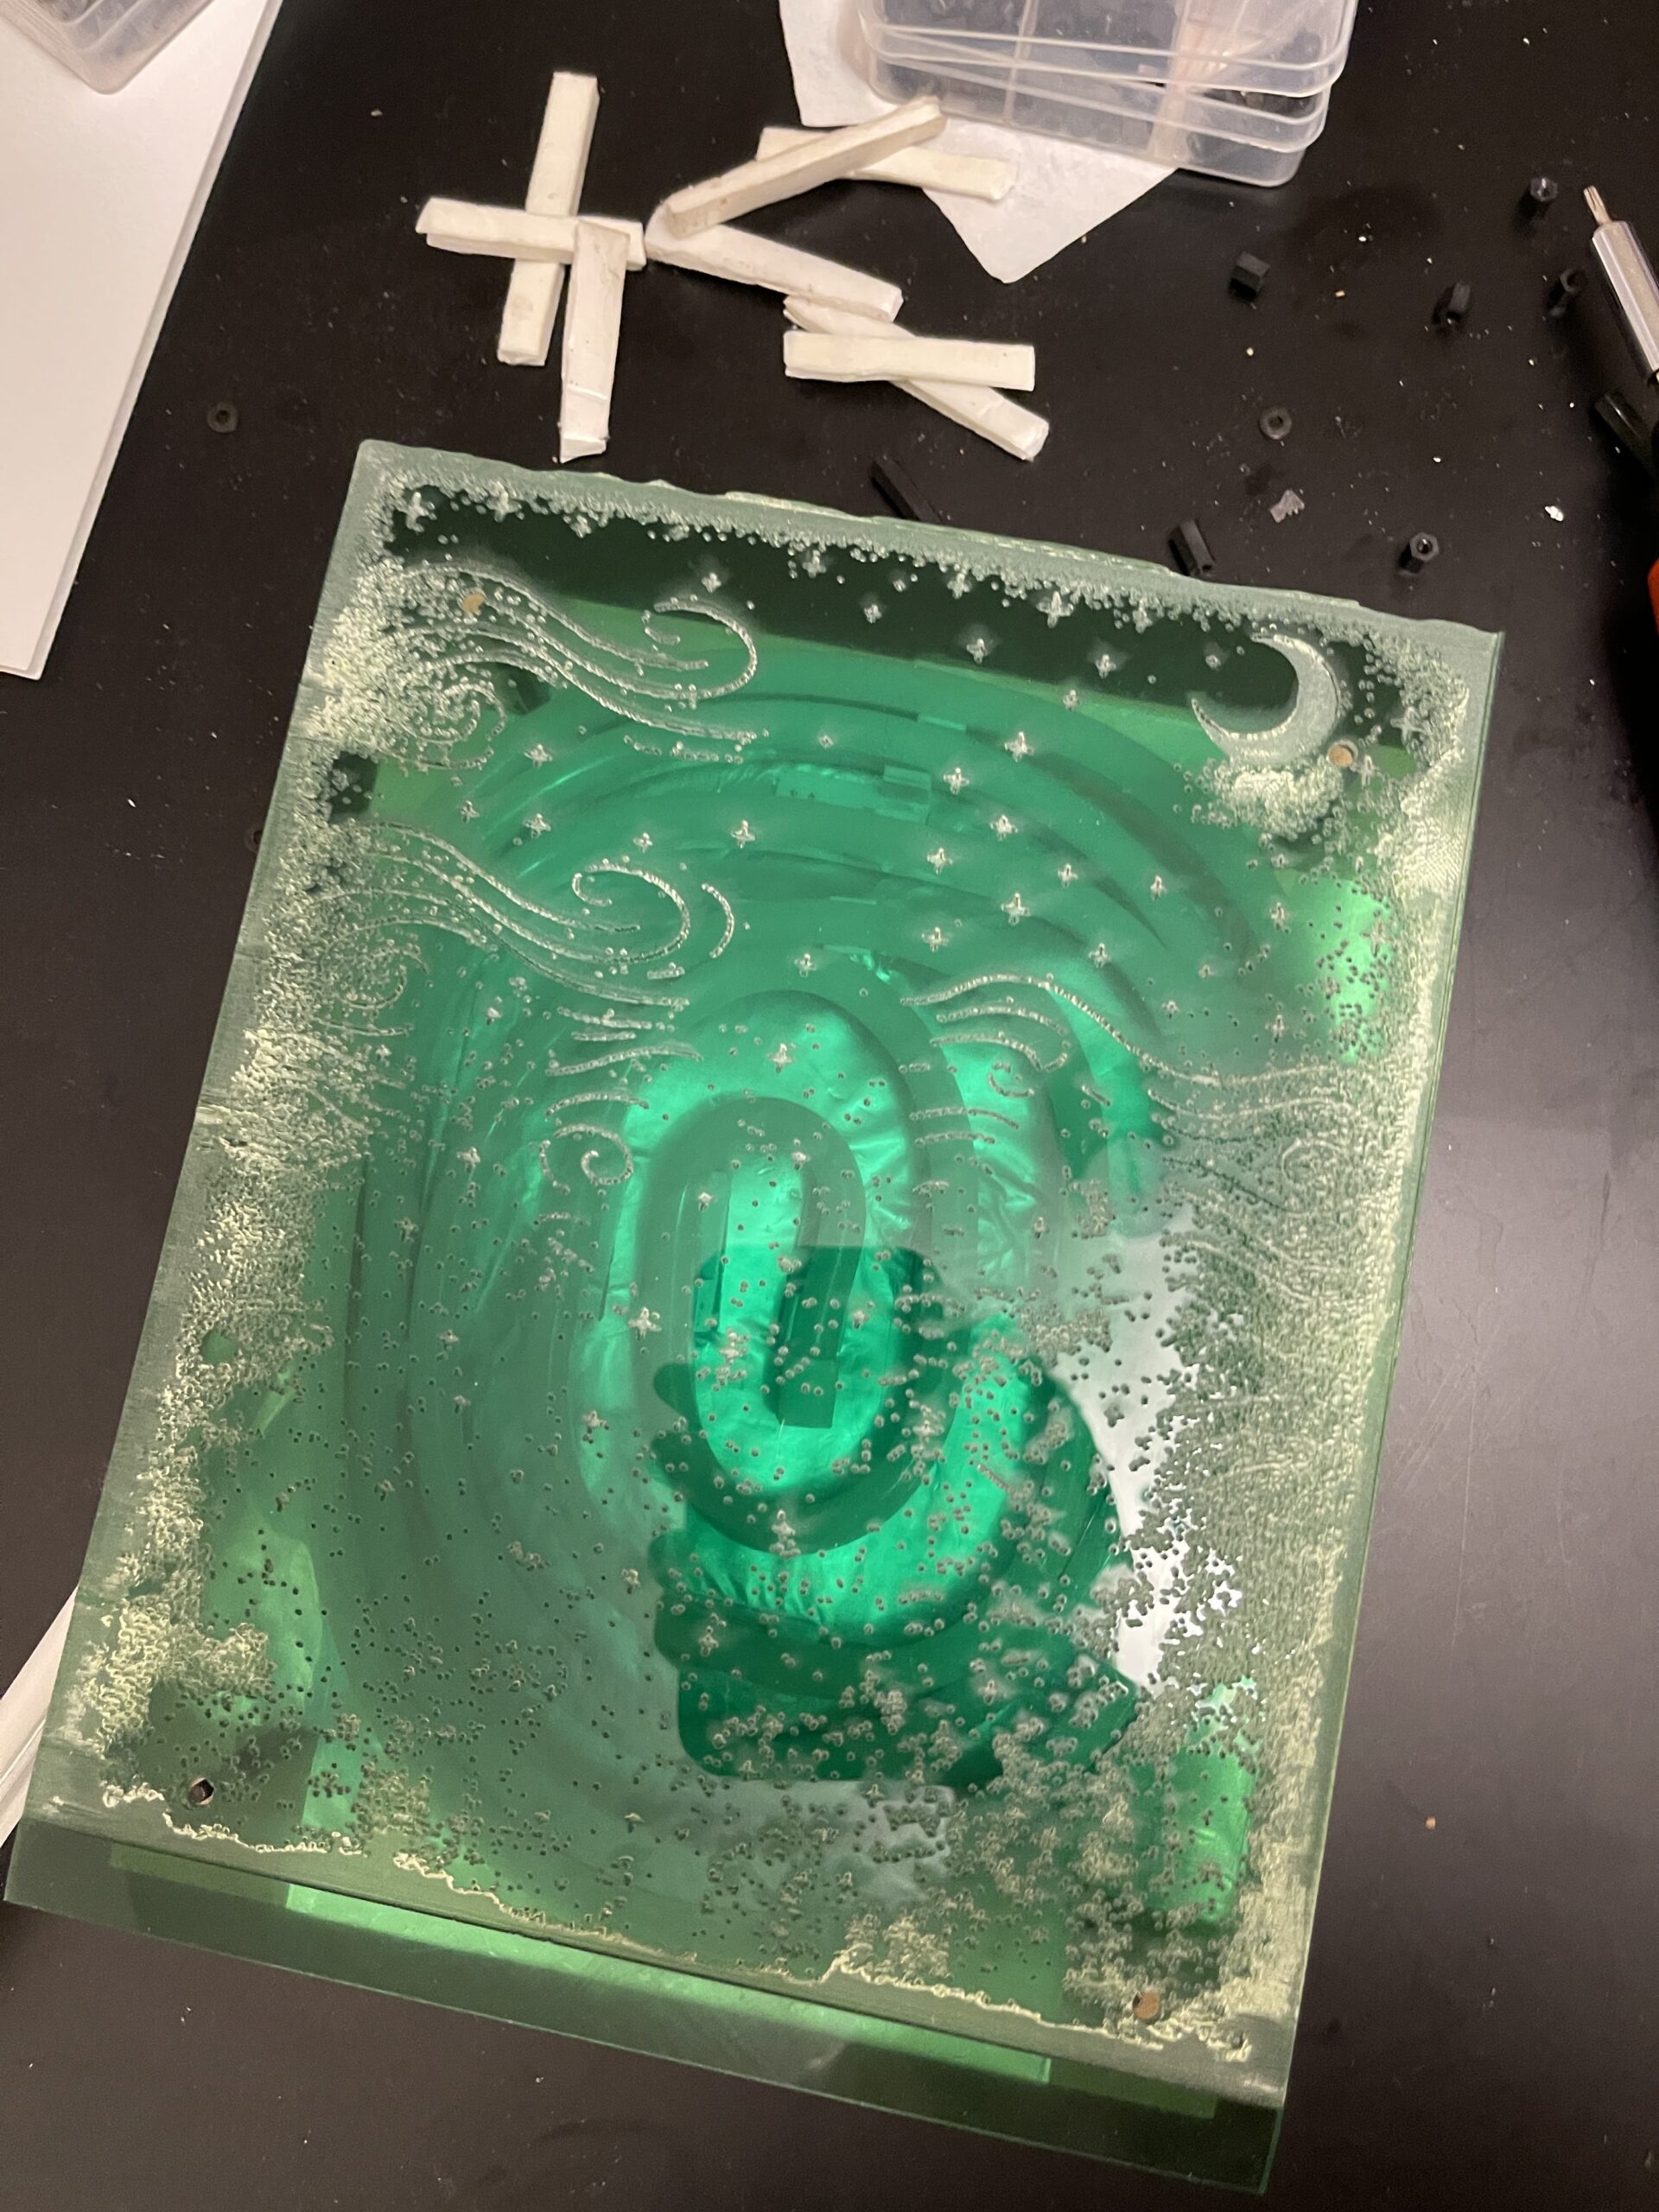
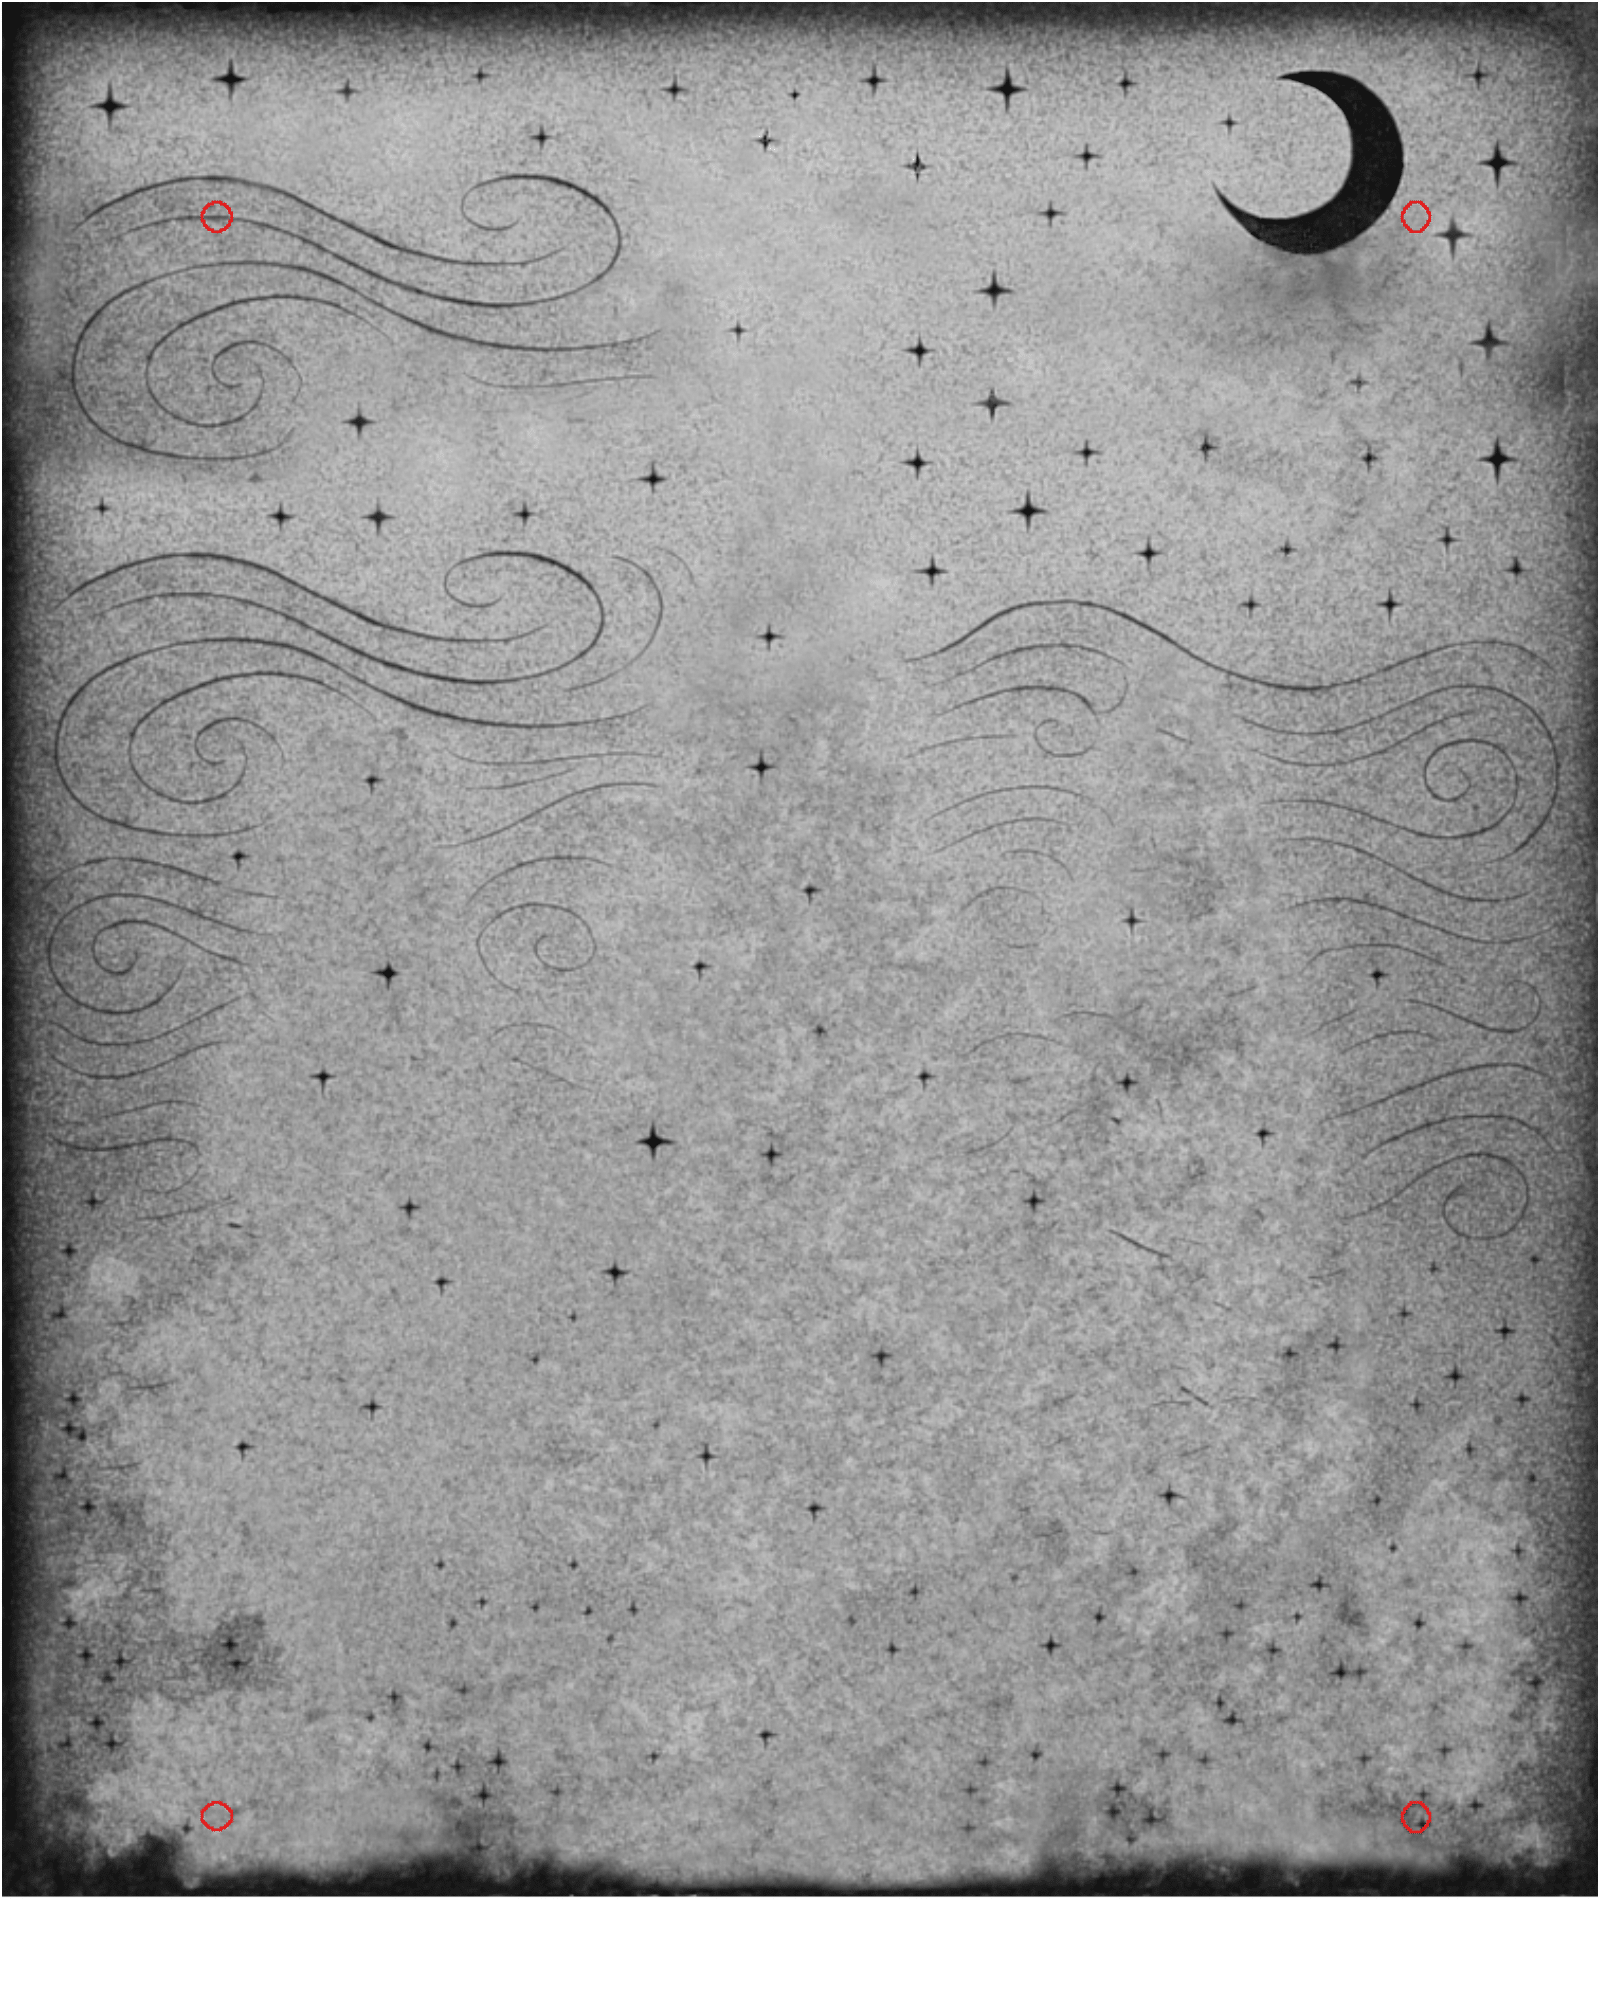
The above picture depicts the first layer (background layer, which depicts a night sky and a moon) spaced by standoffs off from the board on which the LED rope is mounted.
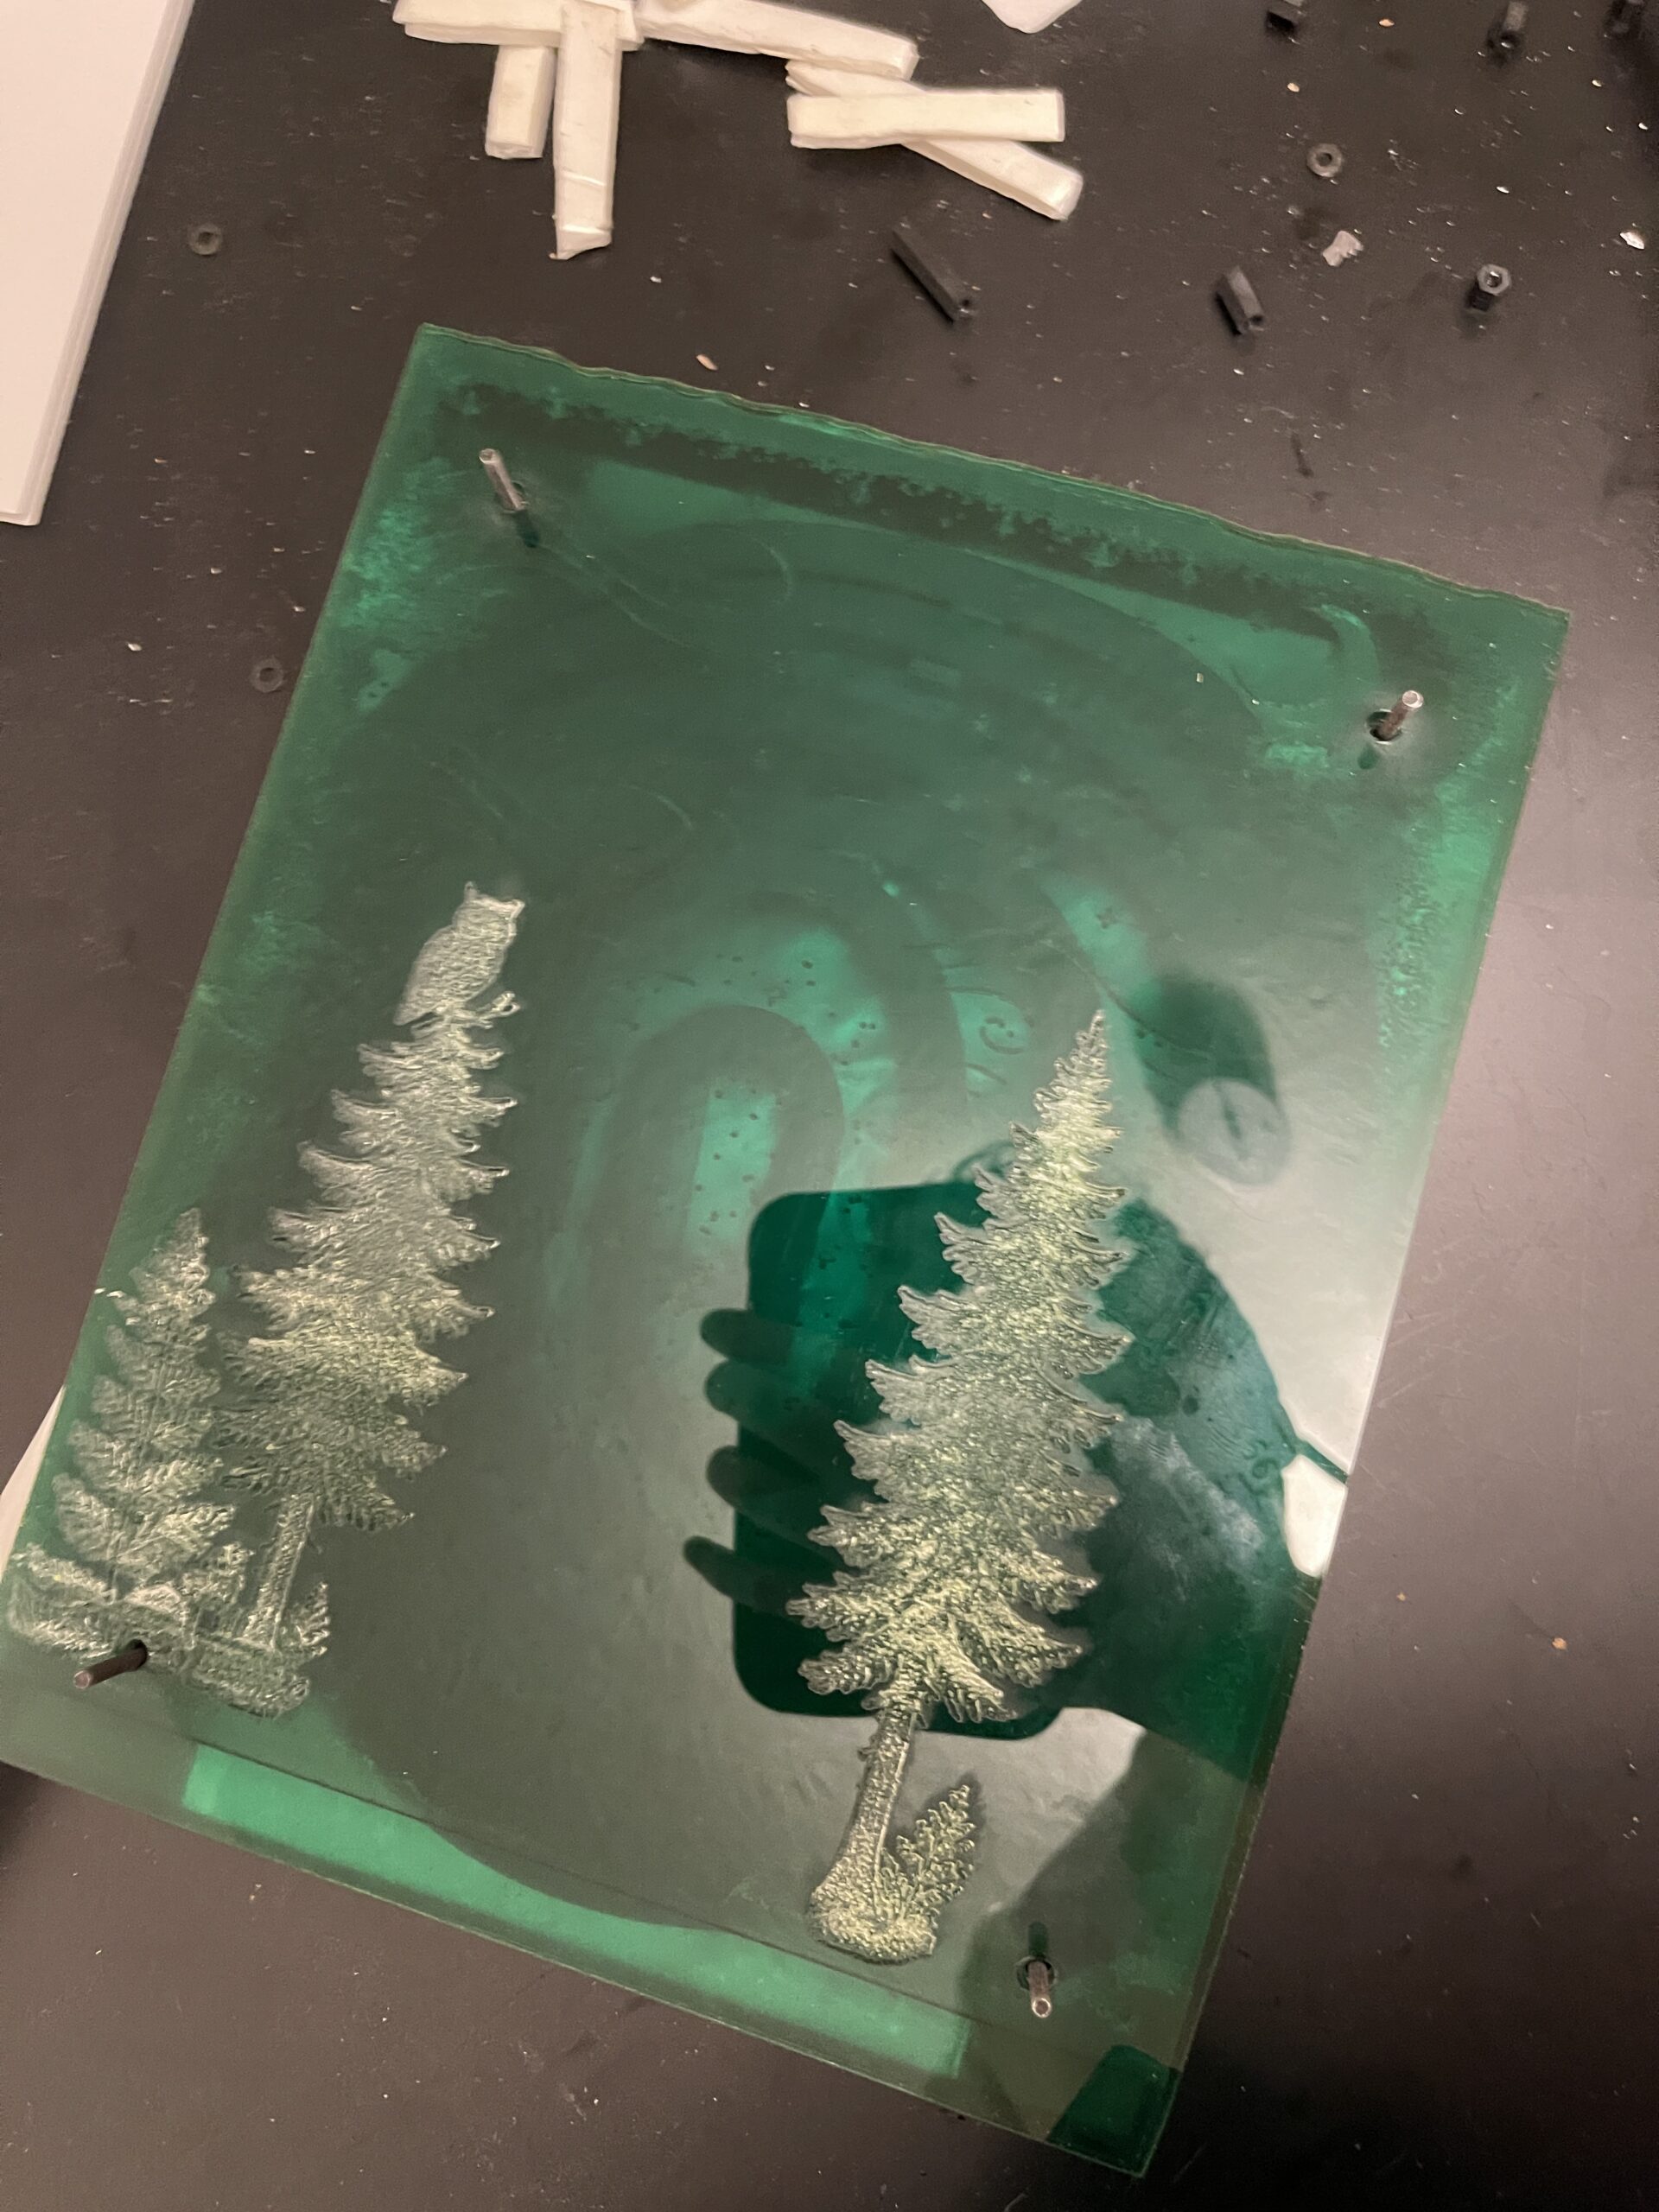
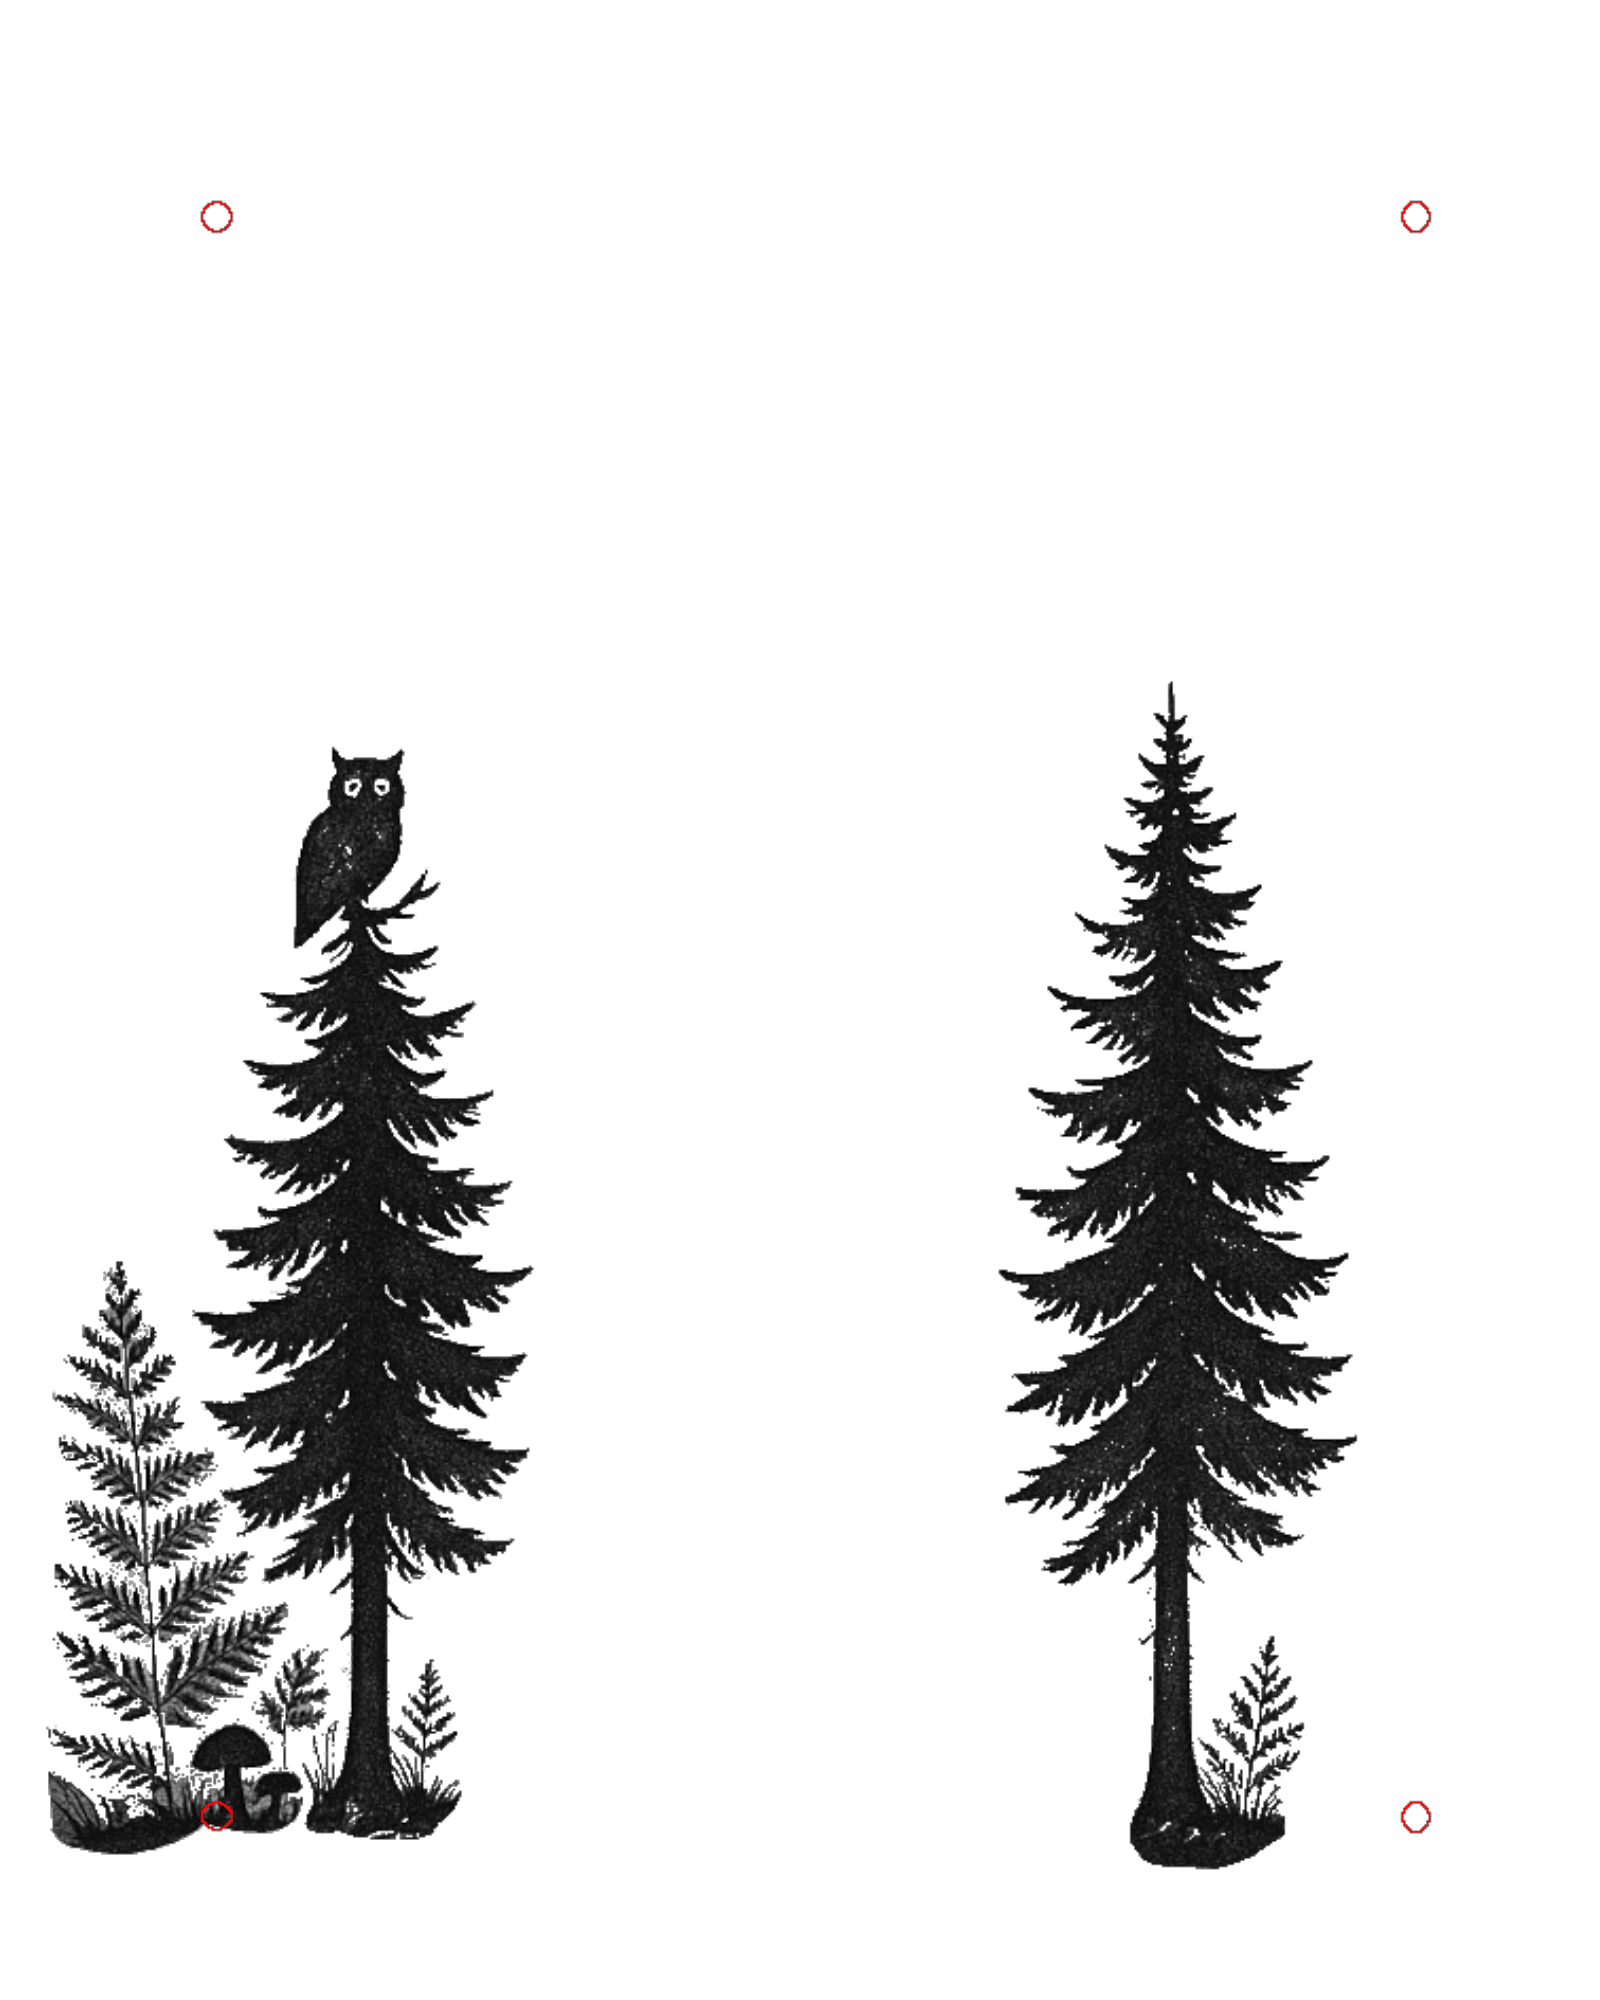
These next two layers are of the two trees and the owl. It is starting to take form!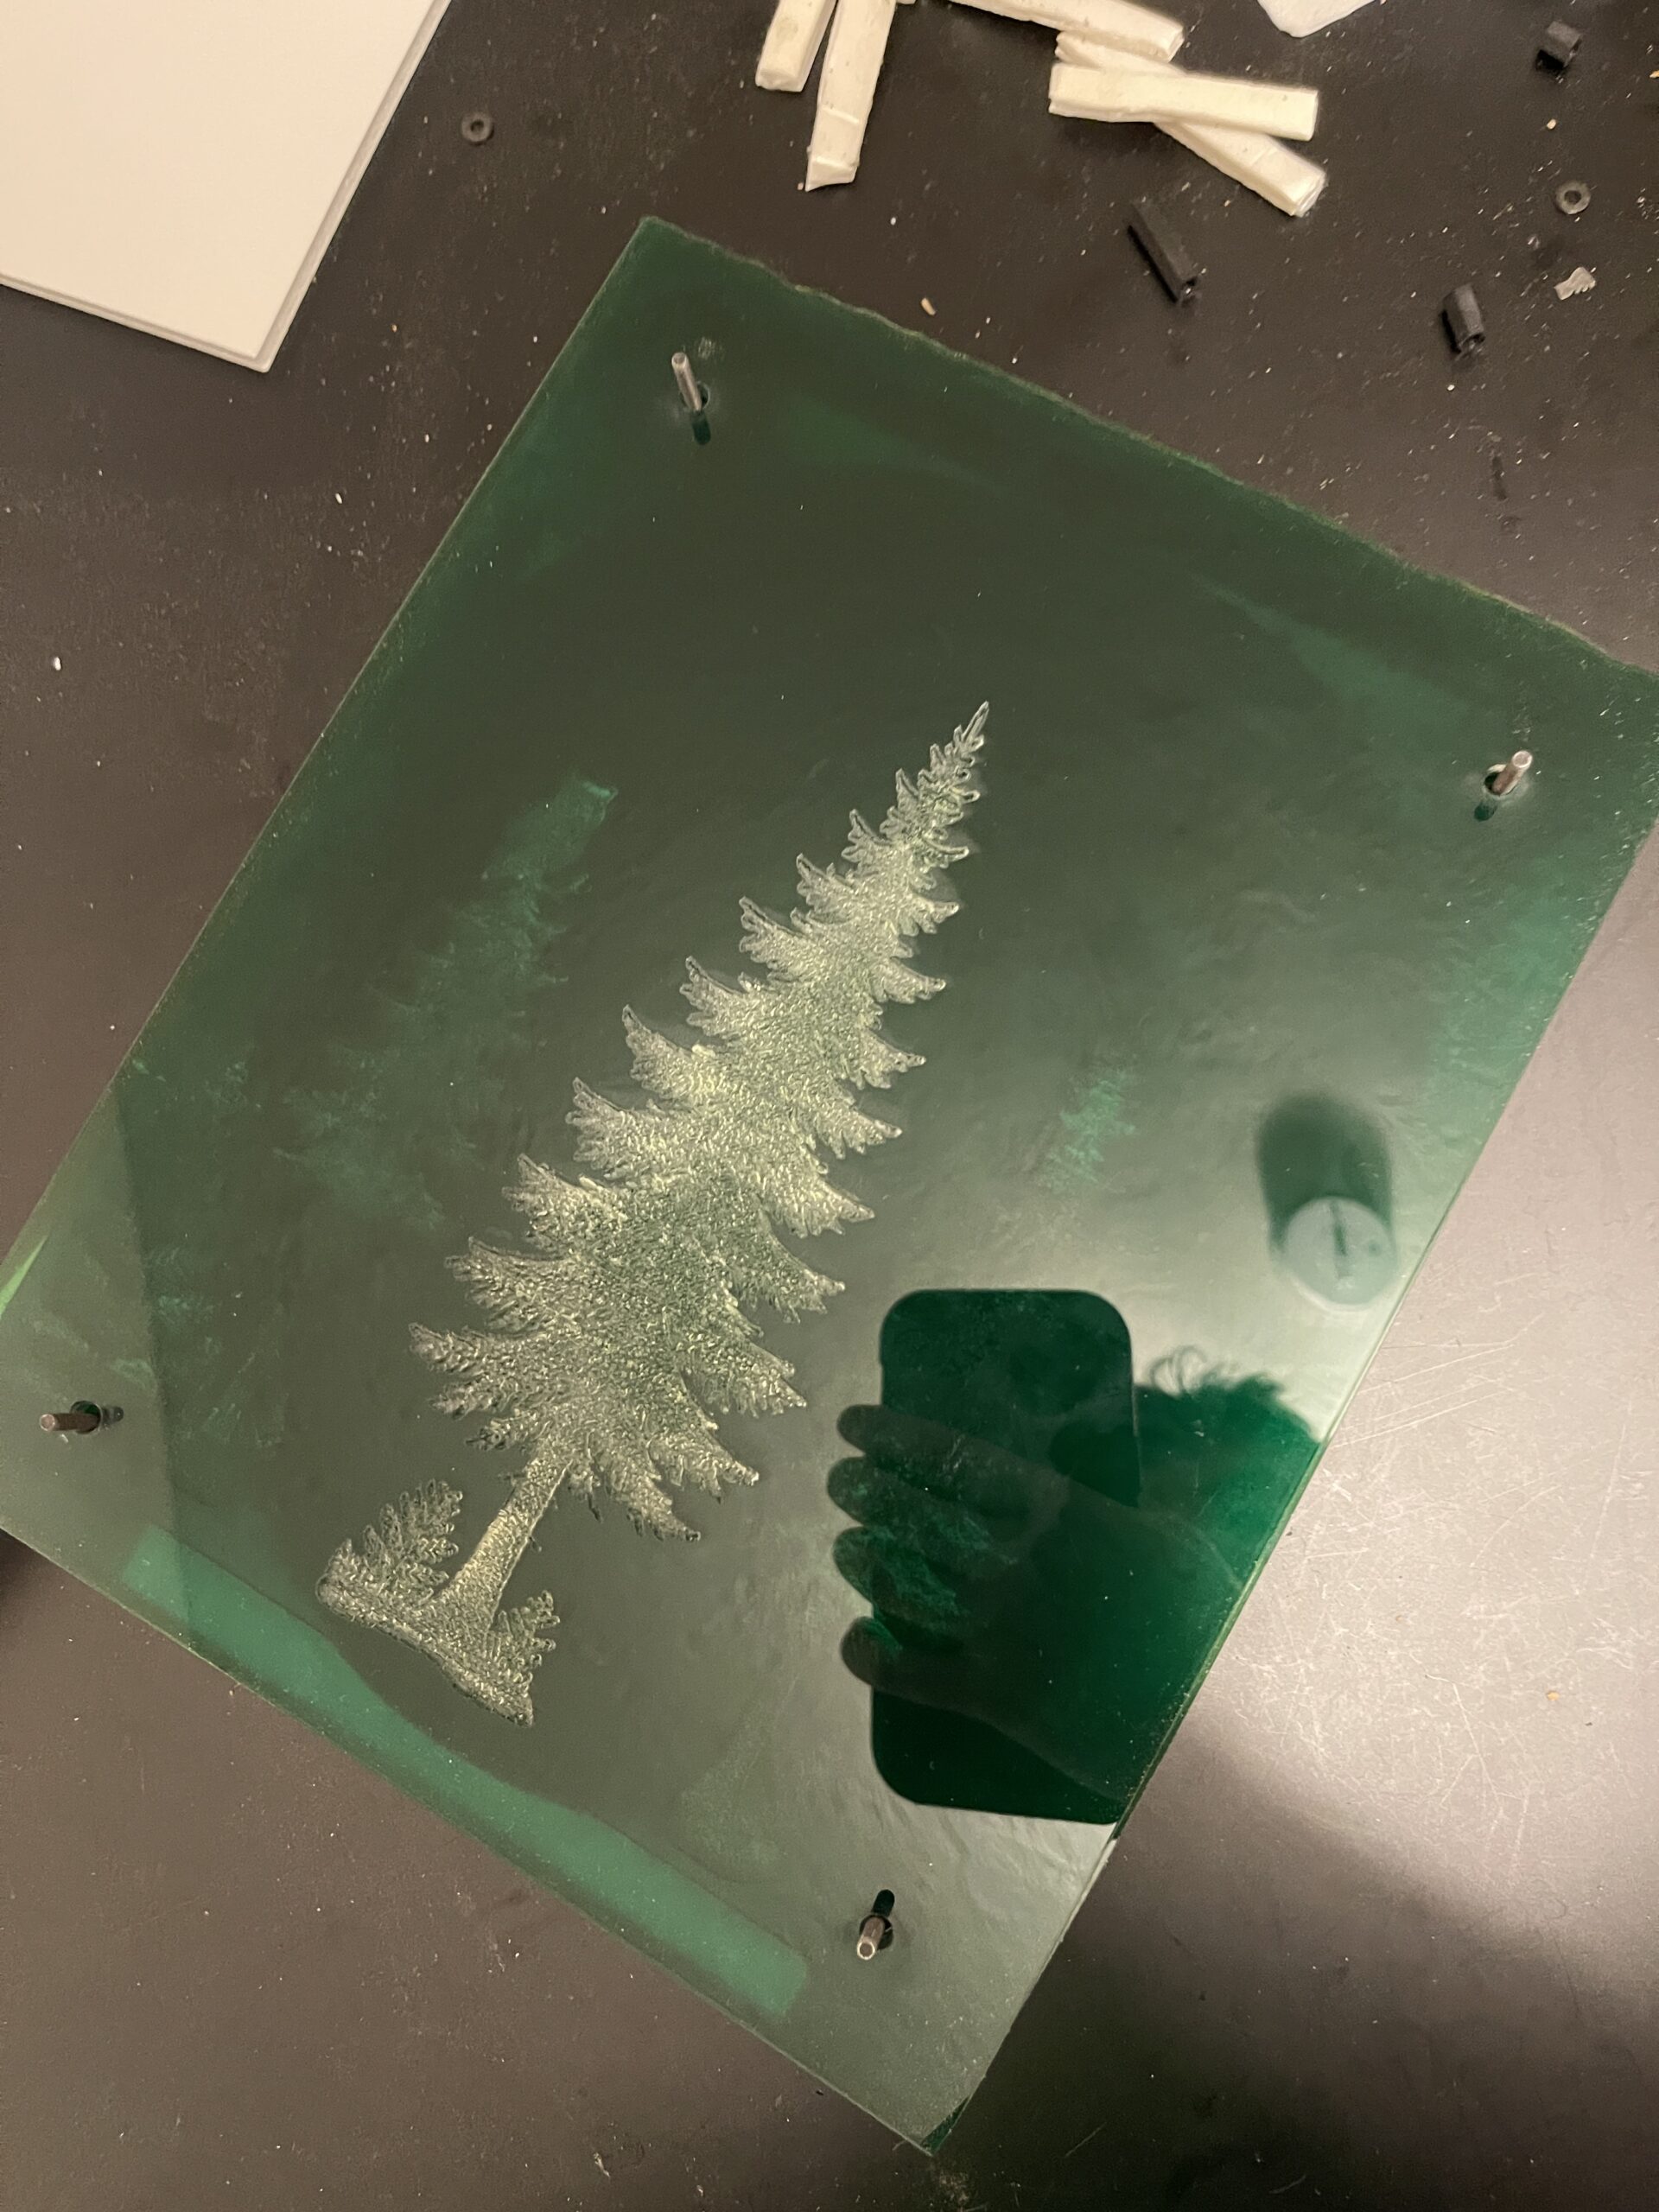
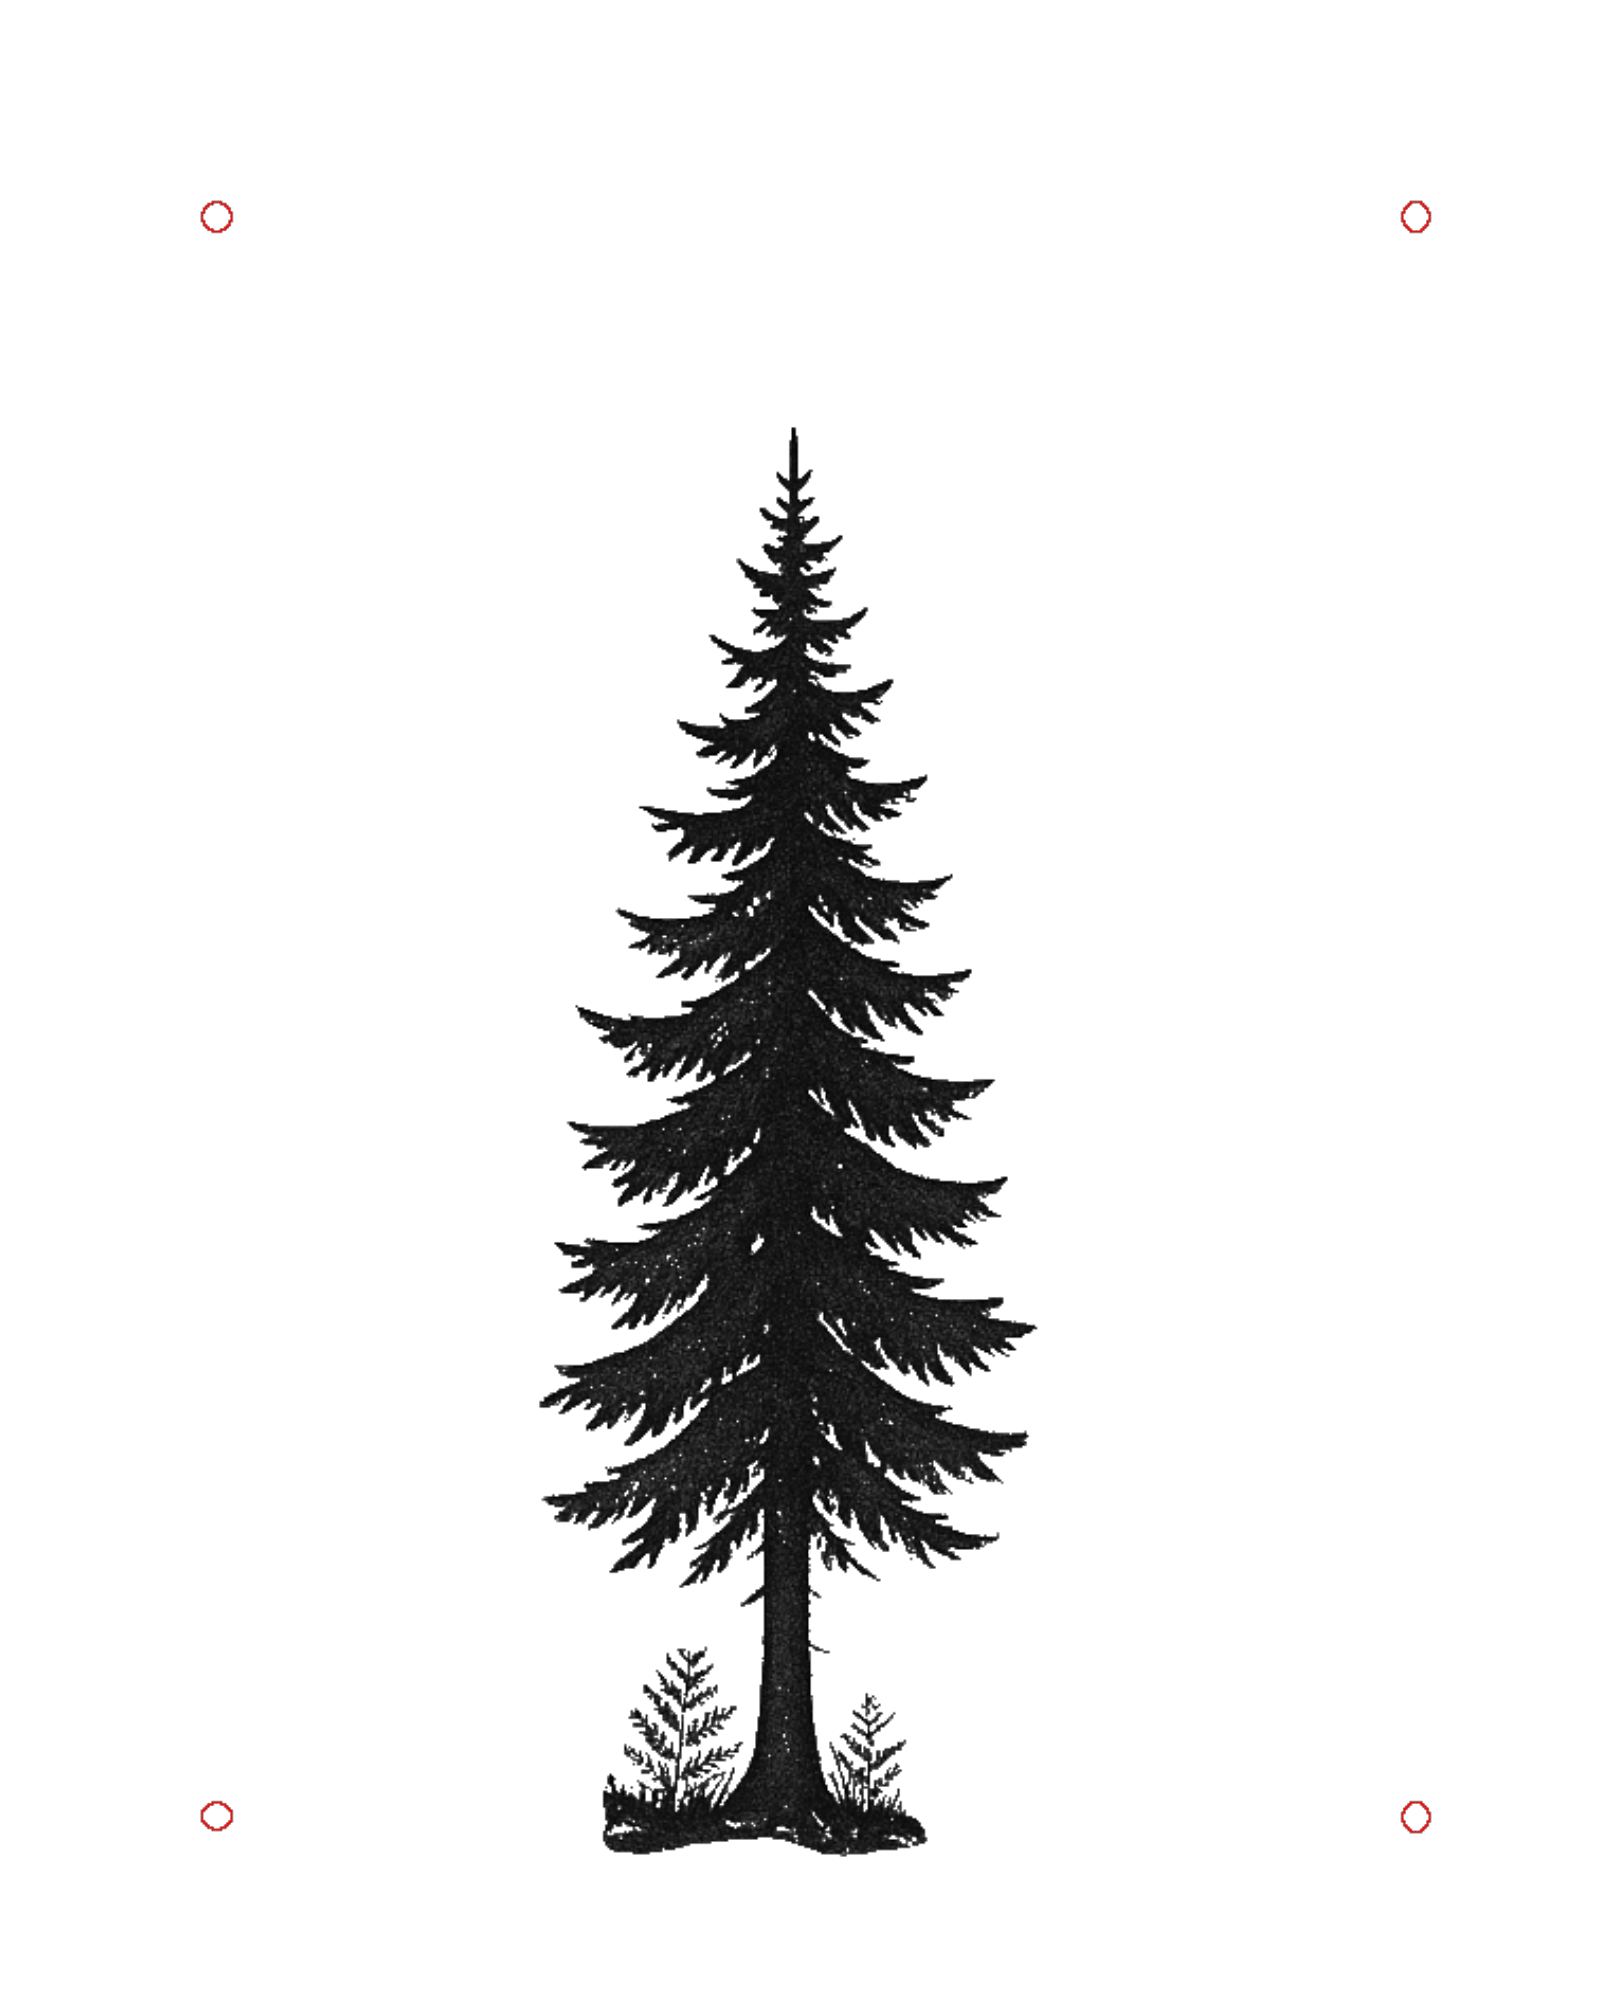
The fourth layer is of the lone middle tree. Following this layer is the foreground, which depicts the deer, mushrooms, and other shrubs.
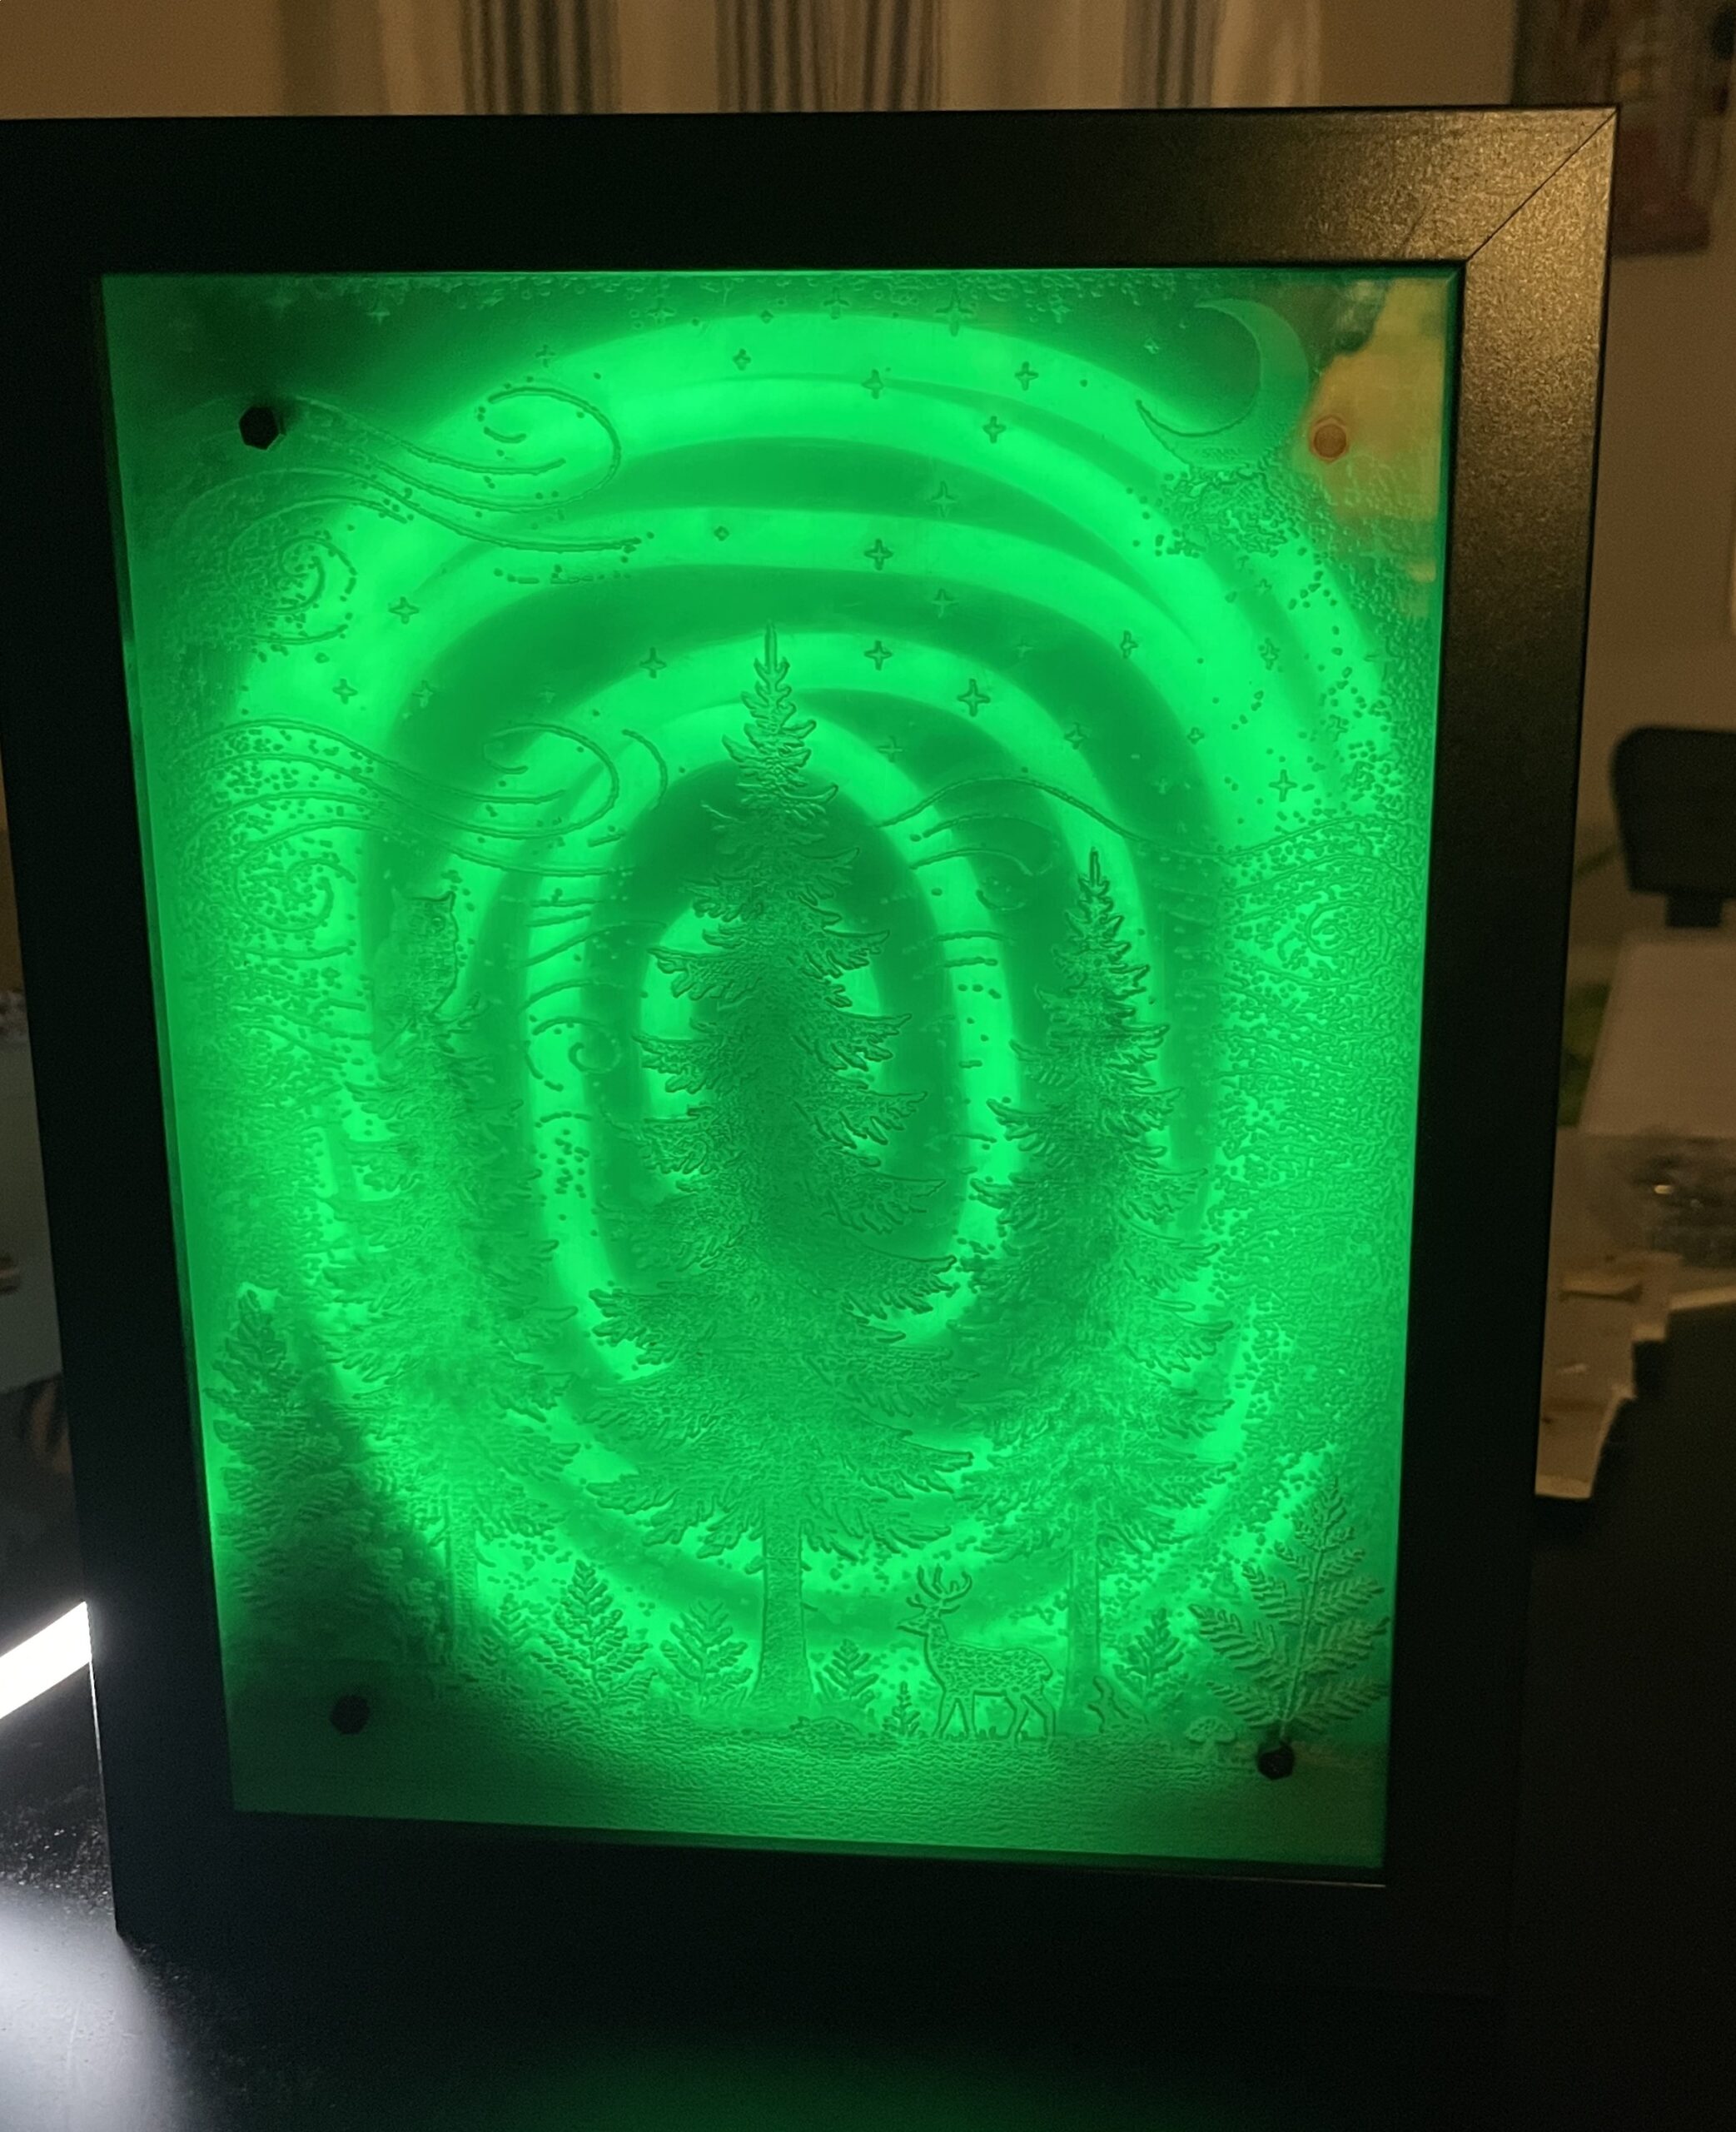
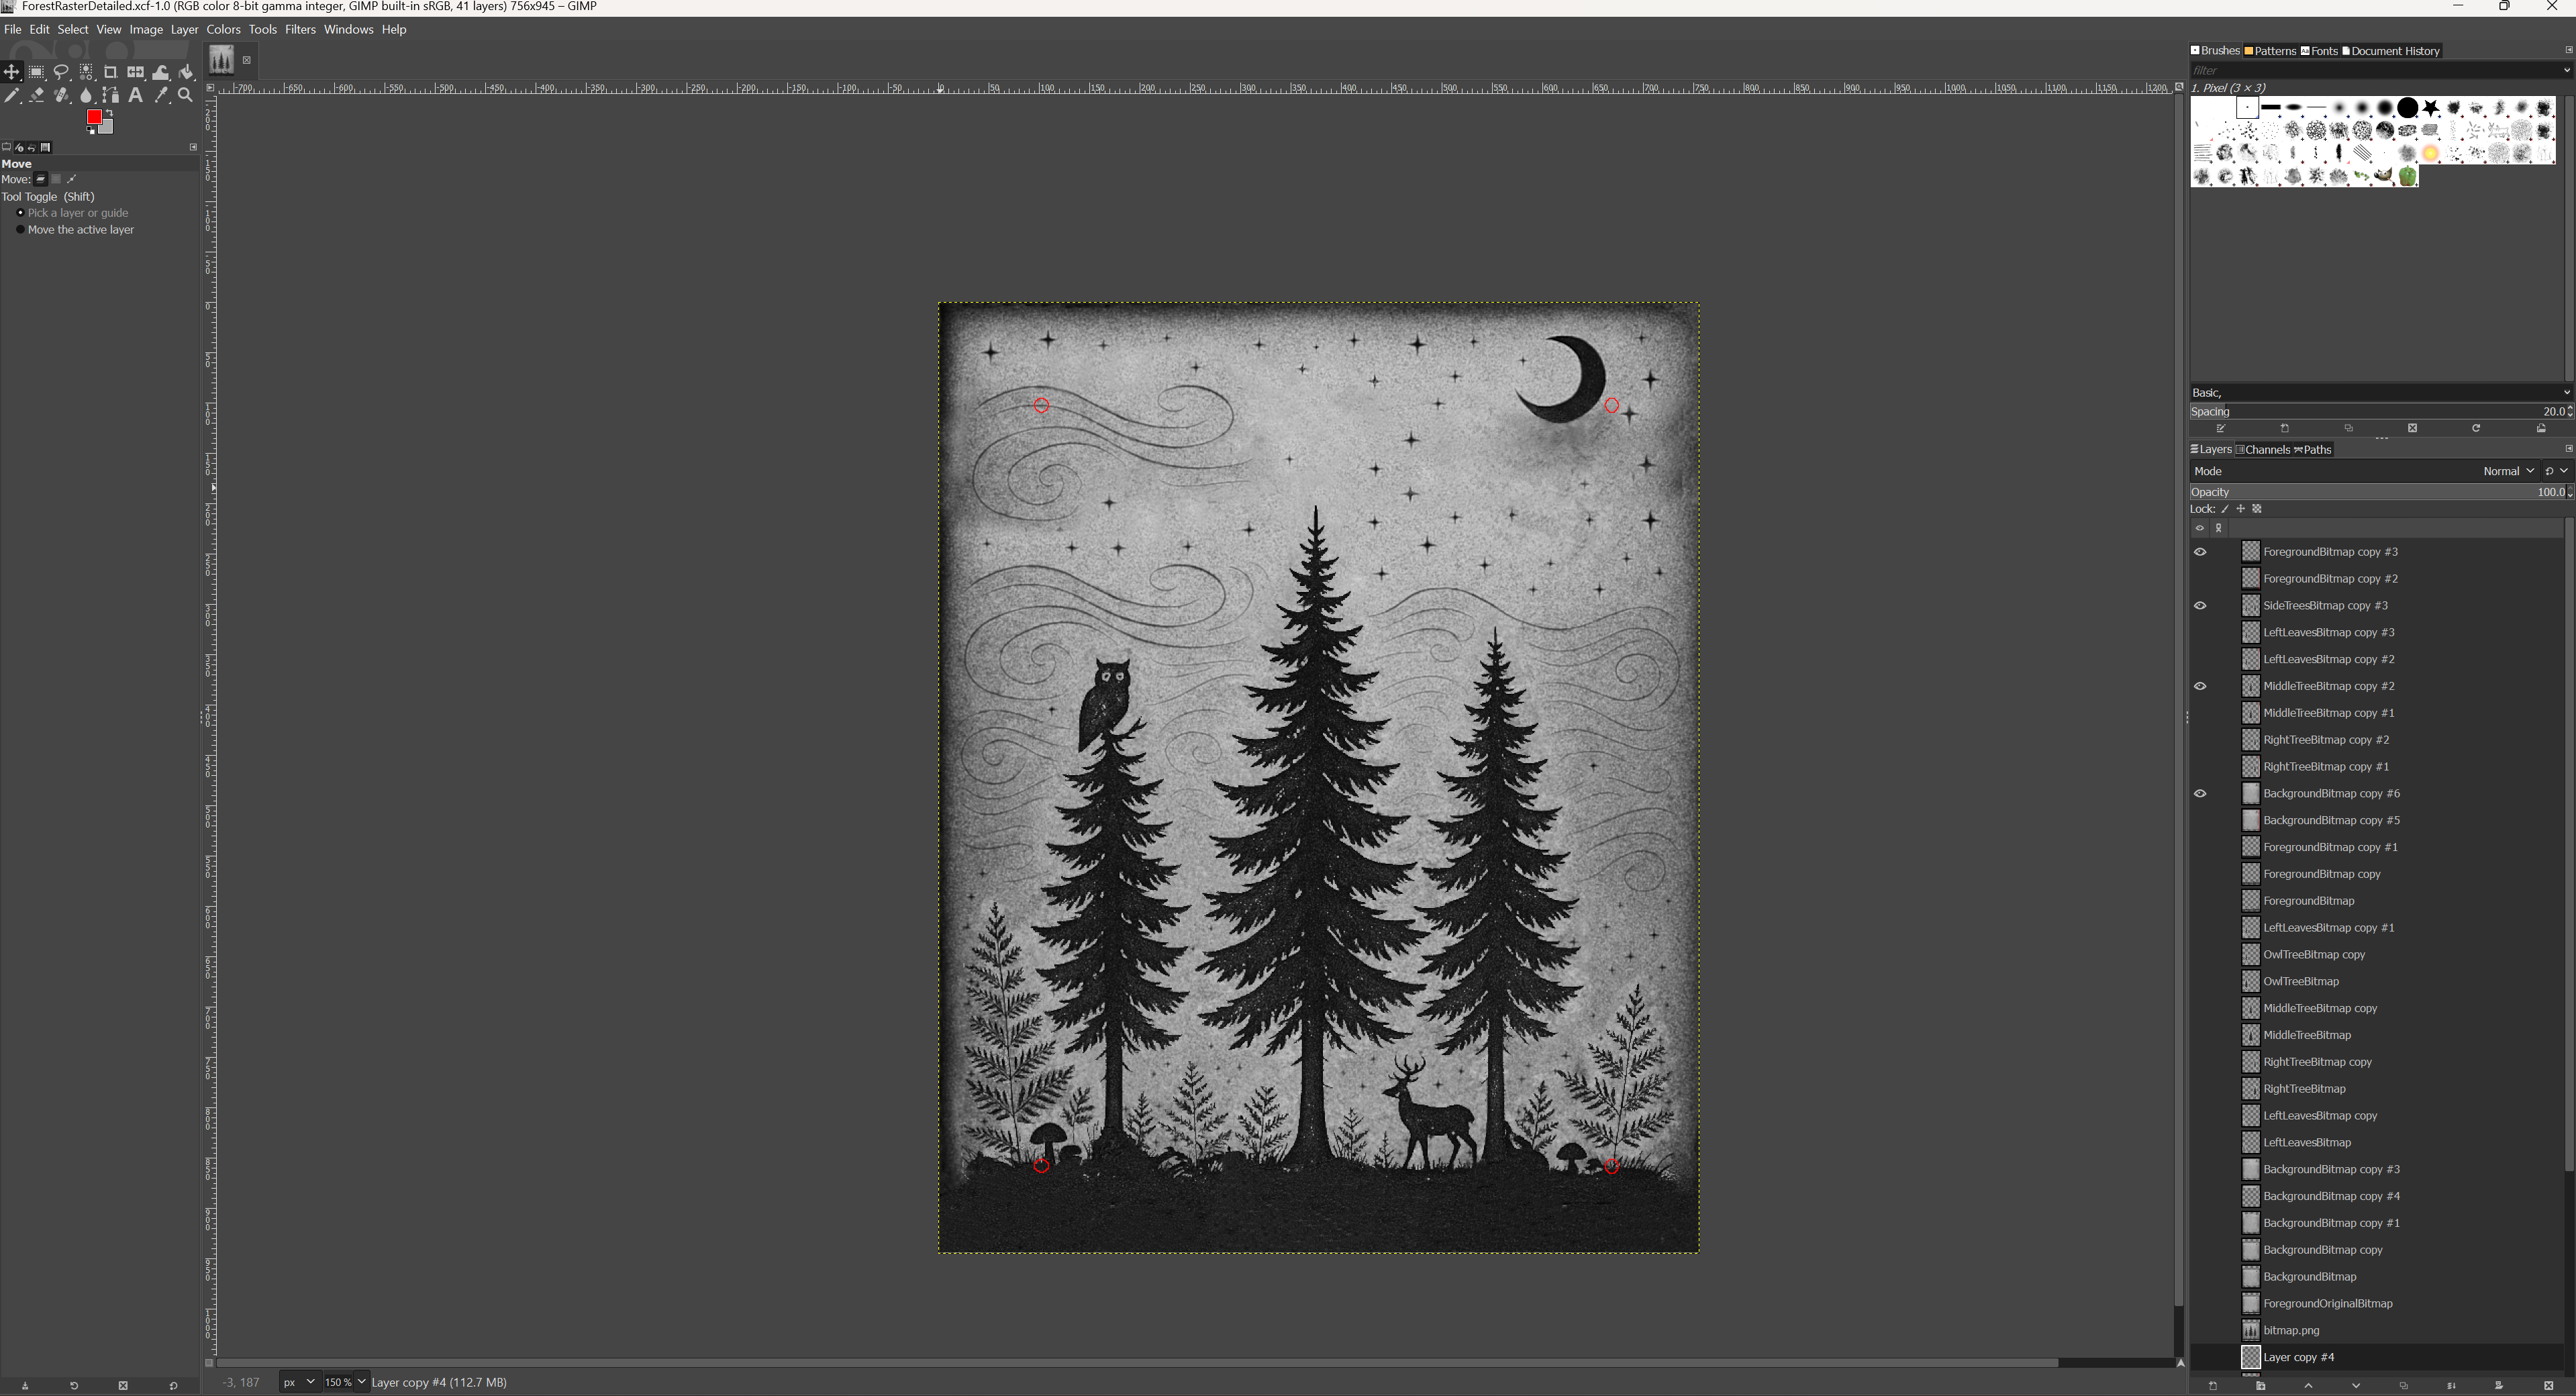
Assembling the foreground layer and the custom light box (made it another project), we get the finished product! What is not shown is the fact that there is actually *aluminum foil* lining the entire inside and back of the light box. I discovered that aluminum foil was incredibly effective at getting the light to bounce around in the light box (lighting up all the layers so maximum detail could be visible). Paired with the air gap, the volumetric lightning ended up being very successful, it looks almost like a portal.
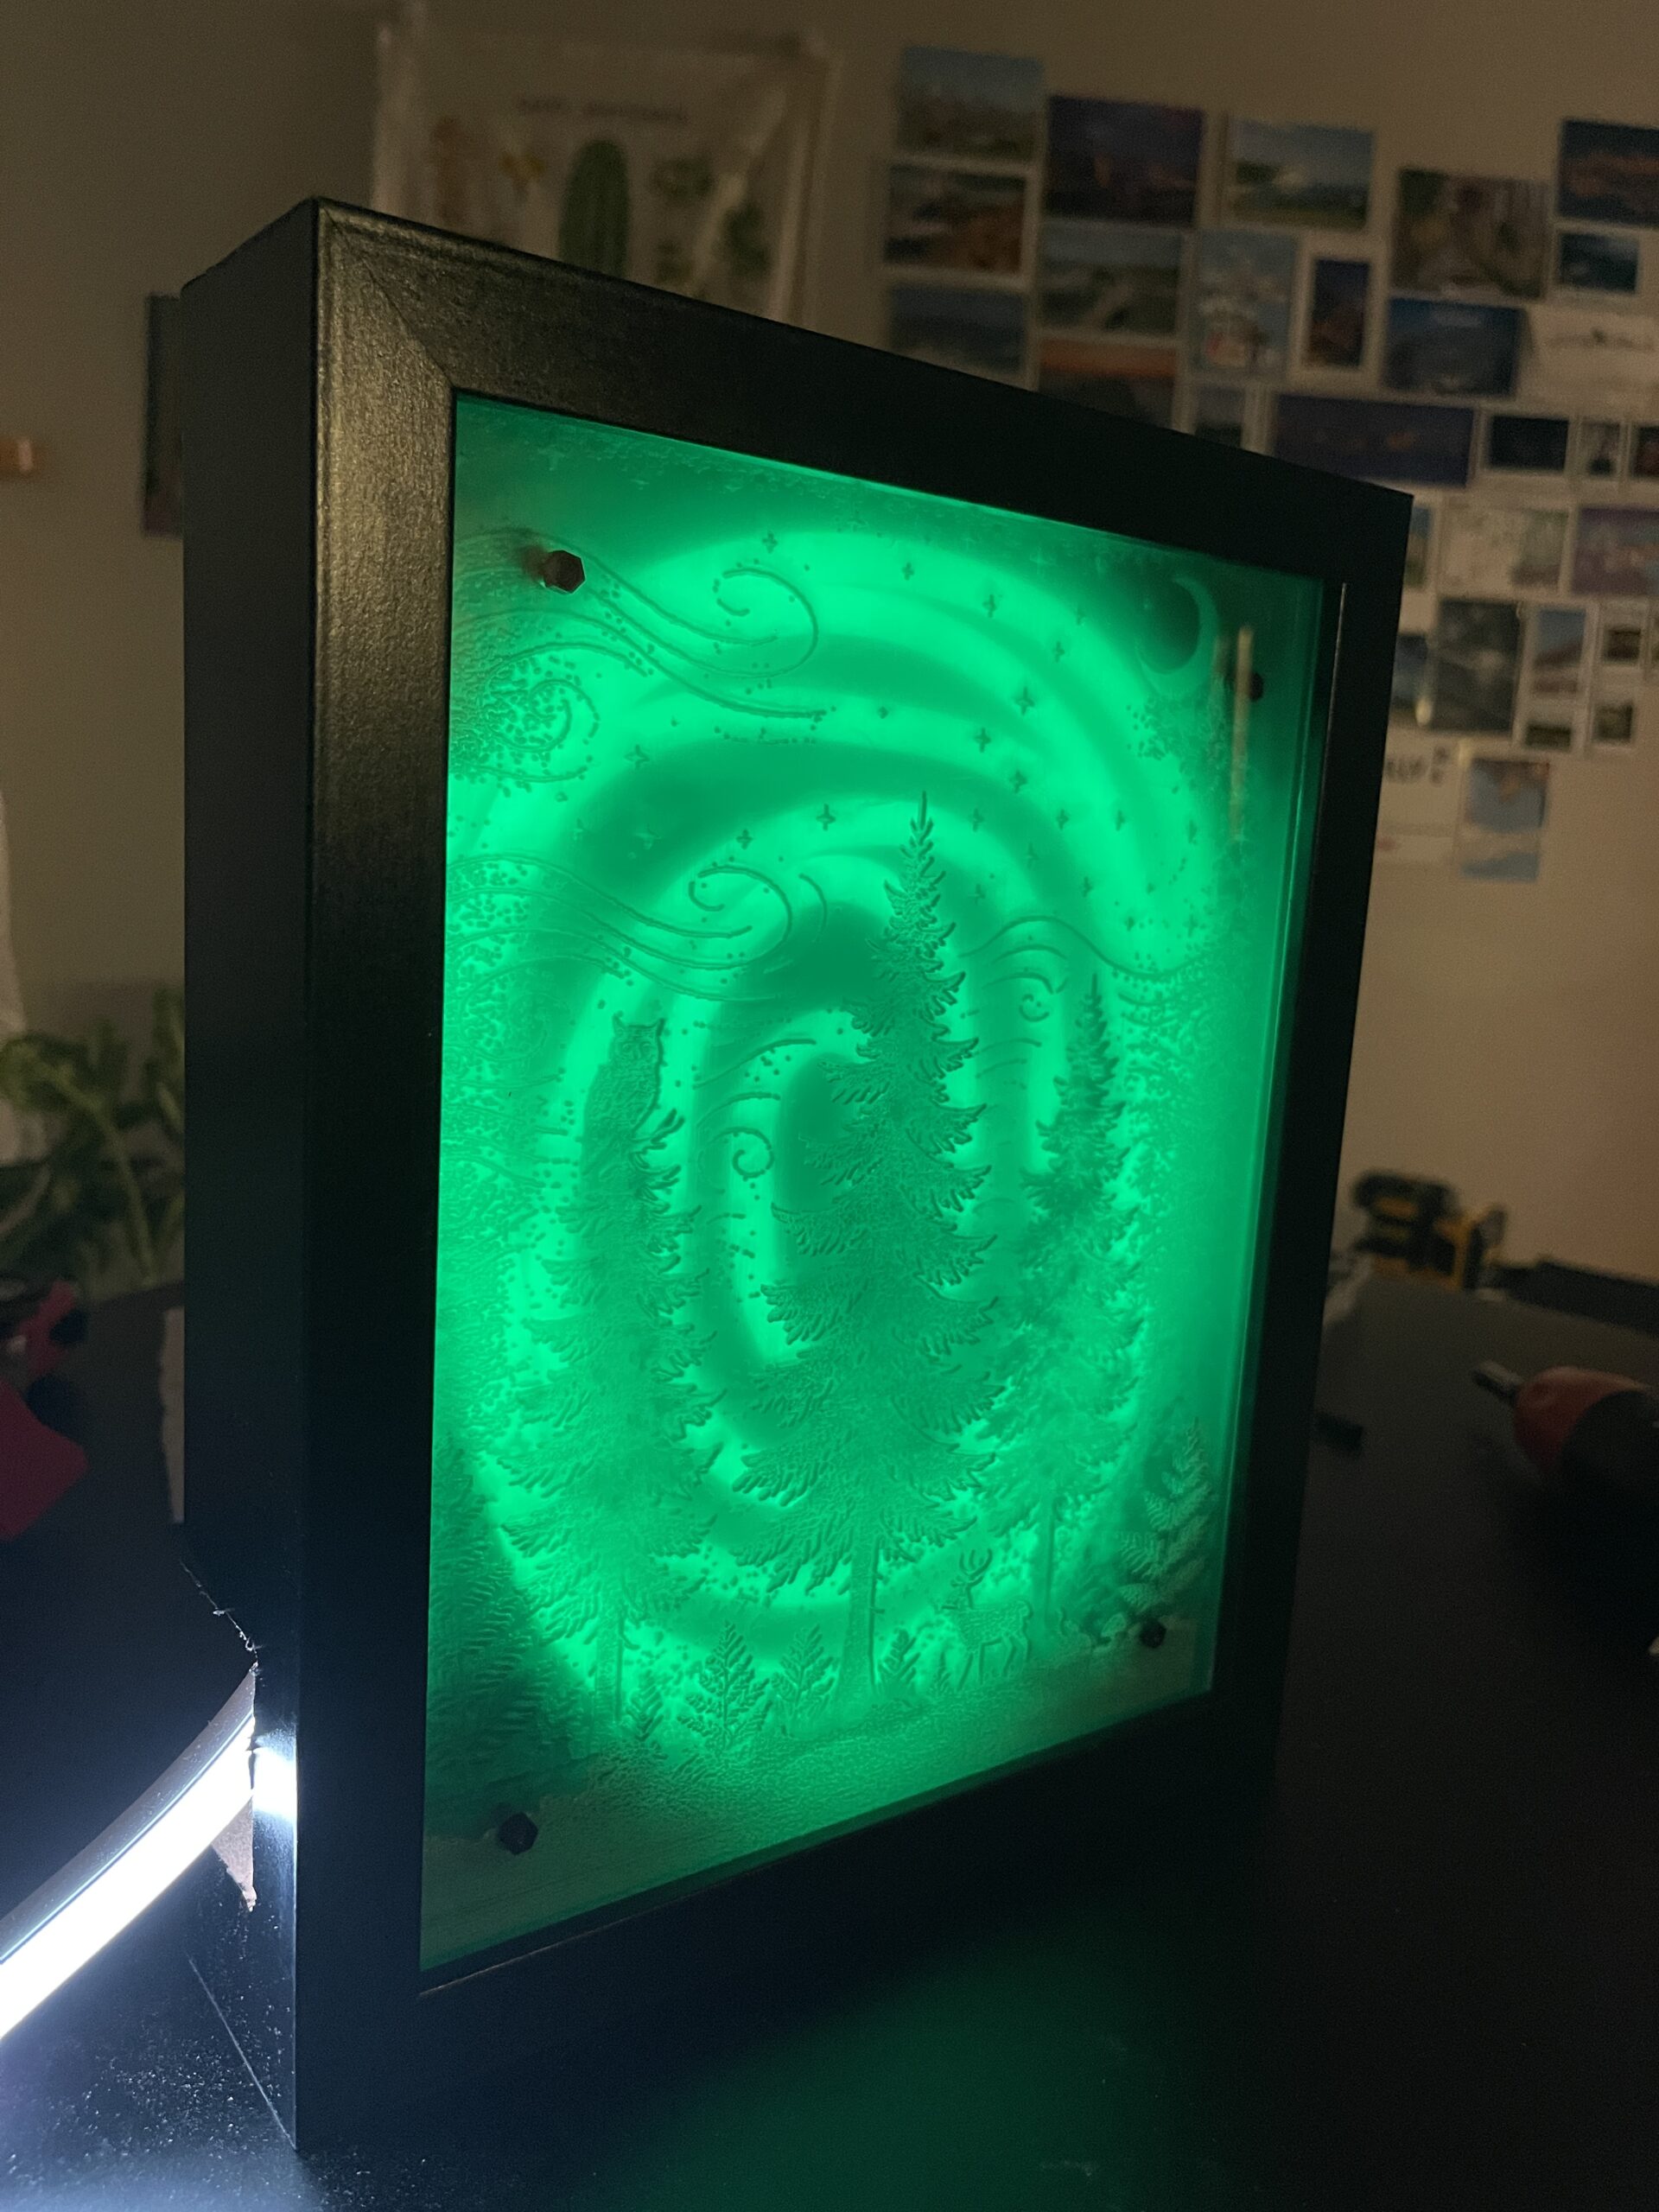
The whole project is completely self-contained within this box after dremeling an opening for the light rope. Despite appearances, getting this far took many weeks of planning and deliberation, especially mounting the light rope to the custom light box. There were not many good light sources readily available for the back lighting I wanted for this project, so I decided to create a spiral with this light rope in order to try to light the layers as much as possible. The nice benefit of this approach is that it makes programming cool patterns on the light rope super easy—a sequence of increasing brightness along the length of the light rope corresponds to a spiraling motion.
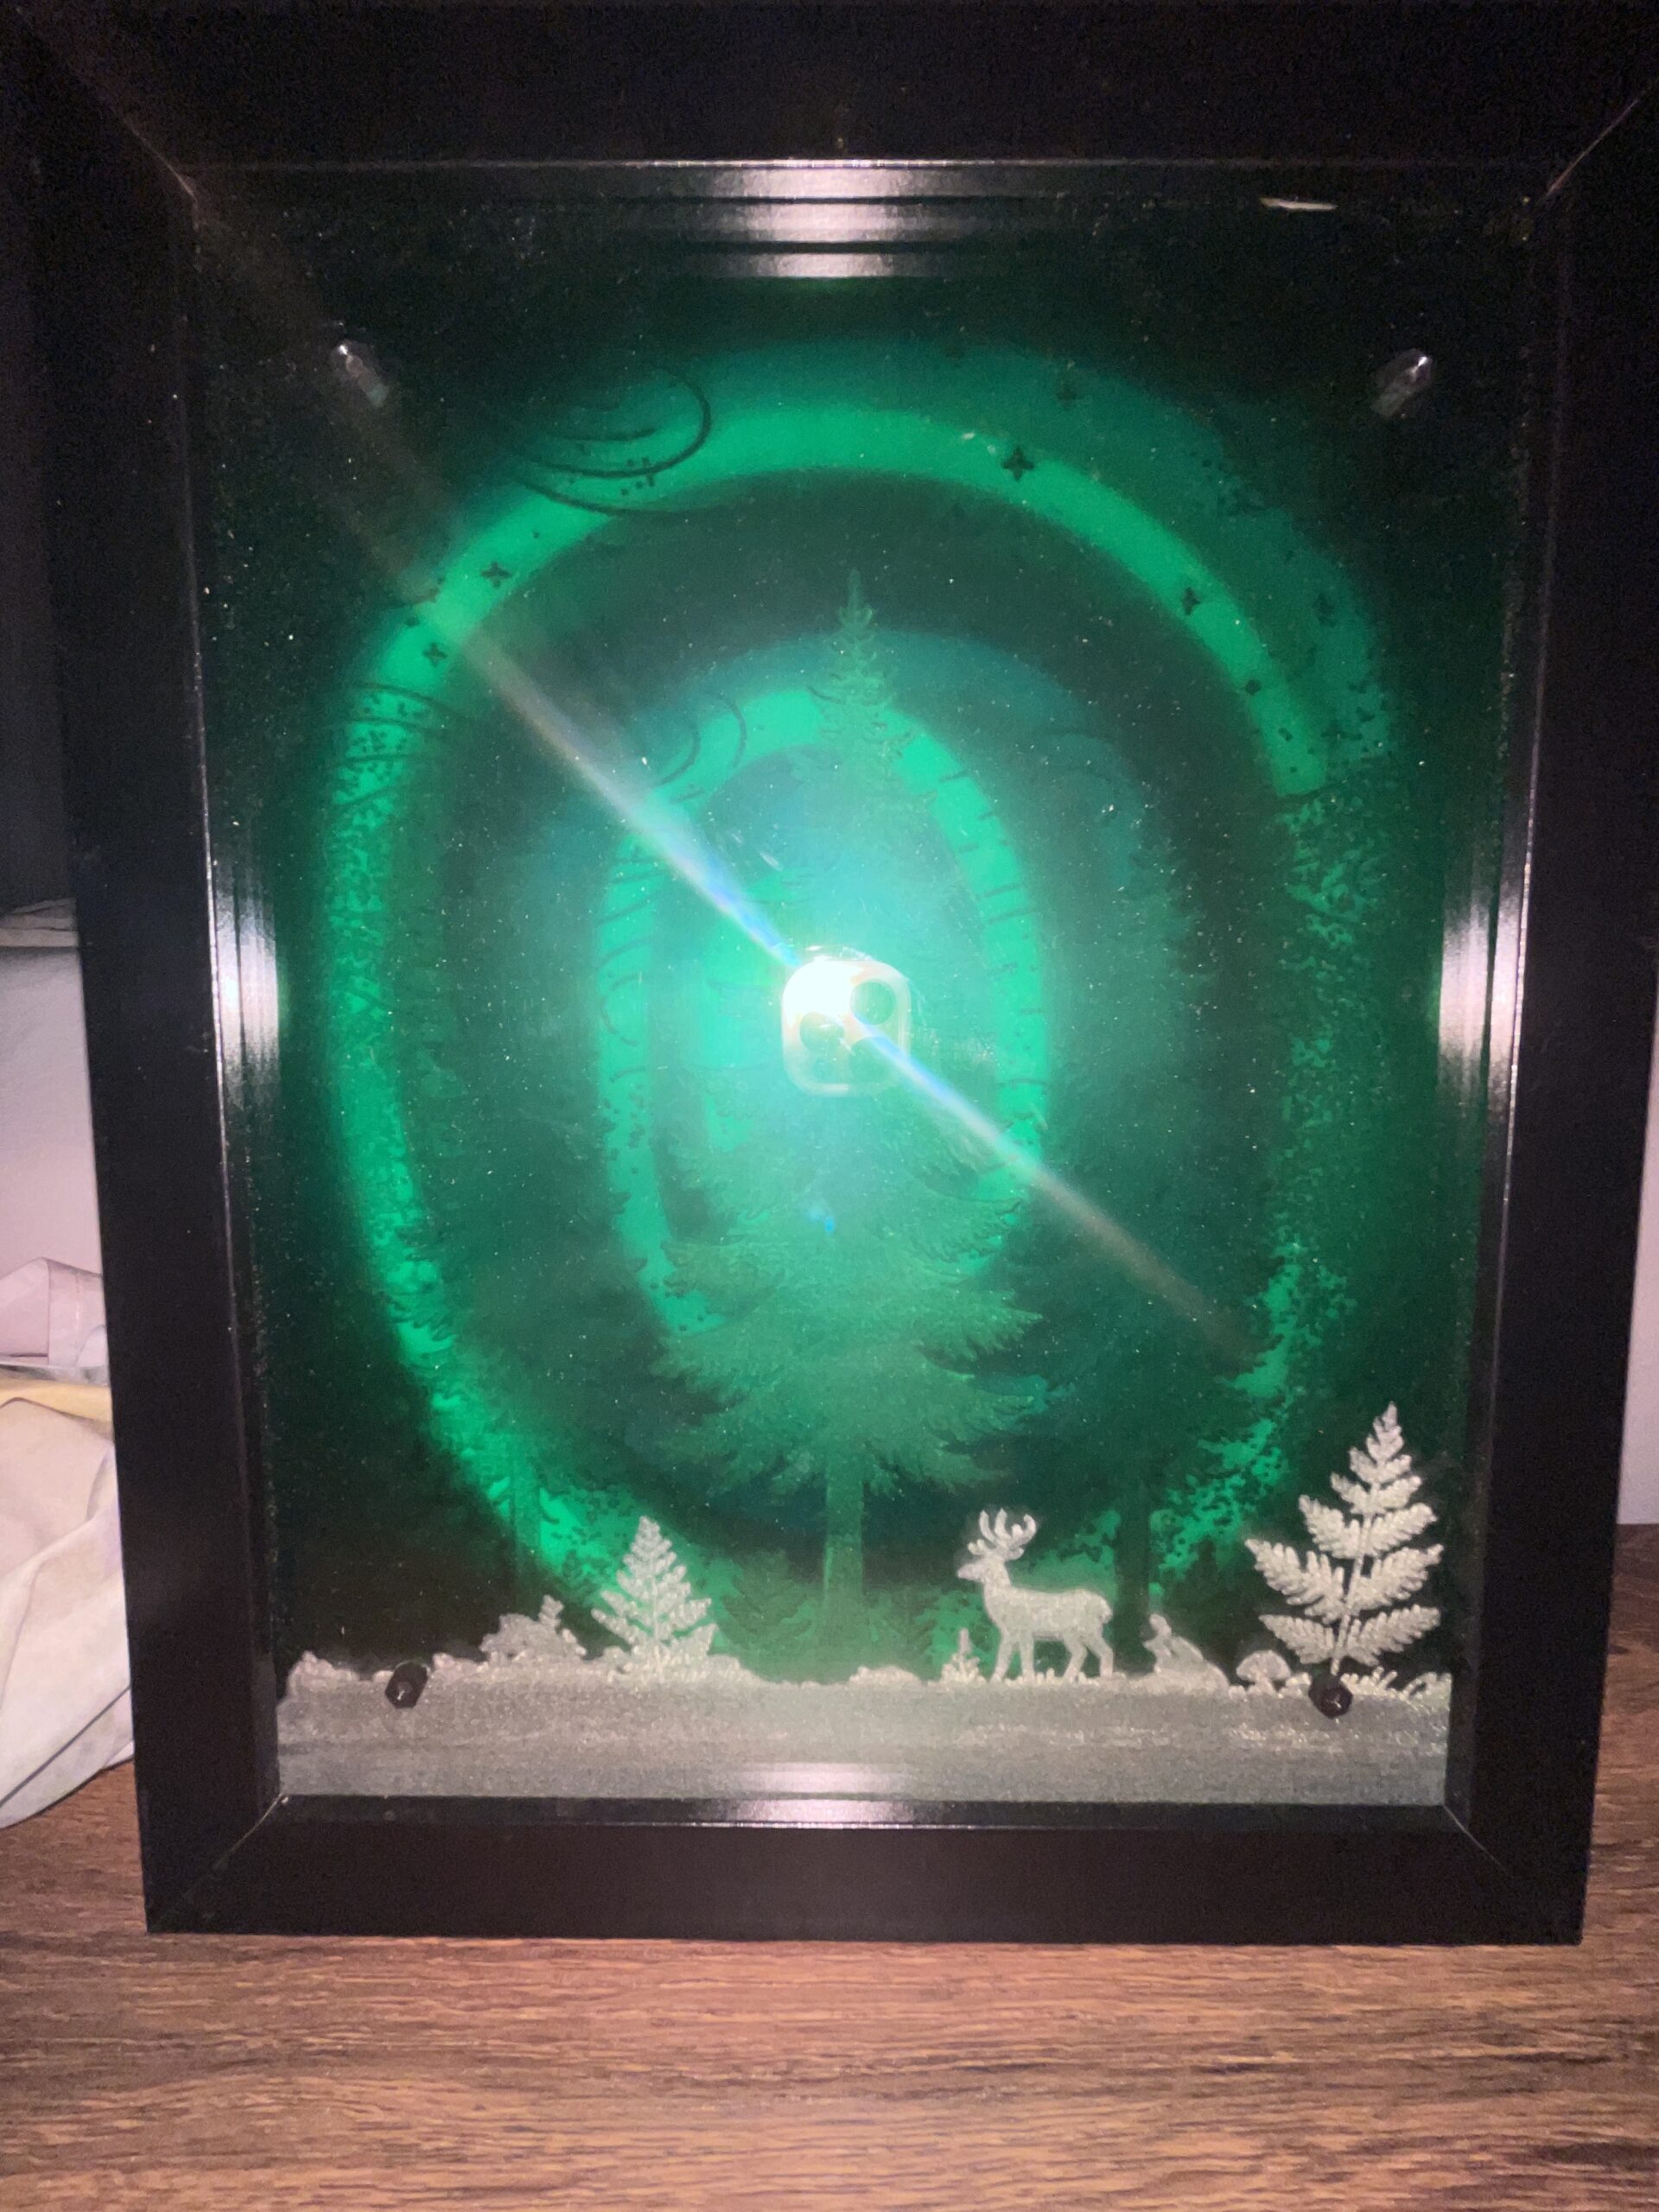
(Flash is turned on intentionally so you can see the foreground completely lit).
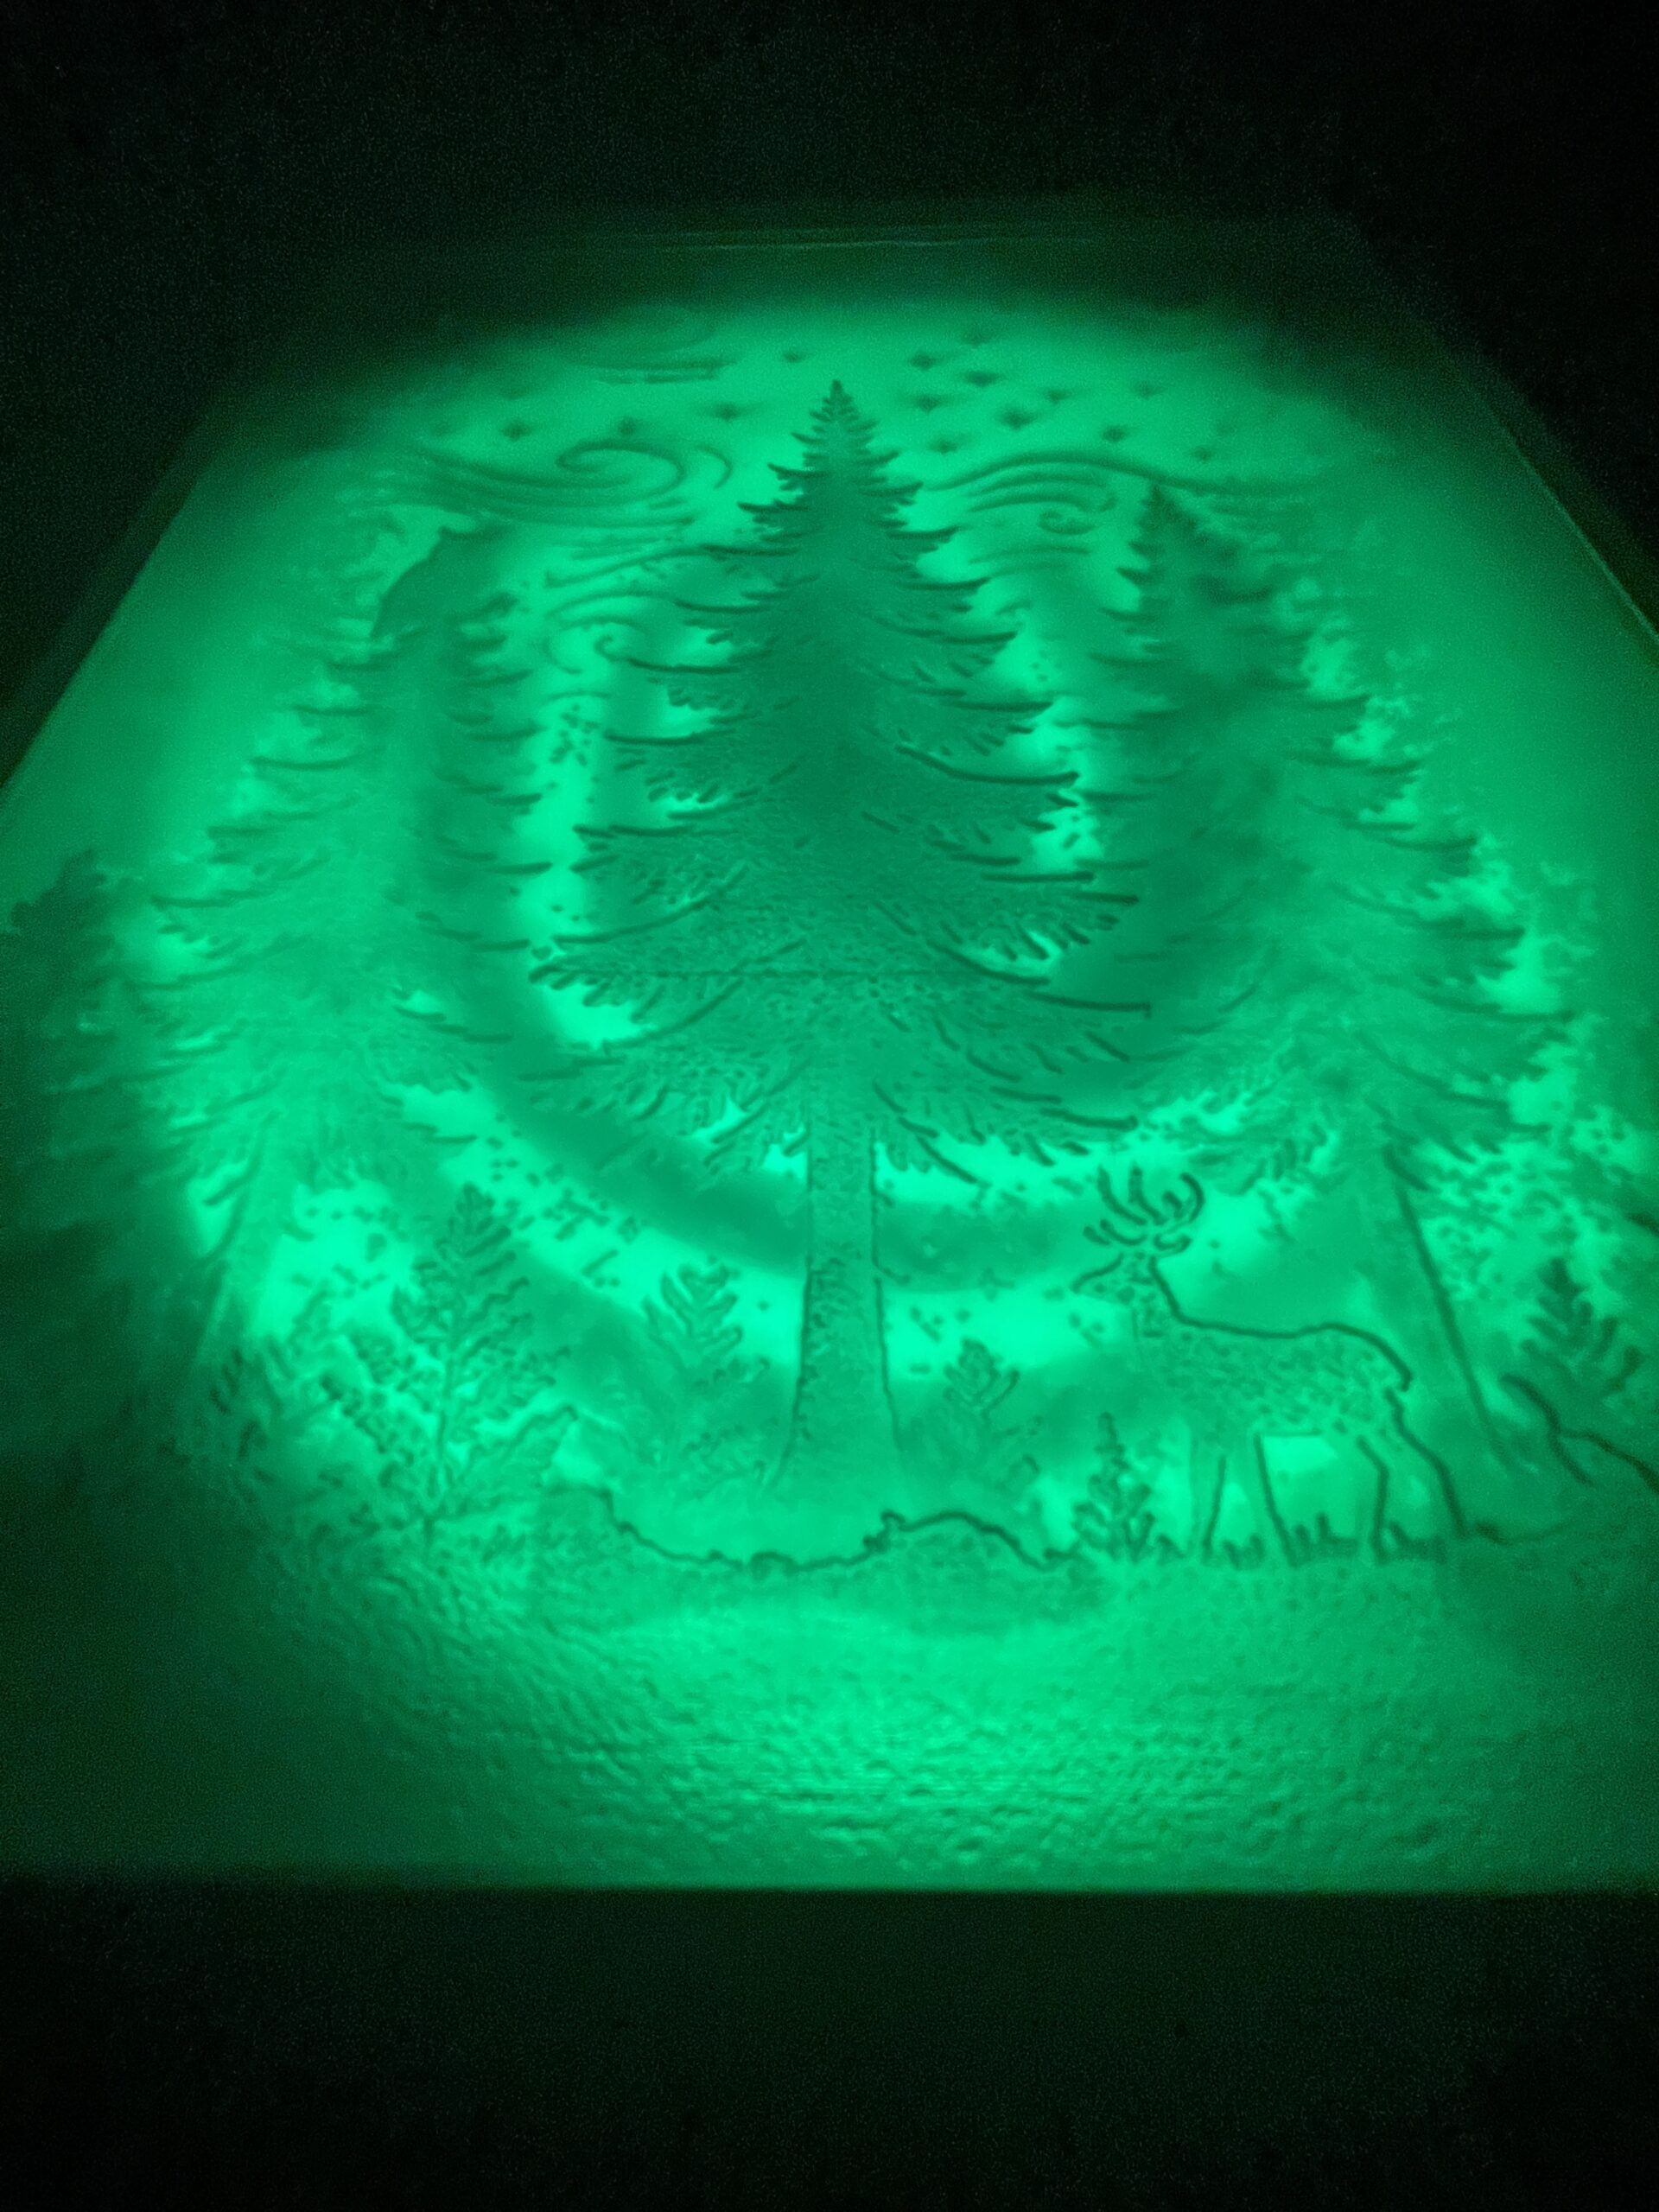
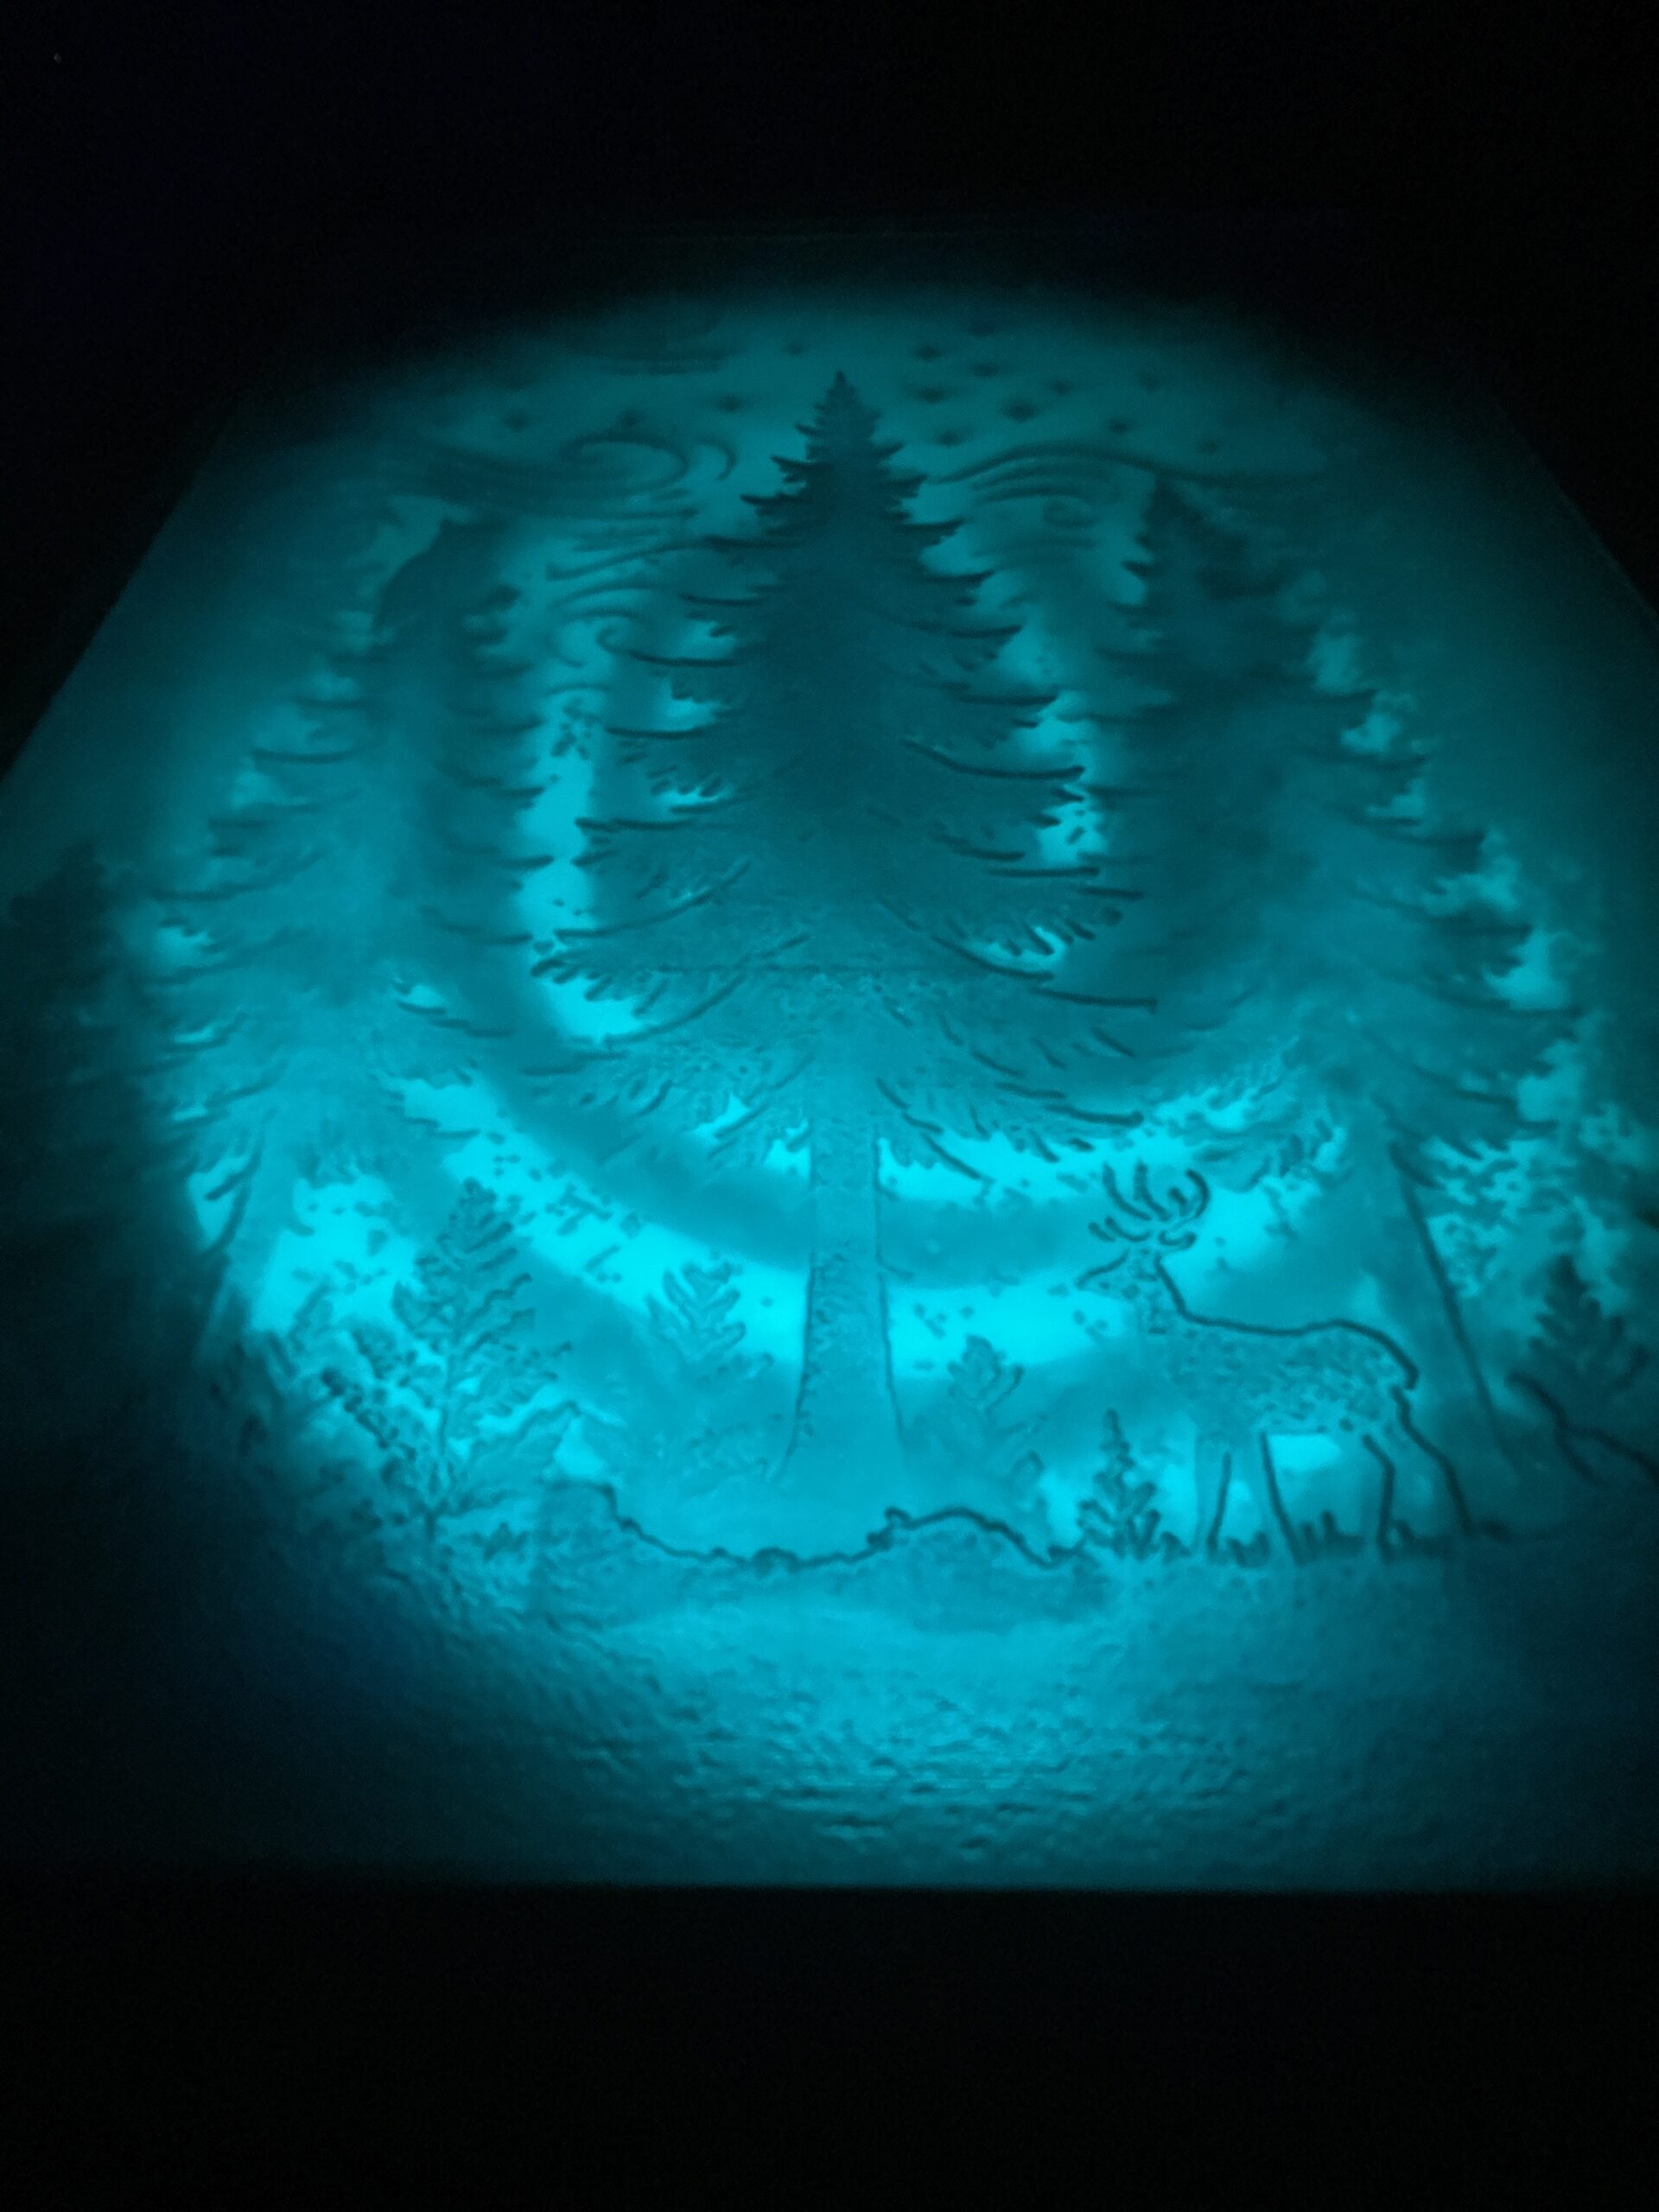
By the way, none of these pictures use a different filter—these color changes are a direct result exclusively from the light rope diffusing within the box.
Success!