This week was a bit more of a failure and recalibration for me, but as of now everything is working.
If you remember from last week, I was not able to get much work done and therefore did not have much opportunity for failure. Which means that this week I got the honor to trip and fall a bit.
The first issue I faced was the lighting:
I had come up with the lighting based off of my test cut, which was significantly smaller than my final designs. When I got my final cuts, I tested the lighting again and discovered the hole that I had made it the back was too small for them. The light didn’t reach the edge of the cut, so you could only see the center. Even after using the largest Dremel drill bit we had, the hole was still not big enough.
So, can’t use the hole. I decided to move the light back inside the box. Problem solved. Except, now the projection is all blurry and you can’t see anything. Right, I’ve experimented with this, the light needs to be focused. Alright, I just search for a new light. Too small, not small enough, not bright enough, too bright. I actually prefer my square light. But it’s too blurry!
Gorilla tape.
I used gorilla tape <3
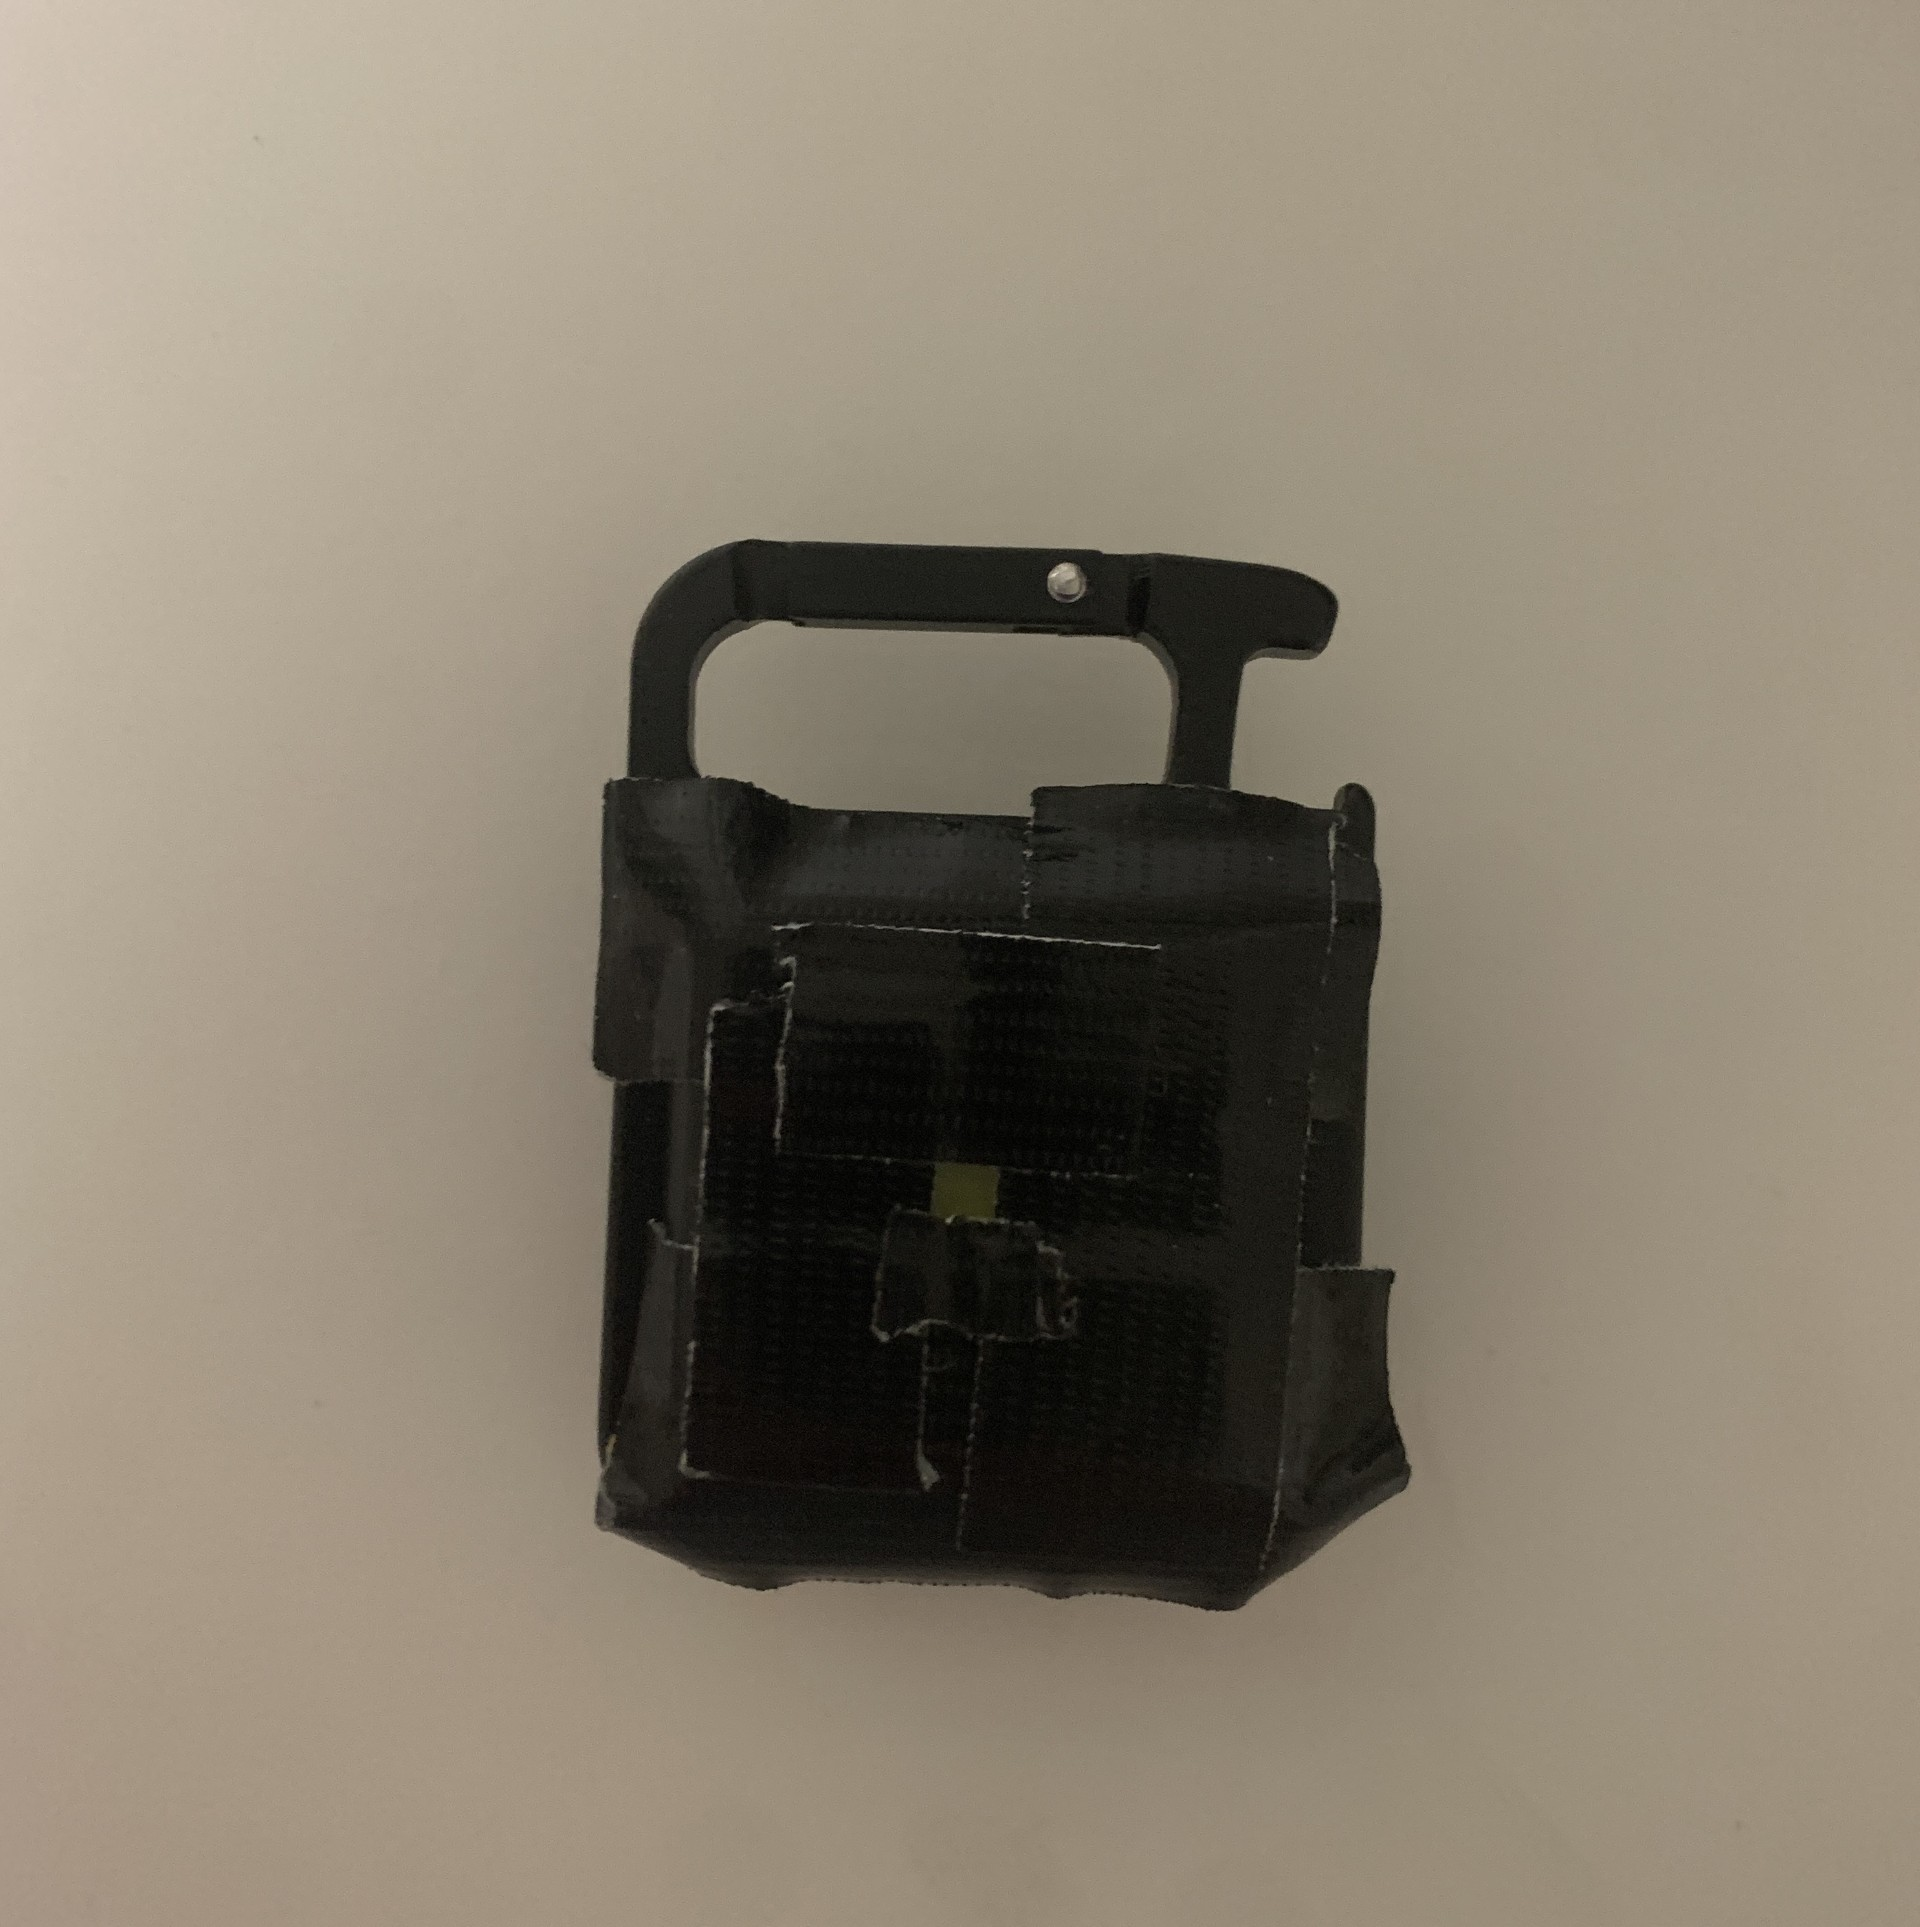
Now it works.
The second issue I faced was color:
So, as of my original concept, I wanted to paint the glass to get a stained-glass effect. I choose this because I believed it would give me the most control and largest range of colors. I was testing it this weekend, painting on a random glass object. Except the paint doesn’t work… when you project through it, it’s just straight shadow. I think I bought the wrong paint 🙁
I am not buying more paint though, so I decided to just use the cellophane. I had considered this before, but there is a limited range of colors, so I was hesitant. However, I thought it wouldn’t hurt to test out. I tried a few different things, which was fun, and this is about where I got to.
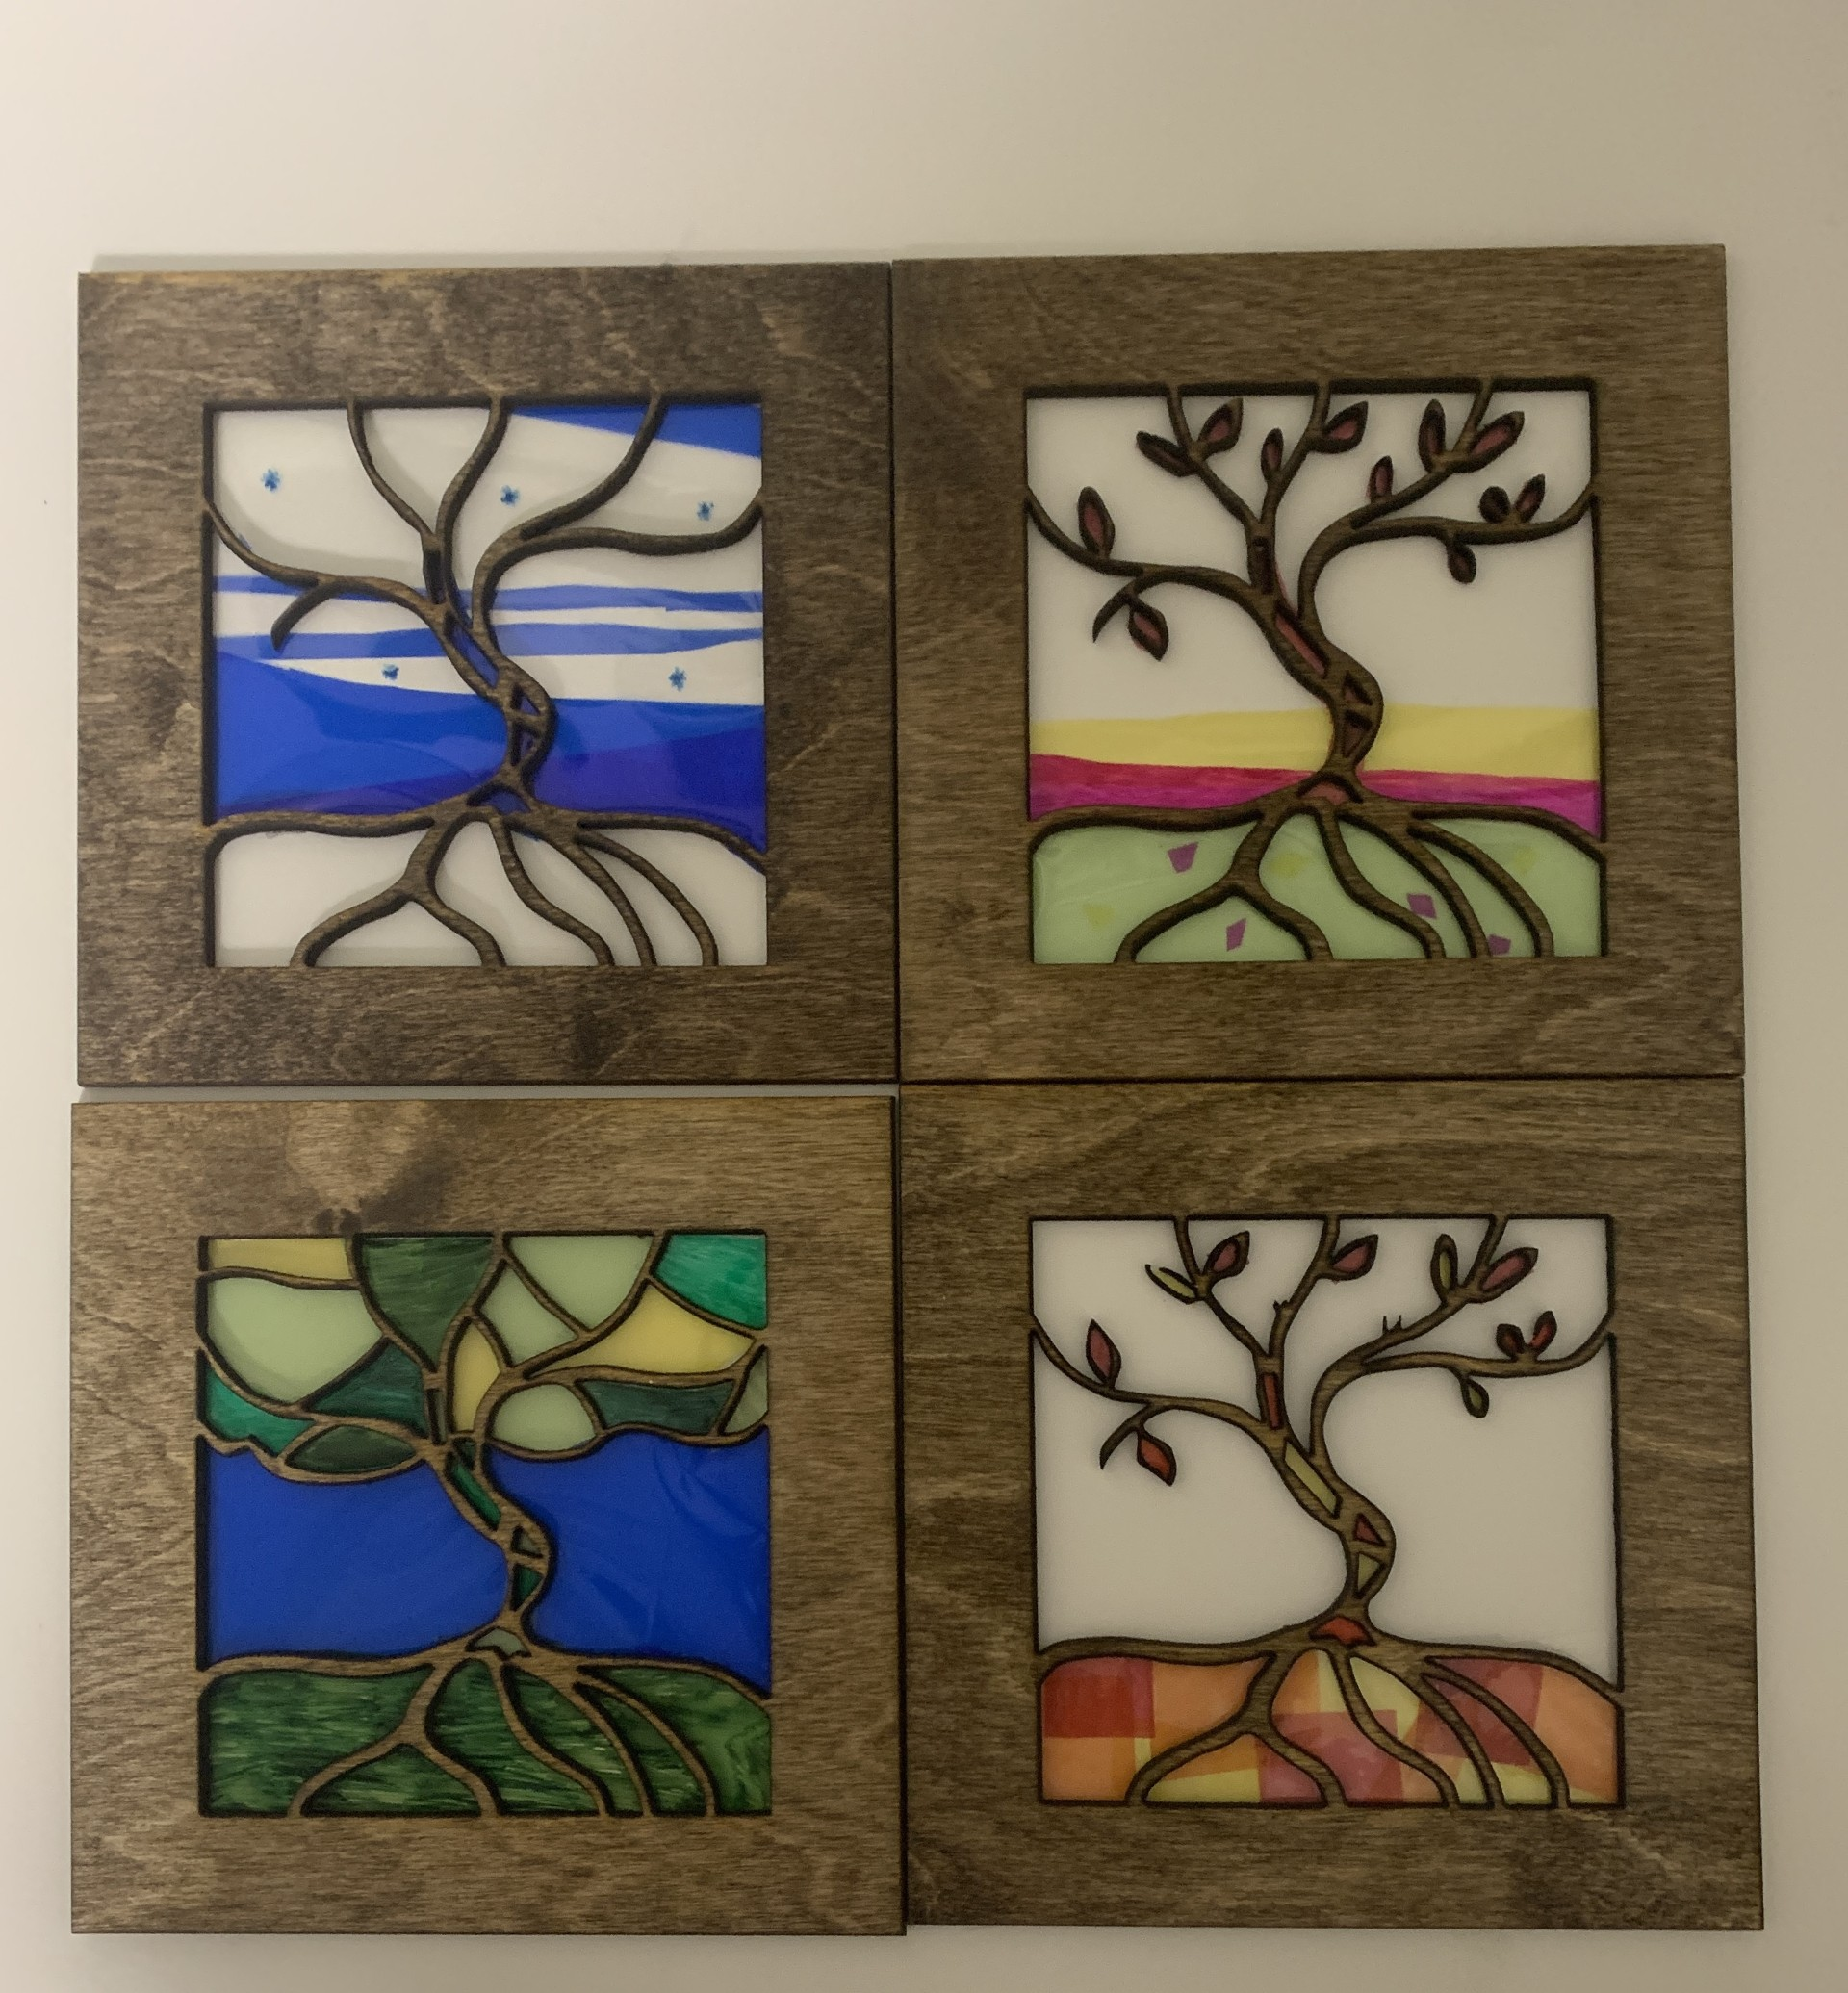
I like it! I had all the basic colors, and I expanded my options by combining colors and using sharpie. They are currently unfished as I decided I reallly need light blue. While I wait for that to come in the mail, this is where I am at. It’s all coming together 🙂
Some of the leaves on the fall one got a little burnt off, I am going to sand them off so do not worry about that.
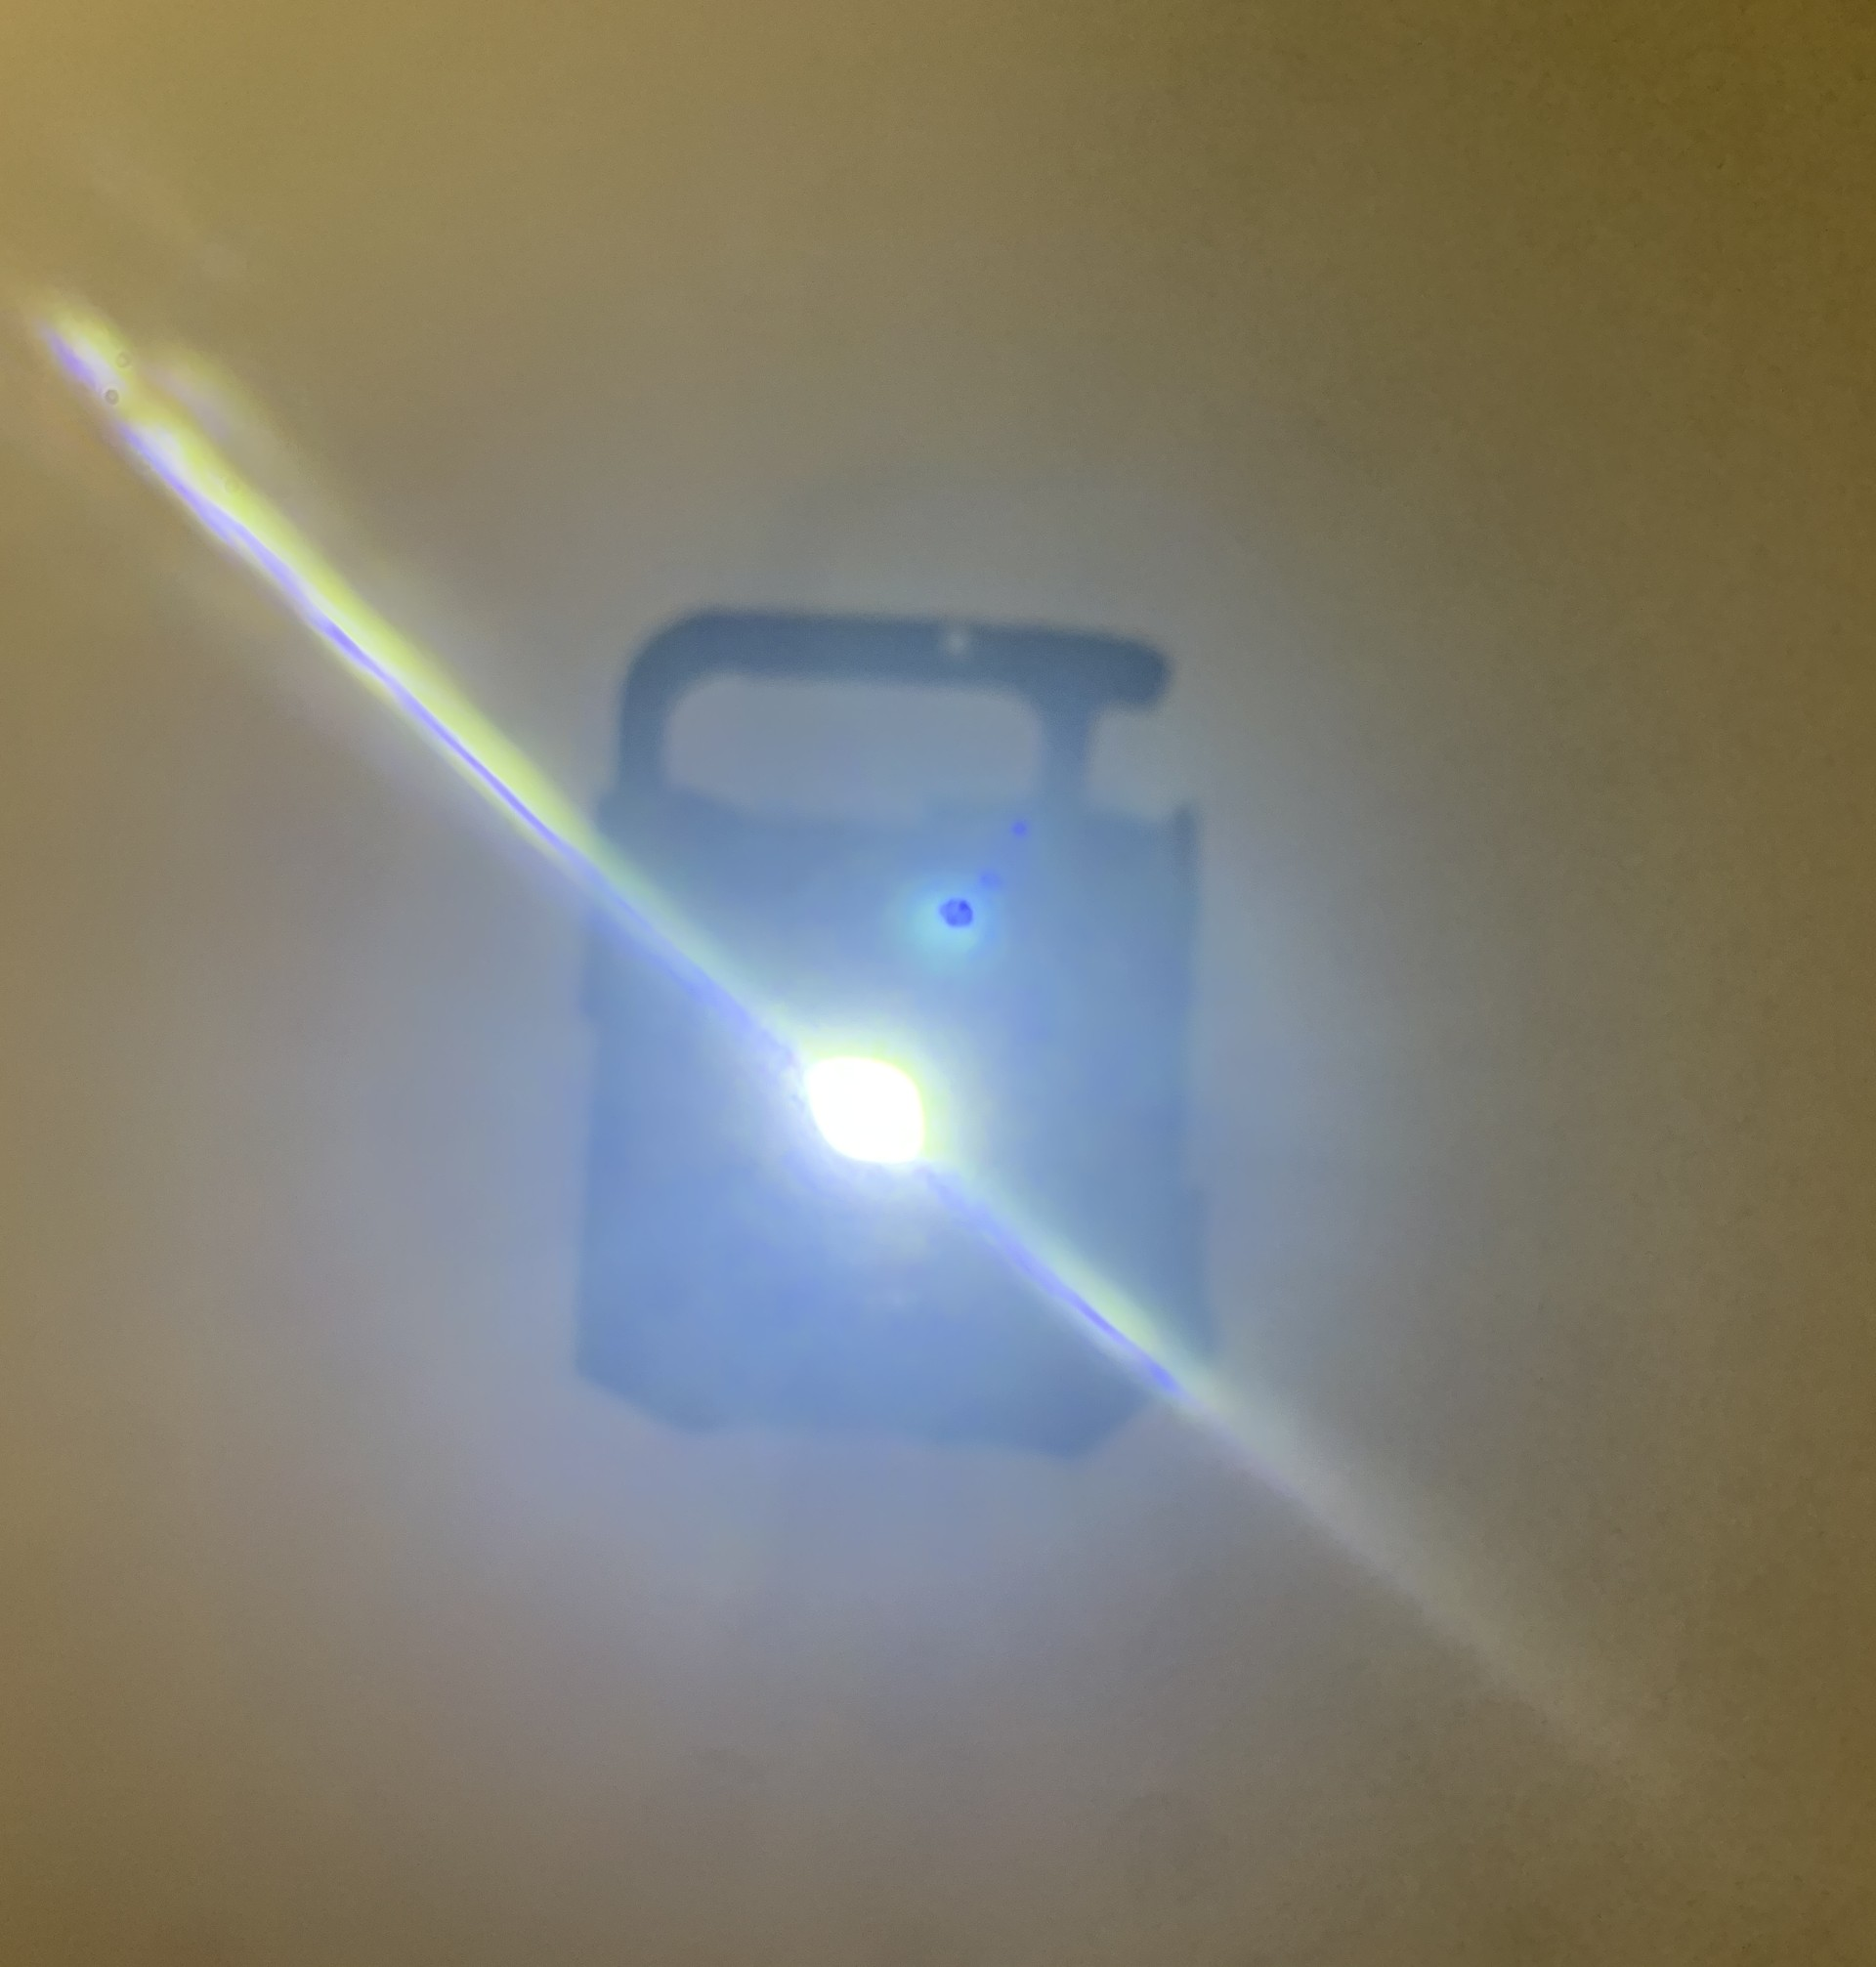
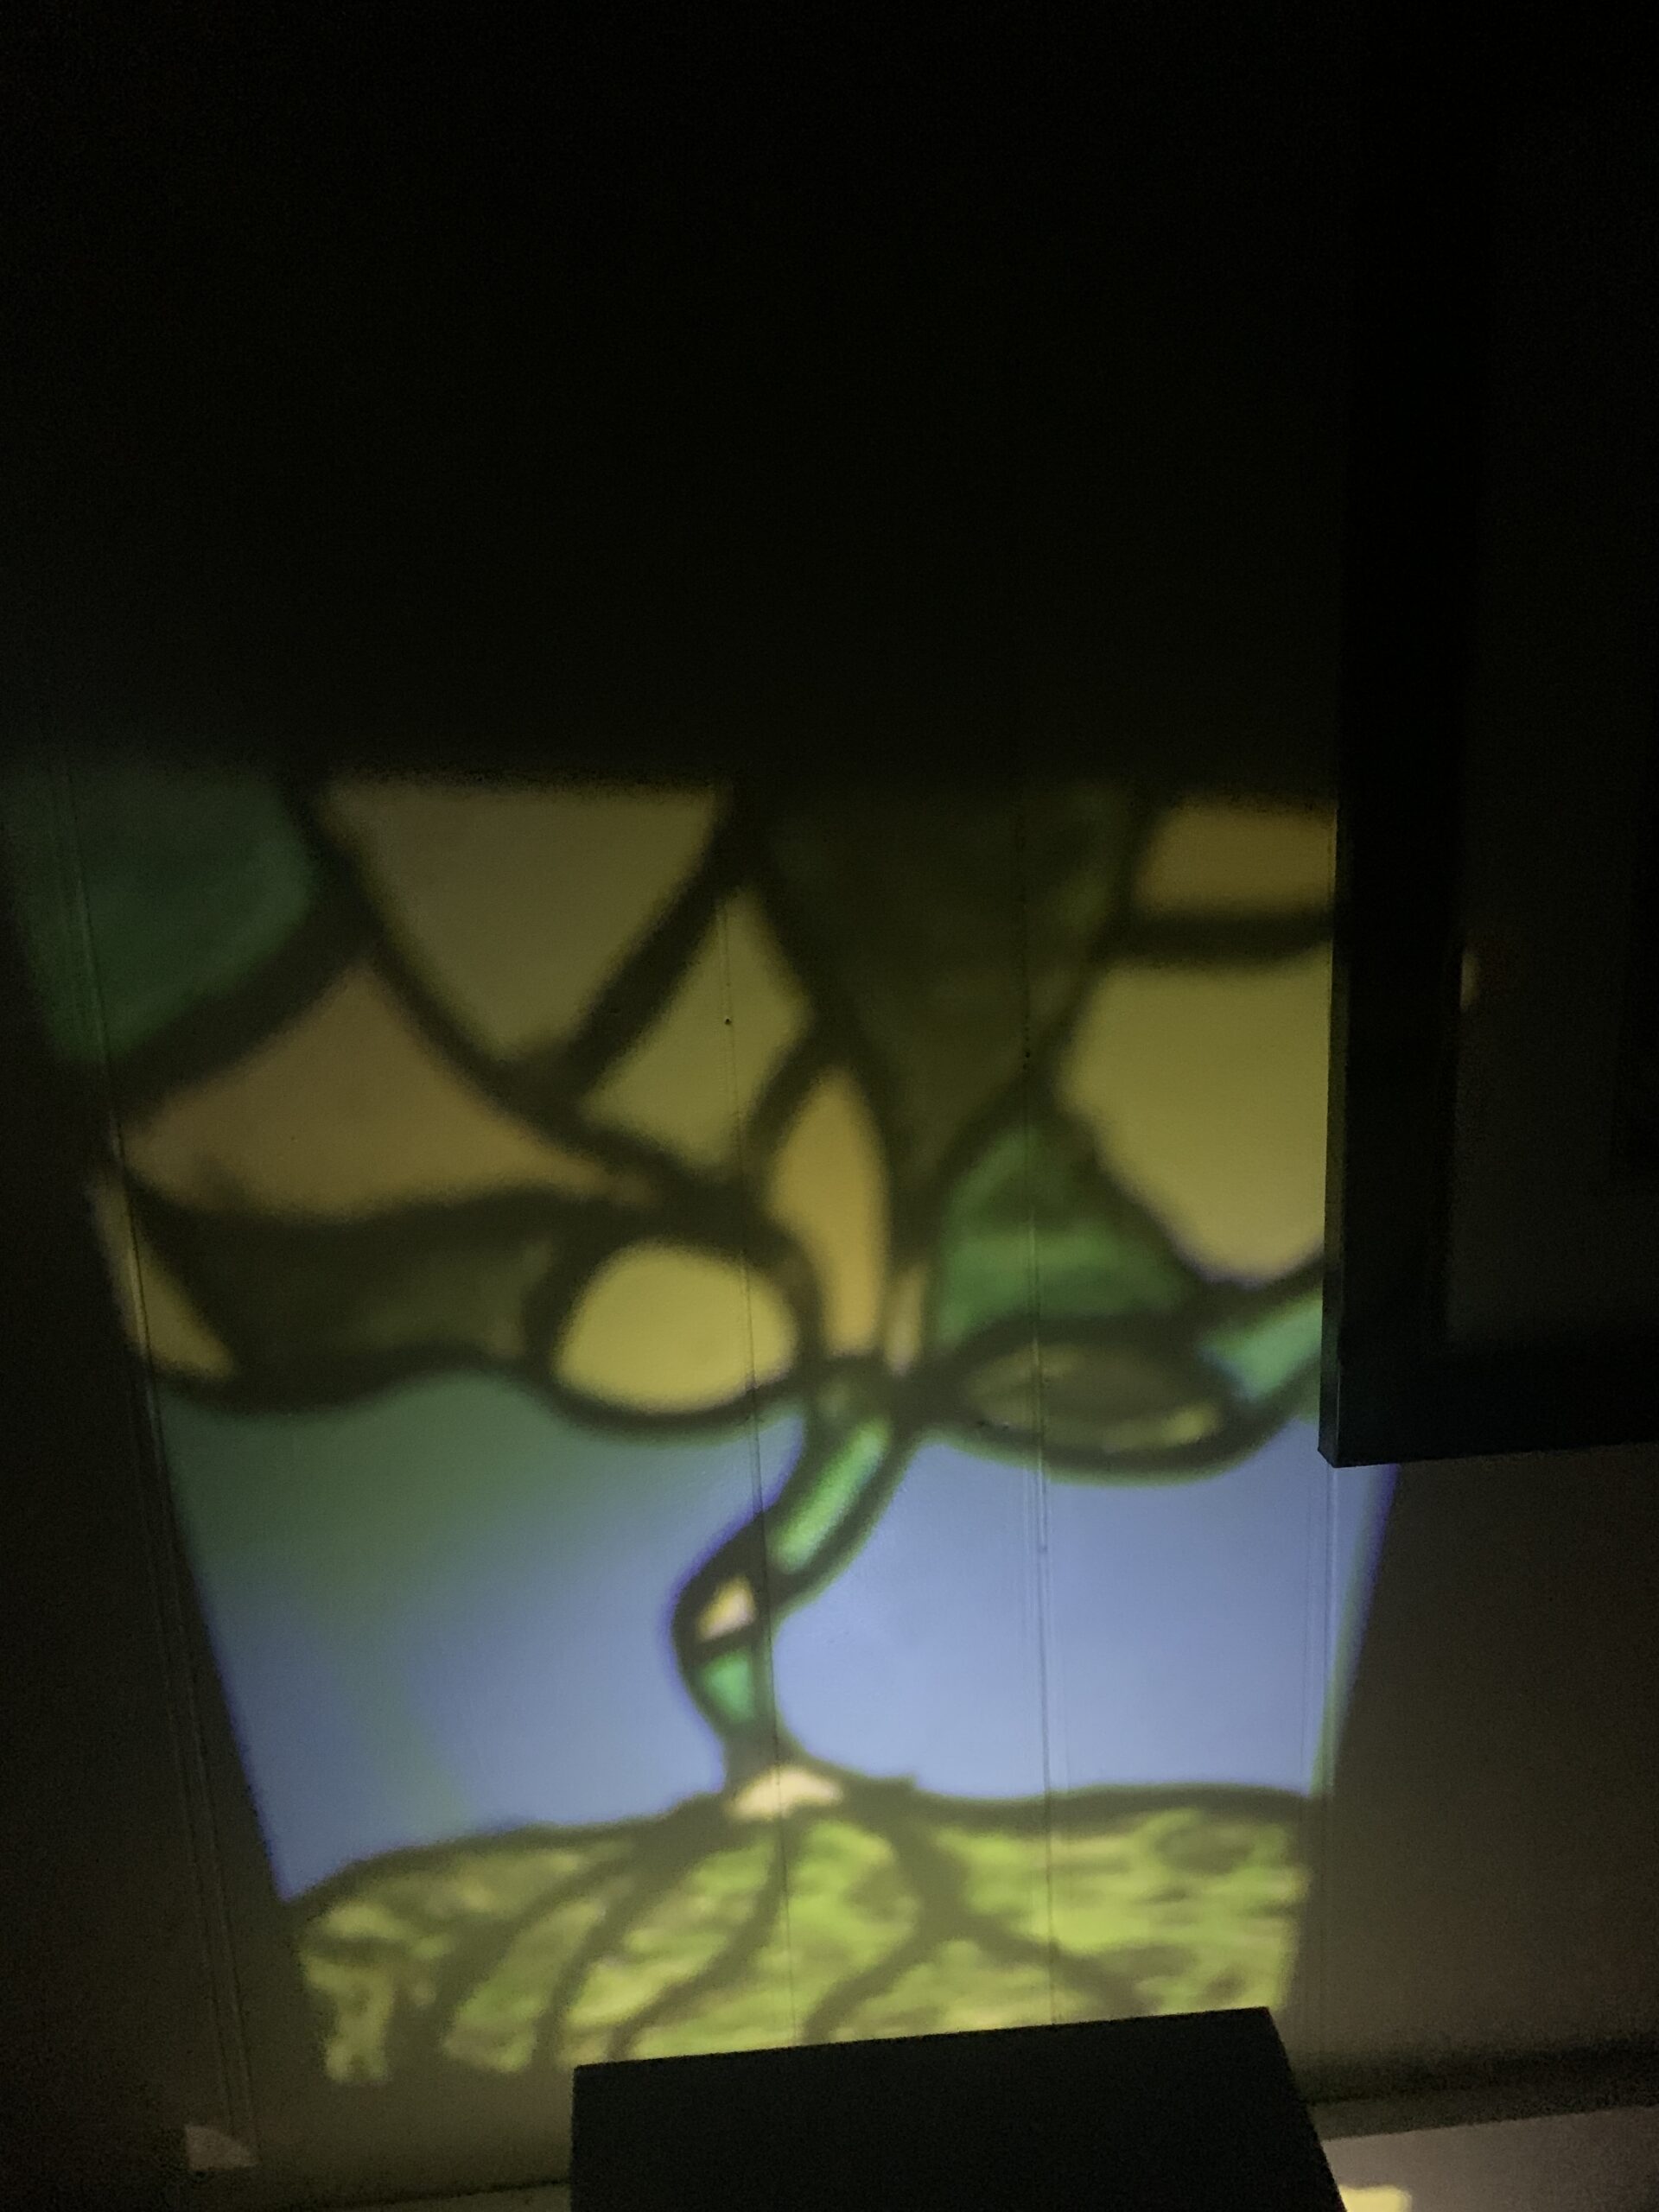
I tried taking pictures of the projections but its light out, so they do not look that good. I will update this post later with those pictures.
Your laser cuts came out really good, and I’m actually a fan of the burnt edges, it gives it a bit more definition in my mind. Your coloring is also coming along nicely and portrays each season very well. I’m looking forward to seeing how it will turn out.
This is awesome! You mentioned that you were having trouble with capturing the reflection through a camera. I think what you can do is set your box to point at a wall, set the camera “on top of” the box, and then set the camera to take a long-exposure image. This should come out sharp and gather a lot of crisp detail which hopefully does a good job of replication what the diffused light looks like in real life.
I think if you have yellow or orange cellophane, that might help with the blue light that coming through. I really love that you decided to color more than just one color per line, it looks great so far and can’t wait to see the final product!!