Project Title: Keep it to Yourself
Concept
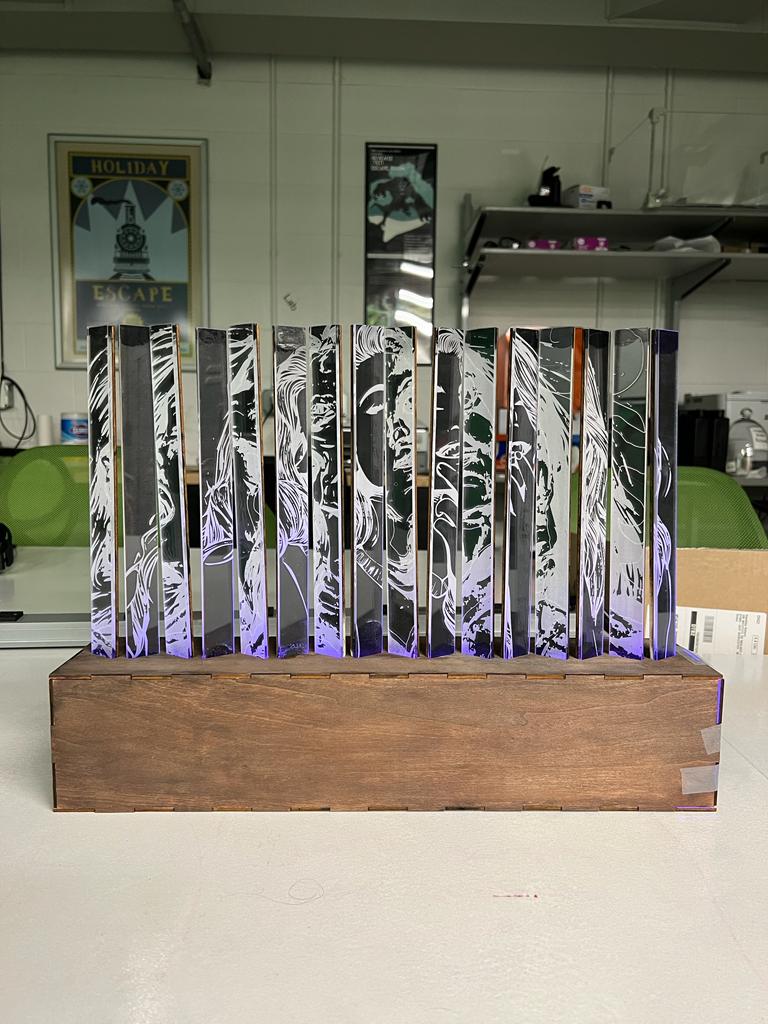
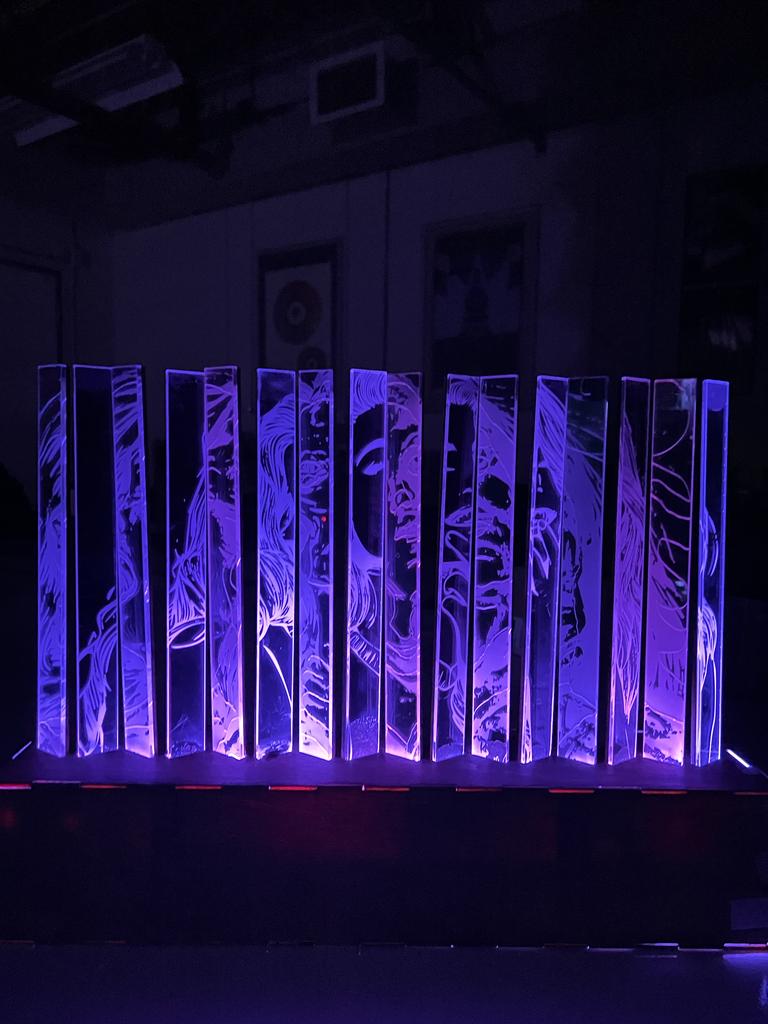
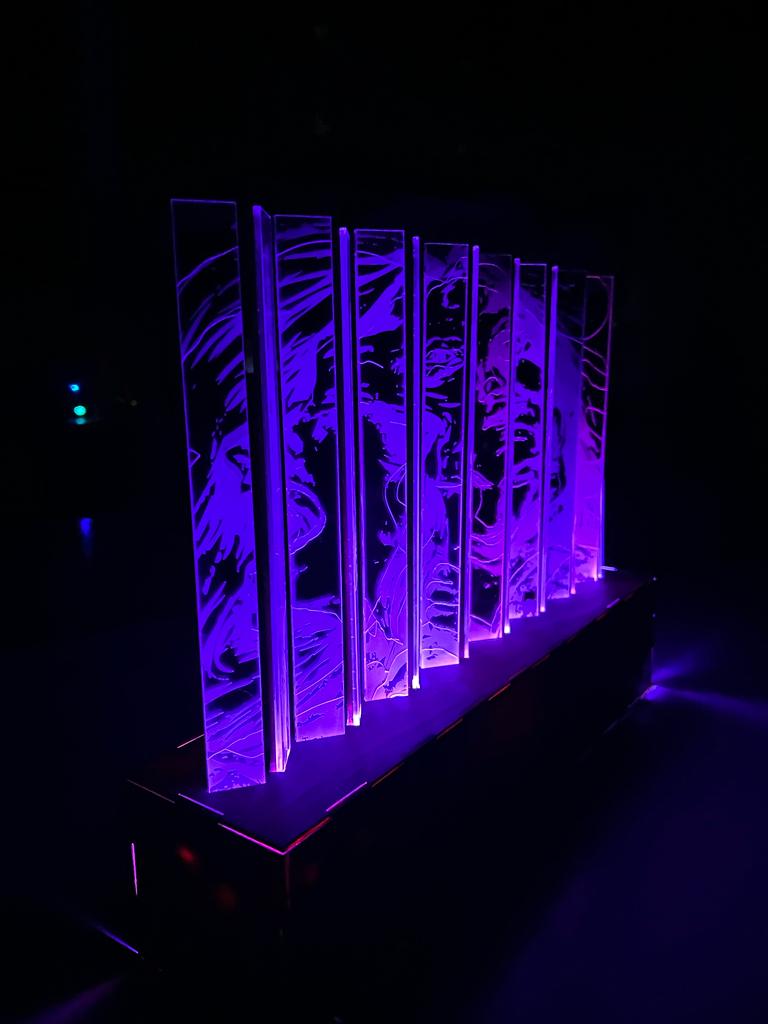
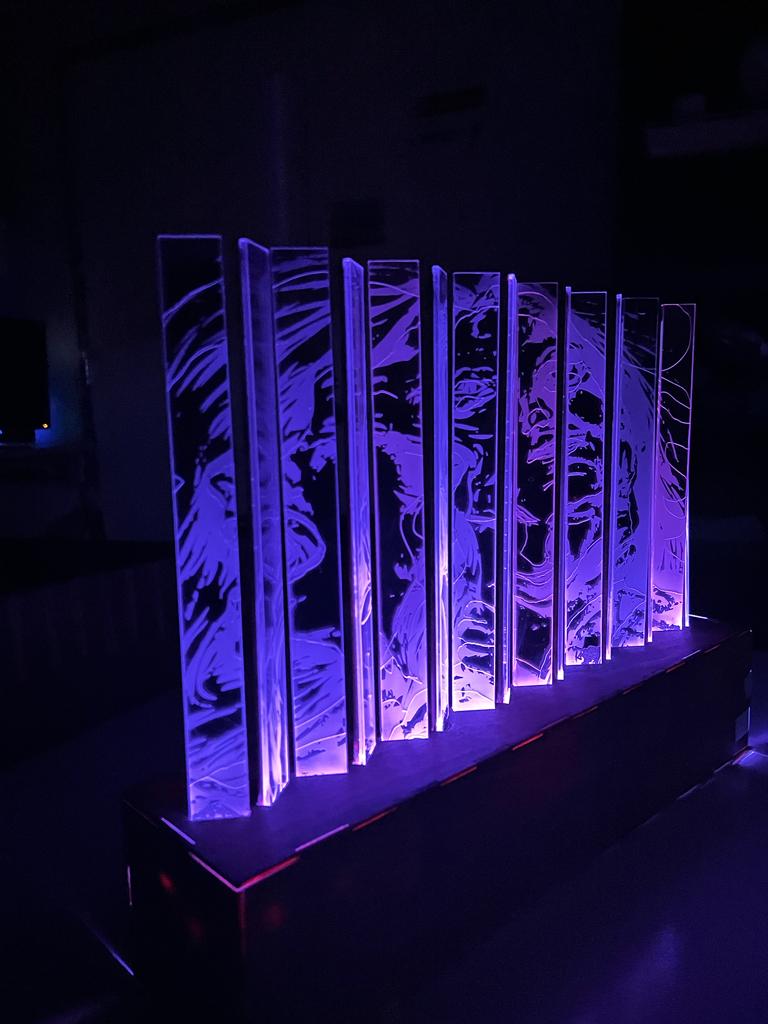
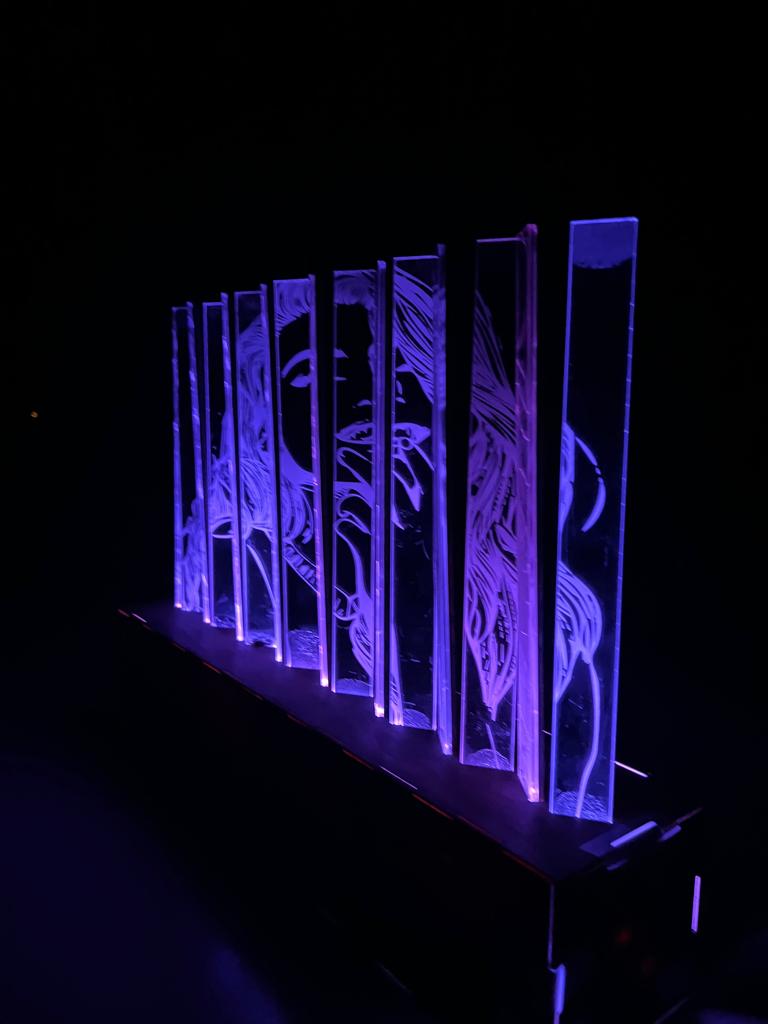
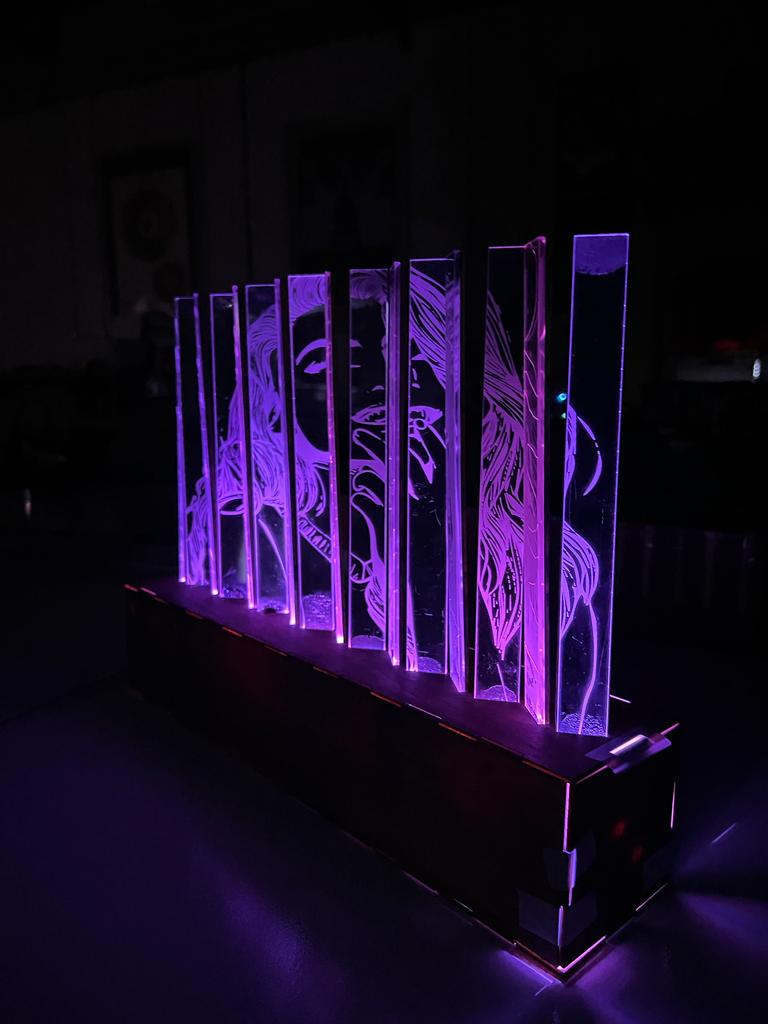
This project was initially started as a way to physically and artistically represent what anxiety feels like to me. As someone who has heavily struggled with this, it is a part of me I keep very hidden. When trying to explain what this feels like, I realized there is a two-sided nature to having anxiety. Internally it feels like I have all these voices telling me everything that’s going wrong and my brain is about to explode, but on the outside, I still seem calm and composed. I wanted to show the two-sided nature through this piece, which is why I chose an agamograph structure. This form of art shows two different pieced when viewed at different angles. One of the sides shows a physical representation of anxiety, and the other side shows a woman smiling. I tried to have different colored lights for each piece, where the anxiety side was red and the smiling side was blue. This ended up more like various shades of purple, but the point still comes across.
Research and Experimentation
This project went through a variety of iterations and trials. Initially, it was supposed to be made in the form of a shadow box with a variety of layers, this then transcended into layered pieces of clear acrylic.
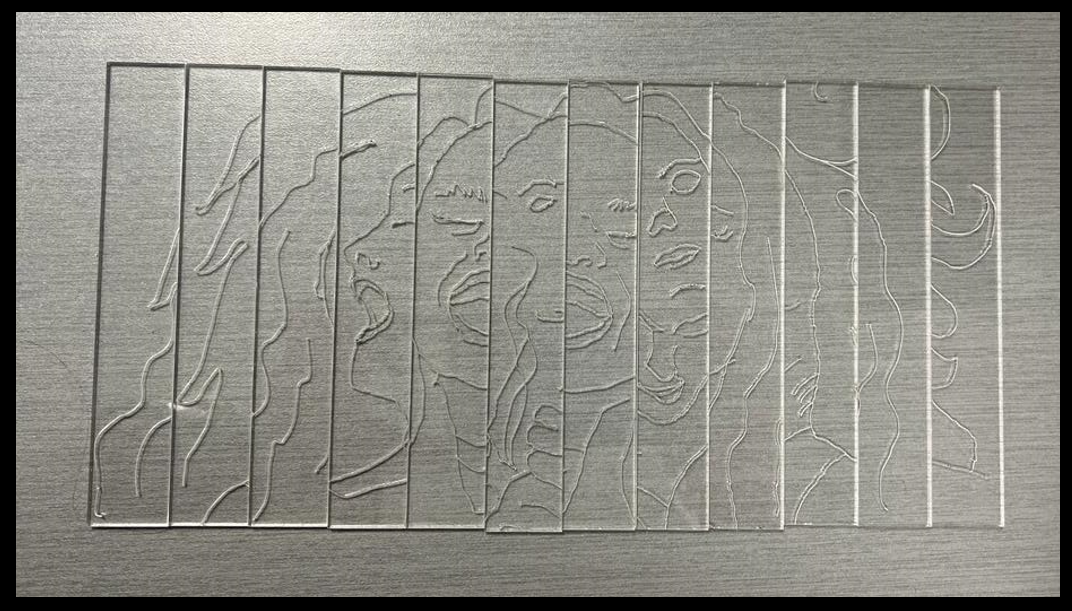
After doing some test cuts on acrylic, I was not a fan of the layers, so the intertwined slices came to mind. This was a better approach to the original goal I wanted to achieve.
I went on to do some research on agamographs, however, I did not find any using light. Most were either folded paper, or darker materials that were then framed. At this point, I decided to combine the idea of the slices and LEDs under a box. Then final testing had started!!


Project Timeline and Progress
Week 1: Artist research and learning about light art
During the first week, I spent majority of time dedicated to looking at the variety of projects and trying to come up with ideas I would be interested in executing. This is when I first saw shadow boxes and LED displays.
Week 2: Potential concepts
During this time, I explored two major concepts I was interested in at the time, which were shadow boxes and acrylic-layered LED displays. Eventually, I changed my idea but this was definitely a good start!
Week 3: Prototype
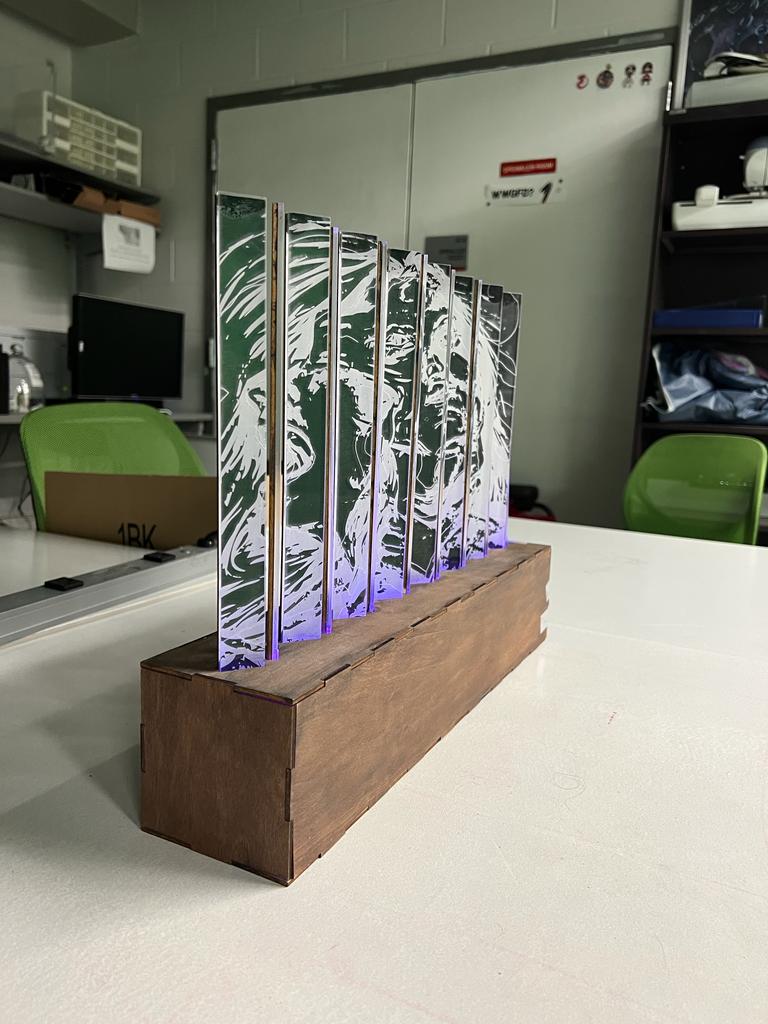
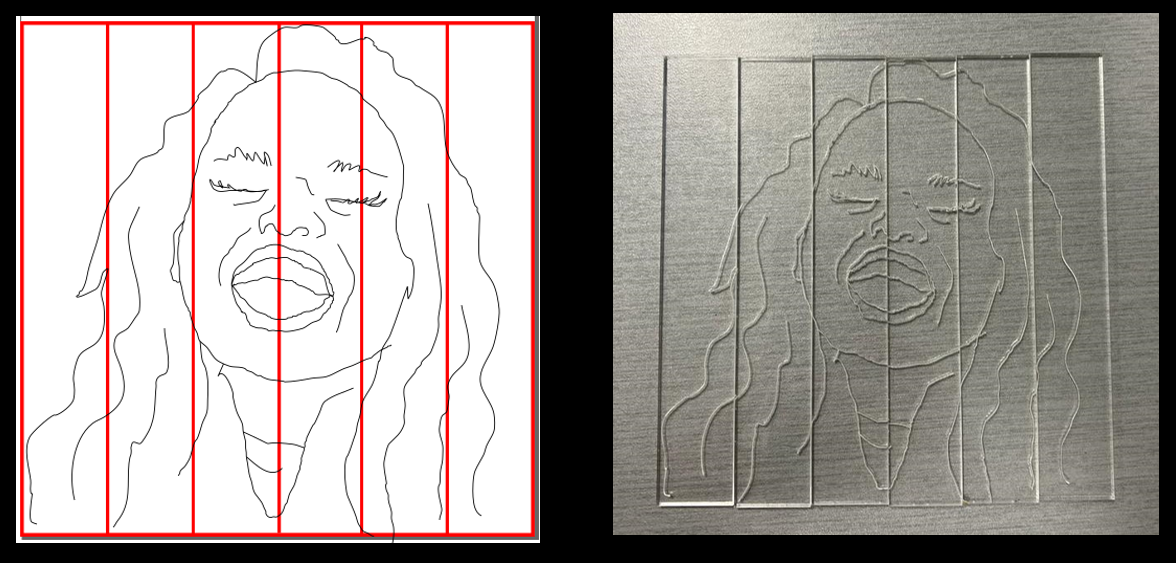
This was the first time, I actually thought out the final project I was aiming to complete. I made a mini-version of the two pieces I wanted to laser cut and a sample base. The size of this was about 1/3 of the final size, and was only 6 slices per image!
Week 4: Making adjustments and final drawings in inkscape
At this point, I looked over how large I wanted the final piece to be. I decided 10 slices with 25cm width and length for both images. This would make a base of 50cm or 0.5m base. I also finalized the drawing in inkscape.
Week 5: Finalizing sizes and laser cutting
This was a ROUGH week, I spent the most time yet did not make as much progress as I would have liked. I had to readjust size given the size of the wood I was laser cutting for the box. It ended up being 8 slices per image instead of 10. I had to laser cut the same images and boxes multiple times given issues with the laser. I also spent time working on the circuitry and eventually realized the LEDs were not as bright as I would have liked.
Week 6: Putting blocks together and debugging
During this week, I realized I wanted a darker background to be able to see the images on the acrylic better. I painted slices of wood black and super-glued them behind the acrylic slices. I also resorted to using LED strips for a brighter display. I also painted all of the wood used for the boxes.
Week 7: Documentation and pictures
During this final week, I went back to the FL room and took pictures in the dark lighting!
Execution and Presentation