It was a busy week for assembly. Over the weekend, I ordered a bunch of new components on amazon that I didn’t know I would need at the beginning. I printed a bunch of parts while I waited for my online orders, and began the assembly process.
Battery Holder
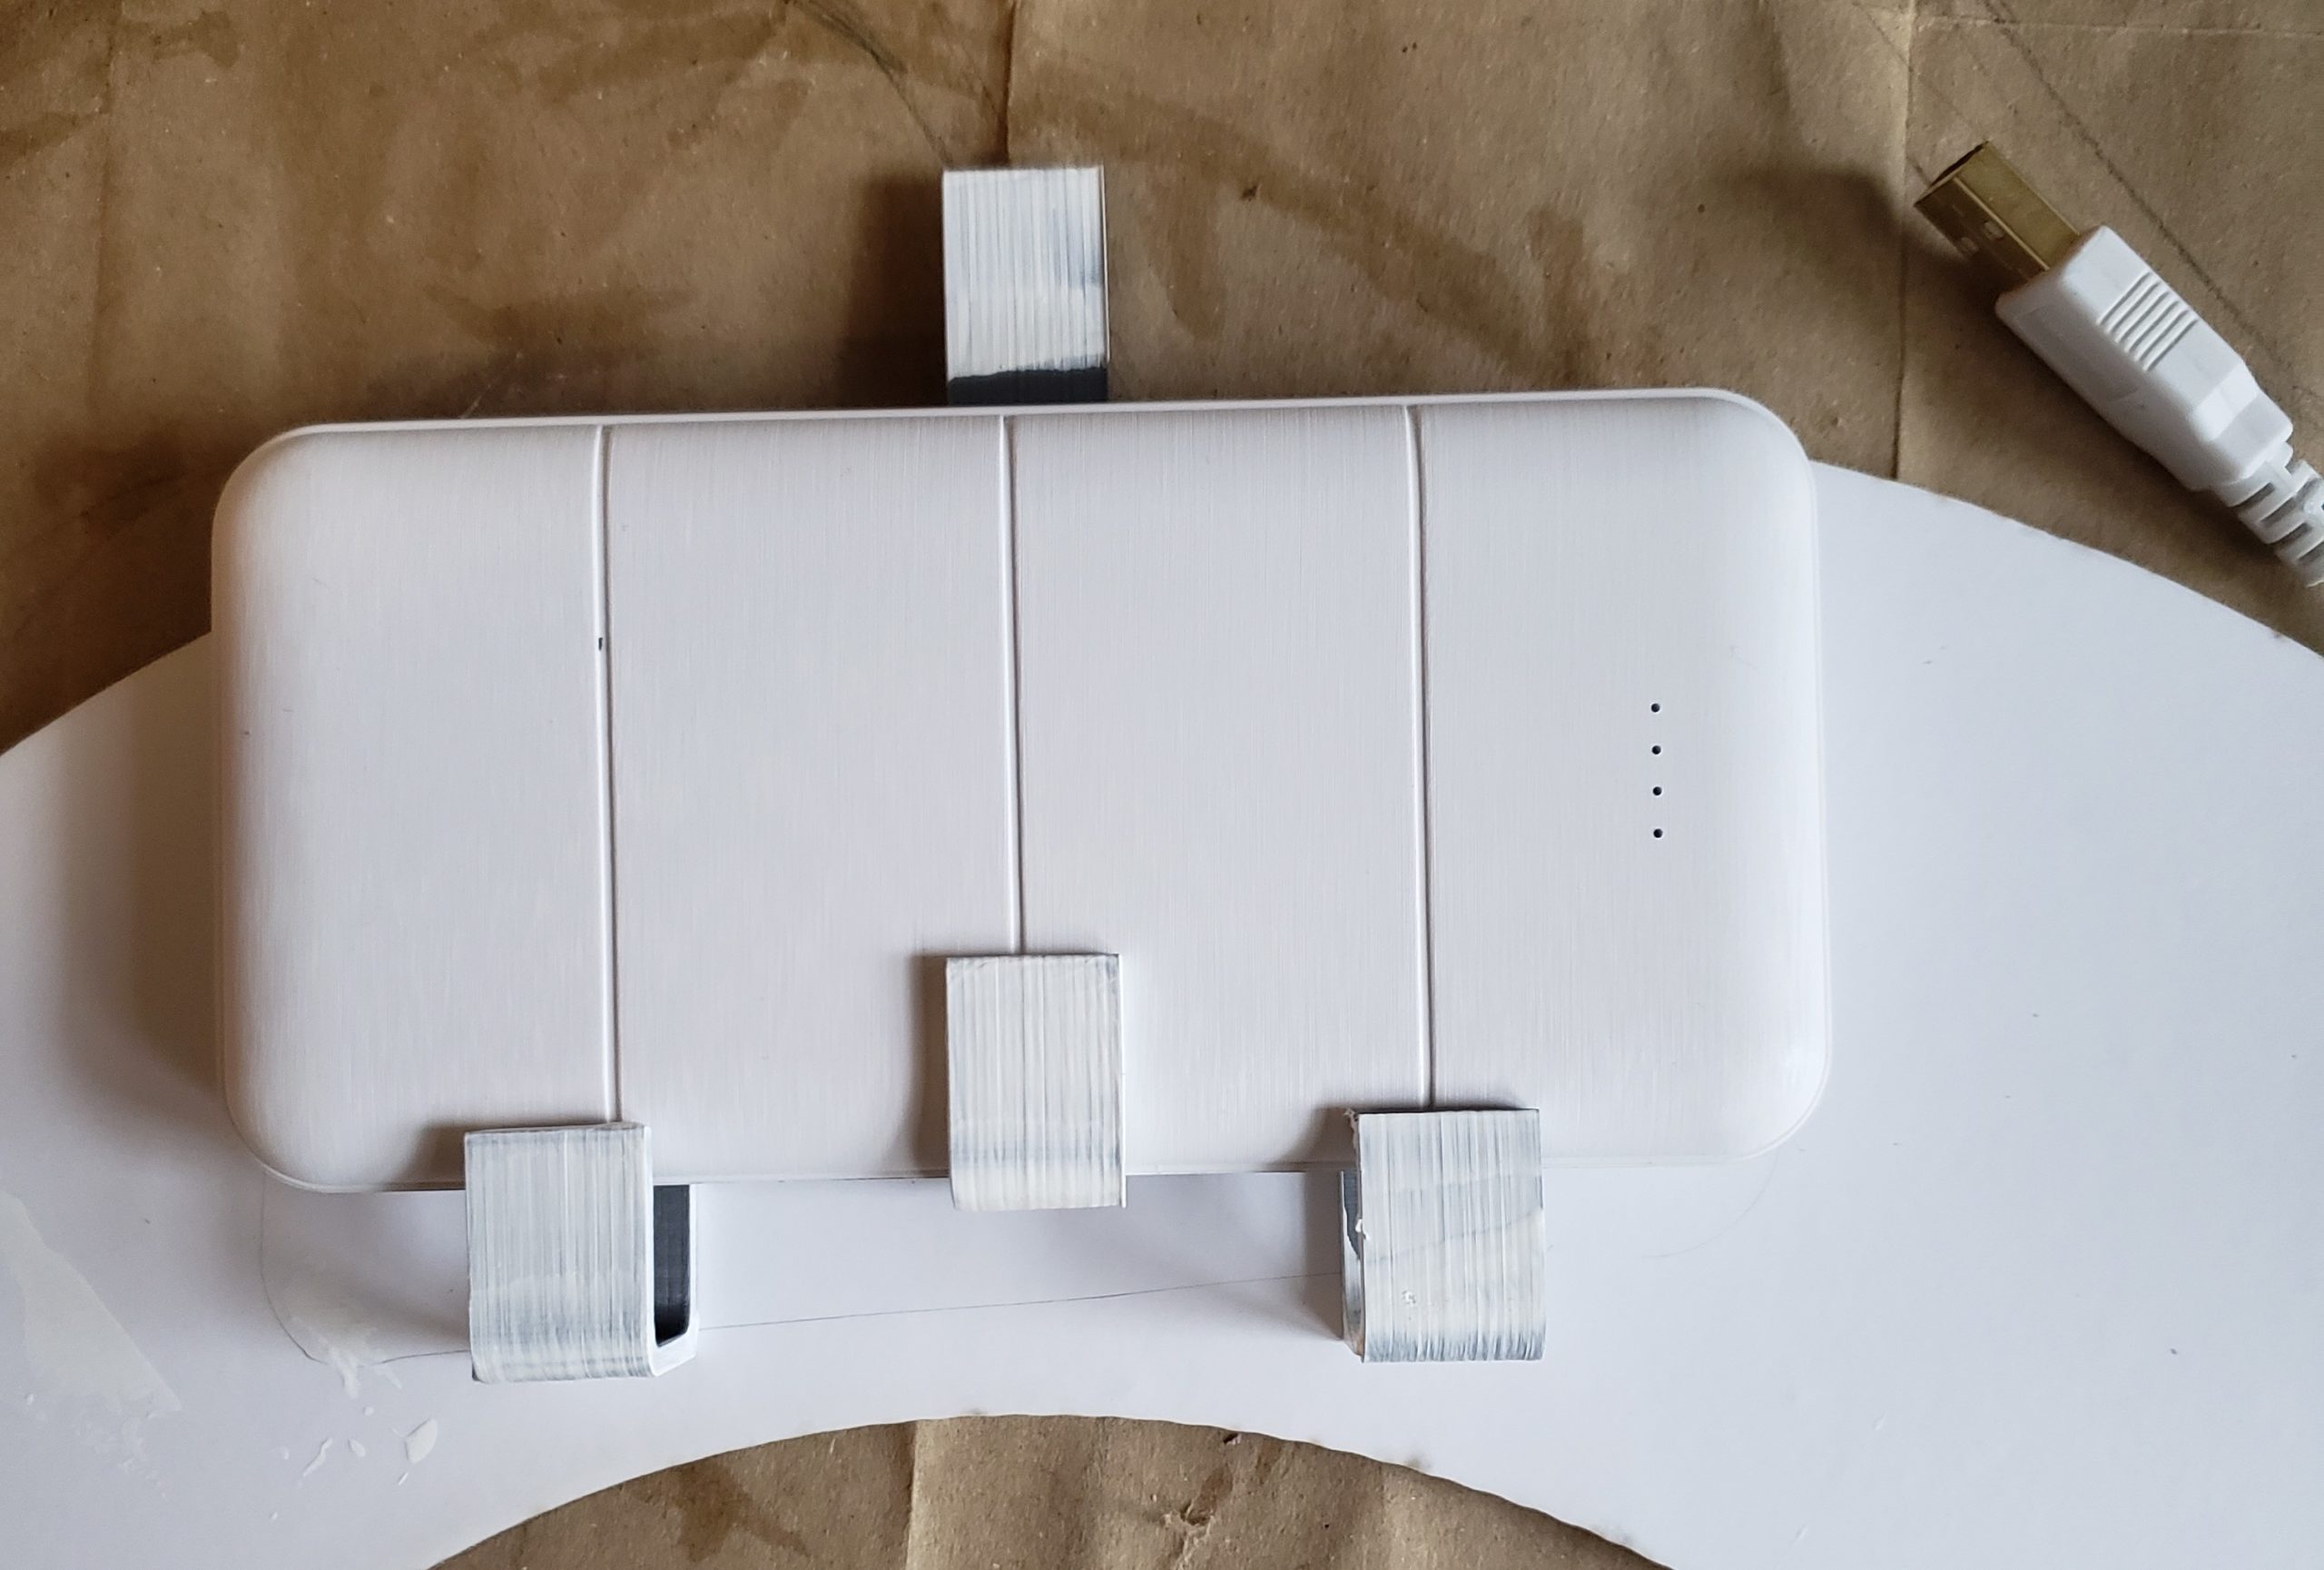
I wanted to be able to remove the battery and recharge it, so I designed a system of three brackets to hold it in place and allow for easy removal. The center hook is attached to the battery, and the side hooks are attached to the foamcore board.
Electronics
I moved my breadboard circuit onto perfboard. The power wires from the USB cable I connected to the battery bank were too flimsy to connect to the breadboard, and I was concerned about components falling out of the breadboard over time anyways. The perfboard I purchased had strip connections instead of individual pads, which I didn’t know until it arrived. I was so concerned about accidentally shorting my power supply connection that I forgot to break the connections in between the Arduino pins, and promptly fried my Arduino Nano as soon as I applied power. Thankfully, I had a backup Nano. I drilled out all the connections in between the pins, and checked everything with a multimeter before powering it on again. I designed a box in Solidworks to hold the board, 3D printed it, and painted it white because I only have grey filament.
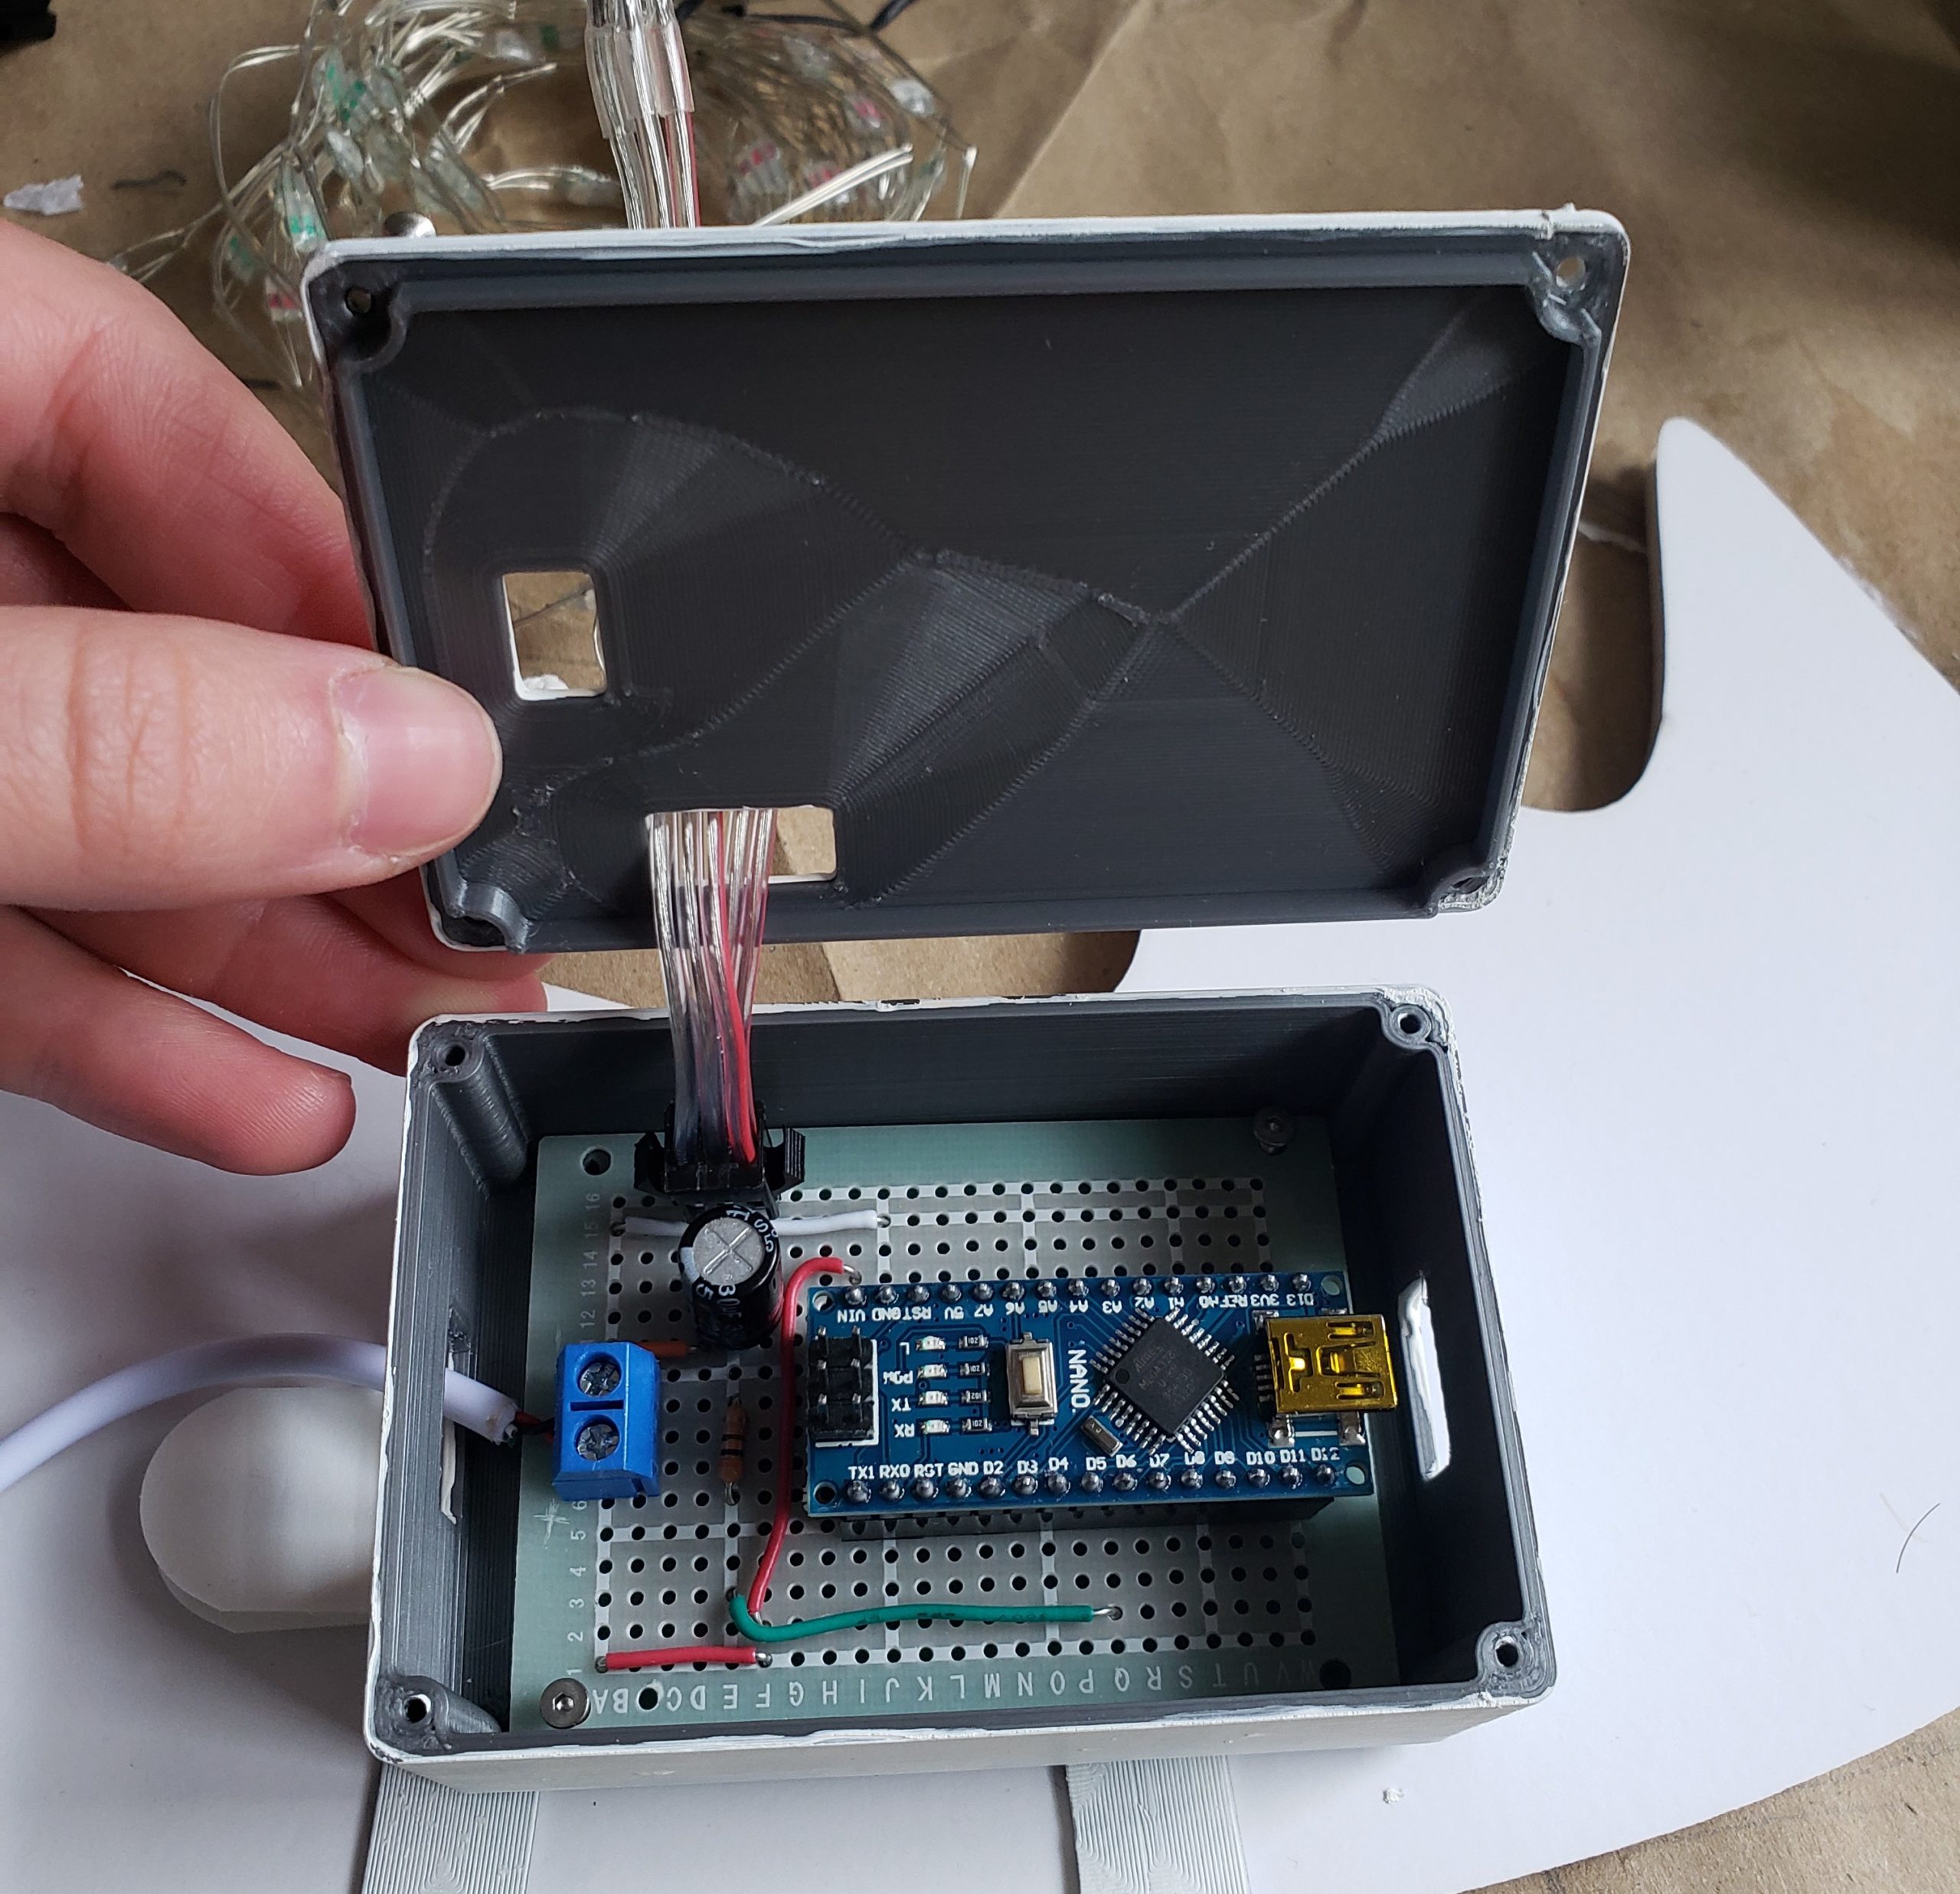
For the on/off switch, I wrestled with the idea of using a button, because that’s what I had lying around. In order to use the button as a toggle switch, I would need to use interrupts to enable me to turn the system off even though my fade code was blocking. I was able to turn the system on using the button, but I did not get my interrupts working to turn it off. I then realized that phone battery banks sometimes turn off if they don’t have any current draw for a while. Because the battery would be connected to the Arduino, I wouldn’t be able to turn the system on if it had been dormant for a while. Instead of the button, I purchased a USB chord with a built-in switch to cut the power to the Arduino completely when the system is not in use.
Dangly Bits
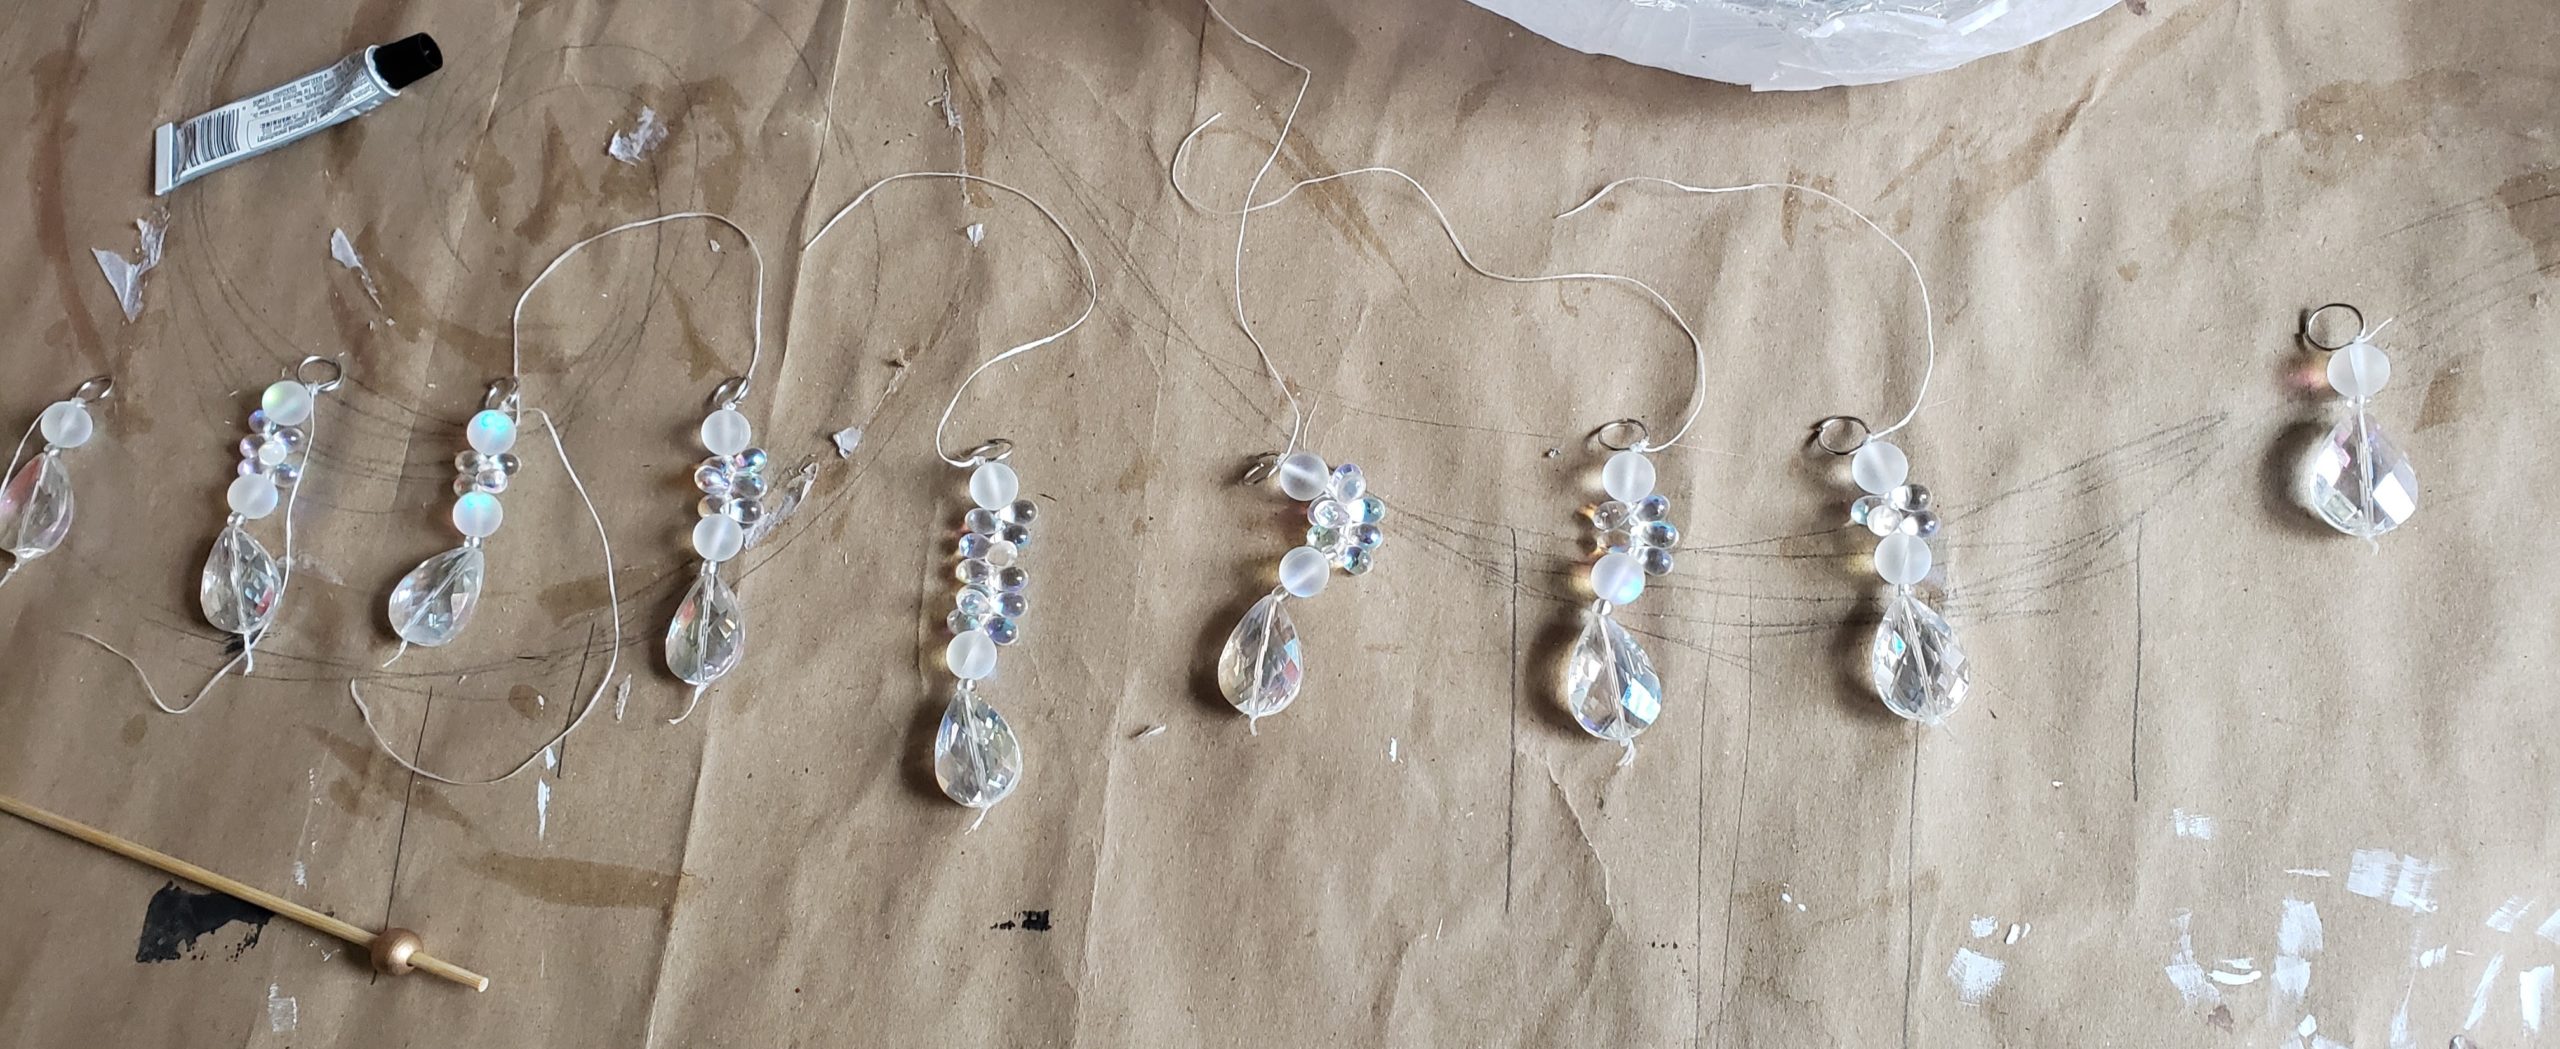
I threaded my beads onto some cheap floss, and secured the ends with a dab of superglue. I played with different compositions of beads, and decided to vary the number of small, lateral beads in the center. I’m very satisfied with how these turned out, and they look very nice on the end of the chains.
Putting It All Together
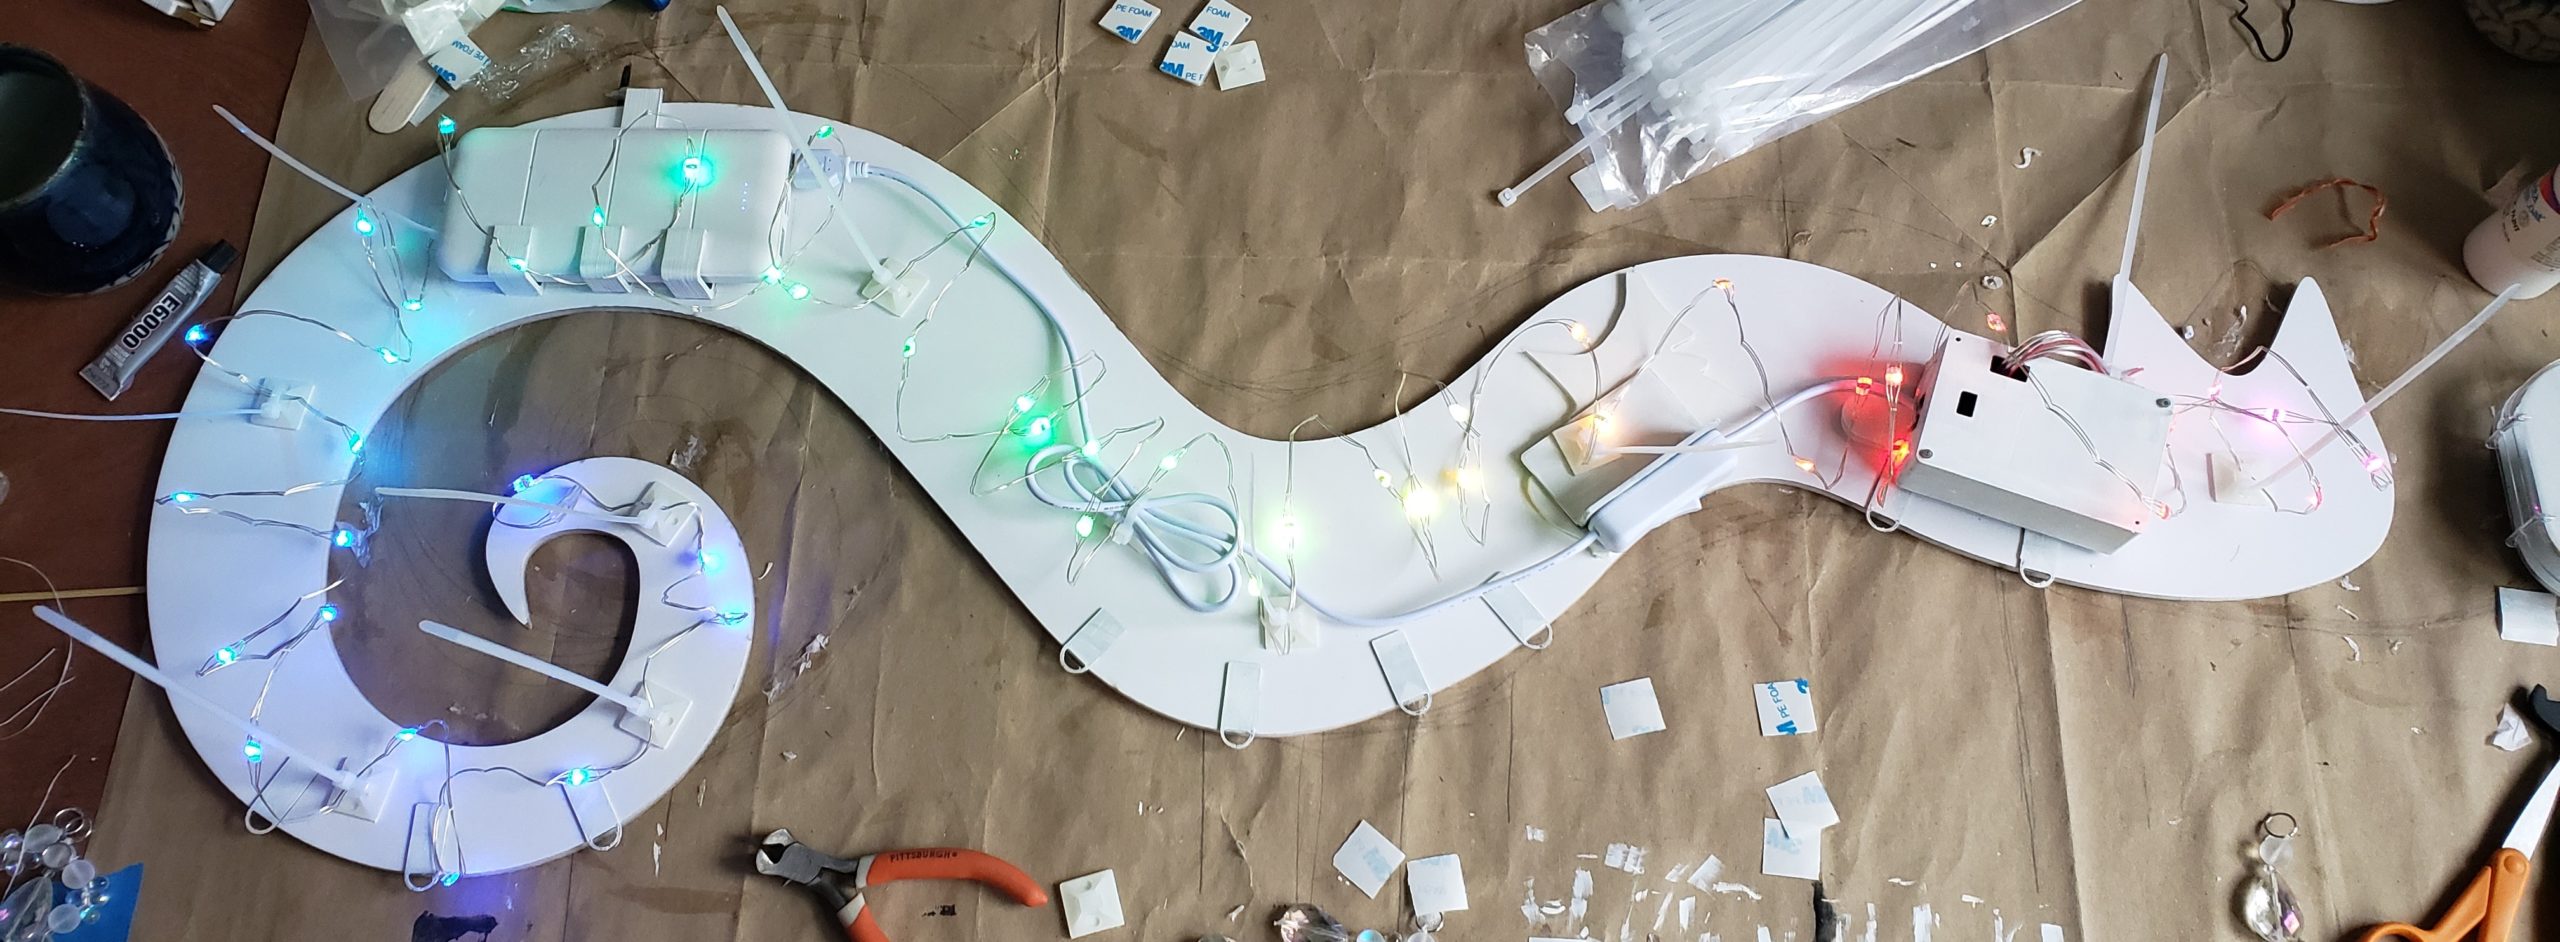
I printed small tabs to attache the dangly bits, and superglued all of the 3D printed components to the foamcore board. I glued the on/off switch to a bracket that I 3D printed. To attach the fairy lights, I purchased white ziptie mounts, which come with an adhesive backing. I attached these along the animal, and ziptied the fairy lights down.
I cut two holes for the eyes in the “eye sockets” of the diffuser, and glued in two clear marbles for eyes.
I toyed with many ideas for attaching the diffuser, but eventually I decided to use scotch tape. This decision turned out to be incredibly frustrating, but at that point I did not have time for an alternative solution. I was able to get the diffuser attached, although some of the tape began to peel. There is no way to apply pressure from the outside to make sure the tape adheres properly, because the diffuser is so flimsy. I may try to make some small brackets to attach the diffuser without disrupting the light too much. I want to find a more permanent solution before the animal goes on my wall.
