I thought I was supposed to fail last week, but I guess the laser cutter decided I’m not done. There were MANY issues with the laser cutter this week. First, the foise one was closed, so the unity one was where I went and there are a lot of inconsistencies with that laser. I spent an hour doing a rastor on acrylic at 20% power and the laser decided to die out on my in the middle of the rastor. You can kind of see it at the bottom of this rastor. I decided to just spend another hour and redo the rastor over it. But overall, it was just not dark enough and you can’t really see the image.
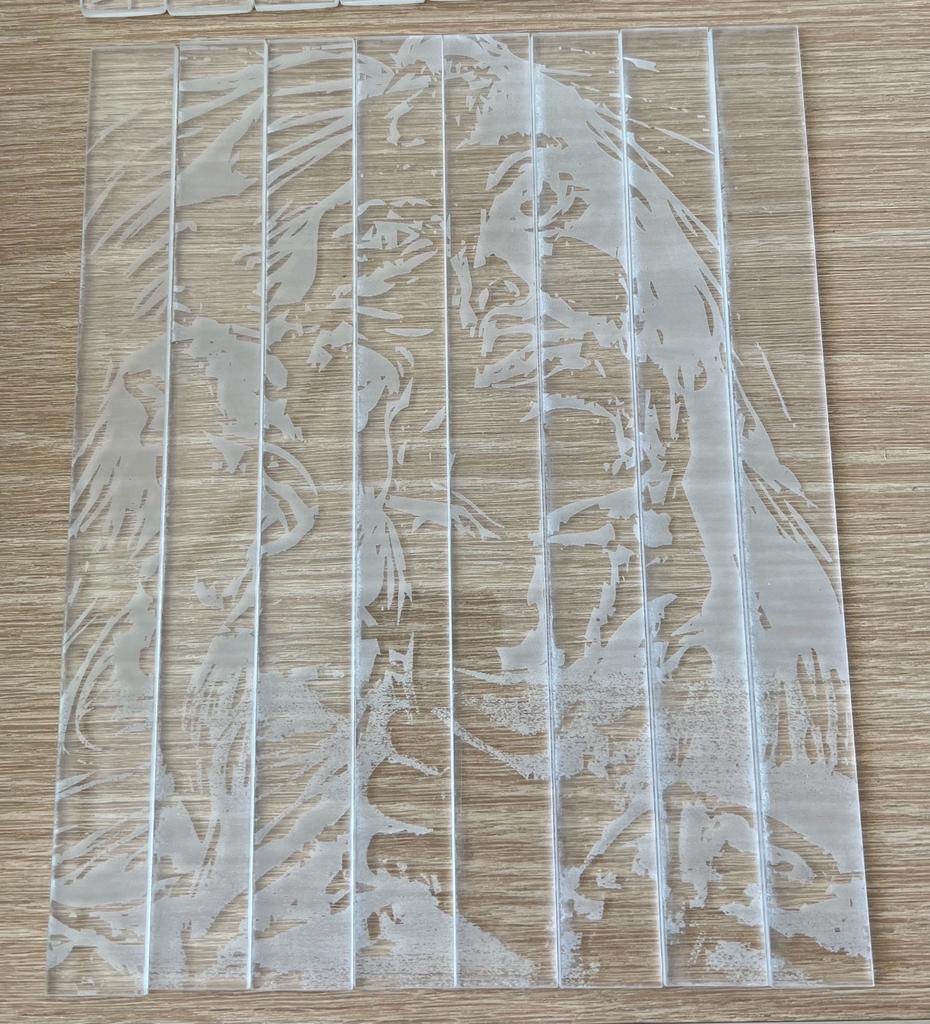
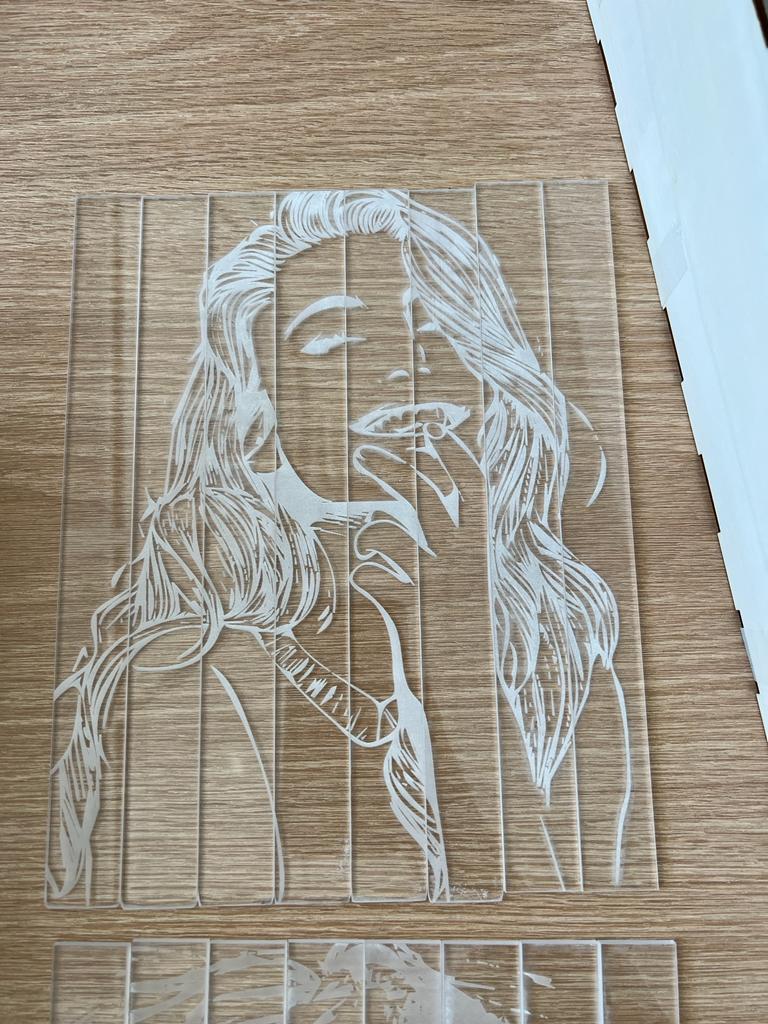
I went back the next day to do the next image and I tired 20% power again, but this image WAS SO DEEP and left the burn marks. I really do not understand how both of these were completed at the same power.
At this point I was like let me just move onto the box, and I can deal with the acrylic later. Even though the plywood was only 1/8in the laser took like 5 tries to even cut through it and I ended up using 6 whole slabs of 12×24 in plywood (money down the drain :(). I had to just deal with the last version in which the kerf was messed up so I had to literally tape the box together. The other issue with the laser cutting was for the holes for the acrylic slabs, Im going to guess because they were small, there were too many inconsistencies and the holes were not straight and various different sizes. Even after sanding down the edges of the acrylic, the holes would keep breaking – so I am going to have to redo that.
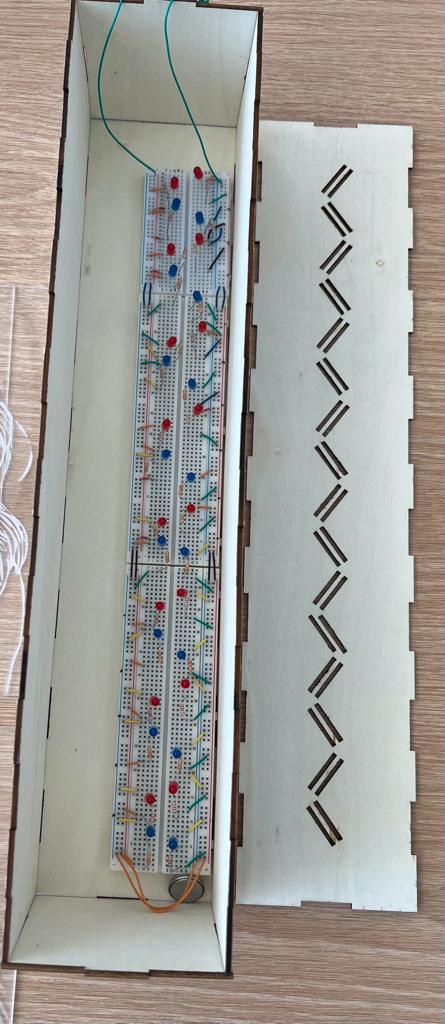
Next I went to solder the LEDs and they kept burning or the fuse kept blowing because of the heat of the solder – this was definitely a me problem because my soldering skills could use some help. So I ended up just switching to a breadboard. The LEDs were advertized as super bright but they are a bit dim so I am kind of nervous for them to be strong enough for the display, I might try a 9V battery instead of 3.3V.
One other thing I have left to do is paint the wood. so it is a bit darker.
I made a final to-do list:
- recut top of box with holes (try 1/4 in and just place together 2 pieces to avoid breakage)
- create riser for the breadboard to sit on so it is high enough
- paint wood
- recut acrylic 🙁
- try 9V battery
I honestly think that the second acrylic image came out great!
I forget how exactly to set tolerances for your boxes measurements but if you can add them in the program you are using for the design layout it will really help the laser cutter with keeping consistency.
I agree that the second engrave looks fine but that may just be the image. Maybe try some test engraves at different powers for your next engrave to ensure you get the desired outcome.
I’m not sure why the laser is so inconsistent, maybe someone reset the z height between the first and second time you used it. I agree with Taylor that it would be worth doing a simple test first on a piece of scrap acrylic. If you’re having trouble getting a clean cut, it helps a lot to cover the acrylic with blue painters tape before cutting. This will prevent the edges of the cut from burning. If you don’t peel off the plastic layer that comes with the acrylic, that has the same effect.
The second cut looks really good! That being said, I get if it’s not part of the vision.
Personally (something to consider) I dislike using batteries, because you have to replace them and that means getting new ones and blah blah blah. If you can, I would recommend getting a 9V power supply!
Sorry the laser is causing so many problems. It sounds to me like maybe it’s gotten out of focus.
You can stack the coin cells and make a little battery pack as another way to get more voltage.
Hang in there – it’s going to look awesome when it’s all together!