This week I might have hit my “failure” a little early! or really, after gathering my thoughts and putting together a materials list and a plan for how I would actually create my idea, it wasn’t coming together how I imagined. Anyways, I’ll still show what I did.
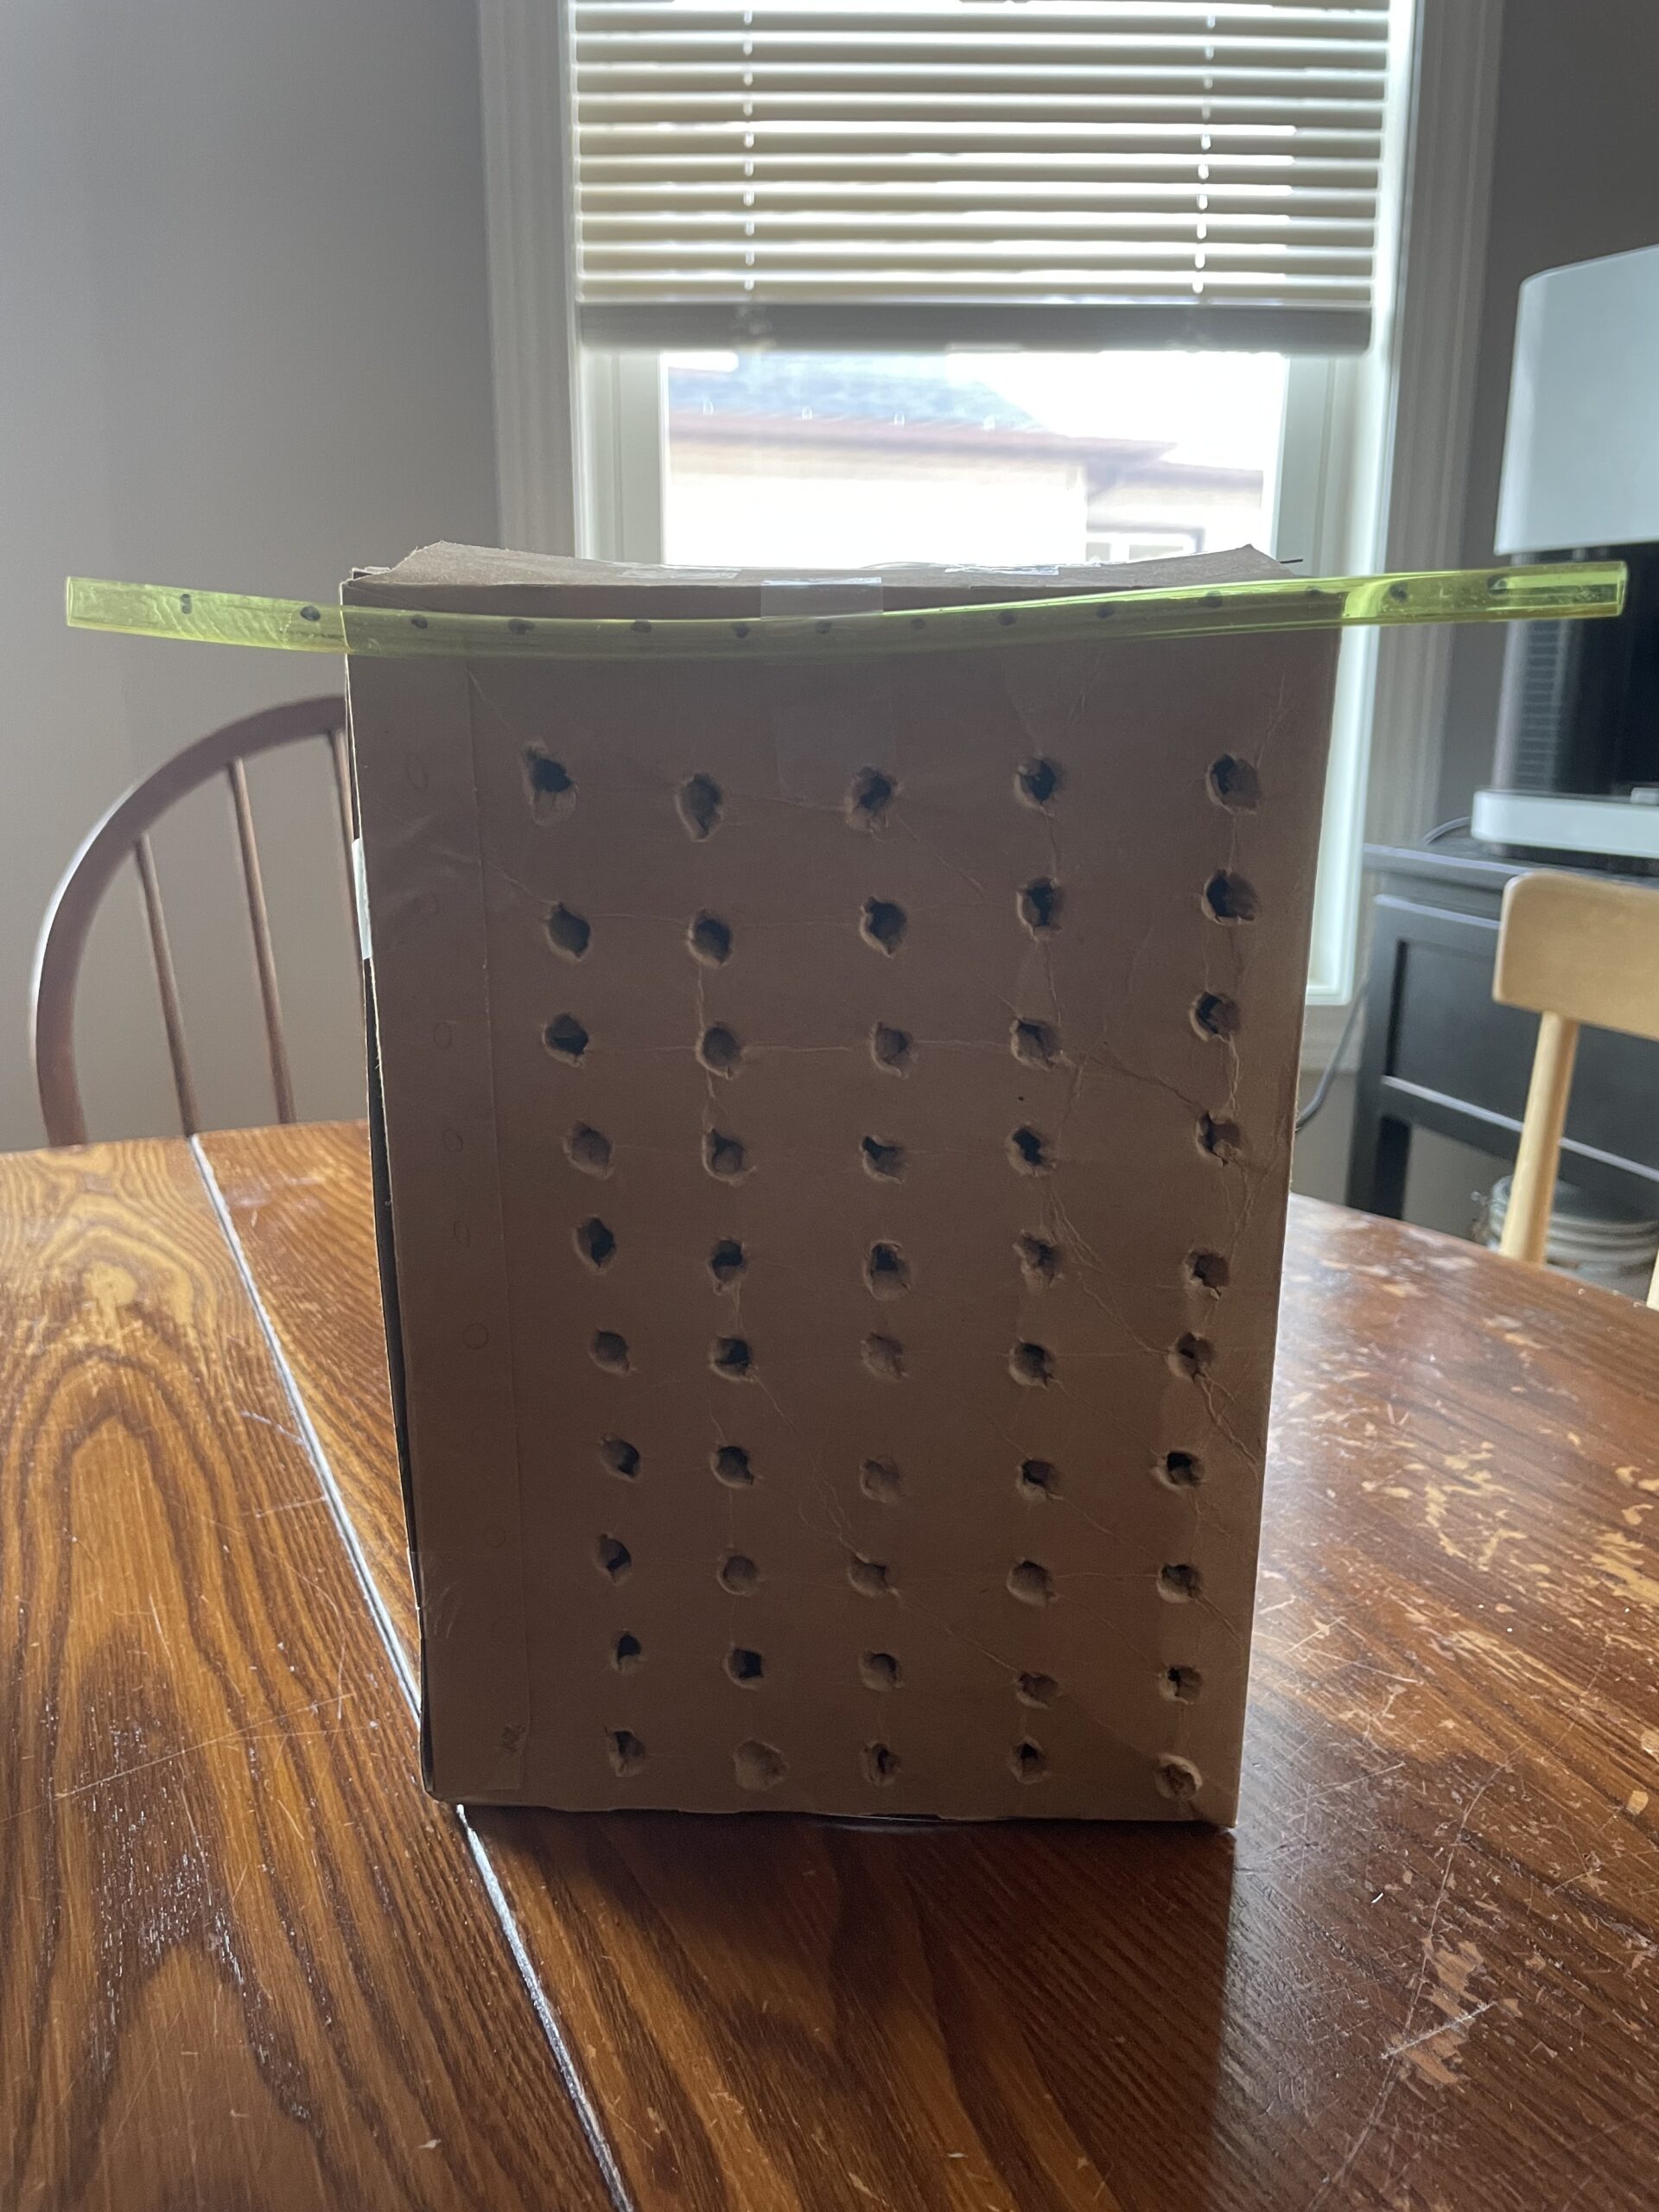
So here is my mini model. It is just a carboard box with peg holes created. My hope was to have small colored objects fill the pegs but I couldn’t find anything of the right size. The straw on the top represents the dripping waterfall which will run in front of all the lights, adding movement and reflection. At the bottom of the box will be a water basin with a water pump that pumps the water behind the box and back through the straw.
As for the colored bulbs, I have one feasible idea right now. I was planning on using glass ornaments or candlelight lightbulbs and painting the surface of them to shine different colors. I tried this on a regular size glass ornament and shined a phone flashlight through the back of the ornament to see how the color reflected.
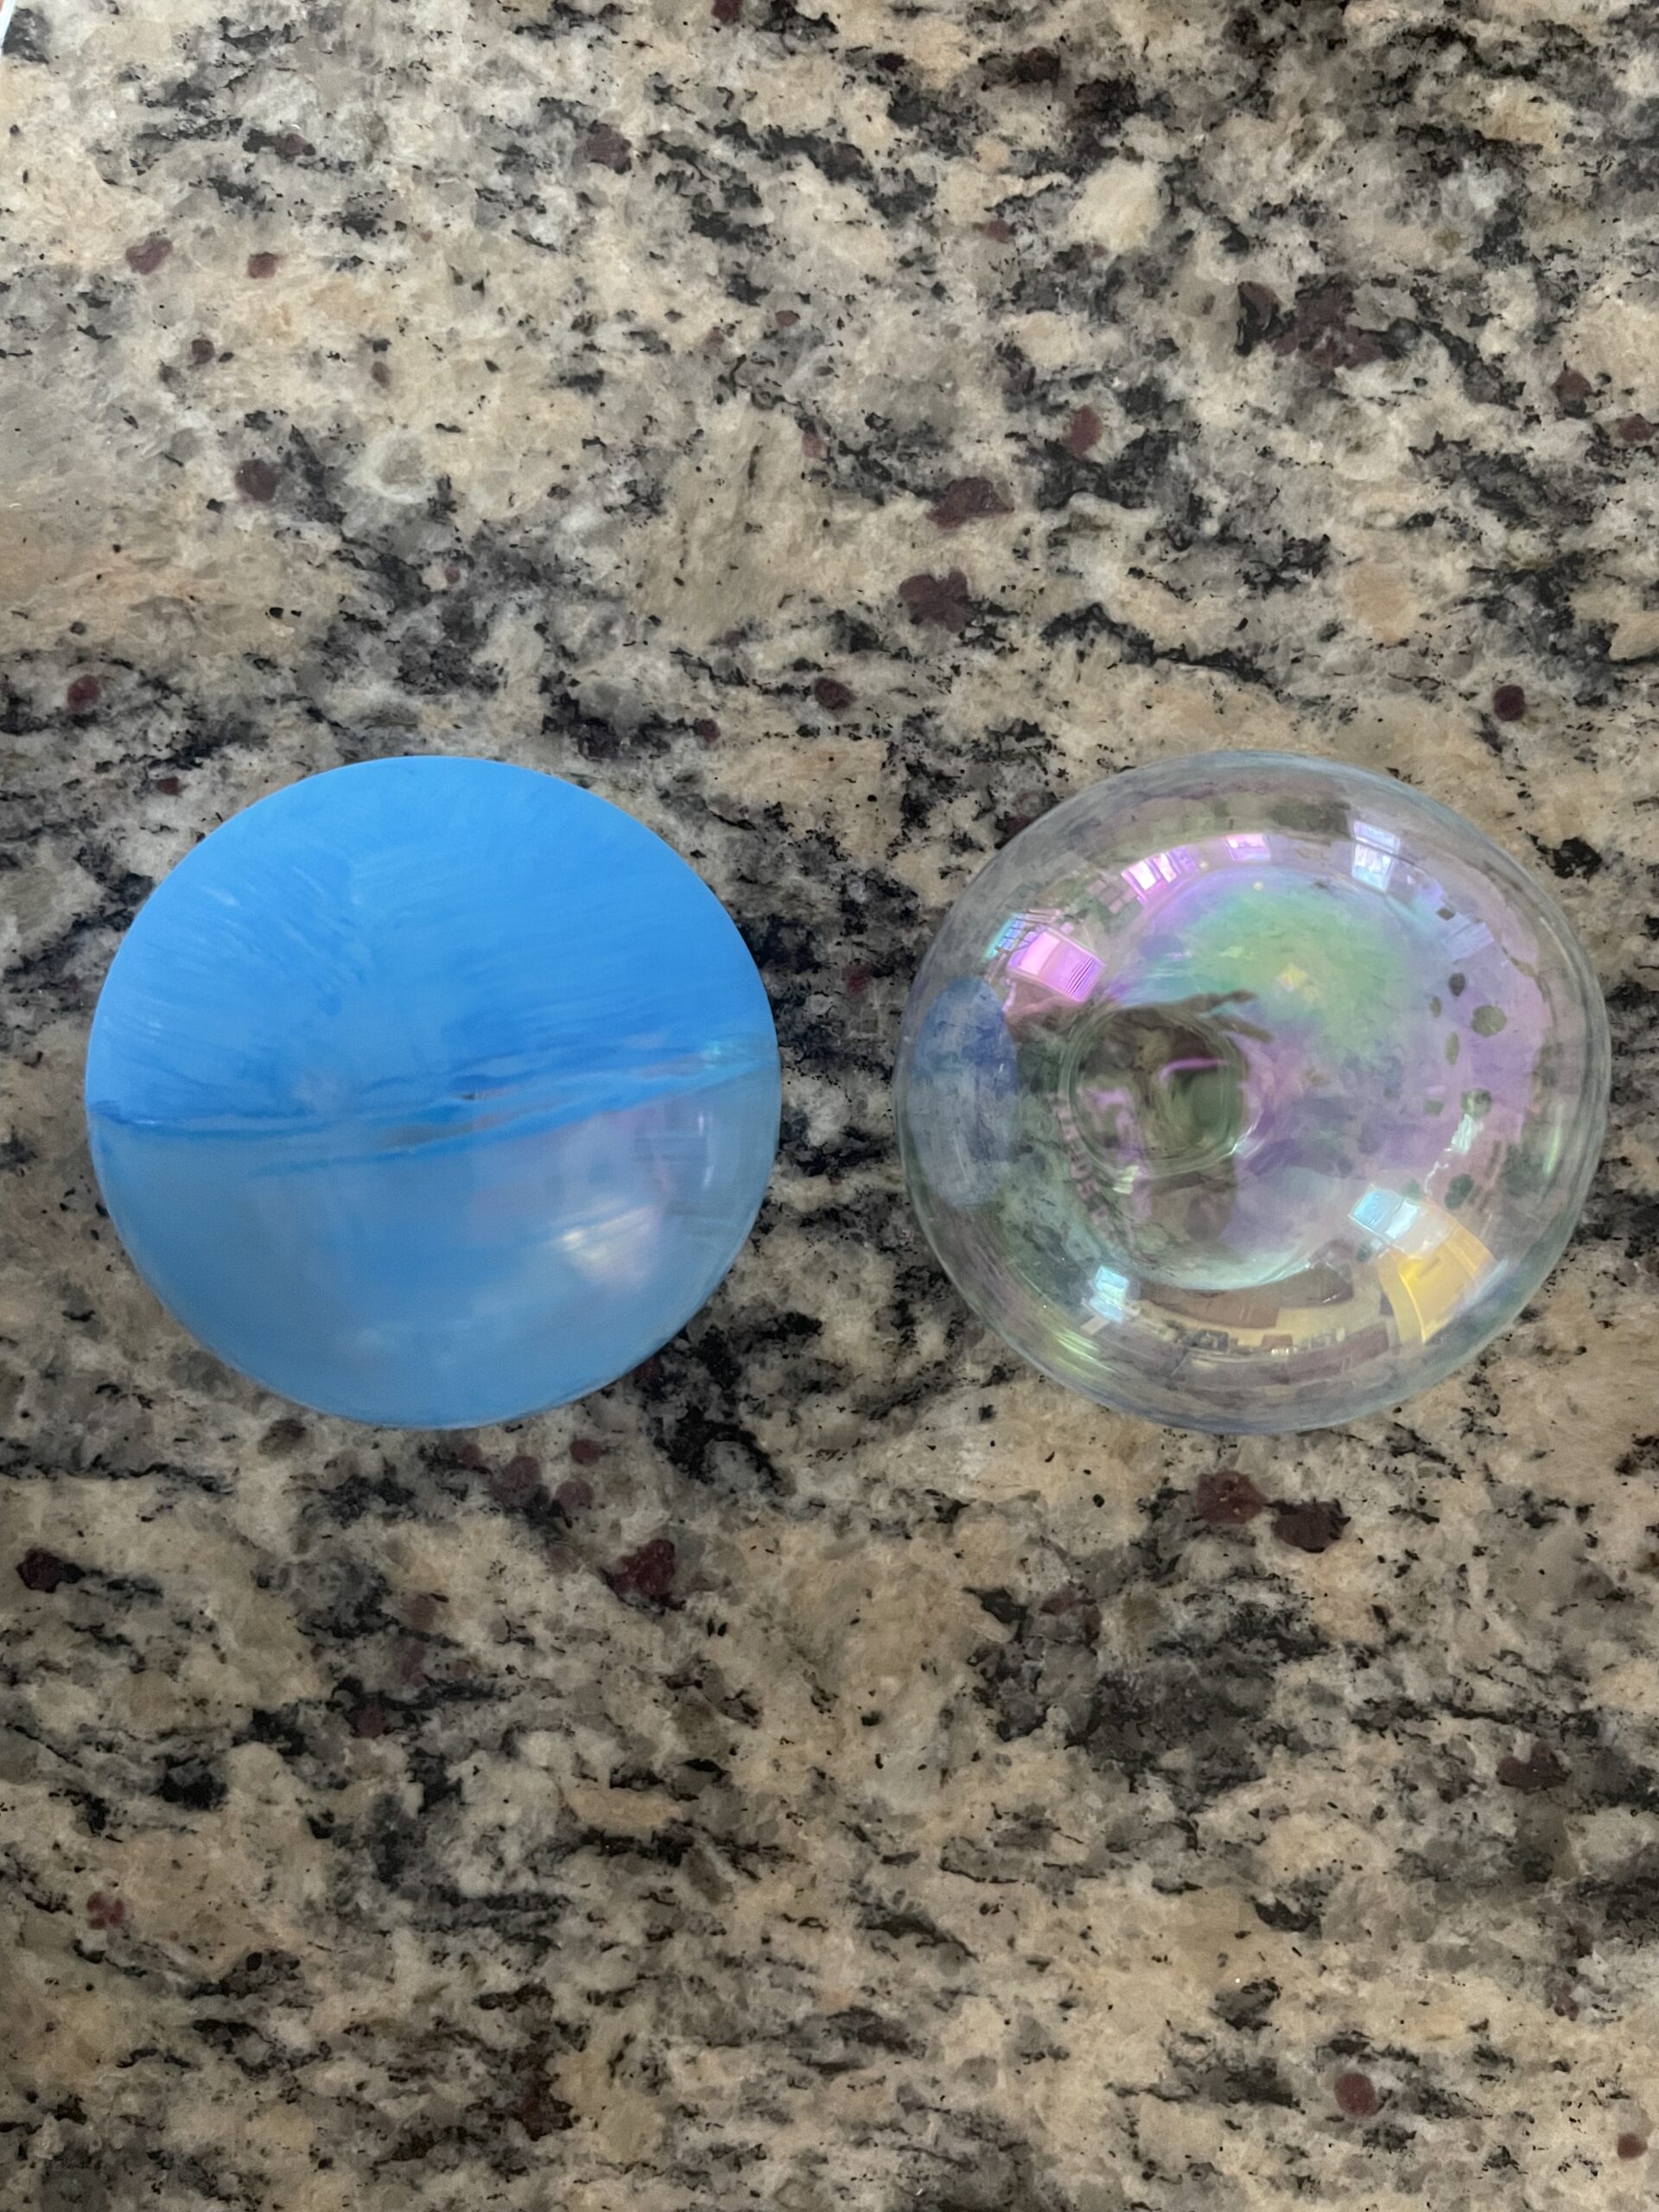
Here is the glass ornament painted as an experiment. The top side of the ornament has one layer of medium blue acrylic paint and the bottom side has one layer of medium blue acrylic paint thinned with acrylic glazing medium. This is just the paint I had access to, but if I were to do this on my final project, I think I would find more success with a neon acrylic paint that was more sheer.
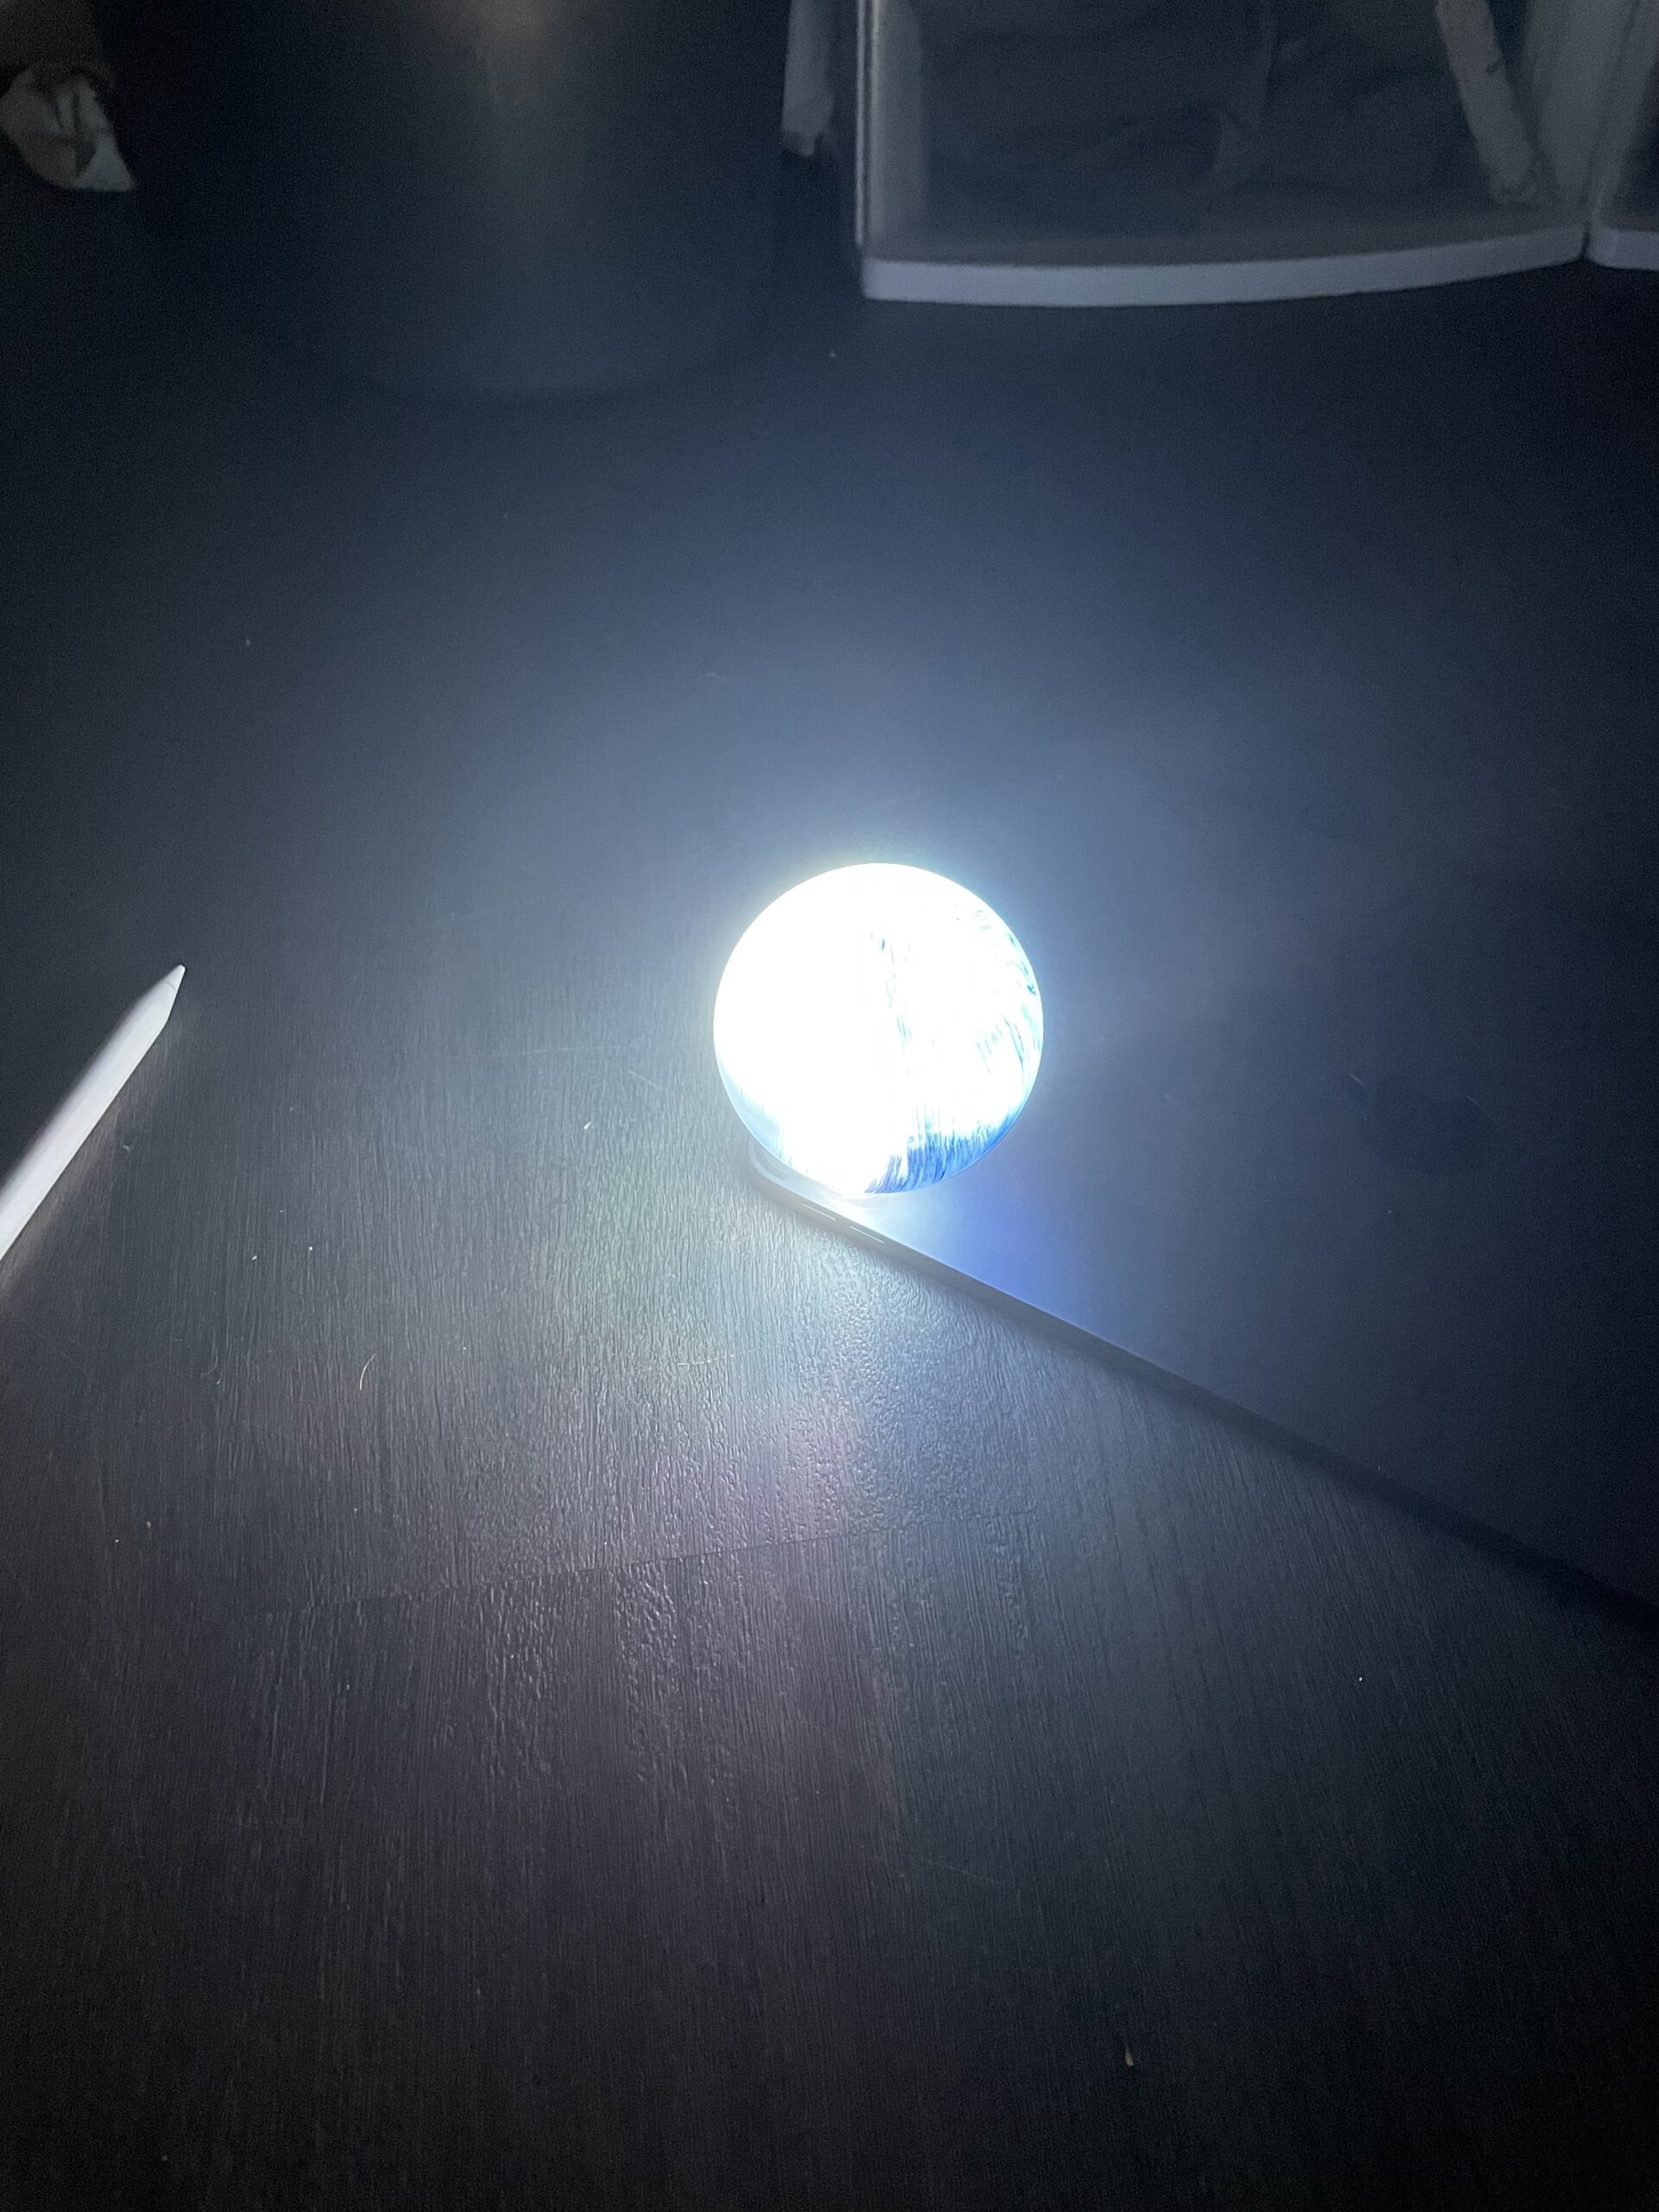
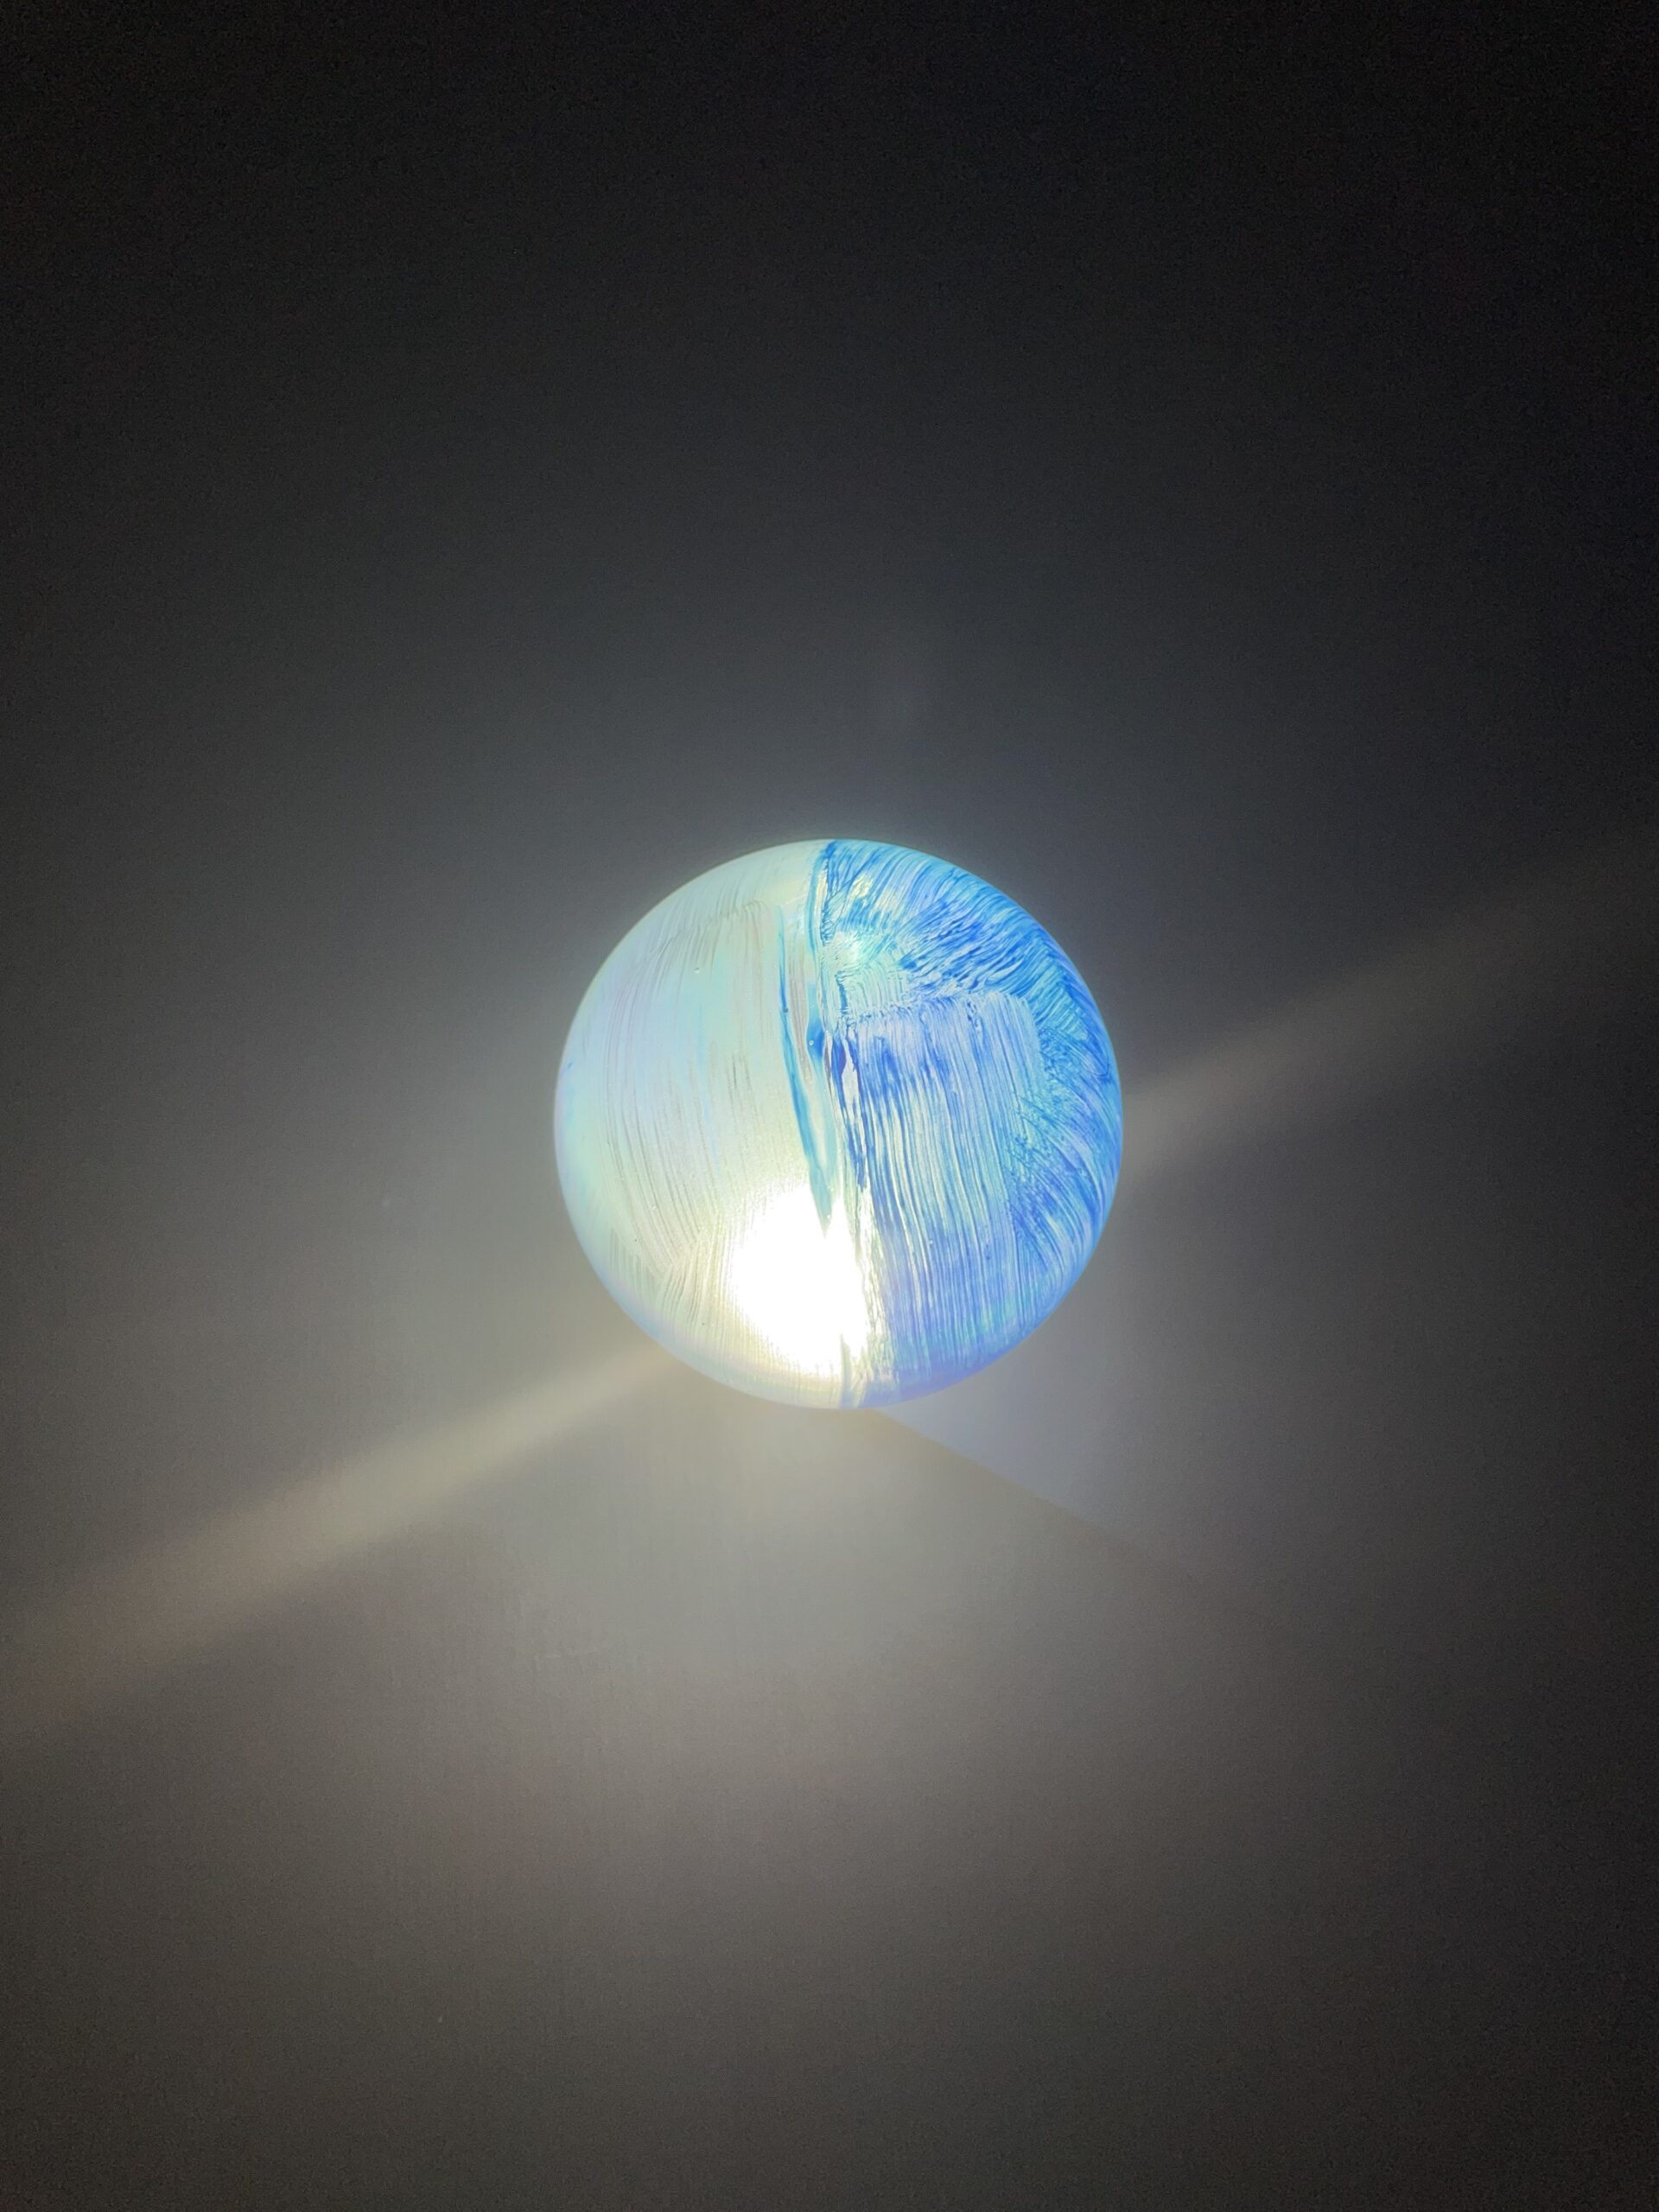
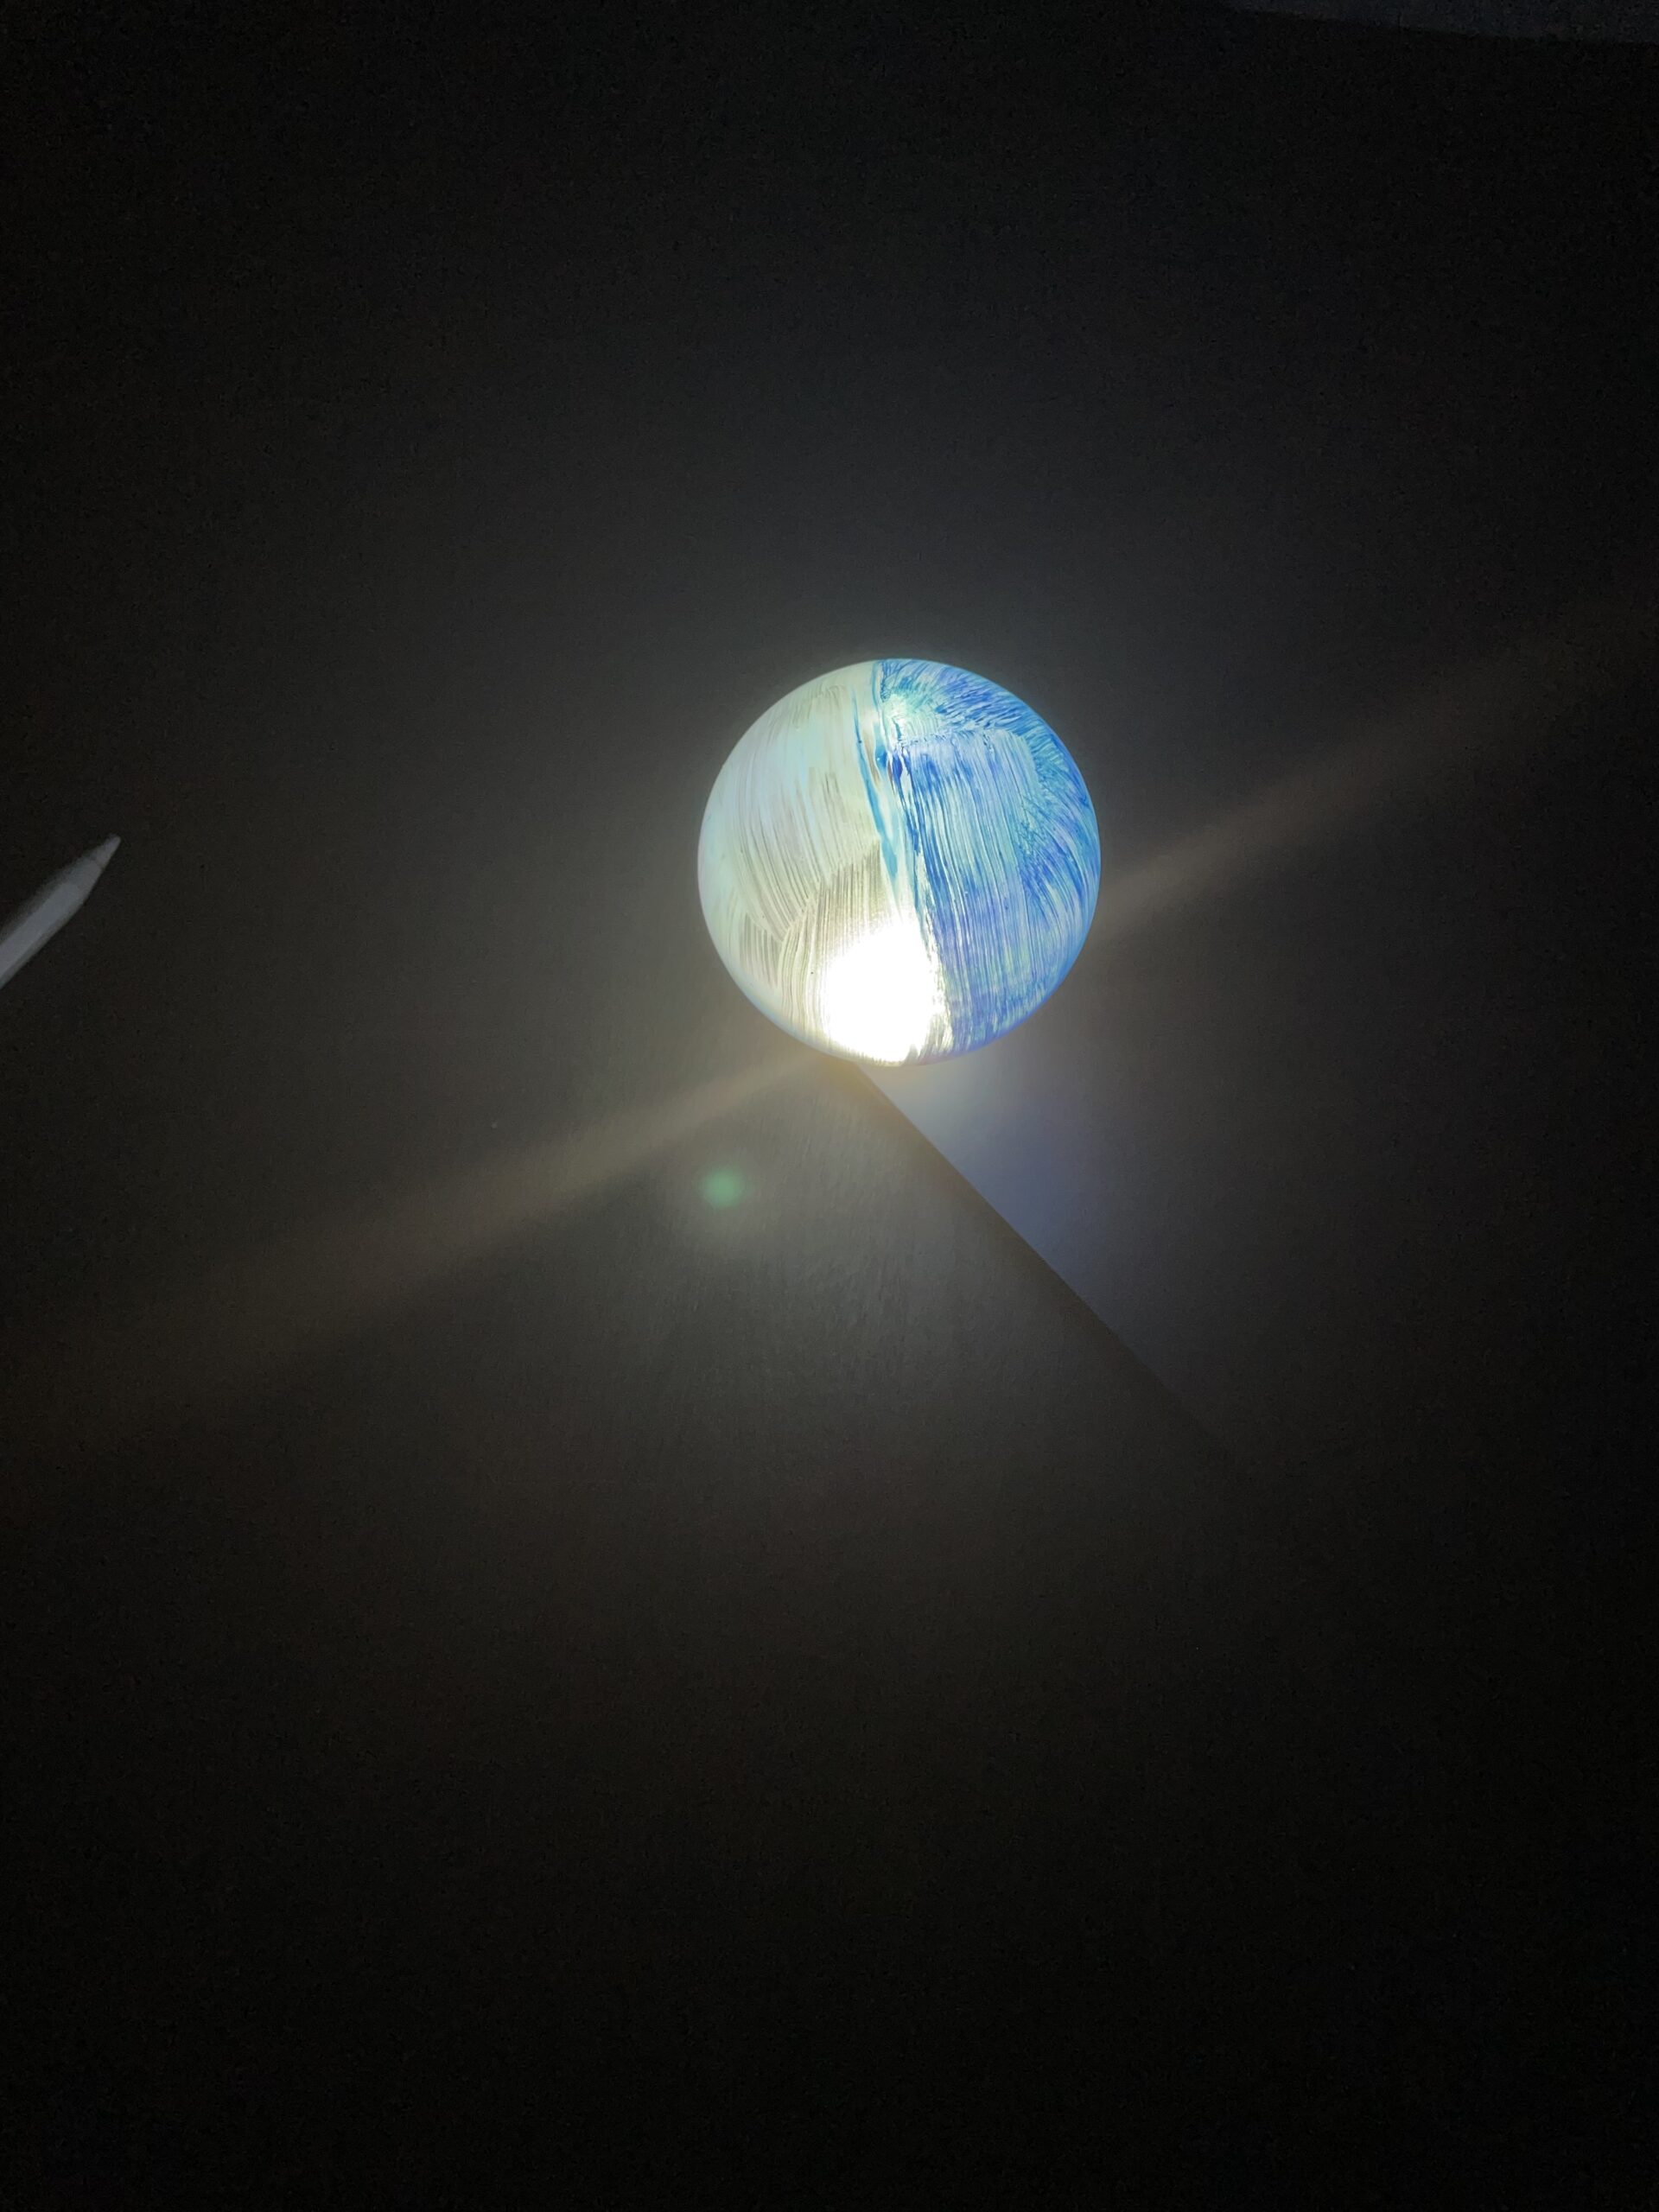
My first attempt at this is nowhere near what I want my final project to look like, but I did learn some lessons. I like the acrylic paint mixed with the glazing medium better (left side), but both sides still came out pretty streaky. I would attempt to coat the ornament differently next time. Probably by dipping it and hanging it to dry to avoid visible brush strokes.
My shopping list is as follows:
- LED Strips – 100 ft
- Glass Bulbs – 200?
- Neon paint
- the laser cutting material
- a tray
- water pump
- silicone tubing
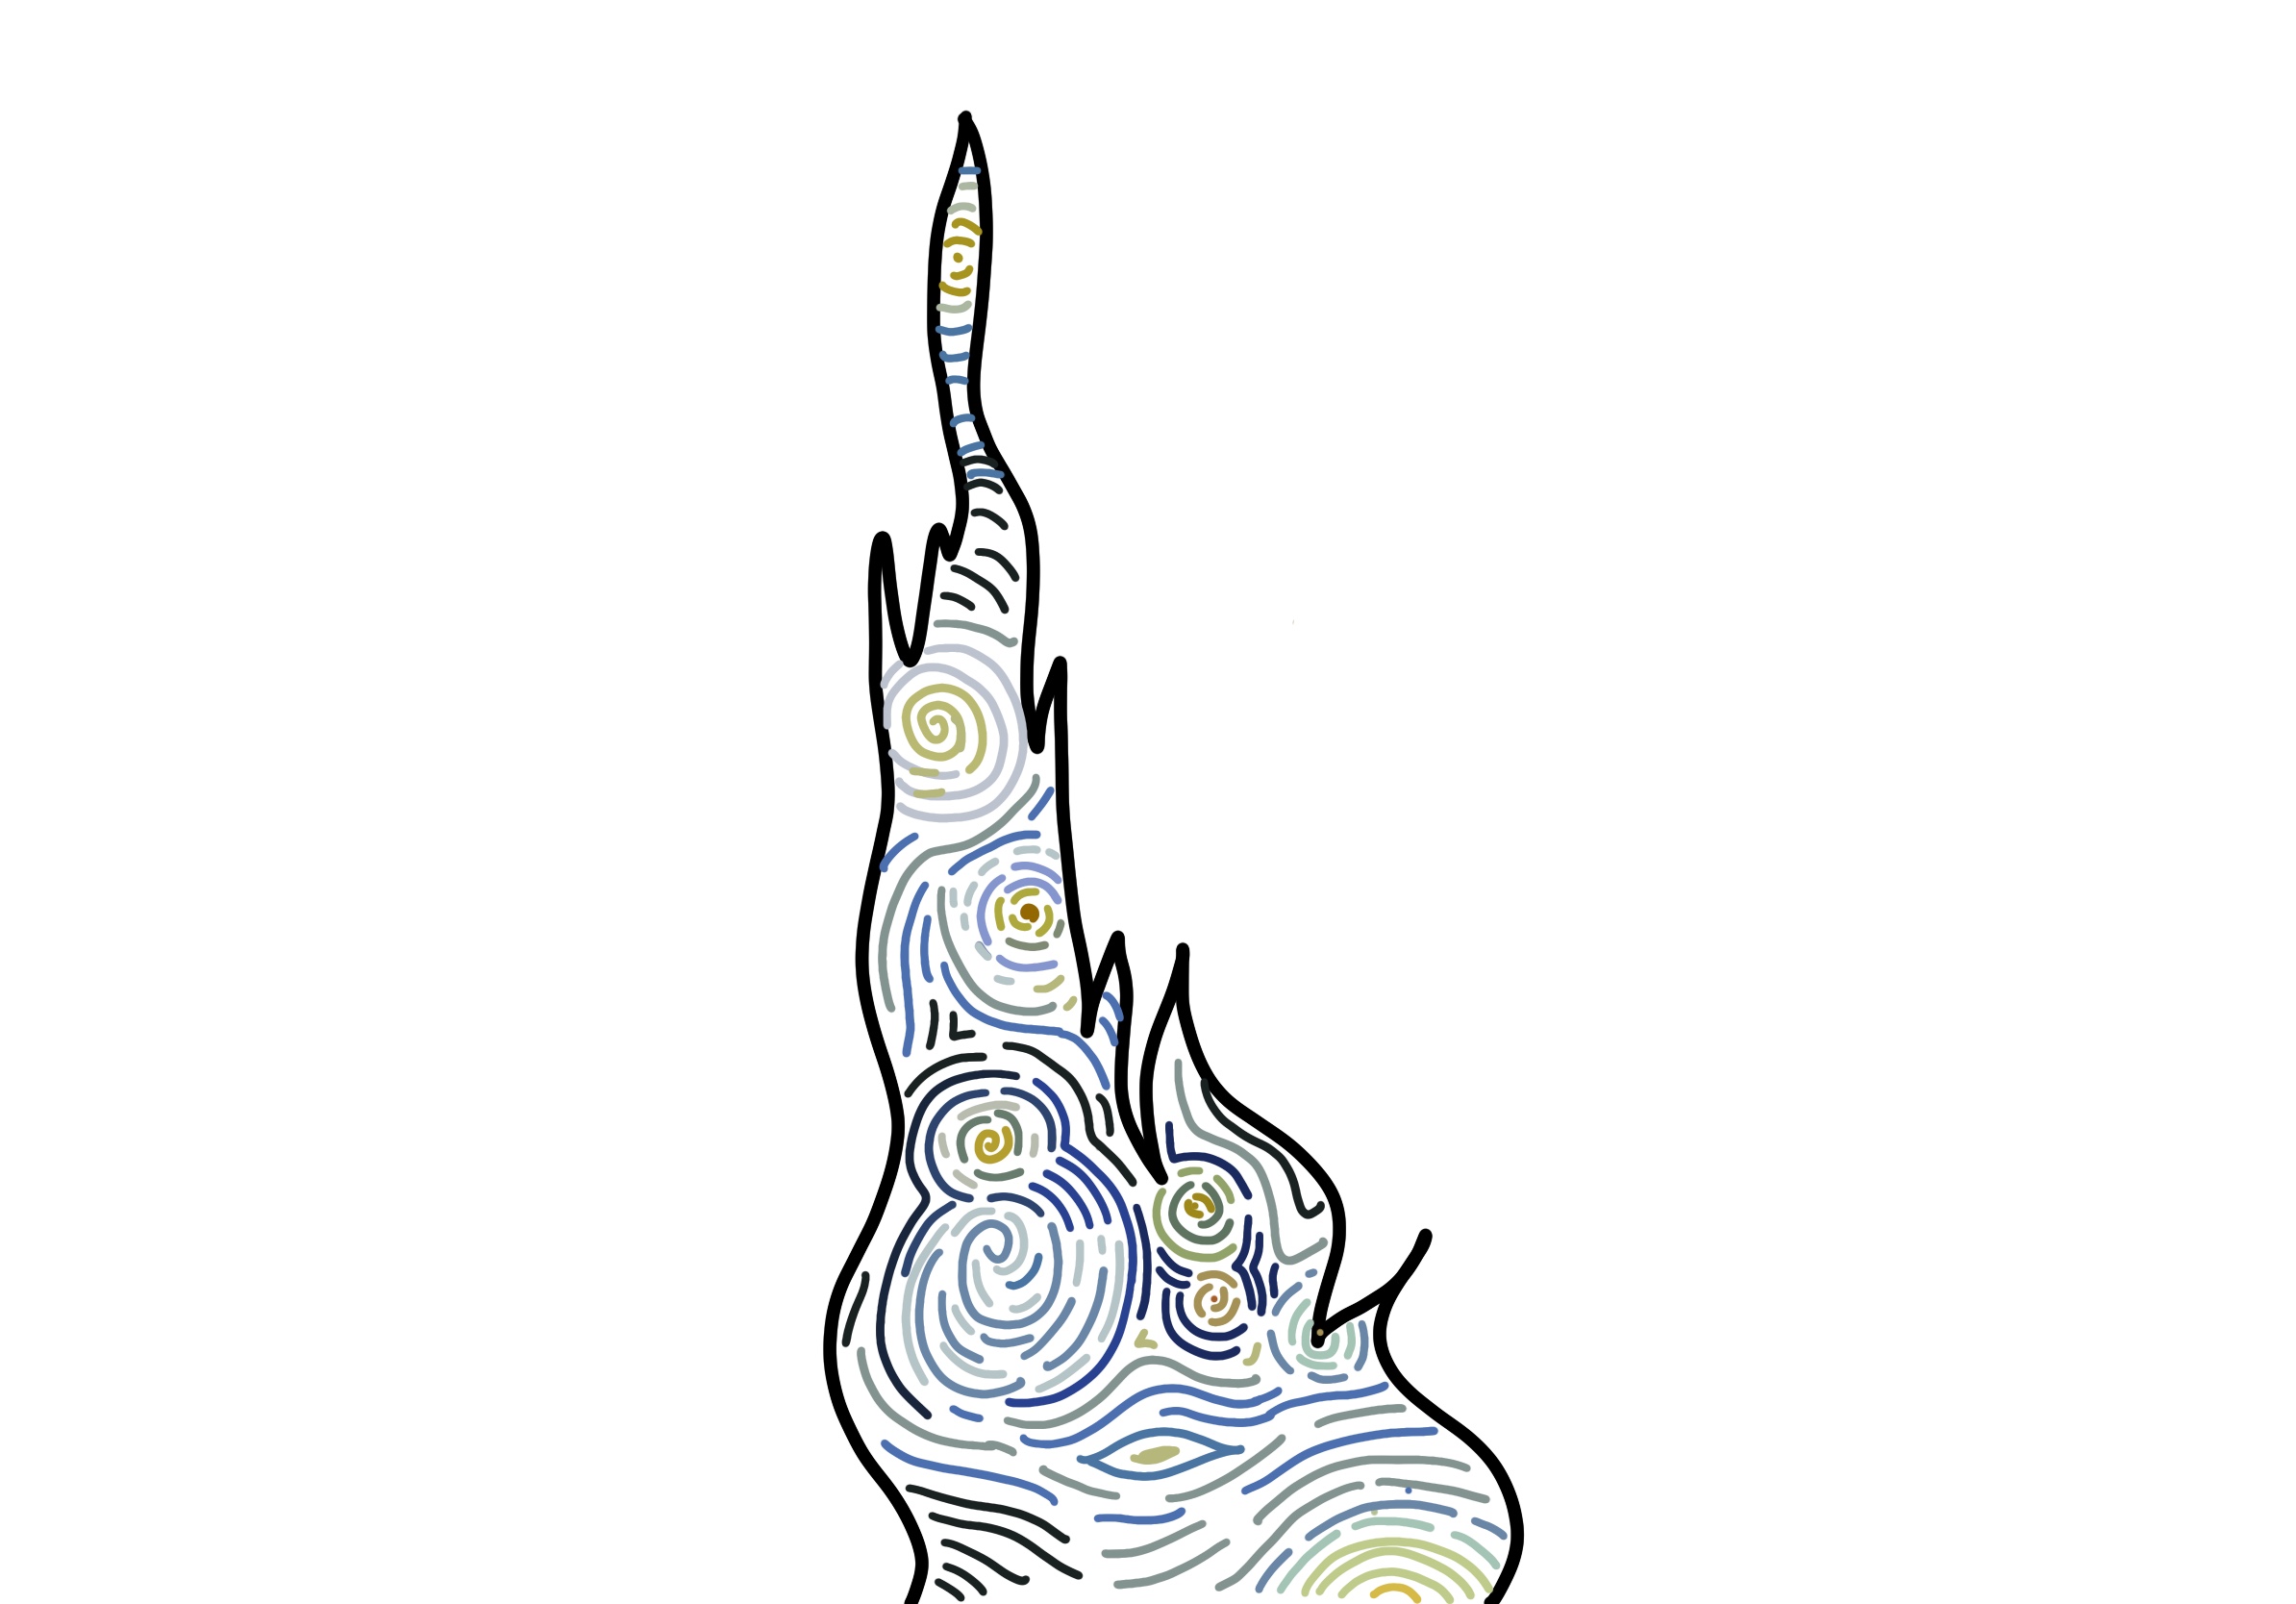
Because this list is getting expensive, and I don’t love my model. I have started to redraft my idea. I will go into further detail next week but I am now thinking of creating a 3D neon sculpture inspired by Van Gogh’s Starry Night. Below is a drawing. I would still CNC cut the base, cut all of the lines out, and fill the space with some type of colored light filters to have the cracks glow the desired color when the backlight is put behind it.
I don’t think you can go wrong with either project, it’s just whichever you feel most comfortable and excited with. I had no clue you were planning on using water with the Lite Brite concept and wanted to know if you have run any tests with it yet to see how the water plays with the bulbs and light? A cool idea might be to offset the bulbs so that the water splits and hits all the lights.
I can really see the vision coming through for both aspects. I agree with Cullen that you can’t go wrong either way. I am so excited to see variety of colors that you use because I think that you’ll get some really cool effects with the different shades of blue. How committed are you to using bulbs or something that really sticks out of the board? I think that if you use some type of clear peg like material, you could also use tissue paper to color it or some other cheap alternative to help keep the cost down while also getting various shades of blue.
I really like the lite brite idea, but the concept of putting starry night inside of the Cyprus tree is also a really great back up plan. Test tubes definitely seem like a cheaper option than the bulbs you used for the test. Dipping the bulbs, as you mentioned in class, will also likely get the non-streaky effect you want. Like the other’s mentioned, you should do some tests with water to see how it interacts – and to see how difficult working with water is.