Concept
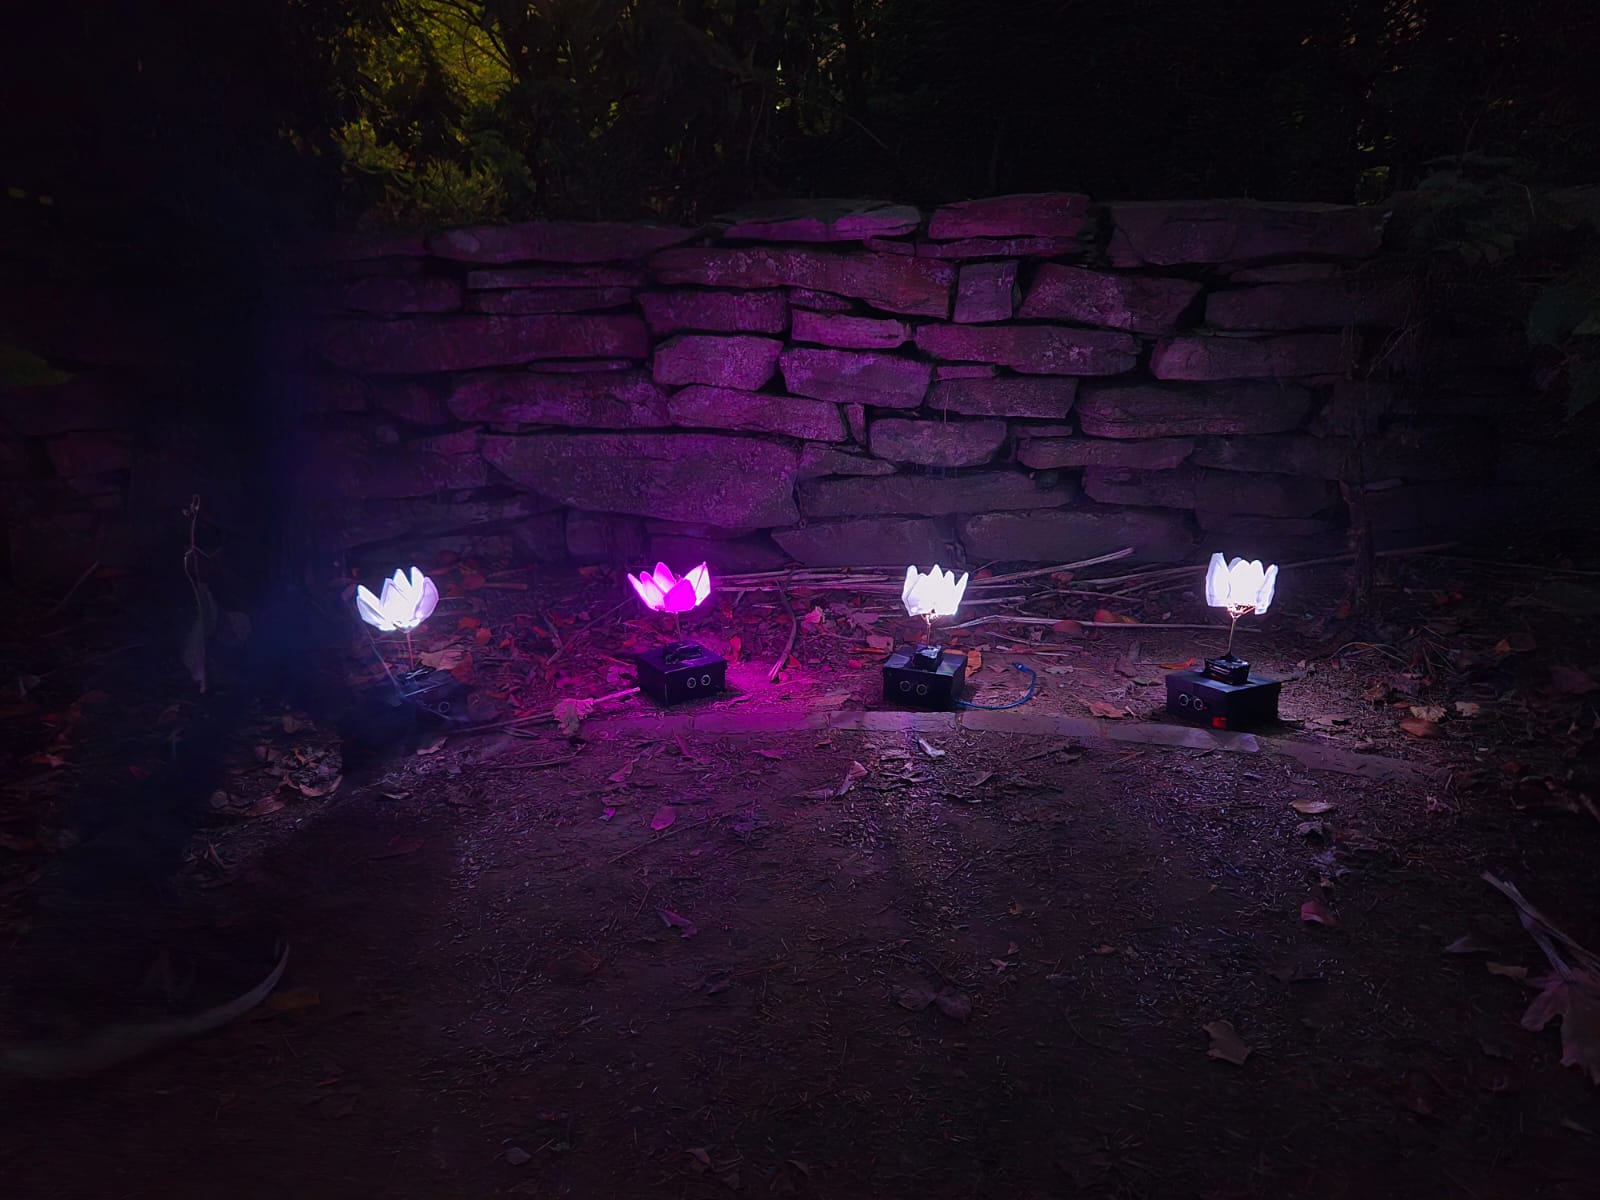
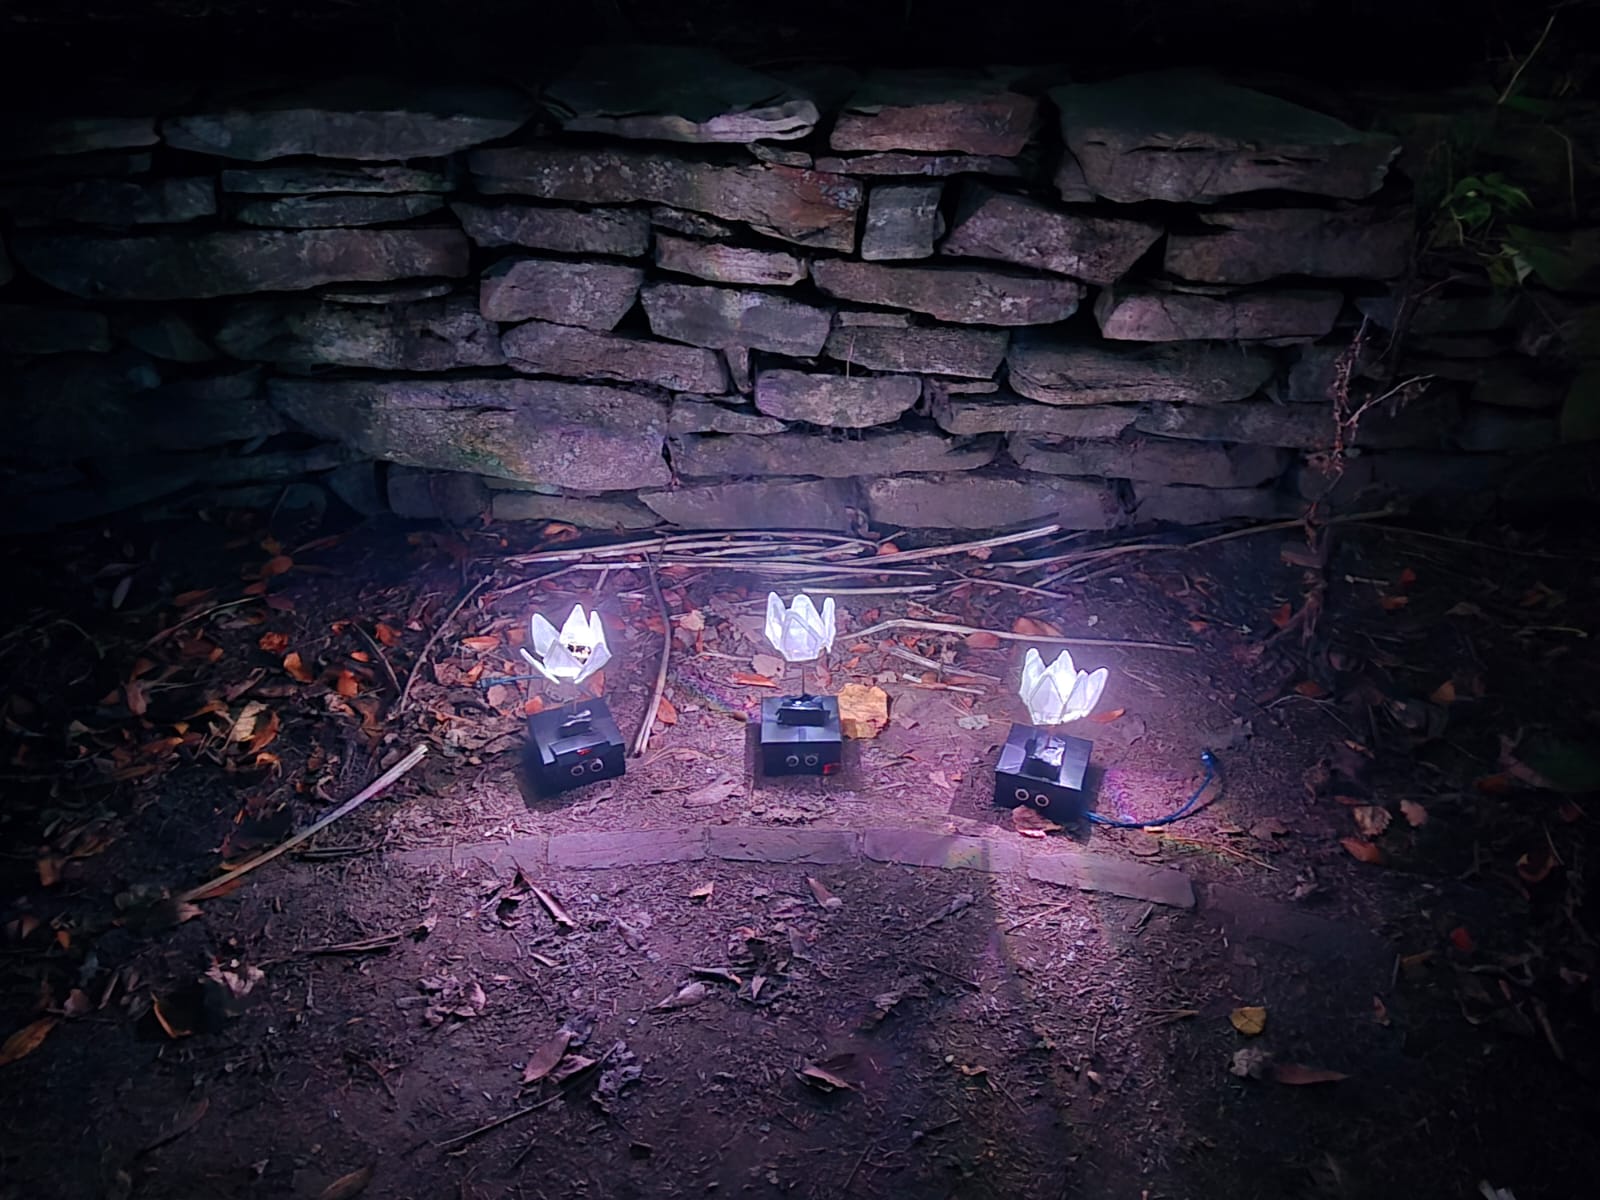
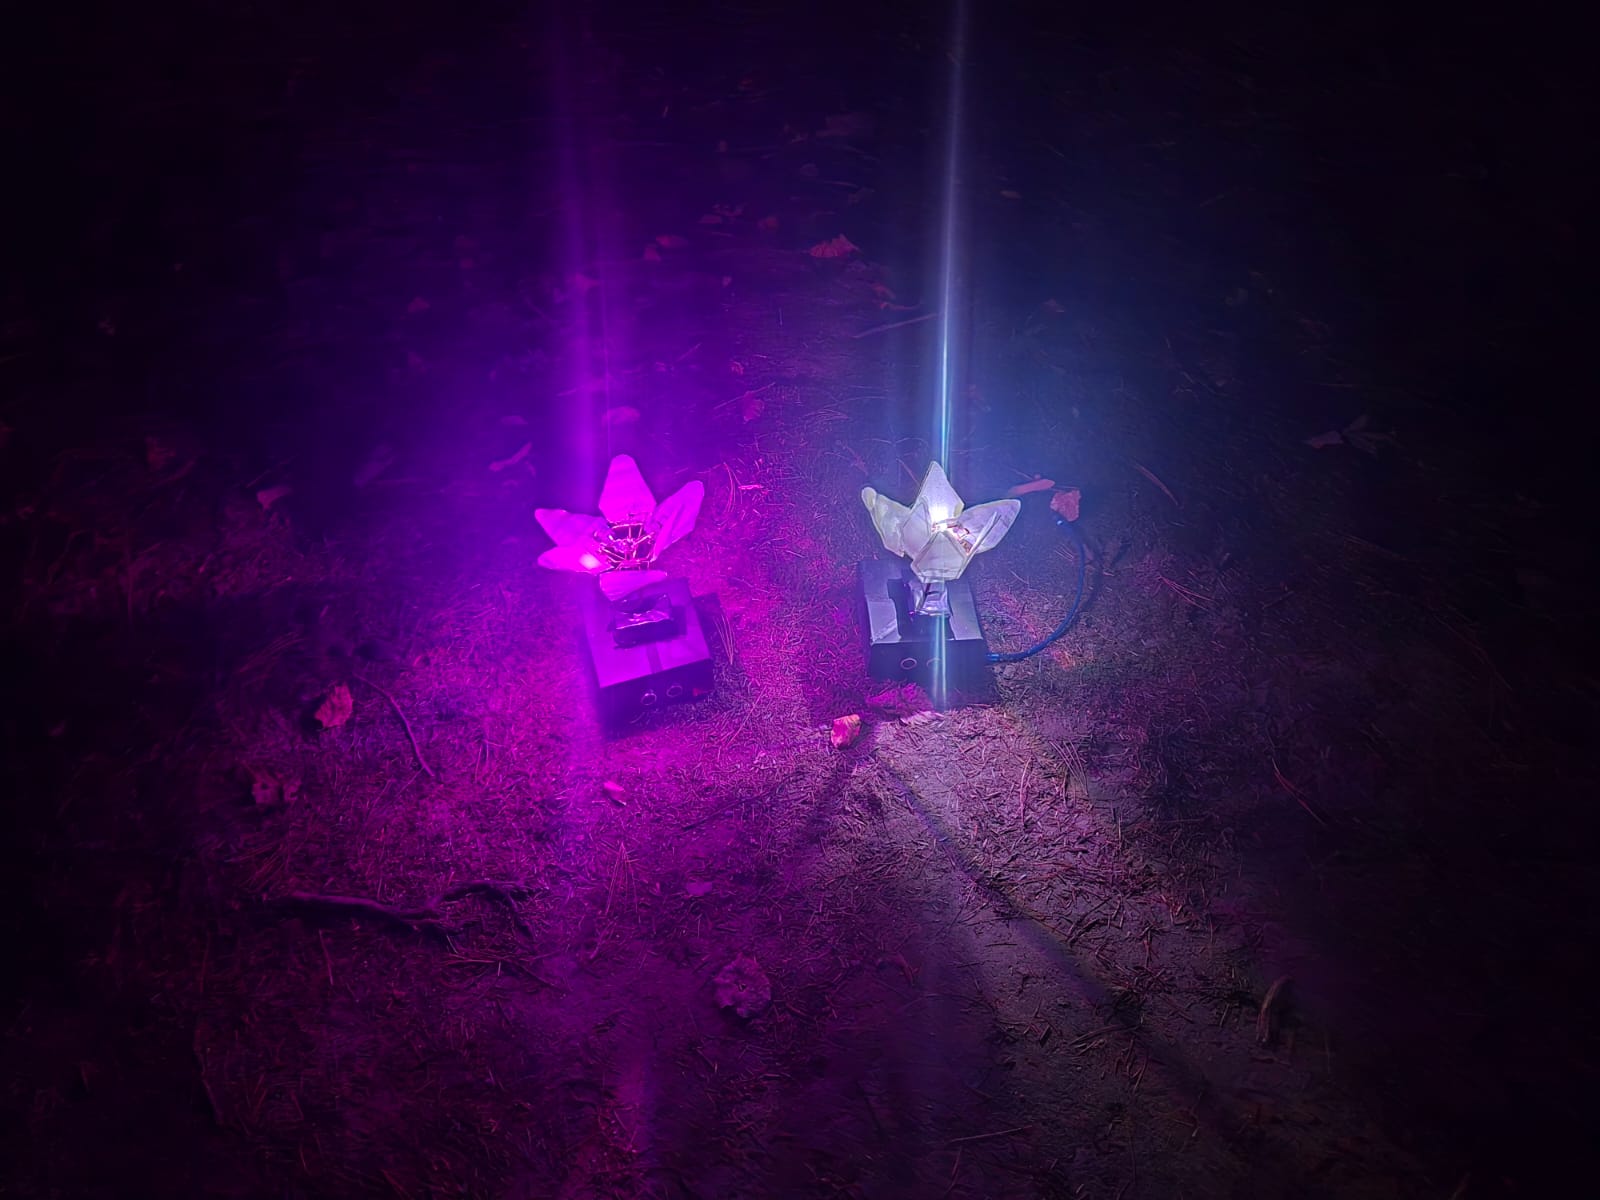
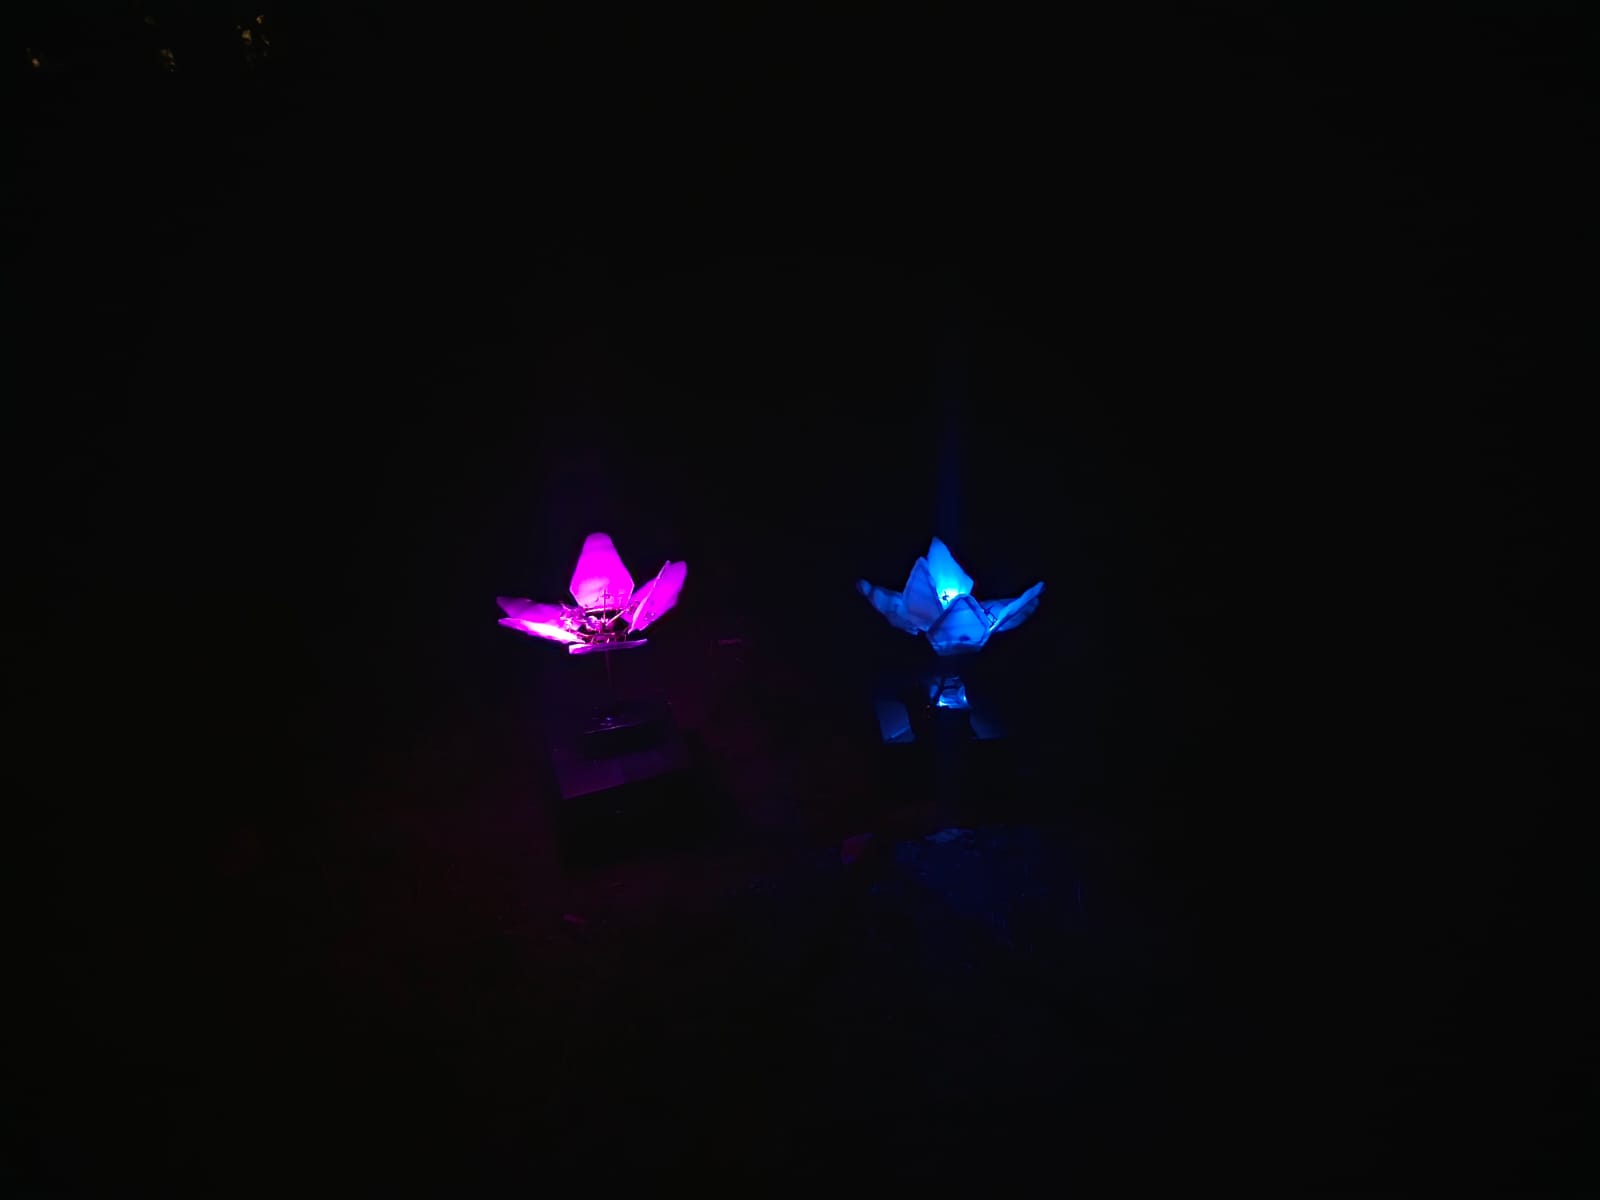
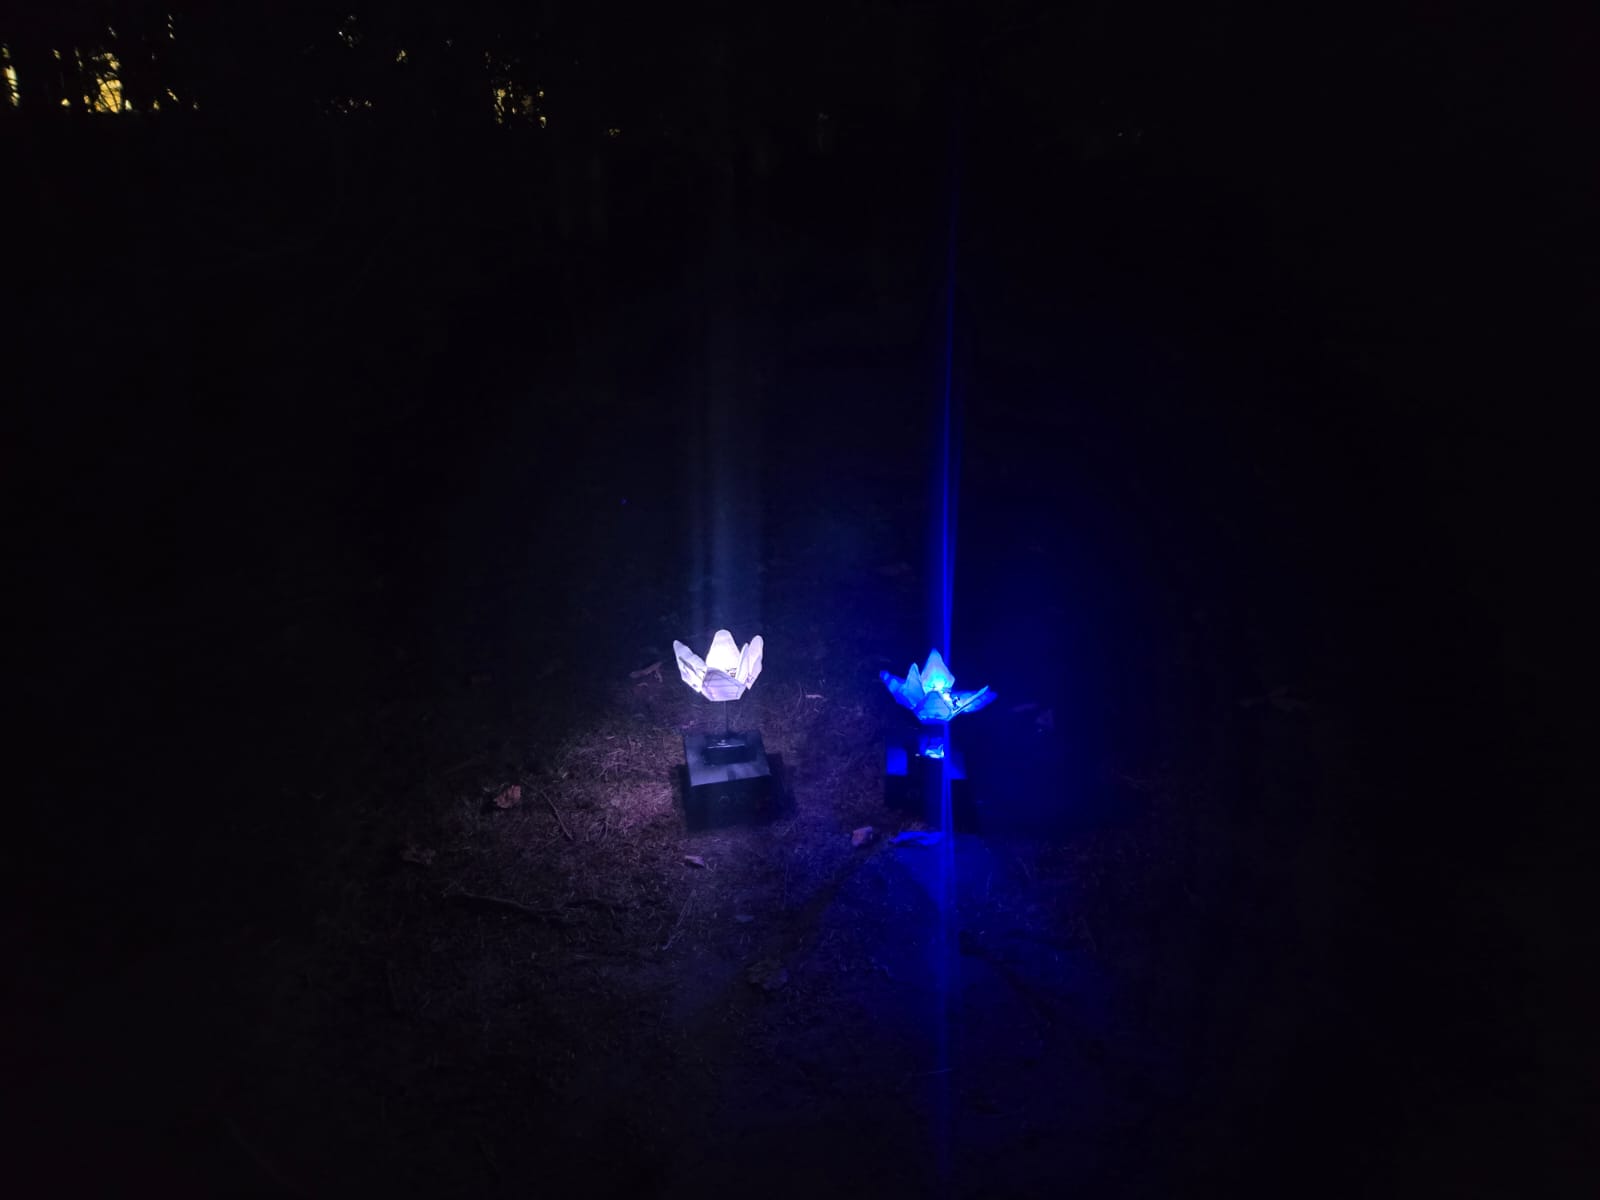
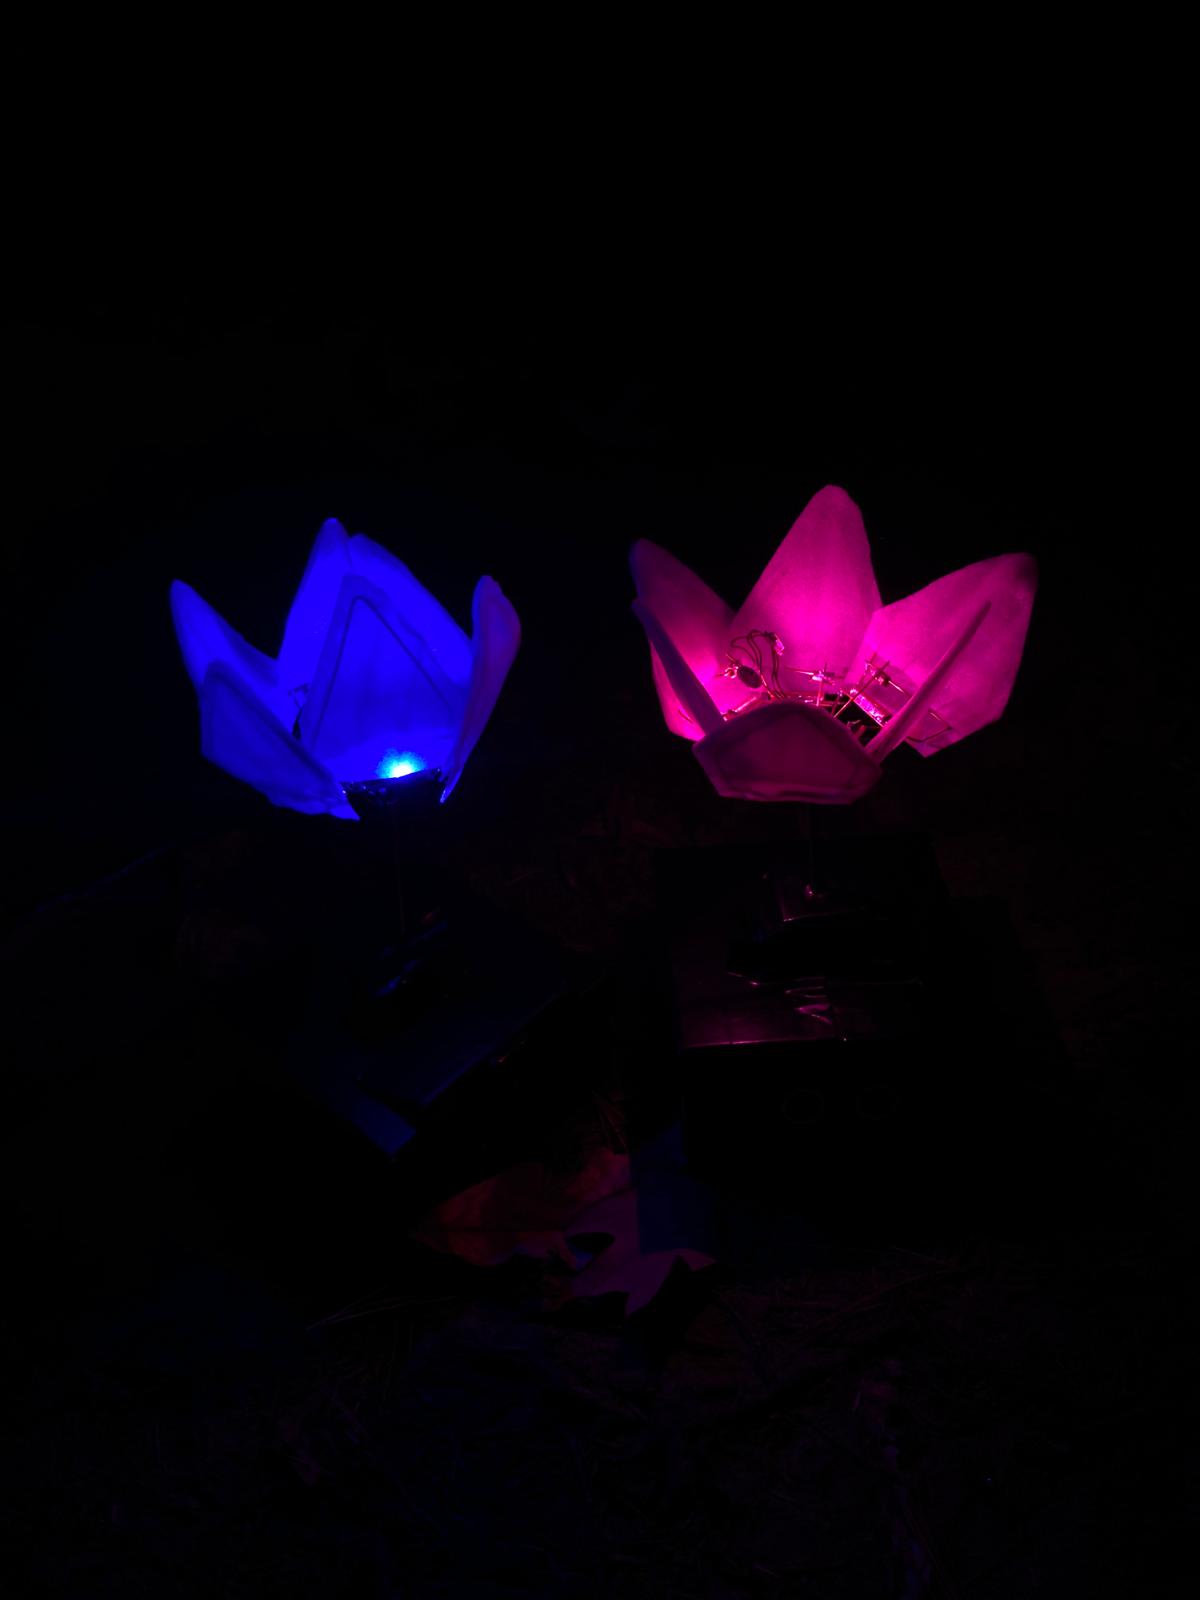
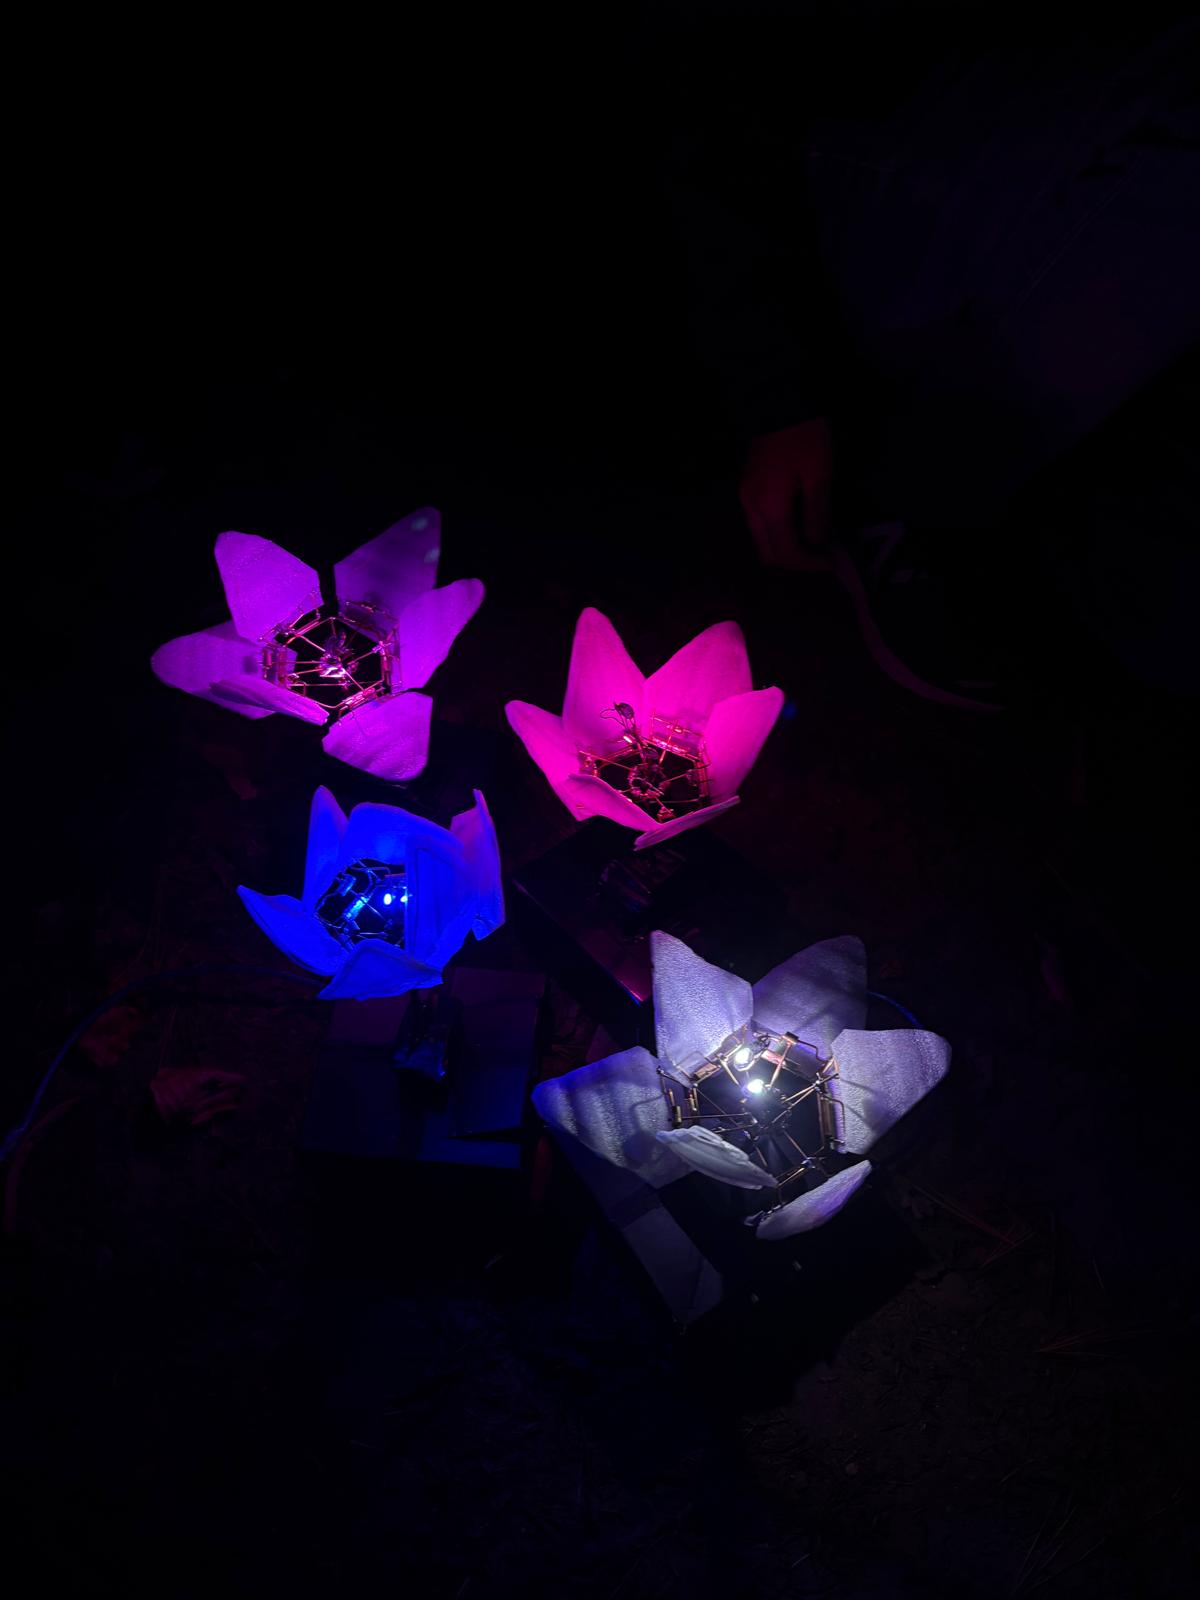
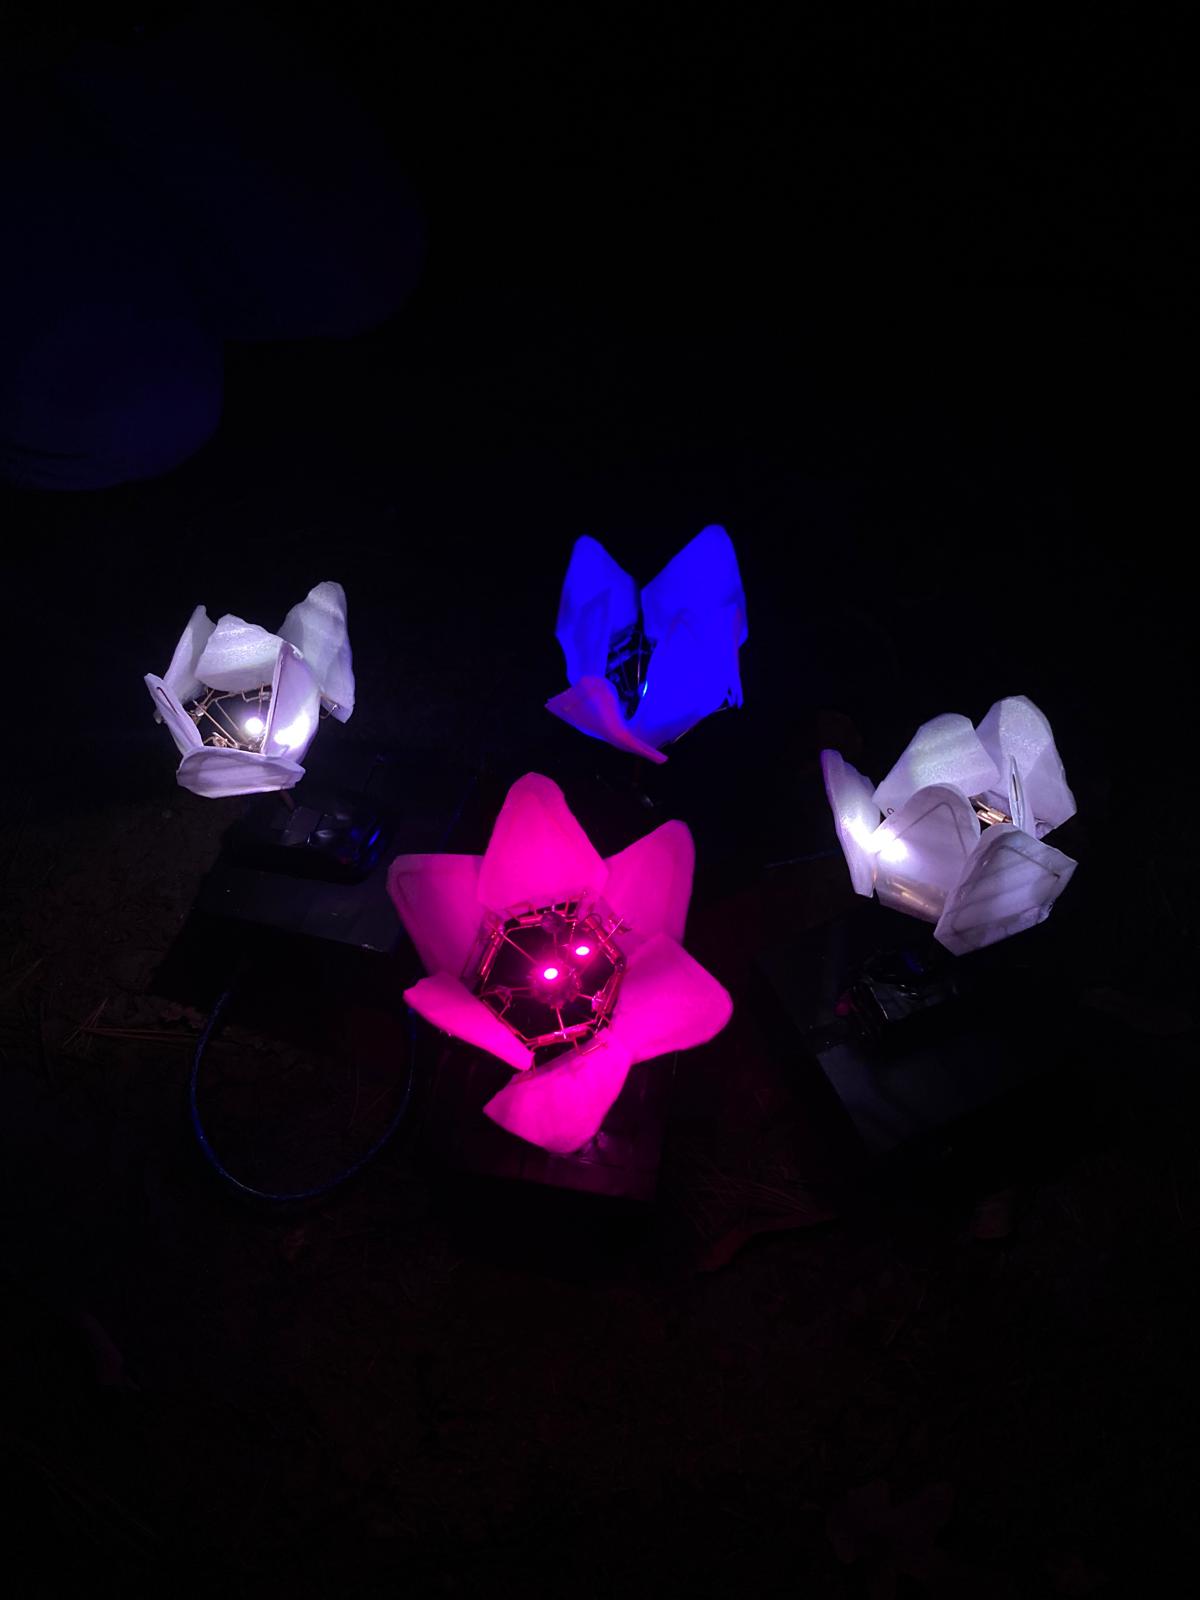
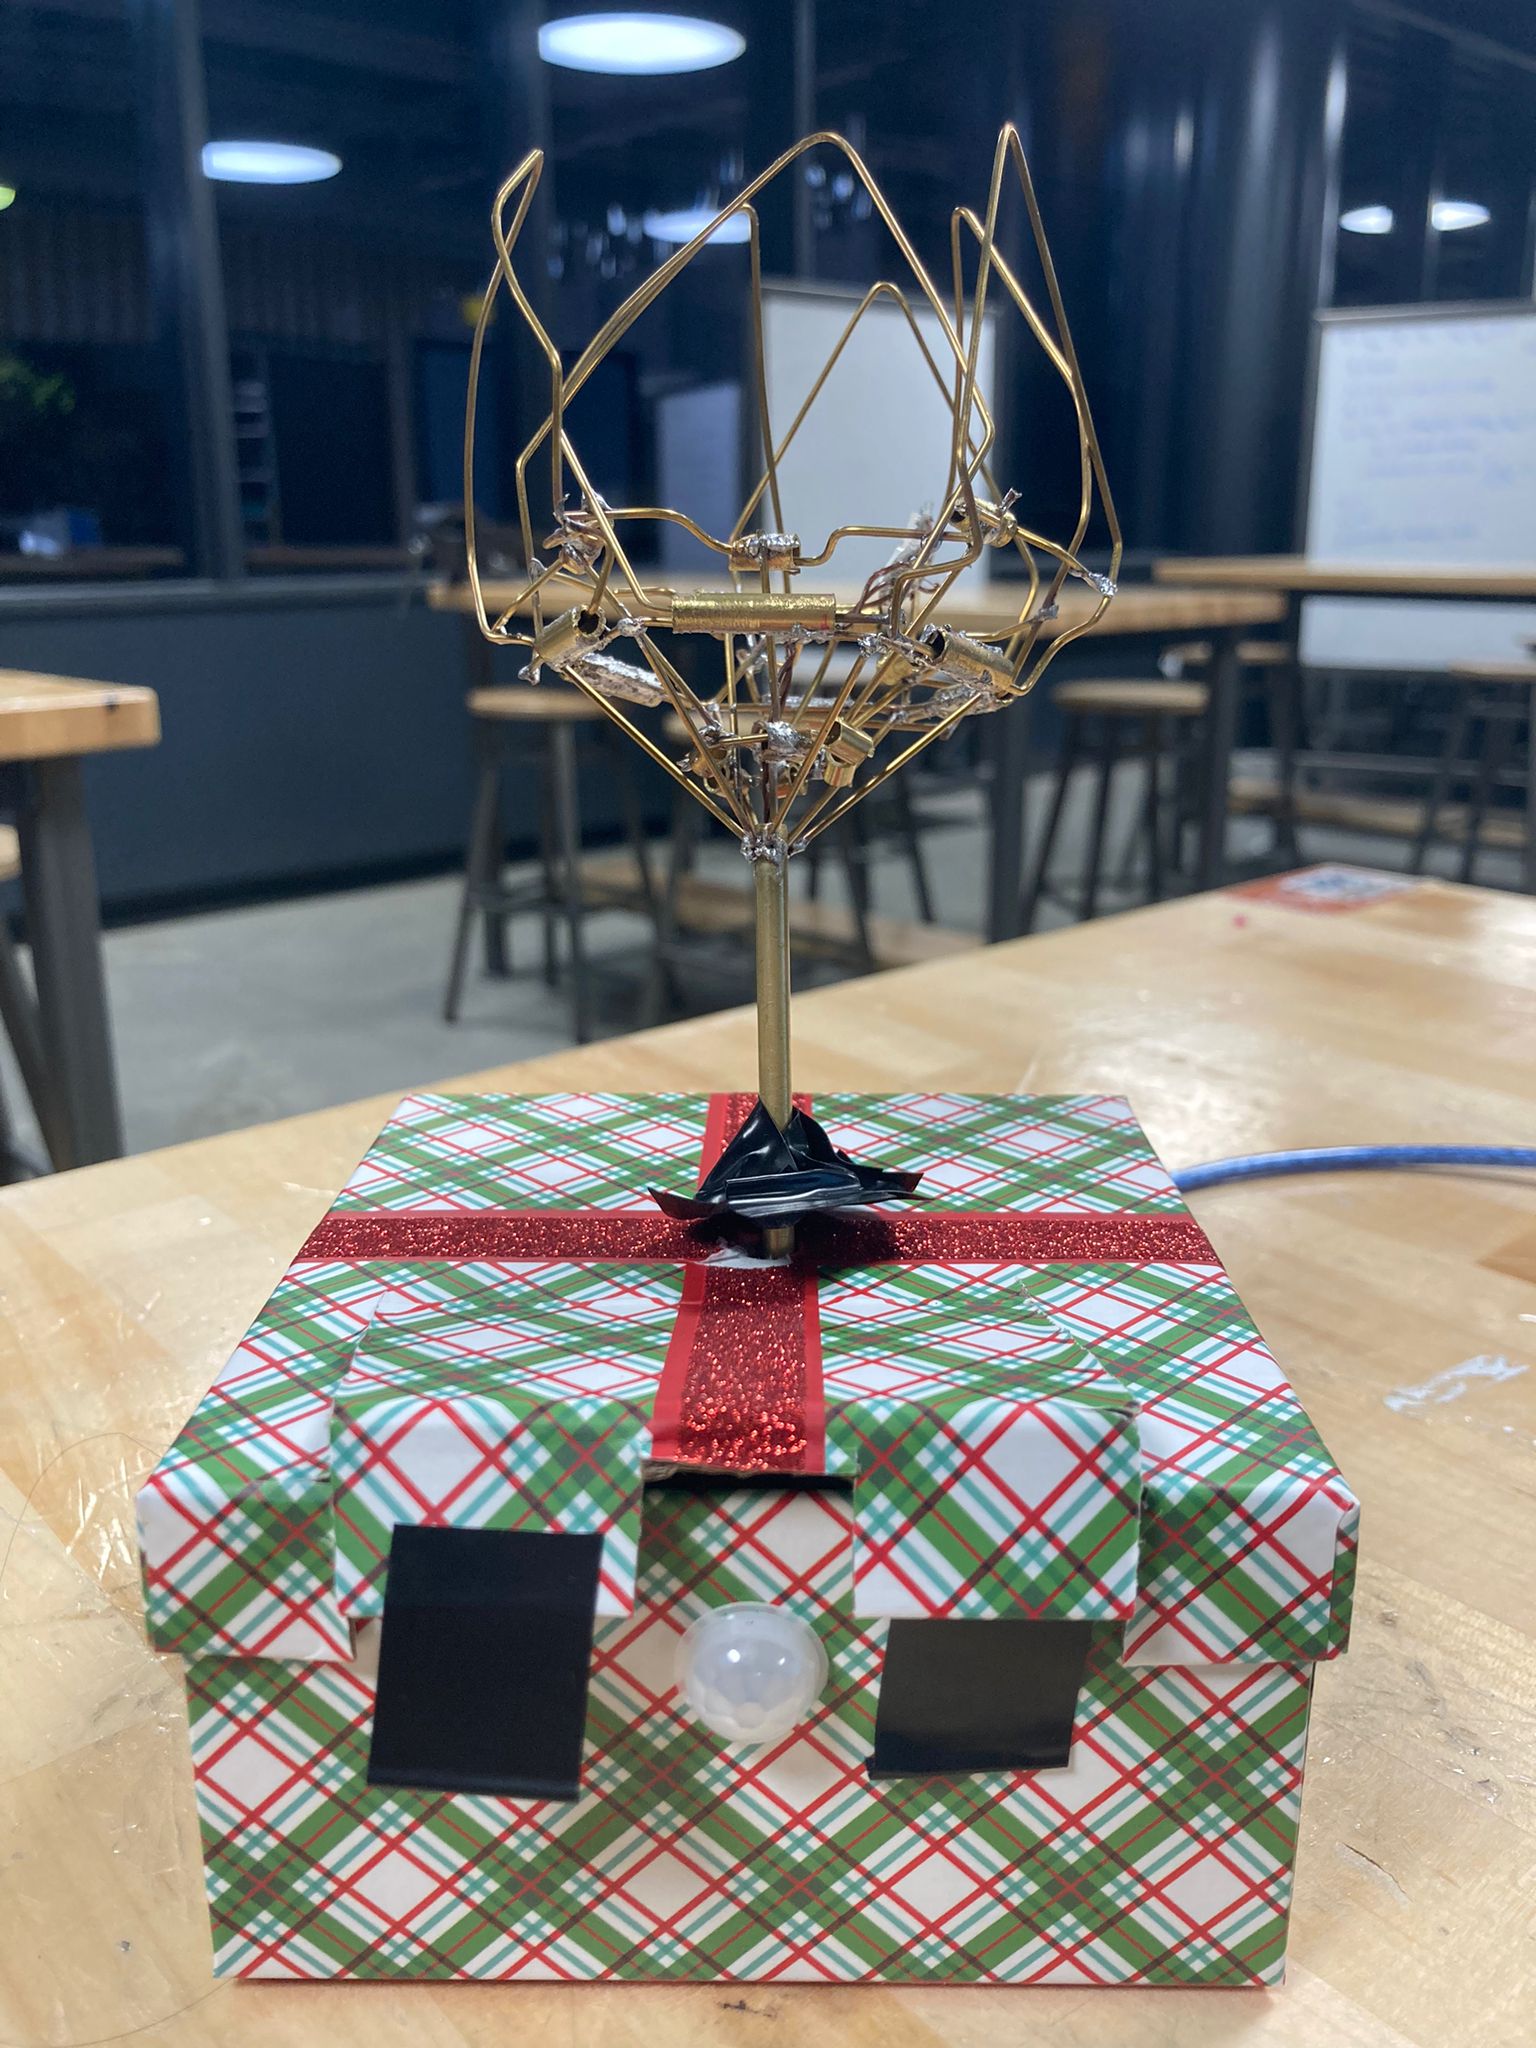
The title of this piece is “Nature’s Glow”. The goal was to capture an ethereal feeling that sometimes can be found in nature. As such, the design was decided to be flowers lining a dark walkway that use light and mechanics: as people walk past the flowers open and glow bright.
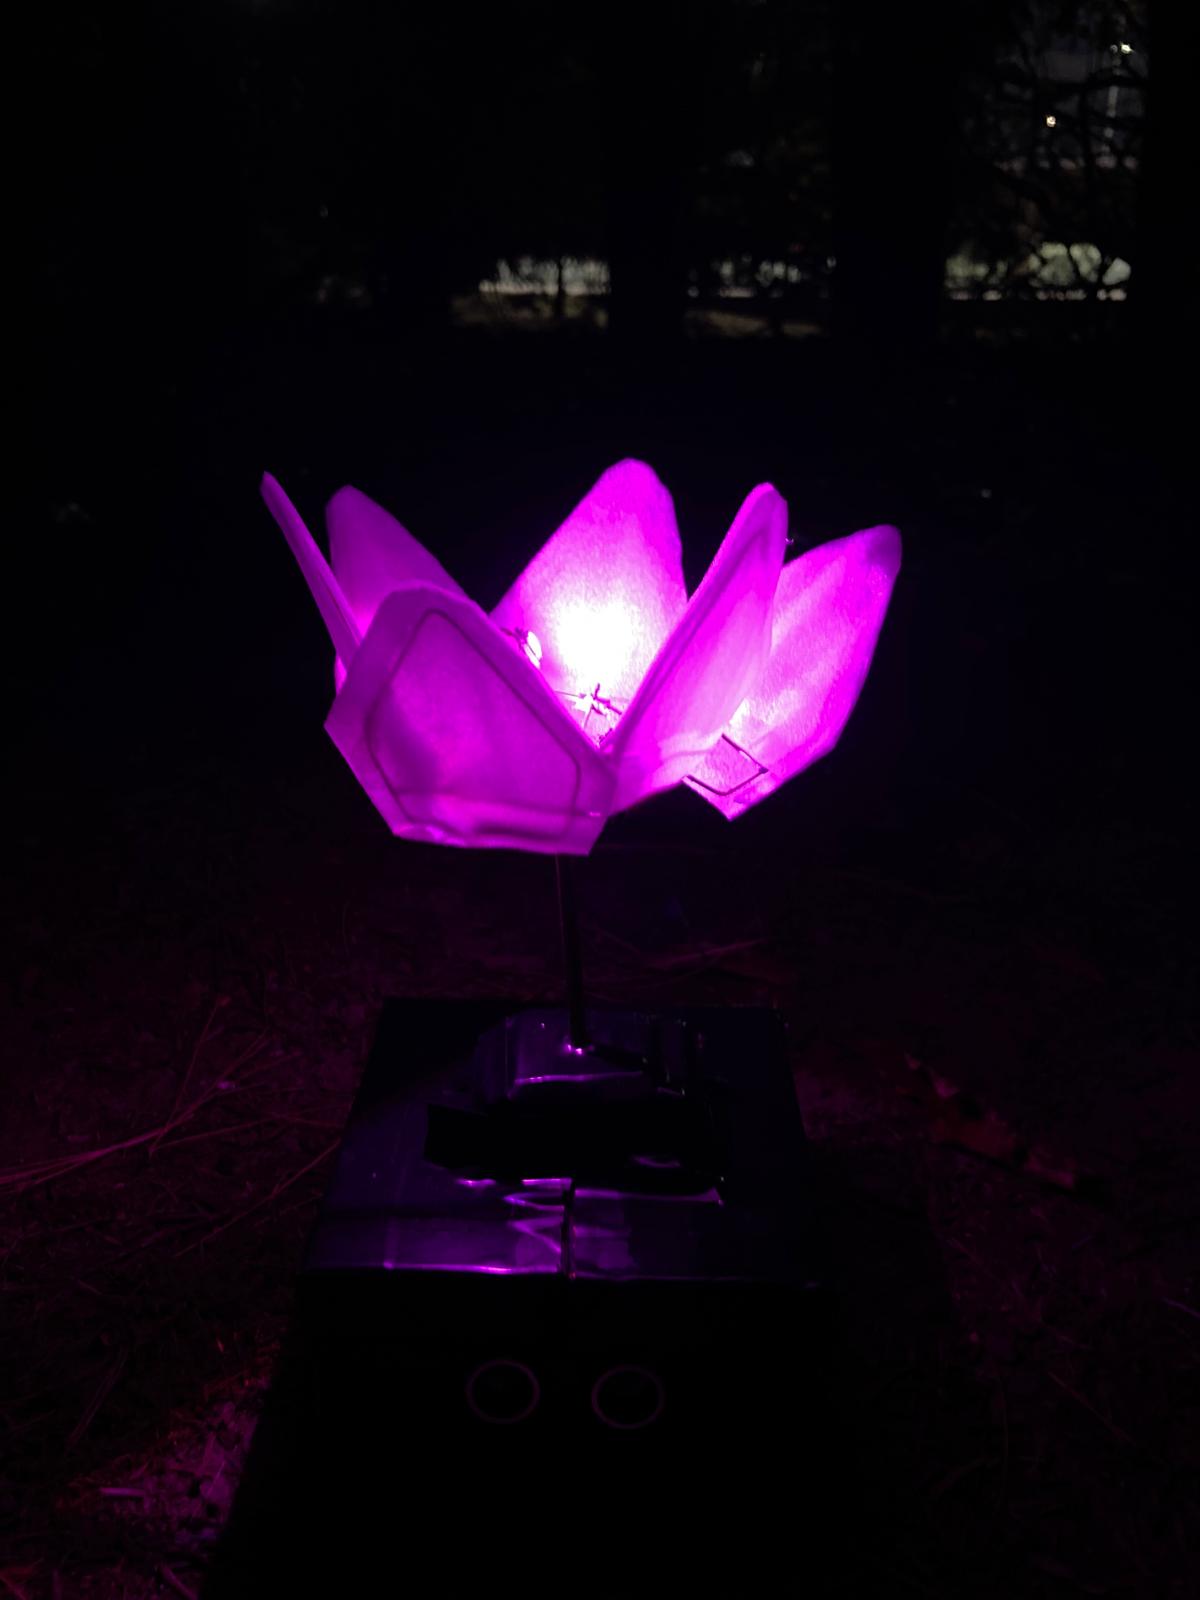
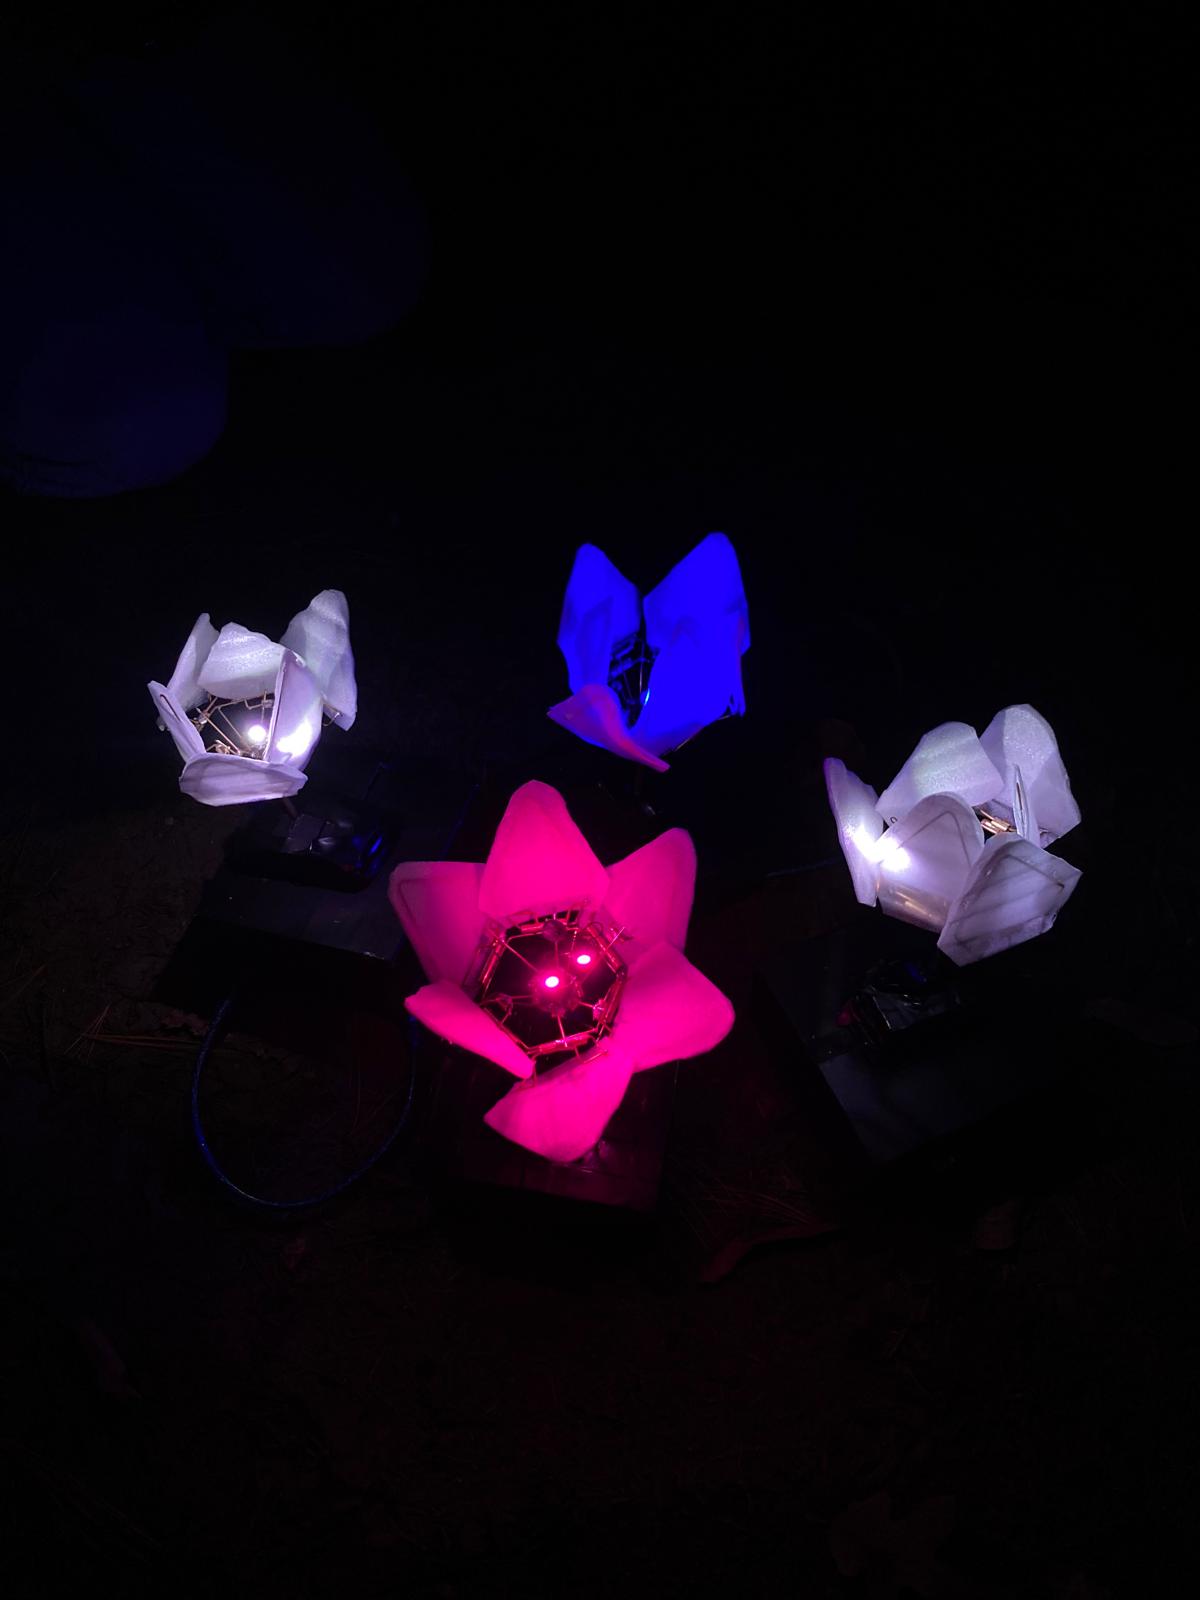
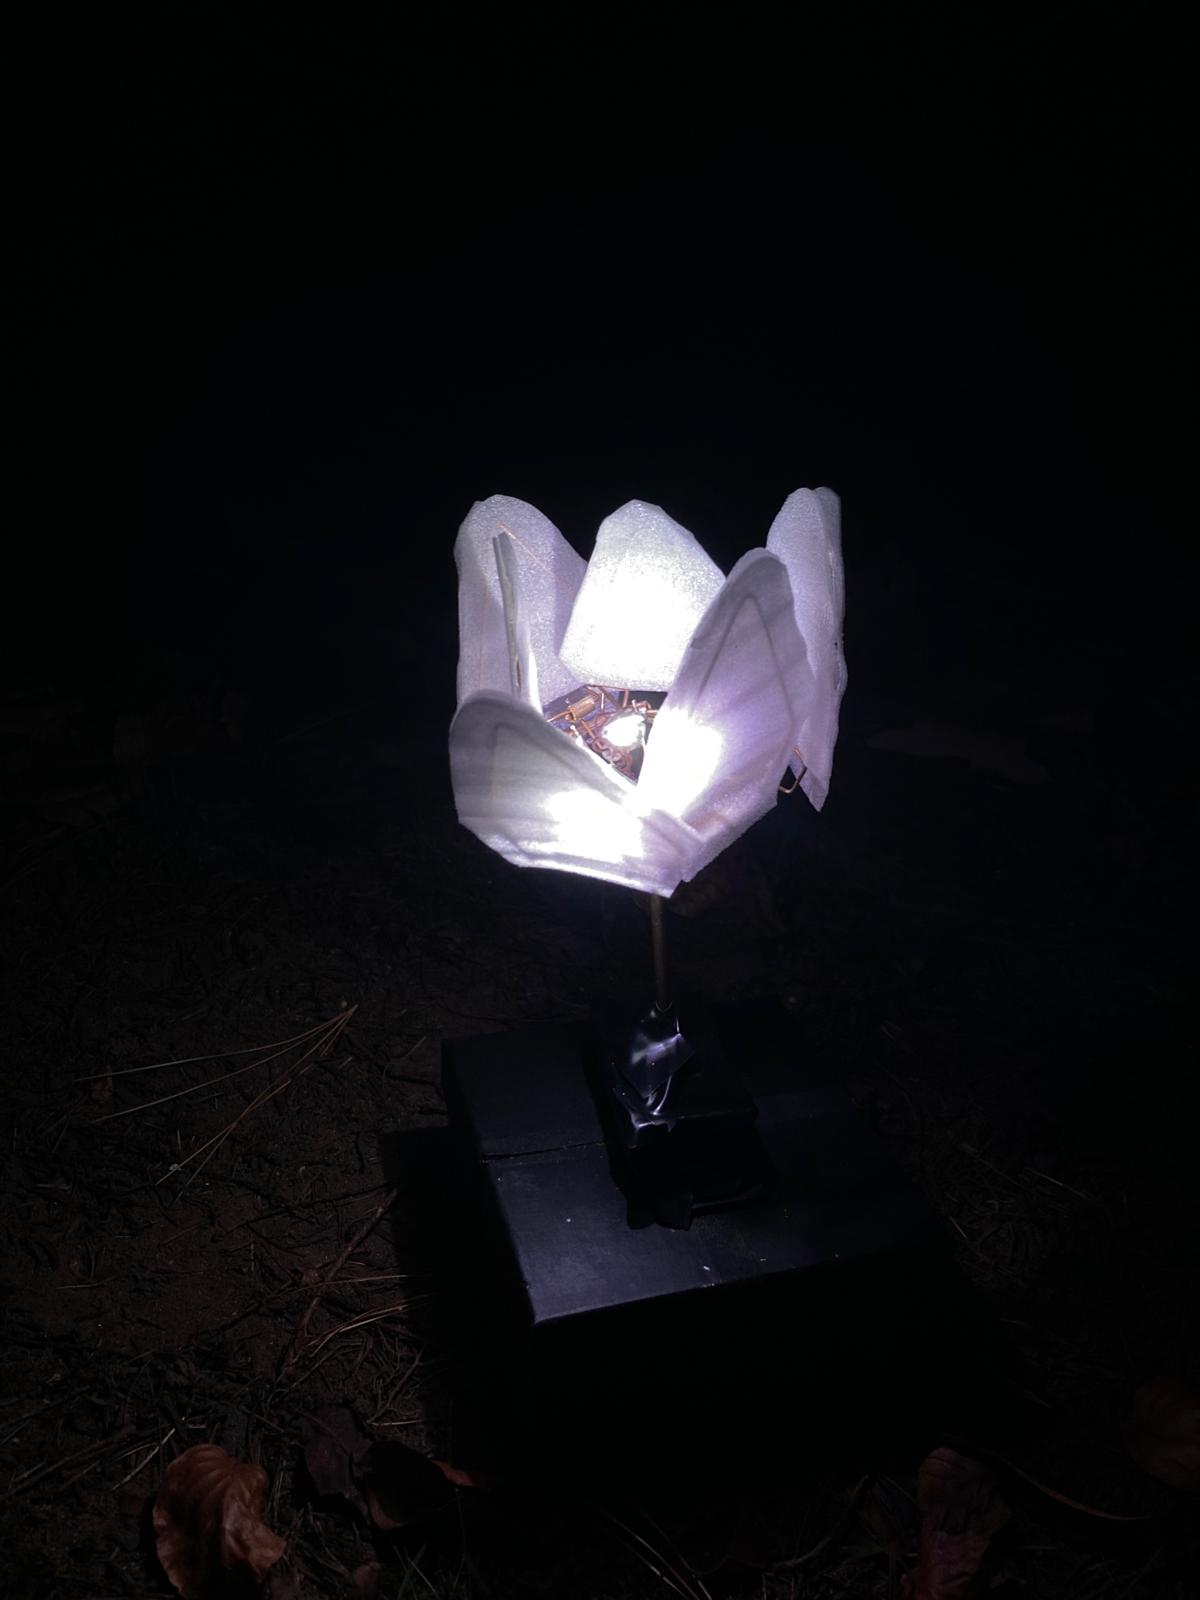
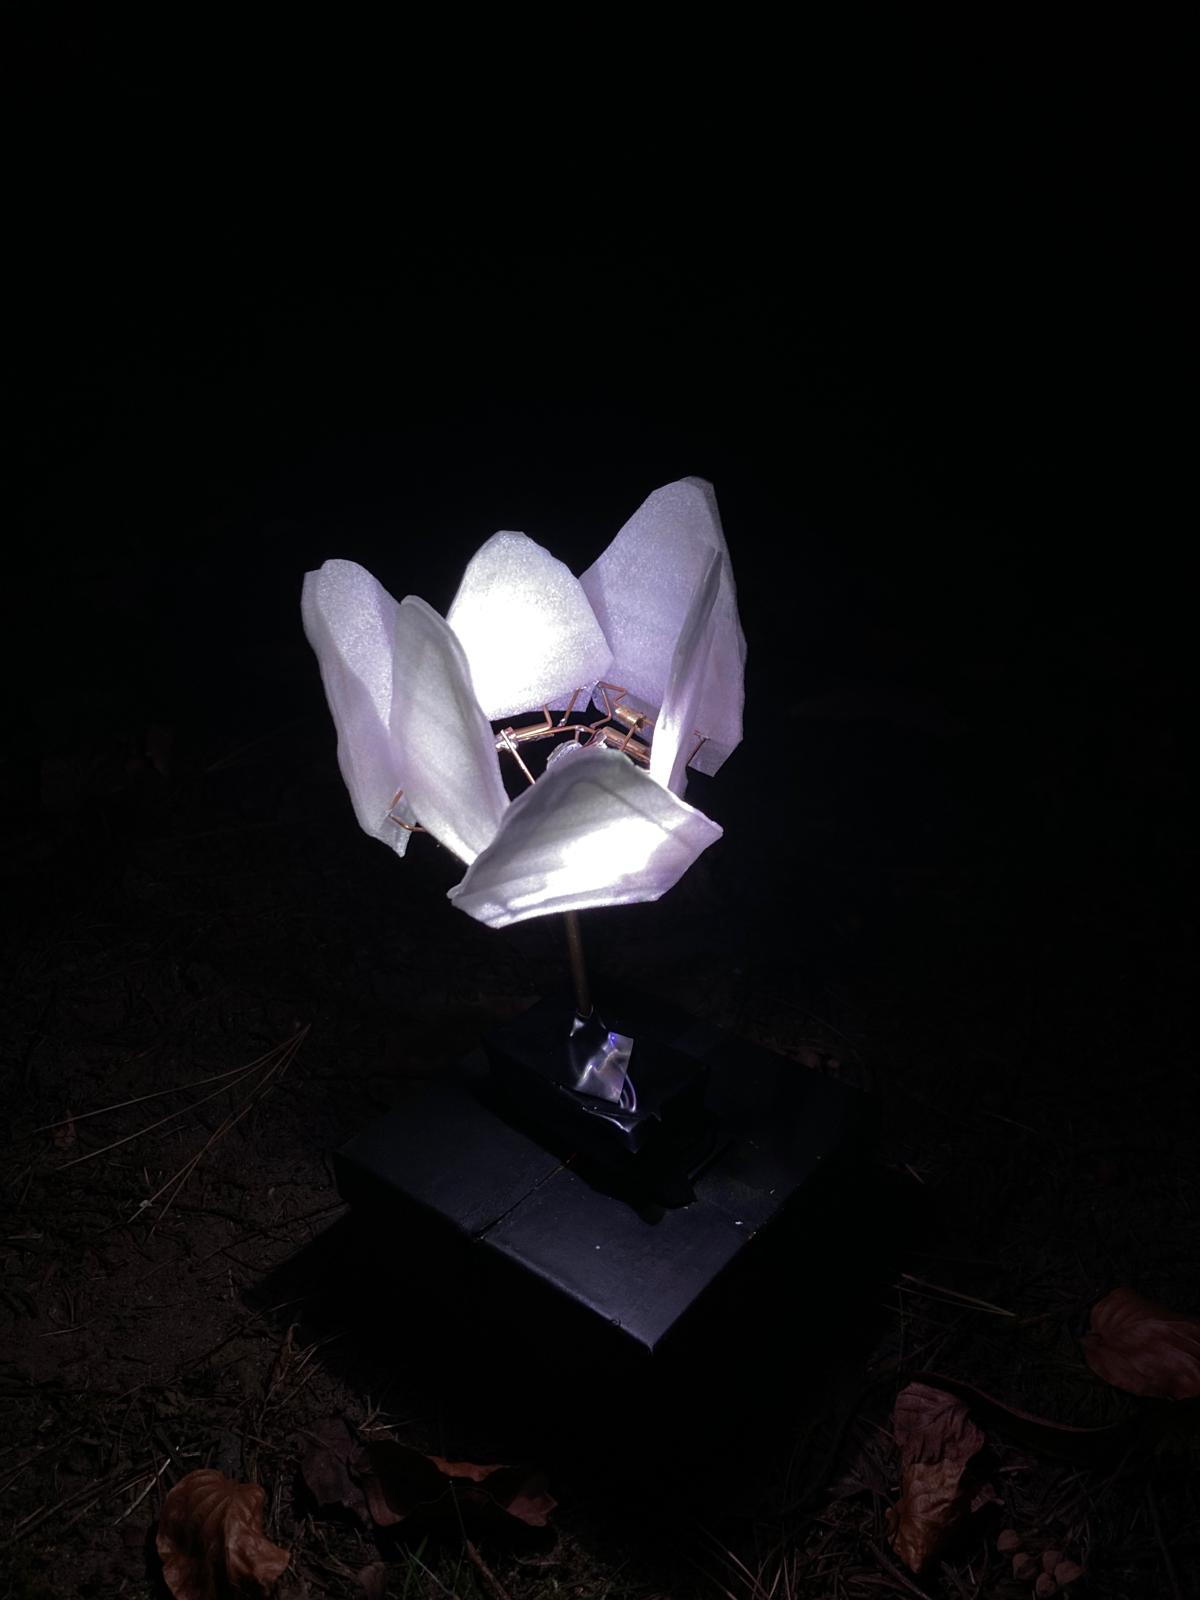
Final Result!
Finished Product Videos and Photos
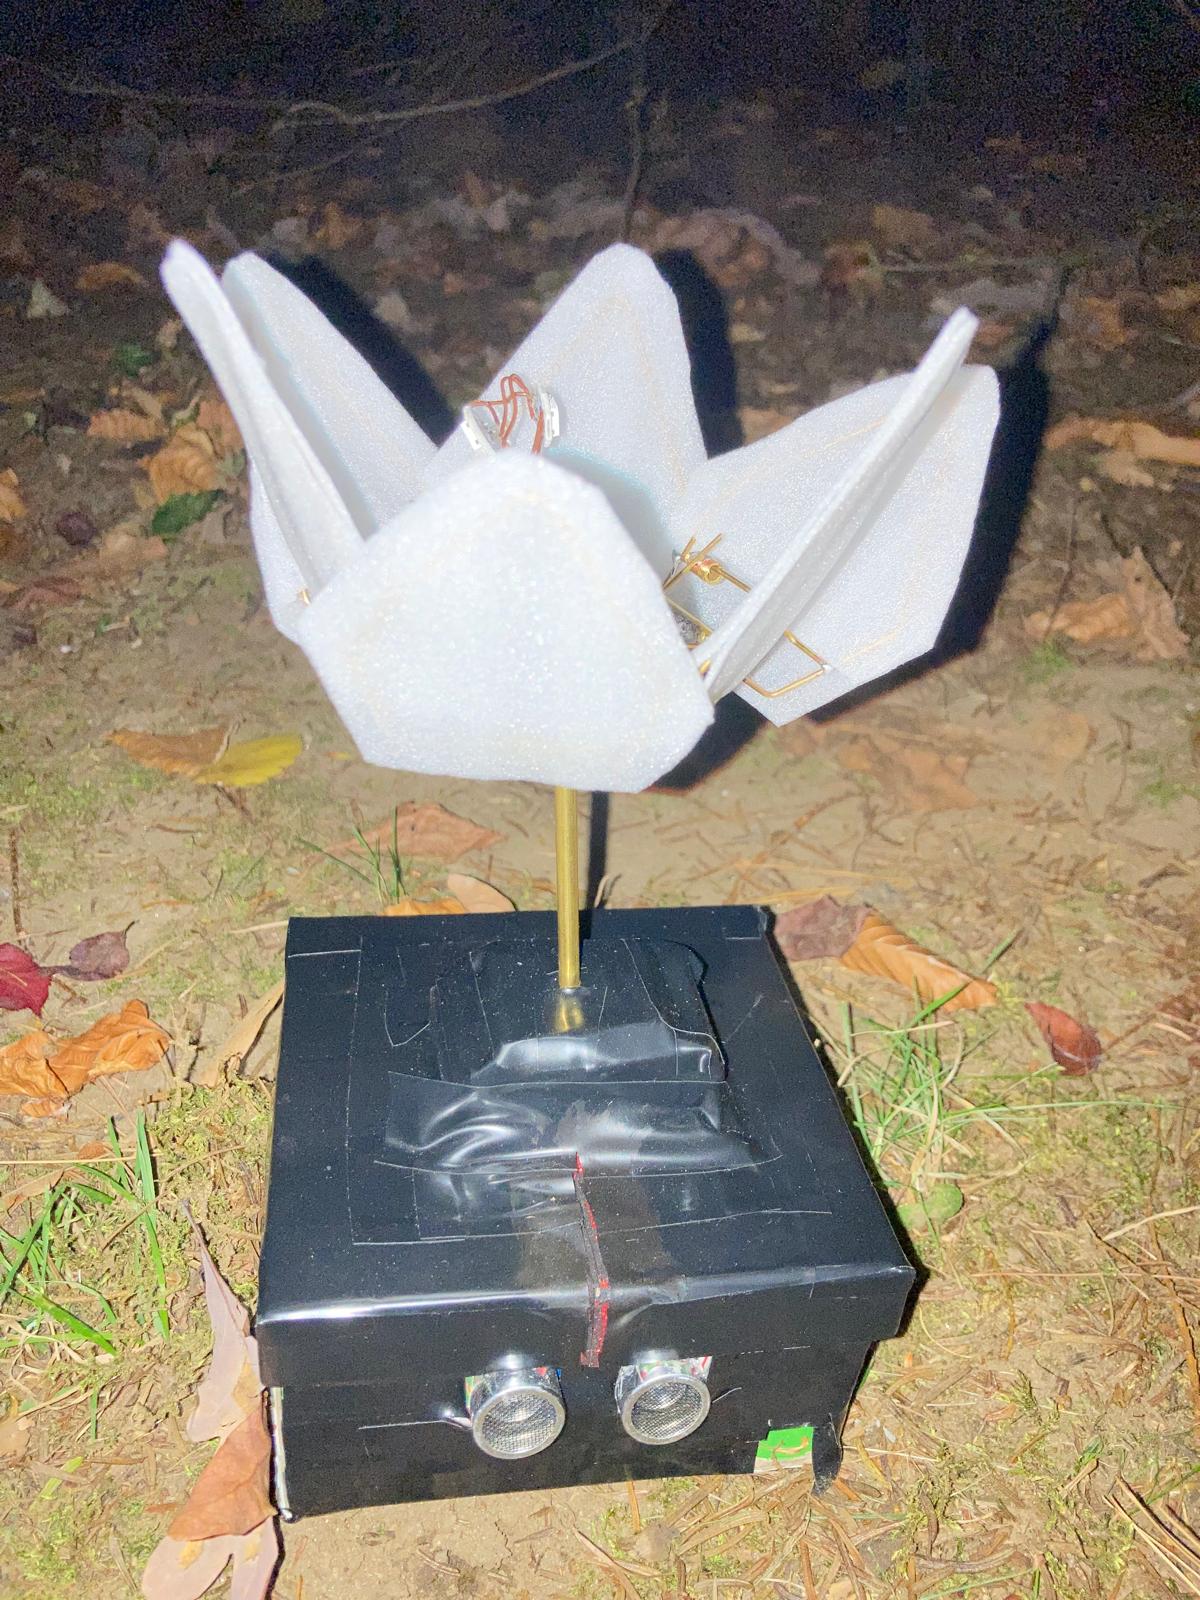

Parts
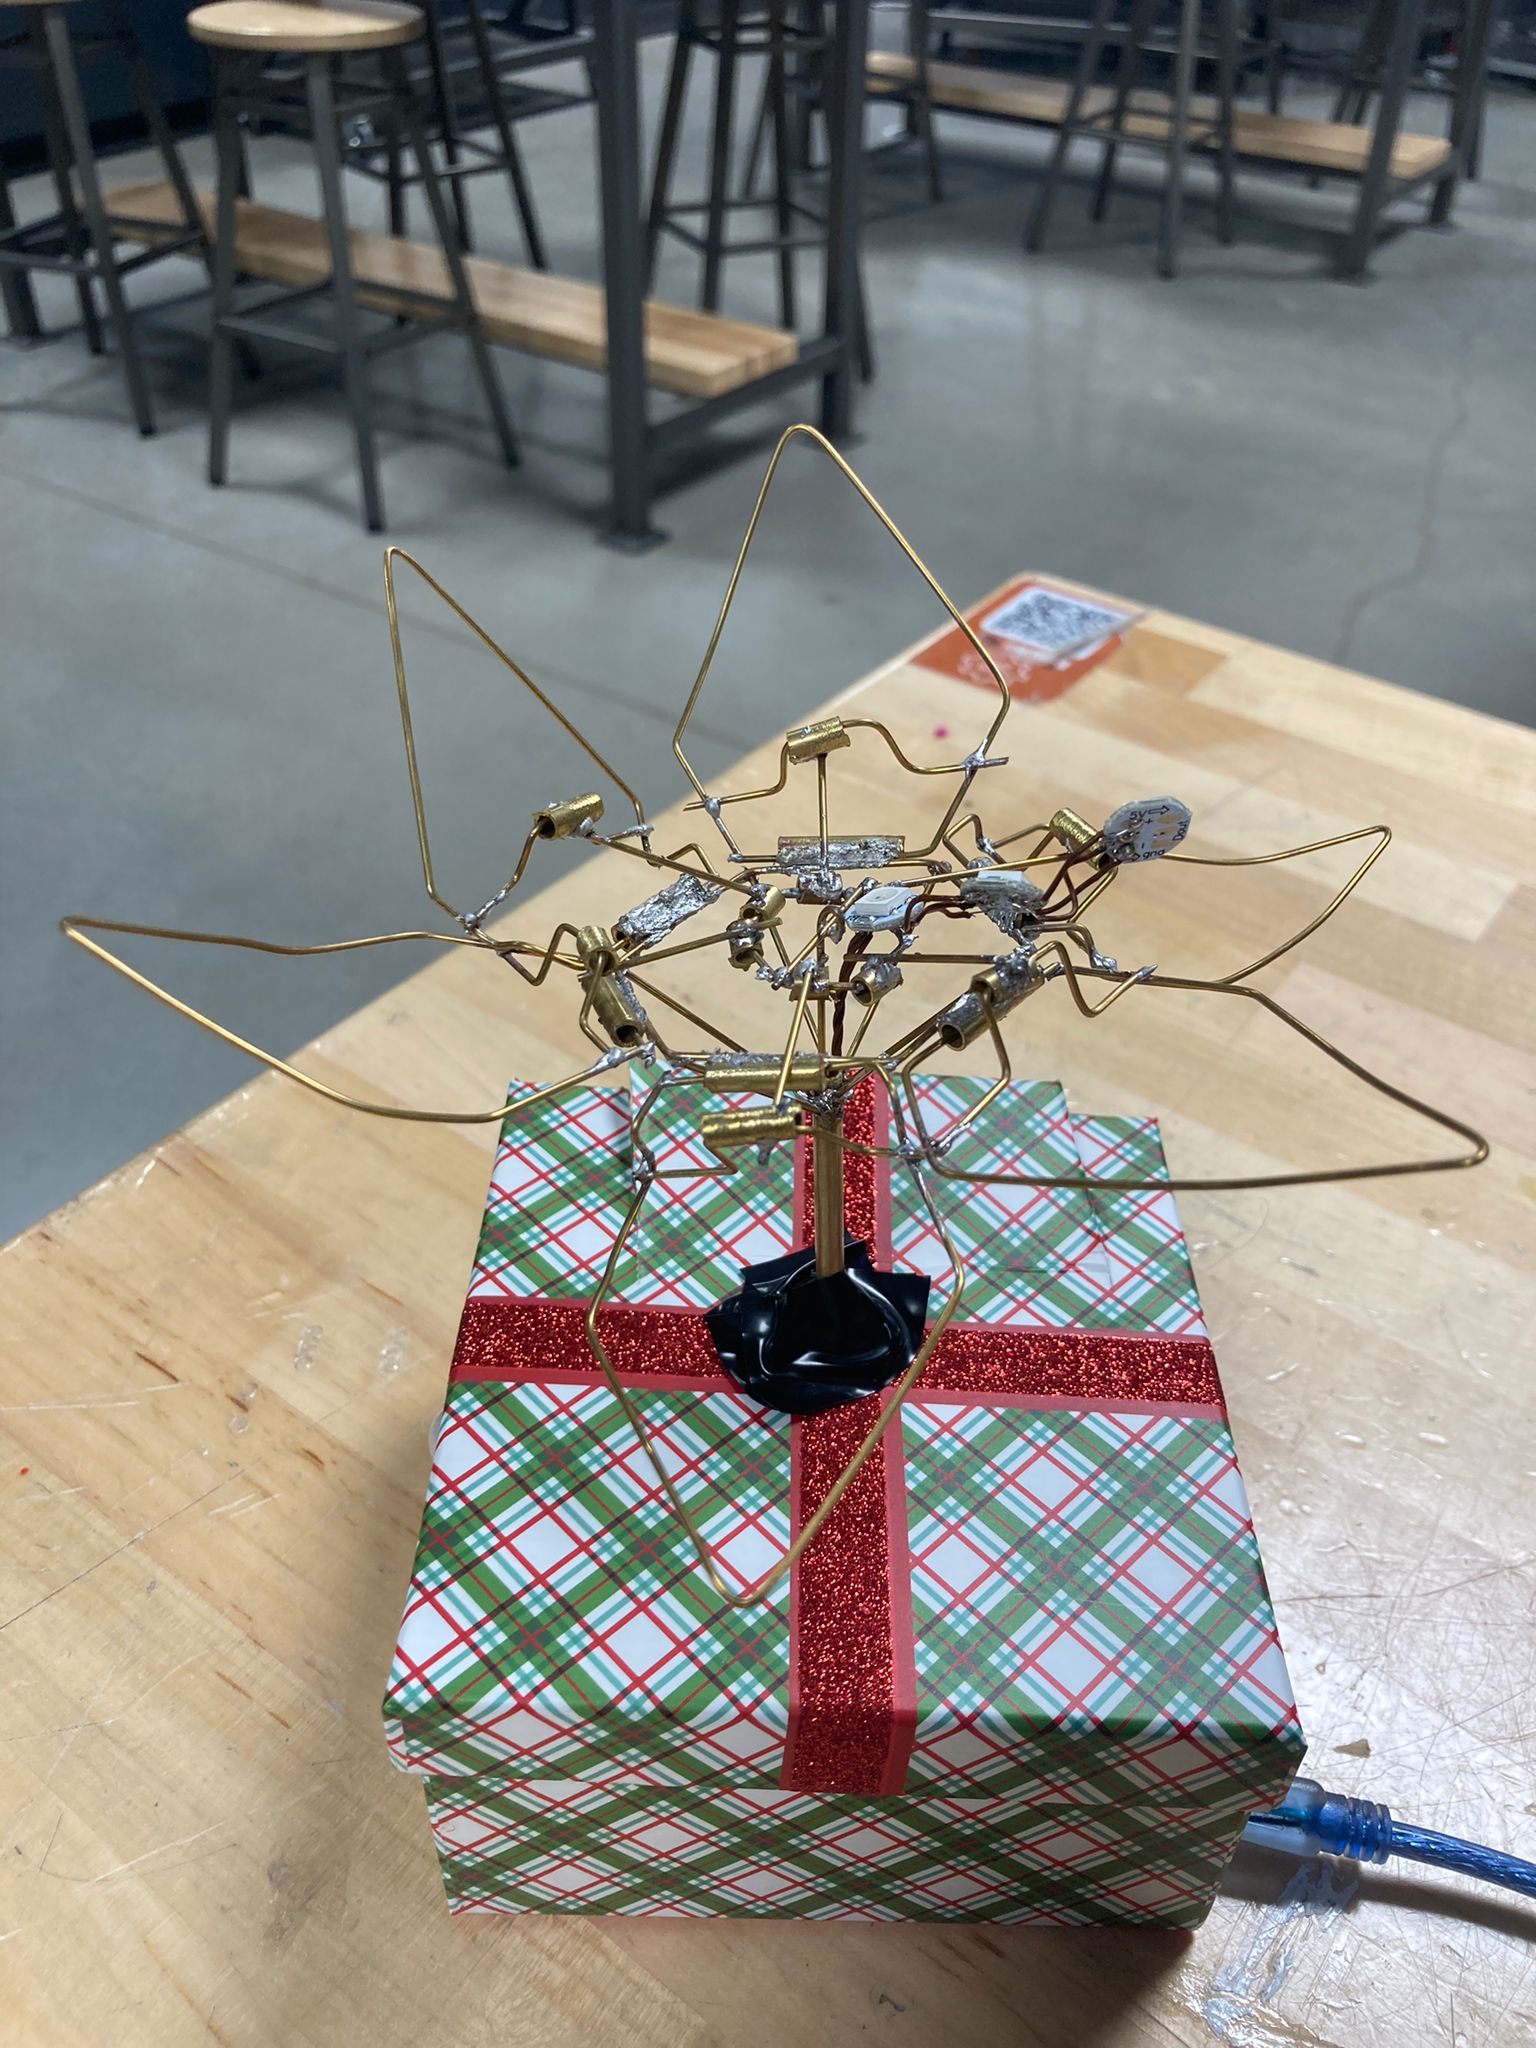
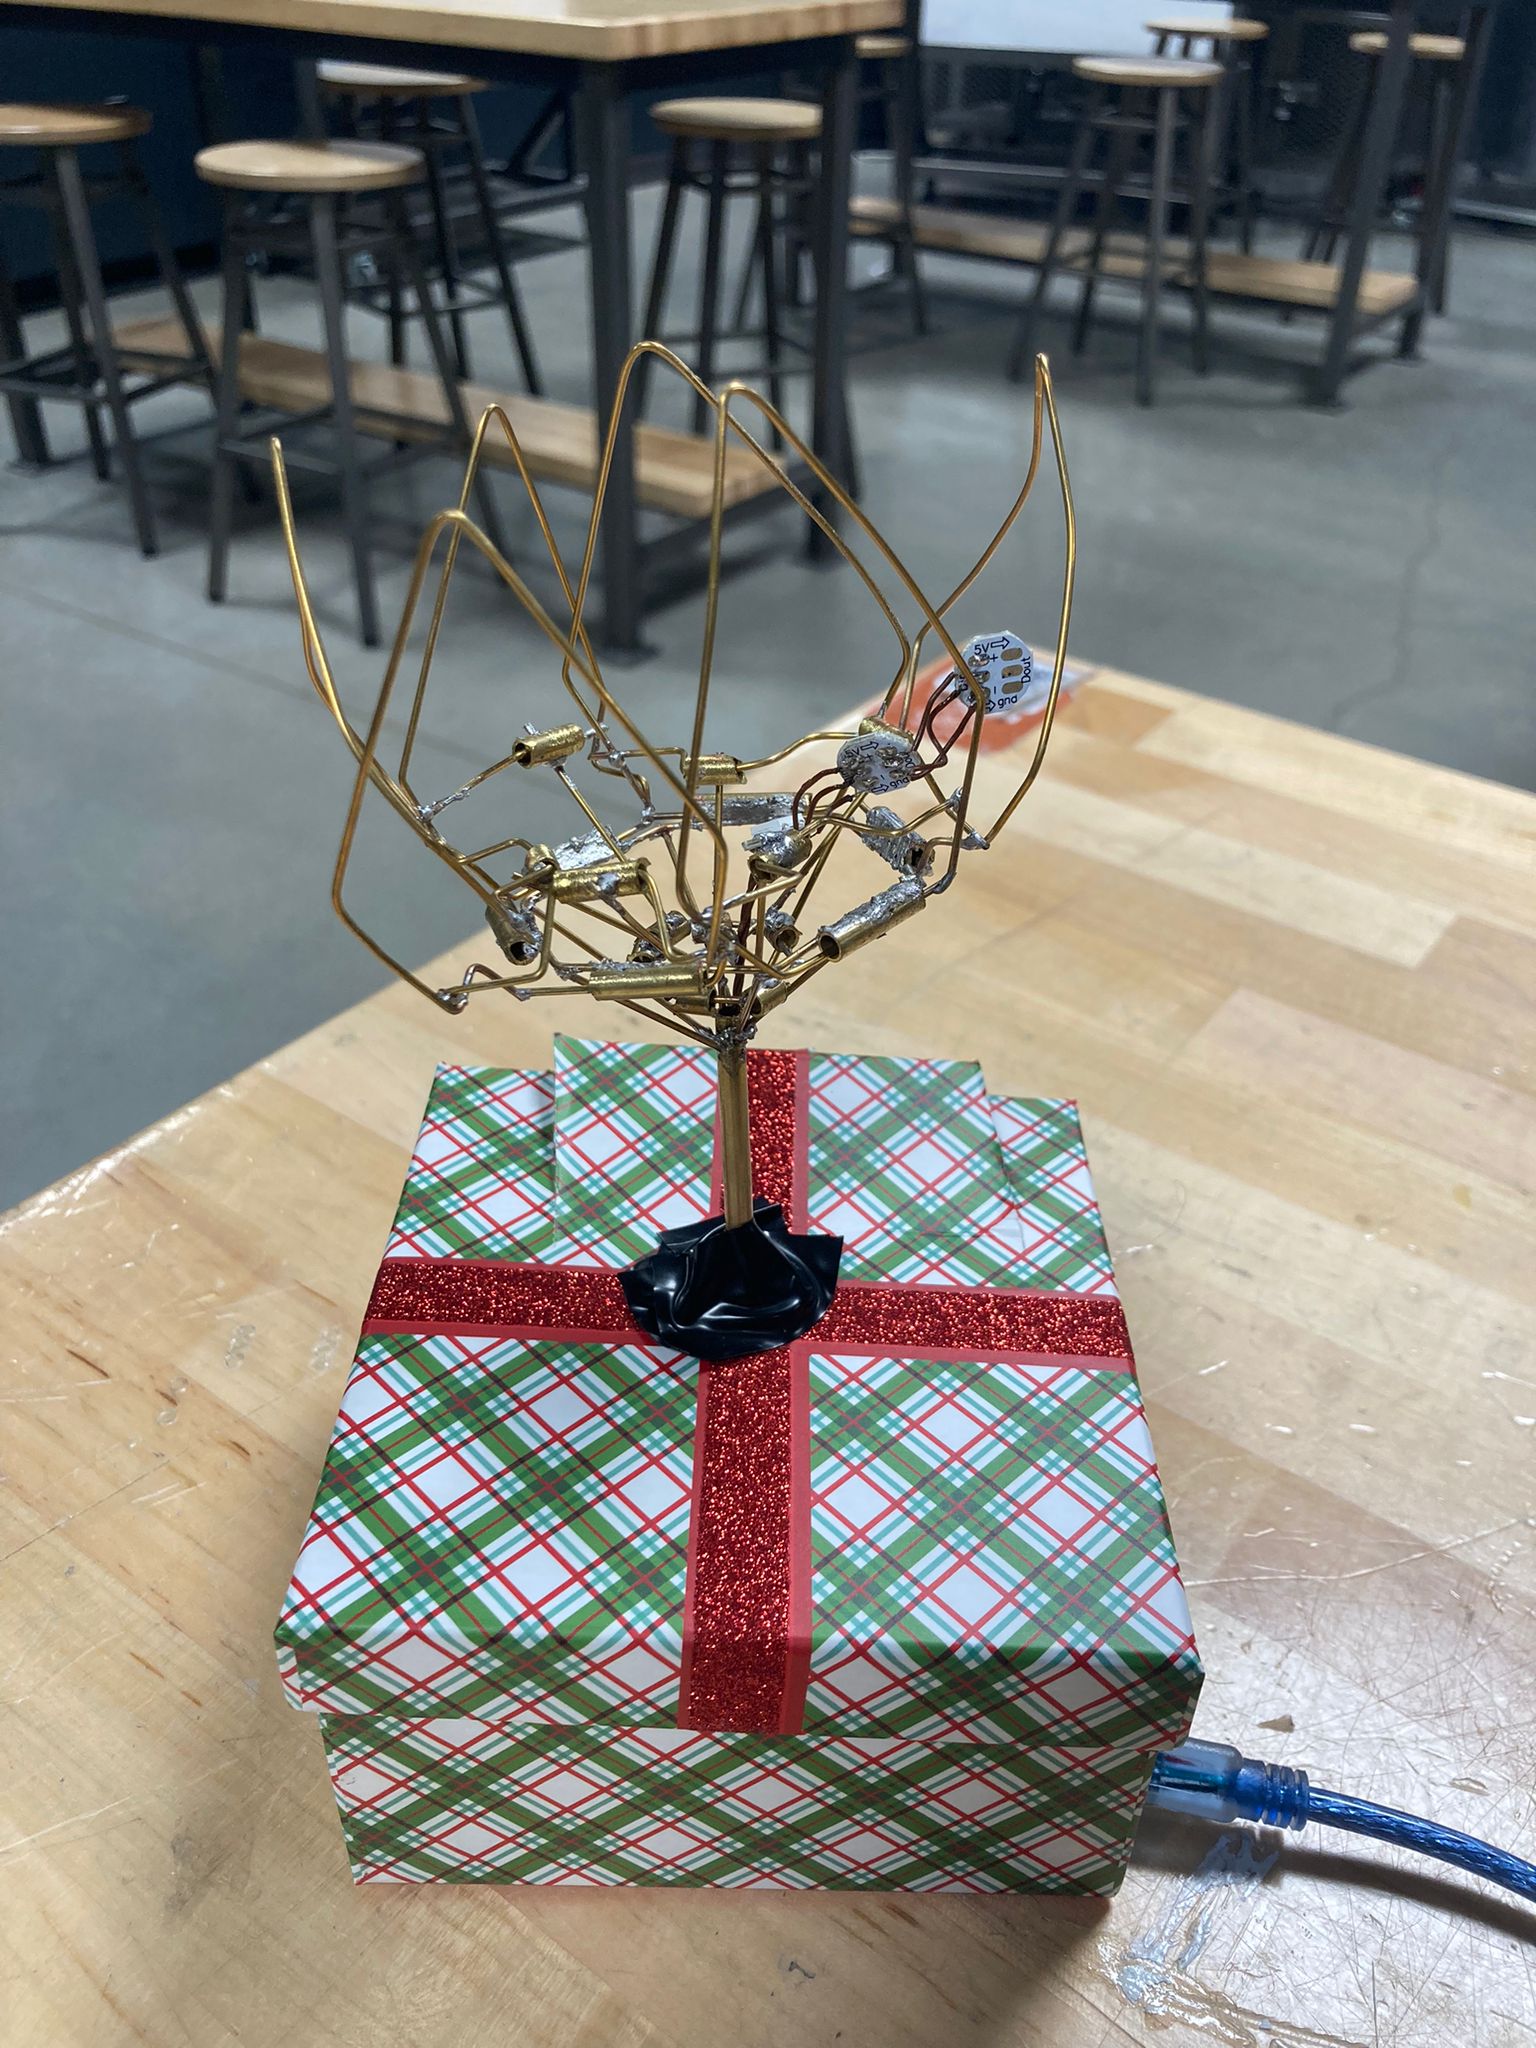
The mechanics of the project was made using brass wire for the structure and tubes for the hinges. This summed to about 40 feet of brass wire, and 4 feet of brass tubes. An unknown large quantity of solder was used to connect the pieces together.
For the electronics, there was a much larger list of parts.
Each flower required:
- 1 Arduino Nano
- 3 individual RGB LEDs
- 1 Ultrasonic sensor
- 9V battery
- 1 battery connector
- 1 switch
- 1 servo
- 1 3D printed
And lastly for aesthetics I used black paint and thin white packing foam to catch the light.
Progress & Challenges
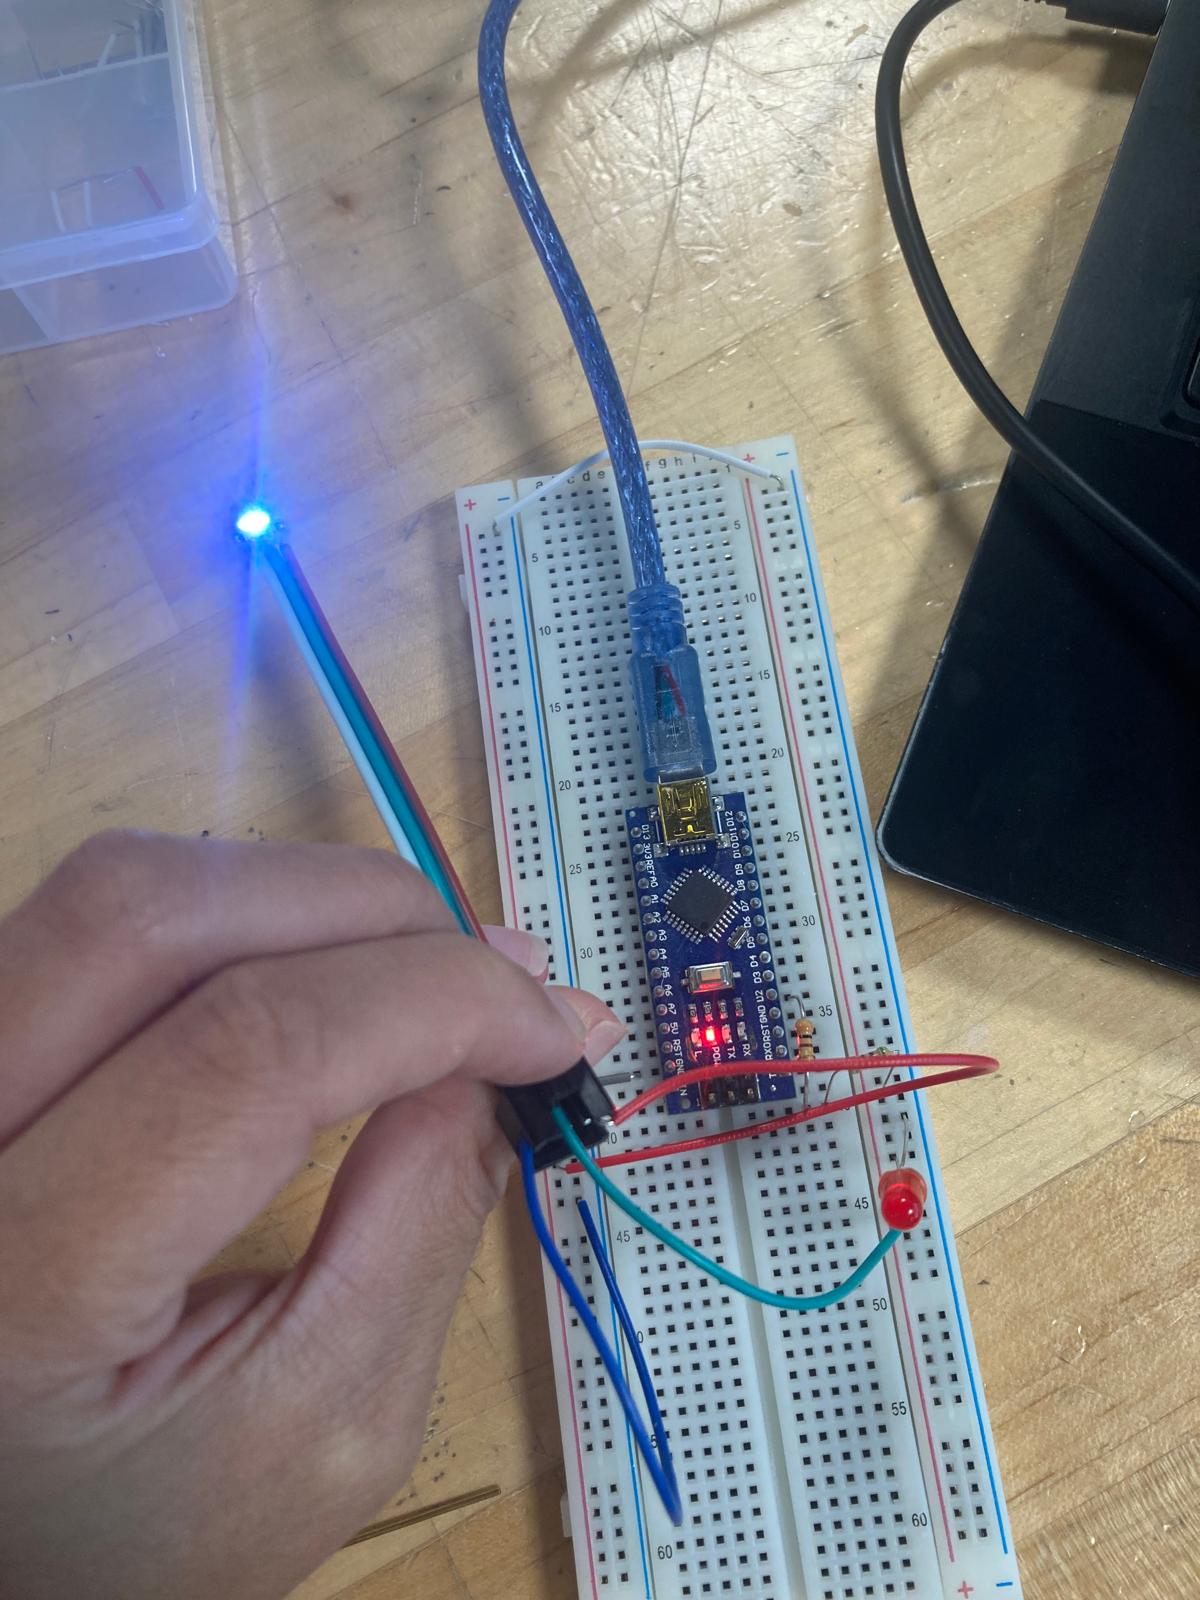
There were a LOT of challenges for this project, with the biggest one being the learning curve. While I have plenty of experience with coding, some experience with connecting circuits, and a small amount of experience with putting together mechanical systems using kits, trying to mix those skills together was a struggle.
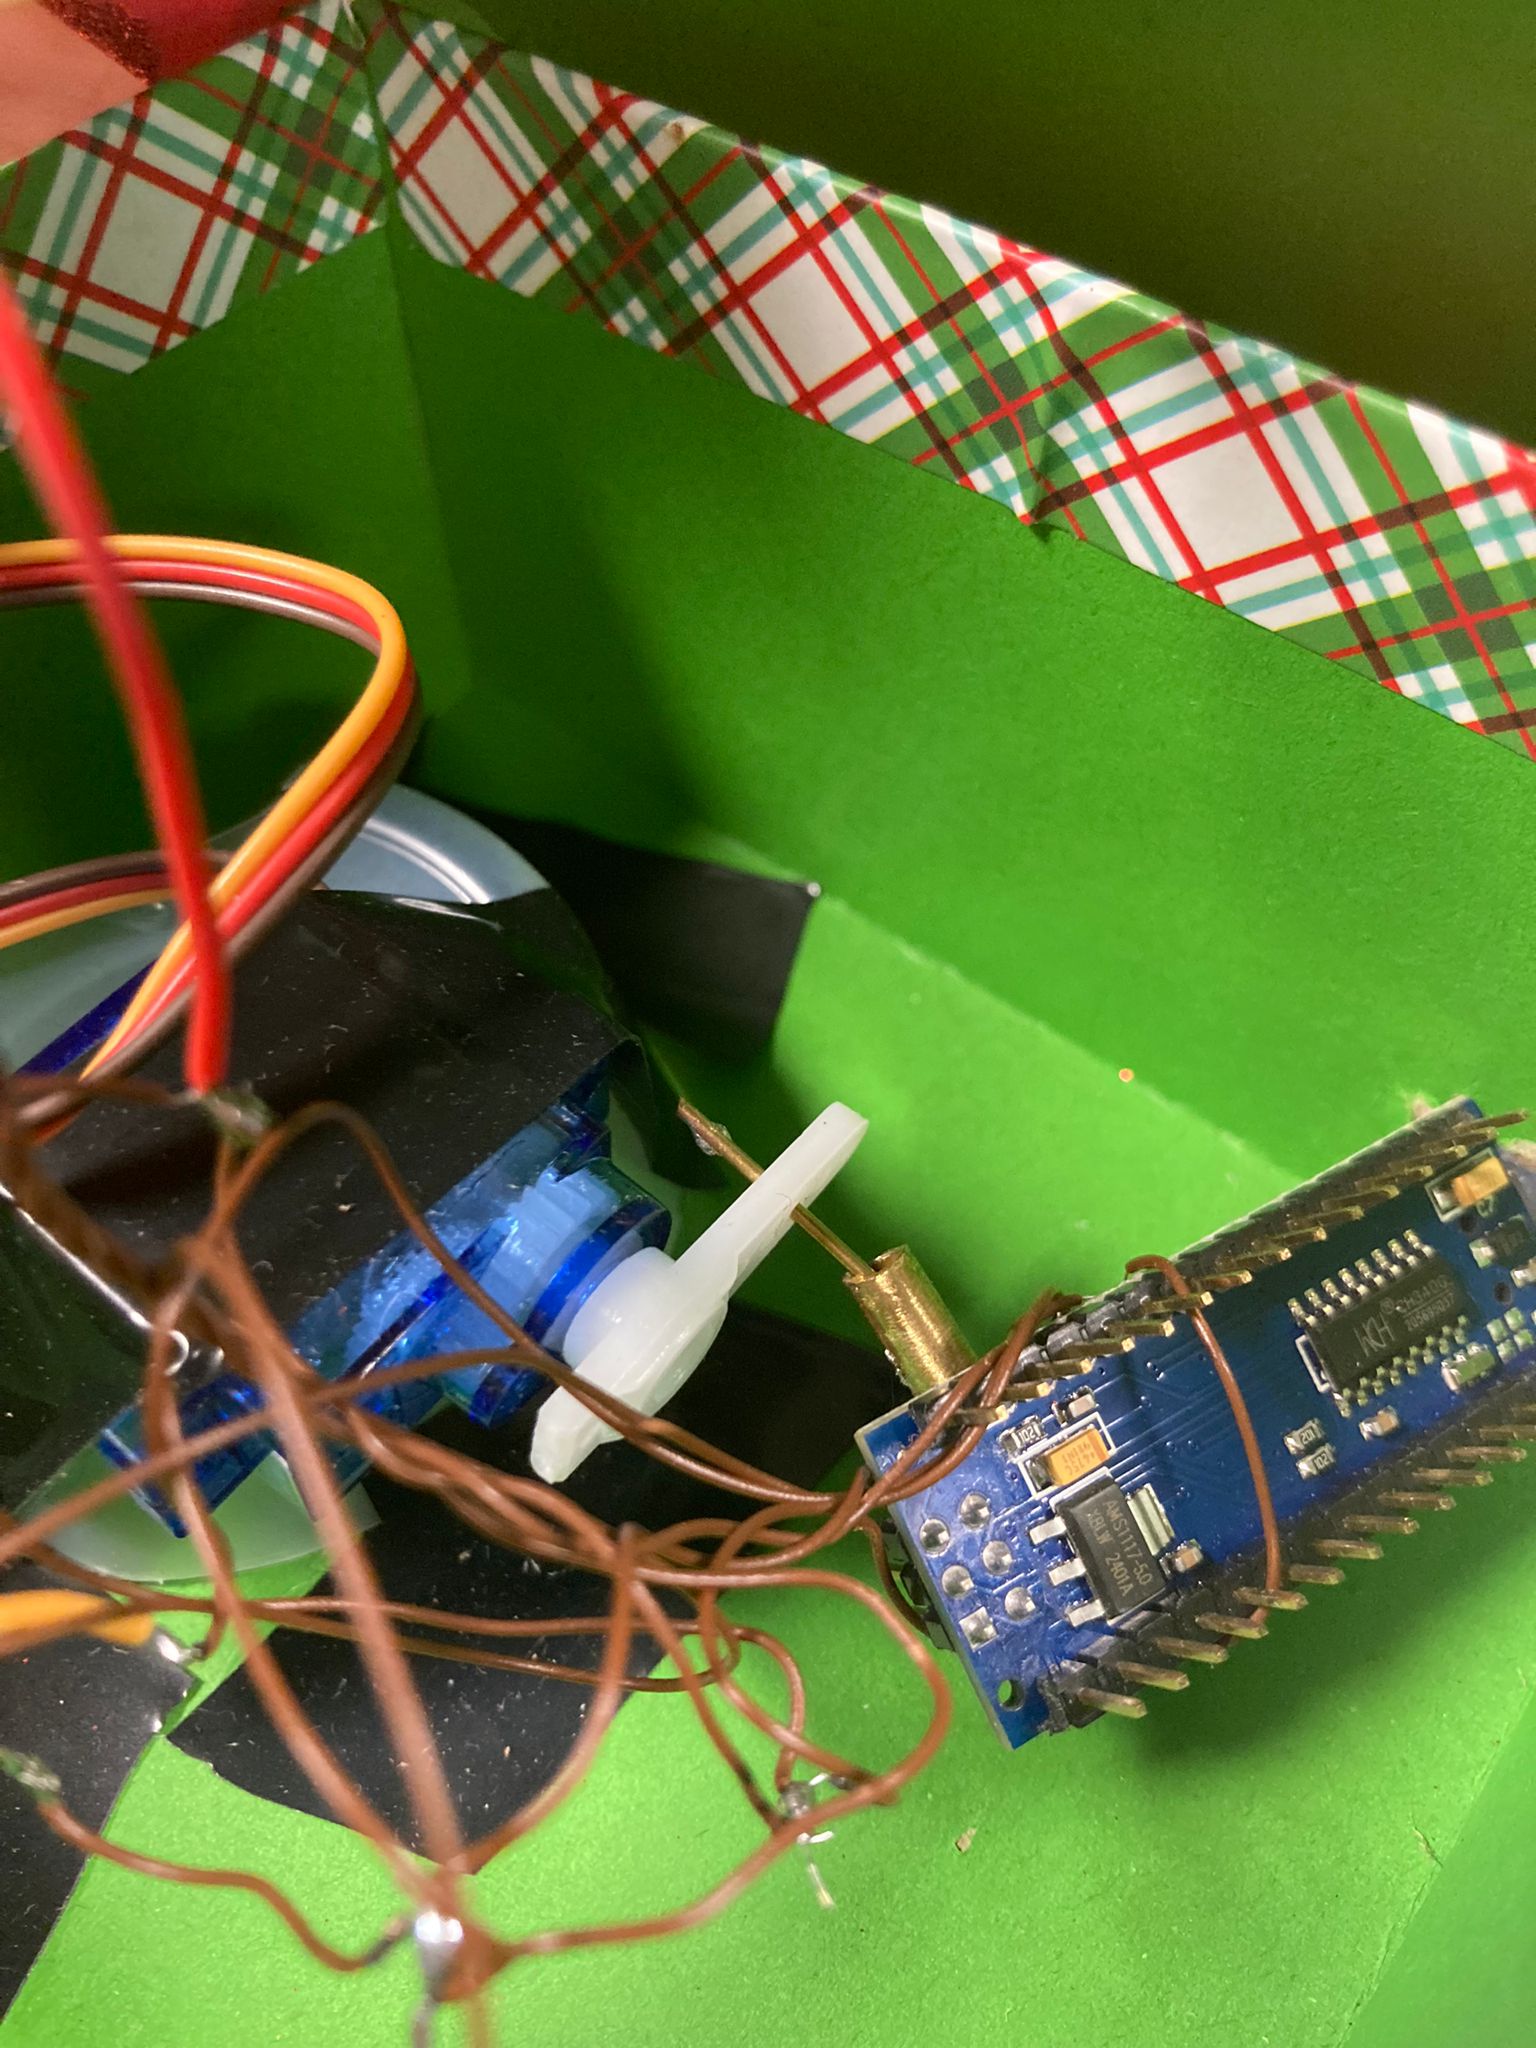
I started with the mechanical aspect of the project as I figured it would take the most time, which I was correct about. Learning to solder, which I had never done before, took lots of time and incurred lots of burns. Cutting the pipes for hinges taught me how to use a dremel, another tool I had never used before. Through a lot of trial and error, I built the first flower, then moved onto converting the rotational motion of the servo into the needed vertical motion. At first I thought I could simply link the piston of the flower onto a servo arm with a small pivot, however this mostly bent the piston rather than lifting it vertically. This lead to multiple remodels of a 3D print (reference below), to achieve the vertical motion I needed. This was once again a new skill I had to learn for the project to advance.
The biggest challenge with the electrical components was acquiring all the needed materials, and building a stable circuit. There were multiple parts that I didn’t realize I would need until I started to connect other parts, like the power supply. This led to wait time as parts arrived. I also ran into an issue where I ordered breadboards to stabilize the circuit, only for them to never arrive at all. This lead to the circuit being slightly loose in its container and wires occasionally disconnecting. The mechanical motion also would cause wires to sometimes disconnect. The servos I acquired for the project turned out to not have the necessary parts to attach properly to the gears printed for vertical motion. As such, when the servos were connected to the power, the vertical motion would sometimes be jumpy or inconsistent. This was mostly fixed by solidifying the connection points and blocking the gear from shifting too much.
Progress Photos
References
The blueprint for the mechanical aspects of this project came from a tutorial by jiripraus, and was a great help in understanding how to make a lightweight flower design without deviating from the shape of a normal flower. The tutorial can be found here: https://www.instructables.com/Ever-Blooming-Mechanical-Tulip/
The vertical motion servo print STL files were gotten from a tutorial found online
linked here: https://www.youtube.com/watch?v=2vAoOYF3m8U
The files were modified slightly to fit inside the box the flowers were built in, with help from Carlos (Thank you!). The gear was modified as well to mesh with the servo attachments I already had, as it was the only way to maintain a proper connection to the servos I owned.
Huge thank you to my friends Joana and Aashi for helping me take photos and videos!
Code File
Here is the code file for running the flowers!
#include <FastLED.h>
#include <Servo.h>

#define TRIG_PIN 3
#define ECHO_PIN 2
#define SERVO_PIN 4
#define LED_PIN 7
#define NUM_LEDS 3

#define RED 0
#define GREEN 2
#define BLUE 3
#define WHITE 4
#define OFF 5
#define PINK 6

#define OPEN 0
#define CLOSED 1

// state
int state = CLOSED;

// sensor vars
long duration;
int distance;

// led constants
const float BRIGHTNESS = 1;

// servo constants
const int OPEN_POS = 0;
const int CLOSE_POS = 80;
const int TICK_TIME = 20;

Servo my_servo;
int pos = 0;  // Servo position

CRGB leds[NUM_LEDS];

int PIR_state = 0;  // current state of the sensor
int PIR_prev_state = 0;

void setup() {
  pinMode(TRIG_PIN, OUTPUT); // Sets trigPin as output
  pinMode(ECHO_PIN, INPUT); // Sets echoPin as input

  my_servo.attach(SERVO_PIN);

  Serial.begin(9600);

  FastLED.addLeds<WS2812, LED_PIN, GRB>(leds, NUM_LEDS);
  FastLED.setMaxPowerInVoltsAndMilliamps(5, 500);
  FastLED.clear();
  FastLED.show();

  set_center_leds(OFF, OFF, OFF, BRIGHTNESS);

  my_servo.write(CLOSE_POS);
}

void loop() {

  int distance = get_distance();
  int prev_state = state;

  if (distance < 50) {
    state = OPEN;
  } else {
    state = CLOSED;
  }

  if(state != prev_state) {
    if(state == OPEN) {
      open();
    } else {
      close();
    }
  }

  // open();
  // delay(1000);
  // close();

  delay(1000);
}

void open() {
  set_center_leds(BLUE, BLUE, BLUE, BRIGHTNESS);

  set_servo(CLOSE_POS, OPEN_POS, TICK_TIME);
}

void close() {
    set_center_leds(WHITE, WHITE, WHITE, BRIGHTNESS);

  set_servo(OPEN_POS, CLOSE_POS, TICK_TIME);
}

int get_distance() {
  digitalWrite(TRIG_PIN, LOW); // Resets the trigPin
  delayMicroseconds(2); // Waits 2 microsenconds

  digitalWrite(TRIG_PIN, HIGH); // Sets the trigPin state to HIGH
  delayMicroseconds(10); // Waits 10 microseconds
  digitalWrite(TRIG_PIN, LOW); // Sets the trigPin state to LOW

  duration = pulseIn(ECHO_PIN, HIGH); // Reads the echoPin and assign it to the variable duration

  distance= duration*0.034/2; // Calculation of the distance

  Serial.print("Distance: "); // Prints the word Distance to the Serial Monitor
  Serial.print(distance); // Prints the actual distance to the Serial Monitor
  Serial.println(" cm"); // Prints the word cm to the Serial Monitor and makes a new line

  return distance;
}

void set_servo(int start_pos, int end_pos, int delay_time) {
  if(start_pos > end_pos) {
    for (int x = start_pos; x >= end_pos; x -= 1) {
      my_servo.write(x);
      delay(delay_time);
    }
  } else {
  for (int x = start_pos; x <= end_pos; x += 1) {
      my_servo.write(x);
      delay(delay_time);
    }
  }
}

void set_center_leds(int color1, int color2, int color3, float brightness) {
  set_led(0, color1, brightness);
  set_led(1, color2, brightness);
  set_led(2, color3, brightness);
}

void set_led(int index, int color, float brightness) {
  if(color == RED) {
    leds[index] = CRGB(255*brightness, 0, 0);
  } else if (color == GREEN) {
    leds[index] = CRGB(0, 255*brightness, 0);
  } else if (color == BLUE) {
    leds[index] = CRGB(0, 0, 255*brightness);
  } else if (color == WHITE) {
    leds[index] = CRGB(255*brightness, 255*brightness, 255*brightness);
  } else if (color == OFF) {
    leds[index] = CRGB(0, 0, 0);
  } else if (color == PINK) {
    leds[index] = CRGB( 255,192,203);
  }
  FastLED.show();
}