Here is my final project:
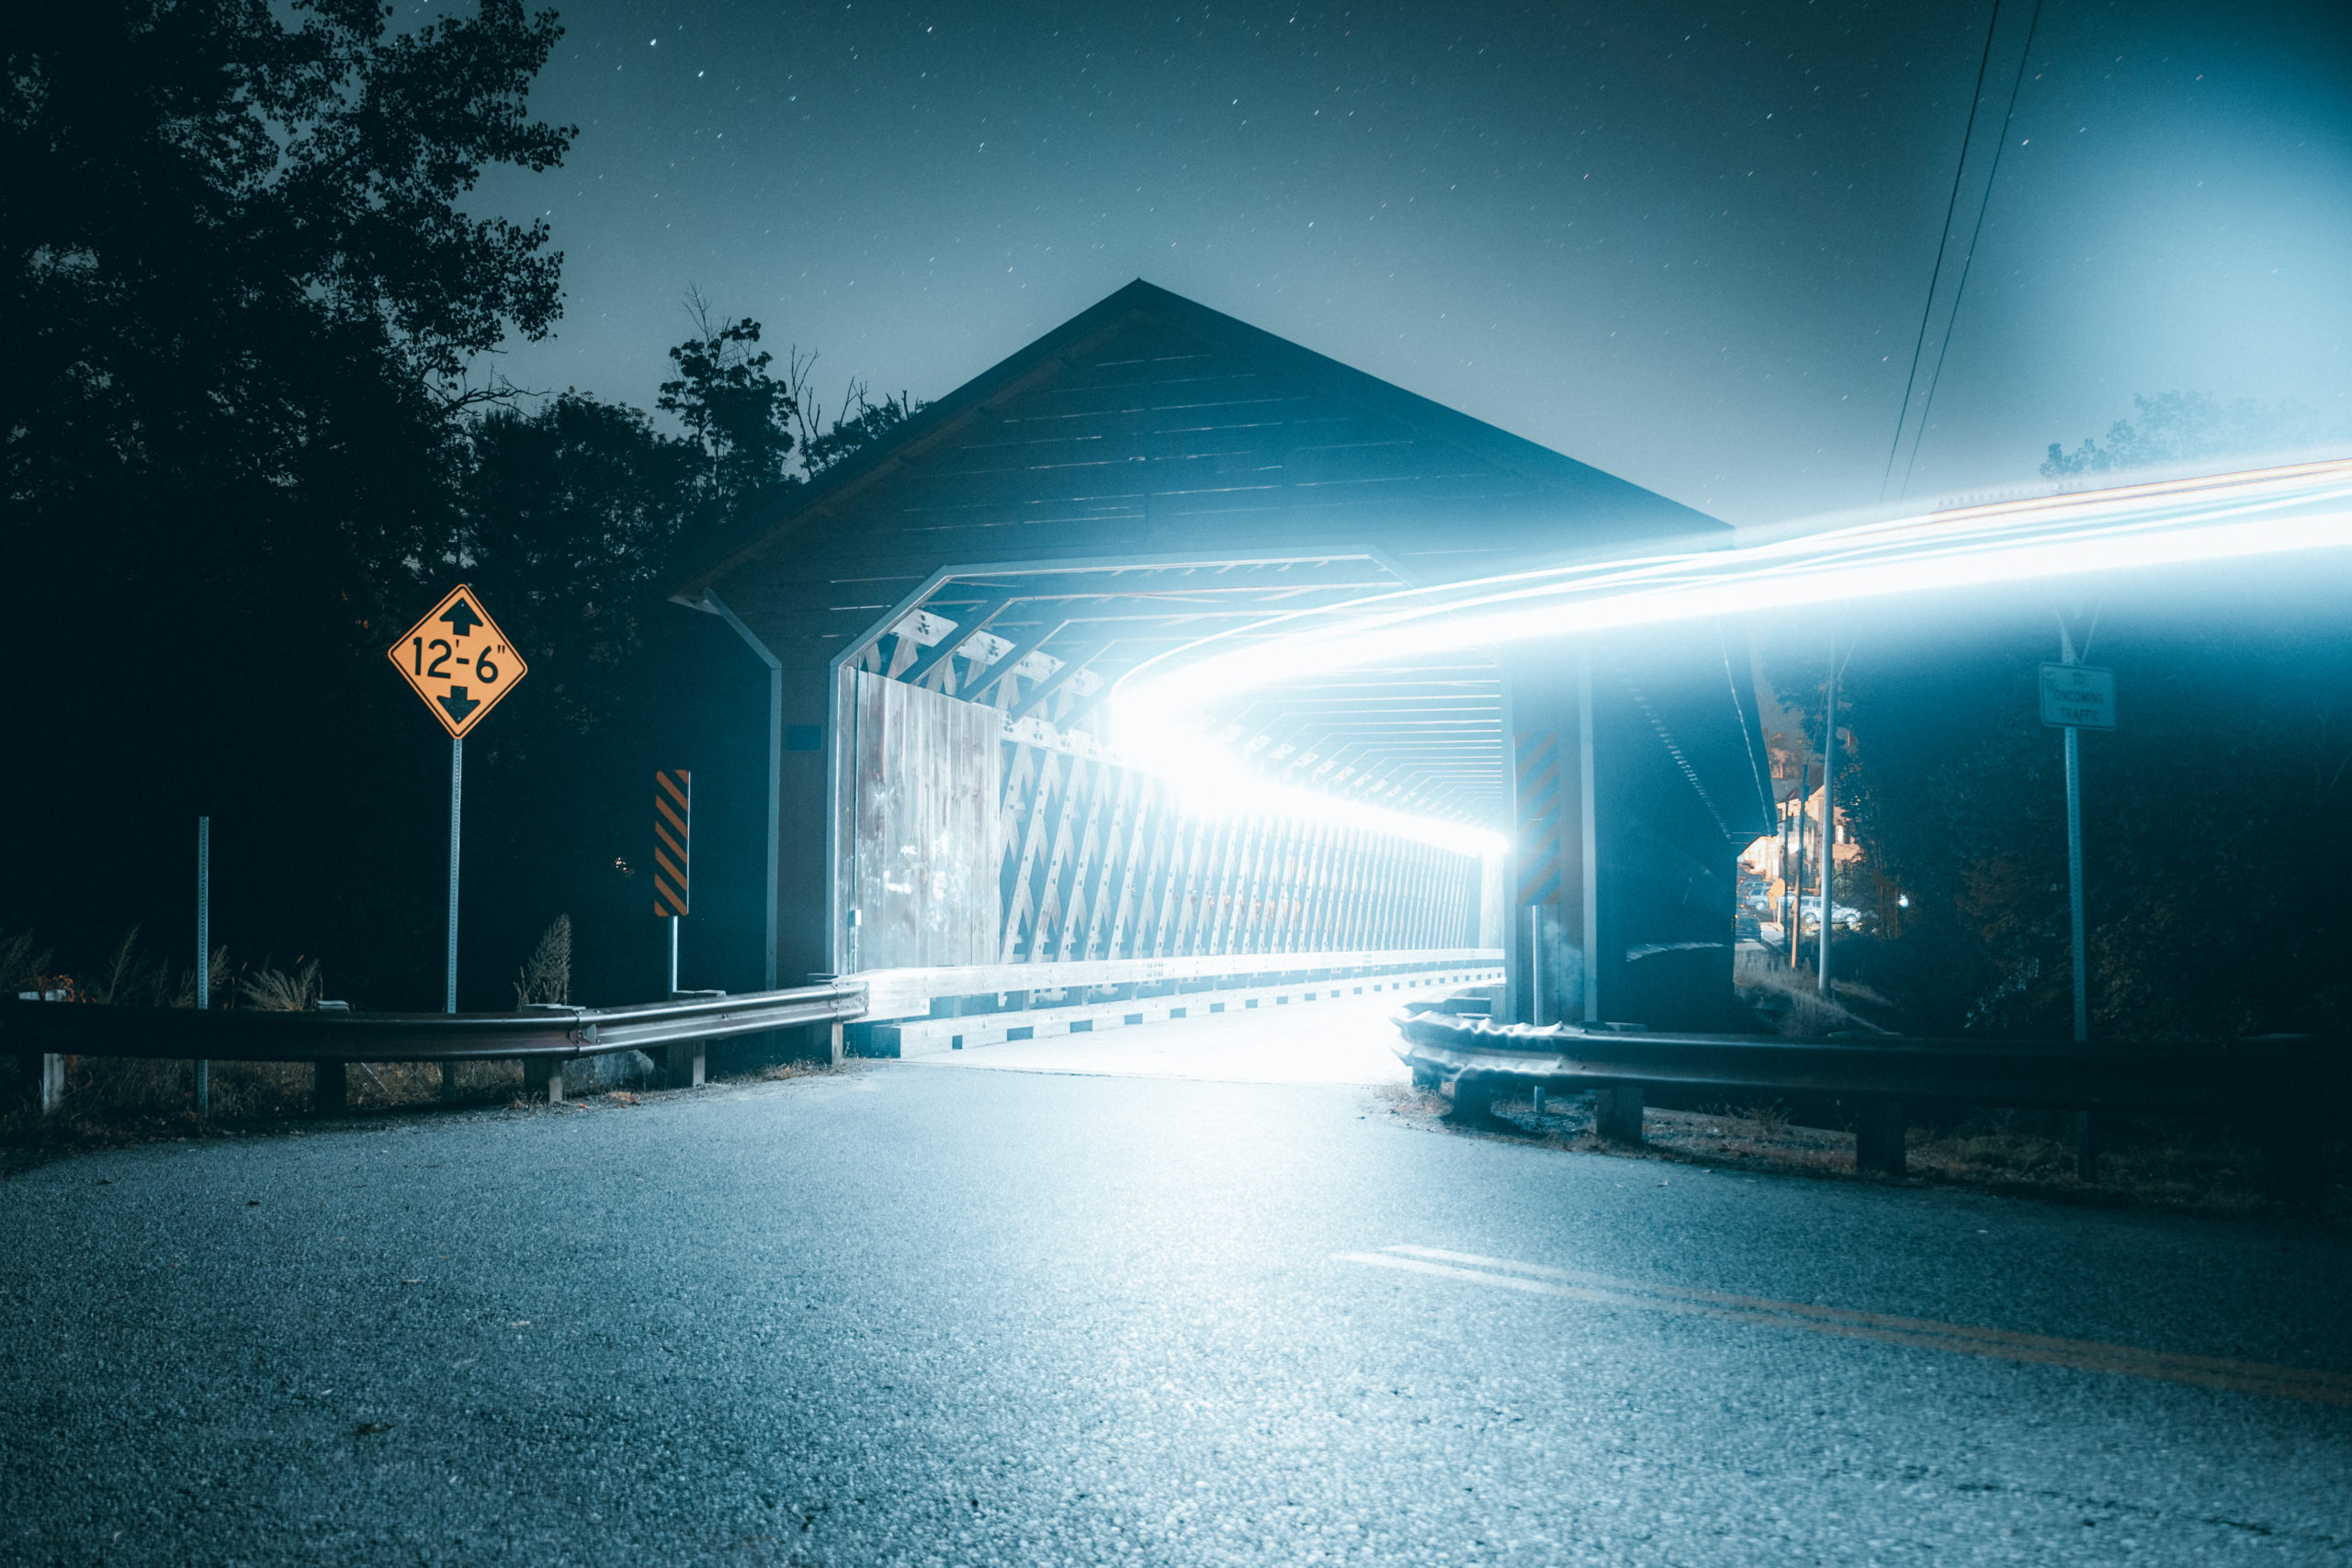
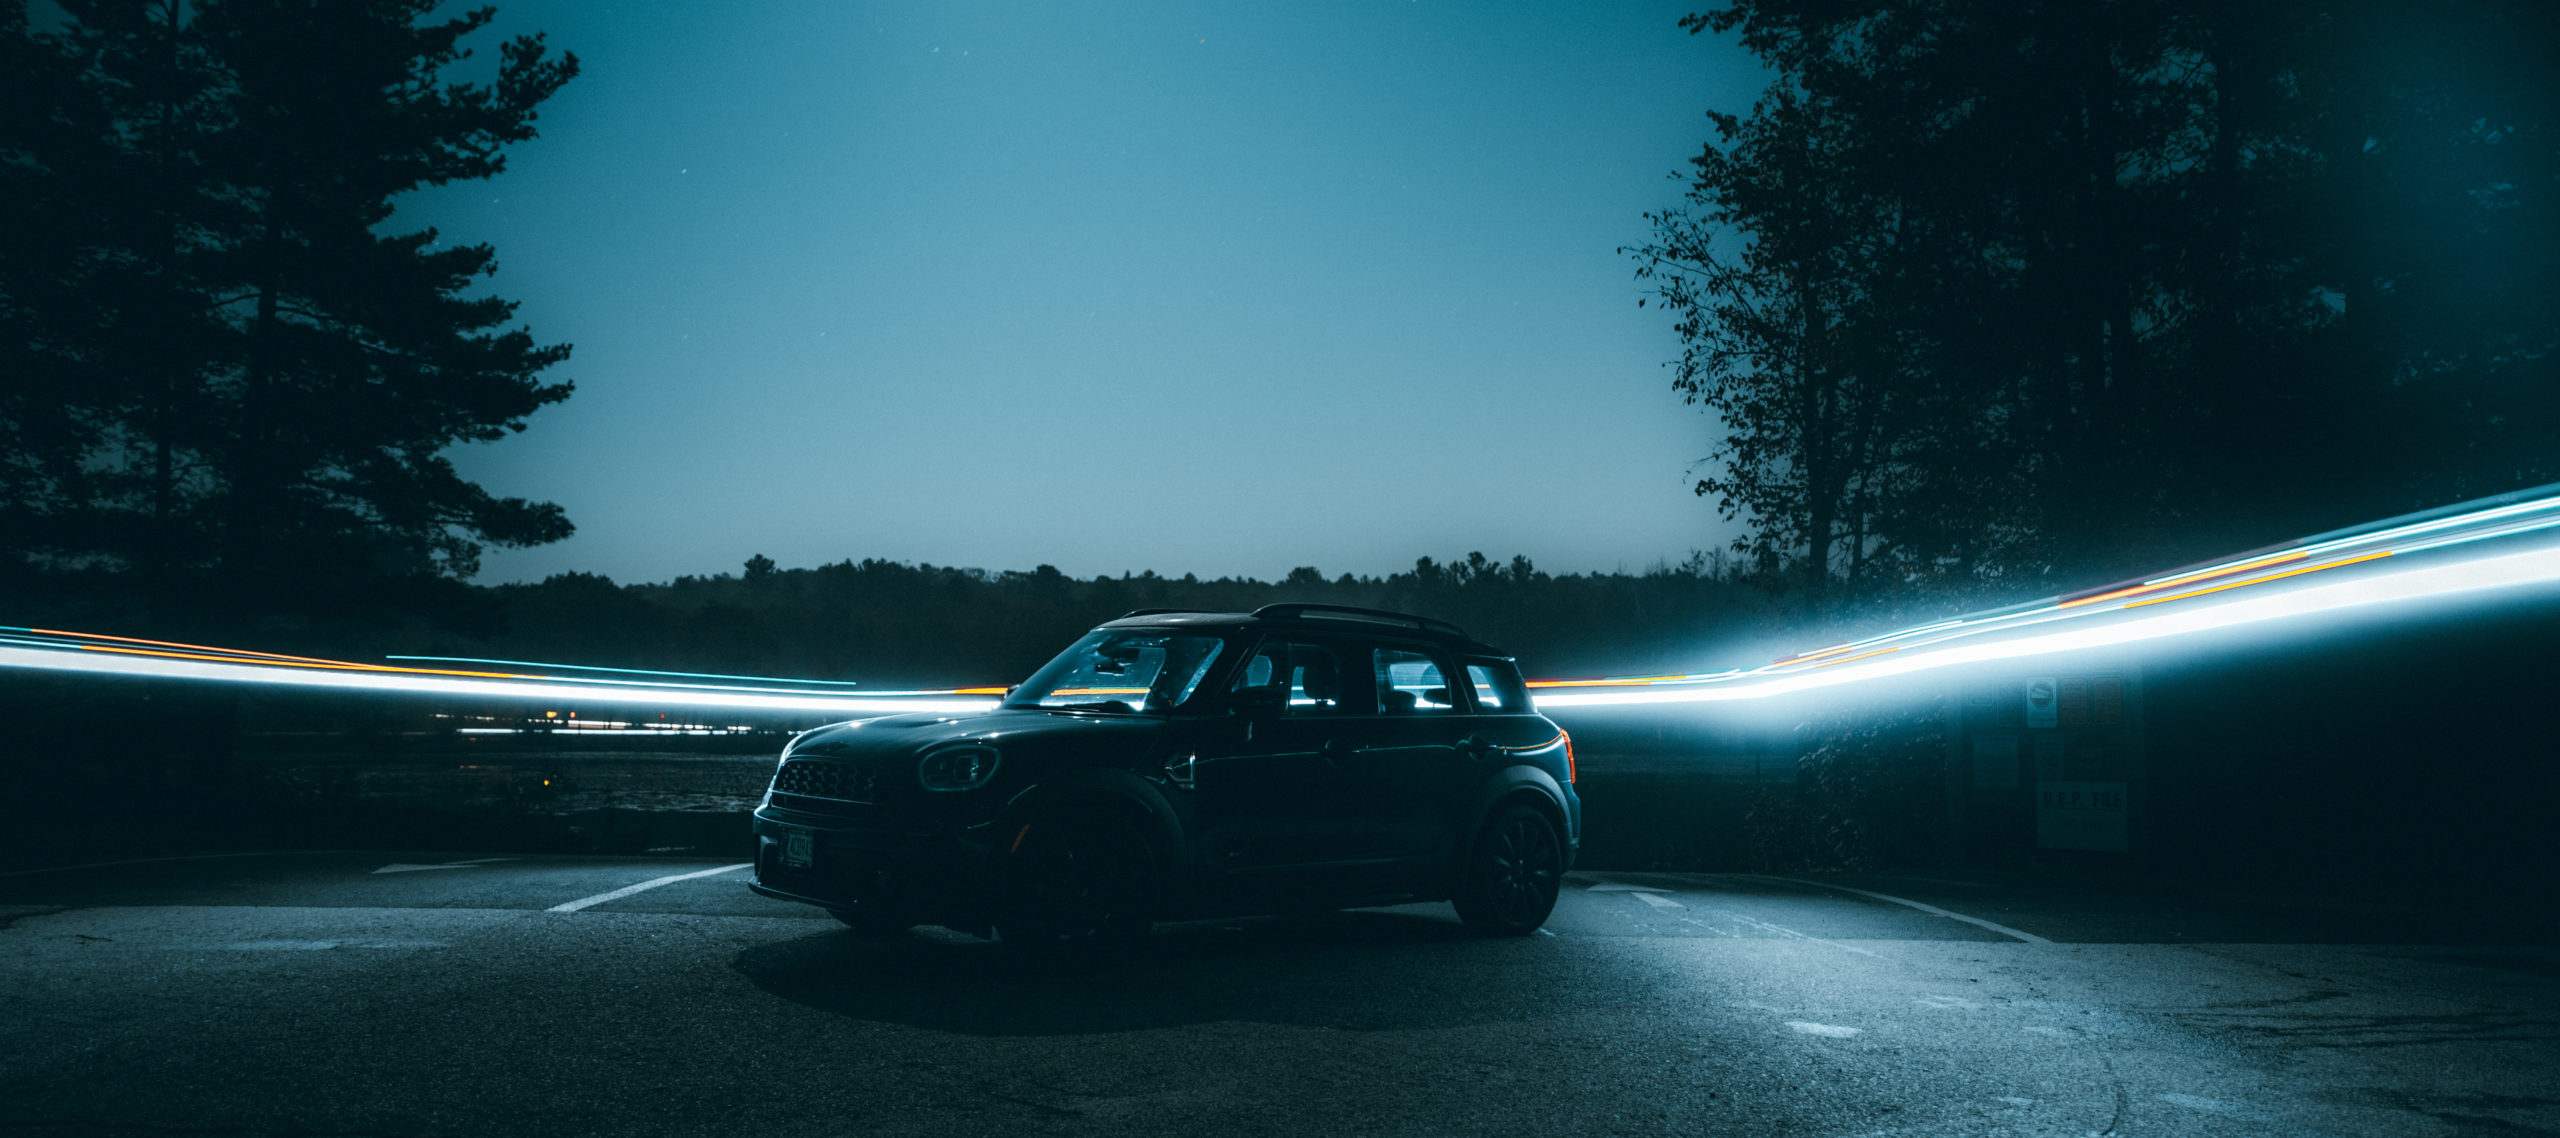
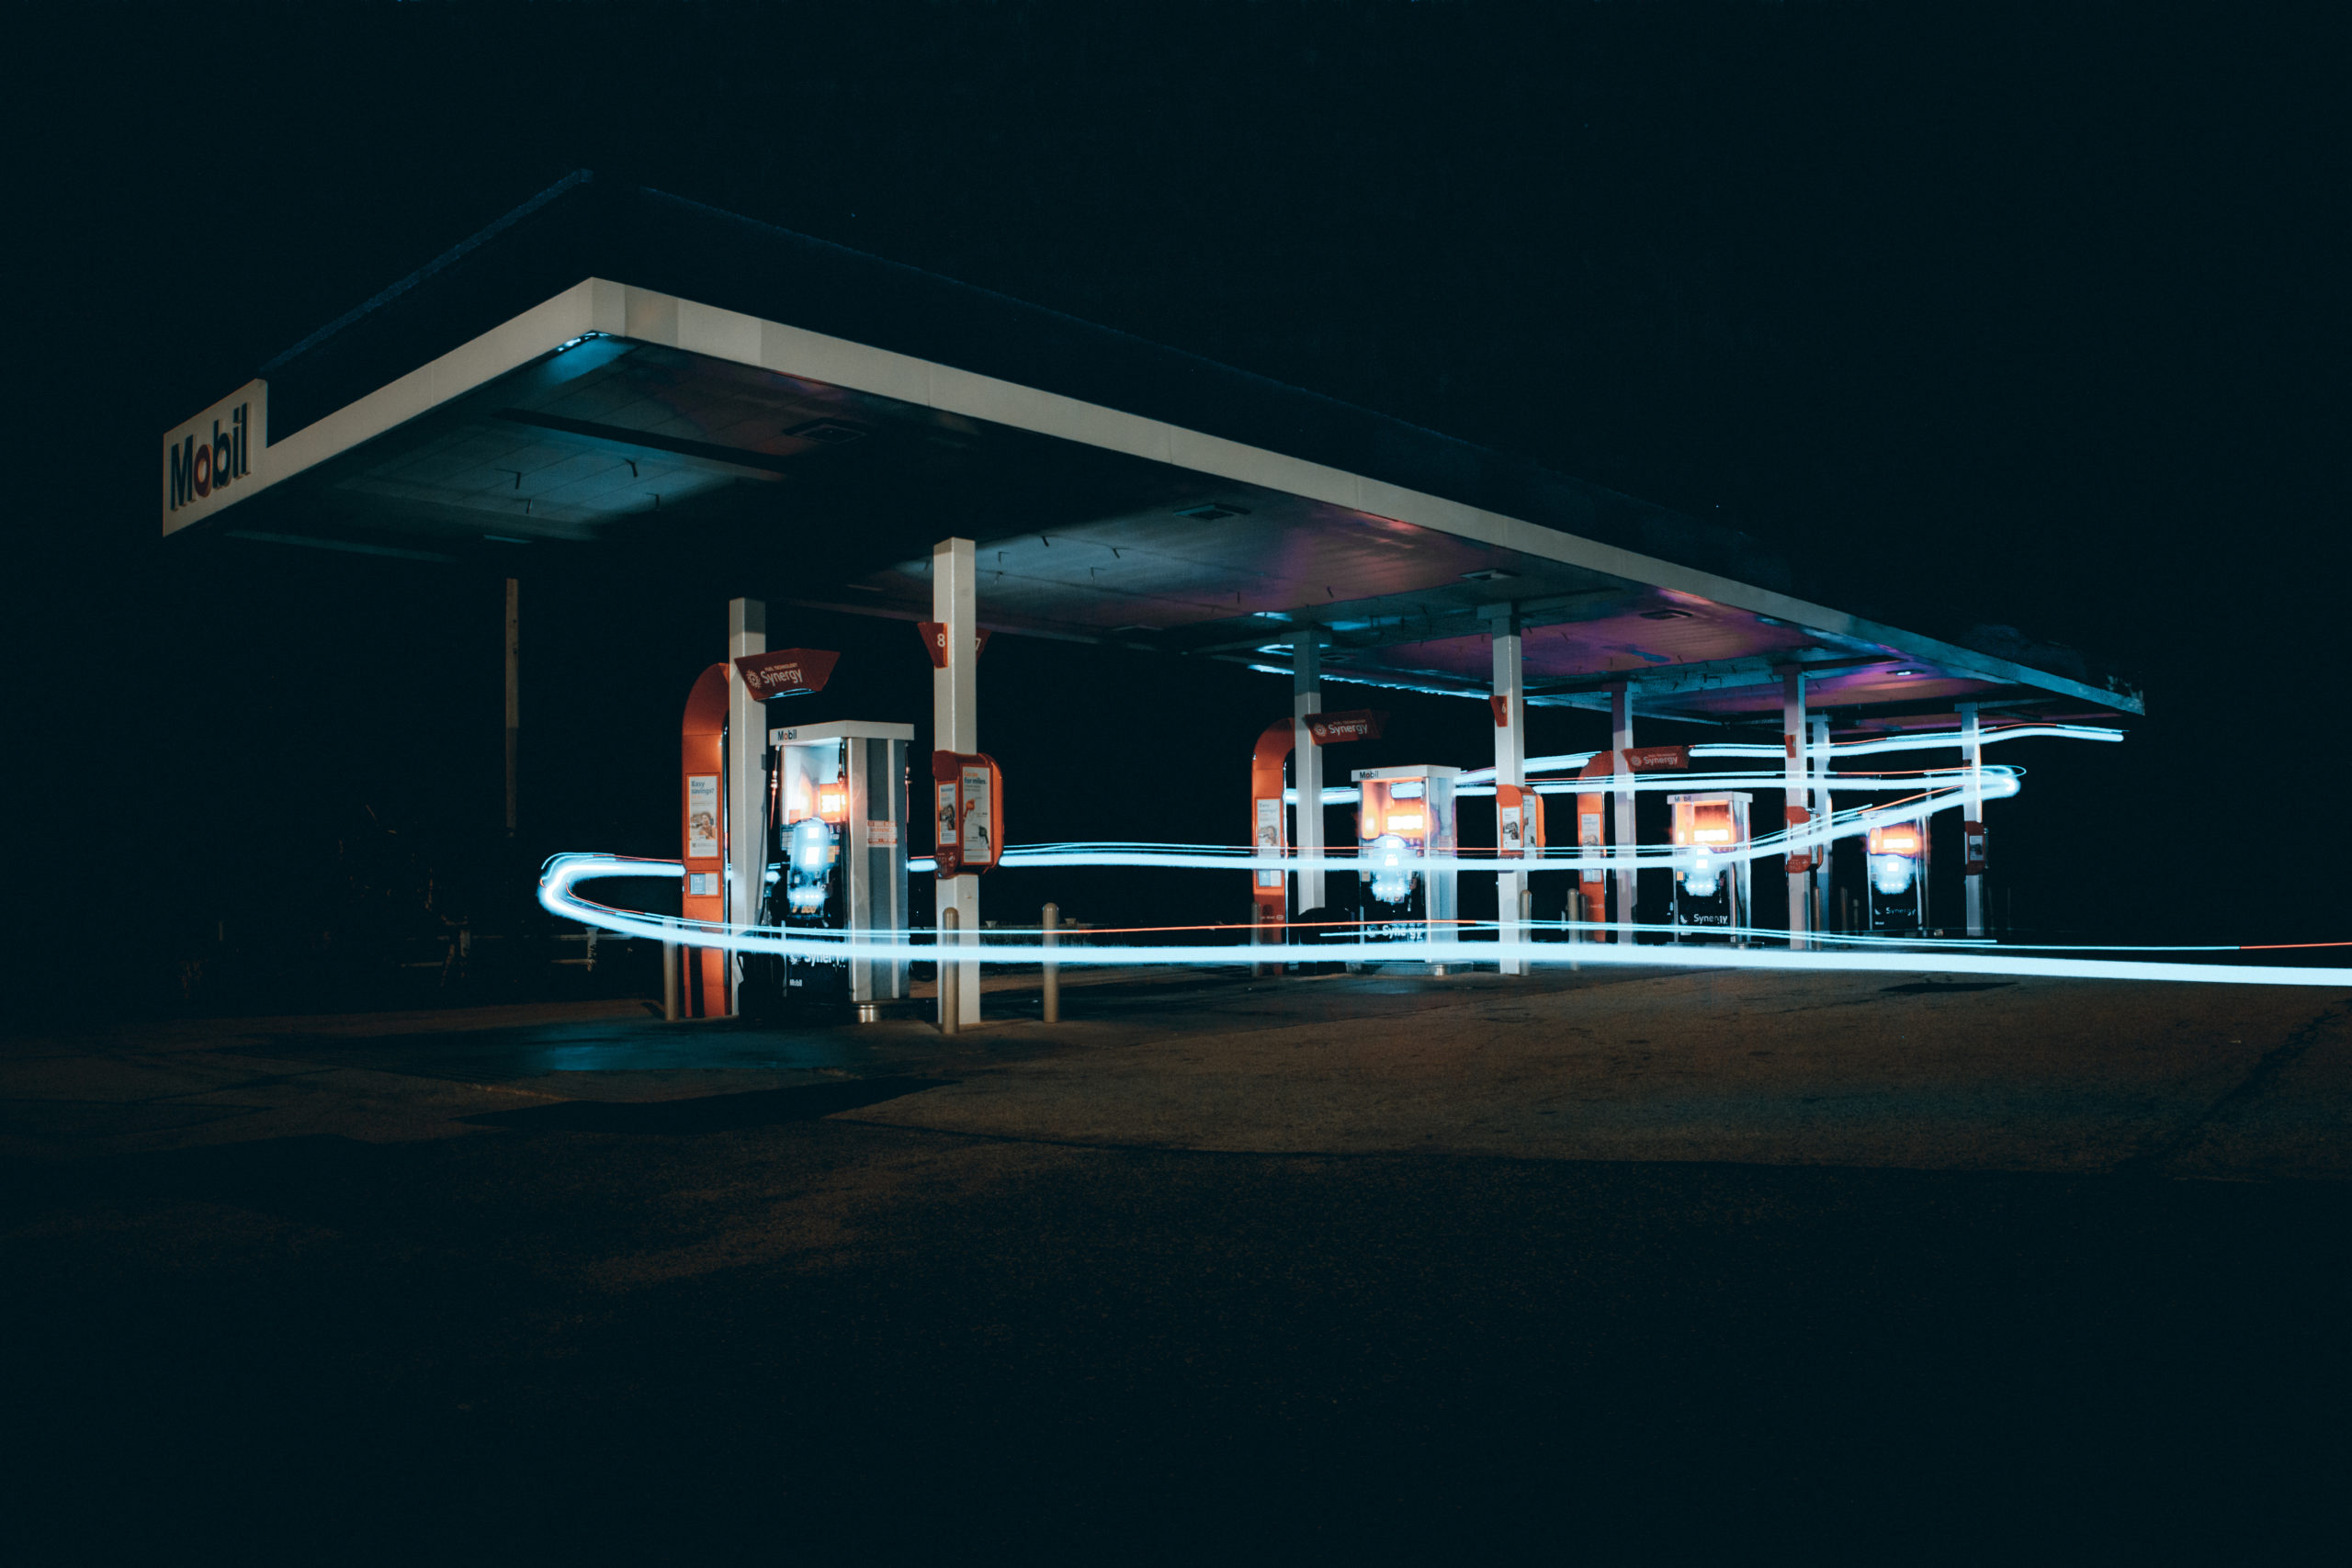
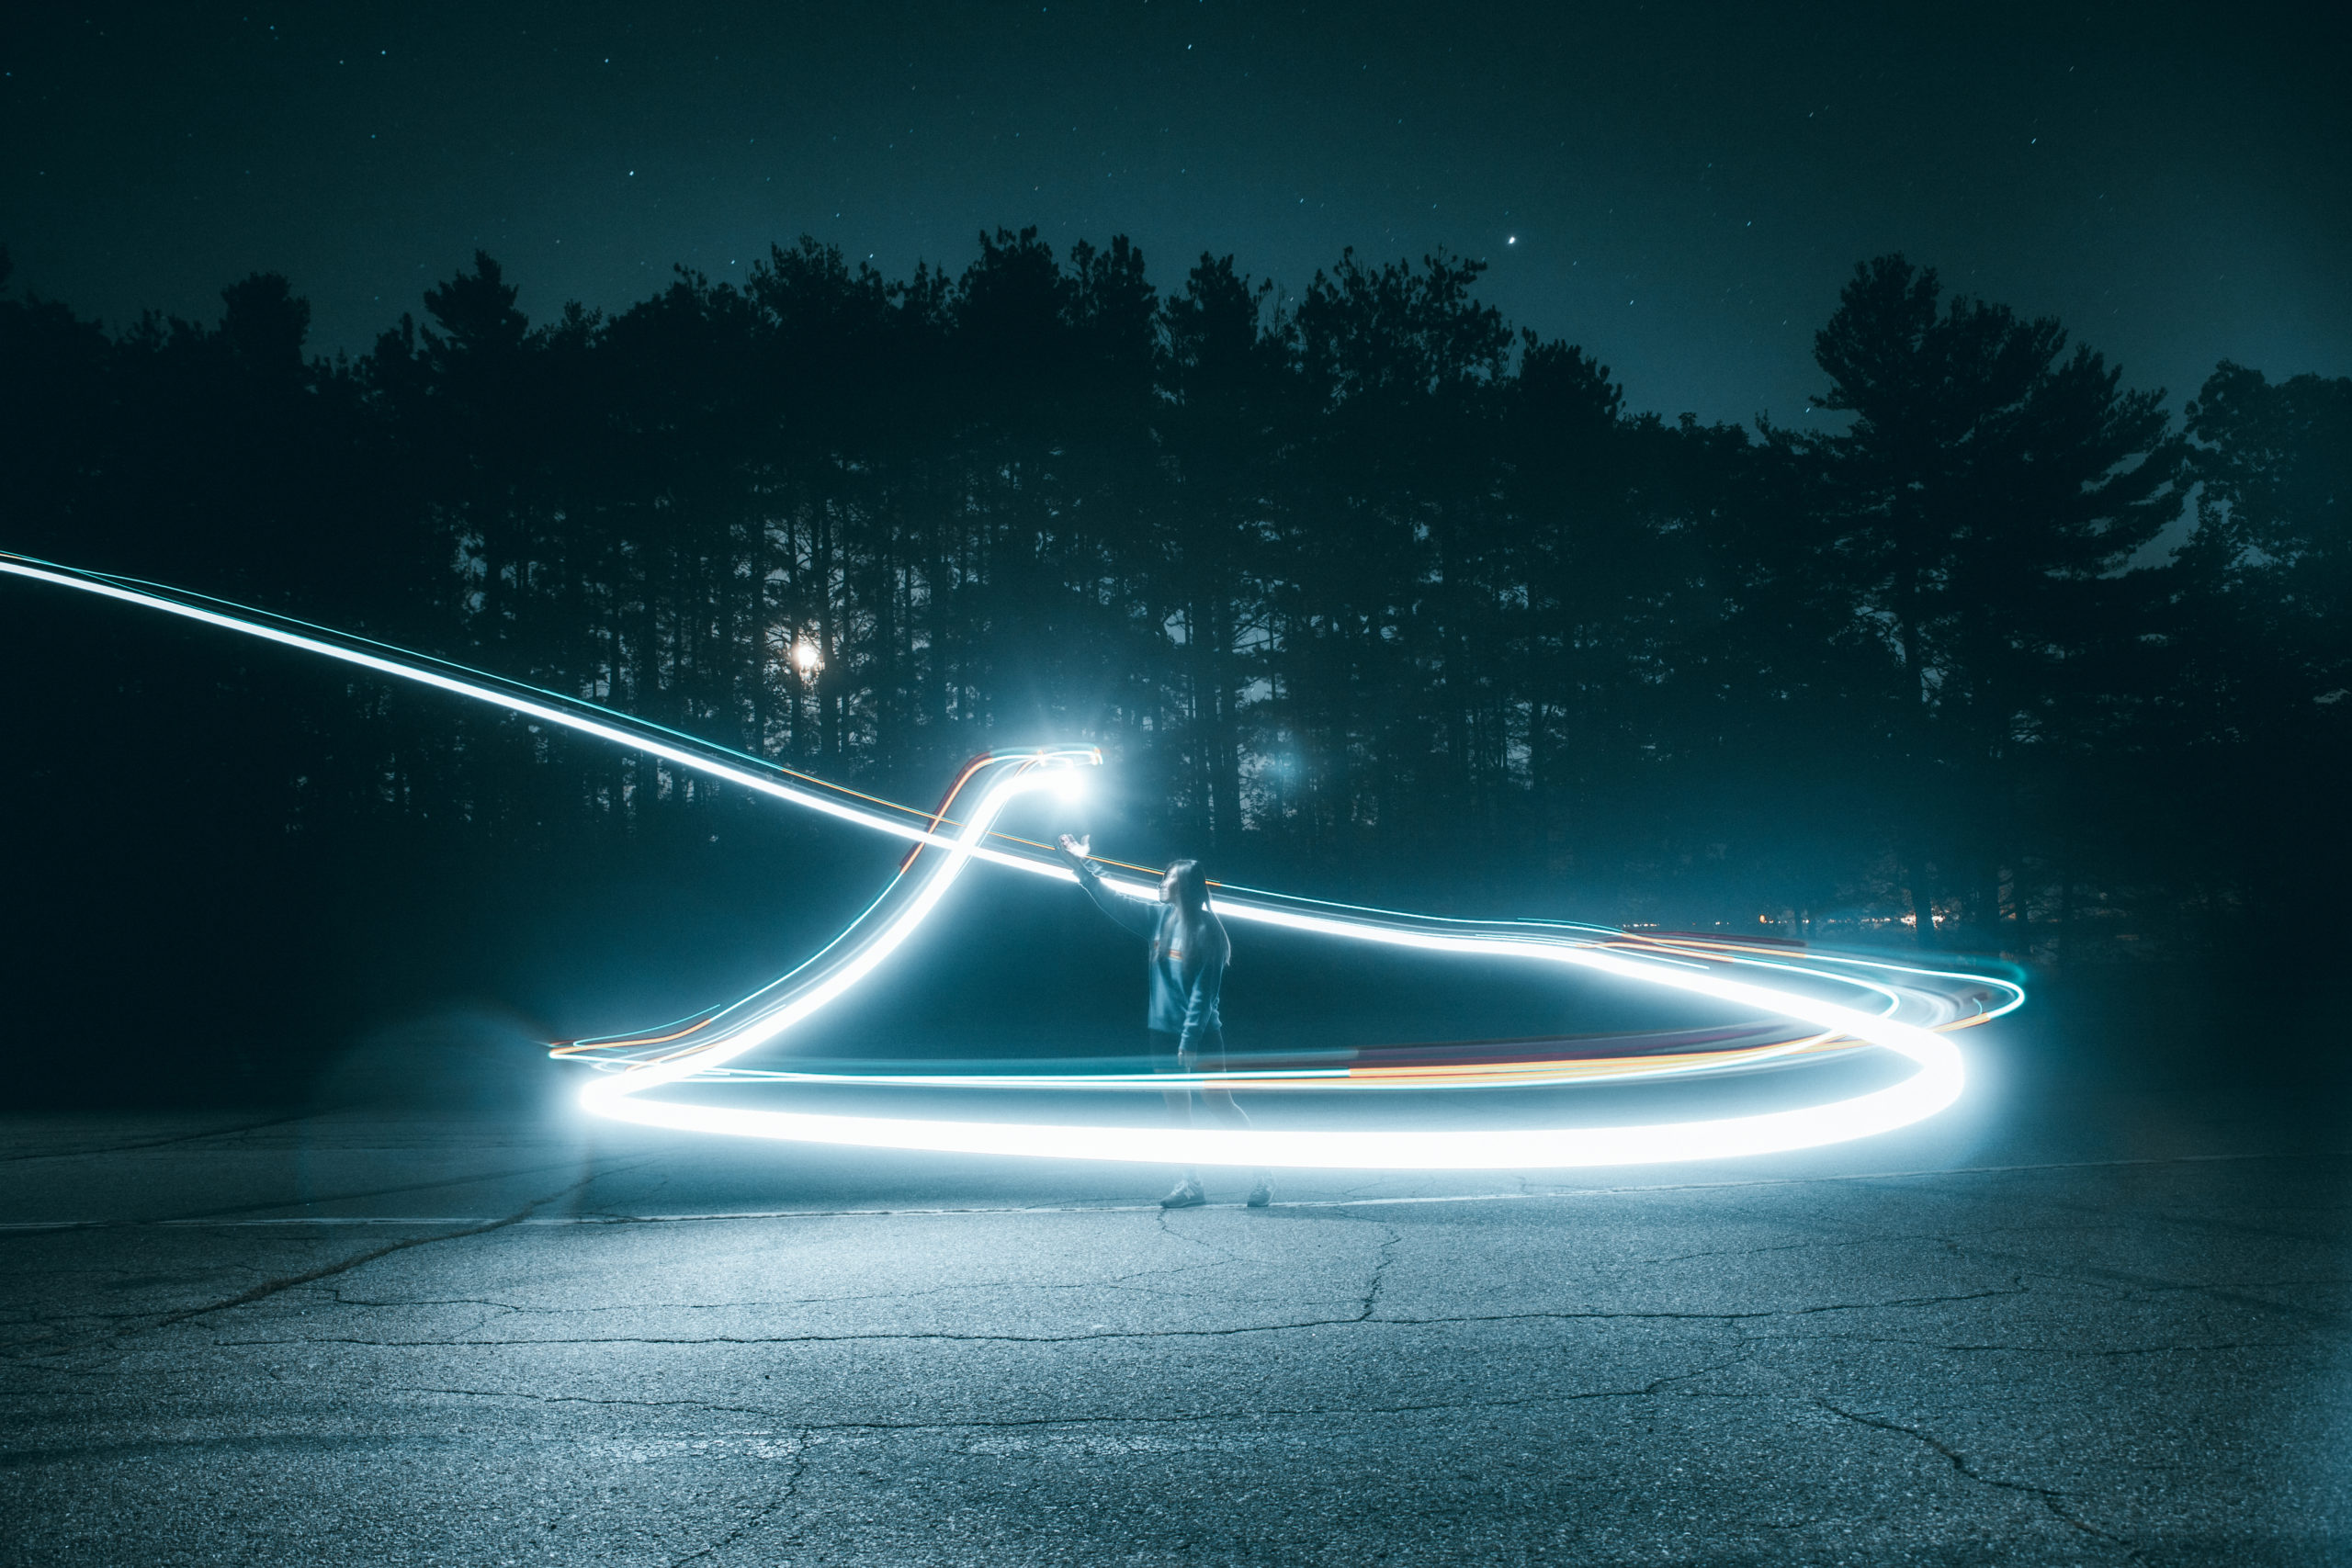
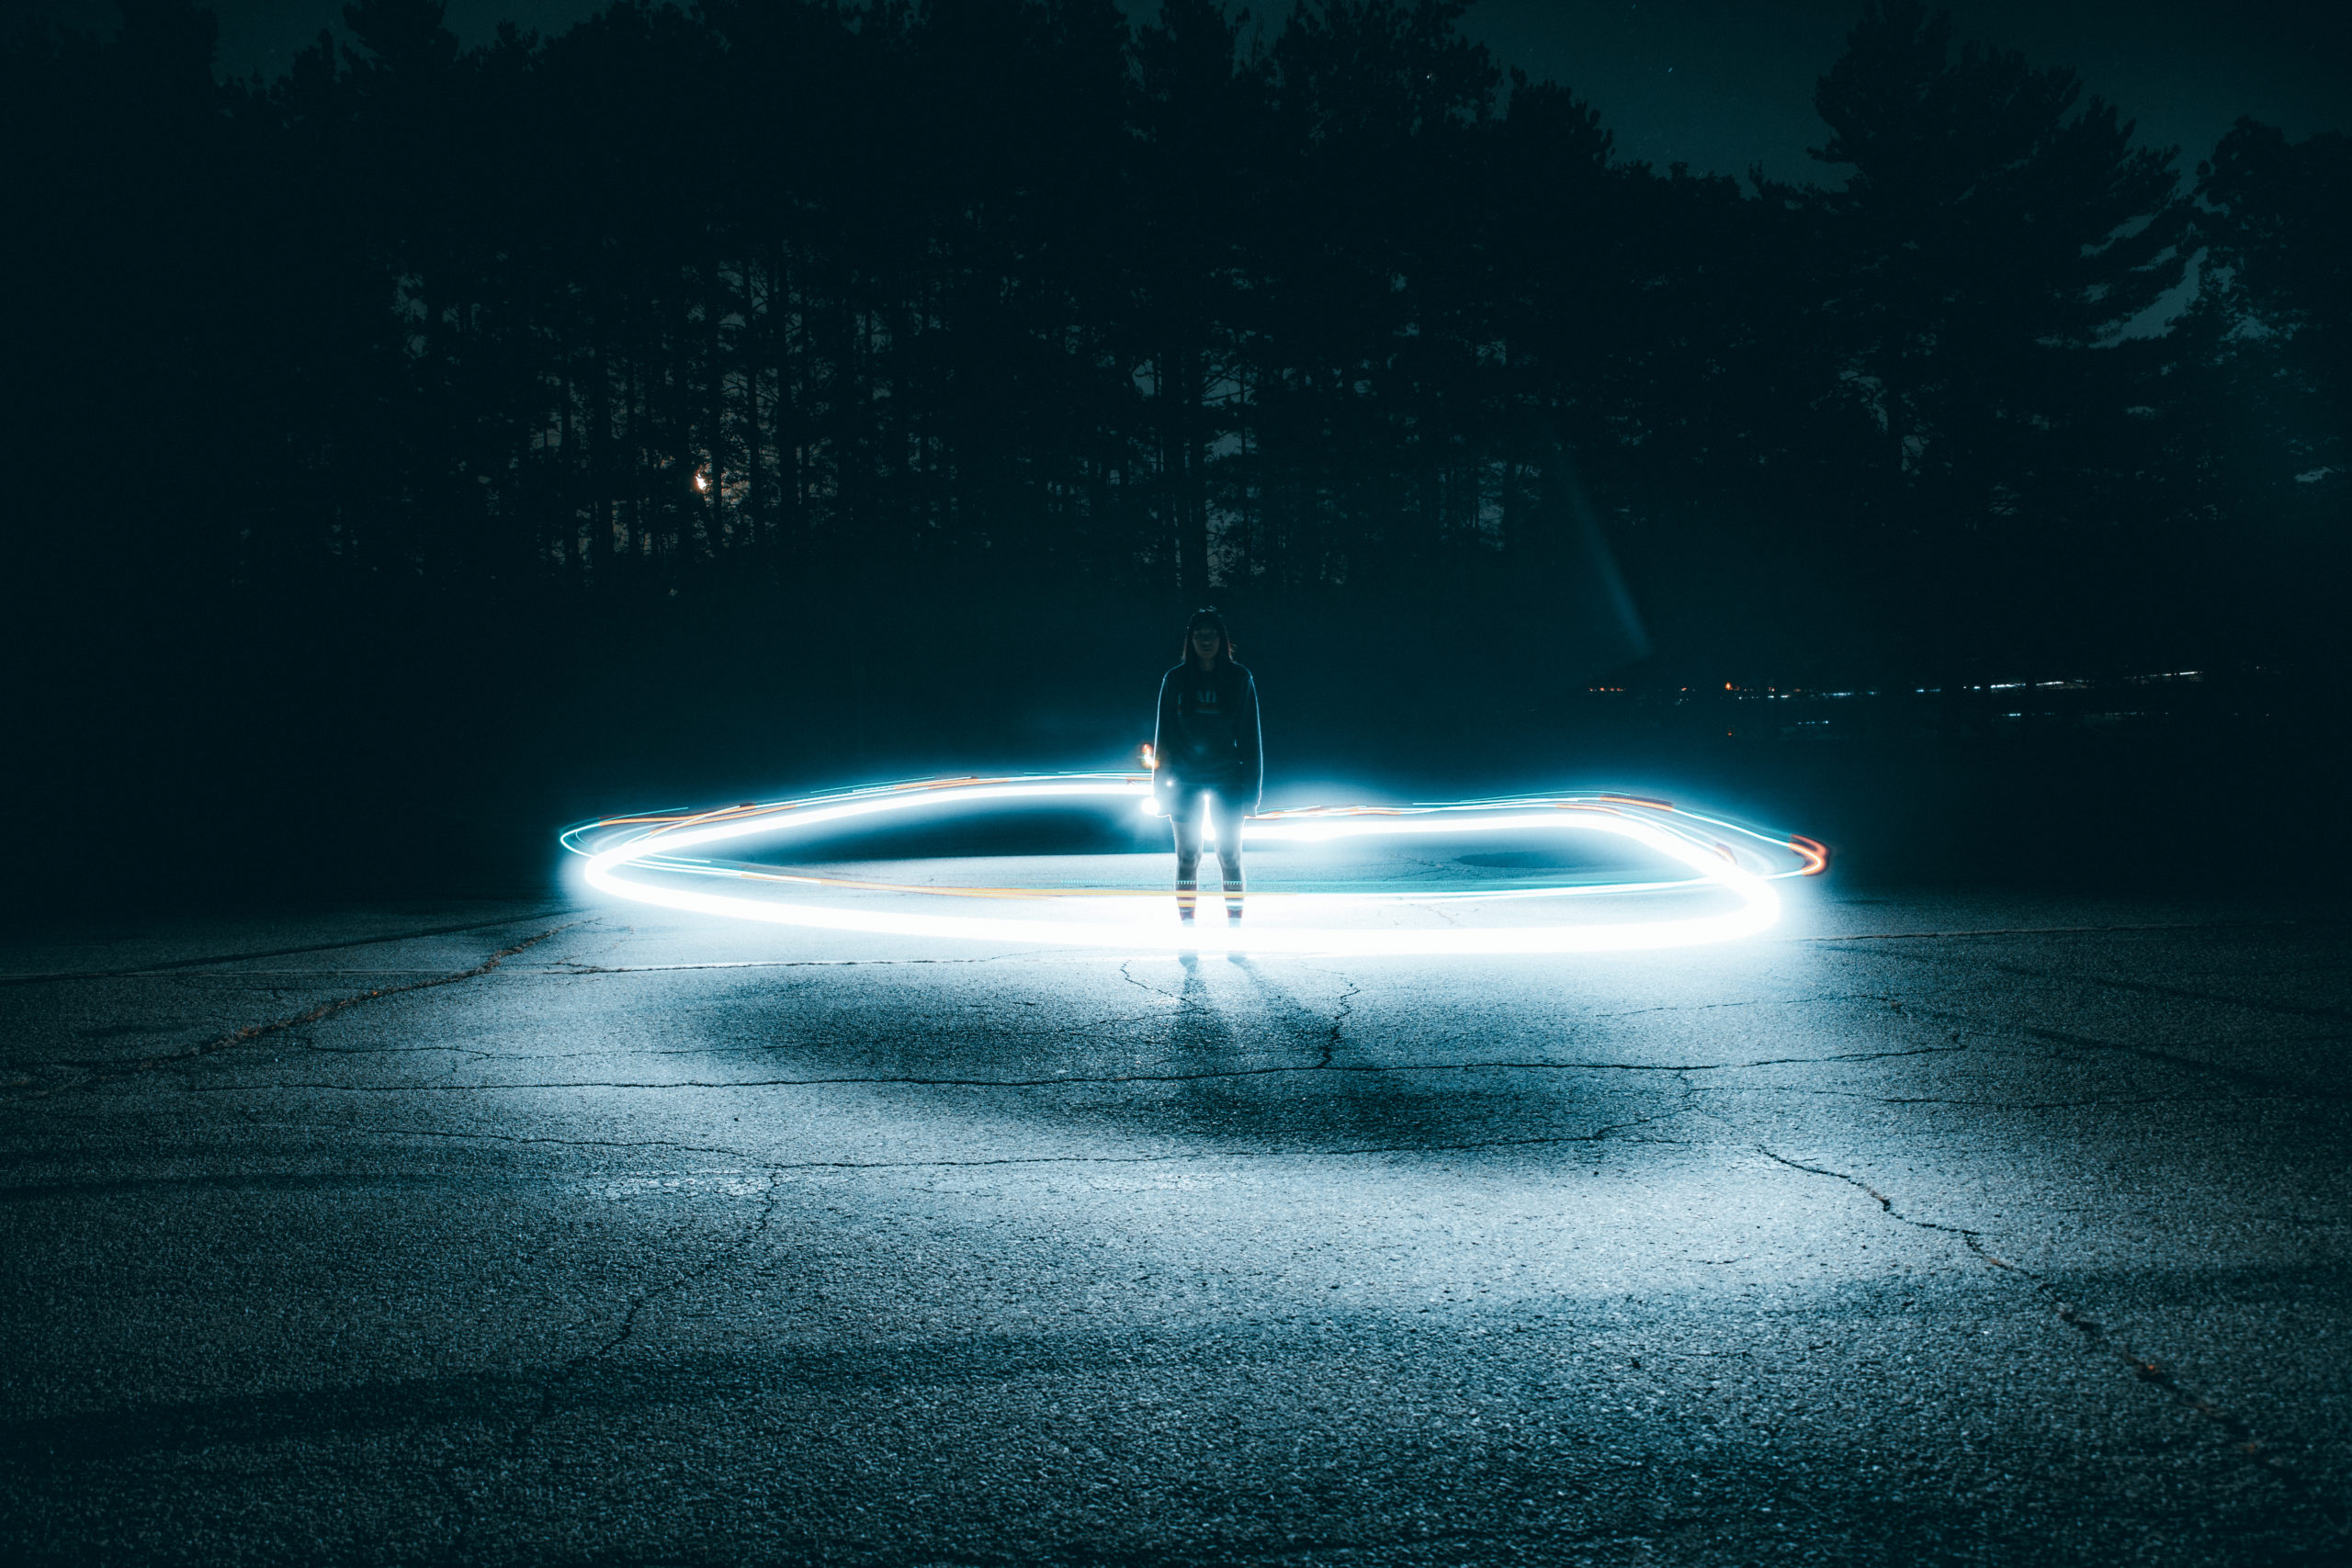
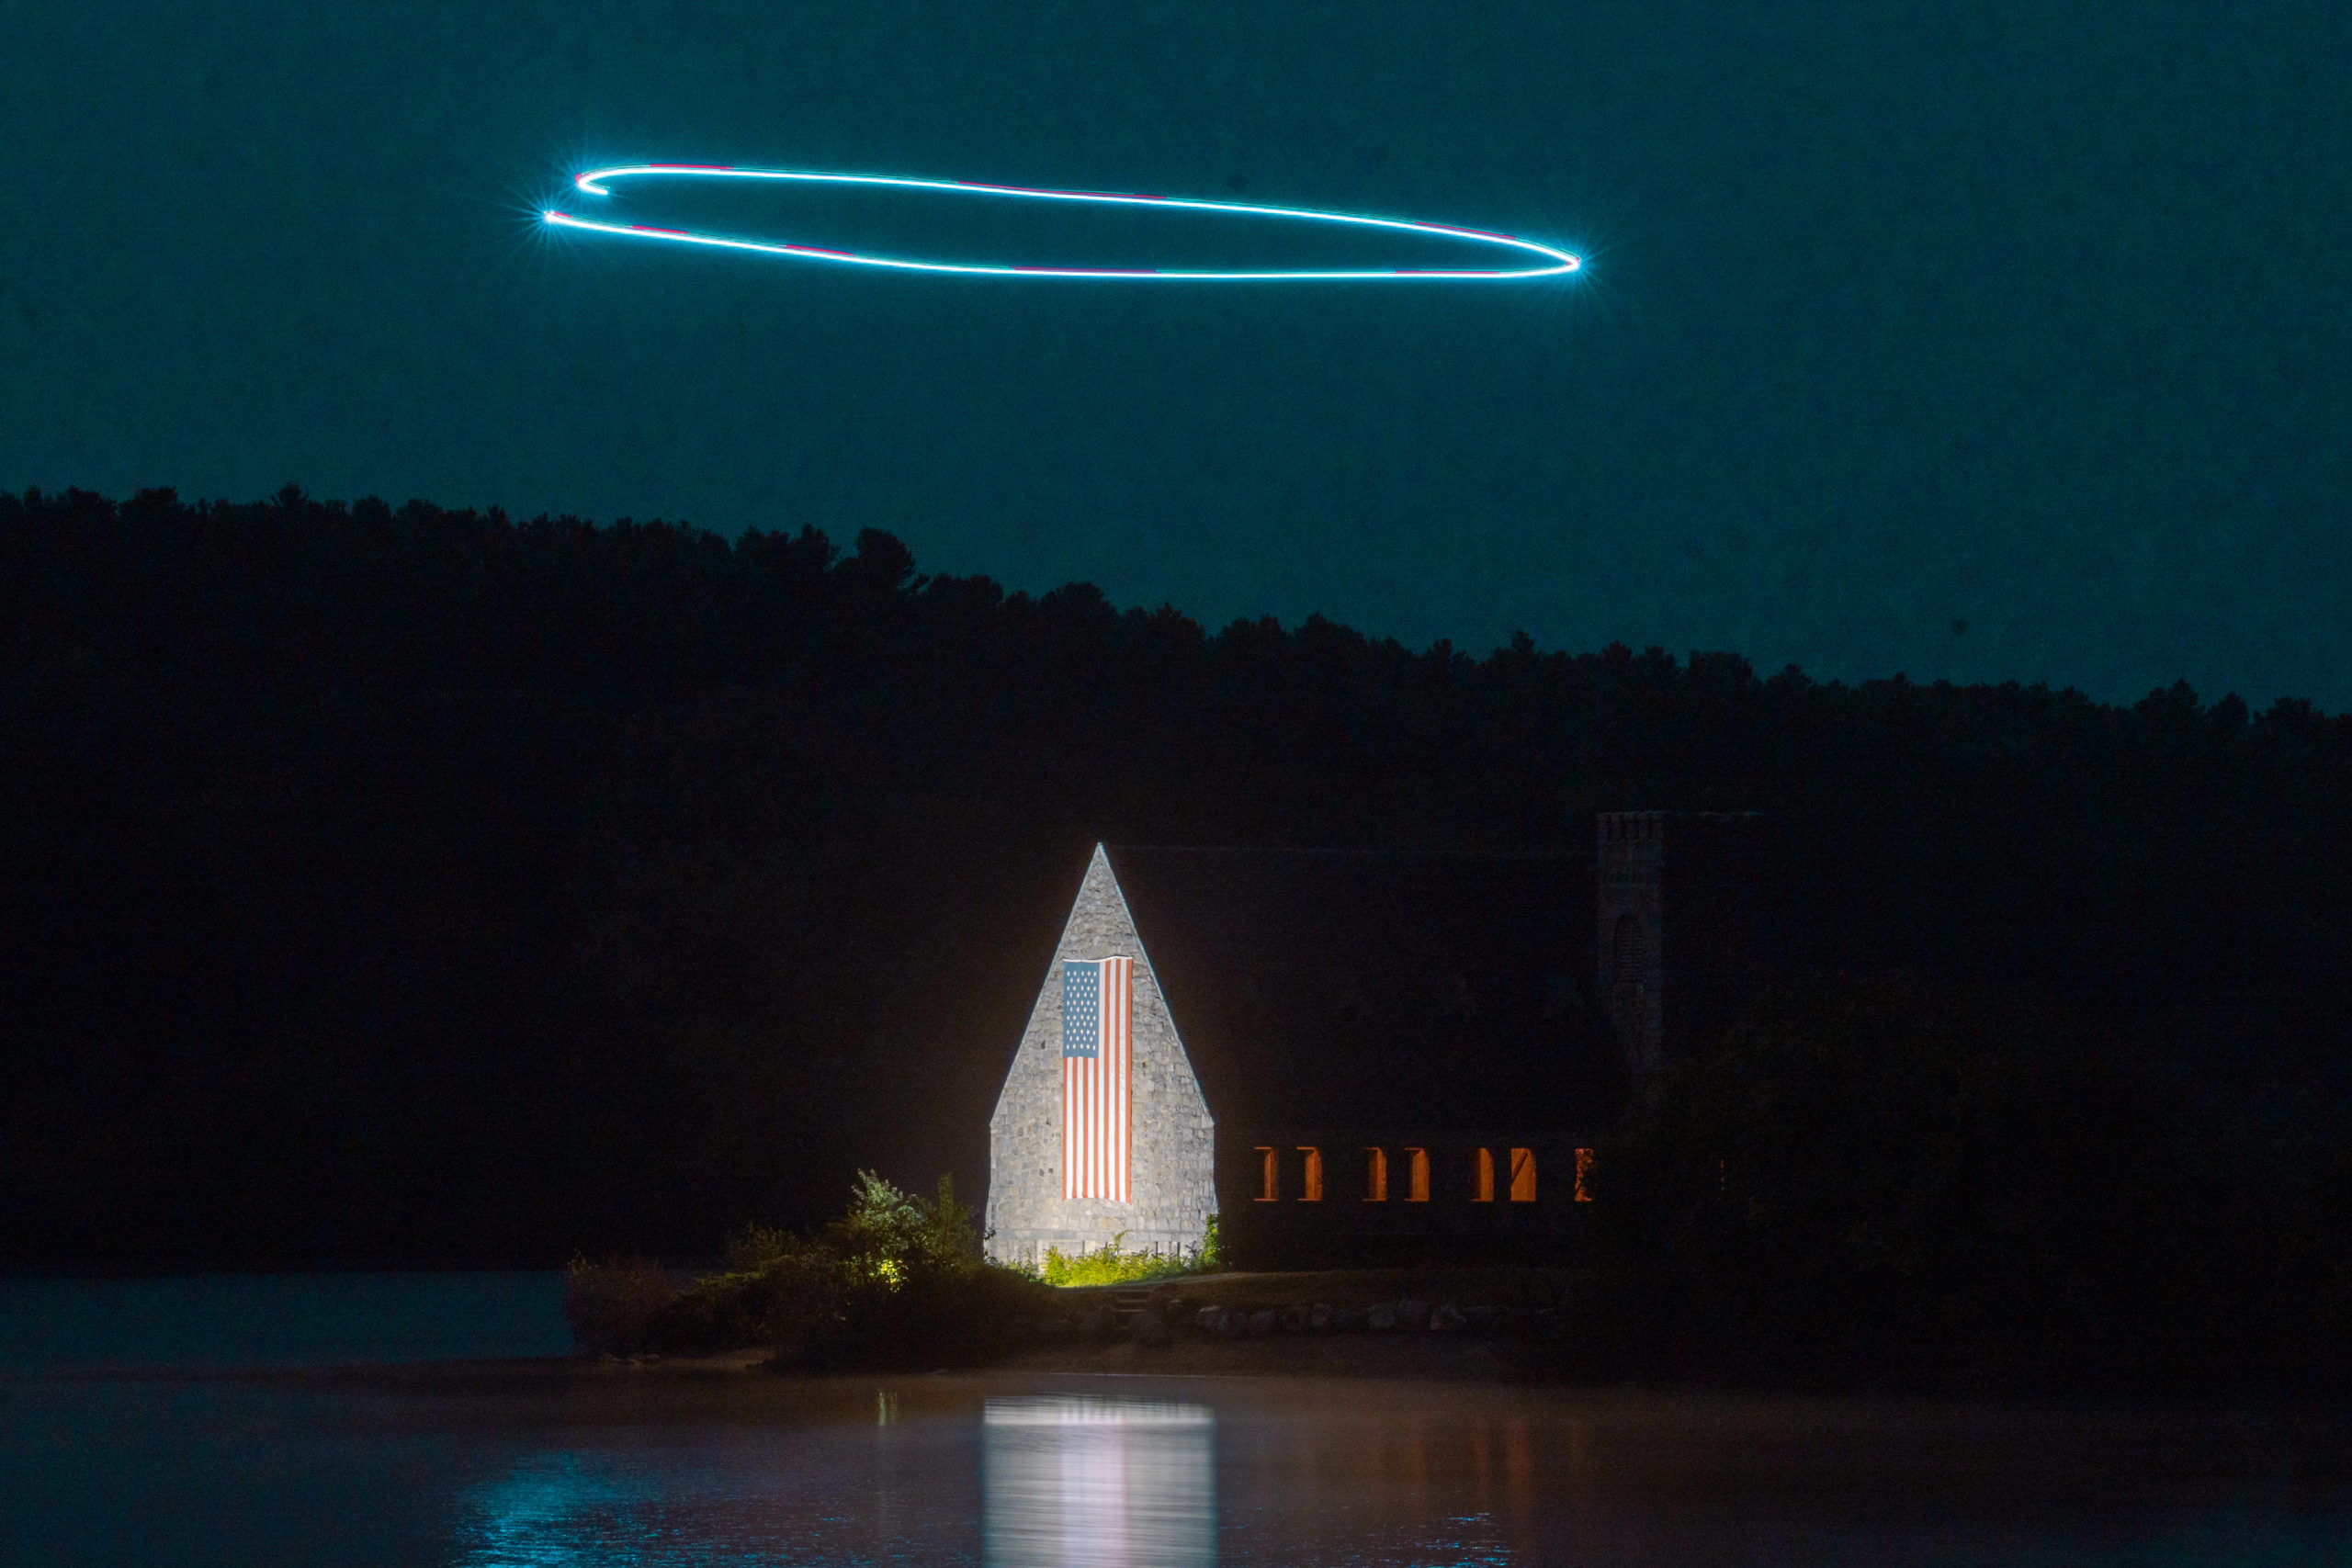
This project has been something I’ve been wishing to tackle for many years now but never have taken on the task of doing so. Each of these photos is taken using the same technique: light painting. Though, not your traditional light painting with a wand or a light in your hand. In order to take each of these photos, the light used to paint was attached to a drone and flown around in the sky. This came with a handful of challenges, some unforeseen, and some as expected.
A lot of my inspiration from this subject came from these youtube videos, which showed me ideas of how to use the drone more as an emphasis to a subject instead of a subject itself:
https://www.youtube.com/watch?v=fZ407I9hmKw&pp=ygUUZHJvbmUgbGlnaHQgcGFpbnRpbmc%3D
https://www.youtube.com/watch?v=WKlxUQtnyxQ&t=635s&pp=ygUUZHJvbmUgbGlnaHQgcGFpbnRpbmc%3D
https://www.youtube.com/watch?v=RjmHa1TVZeM&t=141s&pp=ygUUZHJvbmUgbGlnaHQgcGFpbnRpbmc%3D
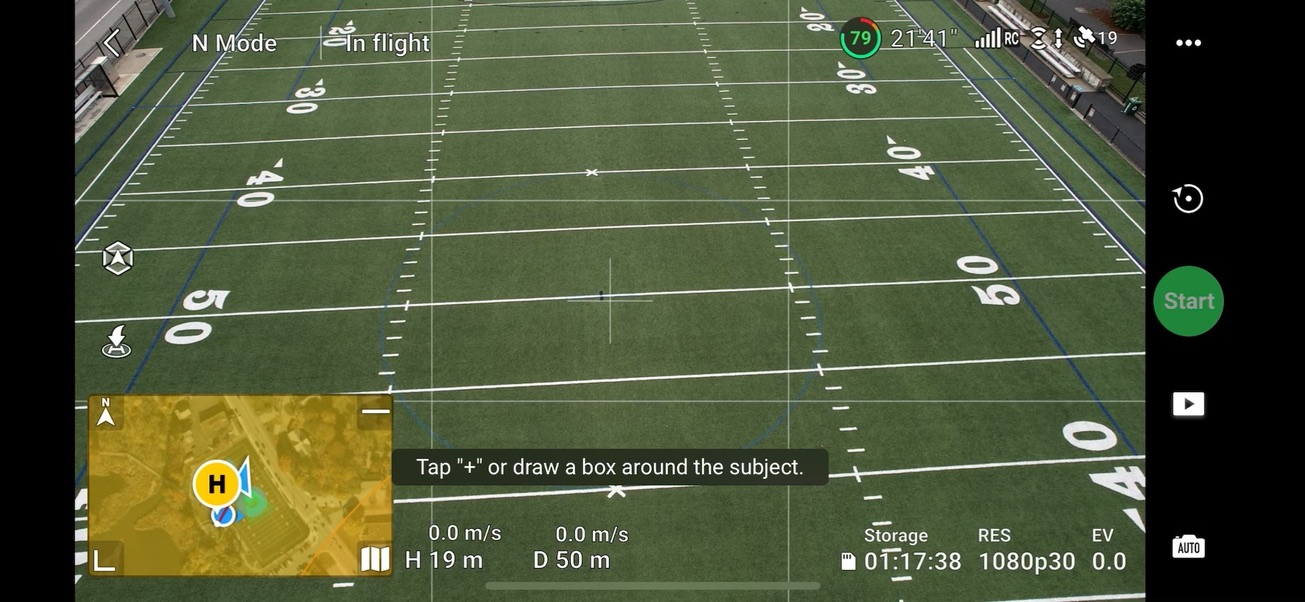
During the first week of testing, I set out with the goal of using the drone unmanned and autonomous using some coordinate tracking software. After doing plenty of research, I found that the only software installed on the drone required cameras to be active for the drone to track a subject. Since each of these photos was to be taken in the dark, the drone could not rely on its camera or its sensors to track an object. Moving past that idea, I decided to use the drone strictly manned during the photos.
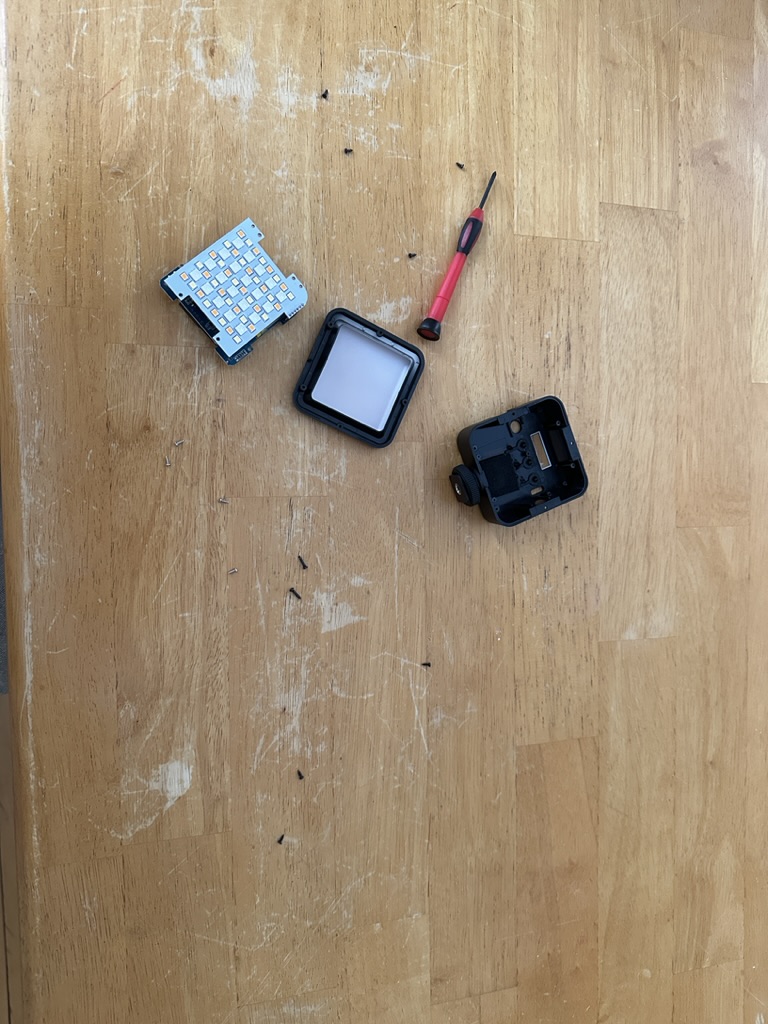
After that, I had to order the materials to strap a light onto the drone. And, though this may seem simple, it was anything but, as the light I ordered mistakingly had a magnet in it. Due to the software in the drone requiring a compass calibration before takeoff, the magnet interfered with the drone enough that it would not calibrate. After trying ways to keep the light far away from the drone, I finally made the executive decision to open up the light and remove the magnet. Luckily, I kept the shell of the light intact.
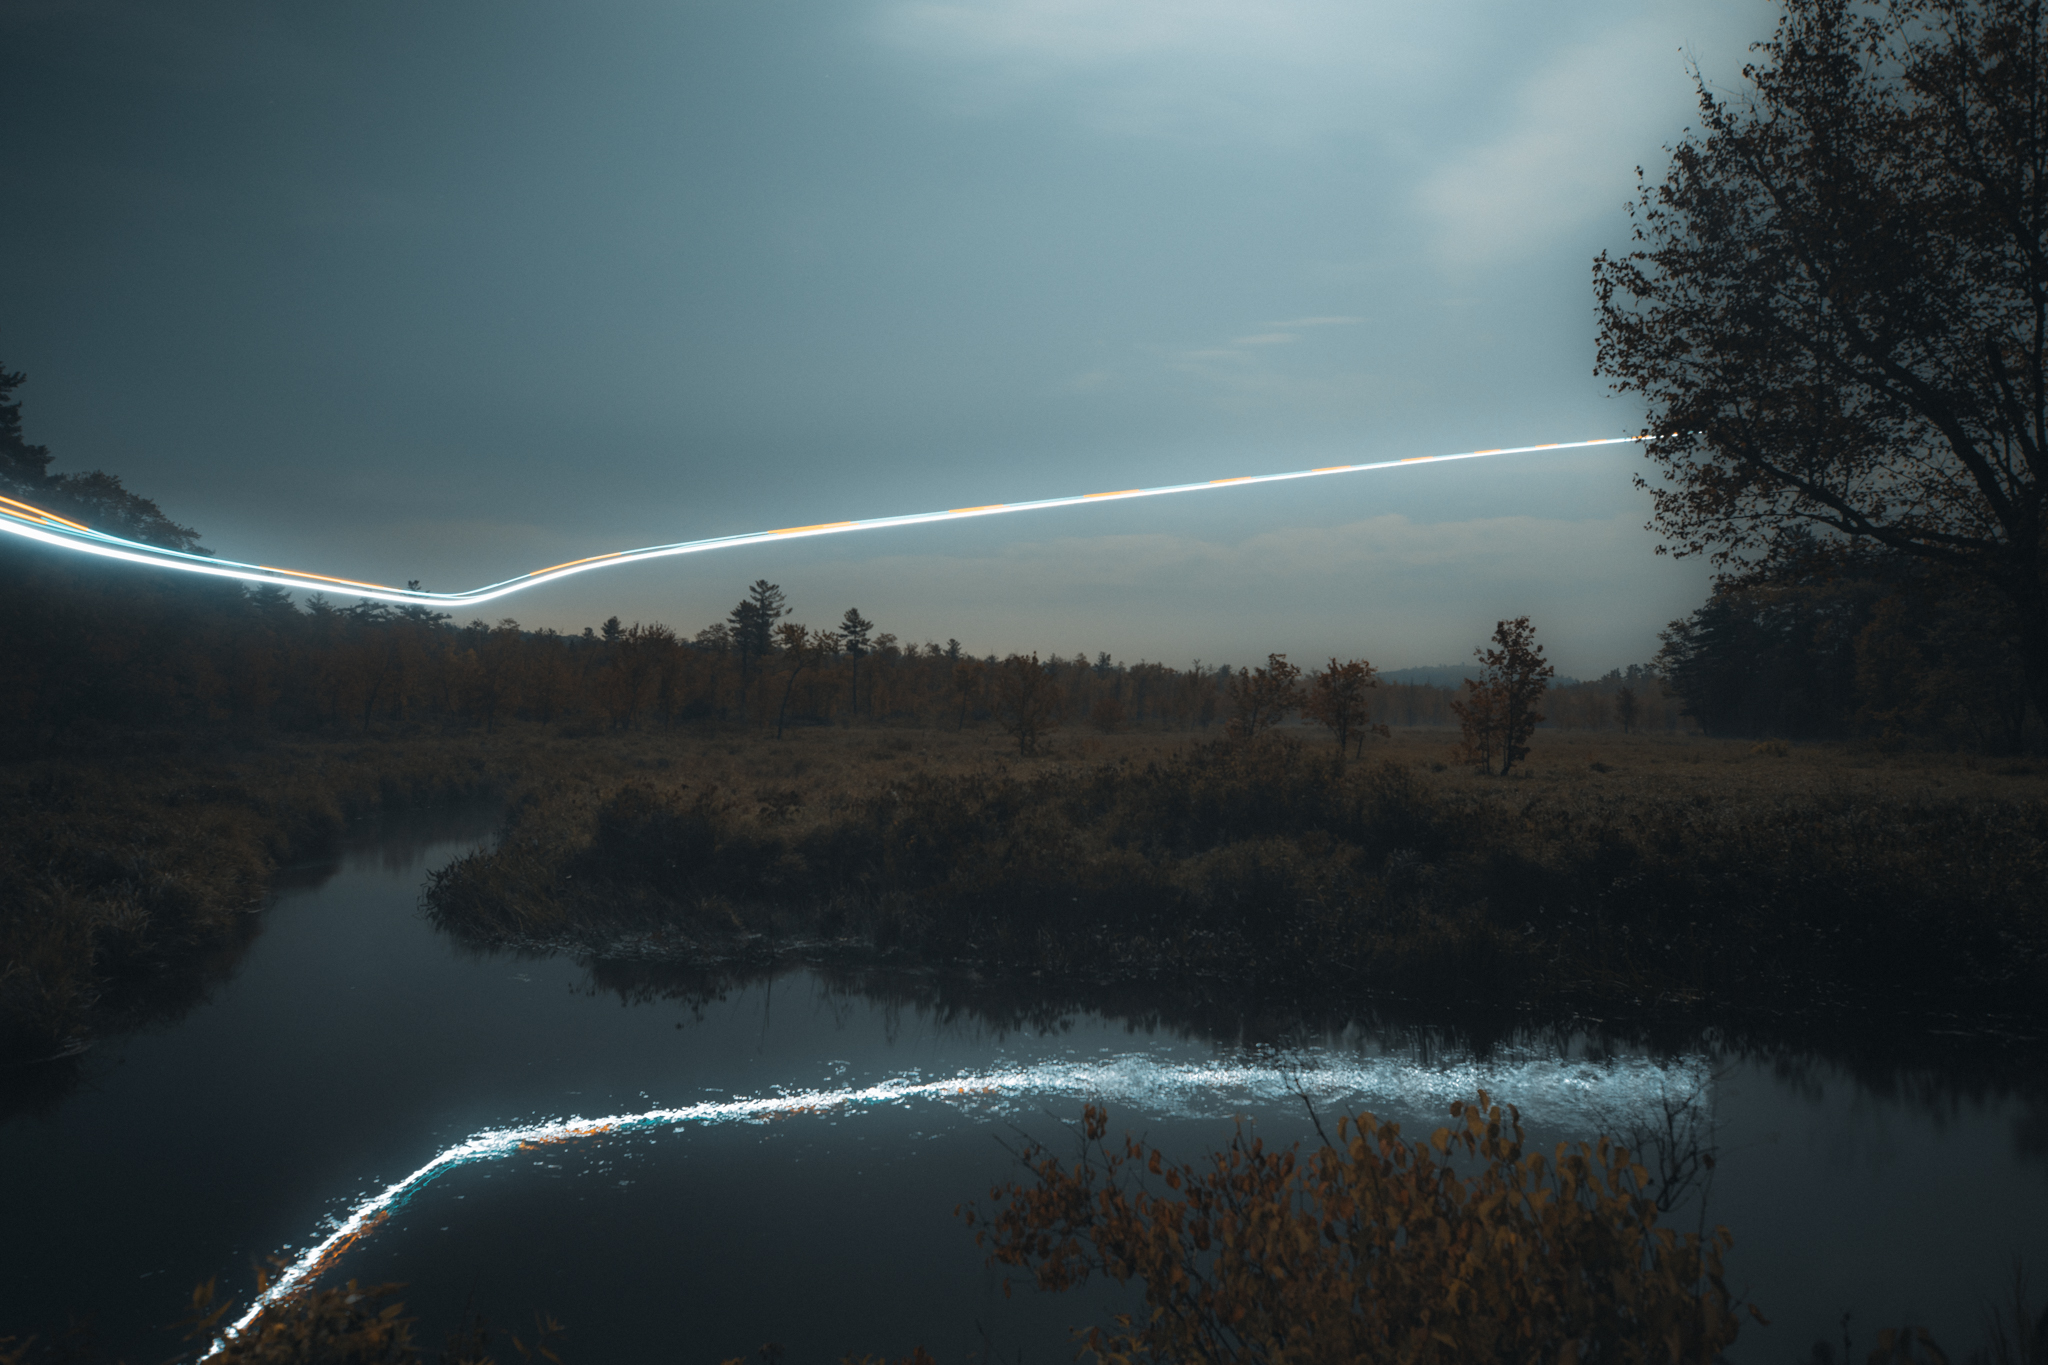
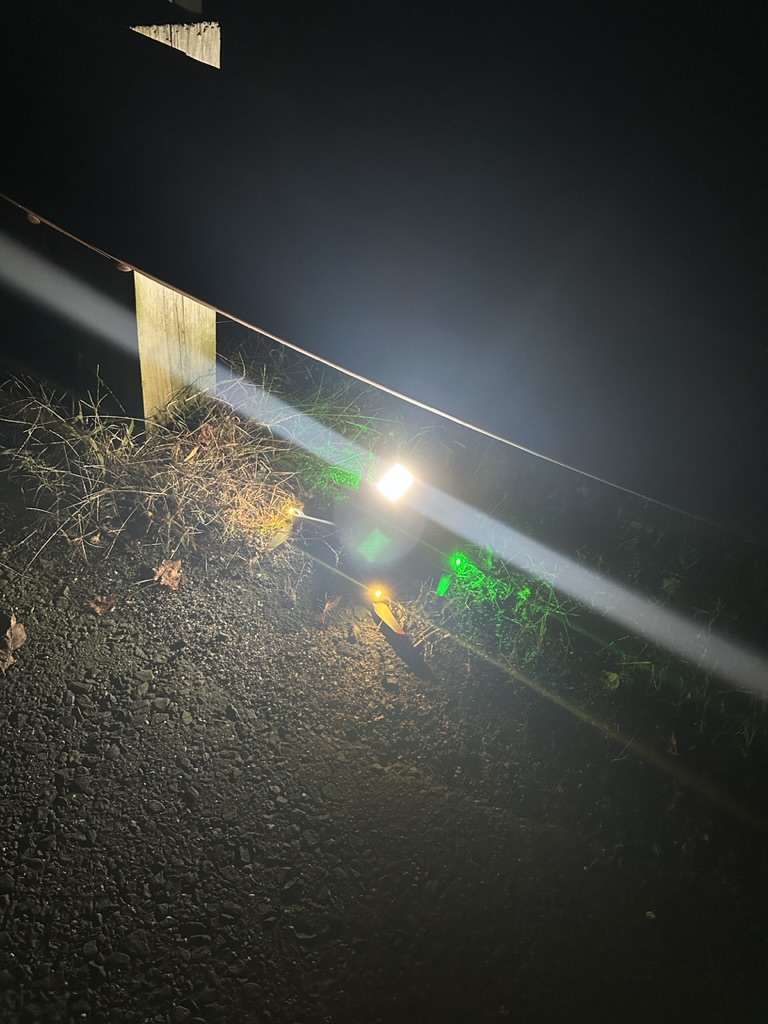
After I finally had the magnet out of the drone, I managed to find a harness system for the light that worked perfectly for my needs. And, I was off. With countless hours of scouting locations for photos and finding the best night-time weather for each picture, I set out on my first mission, where I tested the long exposure with the drone. The photo shown over the swamp above was my first night out and after that I was ready to take on each of my photo locations. The idea came to birth quickly after I finally figured out all the details and I was very excited to see it come to life in the way it did. With many failed attempts and even a drone crash, it seemed almost anything could happen every night I went out.

I hope you enjoyed these photos, and I hope to make more of them very soon!