Kevin Doan and Liam Stearns
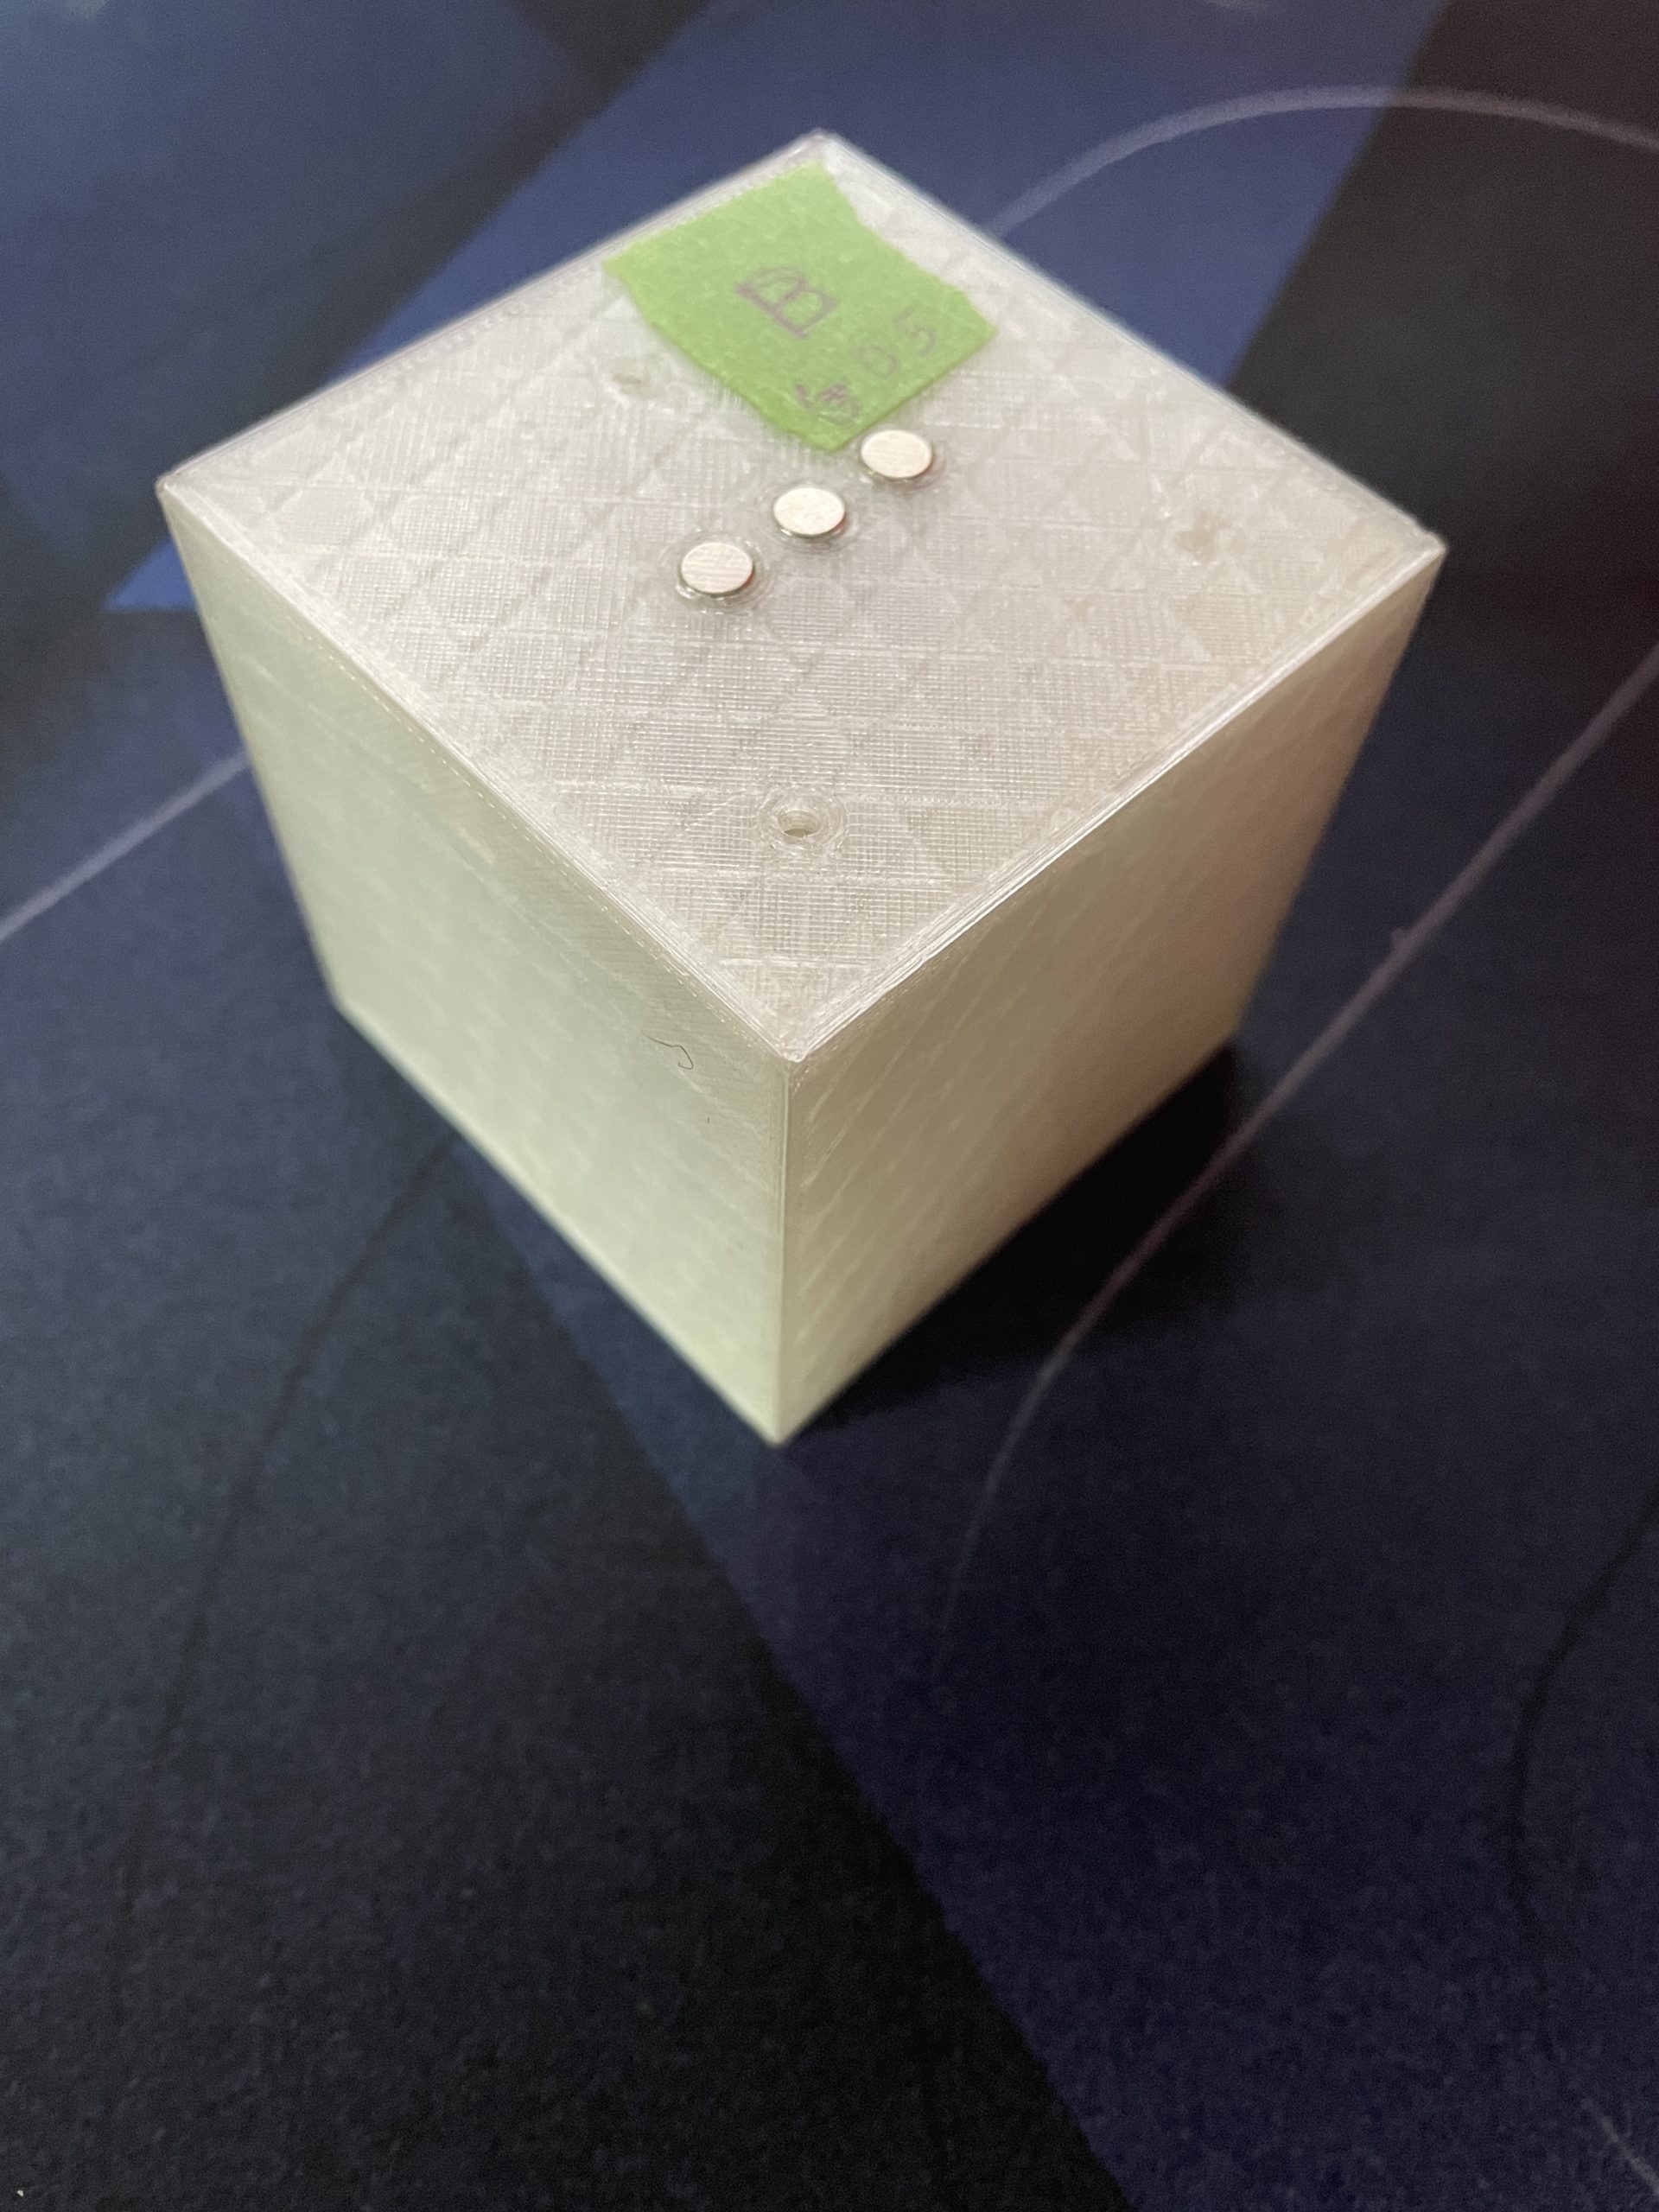
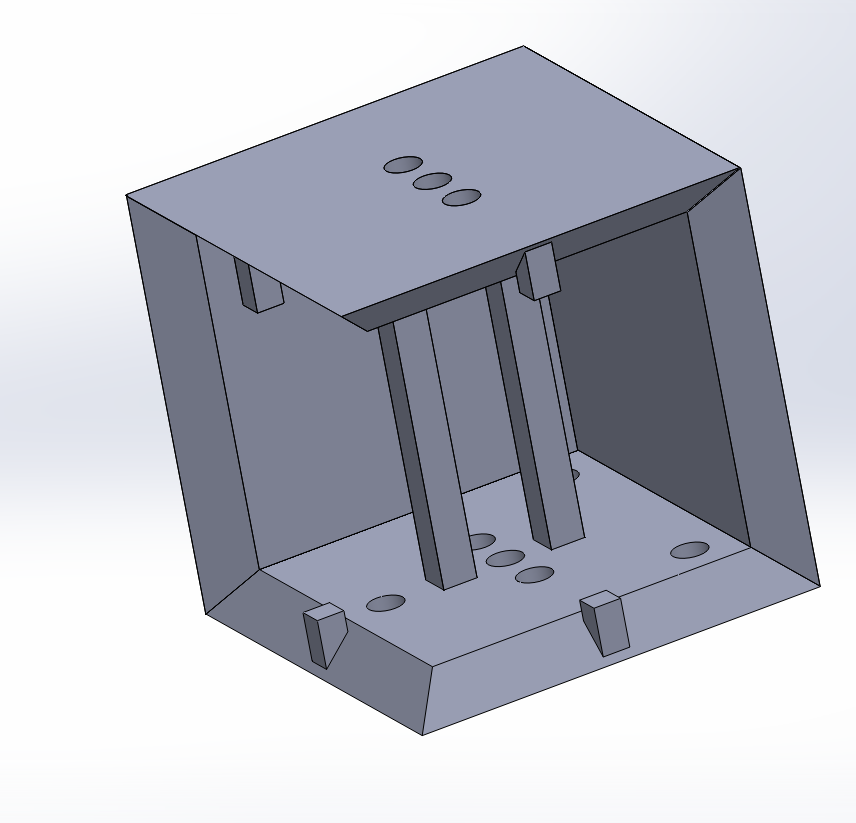
During this week of development, a significant amount of time had been spent modeling the base cube and test printing all of our designs. When designing the base for our cube tower, we wanted to make sure that we could house our Arduino Nano in side the cube and connect to it with a mini USB cable. A design technique kept in mind is that we wanted to build each cube and the base without any glue or adhesives. This resulted in the base cube shown below.
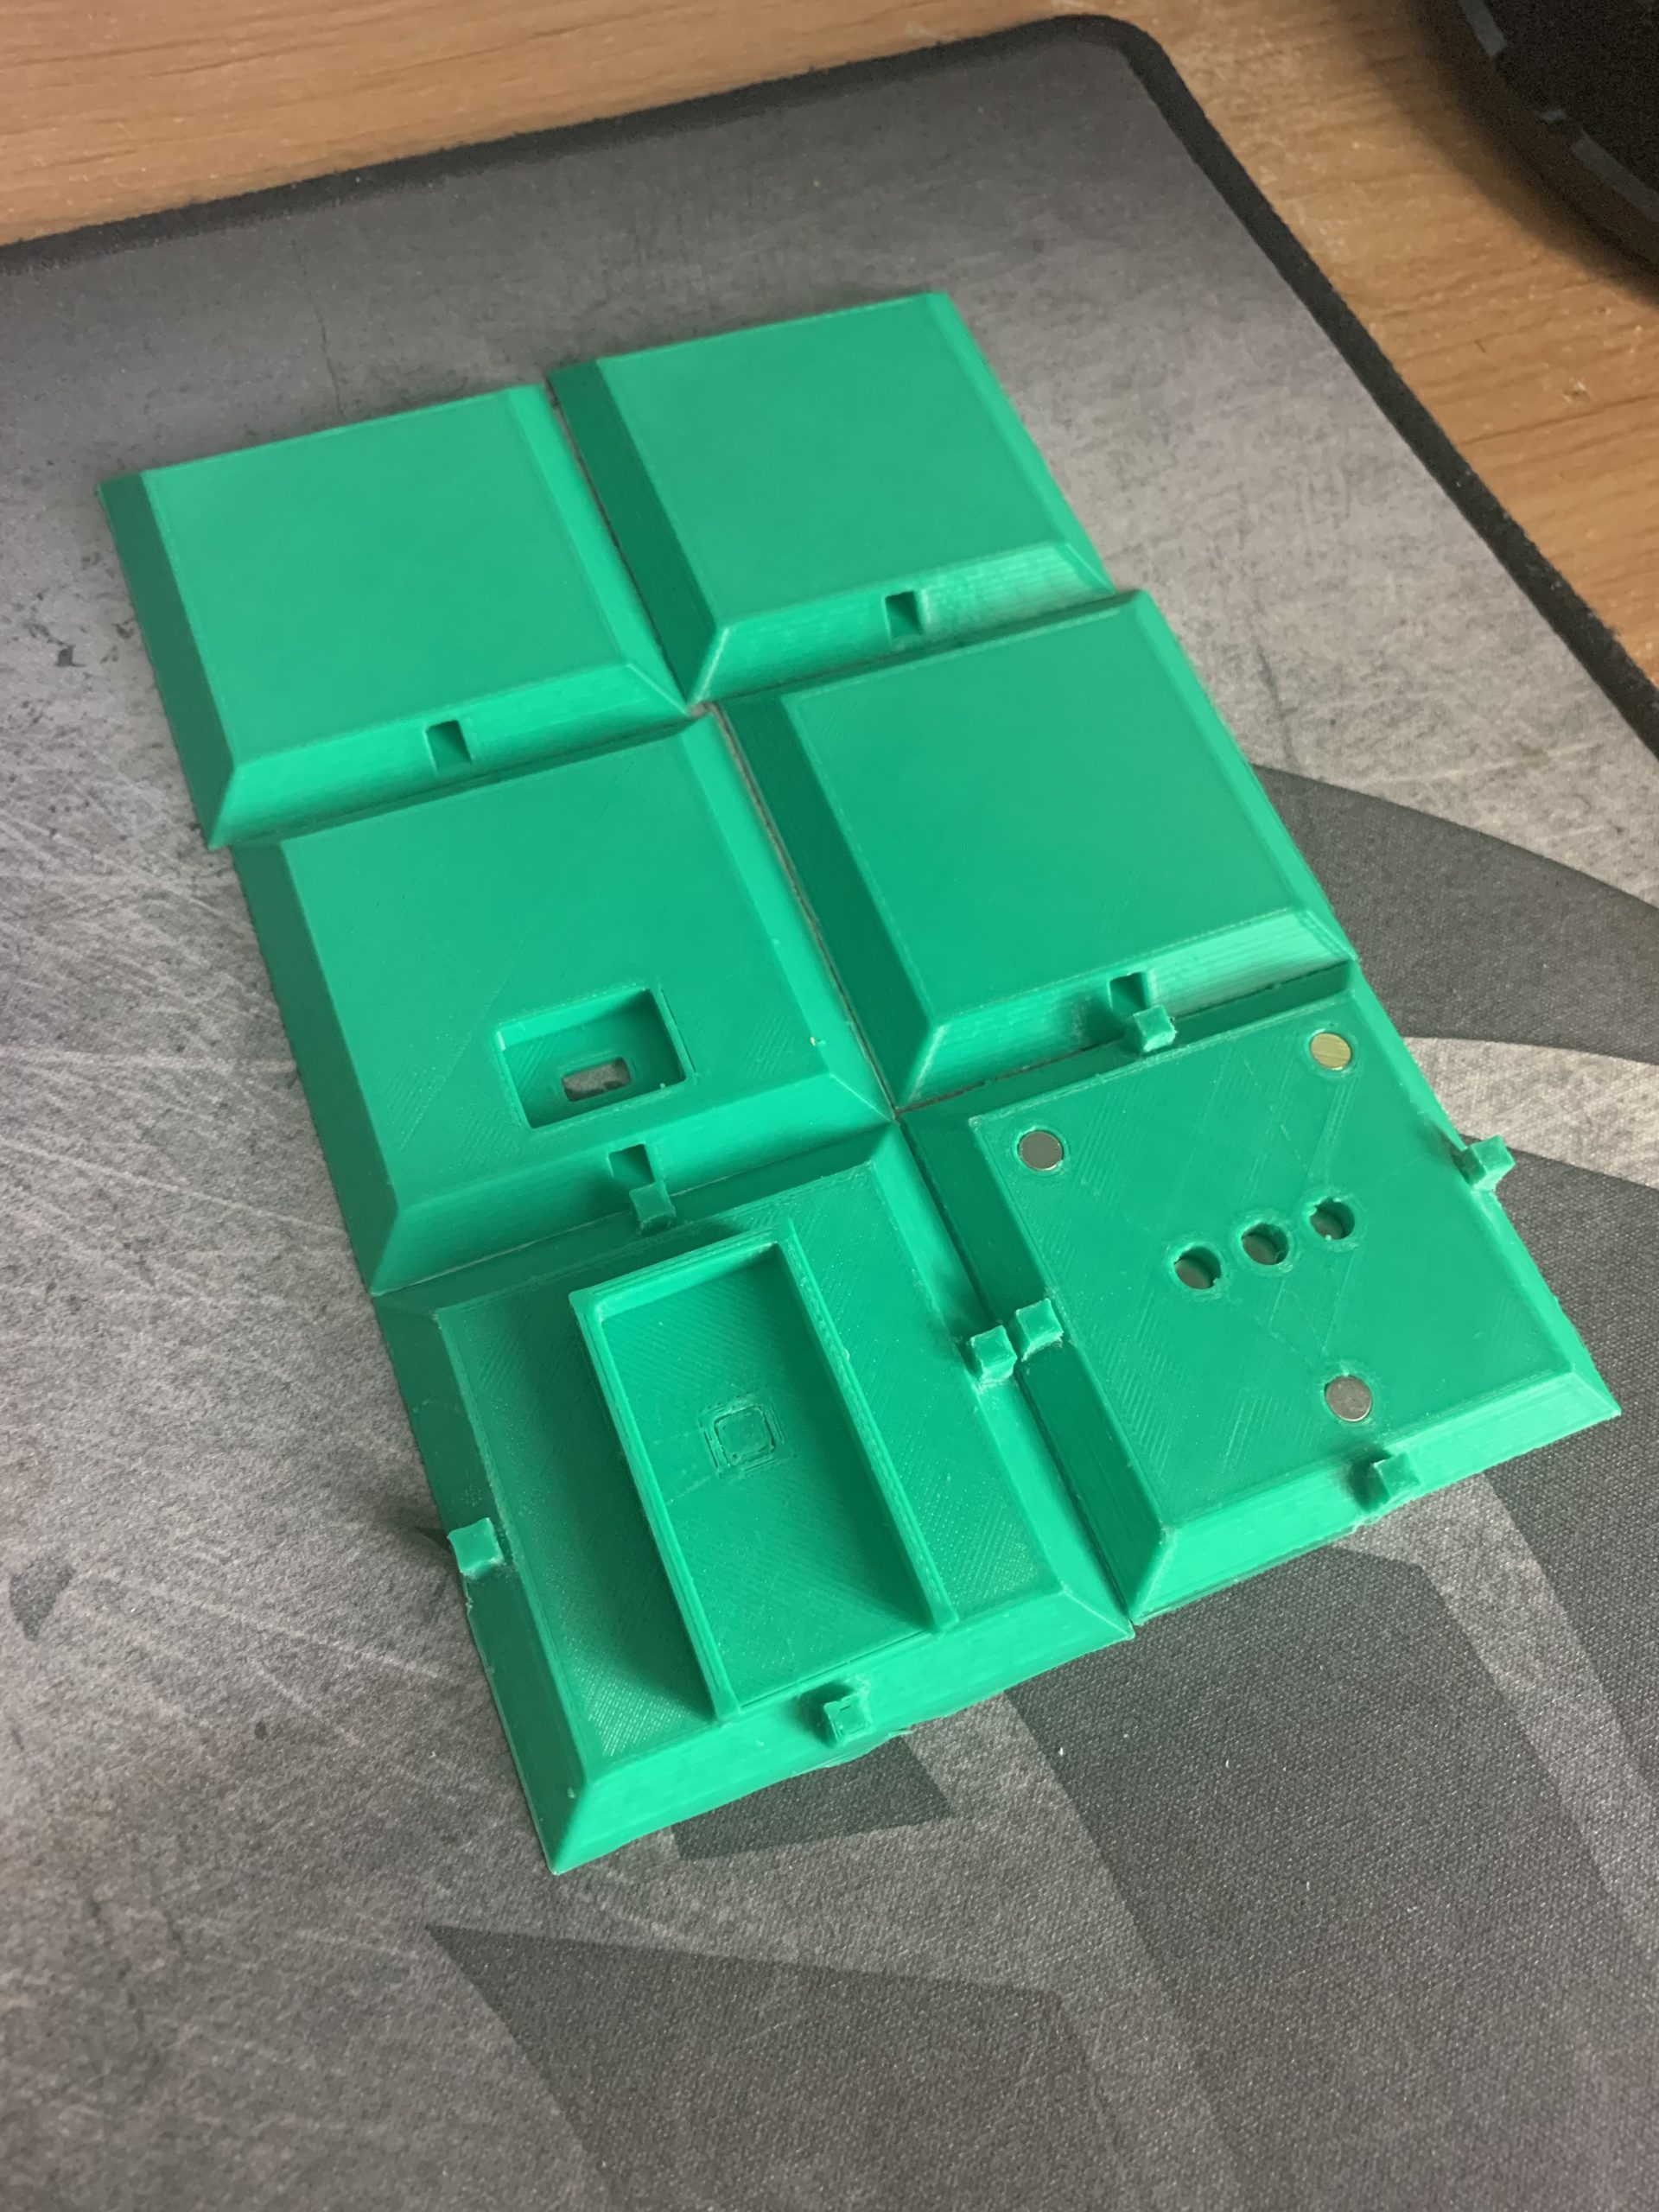
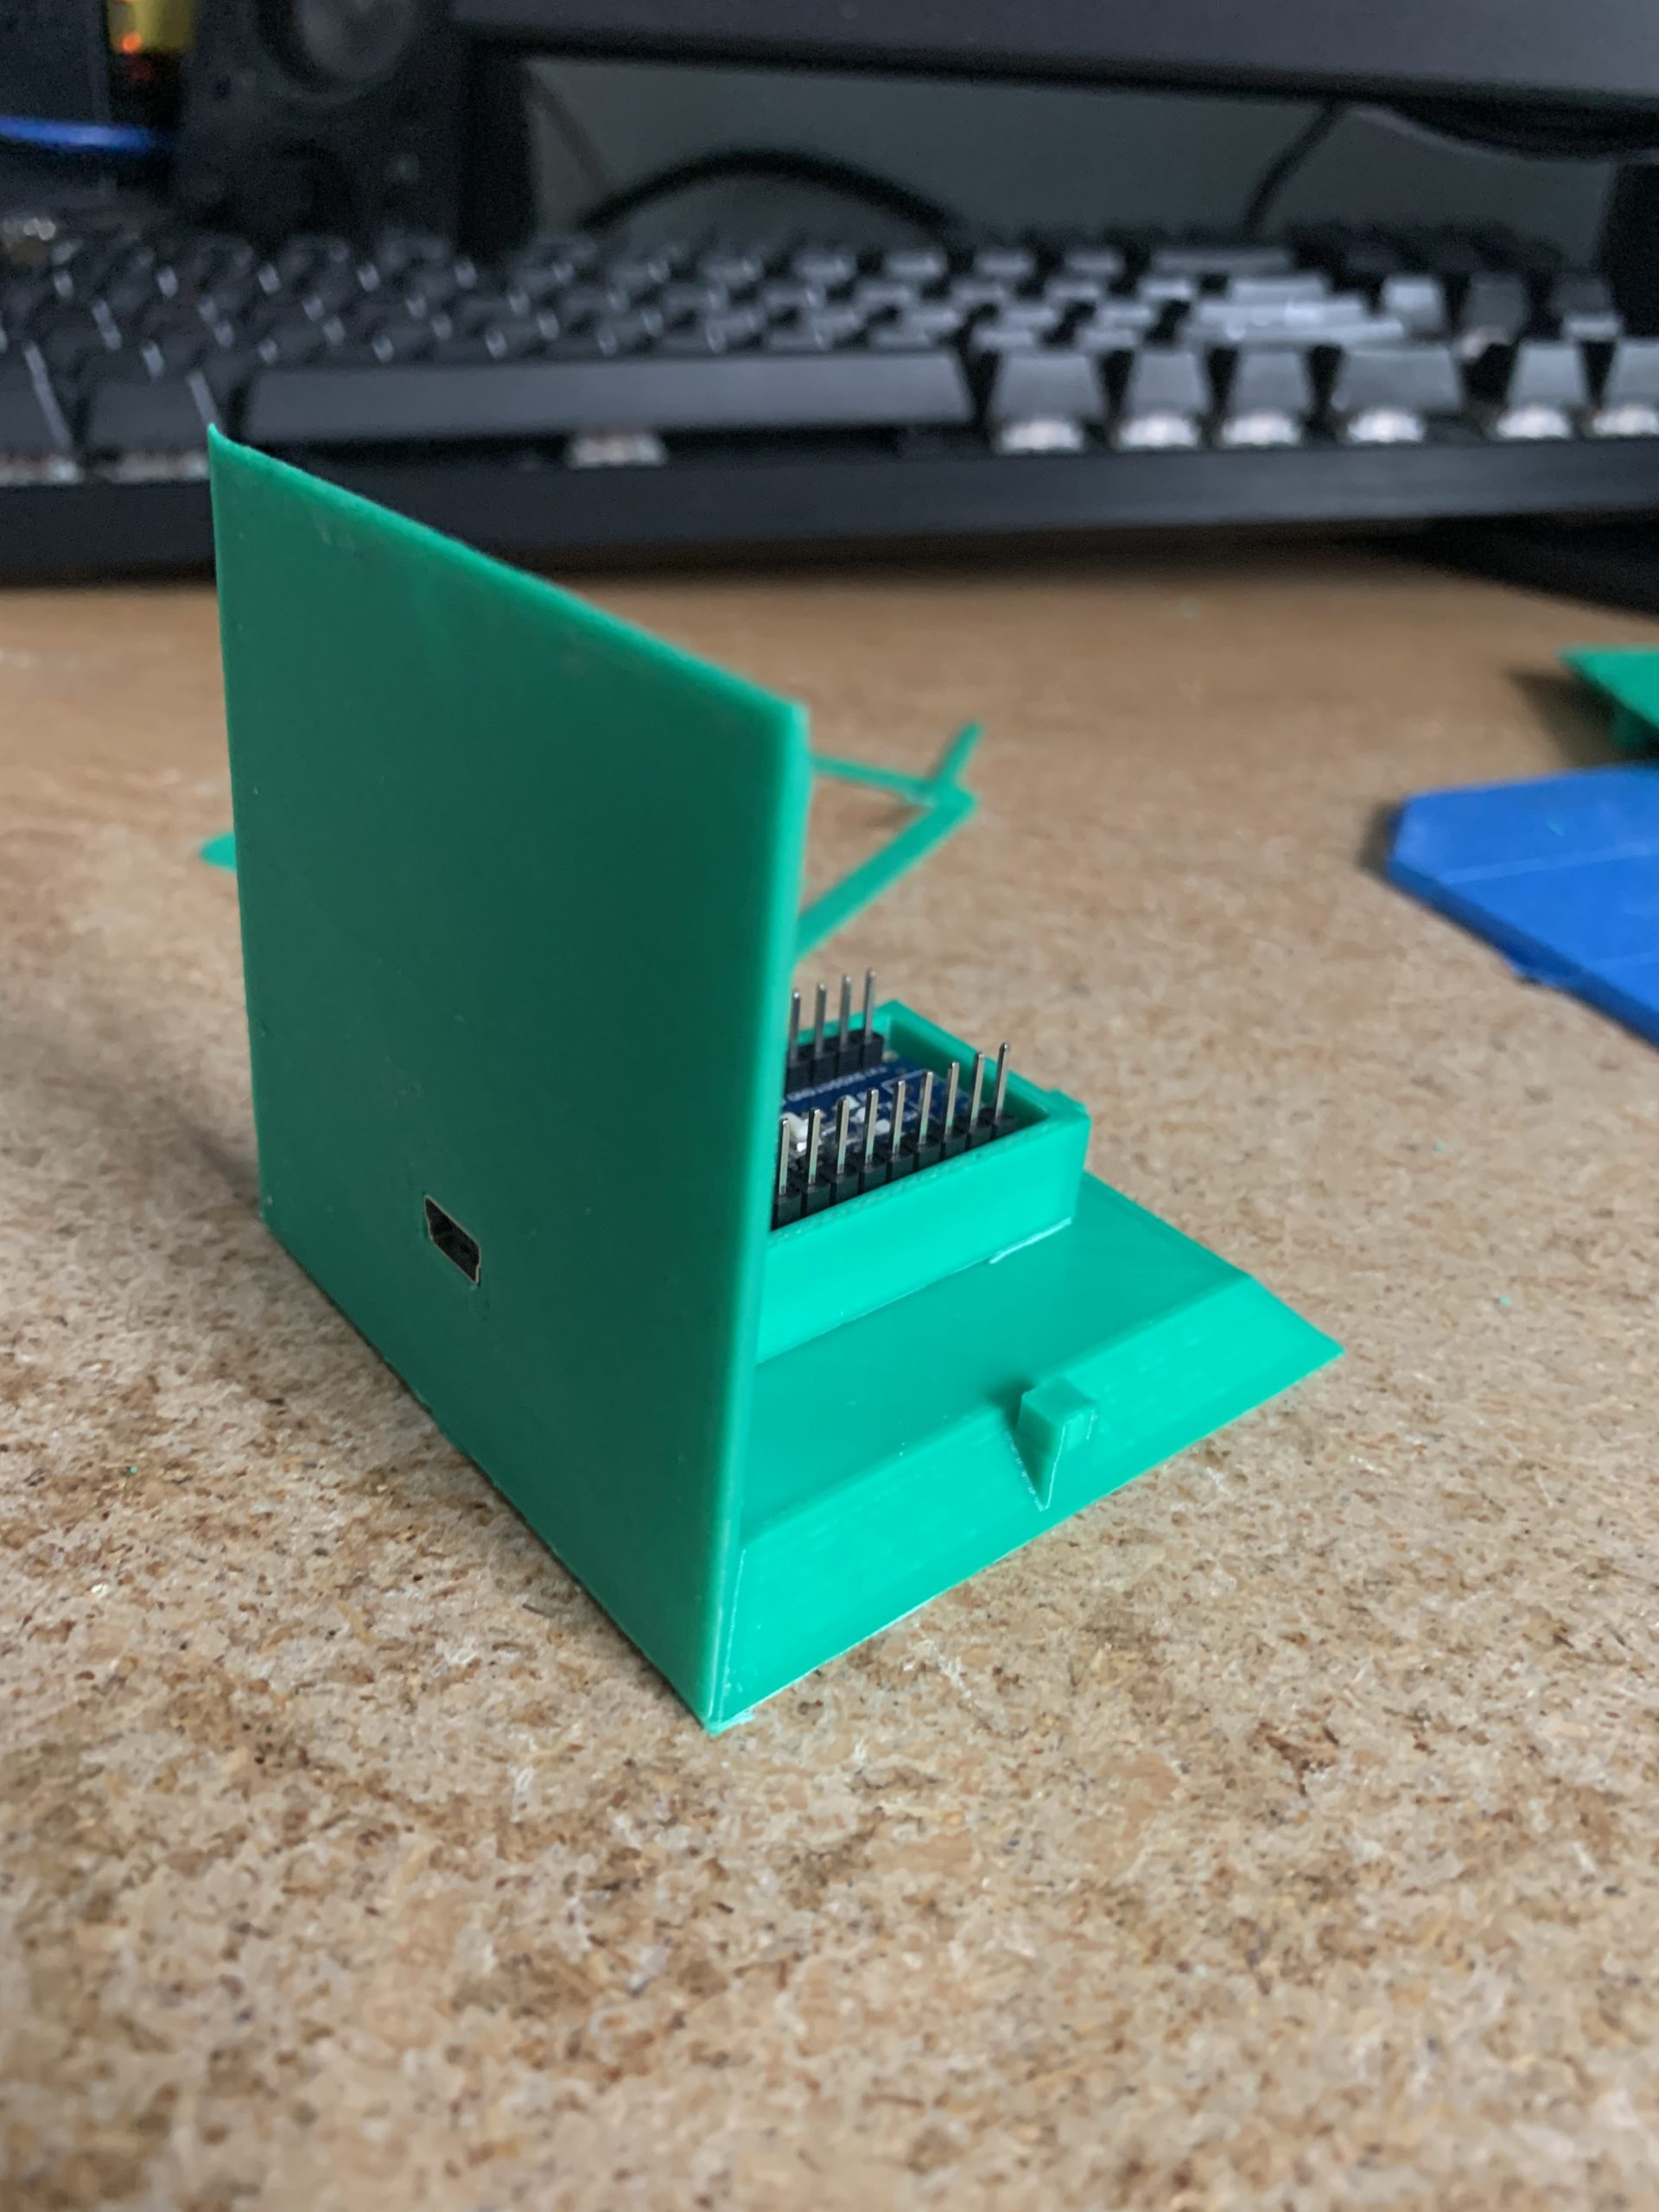
In addition to designing the base, some changes had been made to the cubes themselves. To start, the cubes had been designed to be 1cm larger in each dimension to allow for easier wiring, and to make sure that the Arduino fits. Initially we had wanted to put a tube in the center of the cube to wrap the led strips around, but instead we placed 2 pillars.
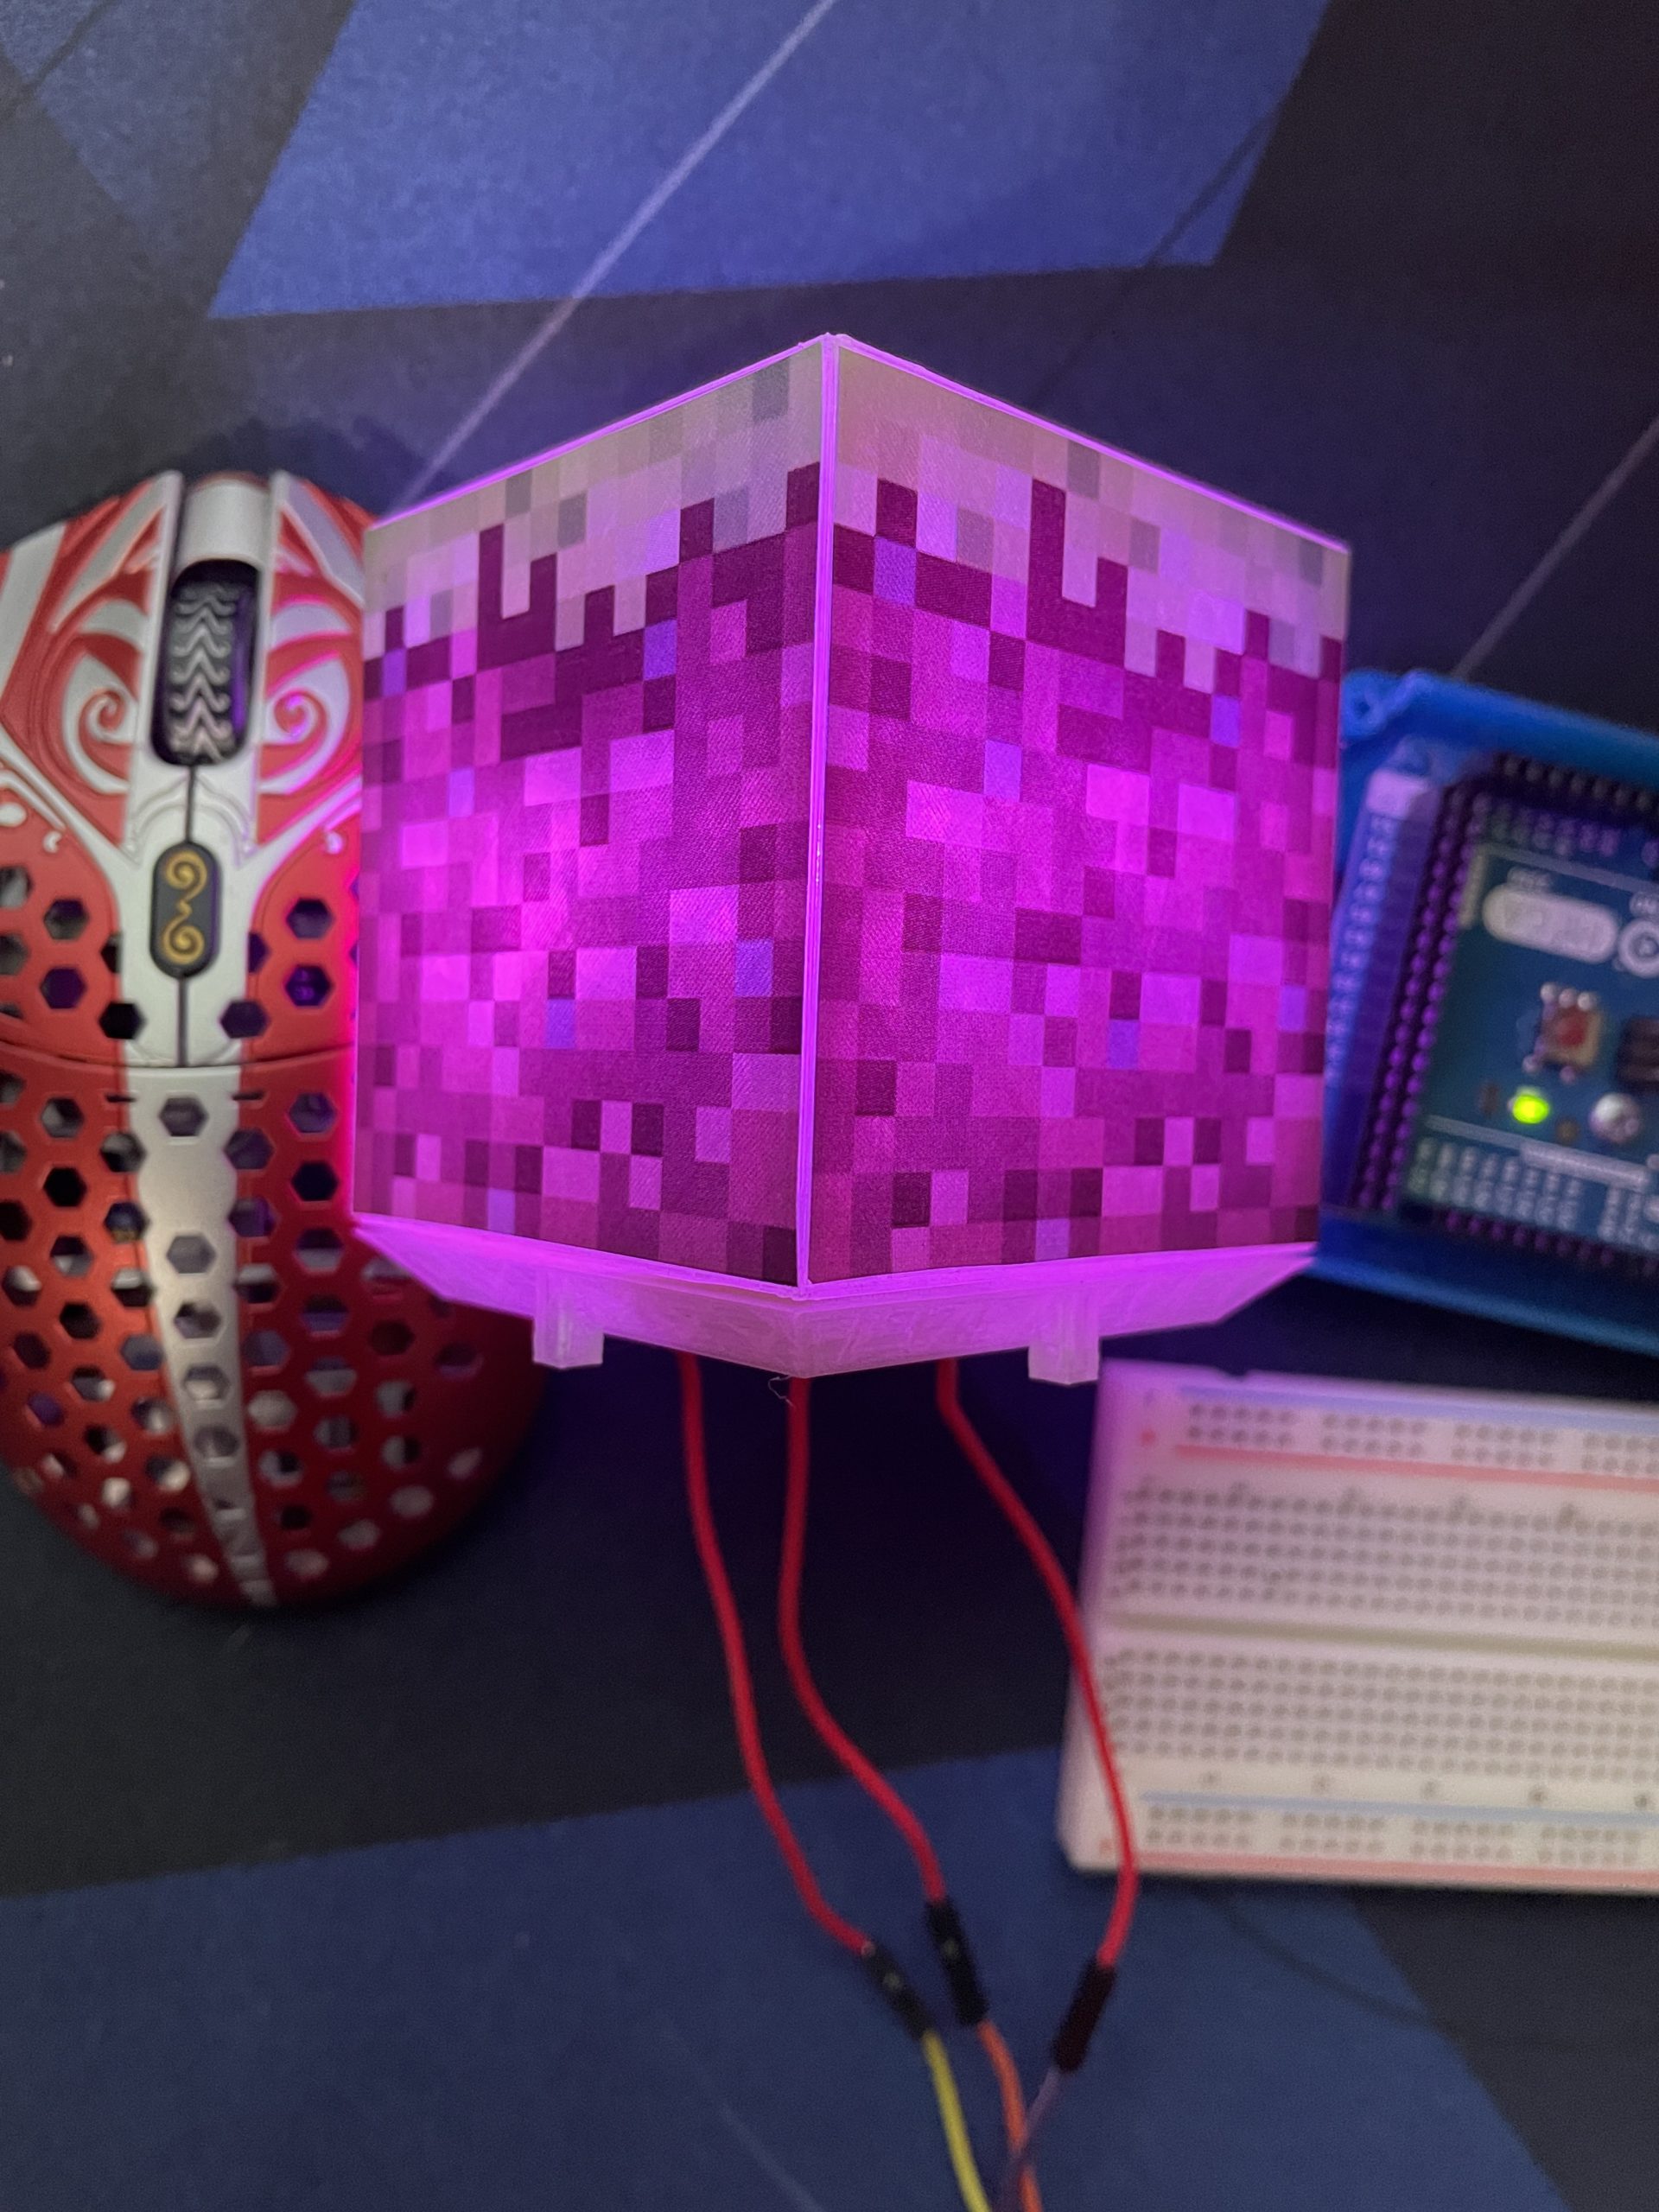
Now that all the models for the cubes and the base had been designed and printed, we then worked on assembling a functional cube. When assembling the cube, we soldered both sides of the small LED strip to the neo magnets to allow for a connection between other cubes. In order to make up for the depth of the block, we had stacked 2 magnets on top of one another so that they will touch and connect to other blocks.
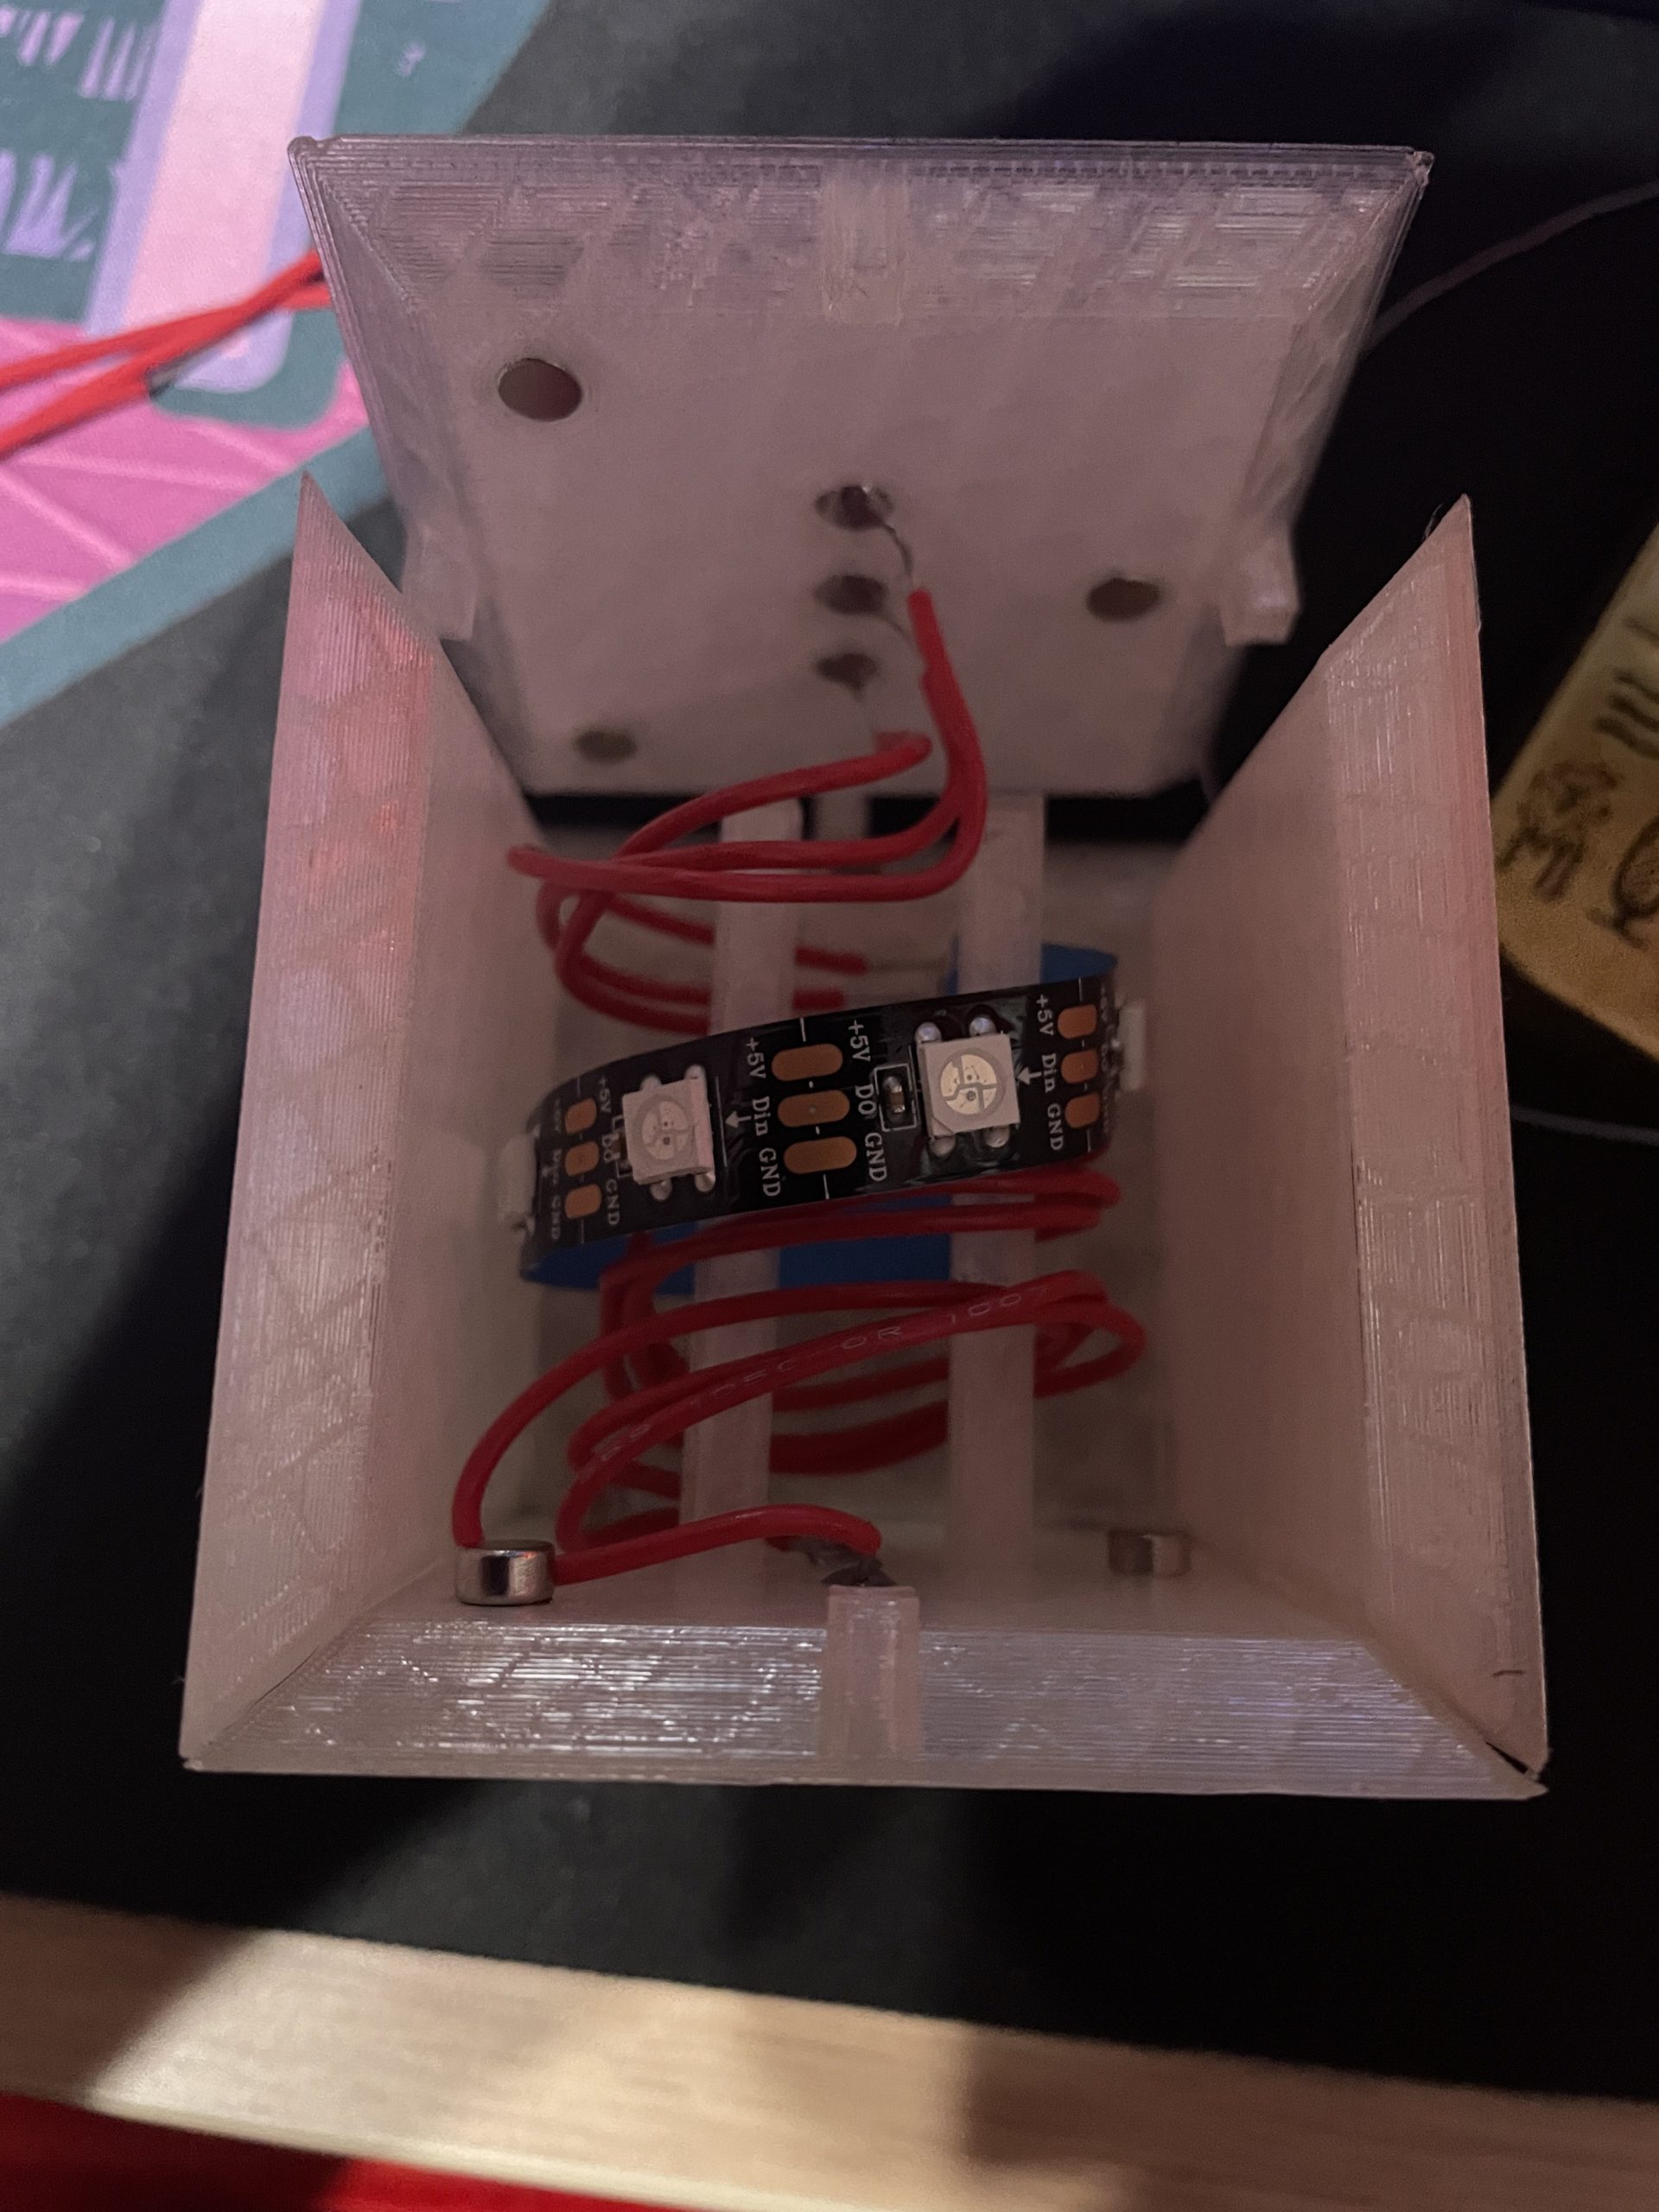
One cube had been fully assembled, and when we connect it to a base plate, it lights up as we had hoped. Using a clear sticker paper, we printed a test Minecraft block image to adhere to the cube, and found that the light shines both through the cube and the sticker sheet