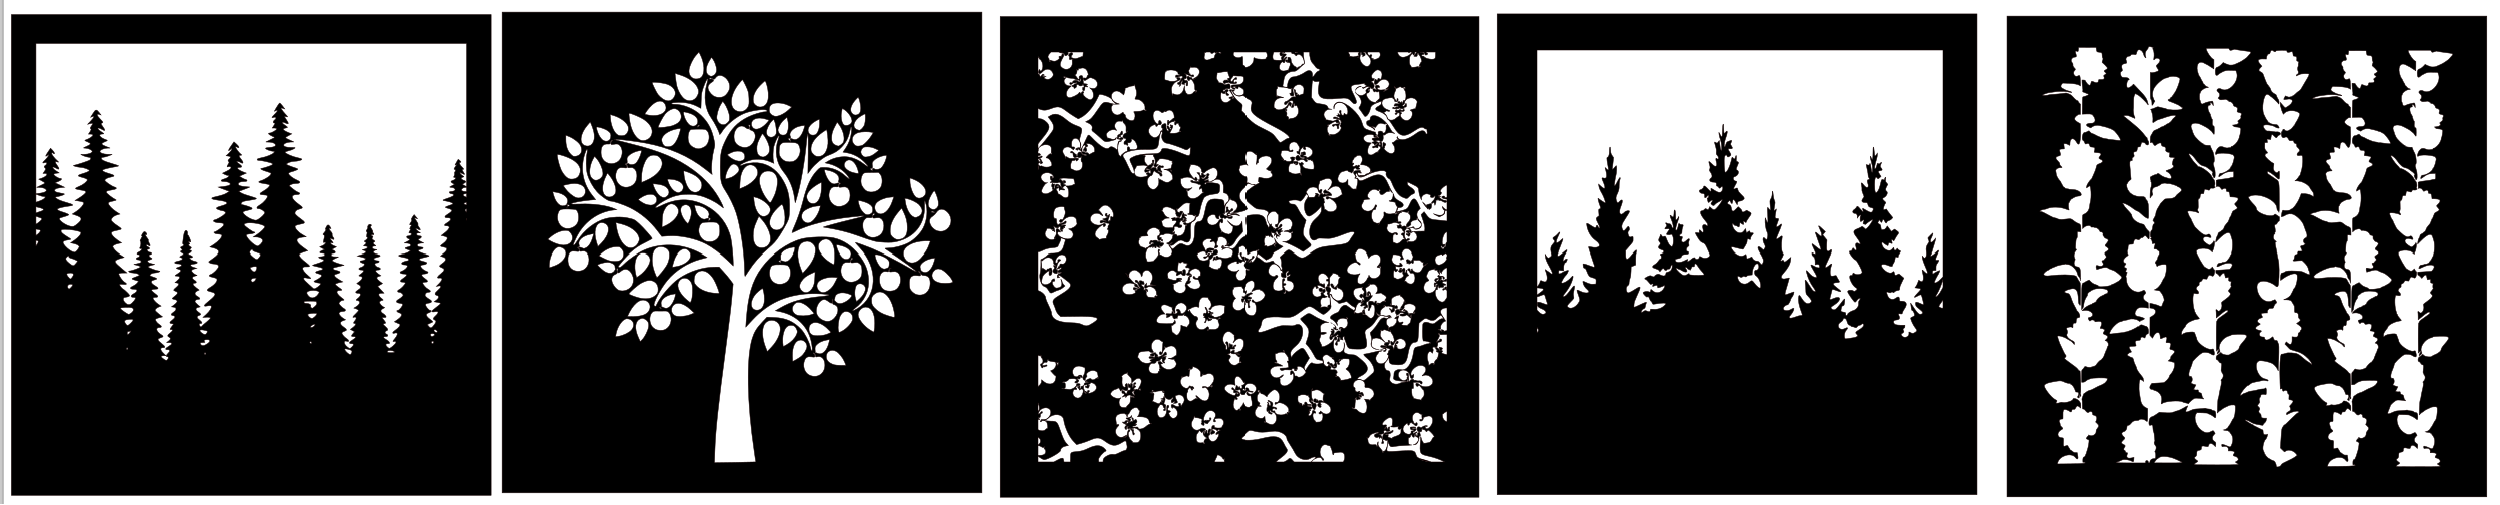
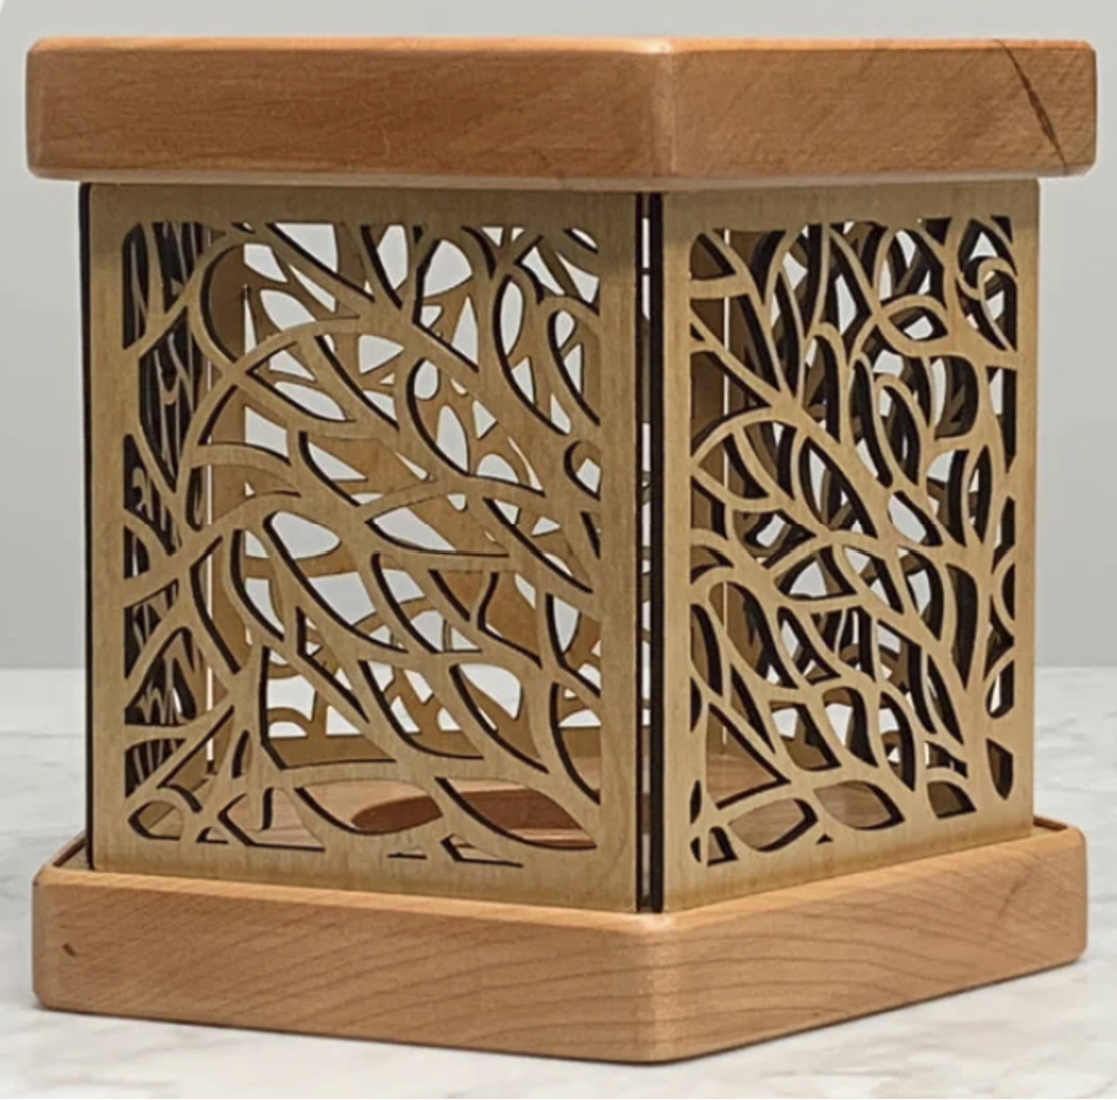
Here are the 5 sides of my lantern. Again, I’ve added my inspiration image so y’all can see the finished shape I’m going for. I plan to use the regular plywood for the 5 sides. Any suggestions on the base piece? I’m not sure how I’m going to connect it all. I think the base piece is going to be too thick for the laser if I do it in the way that the artist did it in the inspiration photo.
How do you plan on lighting the lantern?
Depends on the top. I’d like to put a real flame in there, but obviously if I end up having to enclose it I’ll have to use a battery one.
You could attach them using the notches we talked about in class, or another idea could be to raster an indentation into a piece of plywood that the standing up pieces fit into it, and then you can just glue those pieces into the indentations.
Thanks for the suggestion!
Are you planning on adding any colors to the wood/staining it?
I think I’ll decide this once I have it printed and can gauge what it’ll look like !
I am struck by contrast of the different designs. I think it will come out interestingly in a room with lots of wall space. I think for the base you just need a material that can be cut and make grooves for the pieces to fit in. You can supplemement this with glue.
5 completely unique sides that’s cray cray gosh darn. How/do you plan on diffusing the light source in the lantern?
I am just going to use a dim light!