Updated WIP Post:
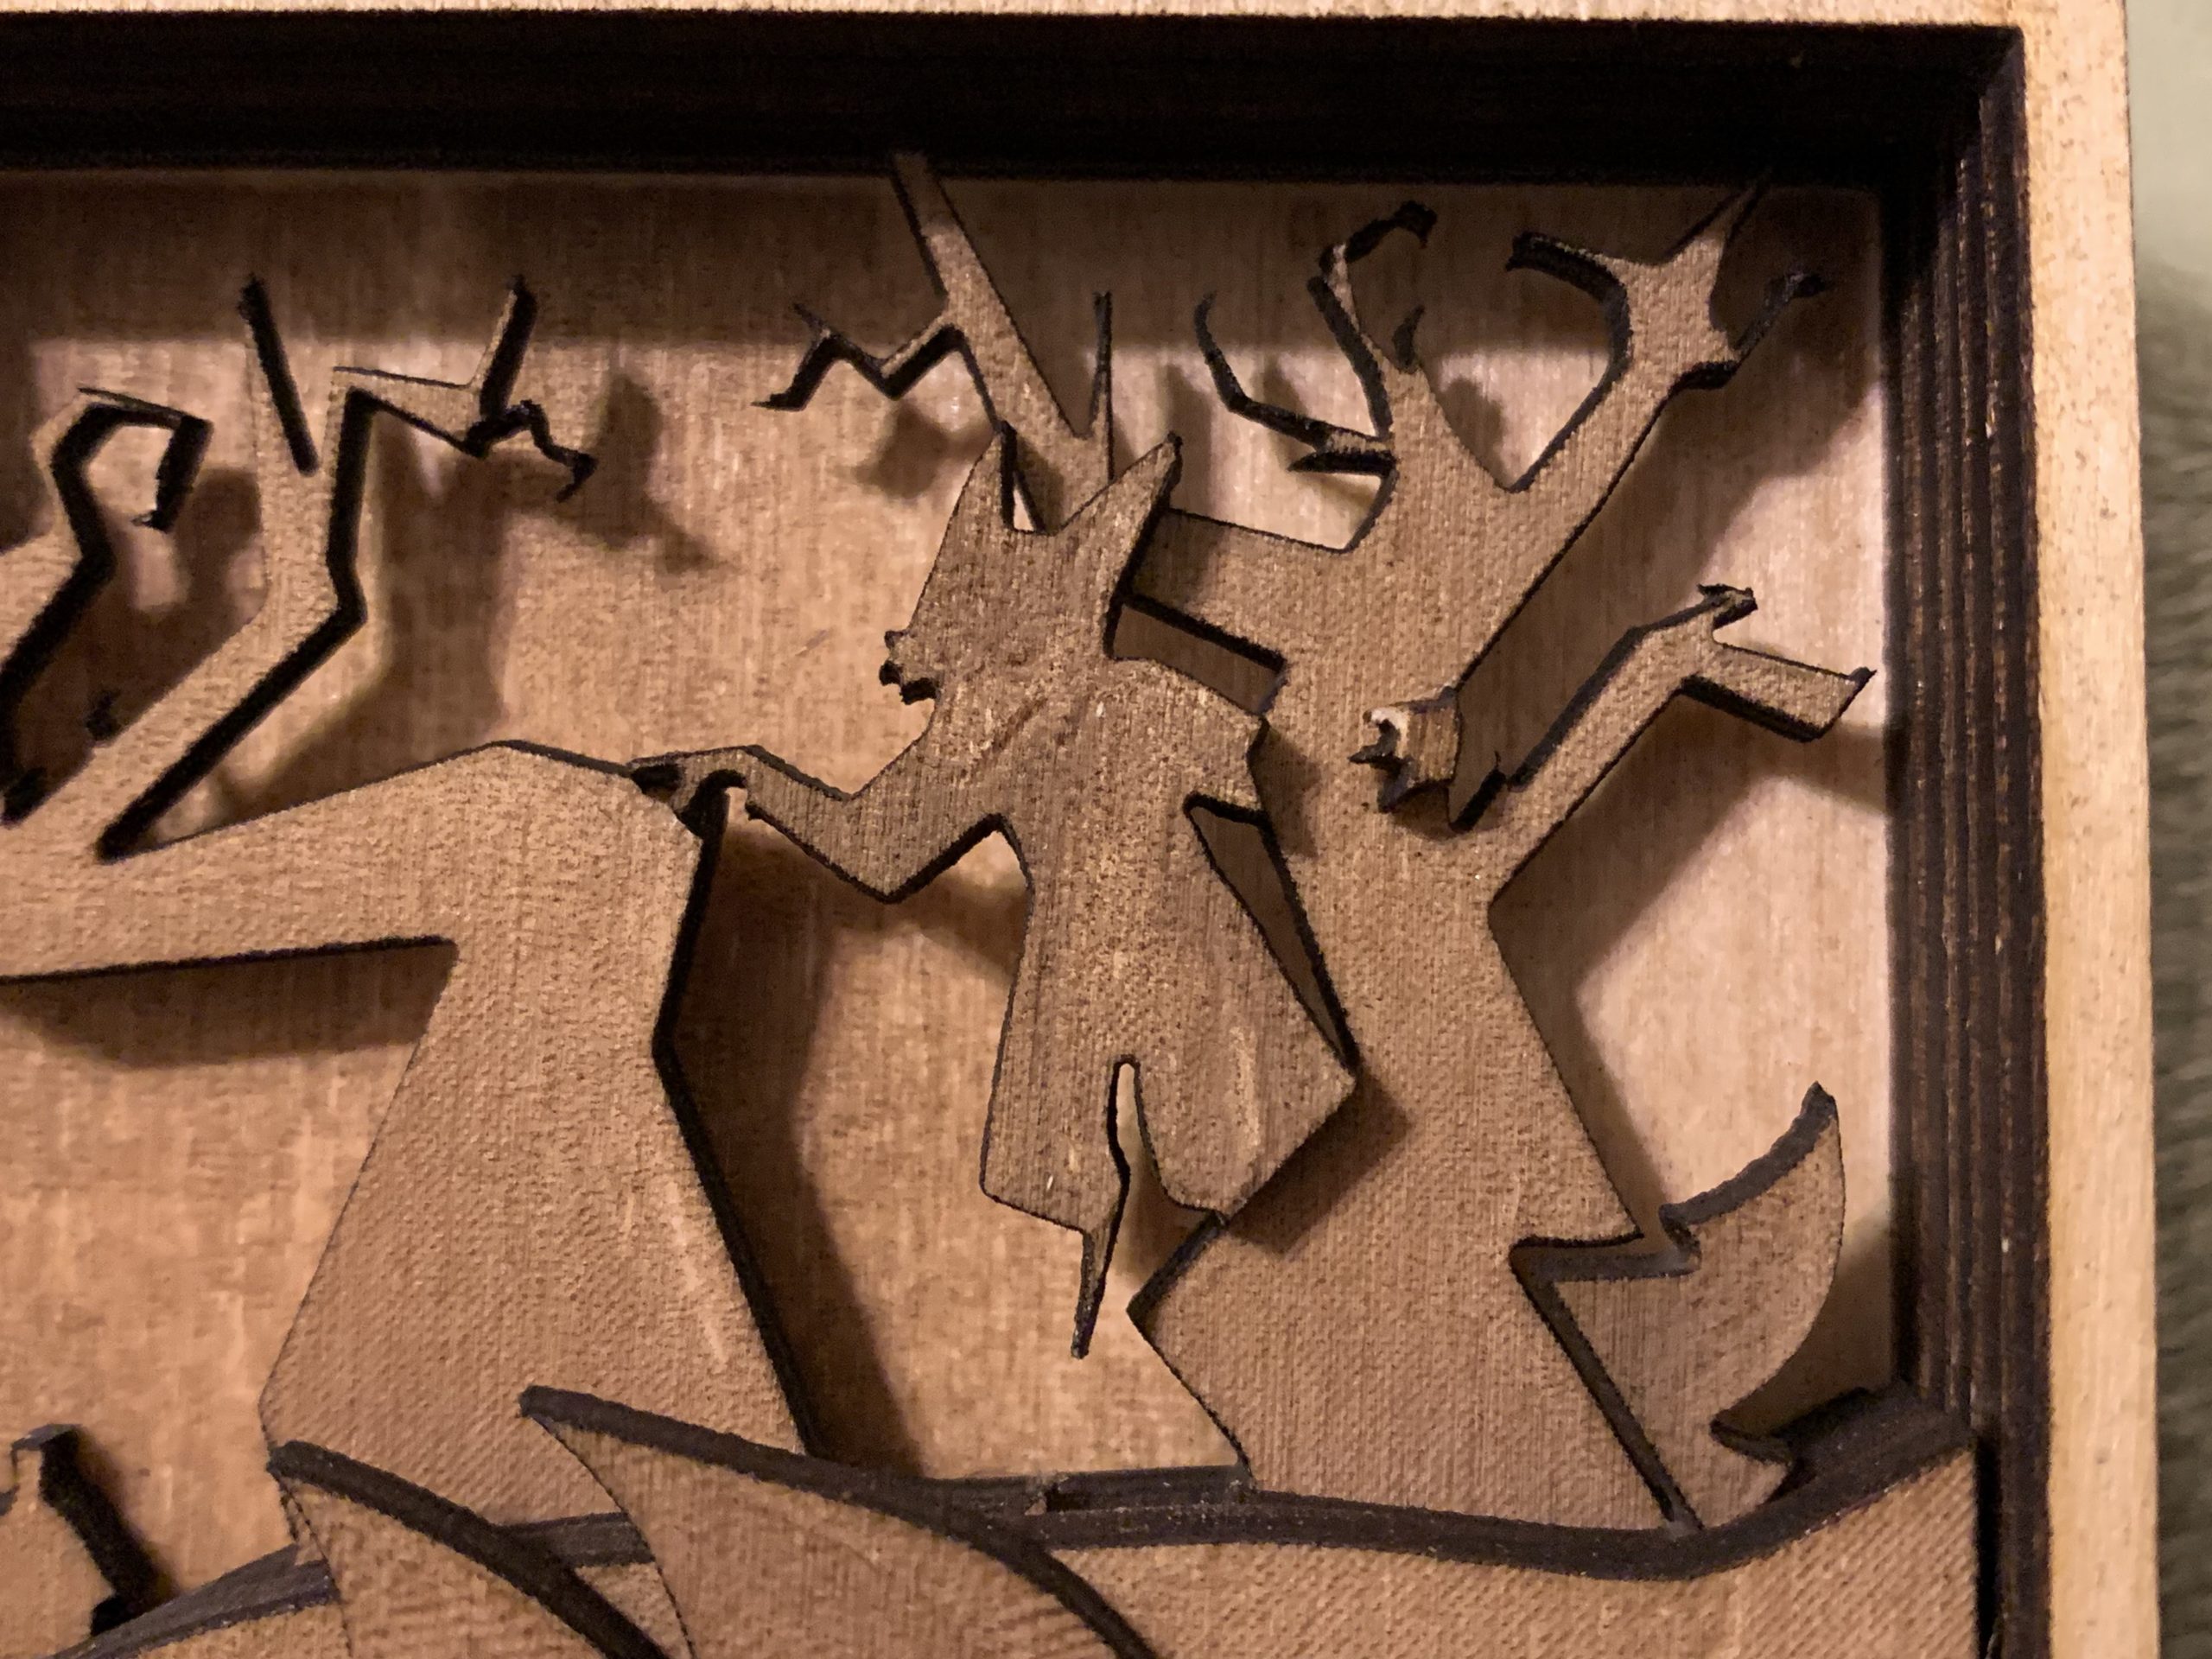
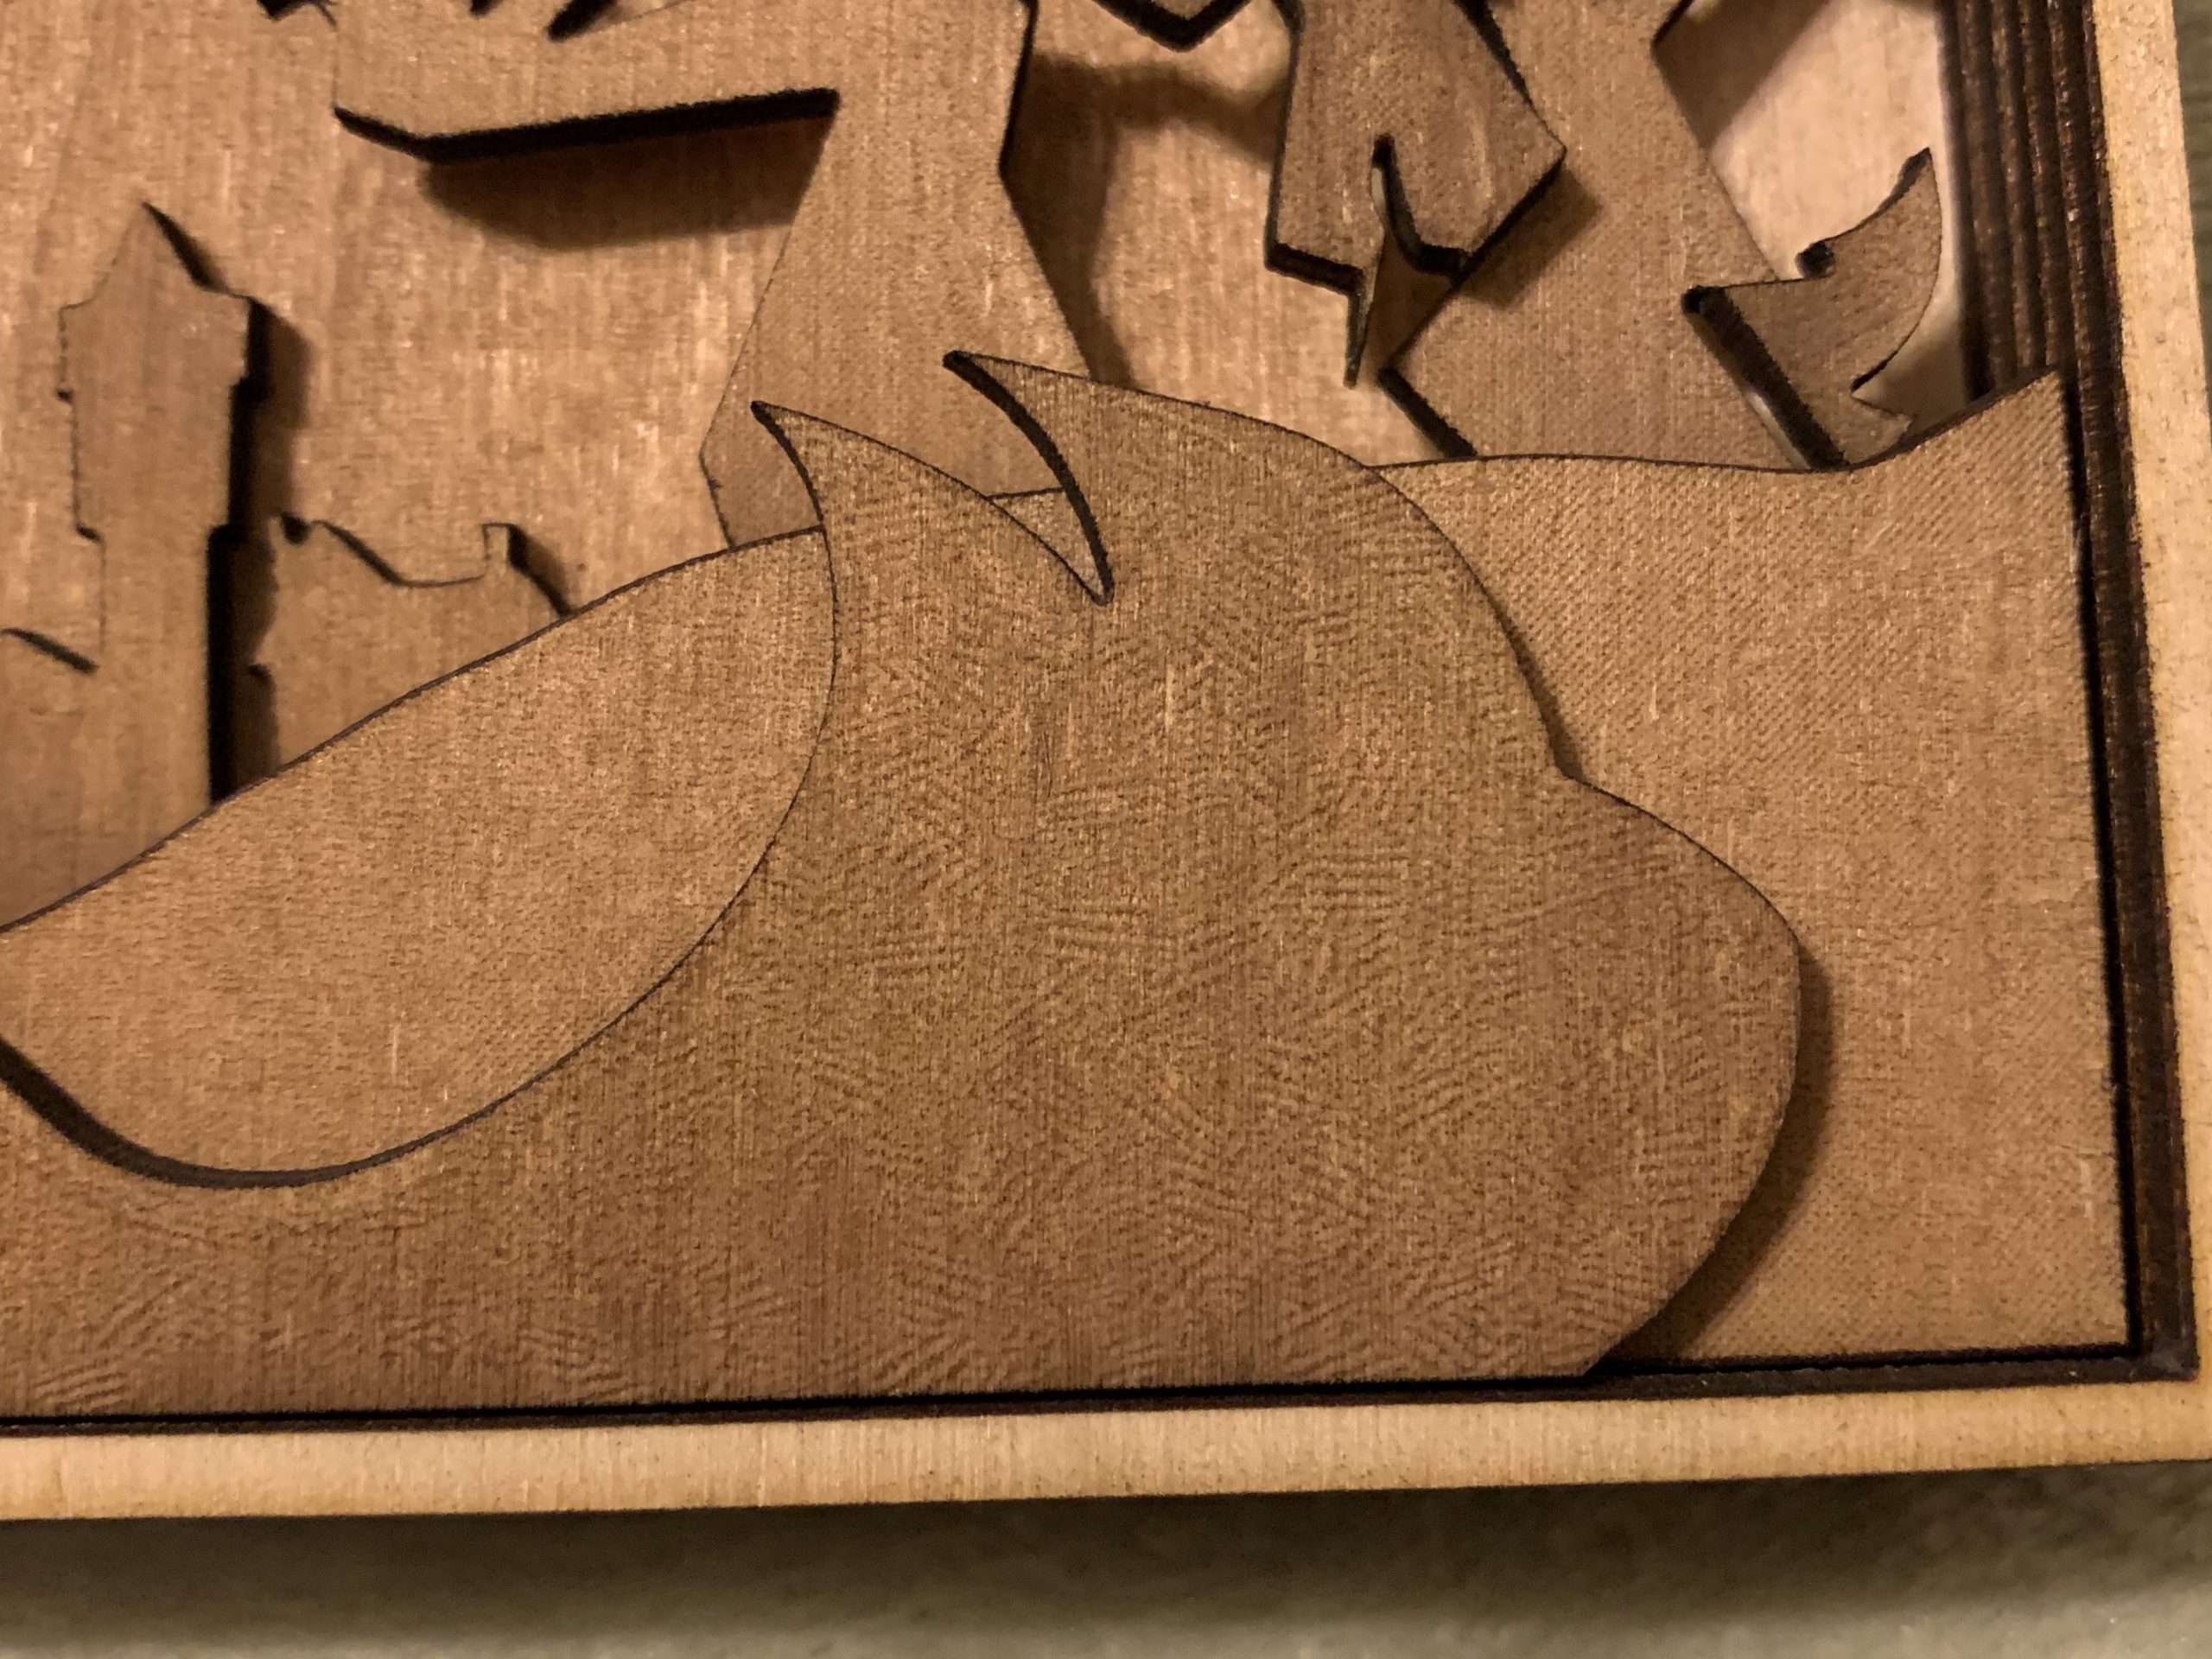
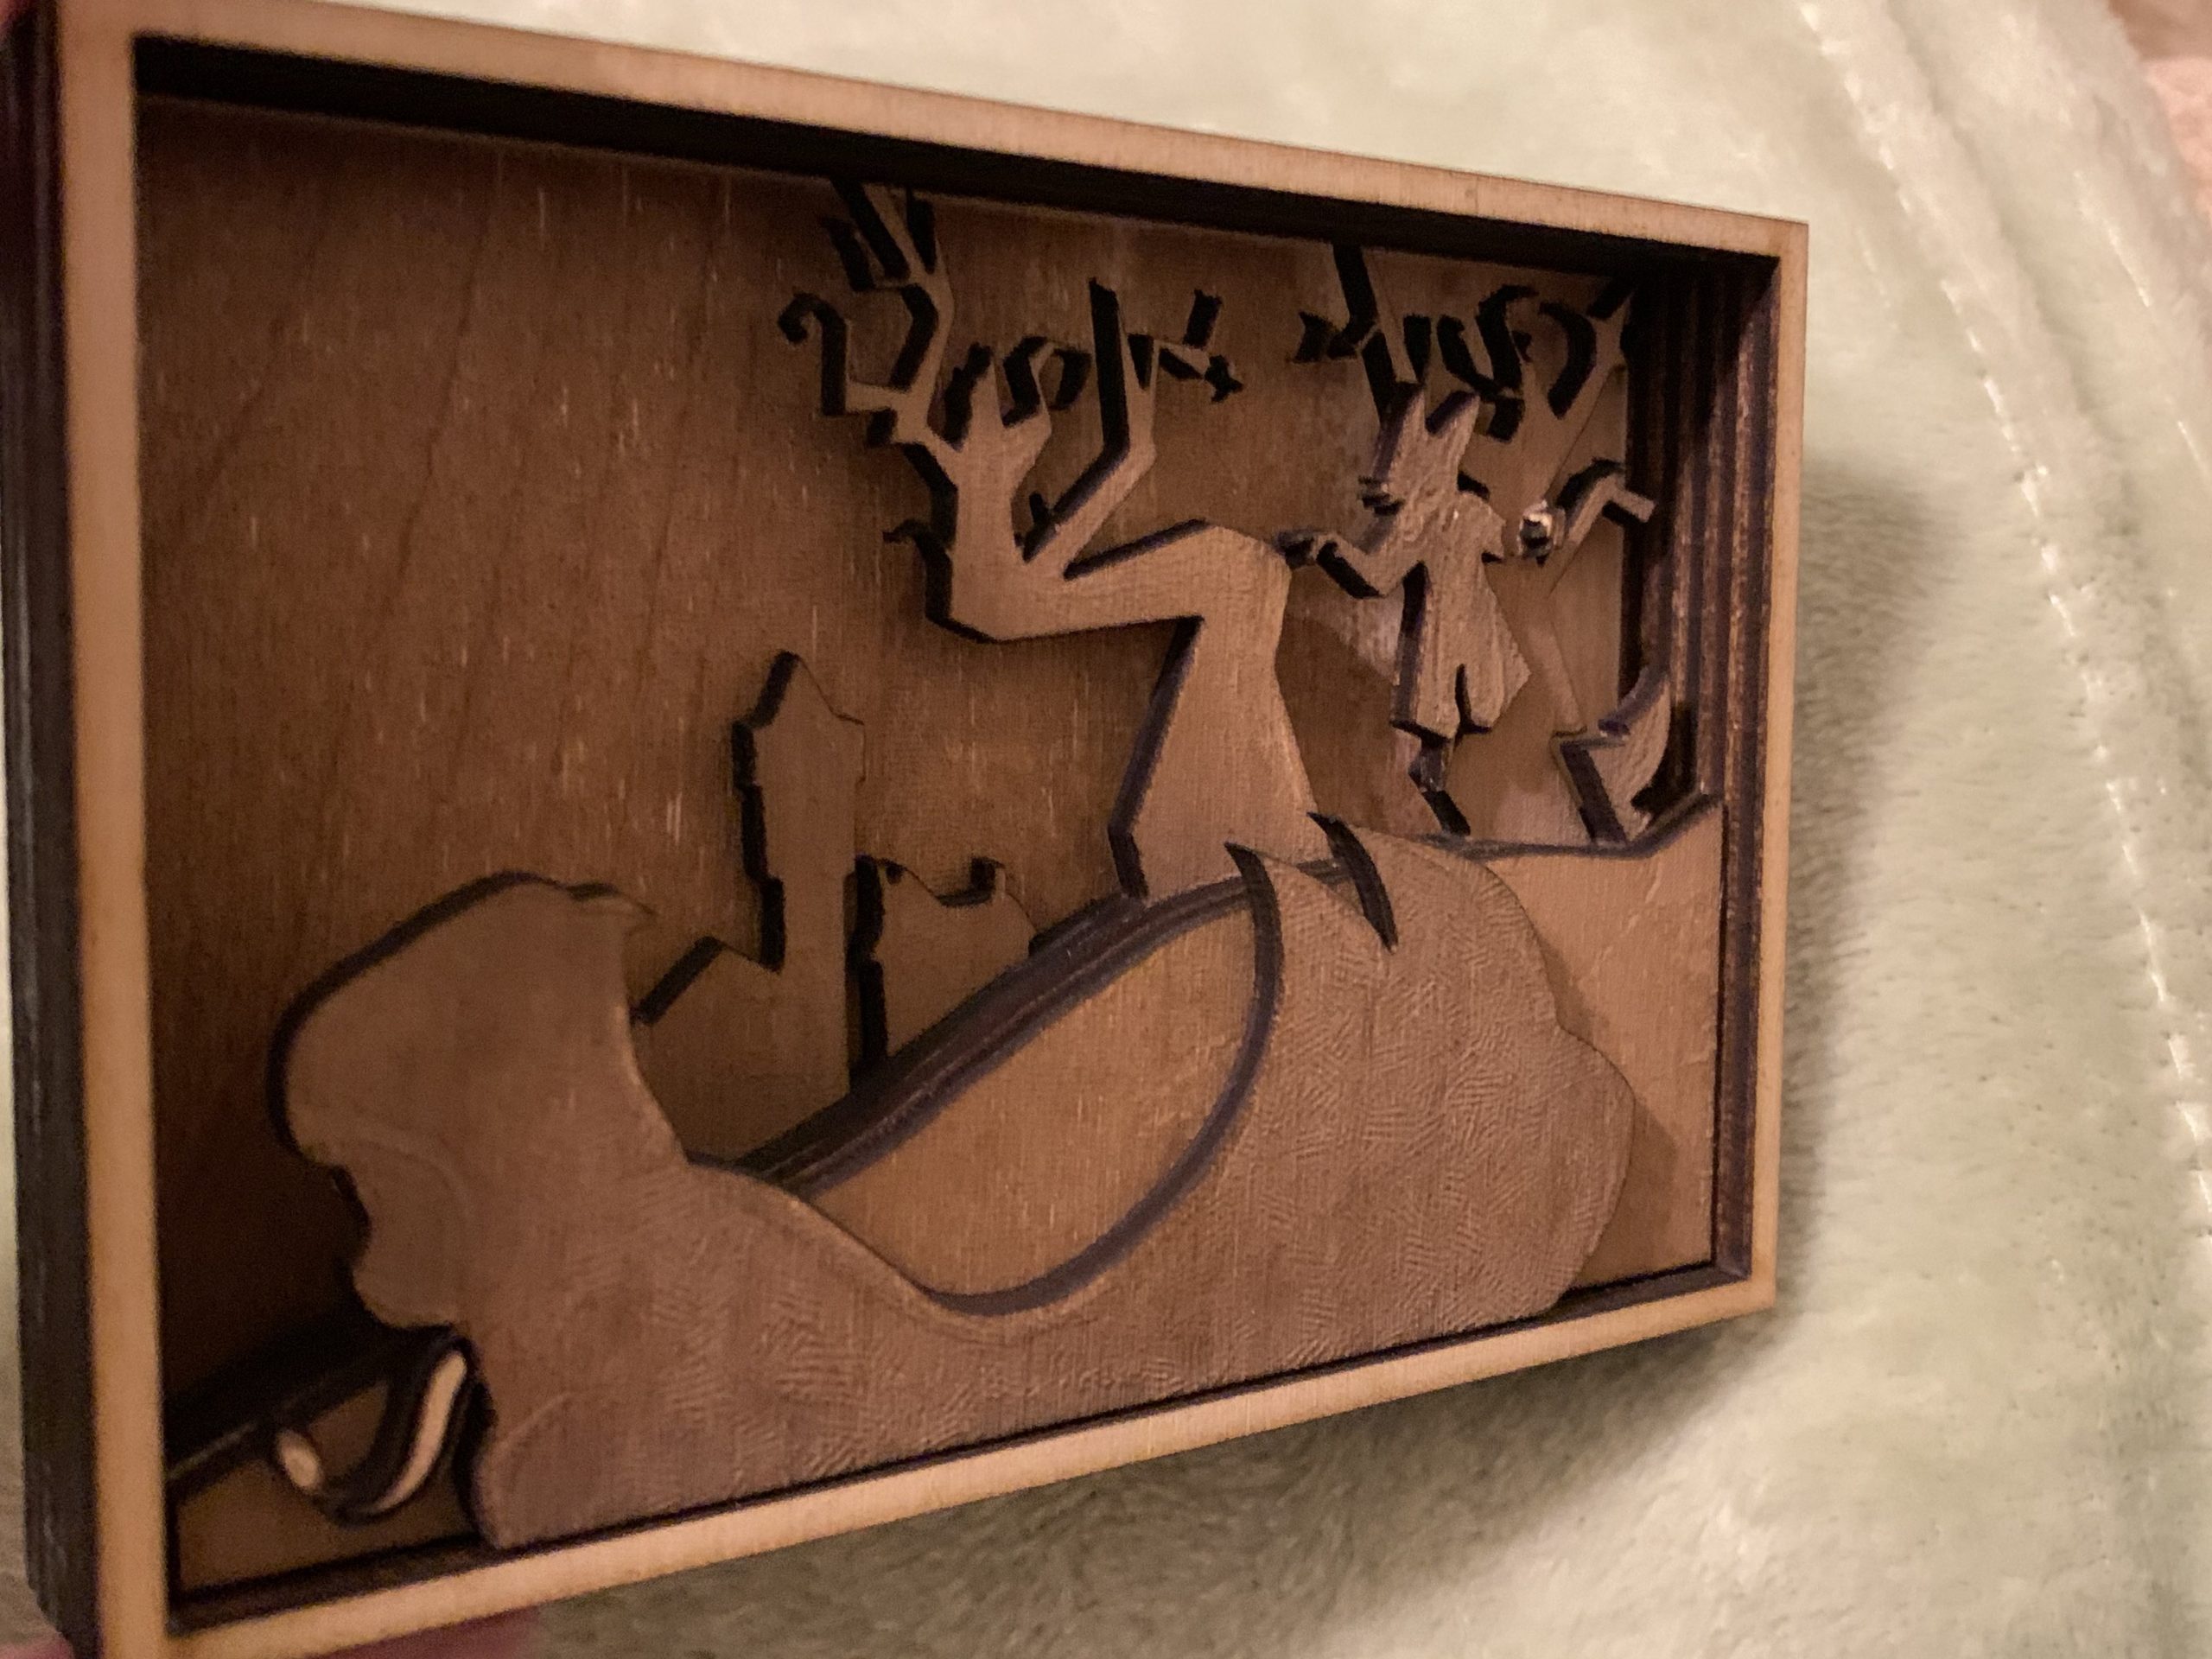
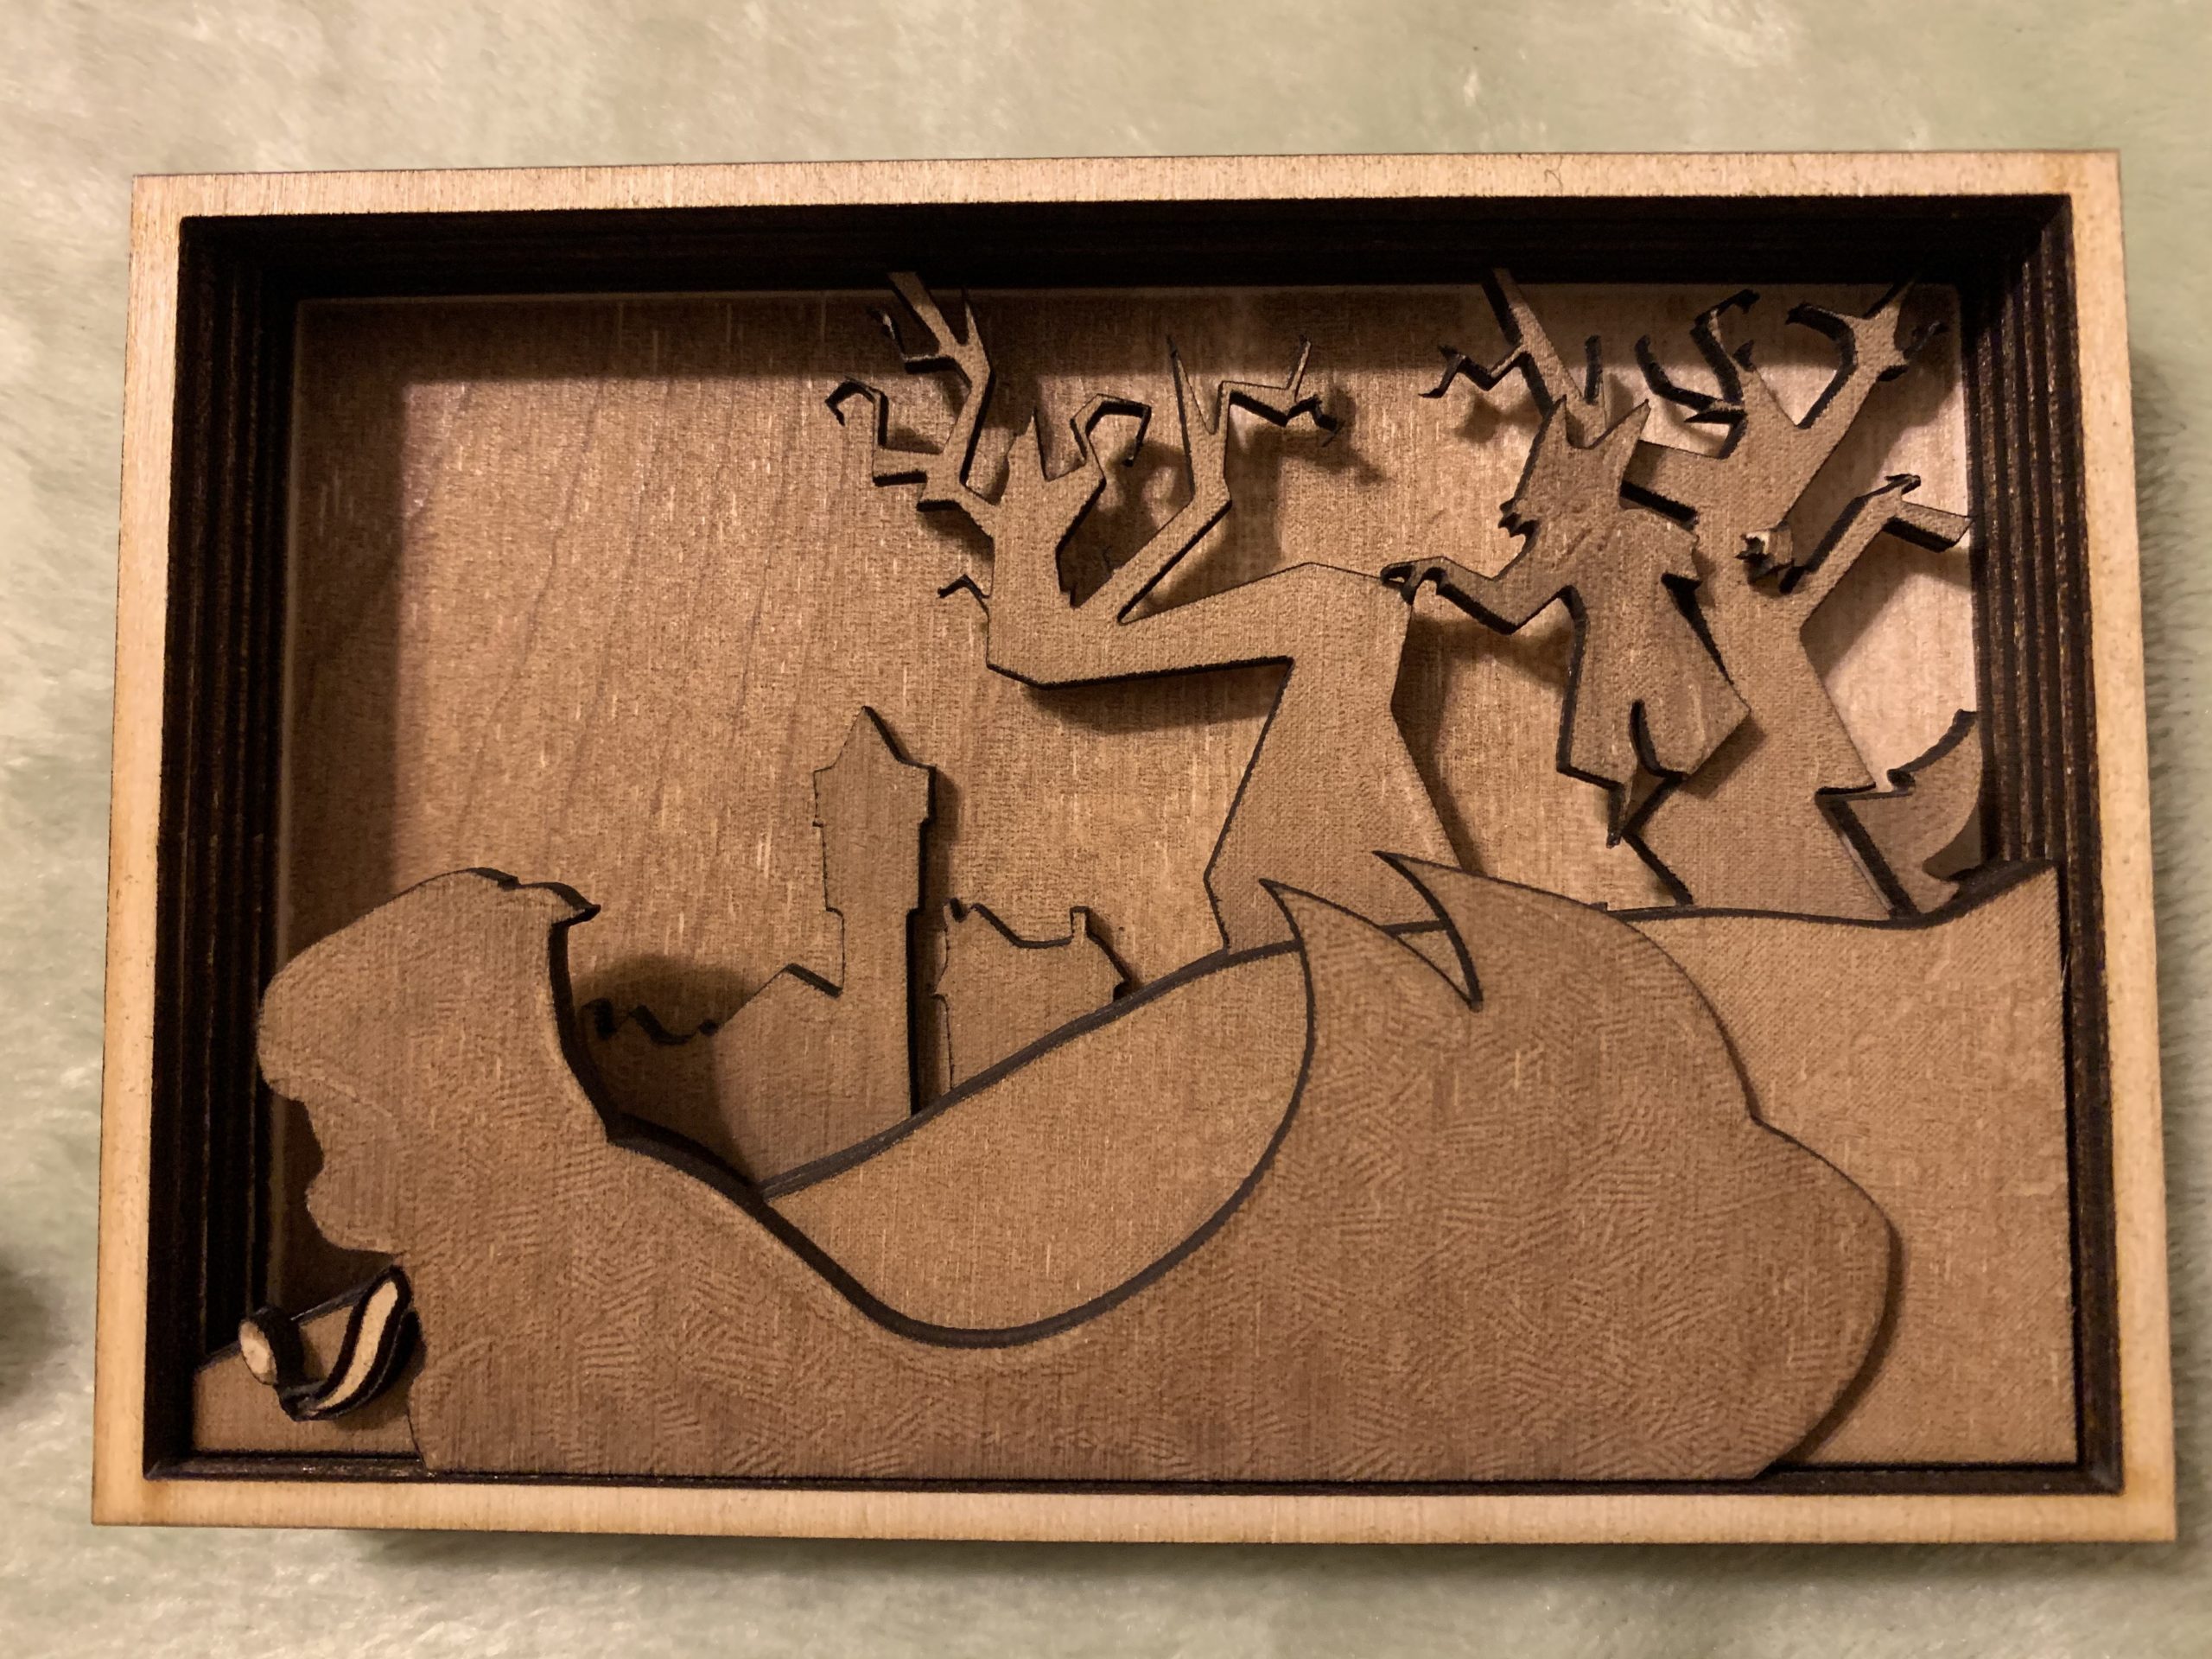
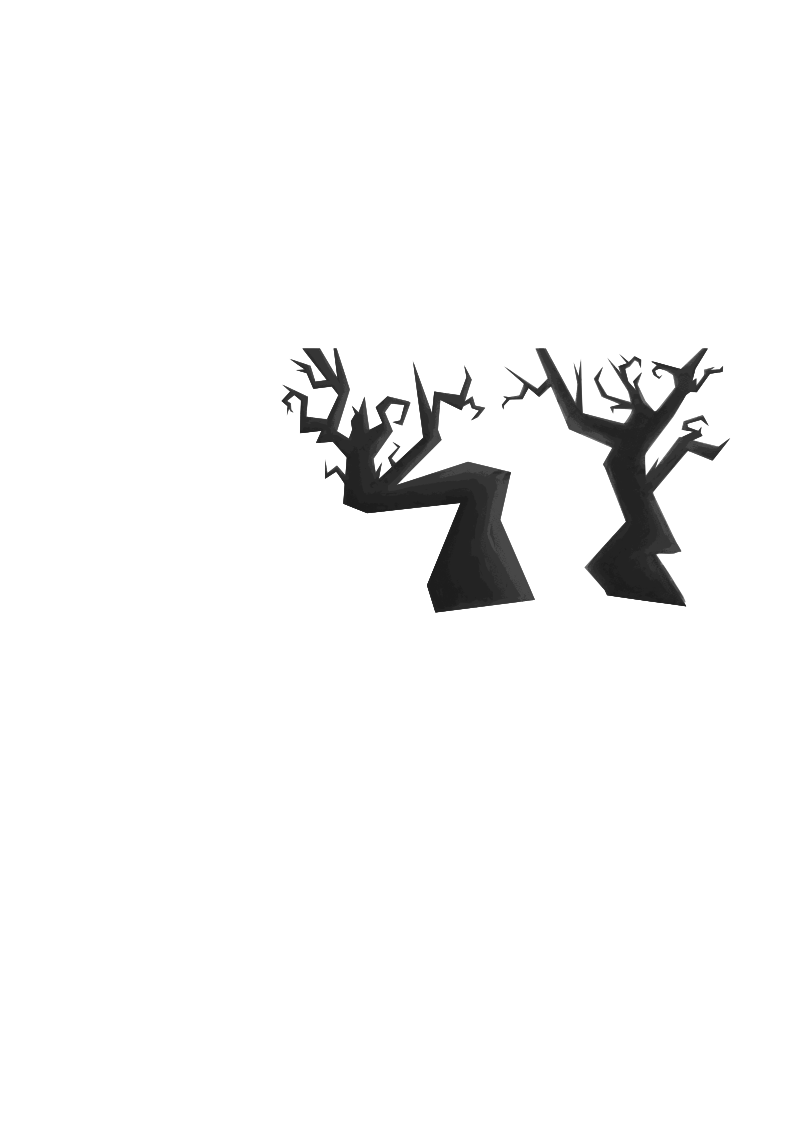
I have almost all the pieces printed out! despite the fact that I did five thousand tests, I still couldn’t get it to come out as detailed as I wanted. Long story. But I’ve got it all assembled, and I think I might just go in and add some lines where there was supposed to be detail with a fine-tipped pen honestly. Maybe at the end of the course I’ll re-make it to be actually detailed (I would also adjust the thickness of some lines, like the fox’s legs + the ends of the tree branches + the cat’s necklace), but for now it’s almost finished — just need to add the border.
Original WIP Post:
So far I have everything set up in Inkscape (thank you V for the help with some weird issues I was having with creating outlines).
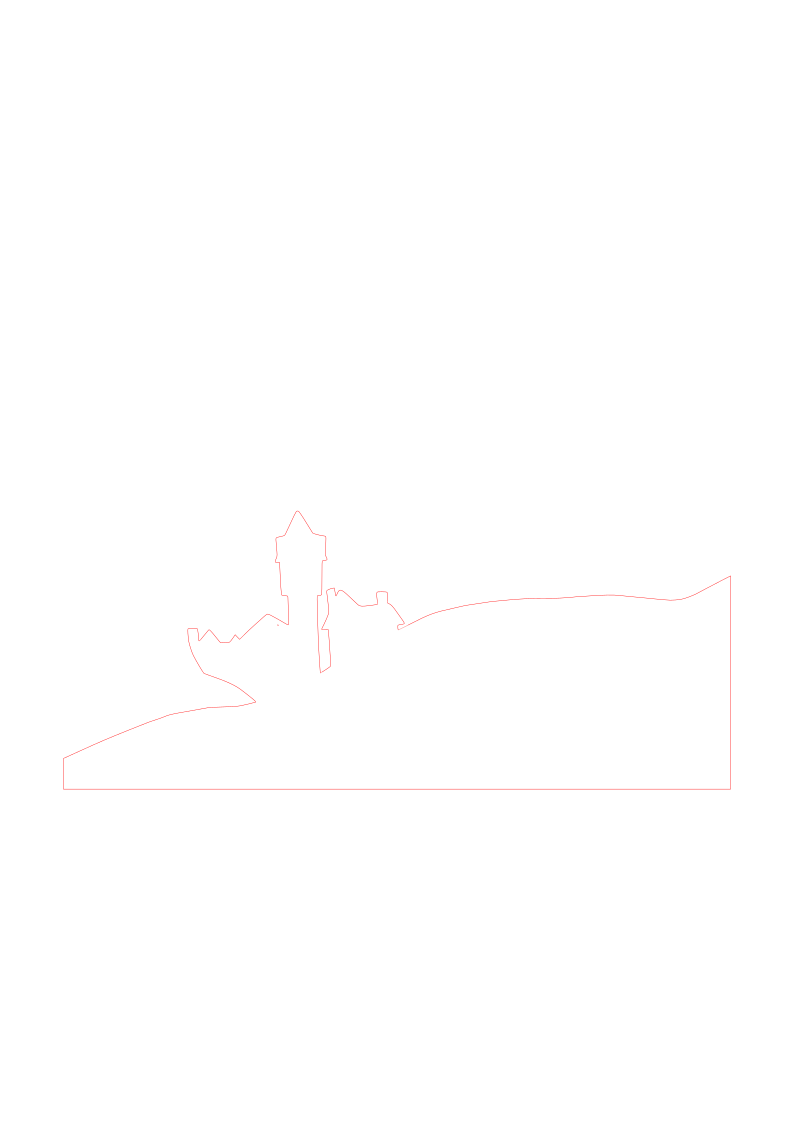
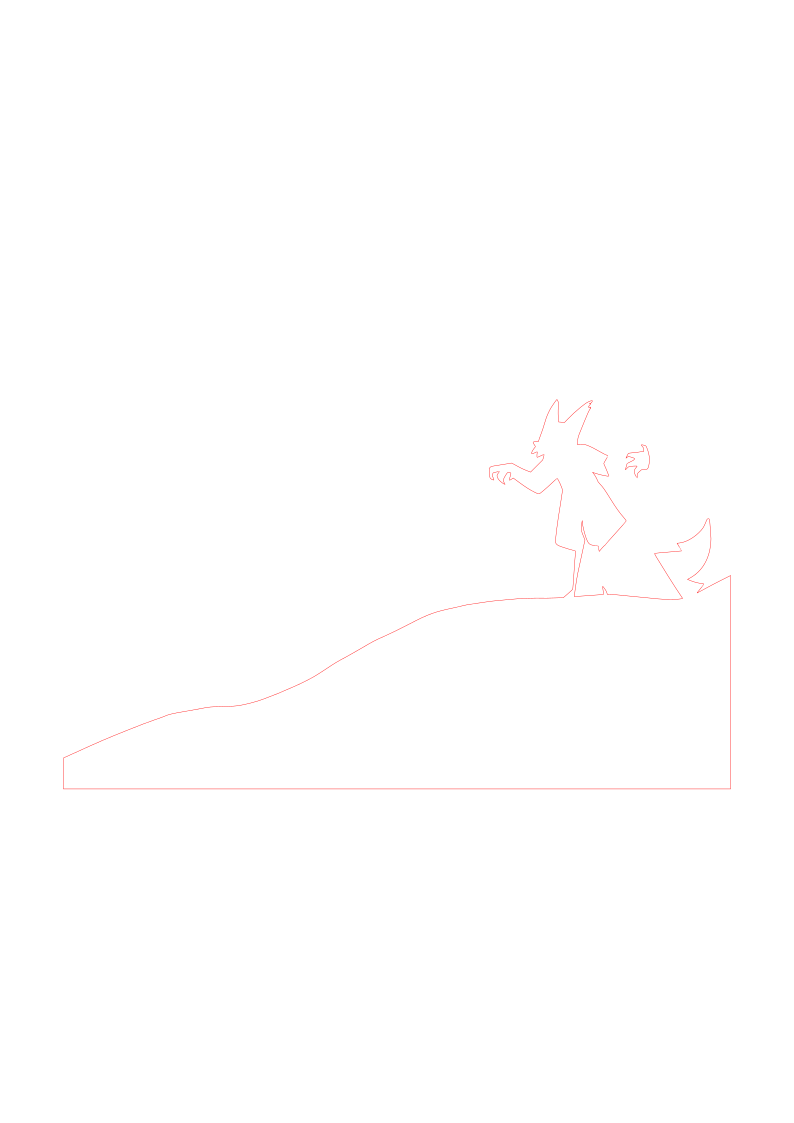
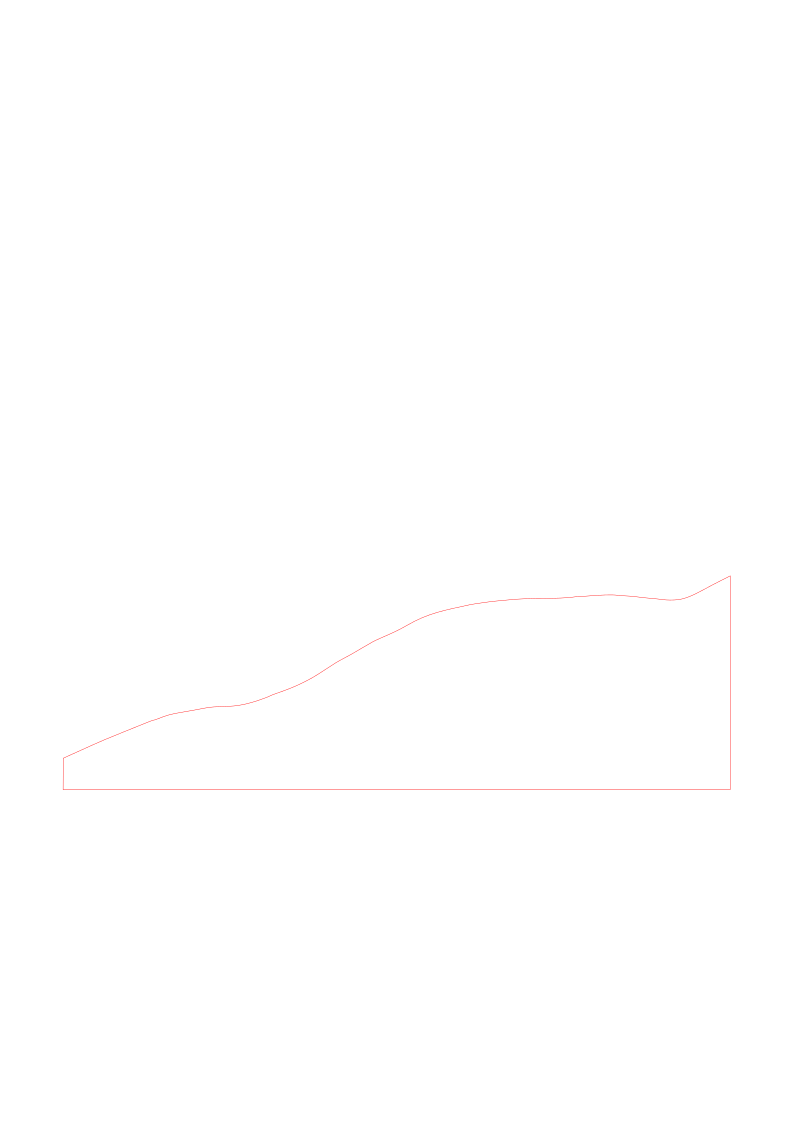
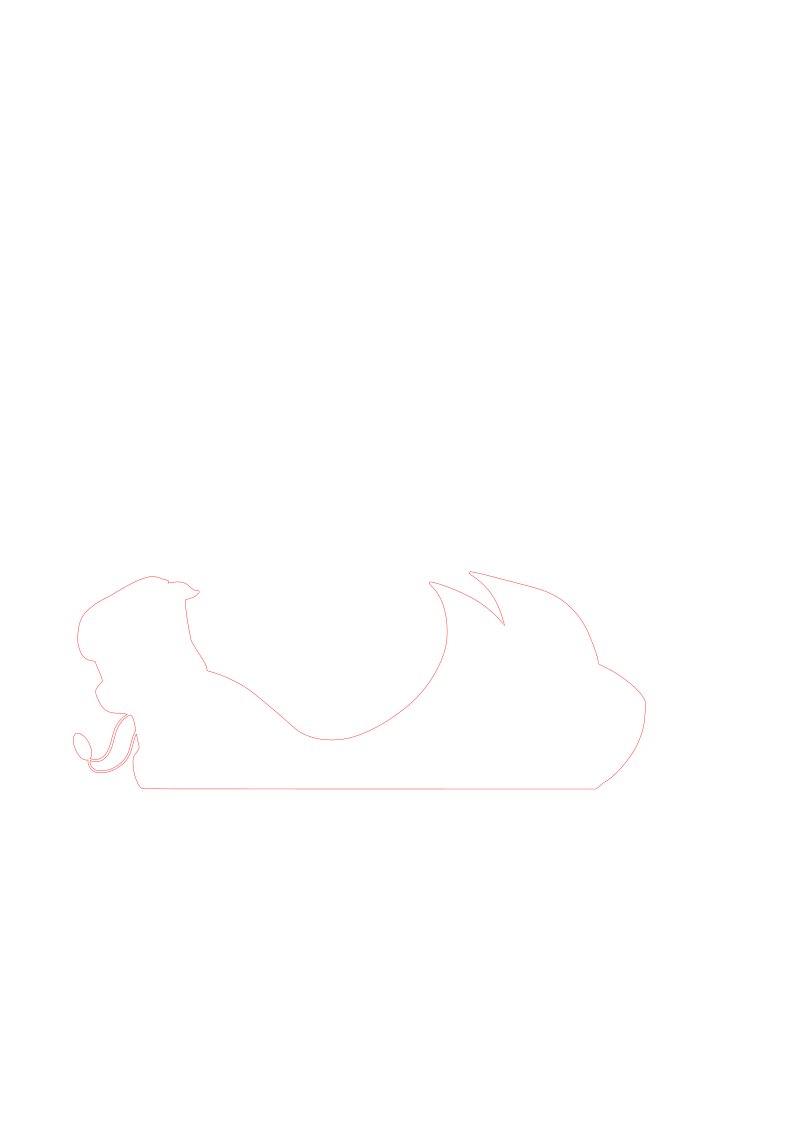
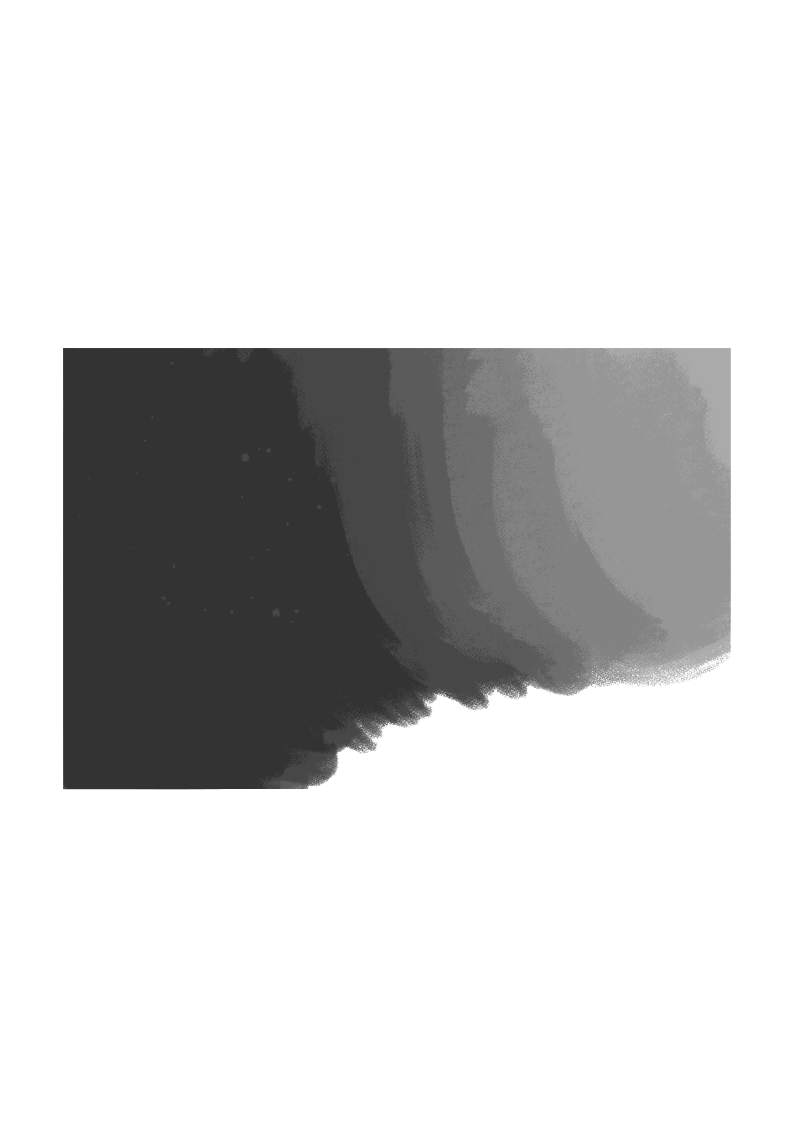
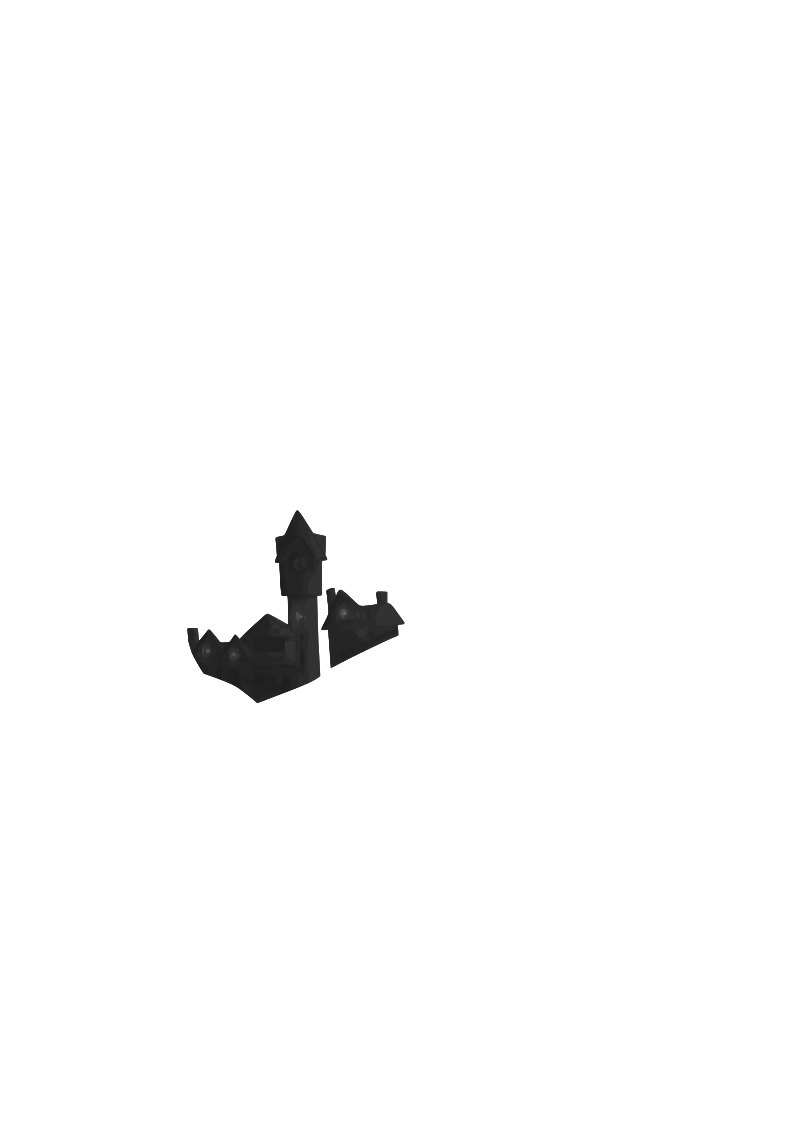
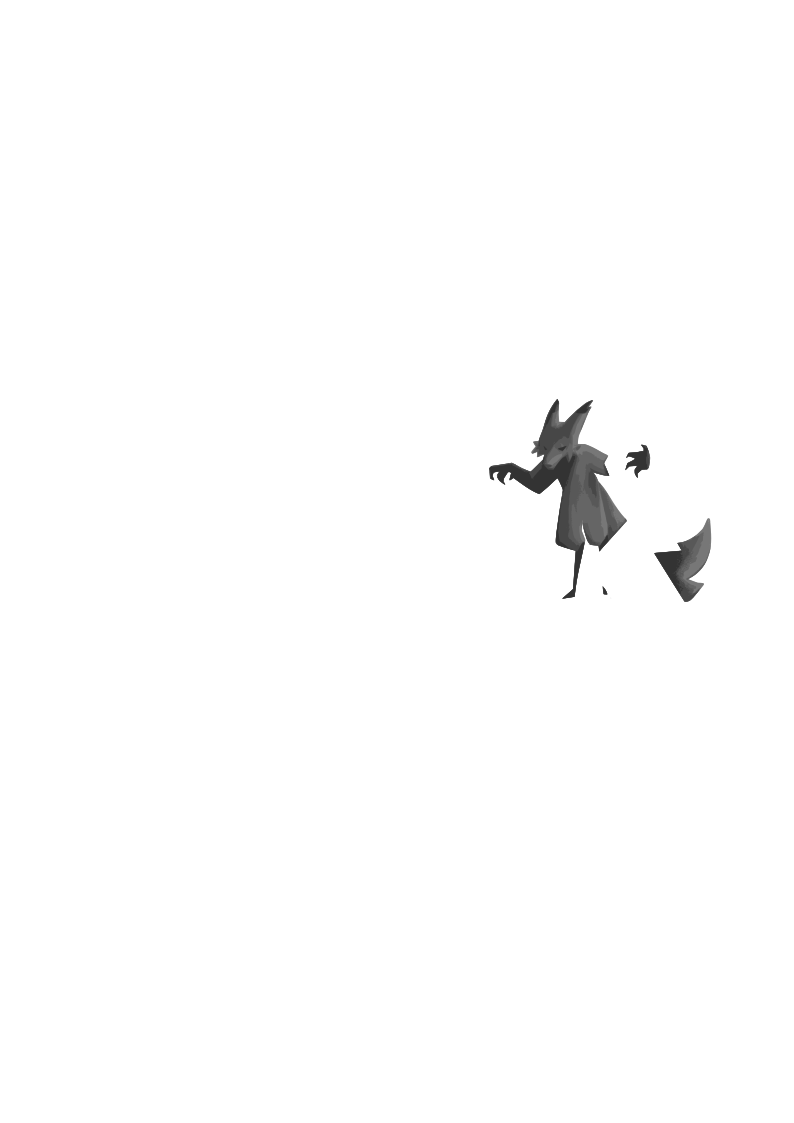
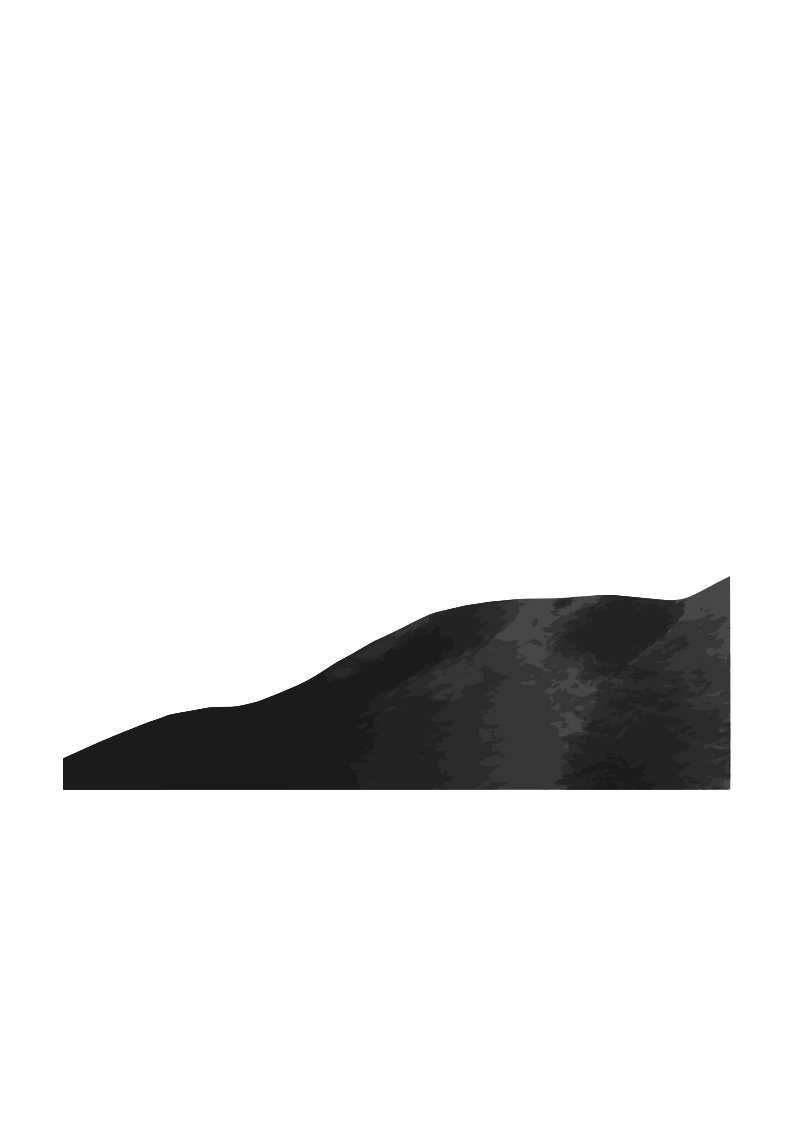
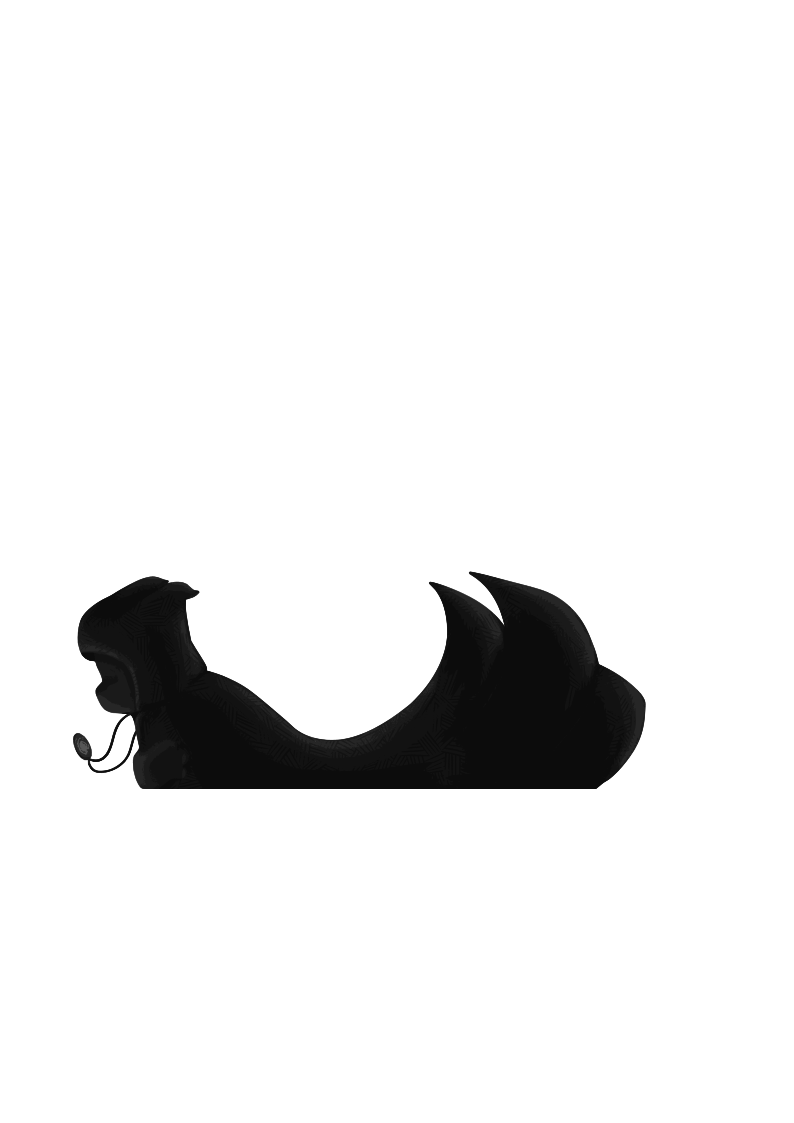
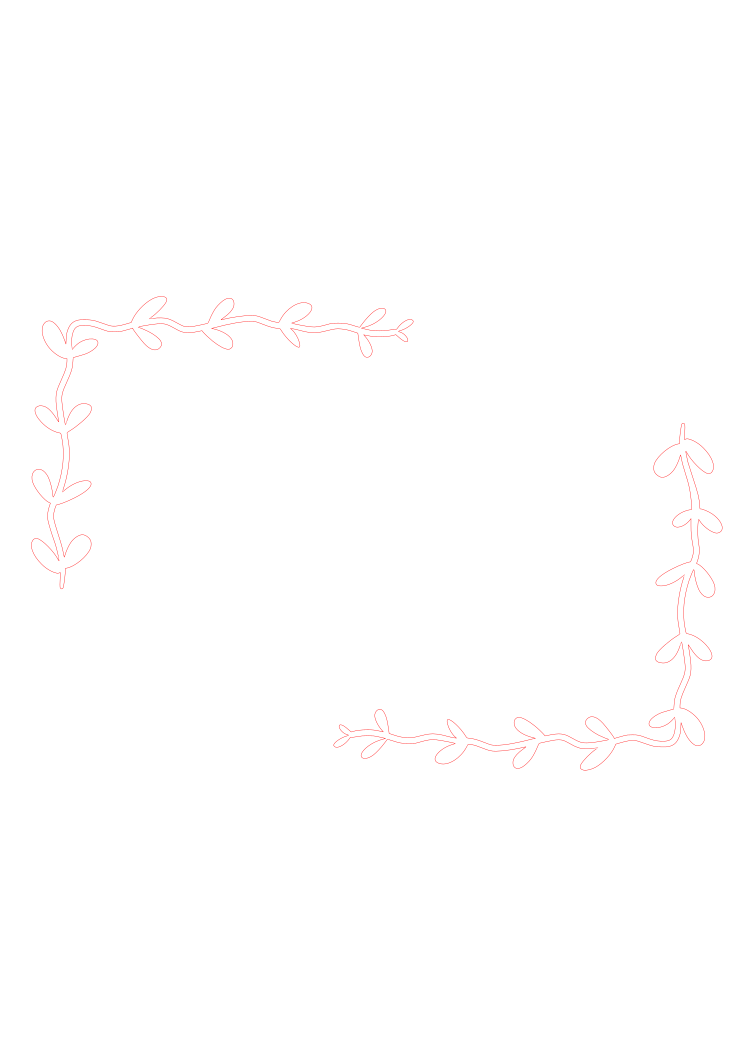
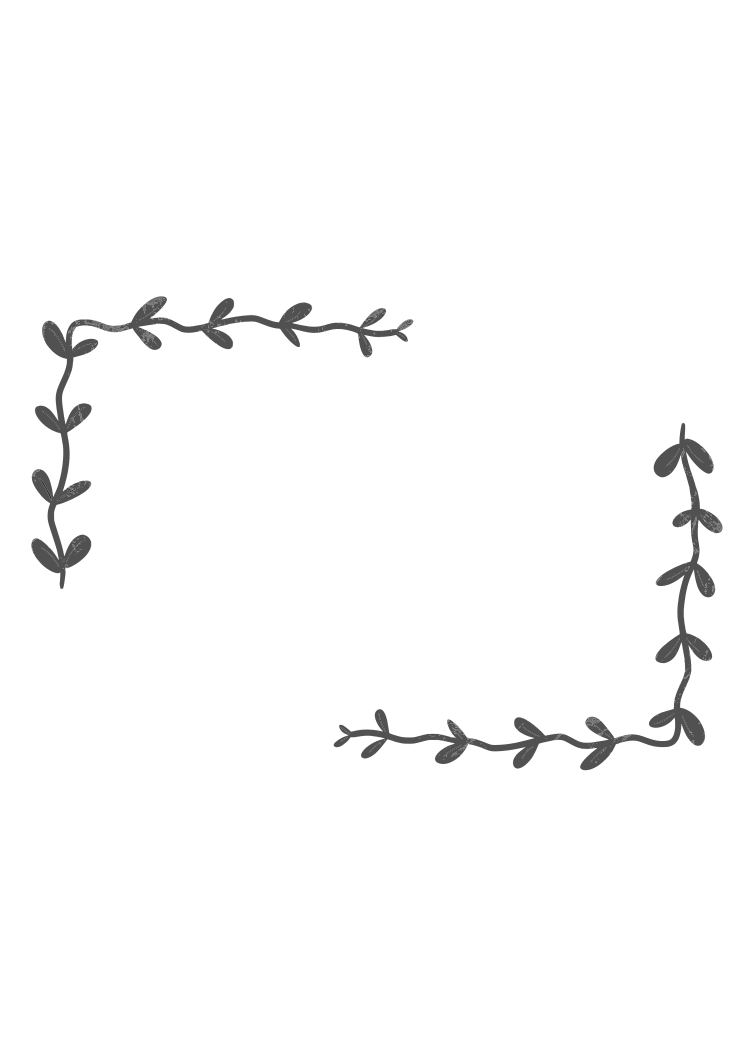
Here are the vector pieces I have (red outlines are for cutting, and the grayscale pieces are for engraving — sorry the red line weight is so thin, there are a lot of small details that you can’t see if the line weight is thicker). Pieces are shown in the order I intend to layer them, starting at the bottom:

Question: I want this to have a shadowbox frame around it so that the whole piece seems to recede into the background (see below), but not sure how I should go about this — should I make the frame? Get one from the store? Something else?
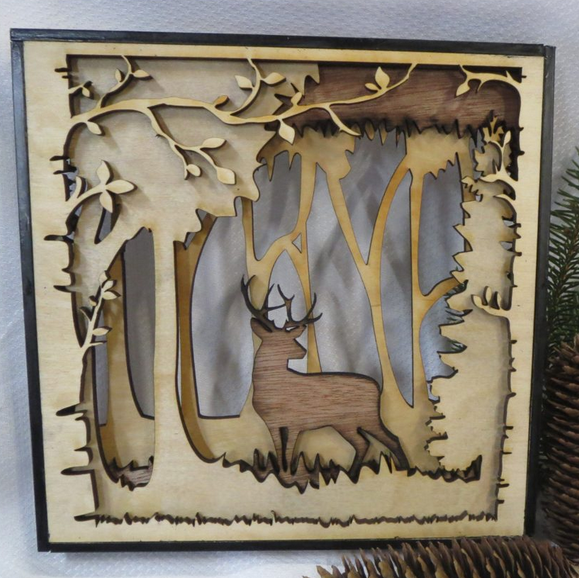
Lastly, on top of the frame I have this small border I’d like to add to the outside:
For your question, I would include the frame as part of the cut of each layer. This could help line up all of your pieces as well.
I appreciate the way you organized your layers so cleanly.
Do you plan on adding shading or color to the piece?
In my opinion it might look nice to raster or paint the further back layers a darker color.
I notice how neat all of the cuts and layers are, and in my opinion a frame would continue adding to the neatness! You might want to see if craft stores have frames like these in size you need before cutting everything, but if you need a specific size then I think making one out of a dark material would look good as well.
I am struck by the detail in your sky engrave how do you plan on keeping this dimension to your final product? You could incorporate some light rastering or turn it into more layers. I personally found that the different levels of rastering can make a really cool effect when you go over the same piece in different places.
I noticed your clean lines for each of your layers and the fun story book like feel the overall design has.
For the box frame I think it would be cool to make it part of your layers. I’m not sure where you would buy one, so I think if you don’t make it part of each layer you should explore making one that’s separate. The cool think with making your own is that you will have the ability to set where the layers sit and increase or decrees the distance between them easier than if you have a store bought frame.
What is your plan for adding color to the piece?
Do you plan on using different power settings on the laser for the colors in your rasters?
I noticed how detailed each piece is.
I think that if you can find a box to fit your dimensions at the store, it could be a really nice finishing touch to your piece. It would also make it easier to display the item as well.
Do you plan on using wood and if so what is your plan for the finish of it?
I appreciate the level of detail of this piece. Do you plan on using color or staining? I think incorporating a frame into the layers would be beneficial to keep the layers aligned. An additional layer that’s in the shape of the frame with no other pieces would create a good effect.
I’m struck by the creativity and appreciate the design inspiration. To answer your question, I think it may be good to incorporate your frame in each layer so they can line up together at the end.