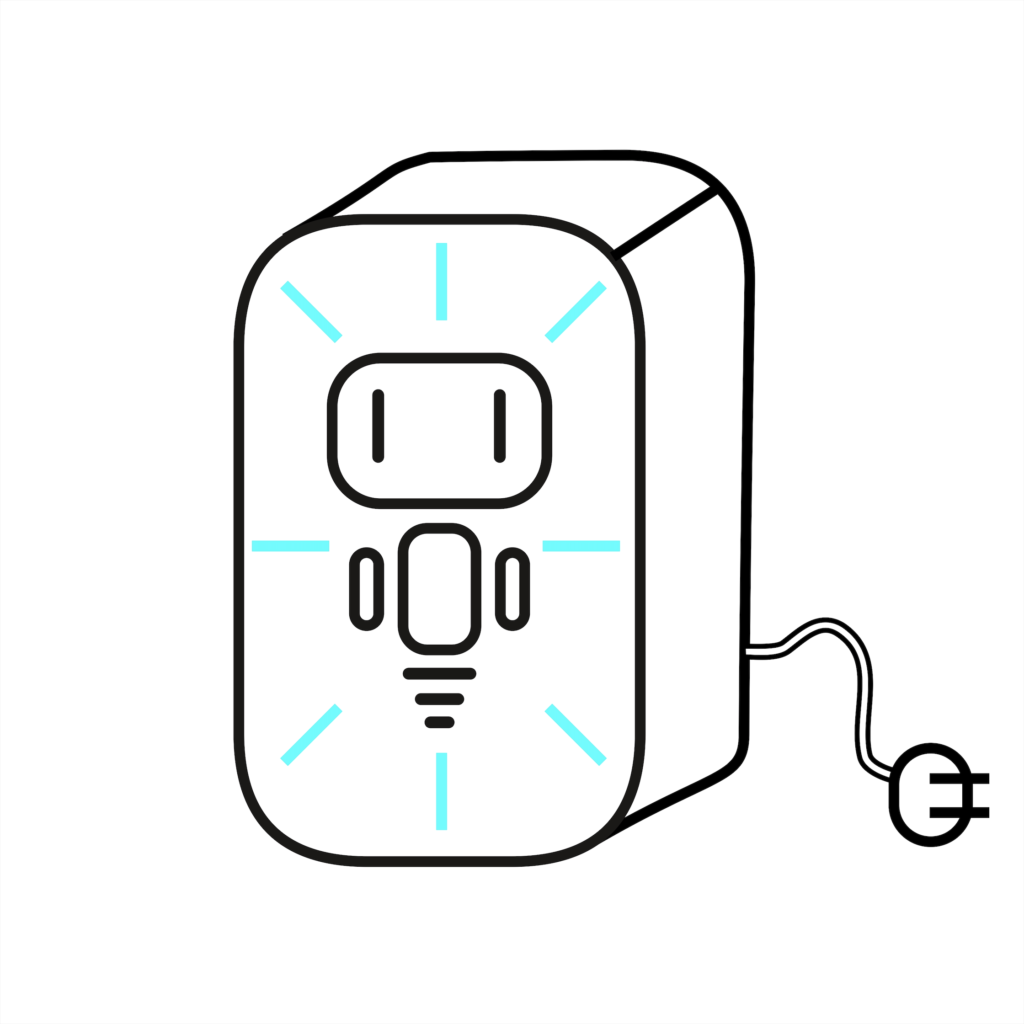
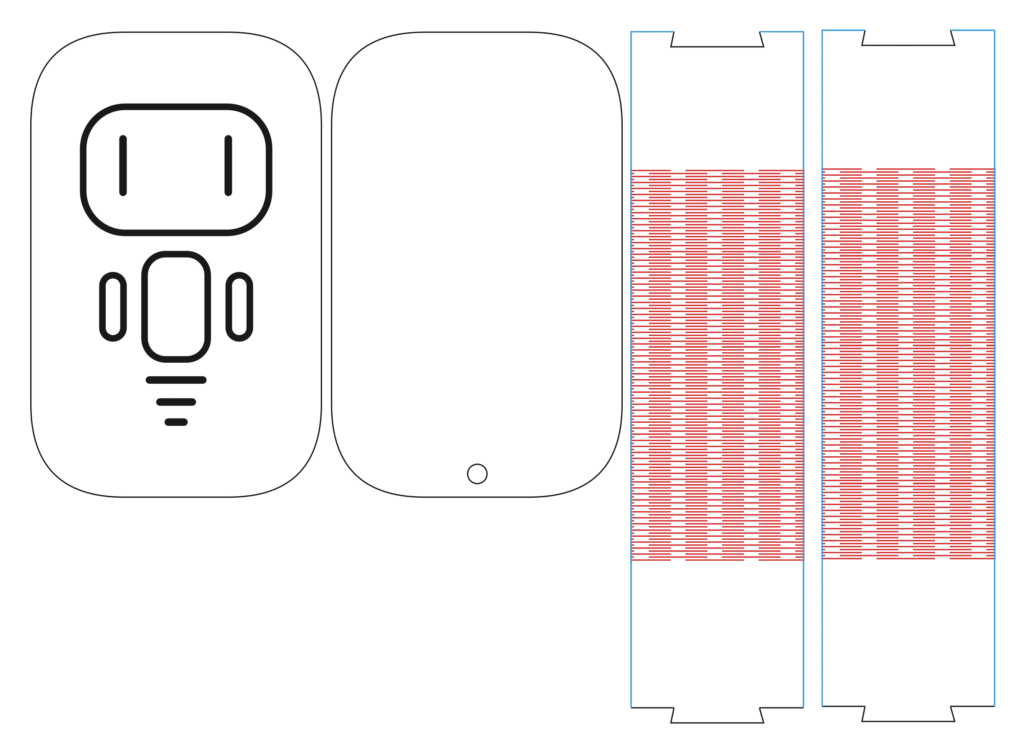
The rounded part and back with hole will be birchwood and the front with design will be frosted acrylic. As of right now for the design I am thinking of cutting through the acrylic and covering the cut portion with black paper to block the light for the lines of the design, so the design is black and the light shines through the acrylic. Right now the design is the robot I made for my first raster engrave, but I might change it.
Hi Marcella,
The cyan lines are just there to indicate light shining through the frosted acrylic. I will be using RGB fairy lights on the inside, so I can change the light color to whatever I want. I just made the design with cyan for now.
Hi! I really like how you are using two different materials so that all the light shines through your front panel. Are you thinking about including the little blue lines in the final design and if so how? I personally like how it makes the little robot pop and seem happy and energized.
Hi Iris,
I just added the cyan lines to indicate light shining through the frosted acrylic. I do agree with what you said about how it gives some energy to the lantern, but I am hoping to have a more mellow vibe with my the lantern.
How do you plan to prevent the black paper from being visible outside of the design? Are you planning to cut it into the exact shape? If so, have you thought about how you’re going to attach it to the acrylic?
Hi Alexander,
I was originally hoping the acrylic was hard to see through so the paper would not be visible, I ended up just coloring the cut out pieces with black sharpie and using clear tape to secure them to the acrylic. Not the most elegant solution, but it works well enough.

Hi! what are your plans for your light source?
Hi Grace,
I will be taping RGB fairy lights on the inside of the box. So I can change the color of the light source to any color I want.
Hey Sameer! I like that you are using a design you’re familiar with. What are your plans with the blue portion of your concept sketch?
Hi Marcella,
The cyan lines are just there to indicate light shining through the frosted acrylic. I will be using RGB fairy lights on the inside, so I can change the light color to whatever I want. I just made the design with cyan for now.
Hi! What is your plan for the size of your piece?
Hi Emily,
The box will be 9.5cm wide, 14.5 cm tall and with a depth of 8cm
Hi! I really like how you are using two different materials so that all the light shines through your front panel. Are you thinking about including the little blue lines in the final design and if so how? I personally like how it makes the little robot pop and seem happy and energized.
Hi Iris,
I just added the cyan lines to indicate light shining through the frosted acrylic. I do agree with what you said about how it gives some energy to the lantern, but I am hoping to have a more mellow vibe with my the lantern.
How do you plan to prevent the black paper from being visible outside of the design? Are you planning to cut it into the exact shape? If so, have you thought about how you’re going to attach it to the acrylic?
Hi Alexander,
I was originally hoping the acrylic was hard to see through so the paper would not be visible, I ended up just coloring the cut out pieces with black sharpie and using clear tape to secure them to the acrylic. Not the most elegant solution, but it works well enough.