Here are the different layers I have planned for my design for right now.


So I have hit a bump in the road for my layers design right now. I knew going in that the cutting process would be challenging because the wood veneers are really thin and because I have small pieces in my design. I went into the makerspace with the idea that my test cuts would not take too long, but I was very very wrong. I had a lot more to test than I initially realized.
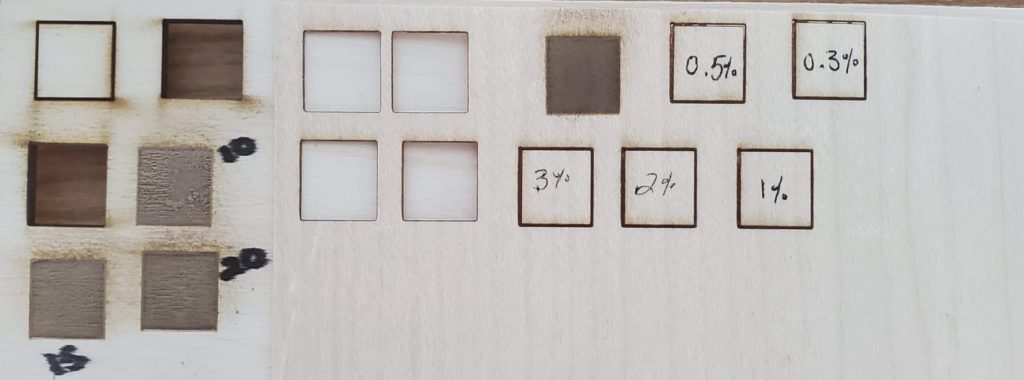
The first tests I did were to check that the laser was cutting properly and how rastering on my plywood would turn out. After talking with Professor Rosenstock, we had the idea to embed the veneer design into a raster on plywood. The four bottom squares on the far left of the image below represent these cuts. You probably can’t read the numbers too well, but I wrote the rastering power next to each test square. I determined that the 20% raster fits the veneer best and lays almost flush. (I tested 10%, 15% and 20%)
The next set of cuts I did were on a piece of scrap veneer. Keep in mind that its roughly the same thickness of cardstock, so I needed vastly different laser settings. I did a total of nine vector cuts and one raster, which you can see in the first and second images below. The settings I used are as follows:
- 30% with 1 pass = cuts
- 25% with 1 pass = cuts
- 5% with 2 passes = cuts
- 5% with 1 pass = cuts
- 3% with 1 pass = almost cuts through
- 2% with 1 pass = almost cuts through
- 1% with 1 pass = almost cuts through
- 0.5% with 1 pass = almost cuts through
- 0.3% with 1 pass = almost cuts through
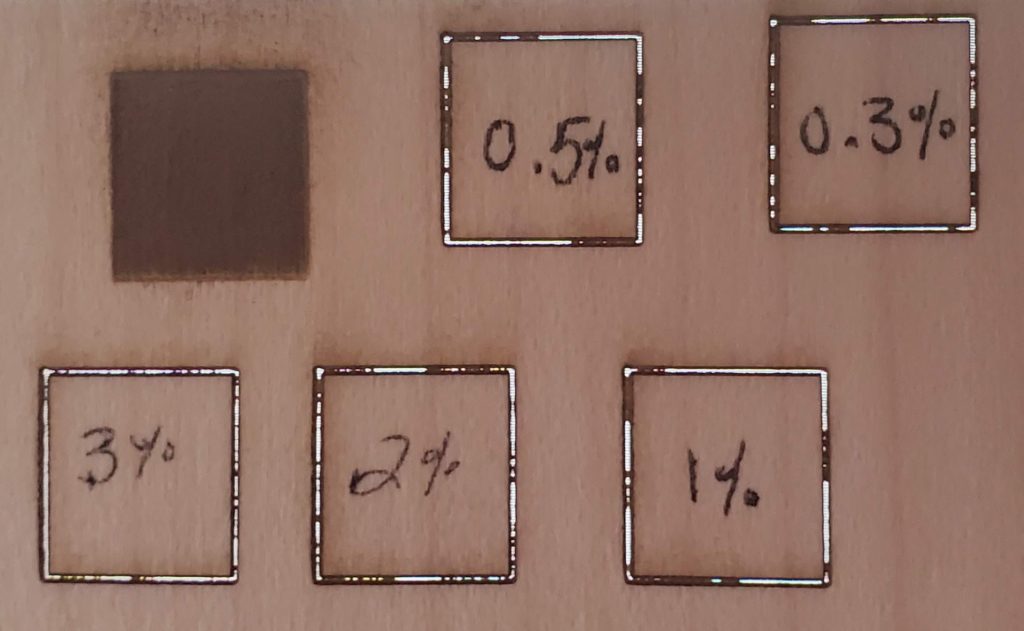
The second image I took with a white background to show how far the laser cuts through the veneer even at low power. Moving forward I’ll probably use the 0.3% power for my vector engraves and 5% power with one pass for my vector cuts. None of the vector engrave squares have fallen out of the piece however, so I am assuming that they are all pretty stable.
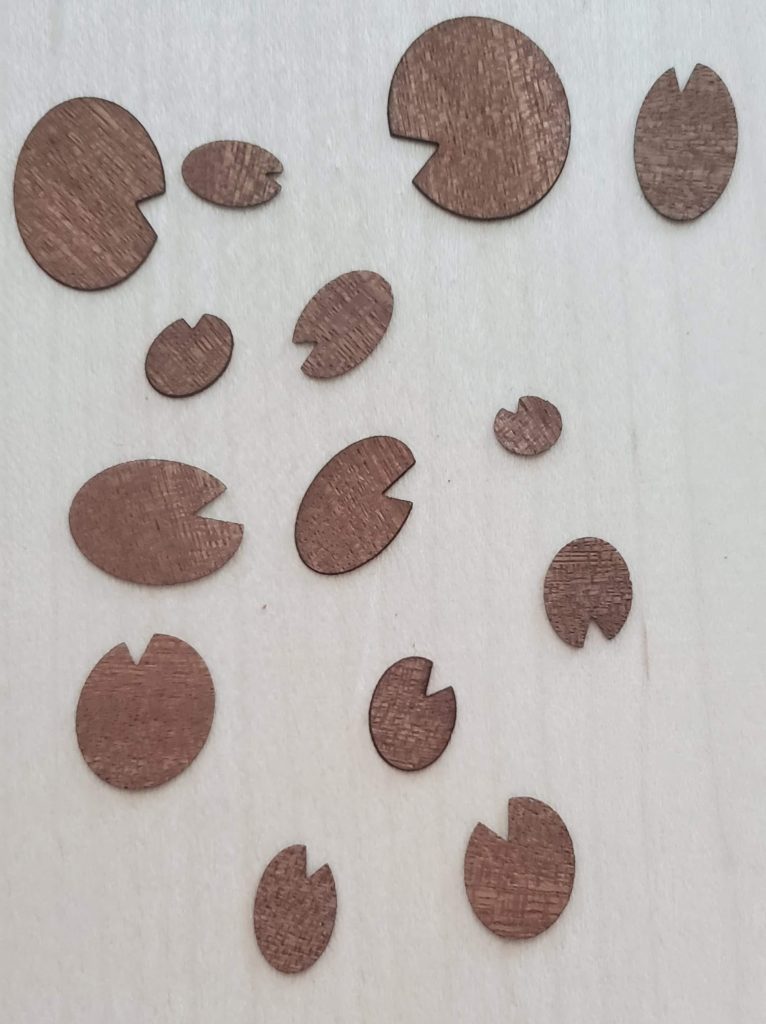
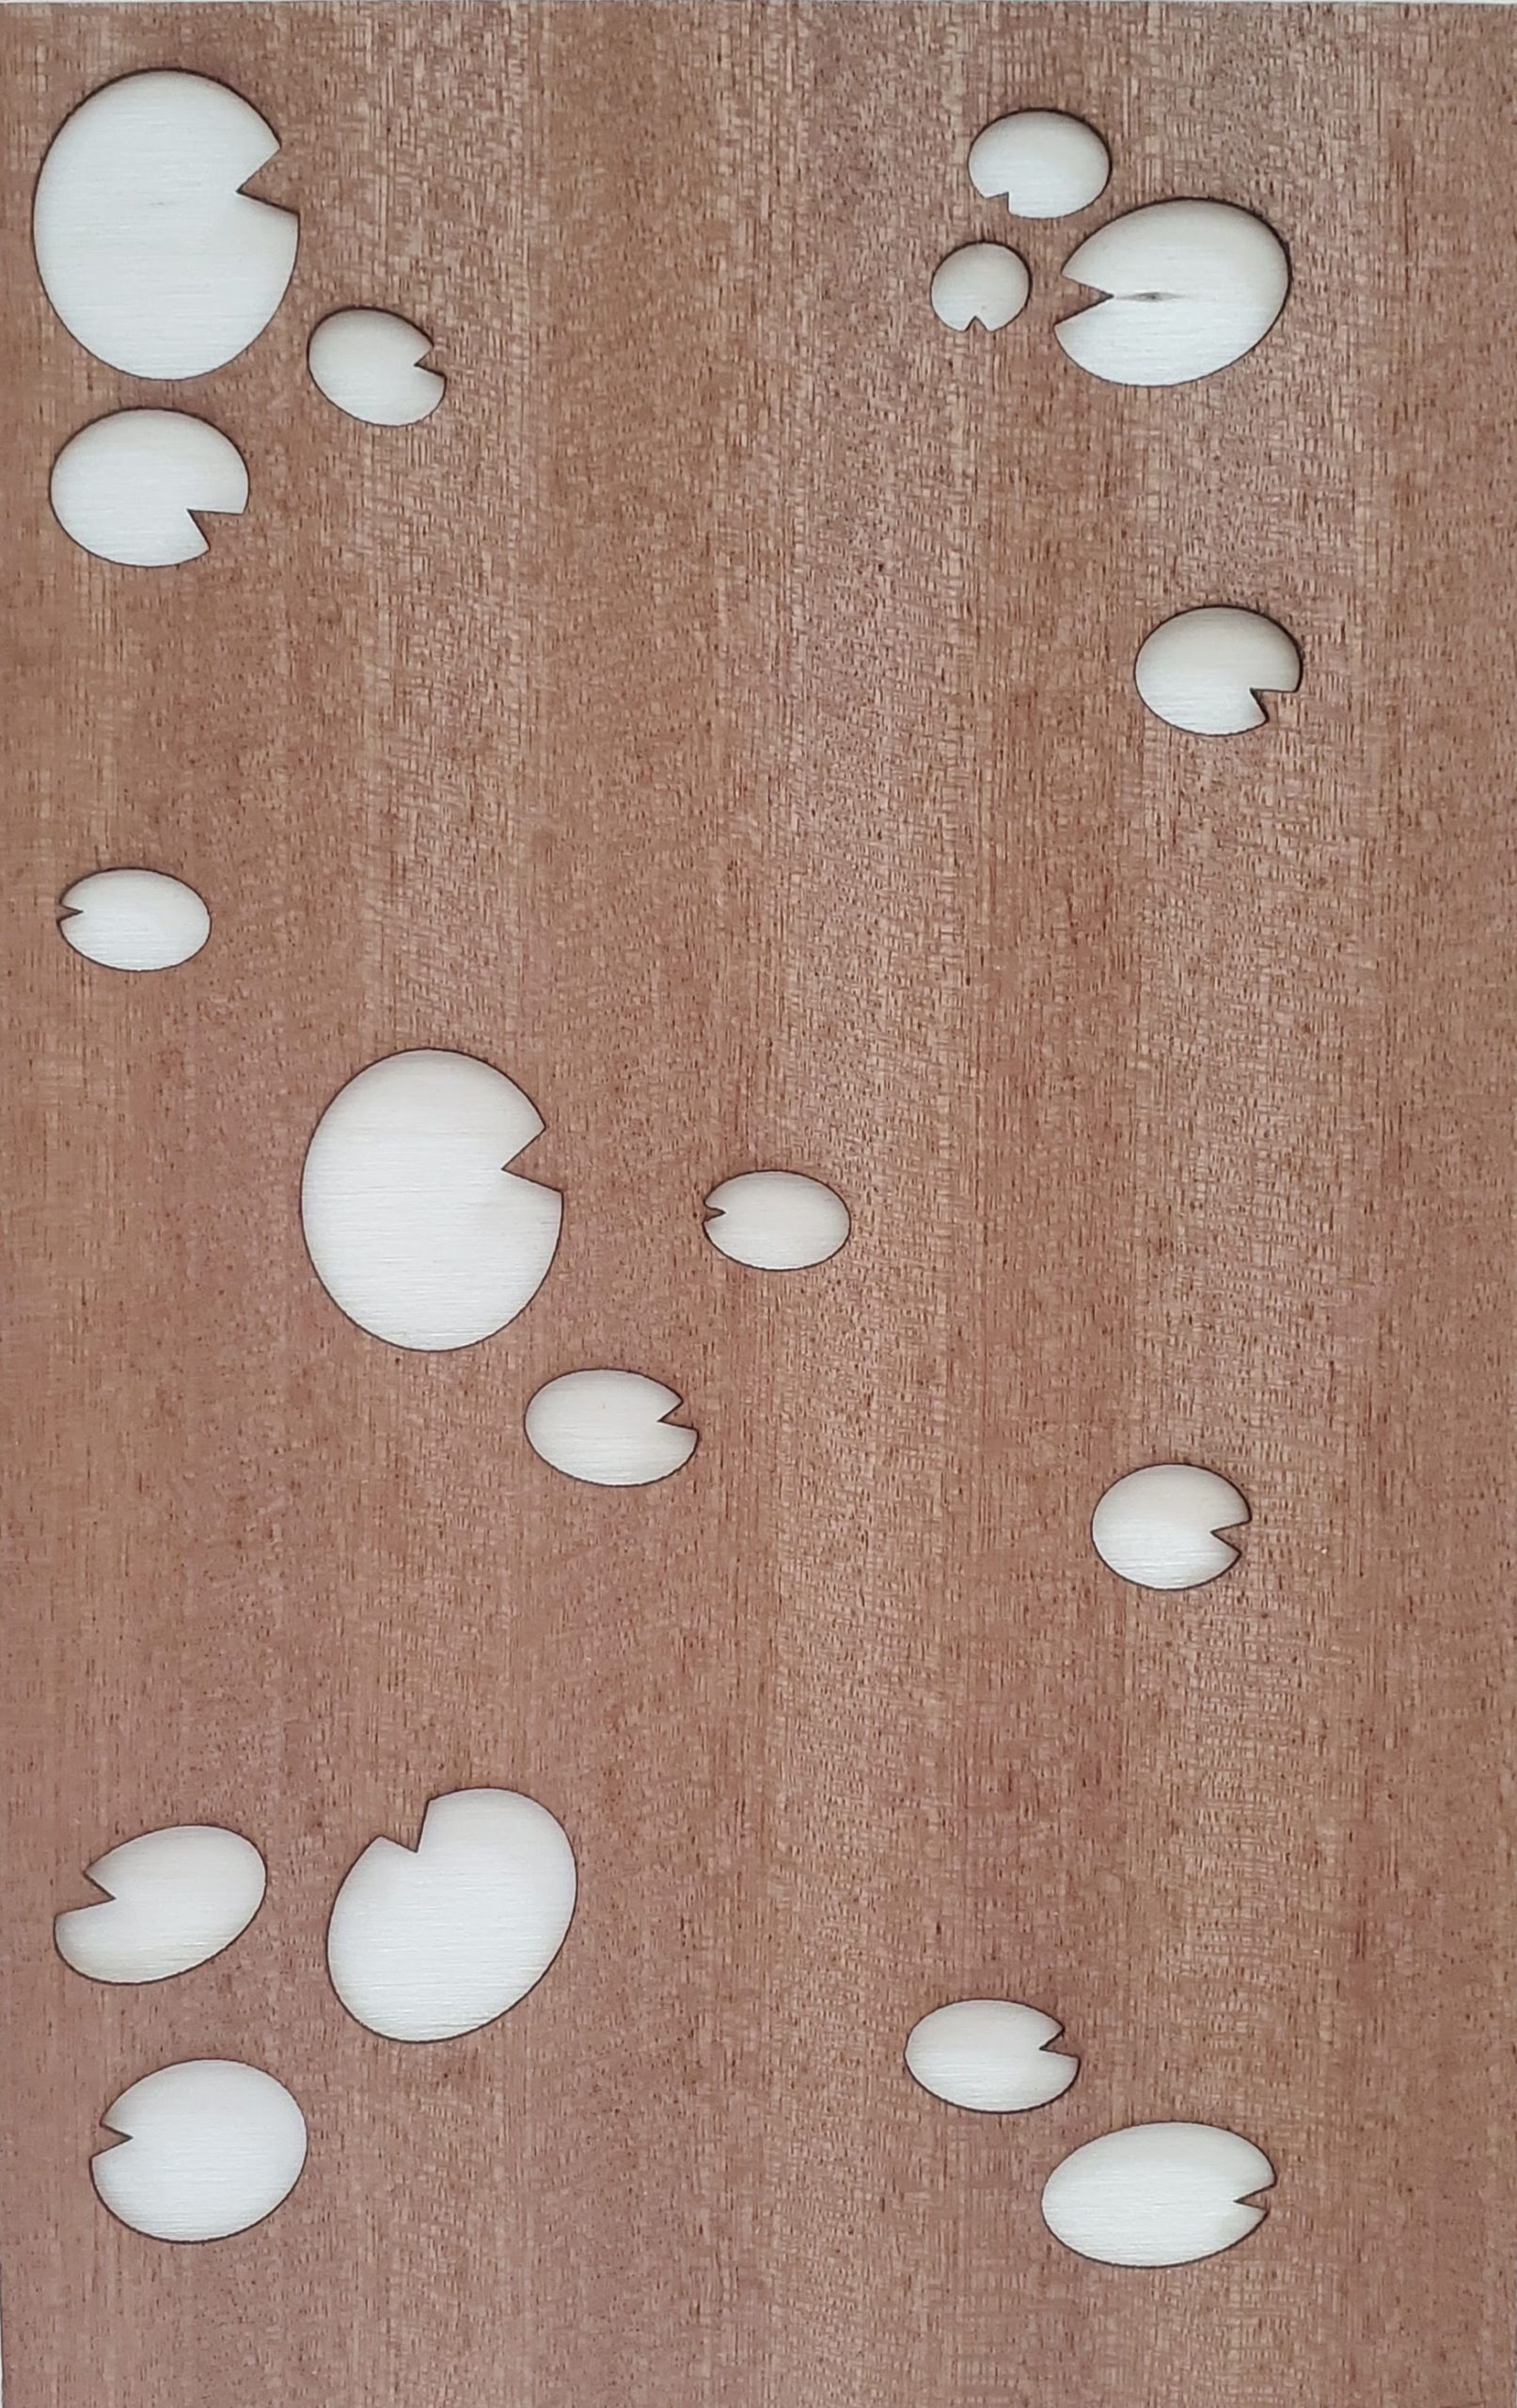
With the remaining time I had in lab I decided to test cut the lily pad layer from my design. Immediately after some of the pieces were cut they flew off into the machine and out of my reach. Funny enough, they weren’t even the smallest pieces that flew away. I quickly learned that the further away from the back of the machine I place my material, the less likely the pieces will blow away completely.
QUESTIONS
Before I continue cutting my design out I need to figure a few things out and want your help!
How do I handle cutting out the smallest pieces of my design? The honeycomb inside the laser cutter (the thing you lay your material on top of) might just be big enough for my smallest pieces to fall through.
How can I improve the concept of depth in my design? Like Jakob pointed out on my last post, how can I make it look like the koi fish are underwater and the lily pads above water?
Please leave any suggestions or ideas you have below even if they aren’t directly related to these questions!
An easy way to prevent the pieces from falling in is to put your material on top of a thin sheet of wood or construction paper before cutting and then calibrate the laser power so that it only cuts through the material, not the paper. That should solve the issue of pieces potentially falling through.
Just piggy-backing on Alexander’s excellent suggestion to add: a little bit of not-very-strong adhesive (like perhaps glue stick) between the veener and the underneath layer would hopefully keep the tiny bits from escaping but would still be removable when you’re done.
Thank you both! I will definitely be trying a bottom layer and an adhesive in future cuts. 🙂
Hi Lauren,
For depth in your piece, maybe you could use a layer of acrylic to represent the water? So the fish would be under the acrylic and the lily pads could sit in the same plane as the acrylic layer.
Hi Sameer! I think I might get a piece of acrylic to experiment with that idea, thanks for bringing it up!
I think shifting the placement of some of the lily pads might help so that it appears they’re above the fish or close enough to the fish that they look they haven’t been disturbed because the fish is under the water. It also might help to add another layer of water that’s in sections so it’s showing different pond depths? I’m not sure.
Hi Emily! That’s a great idea! I think if I can get the acrylic layer to work like Sameer suggested, lily pads above the fish would totally give an underwater feel. I also wasn’t sure how to represent pond depth, but I feel like the top layers are usually the only thing you’d see anyway in a pond.
hello. I wonder if adding a top layer of blue acrylic that is floating maybe an inch above your design would make it look like everything is underwater.
Hi! I am not sure about the water effect, I think it’s clear there is water around the fish as is. For the small pieces/ honeycomb I had a similar question going in to cut my tiny islands out and I learned that there is a catch for little things that fall through the grate that you could potentially ask the person on duty in the lab to unlock so you can retrieve any pieces that may have fallen through. Also that grate hold a lot more than I expected so it might not be as big an issue as your are worries about. Can’t wait to see it!