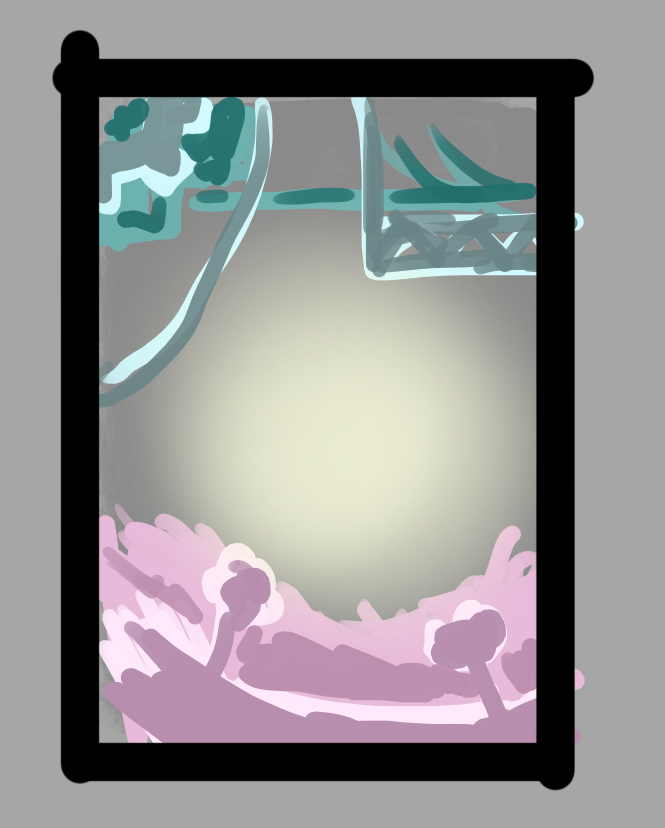
For my Lantern design, I’ve decided to create a shadowbox with cardstock paper. I chose to do more of a floral scene mixed with a partially mechanical and robotic look to it. I want the colors and shapes represent a balance between art and technology. I plan to make this a wall piece that’s about 10 by 8 inches and will hang on the wall. I want to use a simple black acrylic box for the frame and using a slightly larger lip around the outside of front, I plan to start attaching the layers of cardstock to the back. This should seamlessly create the front of the piece. I plan to have the box somewhere between 3 to 4 inches deep. This is to give the paper about 2 inches to be placed backwards to give depth. I allocated an extra inch of space to adhere the LED strips behind the back layer. I chose to work with an LED backlight because I wanted a decently compact light source that would act as the sole light to the piece.
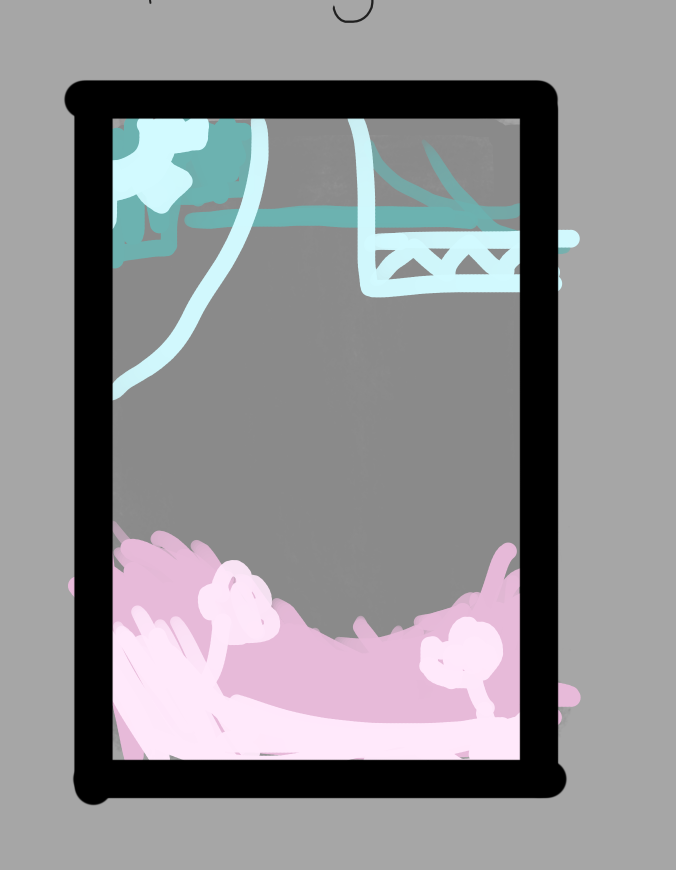
I plan to adhere the individual pieces and layers together either with a glue stick or separated by foam glue dots. I like the idea of have a piece that is very dimensional, but I also want to make sure that I have stability.
Question:
For creating depth, I’m planning on using double sided sticky dots to help create the distinct layers. However, I’m concerned that having all of the paper connected only to the front and back panels may weaken the stability of the piece. What do you suggest for making sure the the pieces are secure and stable?
Will each layer have a border around it? This would help with stability and could be hidden by the slightly larger lip at the front of the box. If the paper is still too weak, you could also use thin rectangles of foam core board instead of the sticky dots for more support.
Hi Shane! That’s a wonderful idea! I’ve started on the design cut outs and a lot of them do go to the edge, so for the more technical pieces I will add that edging to them.
I think the foam core is a good idea for separating the layers, although i would watch where you put them so that they don’t create a shadow behind the layers; but, since you have a frame on the front of the box, then that should’ve be a problem when you put them behind the lip.
Ok, thank you. I’ll make sure I keep a good enough lip to hide the dots. I think about a half inch might be enough.
For the mechanical theme, I think a white or light blue LED will fit it. And for the depth question, I think you can create a standing fold under each layer(like “pop up cards”) if you want to prevent it from falling off. I’m a bit curious about the idea, what will be the centered/main object for the piece?
I didn’t really plan anything to be in the center of the piece, but I could possibly add a pattern on the backside of the main panel to give an interesting lighting effect.
I agree with those who think that using a frame of foam core board between each layer to add depth. I am not sure how to add stability to the paper layers, I just thought of maybe using thicker paper (card stock) but it might not be translucent enough to let the amount of light you want through it. if the sticky dots are opaque remember to be careful of them being seen through the layers when the box is lit up.
Yup! And I was able to get access to some cardstock earlier, and I’m now more aware I need to be very careful with how many layers I stack onto each other as it doesn’t have the best transmission of light.