5/1 Newest Update!
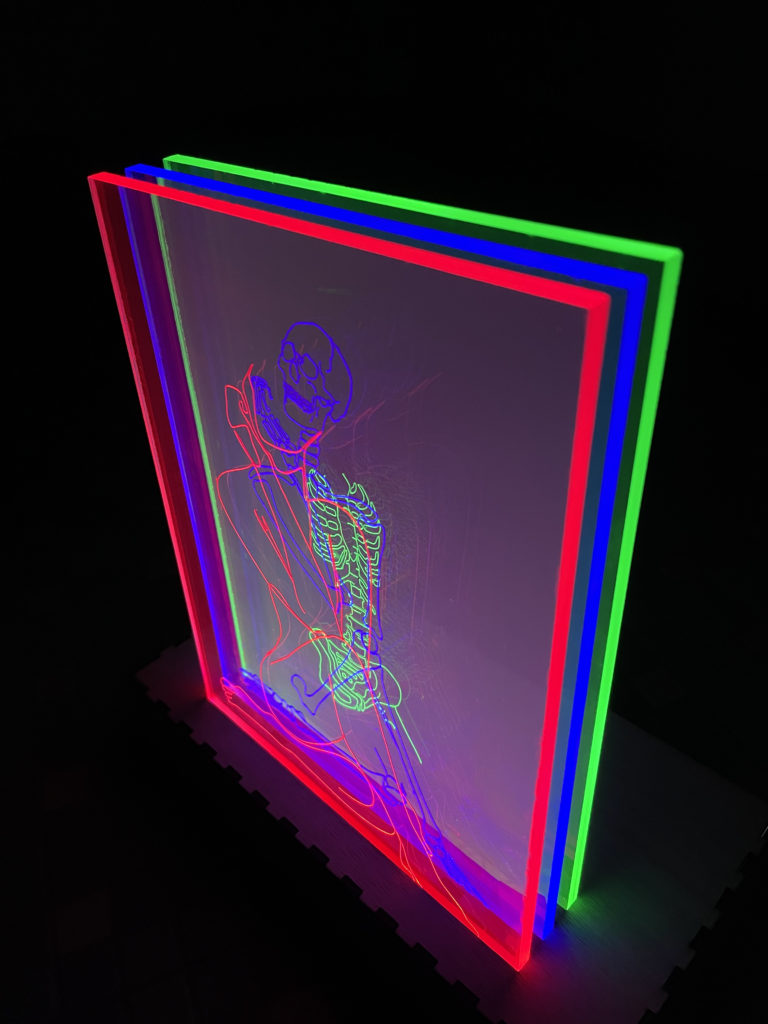
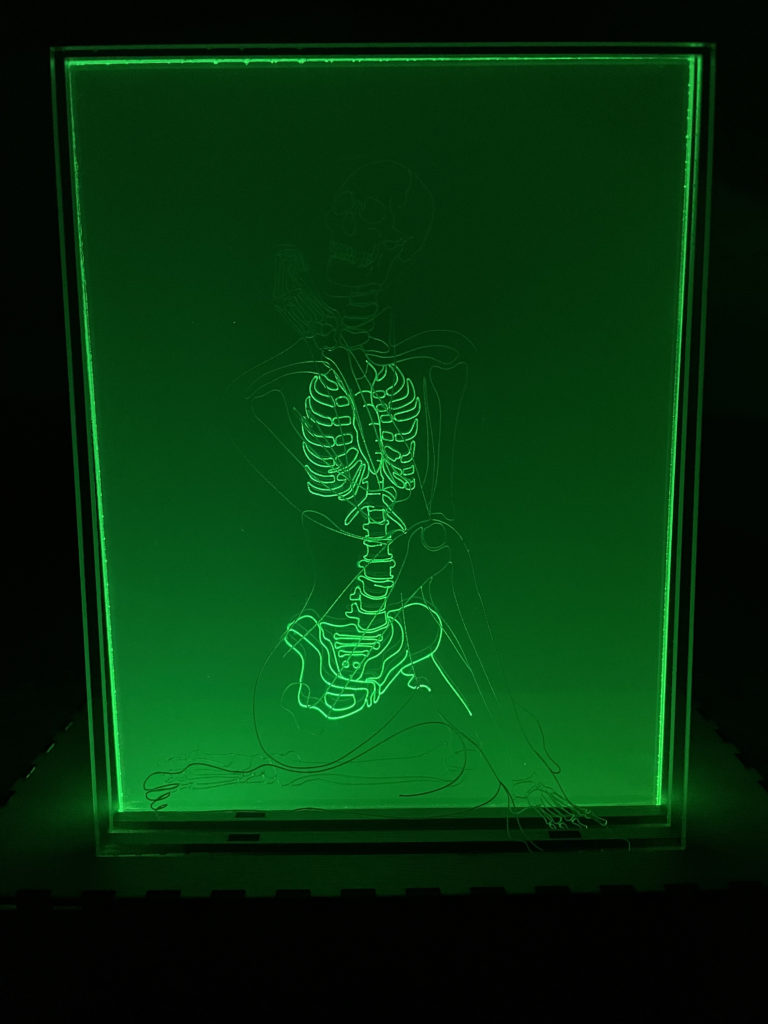
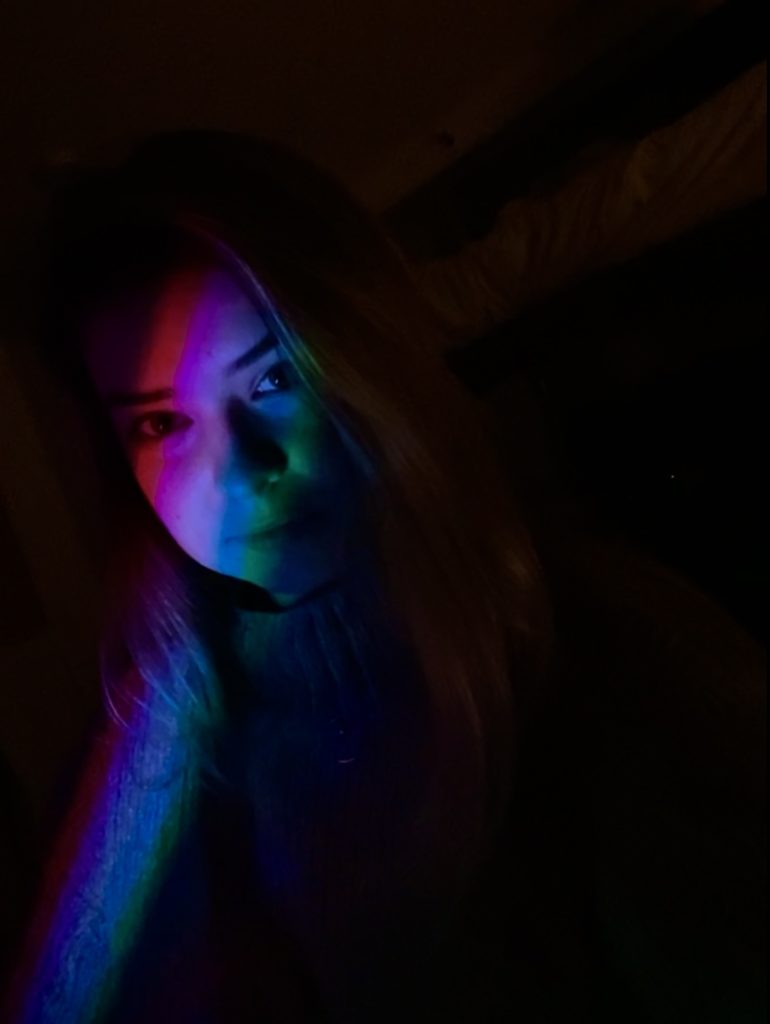
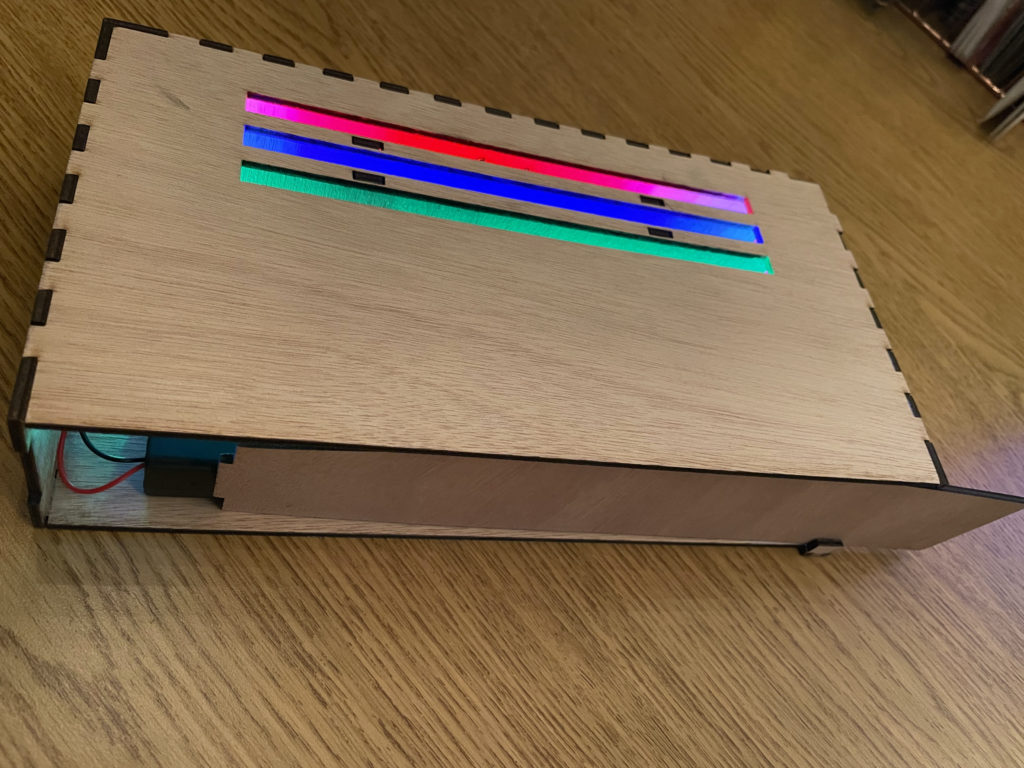
Alright folks, I finally finished my lantern project! Took a while for the LED lights to come in the mail, but once they did I was all ready with my three acrylic layers and the display box. Here is the current status of my project!
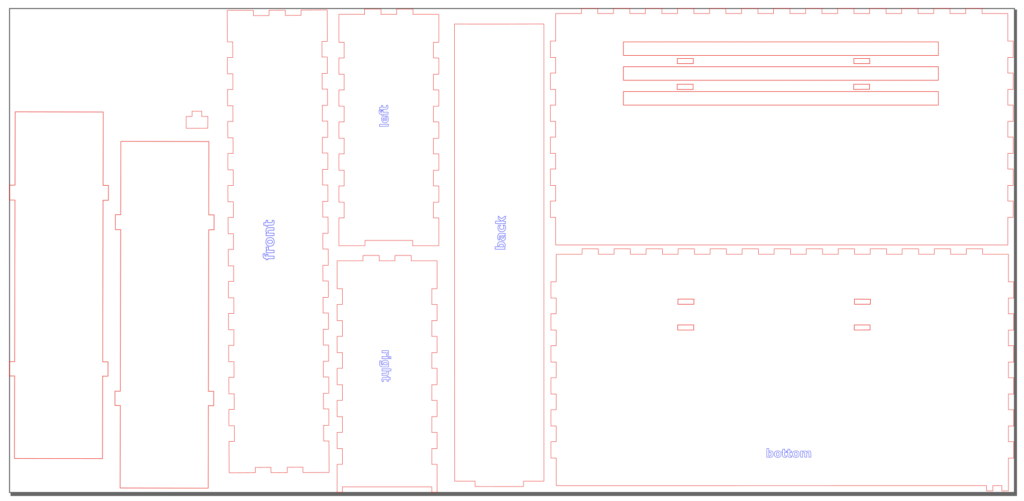
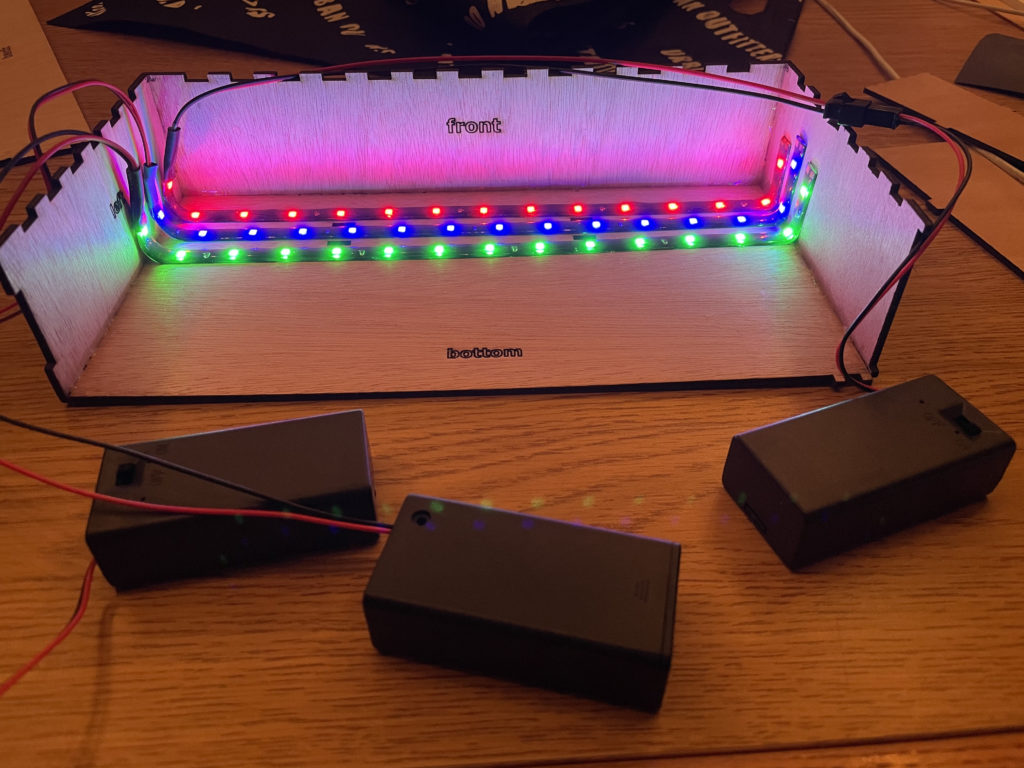
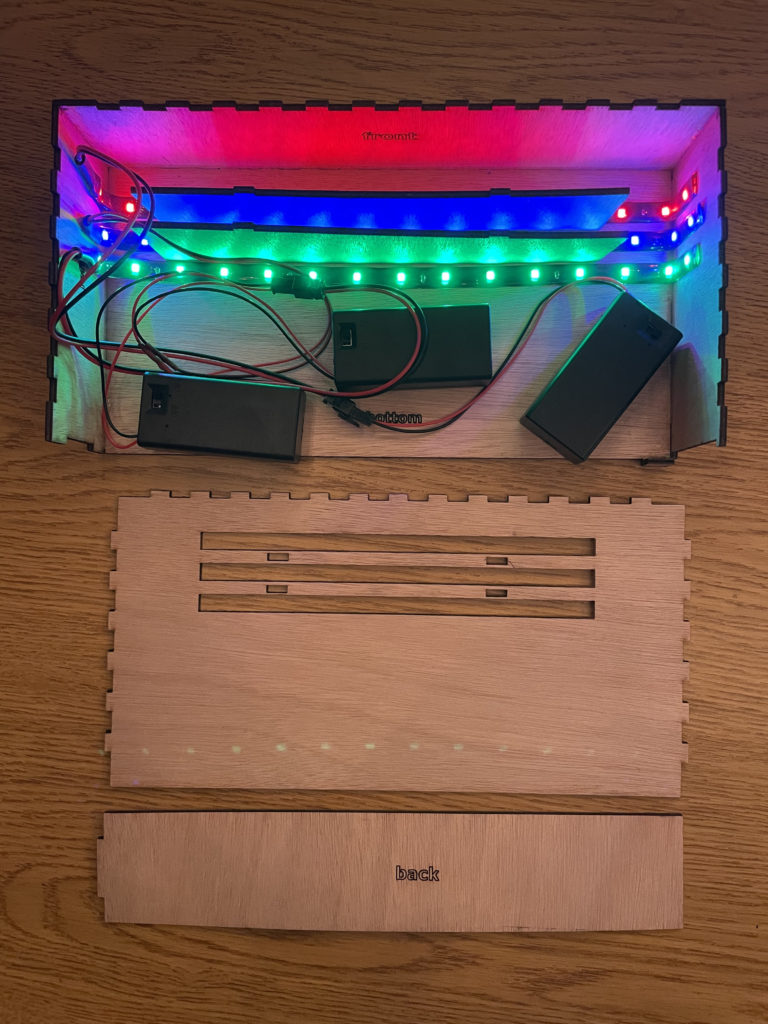
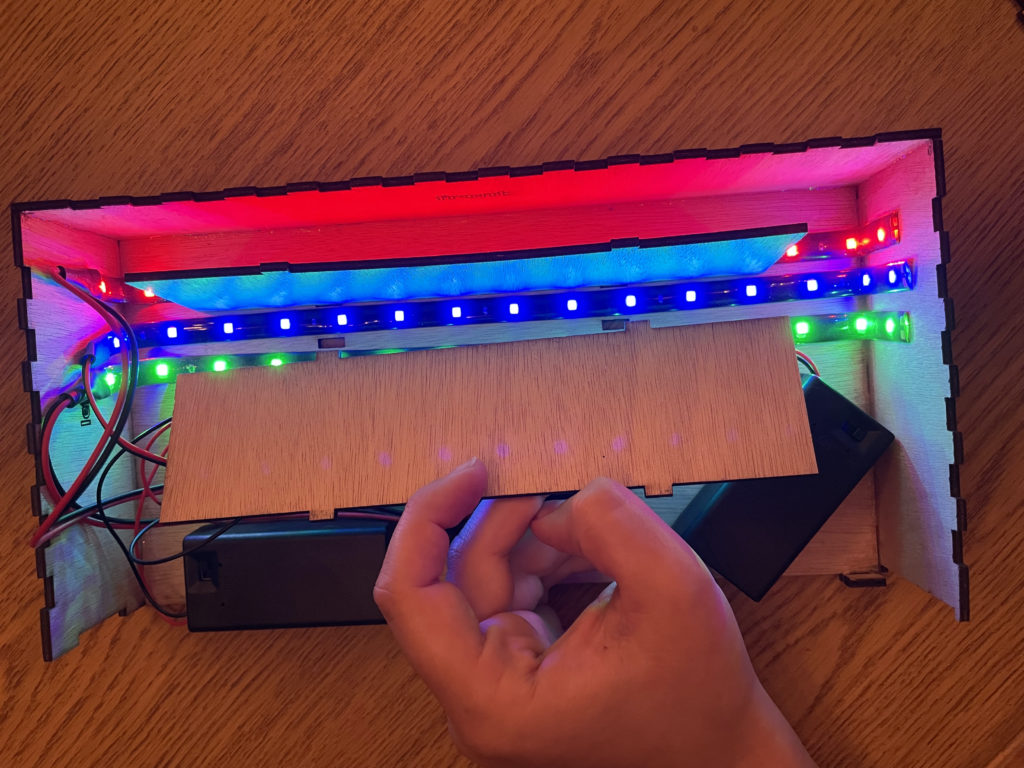
Here are some progress pictures of the display box since it all came together after my last update. I used boxes.py to design the closed box with the dimensions I thought I would need (based off my estimate of the LED battery pack size from the Etsy pictures). The final box design made in inkscape ended up very different from the original “UniversalBox” design, this is because I needed to add the slits in the top for the acrylic pieces to slide into, two dividers to keep the different colored LED lights from bleeding into each other (amazing suggestion from a classmate!), and a sliding back side so that I can access the battery packs after assembly. I ended up using 1/8″ plywood to make the 10x5x2″ box, which I plan to paint black to highlight the layers at all times.
Unexpected Bumps to get here:
The biggest hassle of this project was completely unexpected and it had everything to due with the masking tape I used to protect my acrylic sheets while they were being laser cut. First, I forgot to buy masking tape so I had to borrow a roll of 1″ from Foisie to cover my three 12×8″ sheets. Then, all the masking tape stuck to the acrylic causing it to rip and leave behind lines of glue residue where the strips had over lapped. I did some tests with hot water and soap but to no avail, it was taking forever and I was scratching the surface in the process. After some research I found that letting the layers sit for 24 hours covered in WD-40 would remove the tape, residue, without scratching or staining. So that is what my solution to the tape problem ended up being, and while I did slightly scratch the surface with the paper towels I was using, I am happy with the results!
Future steps:
- Re-cut the top piece of the display box to fix the dimensions of the slots (I accidently made them all 3 mm too wide and the acrylic sheets wiggle and hit each other.
- Use black acrylic paint to finish the display box in a clean seamless way to allow the glowing layers to take all the attention they deserve!
4/22
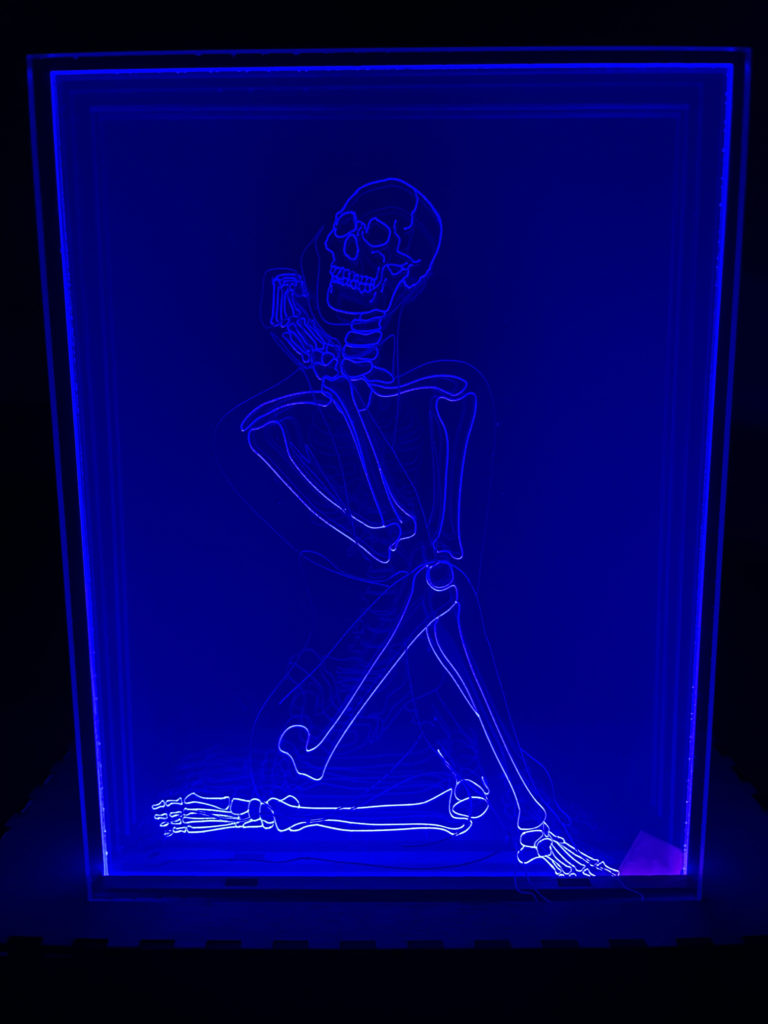
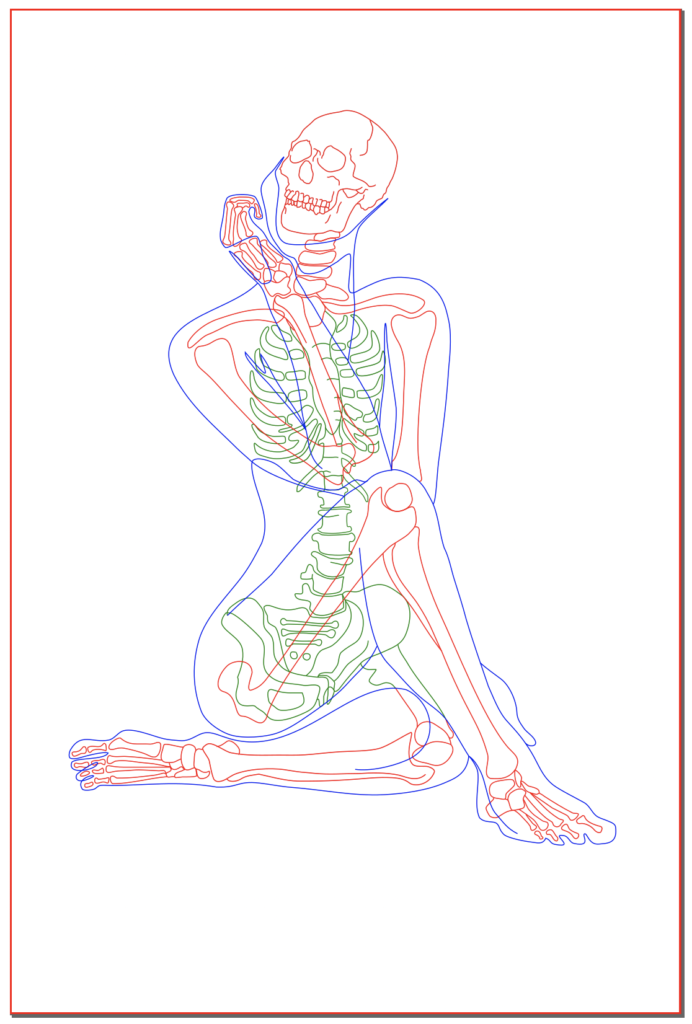
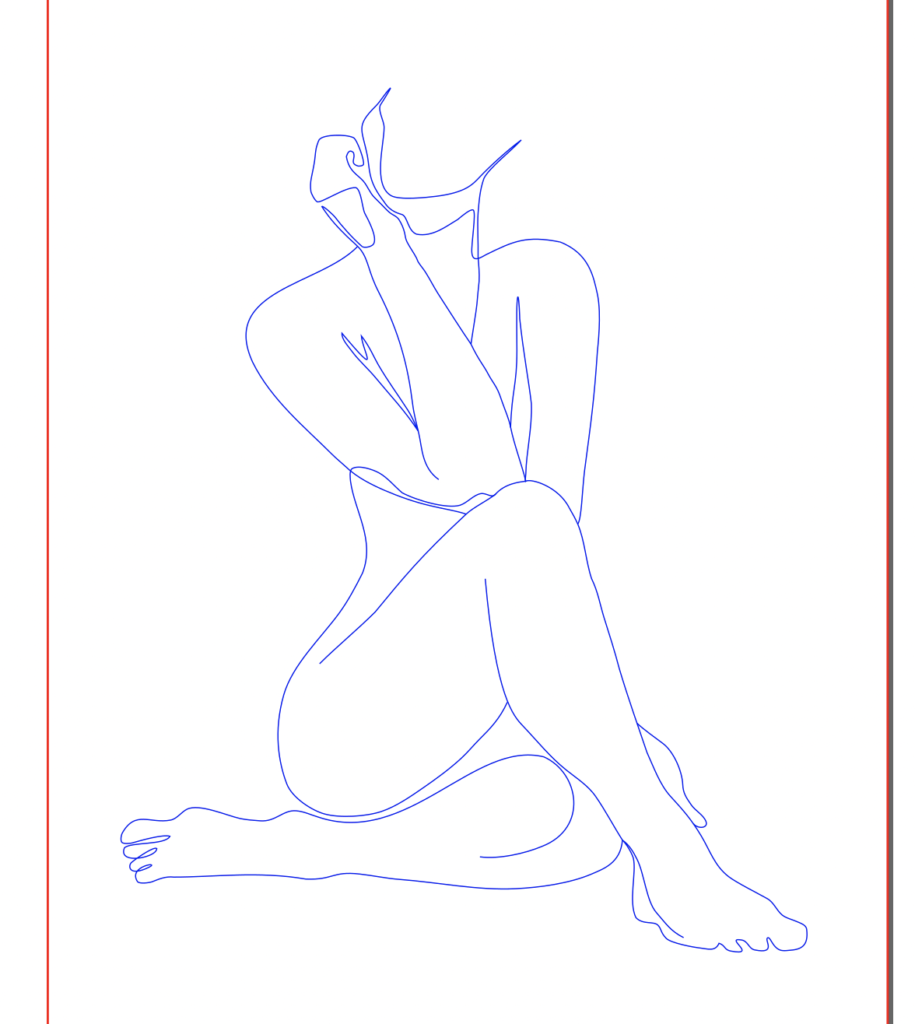
As of today, I have my inkscape design for my lantern project. Each color corresponds to a separate acrylic sheet that will be edge lit with LED strips and sandwiched together for the final display. The three colors depicted in my inkscape drawings may not be the final colors for that layer, but I did order blue, red, and green LEDs so it very well could be!

Materials and (Current) Dimensions:
I have ordered the Lucite Light Guide Acrylic Sheet, which is clear acrylic specifically designed for edge lit engraved designs (currently waiting to be shipped). The sheets are 12×8″ which is what my design is scaled for atm but I will probably end up scaling down to something like 11×7″ or 10×6″ to make sure the edges are clean and the whole project is not huge.
For lights I purchased three 12″ LED light strips. I needed my lights to be separate colors and the only options I found were these battery back powered strips from Etsy for cosplay, cars, exc. that only come in red, blue, and green. (I was hoping for something more like purple, blue, pink, but could not find them in time). As it is right now, these light may not arrive until May 7th (unfortunately I had to wait a day after I placed my order to know the estimated delivery date).
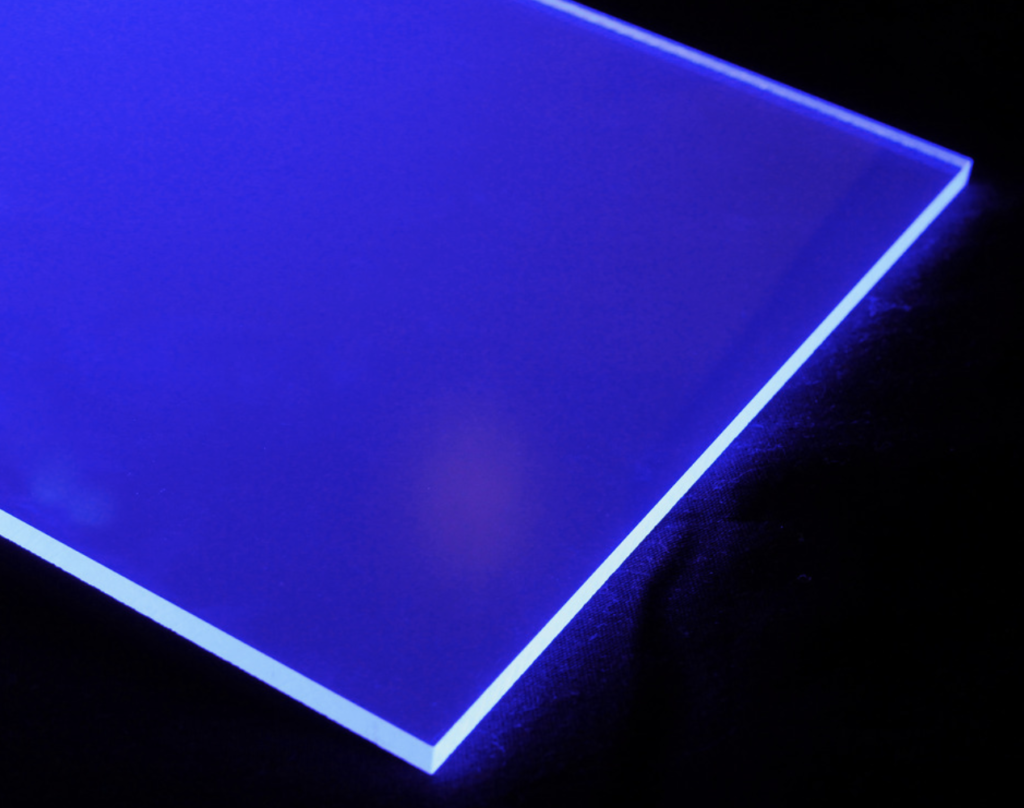
Lucite Light Acrylic sheet 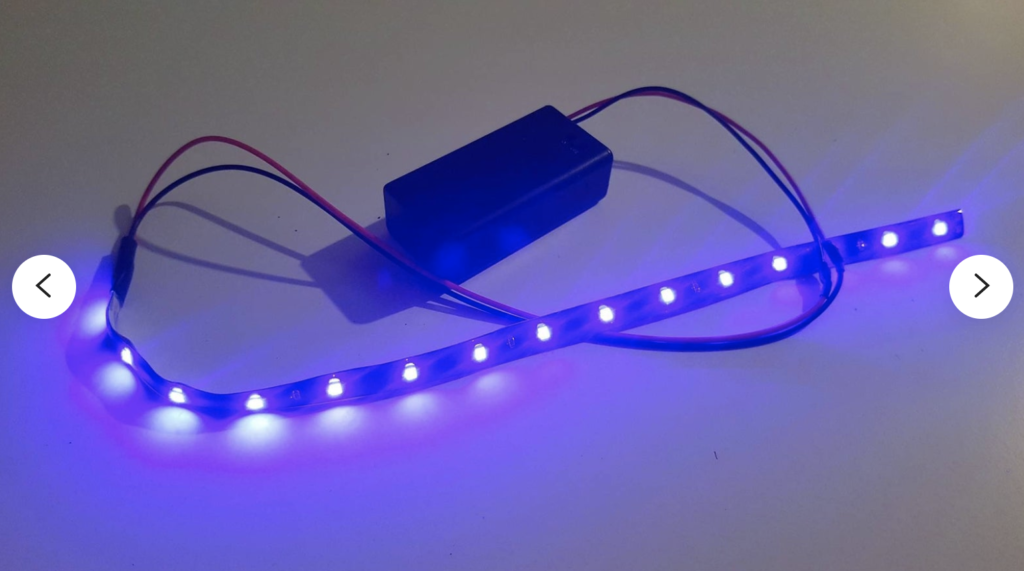
Battery powered LED strip
Display Method:
I am still undecided on how I will end up displaying this project. I won’t be able to finalize a design until my materials arrive (especially the LEDs with the bulky battery pack which I hope to conceal in the base). Current idea is a long slender wood box painted black with a slit in the top for the layers of acrylic to fit into, with maybe the back panel able to slide open so I can access the lights.
Hi Iris,
One idea I had looking at your piece would be instead of having each piece be a rectangle shape, use a silhouette as the outermost cut. It might also be helpful to do a test cut to see if you like how the layers look together.
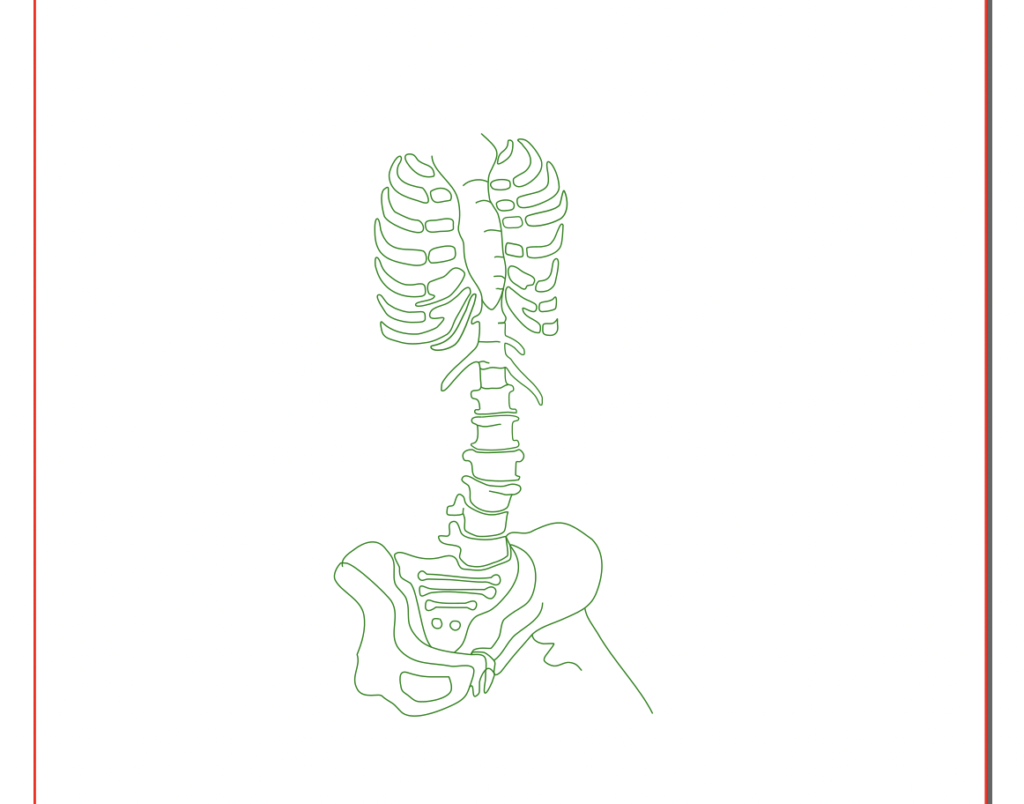
Hi! I noticed how the bones aren’t all on the same layer. How did you decide which bones went to which layer?
Hi! I notice the pose of your design looks very natural and not something I am used to seeing for a skeleton. How are you planning to order the different layers?
Hi Iris! I appreciated the multilayered X-ray look you are going for. How did you choose which layers to have which bones of the body?
Hi Iris! I appreciate the separation between the spine/ribs/hips and the rest of the bones! I think it will add a lot of dimension to your piece. Also to give my opinion, I think that an outer triangular shape would center the person/skeleton really well and use a simple base to hold and separate the layers.
Hi Iris! I notice the pose that the skeleton is in and I appreciate how it creates a movement in the piece that guides the viewer’s eye. For displaying, I think the box idea sounds nice – you could also consider a base that could conceal the battery box and have the acrylic pieces sit on top (though I’m not sure if that will be more difficult). Can’t wait to see how it turns out!
Hi y’all! Here to answer all the questions about layers, and how I split the skeleton.
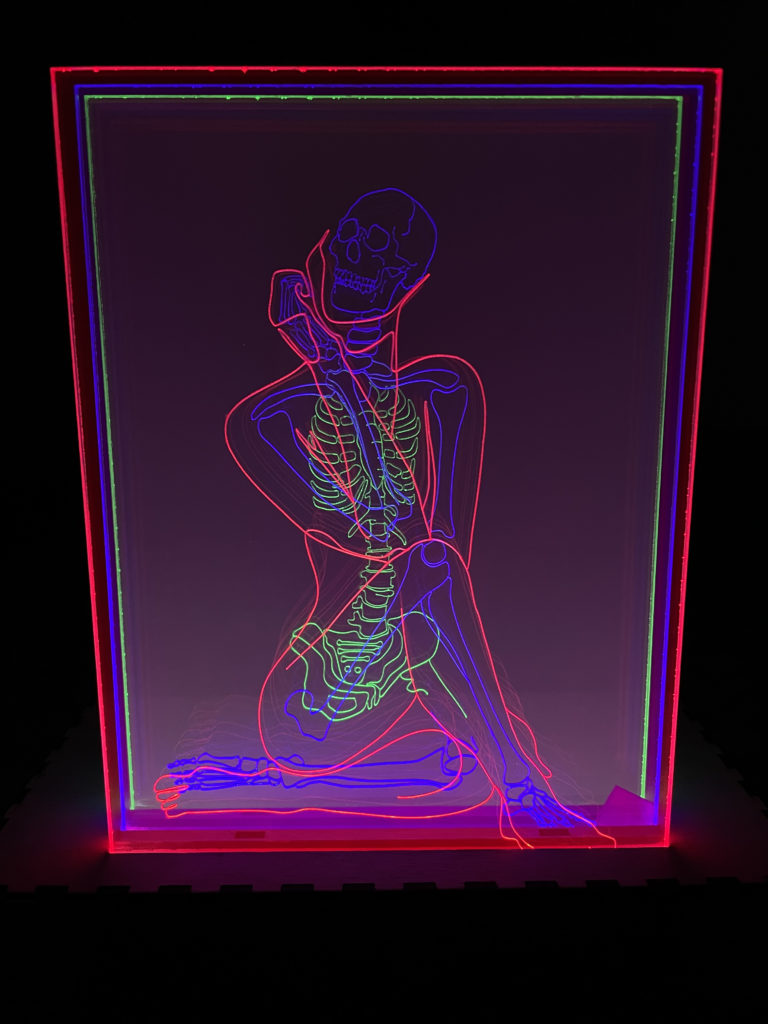
Now that I finished you can see that the figure is in the front, main skeleton with limbs is middle, and ribs/spine/pelvis are back.
When drawing the layers I was thinking the whole skeleton would be a single layer but all my lined were overlapping and I thought the end result would be busy and a mess. So I chose the part of the skeleton that was crossing the busiest part of the figures pose (the ribs) and decided to make that the back most layer.
I like all the ideas to change the acrylic shape but in the end I wanted all the layers to perfectly line up and center the focus on the design and not the “canvas” shape, so I am going to leave it for now.
It took me a while to figure out the order for the LED colors, but I settled on this one because the overall tone was the most purple which was the color I originally wanted to feature with this project (and green needed to back off a bit).
Overall, I am very pleased with how it came out, imperfections and all, possibly to the most rewarding $100 I’ve ever spent for art!
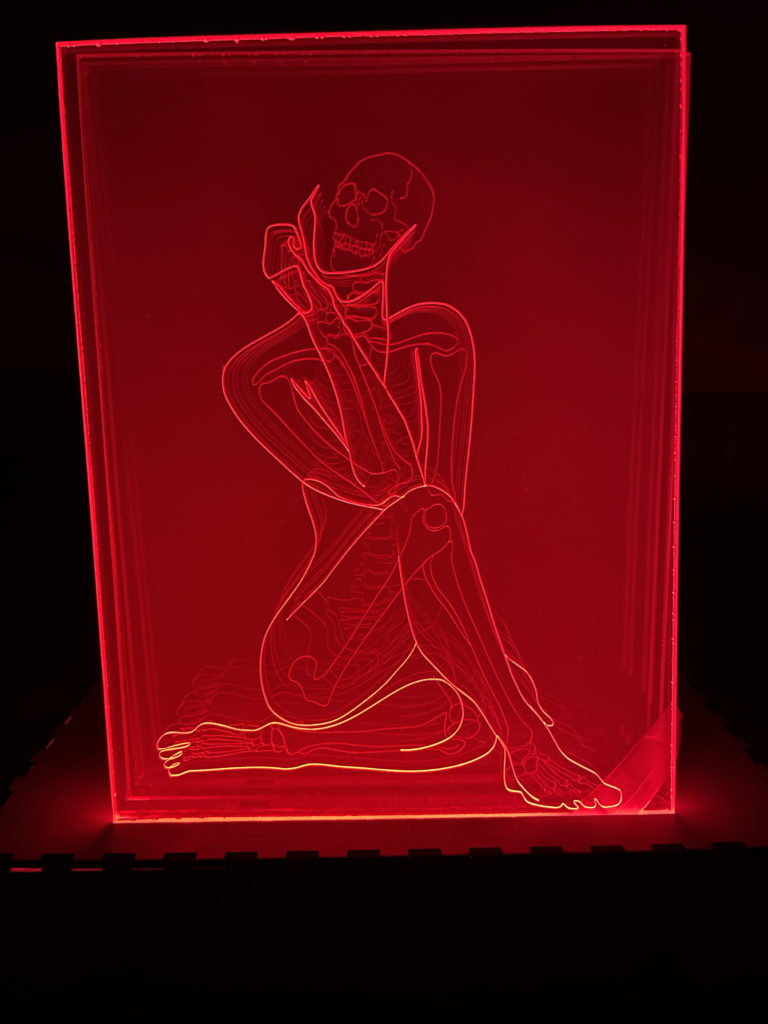
I love how this piece turned out! In my opinion, it looks like something that would be on display at the WAM. I think if I could give you one suggestion, I would say on the red layer that I might finish the top of the head so it’s connected. Other than that, great job!