Layers Project: Layers Map of Penobscot Bay
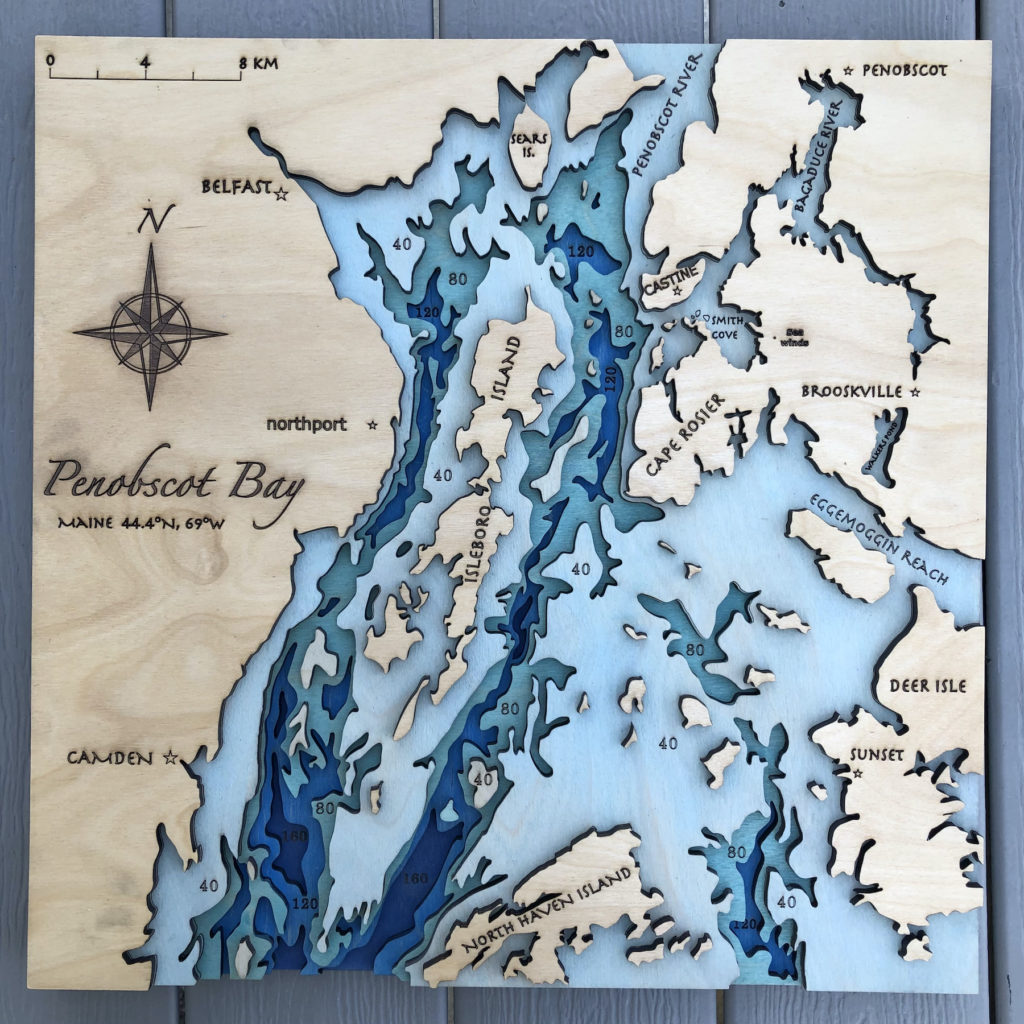
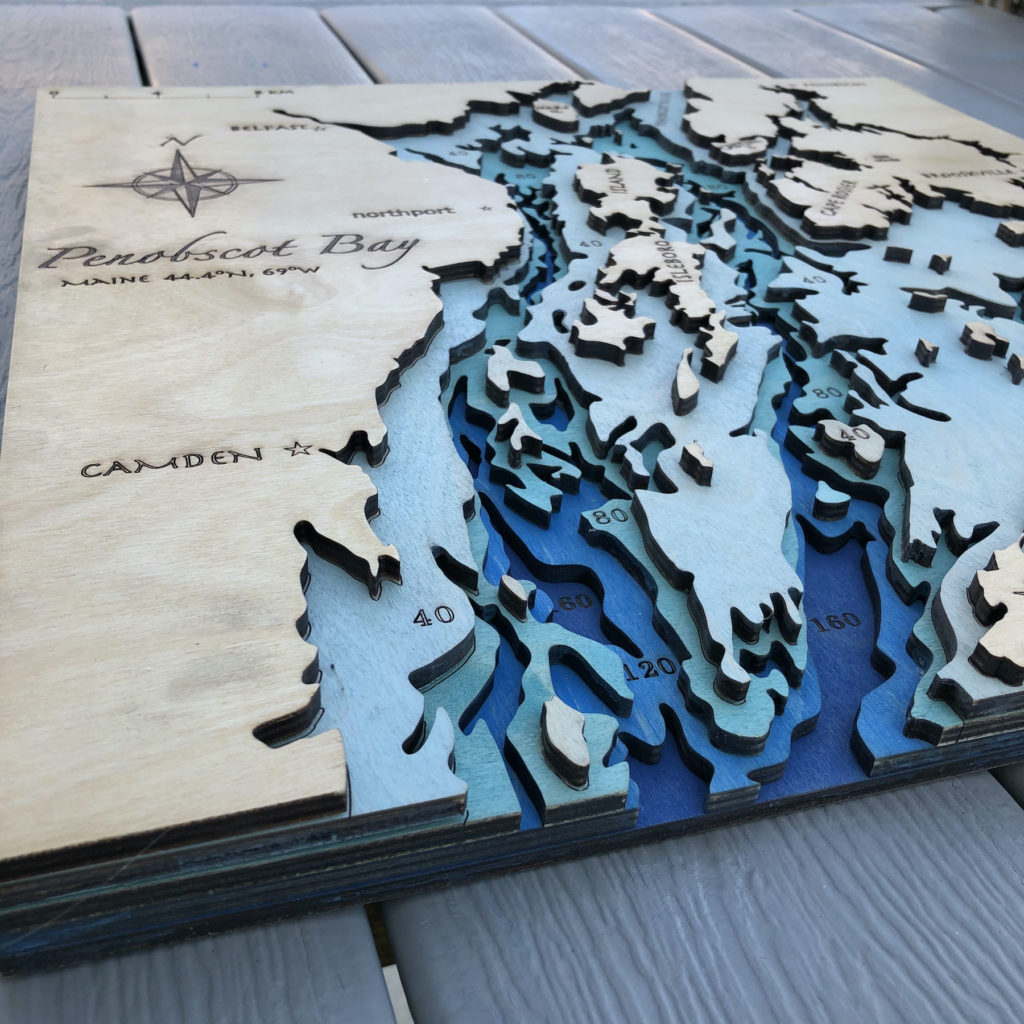
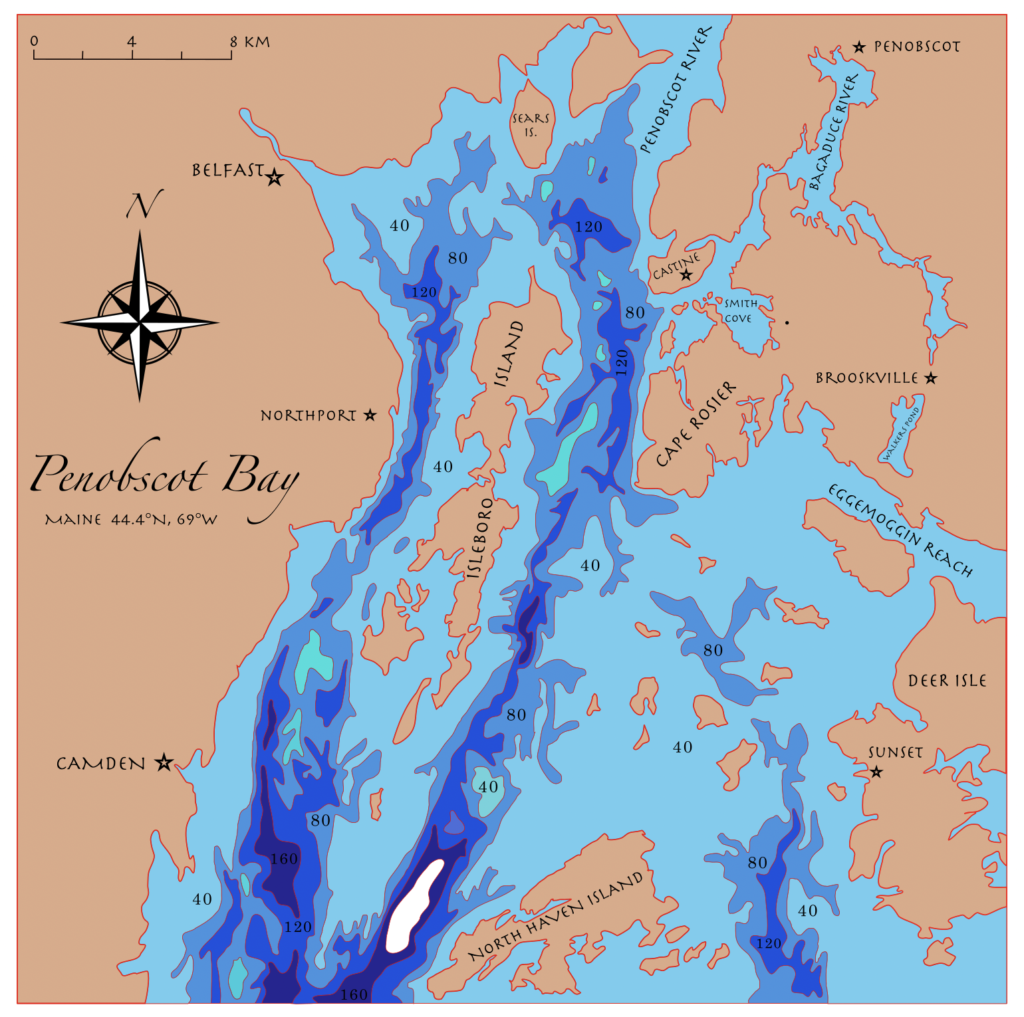
The concept for this project was to make a layered map of the ocean depths around the coat in Maine where I learned to sail. If you can spot “Smith Cove” in the upper-right hand quarter, that is the cove I sail around every summer. And the little dot to the right on the land layer with the label “Sea Winds” is my families property where I stay. The project ended up being a 19×19″ representation of a Penobscot Bay and its bathymetric map. I used 5 layers of 1/4″ birch plywood. The four water depth layers (40, 80, 120, and 160) have a blue gradient and the land layer was left the natural wood with a spray clear finish coat for protection. I used the Abyss Tables and Below the Boat layers maps as inspiration for this project. Because bathymetric maps use a single line to represent a single value of ocean floor depth, the information was “easy” to translate to laser cut layers stacked ontop of eachother by using Inkscape to draw out all the lines and mape features. Because the lines more or less flow the same general shape as they move up or down the space, the final art should naturally draw the viewer’s gaze towards the concentric shapes. I also used a increasingly darker shade of blue on each layer as they got deeper and deeper to simulate the illusion that the water is accumulating and therefore deeper.
Lantern Project: Glowing Acrylic Figure
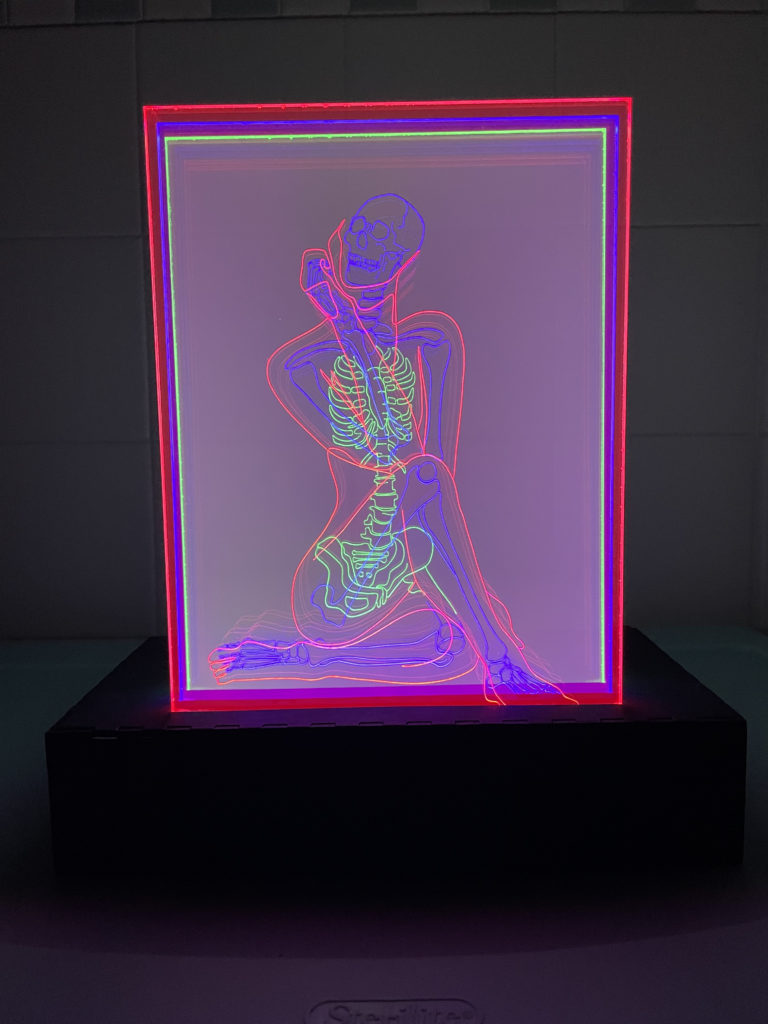
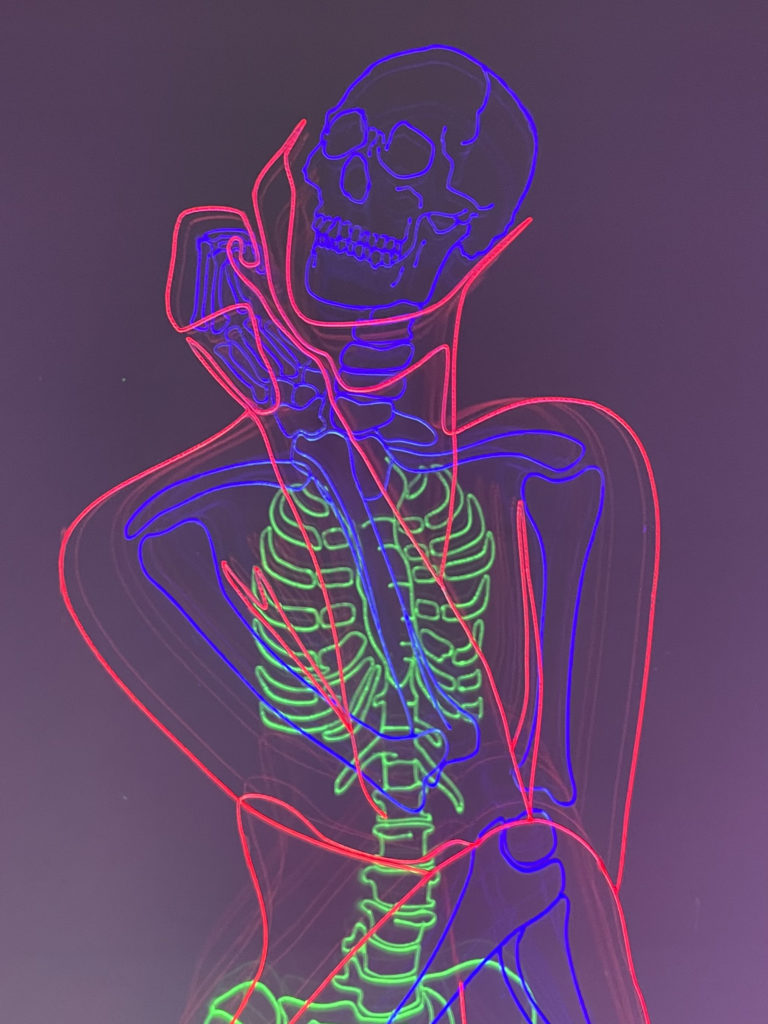
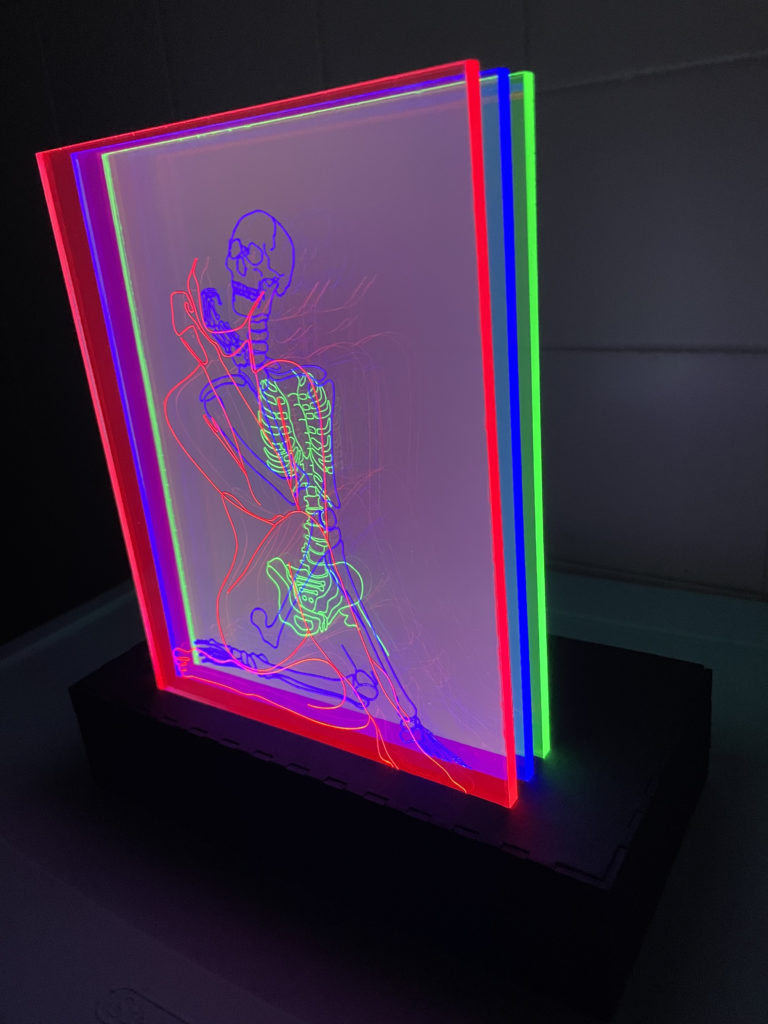
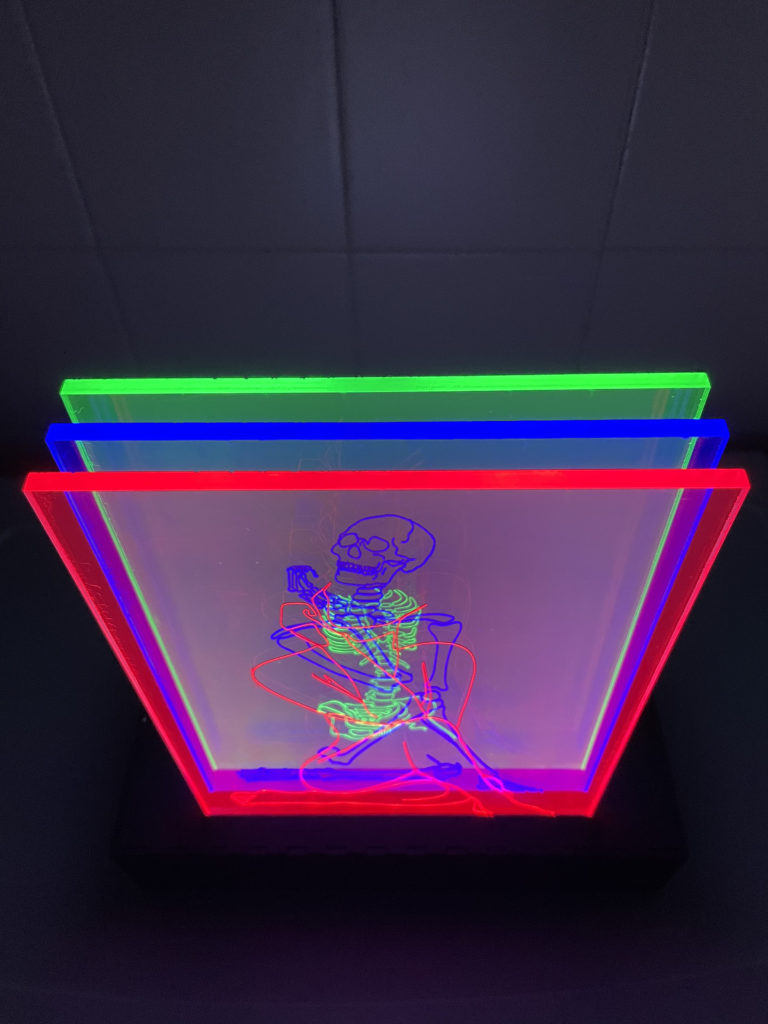
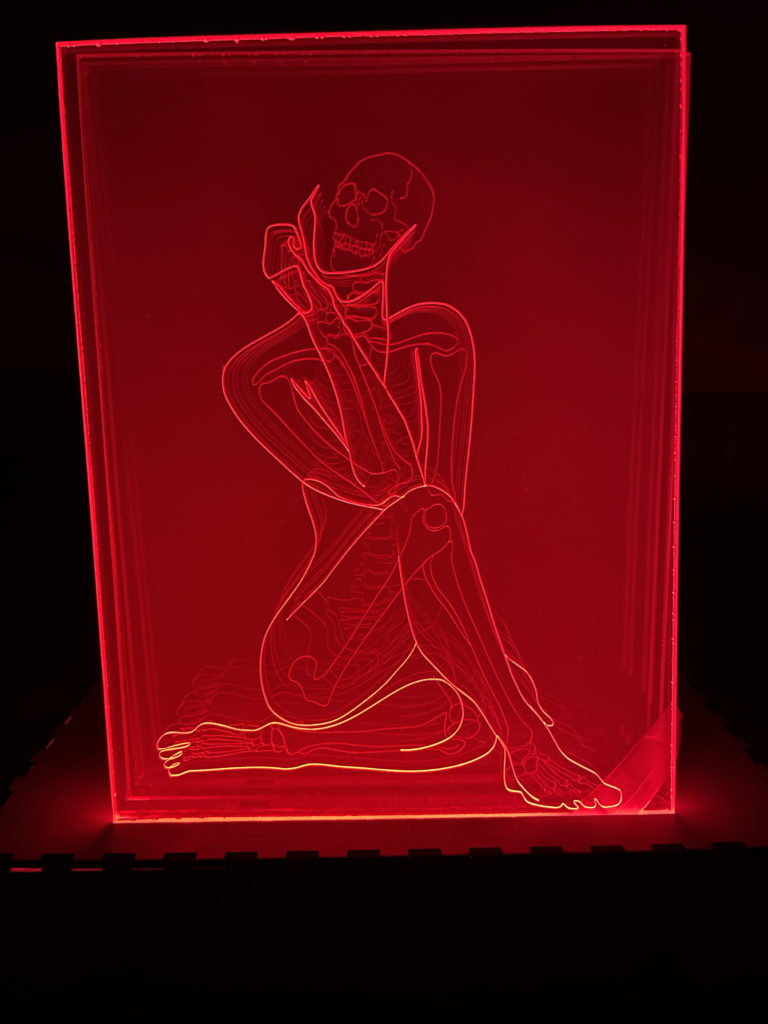
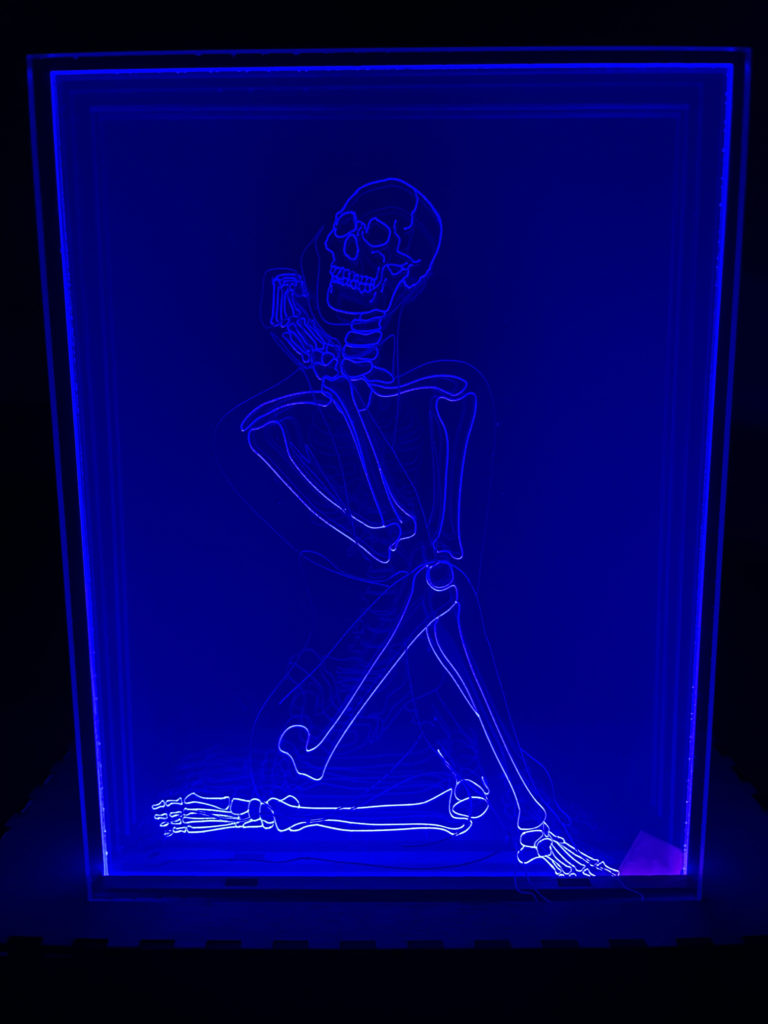
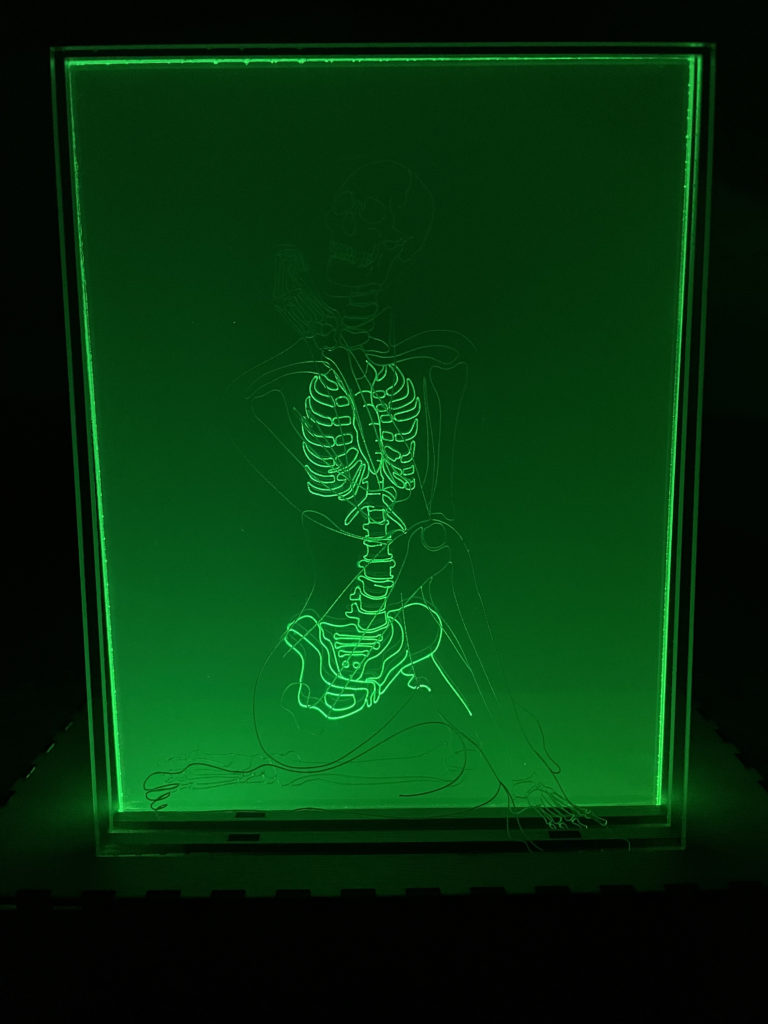
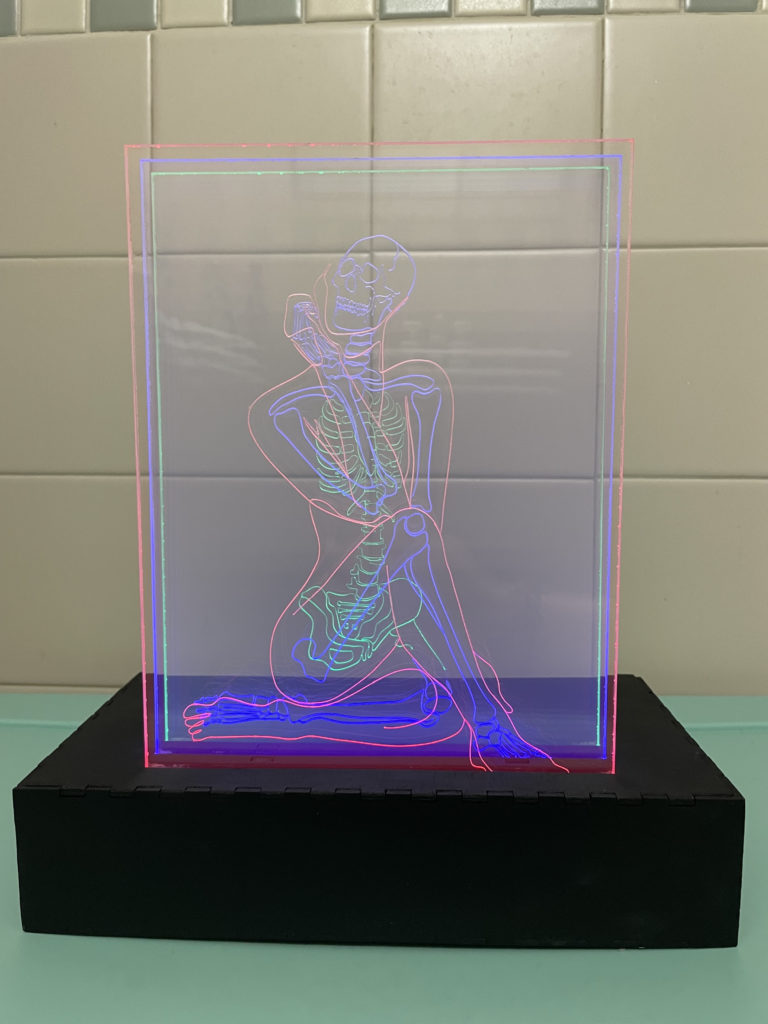
For my lantern project I vector engraved the figure and skeleton of a female figure onto three clear acrylic sheets to be edge lit with LED strips. I have spent a lot of time studying the human figure in art classes and also have had a fascination for the human skeleton for a long time, so to be able to combine these two areas into a single 3D artistic project was a dream. I knew I wanted to try edge lit acrylic for this project as soon as I realized it was a possibility. I remember it was maybe 5 years ago when I first saw a piece of acrylic laser cut and engraved like a lampshade being lit by LED lights, I was blown away by the possibilities of this concept and have been obsessed ever since. For dimensions I have 3 sheets of 1/4″ Lucite Light Guide Acrylic cut to be 7×11″. The display box is a 10x5x2″ box made of 1/8″ plywood painted with black acrylic. I used boxes.py to design the UniversalBox with the correct kerf measurements before sending the designs to Inkscape were I altered the design to add the slits in the top for the acrylic sheets to fit int, the sliding back panel to access the LED battery packs, and design dividers to keep the three colors of lights from bleeding into each other. The lights I used were 3 separate 12″ stips of red, blue, and green LED lights that each have their own battery pack.
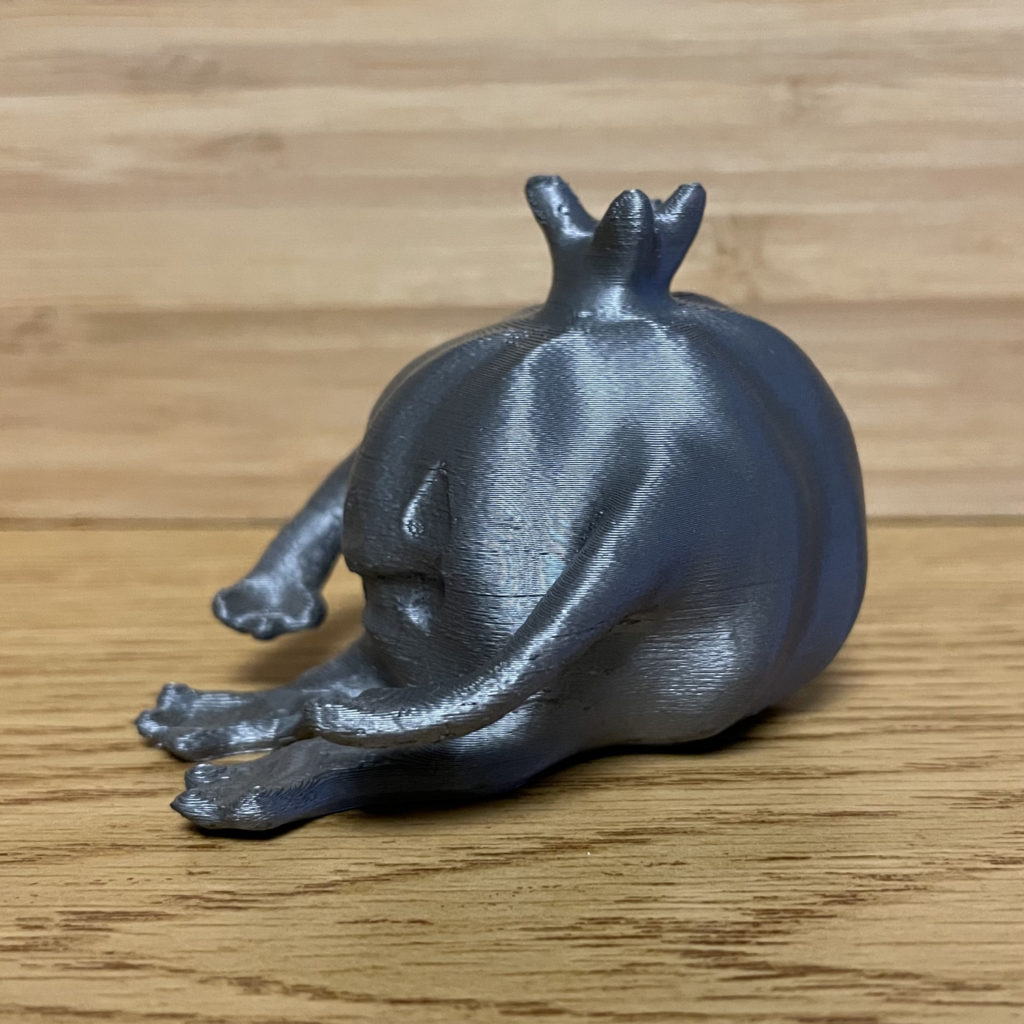
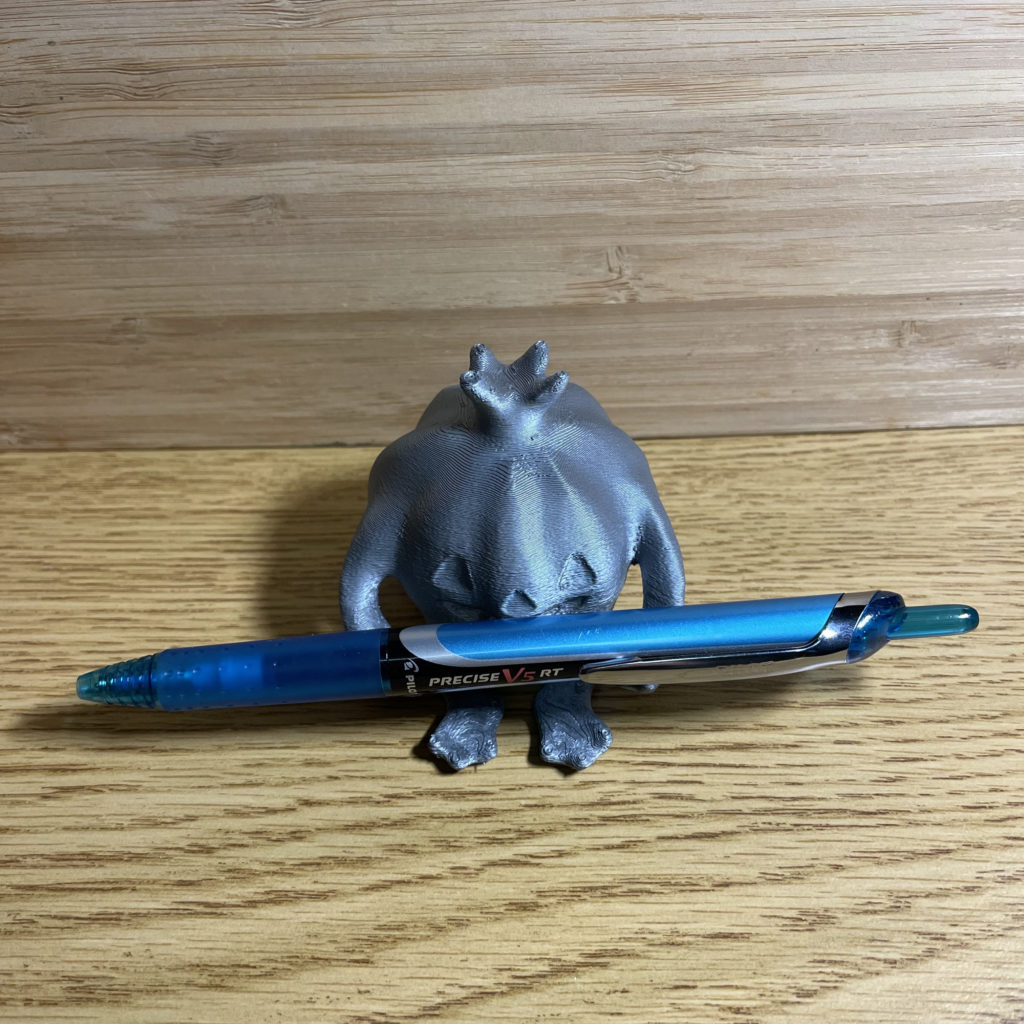
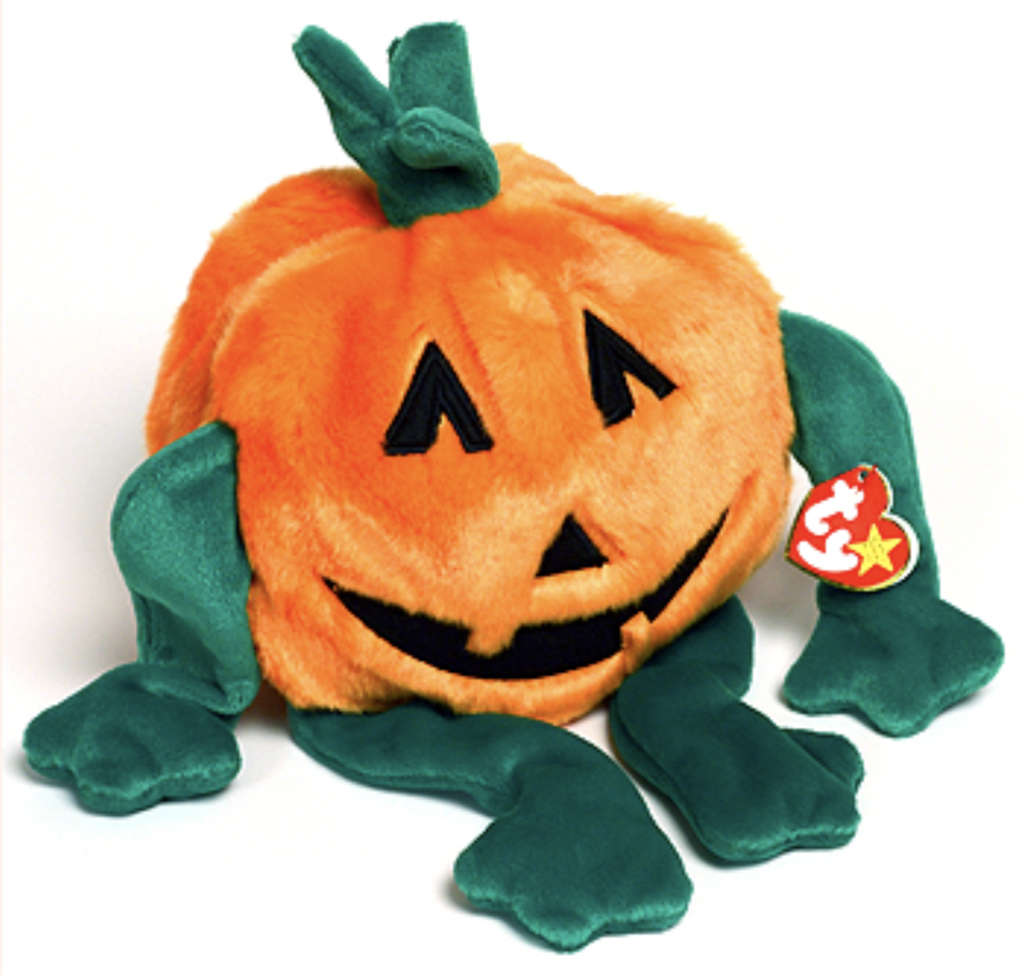
Altered Toys: 3D Plumpkin the Pumpkin
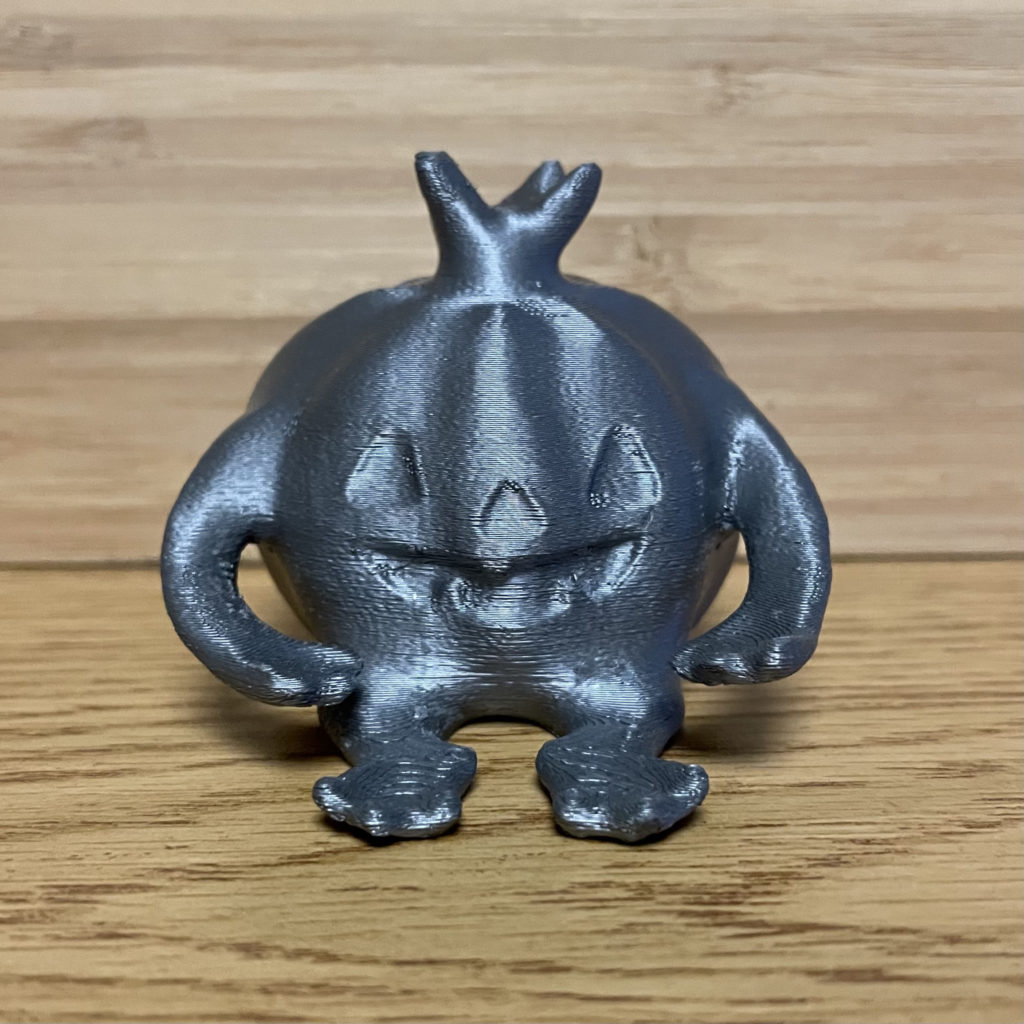
For the project I used Zbrush core mini to design a desk friend to hold my pen. The toy I used as inspiration was a pumpkin beanie baby with funny frog like arms and legs. I had gotten this toy for Halloween when I was maybe 6 years old and lost it not long after. This is not only a replacement for my lost Plumpkin the Pumpkin friend but a cute 3D printed version that has been given a functional purpose. This project two my two tries because my first print accidently ended up with a spaghetti arm. The second print came out perfect, just a little smaller to take up less room on my desk. And it should be noted that they both hold a pen just how I wanted! The color is the silver PLA filament, I thought about painting him but decided against it because I just love the shininess and simplicity from the silver.

Thank you for reading my post. I hope you enjoyed my pieces and have a great rest of your day!
Hi Iris,
I really like the shades of blue you chose for your layers piece, and I love the textures you created with the different depths.
I really like how the edges of the acrylic let the light shine through in your lantern project. I also like how the colored lines line up differently when viewed from different angles.
I like how simple and cute your Plumpkin the Pumkin toy is. Its very satisfying to look at.
Hi!
Your lantern piece fascinated me in person and now even more so when I can see the images of it in the dark. I can see the reflections of each previous layer onto the other 2 layers and this may not be intentional but I think it helps with the 3 dimensionality of the piece to push back the skeleton layers.
I really appreciate how you took something you enjoyed as a child and made him into something that can be used by you today in a more practical but still fun and adorable manner.
The amount of detail and size of your layers piece is very impressive and works very well.
Hi! I think it’s really cool each layer has its own color and when they’re all lit up the color of the lights blend together making slightly different colors. For example there looks like there’s a violet layer. I really like the layer’s piece use of color to add to the differing water levels of the piece.
Hi Iris! I am absolutely in love with your lantern project! I think it is incredibly beautiful and I appreciate the distinction in colors for the different layers. I also love how your layers project turned out!
Hi Iris,
How ya doin. Your layers project is absolutely incredible. The way you got the color to make it look like water depth lines so perfectly is amazing. The detail on the etched lines is so good and it is clear that you put a lot of time and effort into this piece. Your lantern project is also amazing. The color disperses in such a cool way through the acrylic. I apricate how your 3D printed project incorporates an aspect of your childhood as well as a useful and new aspect.
Hi Iris! I am absolutely obsessed with your art! The layers project has such beautiful meaning and the shades of blue you used are perfect. I also love how your lantern project came out! The colors are so vibrant that it almost look like you made a custom neon sign! And of course the pumpkin is so cute too, especially holding the pen.
Your lantern project is one of the coolest projects yet. I like how it is has multiple layers and looks like a neon light.
Your lantern project is incredible! The layers fit together very well and the places were they overlap adds even more depth to the piece. I also love the depiction of anatomy. Your map is also very striking, and looks like it could easily be the centerpiece of a room.
the skeleton light piece is awesome! i would buy that for sure, absolutely incredible omg
Hi Iris! All your pieces are so incredible, my favourites being the topographic map and plumpkin, of course! I am always amazed when I see your map, all the colours compliment each other so nicely. I also appreciate the layering of the skeleton, breaking up the bones to be a background/middleground/foreground. Lastly, the beautiful plumpkin, he works so well with his silver colour and pencil holding skills!
Hi Iris! I appreciate the detail you put into each of your project from the linework in the lantern project to the several islands in the layers project! I kind of like the rustic look that the painted wooden layers give off. Nice job!
Your lantern project drew my eye in when we were in person, but these pictures with the proper setting and lighting I cannot get enough of, the three vibrant colors keep it simple but elegant and I like the bright border they create around the piece.
I think you did some amazing work in this class! I can tell that each of your pieces were well thought out and executed so well! My favorite of your pieces is the layers project (though i may be biased :)) because you did such a good job at perserving the natural wood grain, and using the colors to create the illusion of depth.