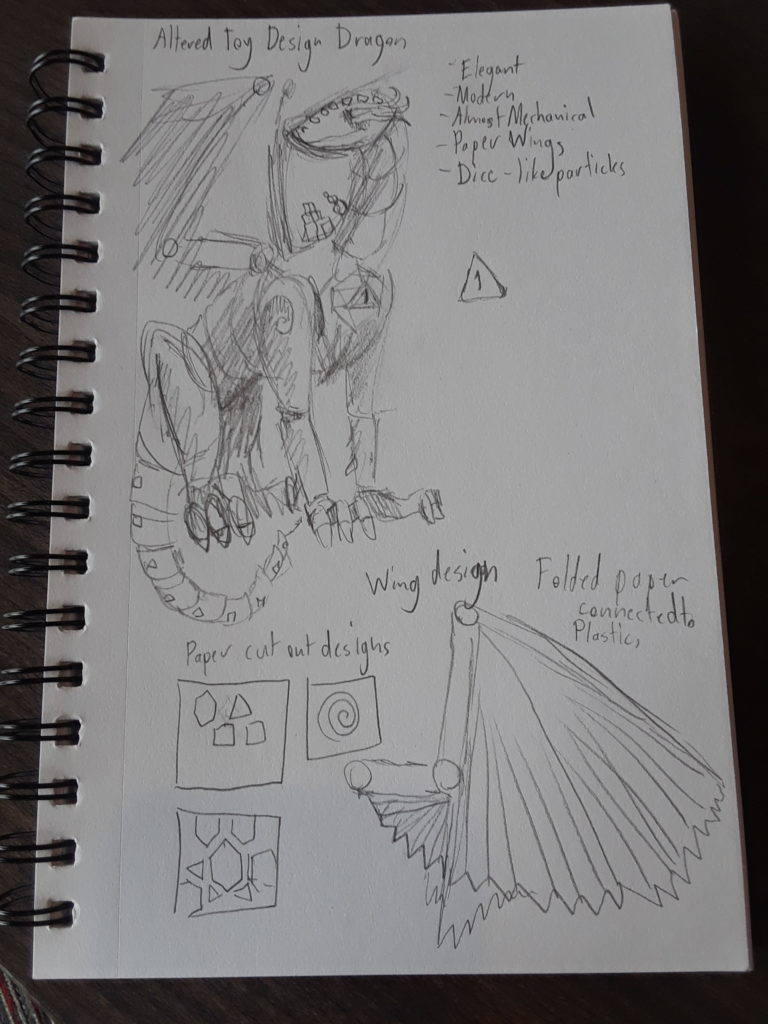
When I was initially thinking about the Altered Toy Design, I was quick to think about how I would want to make a posable dragon. Dragons were a big part of my childhood, I have smaller figurines of them and when I would play with Legos, I would end up building dragons out of the posable pieces I had. When I began to draw more seriously as well, I practiced with drawing dragons. I also wanted something elegant I could have in my room. that would adjust to the surroundings. As per the design on it, I was initially thinking to have a very loosely painted side representing when I started with art and a detailed and ornate side representing how I’ve grown in art. I scrapped this initial idea in favor of elegance and consistency. I didn’t know how I would do that until I played around with Tinker Cad. I liked the idea of using dice shapes to create a dragon. So for my final design, I plan to do a half and half feel, using dice shapes to give texture on top of a dragon. I also met my friends on camps through D&D, something I hope to be DMing soon, so I thought this was kind of a fun allusion to that.

Also, to keep myself on track, I’m planning out a schedule so:
Thursday by end of day: Reach out to Foisie printer staff for consultation on joints.
Friday by end of day: Base dragon model is prepared for sculpting
Saturday by end of day: Features are sculpted and dice are prepared for use in modeling
Sunday by 9 PM: Dice features are added and joints are added allowing the model to ready to print.
-Sunday AT 9:00 PM: prepare print file
-Sunday AT 9:30 PM ish: Submit design to be printed
Monday: Test assemble pieces, if joints fail, redo print over night. If successful, begin paint after 4 pm.
Tuesday/Wednesday: design and attach paper pattern to wings.
I plan to make the model about 8 inches tall from feet to head.
It should be easier to create and implement this design than when I was modeling during the layers project. this is mainly because I don’t have to adjust and glue layers individually but instead just have to rely on the model itself and good 3D printer sense.
Hi Kat,
I admire that you are making your design posable and that you are doing all the 3D modeling yourself. Maybe if you had extra time, one addition could be to add an attachable spew of flames from the mouth?
This is amazing, I love that you’re combining materials to allow the wings to be flexible. Have you thought of creating a hanging/flying model? It could be attached to the ceiling of a room and be a cool piece.
Hi Kat, I love the incorporation of dice! Maybe you could paint the numbers on the visible sides once it’s printed!
When you’re making the folding paper on the wings it would be really cool if you colored it, maybe like a watercolor brown to make it look more like parchment to fit the fantasy mechanical theme you have. I absolutely love the idea of making it poseable.